RSS
 

Archive for February, 2017

Nikon cancels DL compact series citing high development costs

14 Feb

Nikon has officially put an end to the DL series. Announced just under a year ago, the three DL compacts would have had 1″ sensors. Nikon missed its June target ship date, citing problems related to the image processor. Now, Nikon says that the development costs had become too great to continue. A statement released today also mentions the company’s concern that it wouldn’t sell enough units to make up for the increased costs, due to a slow down in the market.

That wasn’t the only piece of bad news from Nikon this morning. The company released its third quarter financial results and due to costs of a ‘voluntary retirement’ program it initiated last year and semiconductor inventory write-offs, has announced an ‘extraordinary loss’ from April to December of 2016. The impact of this is reflected in an updated forecast for the financial year ending in March, lowering predictions of net sales and operating income. The statement acknowledges a ‘sluggish and shrinking’ market for digital cameras.

Articles: Digital Photography Review (dpreview.com)

 
Comments Off on Nikon cancels DL compact series citing high development costs

Posted in Uncategorized


Heliskiing in British Columbia: Scott Rinckenberger uses the Olympus OM-D E-M1 Mark II

14 Feb

Scott Rinckenberger is a professional adventure and outdoor sports photographer. We lent him the new Olympus OM-D E-M1 Mark II for a few days, to shoot a wintry commission for outdoor clothing brand Eddie Bauer.

The OM-D E-M1 Mark II is Olympus’s flagship mirrorless interchangeable lens camera, and should be ideally suited to use in tough, wet (and cold) conditions. Watch our video to find out how it performed. 

Read our in-depth review of the Olympus OM-D E-M1 II


This is sponsored content, created in partnership with Olympus. What does this mean?

Articles: Digital Photography Review (dpreview.com)

 
Comments Off on Heliskiing in British Columbia: Scott Rinckenberger uses the Olympus OM-D E-M1 Mark II

Posted in Uncategorized


Photographing Weddings With Natural and Available Light

14 Feb

As photographers, light is our raw material. It doesn’t really matter what we are trying to say or capture in an image – if we don’t have light we don’t have a picture! Light has to be the prime consideration and the quality, direction, color temperature, source, quantity (as well as a host of other variable factors) of the light Continue Reading

The post Photographing Weddings With Natural and Available Light appeared first on Photodoto.


Photodoto

 
Comments Off on Photographing Weddings With Natural and Available Light

Posted in Photography


Panasonic Lumix DC-GH5 sample footage

14 Feb

With access to a pair of production-ready Lumix GH5s running near-final firmware, we headed to a local whiskey distillery to put them to the test. We shot the footage above at 23.9p, 150mbps, 10-bit 4:2:2. One camera was set to Cinelike D, while the other was shooting ‘Like 709.’ You’ll also see examples of 60p footage slowed down by 2.5x as well as the camera’s ‘Focus Transition’ mode.

Articles: Digital Photography Review (dpreview.com)

 
Comments Off on Panasonic Lumix DC-GH5 sample footage

Posted in Uncategorized


The Benefits of Shooting in Auto Mode

14 Feb

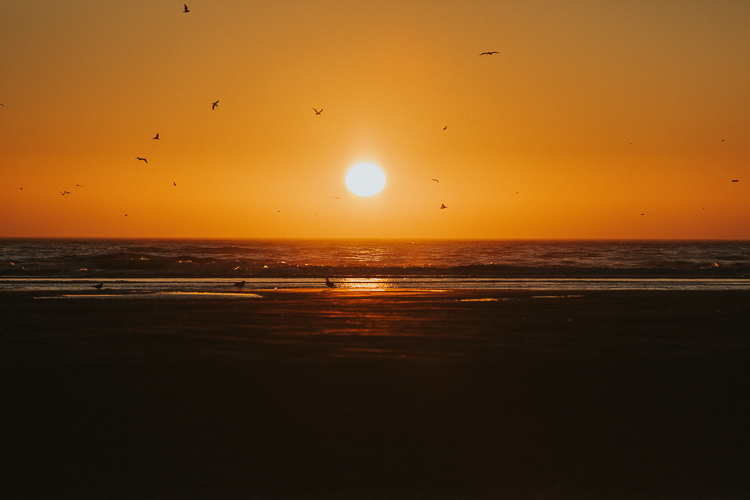
I can still hear the words I was told when I bought my first DSLR ringing in my ears just as clearly as if I heard them this morning. “You have to learn to shoot in manual mode.” When I started to get serious about photography I had no idea what aperture, shutter, or ISO meant, and thought P meant Professional. I didn’t know what I was doing at all and because everyone seemed to say so, I dove right into YouTube tutorials and online articles about how to get away from the dreaded Auto Mode setting on my camera. After all, no serious photographer would be caught dead using Automatic…right?

The Benefits of Shooting in Auto Mode

Auto Mode – don’t knock it until you try it. And even then, maybe give it a second chance.

The truth, like most things in life, isn’t so black and white. Auto mode, while often derided by online commenters and popular YouTube photographers, is not the scourge upon modern photography that some people claim. While it might not be the best way to get exactly the picture you want, and learning to shoot in manual is, of course, a rewarding and hugely beneficial way to increase your skills as a photographer, there is nothing inherently wrong with using Auto.

In fact, there are some clear benefits to using Auto. So, I’d like to explore some of its advantages and offer a few reasons why you shouldn’t feel so bad if you set your expensive DSLR camera on that familiar green Auto setting.

It just works – usually

It is certainly true that you have a much better idea of the picture you are trying to take than your camera does. However, it’s also true that you may not know how to (or care) make your camera do what you want it to do, in order to get the picture you want. Photographers sometimes talk about

use-auto-mode-gum-ball

Photographers sometimes talk about the decisive moment, which was a term used by Henri Cartier-Bresson to describe that instant in which all the elements within the frame come together to form the perfect photographic opportunity. Unfortunately, many amateur photographers will wistfully watch that moment pass by because they are fiddling with aperture controls and thinking about shutter speeds.

I’m all for learning more about how to use your camera (I write for DPS and that’s what we do!) but sometimes it’s nice to just put your camera in Auto mode and let it do all the grunt work for you.

The trade-off

Modern cameras are filled to the brim with all sorts of high-tech enhancements compared to their counterparts from days gone by, and along with this has been a string of steady improvements to their built-in Auto mode. For the most part, shooting in Auto will give you a well-exposed picture that will probably suit your needs. The downside is that your camera might make different choices than you prefer when it comes to selecting an aperture, shutter speed, or ISO value, and if there is not enough light you will likely see the pop-up flash rear its ugly head.

use-auto-mode-food

This is when you may start thinking about learning to use some of the other modes on your camera. But, if you don’t mind the creative decisions your camera makes or just don’t feel like learning the complexities of the Exposure Triangle, then, by all means, go ahead and shoot in Auto Mude. After all, it’s about the picture, and if you’re happy with the results then why not keep using it?

Auto lets you focus on other things too

When you take your camera out to record a moment, memory, or special event, there is usually a lot going on around you and that little black box in your hand. There may be people, kids, music, animals, wind, rain, or a combination of all that, plus much more.

An experienced photographer will know exactly how to set her camera to get the kind of pictures she is looking for and will know just what settings to tweak and change in order to get the right images. However, even experienced photographers can get a bit overwhelmed when there is so much going on, and for casual photographers, it is even worse. It’s times like these when Auto mode can be your best friend. You should not only not feel embarrassed about using it, but my advice is to openly embrace that comfortable little green setting.

The Benefits of Shooting in Auto Mode

Missing the shot due to not knowing the settings

One of the worst times for a photographer is that sinking feeling when you realize you just missed the shot. Even photographic veterans have been known to leave the lens cap on from time to time. If you are just getting started with photography or trying to improve your skills, then fiddling with aperture controls or trying to figure out the right metering mode for a particular scene is enough to make you want to toss your camera out the window in frustration. Many a photographer has missed the opportunity to take a picture because they were wrestling with camera settings and trying to get things just right before clicking the shutter.

By contrast, using Auto can free you up to take pictures while also taking in the rest of the experience around you. Instead of worrying about the ISO, trying to figure out what shutter speed to use, or wondering if you need to use the flash, Auto mode will just take care of these for you. The trade-off is that the results might not be exactly what you wanted (maybe you were going for a shallower depth of field, or would have preferred to not use the flash). But at least you’ll walk away with some pictures while also having the freedom to talk to other people, take in the scene, and be present in the moment. That is unless you accidentally leave your lens cap on!

The Benefits of Shooting in Auto Mode

Auto can help you understand your camera

One of the biggest barriers to entry for people who want to learn more about cameras and photography is all the technical details inherent in the art form. Understanding the basic elements of exposure is enough to make your head swim. On top of that, there are all sorts of other considerations like white balance, focal length, megapixels, etc. The list goes on and it often seems like a cruel and unforgiving proposition that is more alienating than inviting.

Fortunately shooting in Auto mode is a great way to dip your toes into the more complex aspects of photography, provided you don’t mind doing a little bit of legwork on your own.

The Benefits of Shooting in Auto Mode

Embedded in the metadata of every single picture, whether taken on an iPhone or a high-end DSLR, is a whole slew of information known as EXIF data. Most image editing programs, even basic ones like Apple Photos or online solutions like Flickr and Google Photos, let you peek inside the EXIF data to find out more about the technical underpinnings of a photo.

What Auto mode can show you

If you take pictures using Auto mode all the details such aperture, shutter speed, and ISO are saved in the EXIF data along with a slew of additional information like your camera model, whether the flash fired, what type of metering mode was used, even the location of the picture if your camera has GPS capability. Looking at the EXIF data of your photos, and other photos you see online is a fantastic way to learn about the technical aspects of photography so you can get a better sense of how the picture was taken. It’s almost like getting a movie on DVD or Blu-Ray and watching the behind-the-scenes bonus features or listening to the director’s commentary, in that you can get a good idea of what creative decisions were made in order to get the final result.

If you have ever wanted to get more serious about shooting in Manual or one of the semi-automatic modes on your camera, try shooting in Auto and then using the EXIF data to replicate that same shot in Manual mode. Then tweak the settings like aperture or shutter speed and you will start to see how changing these values affects the final image. But be careful – doing this can open you up to a much larger world of photography by helping you learn to creatively control your camera in ways you might have never thought possible!

The Benefits of Shooting in Auto Mode

Conclusion

There’s some kind of a stigma attached to Auto mode, where people sometimes think you are less of a photographer if that’s all you use. I liken this to people who get into arguments about Ford versus Chevy, Android versus iPhone, or any of the other sorts of silly things over which people tend to squabble. If you use Auto and you like it,

If you use Auto Mode and you like it, then by all means, keep using it! Certainly, it’s nice to have more control over your camera, but some people find that by giving up control and just using Auto they are free to focus on other things that matter more to them. If that sounds like you, then by golly (as my dad would say) put your camera mode dial to the green square and click away.

googletag.cmd.push(function() {
tablet_slots.push( googletag.defineSlot( “/1005424/_dPSv4_tab-all-article-bottom_(300×250)”, [300, 250], “pb-ad-78623” ).addService( googletag.pubads() ) ); } );

googletag.cmd.push(function() {
mobile_slots.push( googletag.defineSlot( “/1005424/_dPSv4_mob-all-article-bottom_(300×250)”, [300, 250], “pb-ad-78158” ).addService( googletag.pubads() ) ); } );

The post The Benefits of Shooting in Auto Mode by Simon Ringsmuth appeared first on Digital Photography School.


Digital Photography School

 
Comments Off on The Benefits of Shooting in Auto Mode

Posted in Photography


How to Get Inspiration for Photography When You Feel Stuck

14 Feb

Let’s face it, we’ve all been here before. We start off being in love with photography. We live and breath everything related to it, we take pictures of everything and anything, we obsess over the latest gear and gadgets until we almost alienate everyone around us. Who wants to get up at ungodly hours in the morning just to catch the most beautiful sunrise? But soon enough, the enthusiasm starts to slacken and you feel like you are taking the same photos over and over again. The good and the bad news is that photography is one of these art forms that is constantly evolving. Every day there is some new technique, new gear or even new post-processing style that seems to be quite the rage. So there are some simple and easy ways to stay inspired with your photography.

How to Get Inspiration for Photography When You Feel Stuck

Draw up a plan for your success

Like any other professional industry, documenting your photography goals is also a great idea. Often just voicing and acknowledging what is in your head is the first step towards achieving success. If you are just starting out, maybe limit yourself to a couple of reasonable goals and while you are at it, also document some tasks that will help you achieve your goals.

Maybe it is getting comfortable in shooting in Manual mode, or maybe it is being comfortable using off-camera flash. No matter what the goal, it is easier to achieve when you have a solid actionable plan to help you get there. Take this even a step further by actually writing and planning the execution steps needed to achieve that goal. If you want to learn how to shoot in manual, check out the other resources here on dPS, like Getting off Auto – Manual, Aperture and Shutter Priority modes explained. Schedule time every week to shoot for an hour or so in manual mode. Ask a photographer friend to help you learn the ropes. There are many ways to execute on your photography goals.

Work on personal projects

While it is great to be busy and earn a living doing what you love, it can also start to drain the creative spirit. Give yourself permission to take on a few passion projects, otherwise known as personal projects. These personal projects are a way for you to fall back in love with photography without any pressures or expectations. They can be projects that last for years or they can be projects that get completed within a month. Not matter what you choose, choose a topic that is near and dear to your heart and give it your best shot (pun absolutely intended here!). Read: 12 Creative Photography Project Ideas to Get you Motivated

How to Get Inspiration for Photography When You Feel Stuck

Here I am representing everyday elements in black and white, almost like I am reliving the good old days of black and white film photography. This is just a personal exercise in looking for monochromatic patterns and frames that will work well without any color.

How to Get Inspiration for Photography When You Feel Stuck

To me, black and white for these blades of wheat brings out more texture than in the actual color image.

How to Get Inspiration for Photography When You Feel Stuck

A simple place setting looks more regal in B&W

Go shoot without an agenda

Pick up your camera – whether it’s a DSLR, film camera or even your cell phone, and photograph something – anything. Don’t put much thought or plan towards the outcome. Sometimes it’s just the act of pressing the shutter without thinking of the end result that can provide the right amount of stress release. You can either look at the images or choose to delete your work. The whole point of this is just to enjoy the act of photography without expectations or stressing about creating the perfect frame.

How to Get Inspiration for Photography When You Feel Stuck

How to Get Inspiration for Photography When You Feel Stuck

Take up another form of creative outlet

Creativity does not always mean artistic. Sometimes being creative has nothing to do with art but everything to do with creating with your own hands. Creativity can be found in cooking a meal from scratch, exercising a new fitness routine, knitting or sewing, gardening, writing in a journal, or even just going for a walk outside and studying leaf patterns (what can I say, I live in Chicago where it is cold for more than six months of the year!!).

Let any or all of these activities flow without structure or planning. They are simply a means to release all that creative energy building up inside of you. Be kind to yourself and just give yourself some leeway to take a break from photography.

Create a self-challenge and work towards that

Especially at the beginning of the year a lot of folks opt for creative challenges like a 365 project where you take one photo every day, or a 52 week where you document each week of the year with a series of images. There are other flavors of this like shooting a single color for a week, photographing your daily meals, etc. Whatever is your self-challenge, document it and work on it. Perhaps even join or start a group online where others can participate with you. That can motivate you even further to keep the inspiration alive.

How to Get Inspiration for Photography When You Feel Stuck

My personal project is to become proficient in old school film photography. To me, this is a great way to learn the basics of photography yet again. Plus there is something about the quality of film scans – they just have so much more depth and character to them.

How to Get Inspiration for Photography When You Feel Stuck

Using an old 30+-year-old film camera to capture some landscapes and animals.

Conclusion

I hope this article has inspired you to not give up if you are feeling uninspired or dejected with your photography. With a few simple exercises and a conscious effort to change your mindset, you can come back more inspired and hopefully more motivated to explore all these wonderful facets of this art form that has so many ardent fans all over the world!

What are some things you have found successful when you are in a photography rut? Feel free to share those in the comments below to help other readers as well.

googletag.cmd.push(function() {
tablet_slots.push( googletag.defineSlot( “/1005424/_dPSv4_tab-all-article-bottom_(300×250)”, [300, 250], “pb-ad-78623” ).addService( googletag.pubads() ) ); } );

googletag.cmd.push(function() {
mobile_slots.push( googletag.defineSlot( “/1005424/_dPSv4_mob-all-article-bottom_(300×250)”, [300, 250], “pb-ad-78158” ).addService( googletag.pubads() ) ); } );

The post How to Get Inspiration for Photography When You Feel Stuck by Karthika Gupta appeared first on Digital Photography School.


Digital Photography School

 
Comments Off on How to Get Inspiration for Photography When You Feel Stuck

Posted in Photography


Star Gazing – 18 Twinkly Images of the Celestial Sky

14 Feb

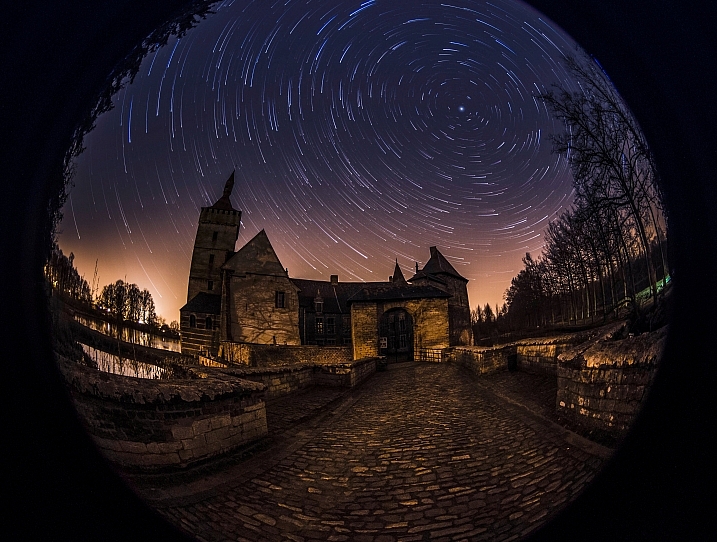
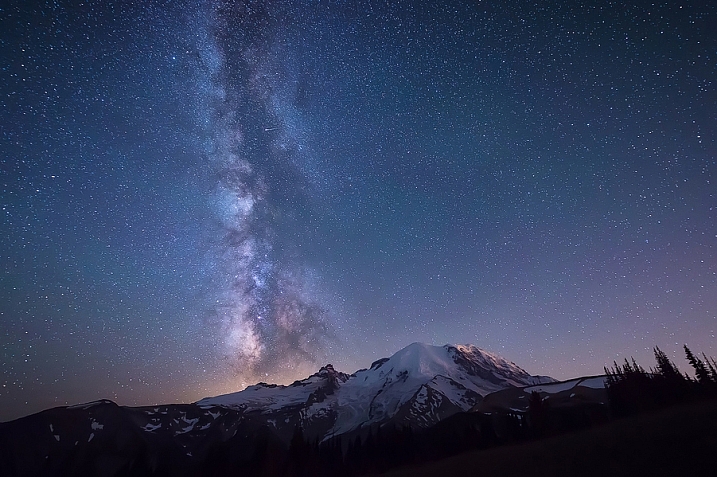
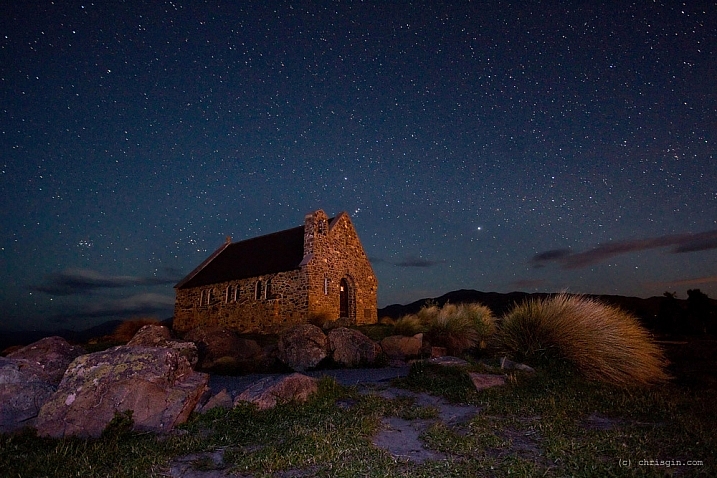
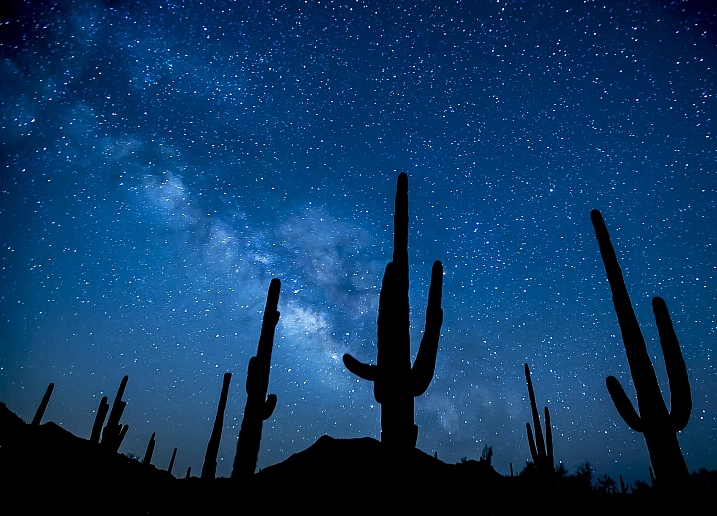
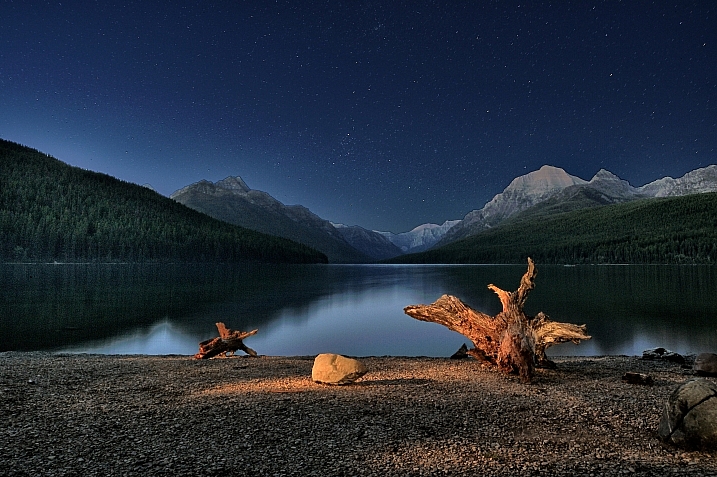
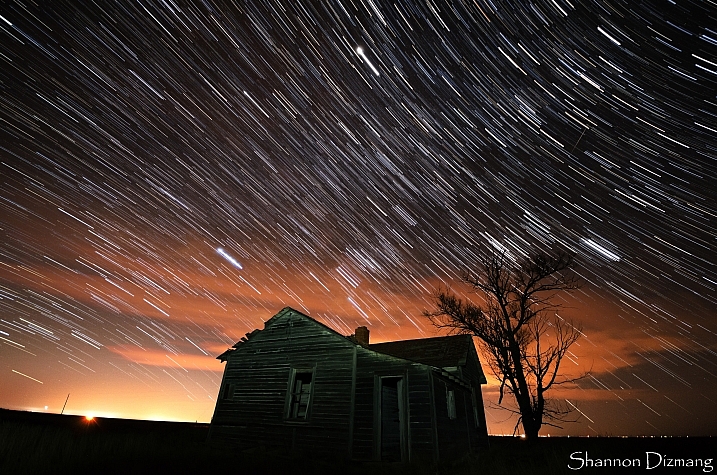
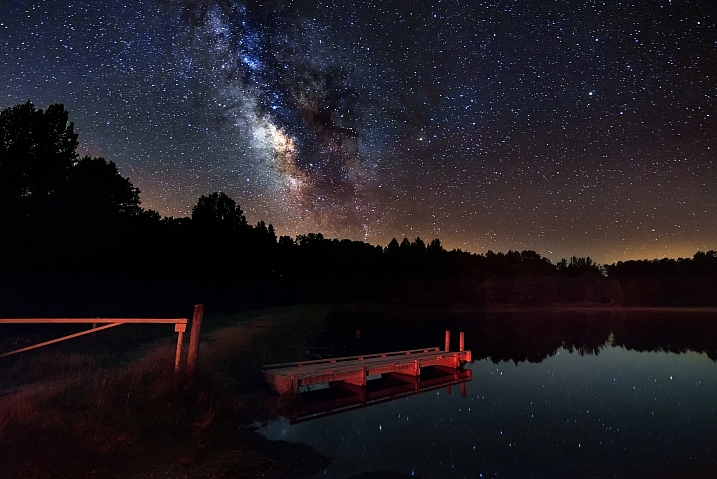
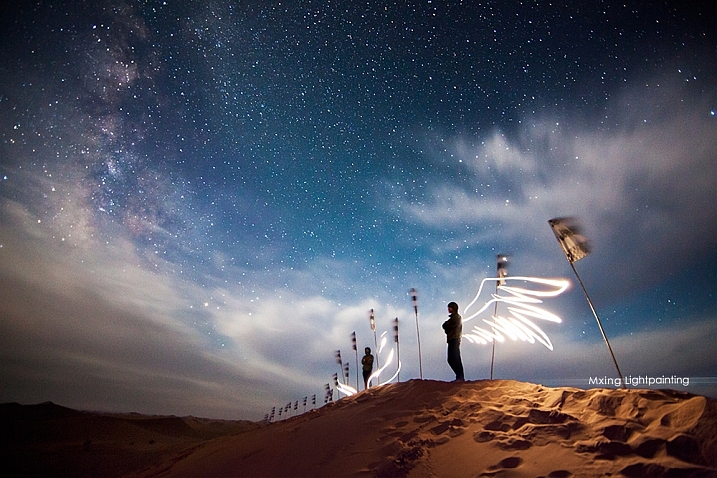
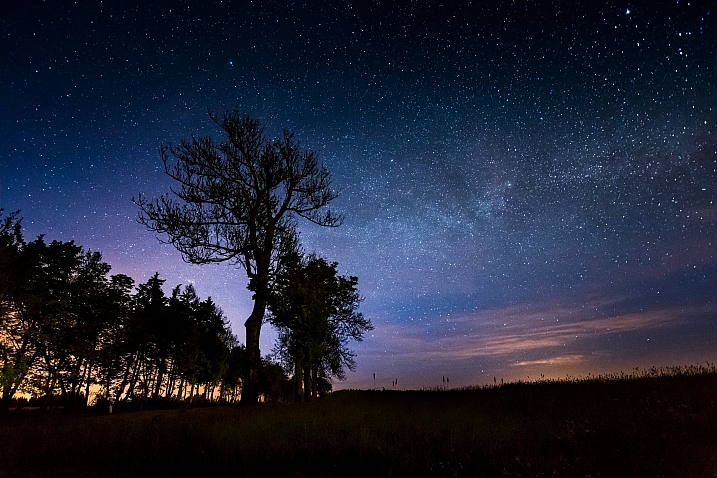
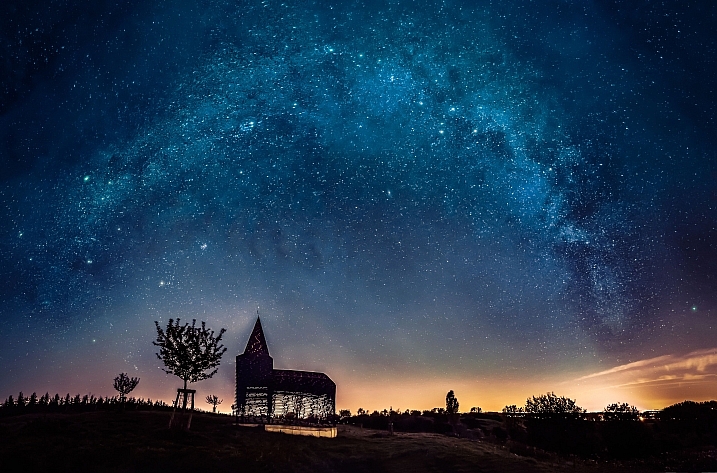
Recently we introduced our new Night Photography course by dPS writer Jim Hamel. Learn more about this brand new course here, so you can take stunning night photos too!


Photography of the night sky and the stars can be challenging but rewarding. If you do it right you can end up with images like these:

Stars

By Kris Williams

By Tom Davidson

By Paul Weeks

By Chris Gin

By Bureau of Land Management

By Diana Robinson

By Shannon Dizmang

By Bill Dickinson

By Jimmy

By Howard Ignatius

By sian monument

By Jeff Krause

By Michiluzzu

By Olli Henze

By Olli Henze

By Julien NKS

By Tom Davidson

By Tralphe XY

googletag.cmd.push(function() {
tablet_slots.push( googletag.defineSlot( “/1005424/_dPSv4_tab-all-article-bottom_(300×250)”, [300, 250], “pb-ad-78623” ).addService( googletag.pubads() ) ); } );

googletag.cmd.push(function() {
mobile_slots.push( googletag.defineSlot( “/1005424/_dPSv4_mob-all-article-bottom_(300×250)”, [300, 250], “pb-ad-78158” ).addService( googletag.pubads() ) ); } );

The post Star Gazing – 18 Twinkly Images of the Celestial Sky by Darlene Hildebrandt appeared first on Digital Photography School.


Digital Photography School

 
Comments Off on Star Gazing – 18 Twinkly Images of the Celestial Sky

Posted in Photography


Phase One and LogicKeyboard launch special Mac keyboard for Capture One Pro 10

14 Feb

Phase One has teamed up with LogicKeyboard to launch a special keyboard designed specifically for its Capture One Pro software (macOS version only). The new offering is an Apple Pro Keyboard with an ultra-thin anodized aluminum enclosure overlaid with a color-coded key mapping layout, giving users quick access Capture One Pro software shortcuts.

According to Phase One, the special keyboard layout included on this Apple Pro keyboard was designed using Phase One Certified Professional (POCP) feedback. As explained in the video below, this color-coded shortcut layout aims to increase user efficiency when editing photographs, therefore reducing the amount of time needed, thus increasing productivity and reducing costs.

Phase One dealers around the world are now offering the Capture One Pro Keyboard from LogicKeyboard for $ 139/€129 with support for three languages: German, American English and British English. Other language support, however, is available via special request.

Articles: Digital Photography Review (dpreview.com)

 
Comments Off on Phase One and LogicKeyboard launch special Mac keyboard for Capture One Pro 10

Posted in Uncategorized


Art History in Contemporary Life: Classical Figures in Modern Scenery

14 Feb

[ By SA Rogers in Art & Drawing & Digital. ]

classical paintings modern photos 8

Dressed in garments from centuries long past, figures from classical paintings peer out the windows of metro cars, vend souvenirs, browse comics and otherwise interact with unlikely scenes in modern-day Naples, Italy. Artist Alexey Kondakov is back with another round of ‘Art History in Contemporary Life,’ his mash-up series that gives the world a new perspective on paintings from the distant past.

classical paintings modern photos 1

classical paintings modern photos 2

classical paintings modern photos 3

The Ukrainian artist is known for relocating angels, royals, knights, the Virgin Mary and other subjects from classical works by artists like Hans Holbein and William Bouguereau into modern-day scenes with careful attention to light and shadow for a convincing result.

classical paintings modern photos 5

classical paintings modern photos 8

classical paintings modern photos 10

Though the subjects remain painterly and the backdrops are crisp photographs of everyday city environments, the blended images read less like Photoshopped collages and more like finished works ready to be hung on museum walls.

Given this new context, the figures suddenly seem more real than they ever did before, as if we really could come across them playing harps in subway stations or hanging out in grungy bars.

classical paintings modern photos 4

classical paintings modern photos 6

classical paintings modern photos 8

Naples is a fitting choice for the latest series, simultaneously giving a nod to Italy’s history as birthplace of High Renaissance Art and illustrating how much the city has changed over the past 500 years. Previous iterations of ‘Art History in Contemporary Life’ were set in the artist’s hometown of Kiev, Ukraine. Check out more images from the Napoli Project at Kondakov’s website or Facebook.

Share on Facebook


[ By SA Rogers in Art & Drawing & Digital. ]

[ WebUrbanist | Archives | Galleries | Privacy | TOS ]


WebUrbanist

 
Comments Off on Art History in Contemporary Life: Classical Figures in Modern Scenery

Posted in Creativity


Apple files patent application for optimization of focus stacks

14 Feb

Focus stacking on smartphone cameras is not an entirely new thing. It was used on some Nokia Lumia phones, including the Lumia 1520 in 2014, to create a shallow depth-of-field effect and allow for refocusing an image after capture, similar to what the Lytro light field cameras can do.

However, now it appears Apple is also taking an interest in the technique. The company describes a method for the optimization of focus stacking in a patent application that was filed in 2015, but only published in December 2016. The patent details a method for calculating what positions the lens elements need to be in for an optimized capture process. After the lens is positioned in its first location and collects initial focus information, an algorithm calculates ‘target depths’ that would be required to capture all objects in the scene in focus. The camera would then capture an image at the current lens location, continuing to other focal points until all elements of the screen have been captured in focus. 

In combination with ever improving smartphone processing power and potentially optimized camera hardware, this new method could help speed up the focus stacking process significantly, making it a possible default camera setting. Current options usually take at least a couple of seconds per focus stack for capturing and processing. The method could also be used for depth mapping and help improve the precision of portrait modes, such as the one implemented on the iPhone 7 Plus.

Articles: Digital Photography Review (dpreview.com)

 
Comments Off on Apple files patent application for optimization of focus stacks

Posted in Uncategorized