RSS
 

Archive for February, 2015

How to Form a Band of Cheerleaders for Your Photography Business

08 Feb

Let’s take a walk down memory lane with the song “One” written by Harry Nilsson. It was made famous by Three Dog Night in the late 1960’s. The song is particularly renowned for it’s opening line :

“One is the loneliest number that you’ll ever do.
Two can be as bad as one.
It’s the loneliest number since the number one.”

I believe there is a lot to be learned from this song. The core message being, don’t go through your life without any social interaction. I am not taking about your Facebook fans or your Instagram followers, but of the actual social connections you make among the people you interact with on a daily and weekly basis. As humans we all crave connections and contact with others. Sad as it may seem, we photographers, in general, are introverts. For the most part, we love to hide behind the camera – one eye looking through the viewfinder and the other closed to the outside world. It can certainly get very lonely and depressing.

We all know and understand the value of friends and co-workers. However, often times we tend to only gravitate towards like-minded people or those in the same profession. I am not undervaluing the importance of having friends in the industry. Personally, I have a select group of fellow photographers whose opinion I really value, appreciate, and am honored to call my friends. Some are local to me while others are through an online community – we not only talk shop but also talk about our families, our kids, and even send holiday cards to each other . But I find it mentally stimulating when I interact with people from many other professions – either related to my genre of photography (weddings and family portraits) or of a completely different field. Trust me, they all are invaluable in your growth as an artist and as a professional.

Here are some tips on how to form your own sphere of influencers and well-wishers for your own personal and professional growth. Some of these tips may seems very technical or business-school like, but are actually very simple to follow and implement for your photography business.

#1 Conduct a social network analysis

As per Wikipedia, Social Network Analysis is the study of network theory in a social analysis. Quite simply, network theory is the study of connectivity among different entities. In a social scenario, it is the mapping of “Who do you know?” also known as, “Who are your friends?” and “Who are your friends’ friends?”. Social media platforms like Facebook and LinkedIn actually have the underlining structure built already. When you friend someone, you can immediately see if you have any common friends or business acquaintances. Use your social media accounts as a starting point and map out who you know, and who those people know. Go as deep and wide as you can without getting confused or lost!
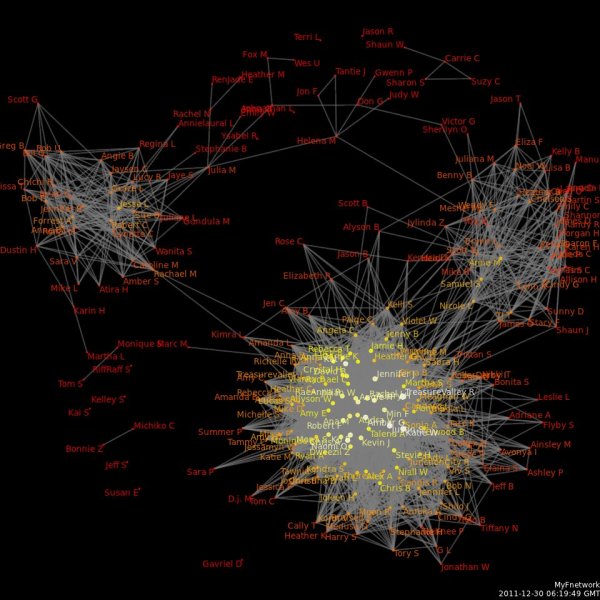
Kenneth Freeman

By Kenneth Freeman

#2 Narrow down your sphere of influencers

Once you have documented your social network analysis, narrowing your sphere of influencers is fairly easy to do. Look to your key friends, well-wishers and family as a starting point. Are there some people who are more invested in you than others? Distinguish those in some way. Are there people who are in the same field as you? What about completely different areas of expertise?

As a photographer, I love colors. A tip that works for me is to color coordinate the different groups. Warm colors like red/orange are people who are in my immediate circle (my core circle of trust). Cool colors like blue/green are people who are important but not as much as my sphere of direct influencers. Neutral colors like brown/peach are acquaintances. Also find a way to distinguish between local connections and online connections. Another tip is to keep your photography and business goals in mind while analyzing your network. This could help you focus on connections and contacts that could help you achieve your specific goals.

Memorable Jaunts DPS Article How to form your band of wellwishers 02

#3 Invest in meaningful engagement

Now that you have completed the technical part, take the time to engage on an emotional level. Connect with people with genuine intent. Take time to get to know the people you want to connect with. Find commonalities – either common interests, or common friends. Ask your friends to provide an introduction.

I cannot tell you the amount of times I have gotten a random friend request from someone – with or without mutual friends. If I don’t know you at all, chances are I am not going to respond. However if you send me an email, introduce yourself and let me know a bit about you and what exactly you want from the reach out, I am more likely to send a response back. Give me a reason to want to connect with you.

Memorable Jaunts DPS Article How to form your band of wellwishers

#4 Work out a mutually beneficial arrangement

Among the connections you make, some will be social, while others will be purely business and professional. That’s perfectly okay. You cannot be friends with the whole world, but you can certainly be cordial and pleasant with everyone you meet. When you are interacting with a vendor or a business peer, keep it professional and ensure that it is a mutually beneficial agreement. If you are reaching out to a small clothing boutique to do a styled shoot, ensure that you provide them with images from the shoot that they can use to promote their work. If you are asking acquaintances to model for you, provide them with images that they can use however they see fit. My personal rule is to provide watermark-free images, but to ask for image credit when they post the images online.

Memorable Jaunts DPS Article How to form your band of wellwishers 01

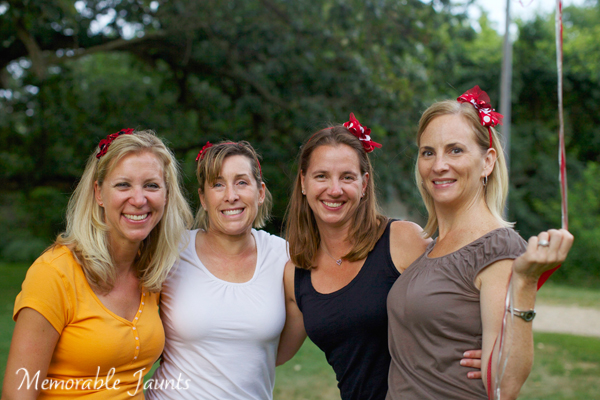
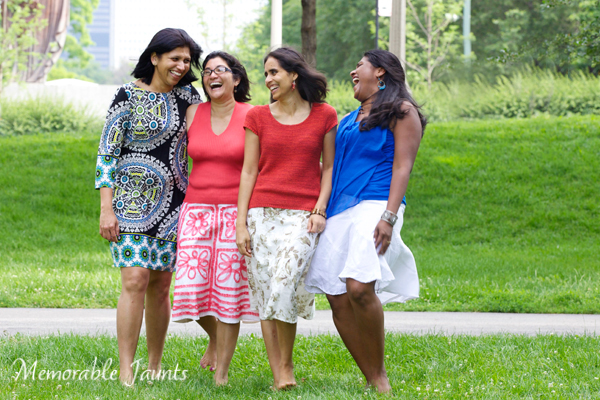
Invest in a core group of friends and wellwishers

 #5 Give more than you receive

This one ties in with #4. Don’t forget to thank people for their time and effort – either for promoting you or for helping you in some way. Just because the job is done, does not mean you forget about them and move on. Keep in touch and keep the connection strong. You never know when you may need to reach out to them again. Make sure that your cheerleaders remain your advocates for a long time.

I know what you are thinking. Shouldn’t something like friendships and relationships come from the heart? Does it really need to be plotted and mapped like a cross-country road trip? There really are a lot of benefits to doing just that. We all know that time is limited, and often time is more valuable than money itself. So, why not use that time wisely? When you are strapped for time, engage in relationships that bring the most value. I am not equating value with money or business. Value is a very personal choice and decision, and can mean whatever you choose to matter most to you – true connections, selfless relationships and/or business transactions.

How do you build your team of cheerleaders? Please share in the comments below.

googletag.cmd.push(function() {
tablet_slots.push( googletag.defineSlot( “/1005424/_dPSv4_tab-all-article-bottom_(300×250)”, [300, 250], “pb-ad-78623” ).addService( googletag.pubads() ) ); } );

googletag.cmd.push(function() {
mobile_slots.push( googletag.defineSlot( “/1005424/_dPSv4_mob-all-article-bottom_(300×250)”, [300, 250], “pb-ad-78158” ).addService( googletag.pubads() ) ); } );

The post How to Form a Band of Cheerleaders for Your Photography Business by Karthika Gupta appeared first on Digital Photography School.


Digital Photography School

 
Comments Off on How to Form a Band of Cheerleaders for Your Photography Business

Posted in Photography


Olympus ‘Air’ clip-on camera for smartphones coming to Japan

08 Feb

Olympus Japan has announced the ‘Air’ – a new camera module which clips onto smartphones in much the same way as Sony’s QX-series products. The Air features a 16MP Four Thirds sensor behind a Micro Four Thirds lens mount, a physical shutter release button and tripod mount. Uniquely, the camera will be released with an open-source API, allowing developers to come up with different applications and explore the potential of the new platform. Read more


Articles: Digital Photography Review (dpreview.com)

 
Comments Off on Olympus ‘Air’ clip-on camera for smartphones coming to Japan

Posted in Uncategorized


Olympus announces OM-D E-M1 firmware version 3.0

08 Feb

The Olympus OM-D E-M1 is about to get an update with the release of firmware version 3.0 later this month. The update’s primary function is to boost maximum framerate from 6.5 fps to 9 when shooting in continuous AF mode, thanks to enhancements for the camera’s 37-point phase-detect algorithm. Read more

Articles: Digital Photography Review (dpreview.com)

 
Comments Off on Olympus announces OM-D E-M1 firmware version 3.0

Posted in Uncategorized


The Under Line: Derelict London Tube Tunnels as Public Paths

07 Feb

[ By WebUrbanist in Architecture & Cities & Urbanism. ]

under line renderings concept

Tapping unused sections of the London Underground,  this bold proposal would create a network of subterranean paths for pedestrians and cyclists as well as spaces for pop-up shops, cafes and cultural events, all situated in stations and subway stretches of rail currently sitting idle and empty.

In the spirit of New York’s proposed Low Line, the plan involves main disused tunnels serving as primary areas for circulation and interaction. Simultaneously, putting existing but unused infrastructural voids to better use, the design calls for old reservoir chambers and exchanges to connect these larger and more open sections of the Tube.

london underline tunnel prospect

Architects at Gensler, the firm behind the idea, developed it to address a series of issues in the densely-populated capital of England, including bicyclist fatalities on surface streets, a lack of public space and ease of movement across the city.

under line subterranean path

As a bonus, special panels lining the interior of these underground spaces would be used to generate kinetic energy from people passing through and walking on surfaces, obviating the need for external power sources. Indeed, the technology for this system already exists, and this would be a great potential application for both cost and sustainability reasons.

under line tube reuse

The development process could also be incremental, moving in stages to make transition and restoration costs more manageable and to test usage patterns. The default plan is to start with voids between Green Park and Holborn, working stations that could provide access to unused portions of the Tube spanning them. In turn, tying these spaces into the existing Underground network would make them more accessible to visitors coming into the city and locals alike.

london underline park idea

Unlike other conceptual projects for London, like the SkyCycle,or serious proposals, like the Garden Bridge, very little would have to be added or displaced for this reprogramming approach to work. The Under Line may also borrow a bit of inspiration from this clever idea to transform Paris Metro stops into event spaces.

Share on Facebook


[ By WebUrbanist in Architecture & Cities & Urbanism. ]

[ WebUrbanist | Archives | Galleries | Privacy | TOS ]


WebUrbanist

 
Comments Off on The Under Line: Derelict London Tube Tunnels as Public Paths

Posted in Creativity


Olympus 14-150mm F4.0-5.6 II offers cosmetic improvements and optical coatings

07 Feb

Olympus has announced a revamped, second generation of its 14-150mm F4.0-5.6 zoom. Resistant to dust and moisture, it uses a new ZERO (Zuiko Extra-low Reflection Optical) coating to protect against scratches and minimize flare. Read more

Articles: Digital Photography Review (dpreview.com)

 
Comments Off on Olympus 14-150mm F4.0-5.6 II offers cosmetic improvements and optical coatings

Posted in Uncategorized


Samsung introduces NX500 with NX1’s 28MP BSI sensor

07 Feb

Samsung has announced the NX500, which borrows many features from the NX1 starting with a 28MP APS-C-size BSI-CMOS sensor. It too provides 4K and UHD video recording, a sophisticated hybrid NX AF system III, tilting Super AMOLED display, and (naturally) built-in Wi-Fi. Read more

Articles: Digital Photography Review (dpreview.com)

 
Comments Off on Samsung introduces NX500 with NX1’s 28MP BSI sensor

Posted in Uncategorized


How to Create a Simple Blurb Photo Book in Lightroom

07 Feb

How to create a simple photo book in Lightroom

The easiest way to get started with Lightroom’s Book module is to create a simple photo book, letting Lightroom do most of the work for you so you don’t get bogged down in the extensive design process involved in making a more complex book.

Things to do before you start

You will make the book design process much easier by doing, or at least thinking about, the following things before you start:

  • Select which photos you’re going to include. Or at least narrow it down as much as you can. You might change your mind many times as you work on the design. Organize them in a Collection.
  • Arrange the photos in the approximate order they will appear in the photo book by clicking and dragging. You can do this in the Filmstrip in the Book module, but it is much easier to do it in Grid View in the Library module. It helps if you have created a Collection containing the photos you wish to include in the photo book. Again, this doesn’t need to be precise as you will probably change your mind as you work your way through the design process.

How to create a simple photo book in Lightroom

  • Choose photos for the front and back covers. The cover photo is the first one in the Collection, the back cover photo is the last. You can change your mind later if you need to.
  • Process your files, if required. Naturally, you have probably already processed the photos you would like to include in your book, but are the photos processed in a consistent way? For example, if you are creating a book containing toned black and white photos have they all been toned the same colour, or are they different? It might be better for the book if they are all toned the same colour. If your photos need processing, it may be helpful to make Virtual Copies, so the originals are unaffected by the changes.
  • Pick which Blurb photo book size to use. There are five to choose from: small square, standard portrait, standard landscape, large landscape and large square. Sizes and prices of Blurb books are outlined on Blurb’s website.
  • Go to Book Preferences, which are found under the Book menu in the Book module (you can’t open them from any other module). Set Default Photo Zoom to Zoom to Fit and leave the Start new books by autofilling box unchecked. The other settings don’t matter for simple photo books.

How to create a simple photo book in Lightroom

Creating a simple photo book

Go to the Book module. If you set your Book Preferences as recommended above, you will see something like this.

How to create a simple photo book in Lightroom

Regardless of what you see on screen, start by clicking the Clear Book button at the top of the Content window. Then go to the Auto Layout panel, set the Preset to One Photo Per Page and use the drop down menu accessed by the double arrow icon to select Edit Auto Layout Preset. The Auto Layout Preset Editor window opens (below). Look for the Zoom Photos To setting and set it to Fit (if it isn’t there already). Click the Done button at the bottom of the window.

How to create a simple photo book in Lightroom

Click the Auto Layout button in the Auto Layout panel. Lightroom creates the book for you. It will look something like this, depending on the number of photos in your book.

How to create a simple photo book in Lightroom

At this stage you will see the words Unsaved Book in the top-left corner. They indicate that the current book layout hasn’t been saved. Click the Create Saved Book button. This prompts Lightroom to open the Create Book window and create a Book Collection – a specialized type of Collection containing photos used in a photo book.

Give the book a name and select a Collection Set to store it in. Click the Create button. Lightroom duplicates the current Collection and turns it into the new Book Collection. It is displayed in the Collections panel with a book icon to differentiate it from other Collections. The name of the Book Collection is also displayed in the top-left corner of the Book module. Lightroom updates the Book Collection every time you make a change, so you can come back to it at any time without losing your work.

How to create a simple photo book in Lightroom

Go to the Book Settings panel and select the Size of the book and the type of Cover you’d like (I chose Standard Landscape with Hardcover Image Wrap for this example). It’s important to decide now which you want, as it may affect the layout if you change them later.

Lightroom displays the estimated price of the photo book at the bottom of the panel (click the double arrow icon to the right of the price to see it in a different currency). The figure changes according to the size of the book, the number of pages in it, and the Paper Type (there is more information about paper types on Blurb’s website.

You can save money by including the Blurb logo page – an extra page at the back of the book with Blurb’s logo. Doing so gives you a discount, but adds an extra page to the layout.

http://www.blurb.com/proline

The first and last photos in the Book Collection are used as covers, but Auto Layout also adds them as the first and last photos in the book. If you don’t want them in those positions then you need to remove them.

Starting by going to the first image, right-clicking and selecting Remove Photo.

You should now see a grey square with a cross in it (if you don’t, go to the Guides panel and tick the Show Guides and Photo Cells boxes). The icon indicates the page contains an empty Photo Cell – Lightroom’s term for the spaces allocated to photos within the layout.

The left-hand page is dark grey, indicating that it’s the inside of the front cover, and that you can’t add anything to it.

How to create a simple photo book in Lightroom

Repeat the process with the last photo in the book. This time, right-click the photo and select Remove page.

How to create a simple photo book in Lightroom

Add a white border

The next step is to create a white border around the photos in the book, rather than run them up to the edge of the printed page. The photos will be smaller, but the additional white space will give the book a more professional look.

Click on a page containing a photo in the landscape orientation to activate it and go to the Cell panel. Grab the bottom slider and move it right. The other sliders should move with it at the same time (if they don’t, click the grey Link All square – when all the squares are white, they will move together). Adjust the sliders until the photo has a solid white border around it like the one in the screen shot below.

How to create a simple photo book in Lightroom

Right-click on the page and select Save as Custom Page. Switch to the Multi-Page View and go to Edit > Select All to select all the pages in the book (the cover isn’t included).

Click any arrow in a yellow frame, go to Custom Pages and select the page layout you just created. If this is the first time you have done this, it will be the only one there. Lightroom updates the selected pages with the chosen layout.

How to create a simple photo book in Lightroom

Design the covers

Go to the covers spread, click on the front cover and then the grey Add Photo Text button at the bottom. Type in the book title. You can change the font colour, size, and text in the Type panel. Click and drag the yellow border to move the text.

You can’t change the width of a Photo Text Cell. But you can easily move the title left or right by going to the Cell panel and moving the Left slider until the title is positioned where you want it.

How to create a simple photo book in Lightroom

Open the Background panel and select a background colour that complements the front and back covers.

How to create a simple photo book in Lightroom

Go to the title on the spine of the cover, and change it to the title of your book. For consistency, you should use the same font you selected for the title on the front cover.

How to create a simple photo book in Lightroom

Another option for the cover is to expand the photos so that they fill the available space. This will crop the photos, which you may not want, but can look really effective. You may also need to move the title. To do so, right-click on the cover images and select Zoom Photo to Fit Cell. This is what it looks like with my covers.

How to create a simple photo book in Lightroom

Congratulations, you have finished your photo book! There are lots of ways you can tweak and improve your design in the Book module,  I may go into those in a later article. But hopefully you now see how easy it is to get started in the Book module. Indeed, if you are happy with this simple design, you can create a photo book in a few minutes.

Uploading your photo to book to Blurb

In order to print your book with Blurb you need a Blurb account, which you can sign up for on their website.

Then, press the Send Book to Blurb button underneath the right-hand panels. Lightroom prompts you to sign into your account. Then, enter the title and author’s name and click the Upload Book button. The upload takes some time, but when it’s done you can sign into your Blurb account online and see your book. Leave this step until you’re ready to order though, as Blurb will delete the book from your account if you don’t order at least one copy within 15 days.

Here are some preview pages from the photo book I just created.

Have you made a book yet? Please share your comments and questions below.
lightroom-create-simple-photo-book-18
How to create a simple photo book in Lightroom


Mastering Lightroom: Book Five – The Other Modules ebook coverMastering Lightroom: Book Five – The Other Modules

My new ebook Mastering Lightroom: Book Five – The Other Modules shows you how to use Lightroom’s powerful features to create fun and interesting projects using the Map, Book, Slide show, Print and Web modules. Whether it’s geotagging, putting together a photo book, printing your best photos or creating web galleries all the information (and inspiration) you require is right here.

googletag.cmd.push(function() {
tablet_slots.push( googletag.defineSlot( “/1005424/_dPSv4_tab-all-article-bottom_(300×250)”, [300, 250], “pb-ad-78623” ).addService( googletag.pubads() ) ); } );

googletag.cmd.push(function() {
mobile_slots.push( googletag.defineSlot( “/1005424/_dPSv4_mob-all-article-bottom_(300×250)”, [300, 250], “pb-ad-78158” ).addService( googletag.pubads() ) ); } );

The post How to Create a Simple Blurb Photo Book in Lightroom by Andrew S. Gibson appeared first on Digital Photography School.


Digital Photography School

 
Comments Off on How to Create a Simple Blurb Photo Book in Lightroom

Posted in Photography


Canon rolls out PowerShot SX410 IS and ELPH 350 HS compacts

07 Feb

Rounding out its pre-CP+ announcements, Canon has introduced two new PowerShot compacts – the SX410 IS and the ELPH 350 HS/IXUS 275 HS. The SX410 offers a 24-960mm equivalent zoom range, a 20MP CCD sensor, 720p video and Canon’s Intelligent IS stabilization. The PowerShot 350 HS assumes a more compact form with a 25-300mm equivalent zoom range, 20.2MP CMOS sensor, built-in Wi-Fi with NFC and 1080p video. Read more

Articles: Digital Photography Review (dpreview.com)

 
Comments Off on Canon rolls out PowerShot SX410 IS and ELPH 350 HS compacts

Posted in Uncategorized


Canon announces ‘G3 X’ with 25x zoom, to become available… at some point

07 Feb

Canon has announced plans for a ‘PowerShot G3 X’ enthusiast compact with a 1-inch type sensor and a 24-600mm equivalent lens. The company hasn’t released much more detail at this time, but it’s obvious from appearances that the G3 X is close in spirit to both the PowerShot G7 X and the G1 X Mark II. Read more

Articles: Digital Photography Review (dpreview.com)

 
Comments Off on Canon announces ‘G3 X’ with 25x zoom, to become available… at some point

Posted in Uncategorized


Die vergängliche Kunst von David Catá

07 Feb

©  David Cata

Ein Beitrag von: David Catá

David Catá ist ein Performancekünstler, Maler und Fotograf. Schmerz, Nostalgie, Erinnerung und Vergessen sind Themen, die seine Kunst kennzeichnen. Seine erste Einzelausstellung „Dandelions“ findet derzeit in Berlin statt. Zu diesem Anlass habe ich mit David Catá gesprochen.

David Catá kombiniert Fäden und Fotografie. Anders als Künstler, die Bilder mit Nähten verzieren, nutzt David Catá seine Haut als Leinwand.

Die Stiche auf seine Handflächen sind eine Metapher für eine dauerhafte Symbiose zwischen Zeit und Vergessen. Cata näht Gesichter geliebter Menschen in seine Handflächen. Wenn die Fäden entfernt werden, verbleiben Einstichstellen in der Form des Portraits in seinen Händen.

David Catás Arbeiten lassen niemanden unberührt. Von Liebkosungen der Löwenzahnsamen bis zur Brutalität von Stichen reichend, ist sein Werk von einer tiefen Innenansicht geprägt – einem verzweifelten Versuch, Erinnerungen festzuhalten und sich mit dem Schmerz des Vergessens zu konfrontieren.

Junge mit Sonnenblumensamen.

Frau mit Sonnenblumensamen.

Hast Du das Nähen für Deine Projekte gelernt oder konntest Du bereits vorher mit Nadel und Faden umgehen?

Die Wahrheit ist, dass mein Interesse am Nähen, oder besser gesagt dem Nähen auf der Haut, erst vor fünf Jahren während meines Masterstudiums auftauchte. Vorher habe ich noch nie genäht, ich wusste noch nicht einmal, wie man Knöpfe befestigt. Aber als Kind habe ich immer mit Nadeln meiner Mutter experimentiert und versucht, sie durch meine Haut zu stechen. Meine Mutter hat oft nächtelang genäht.

Wie hat Deine Familie reagiert, als sie bemerkte, dass Du ihre Portraits auf Deine Handinnenflächen nähst?

Sie waren erstaunt und besorgt. Aber meine Familie ist heute froh, Teil des Projekts zu sein, weil sie den Sinn dahinter verstehen.

Wie viel Zeit musst Du zwischen zwei Performances verstreichen lassen?

Ich warte immer solange, bis sich die Haut vollständig regeneriert hat. Das dauert in der Regel vier Wochen. Das heißt aber nicht, dass ich alle vier Wochen ein Portrait in meine Hände steche. Ich mache das nur, wenn ich ein Bedürfnis danach verspüre.

Ein vernähter Handschuh

Haus schwebt auf Hand

Welche Rolle spielen Schmerzen bei der Art und Weise, wie Du Deine Familie portraitierst?

Obwohl meine Arbeit schmerzhaft zu sein scheint und wie ein aggressiver Akt gegen meinen Körper wirkt, spreche ich immer von emotionalen (und nicht körperlichen) Schmerzen. „Overexposed Emotions“ ist ein Projekt, das von Schmerz spricht, aber vor allem davon, wie die Menschen, die ich auf meiner Haut portraitiere, mein Leben geformt und eine Spur hinterlassen haben.

Welche Technik hast Du benutzt, um die Löwenzahnsamen auf Deinen Modellen zu befestigen?

Die Löwenzahnsamen klebe ich vorsichtig auf Menschen und Objekte. Das ist eine heikle Vorgehensweise, weil die Samen so zerbrechlich sind. Mein Projekt nutzt Löwenzahnsamen als Metapher für die Vergänglichkeit des Lebens, weil sie einerseits die Überreste einer verdorrten Blume und andererseits der Beginn einer neuen Pflanze sind.

Deine Arbeit ist sehr intim und zart, aber auch brutal und schockierend zugleich. Glaubst Du, dass dieses Spannungsverhältnis den Reiz für Dein Publikum ausmacht?

Meine Arbeiten spielen mit Gegensätzen: Liebe und Schmerz, Vergessen und Erinnern, Bindung und Verlust. Und das erzeugt eine gewisse Spannung beim Betrachter. Einerseits will man nicht hinschauen, andererseits kann man nicht wegschauen. Ich will Gefühle mit meinen Bildern auslösen.

Buch mit Sonnenblumensamen

Bild mit Sonnenblumensamen

Was sind Themen, mit denen Du normalerweise arbeitest? Glaubst Du, dass Kunst eine Waffe für politische Veränderungen sein kann?

Die Themen, die mich bewegen, umkreisen Erinnern, Vergessen, Schmerz und Beziehungen. Diese Themen beschäftigen mich zunehmend. Ich glaube, dass Kunst ein emotionaler Defibrillator für Gefühle und soziale Interaktionen sein kann. Kunst regt uns zum Nachdenken an und stellt die Schwächen von Menschen zur Schau.

Warum hast Du Dich entschieden, nach Berlin zu ziehen?

Ich kam aus persönlichen und beruflichen Gründen nach Berlin. Ich möchte als Mensch wachsen und meine Arbeiten weiterentwickeln. Berlin ist eine Stadt, die ständig in Bewegung ist und das ist es, was ich derzeit brauche.

Mit welchen Projekten möchtest Du Dich in der Zukunft beschäftigen?

Gerade bereite ich mehrere Ausstellungen in Spanien vor, aber ich arbeite auch an meinem zweiten Fotobuch, das „In the skin“ heißen wird. Vor ein paar Wochen habe ich mein erstes Buch veröffentlicht, das „Let me fly“ heißt. In einem weiteren Projekt versuche ich, meine beiden Leidenschaften, die Fotografie und die Musik, miteinander zu kombinieren. Und ich beschäftige mich auch mit der Malerei.

Eine Pflanze hängt in einer Hand

Vernähte Hände

Die von Ana Sanfrutos kuratierte Einzelausstellung von David Catá kann noch bis zum 15. Februar 2015 im Kleinen Salon, Manteuffelstrasse 46, 10997 Berlin besichtigt werden. Internetgaleriebesucher können sich auf David Catás Webseite umschauen.

Die englische Originalversion dieses Interviews wurde auf Sleek publiziert und für kwerfeldein von Kat Kapo für Euch ins Deutsche übersetzt.


kwerfeldein – Fotografie Magazin | Fotocommunity

 
Comments Off on Die vergängliche Kunst von David Catá

Posted in Equipment