Month: December 2014

  • Using Rain Puddles to Create Unique Reflection Photos

    6

    Implementing water into a shoot ratchets up the drama in the images but also the difficulty in the execution. I equate the learning curve of lighting water to learning how to light metal objects and other reflective surfaces. It’s not a quick learn, so be patient with yourself.

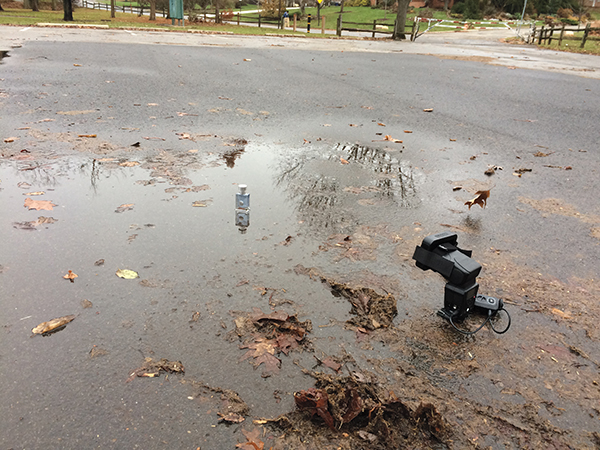
    Rain puddles are awesome. I bet you never thought to run out after it rained to hunt for decent puddles. But as you can see in the image below, that’s exactly what I was working with. Since the product I was shooting was a cologne bottle, which is rather small, the puddle didn’t need to be very wide or long. If I was shooting something larger, like a person, I would need a much larger puddle to pull off this technique of making reflection photos.

    1

    The setup: I was working with a rain puddle in a parking lot, on a patch of blacktop. I added a grid to my flash to keep light from spilling onto the foreground.

    The first thing I was looking for was a puddle on a patch of blacktop, or dark asphalt. Typical asphalt or concrete is much lighter in color, and you need something darker to really make this work. The next thing to keep in mind is the height of the flash. Notice I placed it on the same level as the product – on the ground. If I were to light it from a higher angle instead, the light would illuminate too much of the ground around the product, resulting in a less than dramatic image. I also added a honeycomb grid to the flash to further contain the light spill.

    Since the day I photographed this was particularly drab and dark, I had no problem dialing down the ambient with a moderate exposure. With a flash output of ¼ power I had all but eliminated the ambient light, leaving me with an exposure of 1/60 at f/7.1. On a brighter day, I’d likely need a neutral density filter to get rid of the extra ambient light.

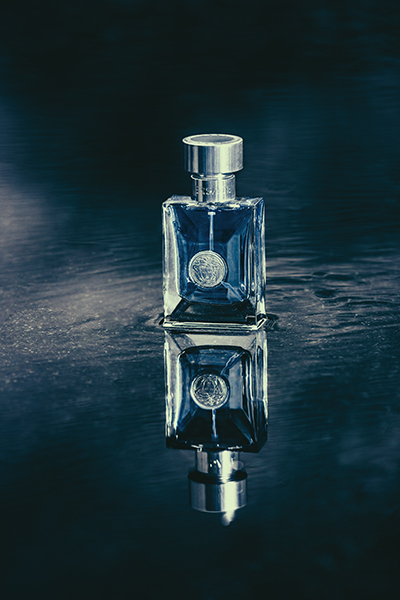
    Though the ambient has been lowered to an almost night-time quality, there are still some reflections of the sky and trees visible in the puddle. The lower shutter speed allowed these tones and shapes to remain. Though the puddle was not especially wide or deep, it sufficed in allowing me to achieve the glassy surface that I was going for, see below.

    2

    The final shot: This rain puddle, shot on a drab, gray, day has been transformed into a dramatic, glassy surface.

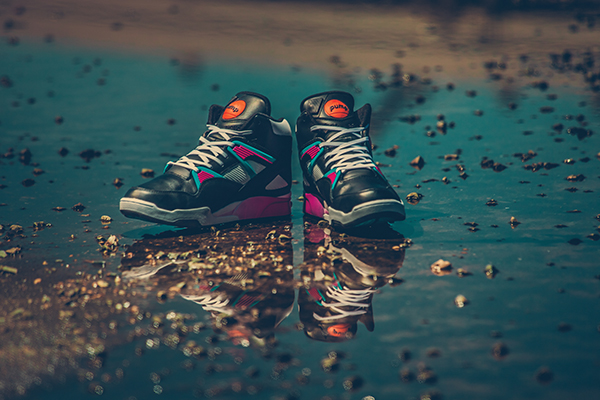
    If the sky had been clear, rather than dark gray, the surface of the puddle would have been a nice, vibrant blue, as seen below. In this shot you can see that while the blue tone is nice, the illuminated foreground is pretty distracting, not to mention the dozens of small rocks. This was because the light was elevated, lighting the concrete in front of the shoes as well, which is why it’s important to lower your lights, so that they’re parallel to the ground.

    3

    When the sky is clear, the surface of the puddle changes to a lovely blue color. However, be sure not to light from above, because as seen in this image, the illuminated concrete makes for a distracting foreground.

    4

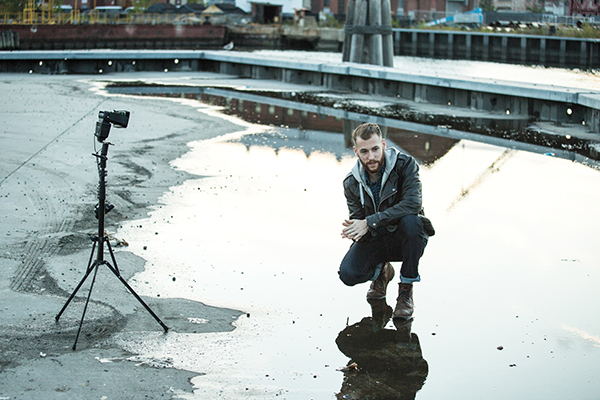
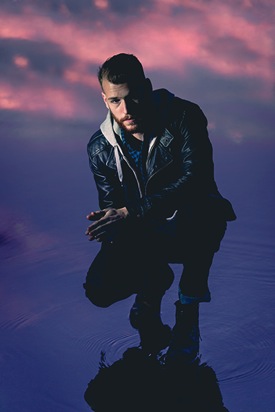
    The setup: A puddle, this time a large one, is the setting for this portrait. The shoot took place right after the sun dropped below the skyline.

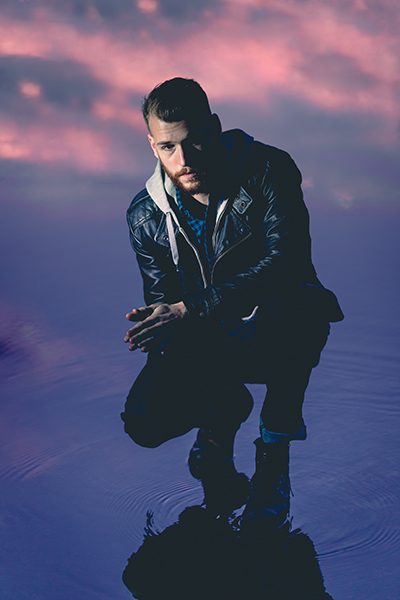
    In this next image I was using a rather wide puddle, which was large enough to allow me to isolate my subject, Max. Once again, to minimize light spill, I set my light at the same level as the subject, rather than above, as well as used a grid. The puddle reads really well, though the reflection shows a bit of the building in the background. After I finished color grading the image in Lightroom, I opened up the file in Photoshop to remove the building.

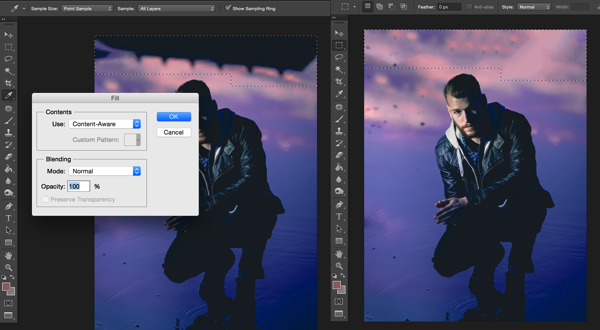
    To do this, select the trouble area and simply hit the delete key. As long as you are using Adobe Photoshop CS6 or CC, you’ll see the option to use Content Aware Fill (see below). It will typically do a decent job at filling in the selection, but minor cleanup is often needed. I used the Spot Healing Brush tool to clean up any remaining trouble areas.

    5

    I quickly removed the building reflection by using the Content Aware Fill option in Photoshop CC.

    6

    The final shot: After removing the building reflection, the water surface looked seamless.

    Have you got any other tips for creating reflection photos? Please share them and/or your images in the comments below.

    googletag.cmd.push(function() {
    tablet_slots.push( googletag.defineSlot( “/1005424/_dPSv4_tab-all-article-bottom_(300×250)”, [300, 250], “pb-ad-78623” ).addService( googletag.pubads() ) ); } );

    googletag.cmd.push(function() {
    mobile_slots.push( googletag.defineSlot( “/1005424/_dPSv4_mob-all-article-bottom_(300×250)”, [300, 250], “pb-ad-78158” ).addService( googletag.pubads() ) ); } );

    The post Using Rain Puddles to Create Unique Reflection Photos by Nick Fancher appeared first on Digital Photography School.


    Digital Photography School

  • Phase One and Alpa release official details and pricing of A-Series medium format cameras

    Phase One has announced official details of its new A-Series medium format cameras after information about the new pairing of the company’s digital backs with an Alpa body and lenses was leaked in November. As was reported at the time, the series will comprise Phase One 50MP, 60MP and 80MP backs, combined with the Alpa 12 TC body and a choice of three lenses – the Alpagon 5.6/23mm, Alpar 4.0/35mm and the Alpagon 5.6/70mm. Read more

    Articles: Digital Photography Review (dpreview.com)

  • Deal 5: Your Guide to Natural Light Photography for $7 (65% off)

    On the 5th day of Christmas dPS gave to me… another amazing $ 7 eBook and bundle option!

    Yesterday saw our servers pushed to their limit with a $ 7 USD eBook deal so today we’ve decided to roll our best selling eBooks of all time at that sweet price of… $ 7.

    That eBook is…

    Natural Light: Mastering a Photographer’s Most Powerful Tool by renowned travel photographer Mitchell Kanashkevich.

    NewImage

    Natural Light is one of the best guides on the market written specifically with beginner to intermediate photographers in mind. Written in easy to understand language, this eBook will certainly help you improve the quality of your photographs… using nature’s free gift to photographers – sunlight!

    Today it is yours for just $ 7 – 65% off!

    Bundle Mitchell’s 3 Ebooks for $ 19

    Want more? Mitchell has written 3 great eBooks for dPS so today if you’d like to explore his full library you can pick up them all for just $ 19 USD.

    Mitchell bundle

    The bundle includes:

    1. Natural Light: Mastering a Photographers Most Powerful Tool
    2. Transcending Travel: a Guide to Captivating Travel Photography
    3. Captivating Color: A Guide to Dramatic Color Photography
    4. Mitchell’s eBooks are perfect for the beginner just starting out or a more intermediate photographer looking for a refresher. They are beautifully illustrated and full of great practical advice.

      As with all of our eBooks they come with a 60 day money back satisfaction guarantee.

      These 3 eBooks have a RRP of $ 60 but today they’re available for $ 19 (68% off).

      As with all our deals – this one lasts just 24 hours. Grab this one here today.

    googletag.cmd.push(function() {
    tablet_slots.push( googletag.defineSlot( “/1005424/_dPSv4_tab-all-article-bottom_(300×250)”, [300, 250], “pb-ad-78623” ).addService( googletag.pubads() ) ); } );

    googletag.cmd.push(function() {
    mobile_slots.push( googletag.defineSlot( “/1005424/_dPSv4_mob-all-article-bottom_(300×250)”, [300, 250], “pb-ad-78158” ).addService( googletag.pubads() ) ); } );

    The post Deal 5: Your Guide to Natural Light Photography for $ 7 (65% off) by Darren Rowse appeared first on Digital Photography School.


    Digital Photography School

  • 17. Türchen: compagnon

    Compagnon Taschen

    17. Türchen

    In unserem heutigen Türchen stehen die schönen Kamera-Ledertaschen von compagnon. Entstanden ist die deutsche Firma aus einer gewissen Notsituation: Auf der Suche nach einer guten und hochwertigen Fototasche aus Leder wurde man einfach nicht fündig. Entweder hat das Material nicht gepasst, die Verarbeitung, das Design, oder irgendetwas anderes. Kurzerhand entwarf man die perfekte Tasche einfach selbst.

    Im Dezember 2012 wurde diese Tasche, der „Messenger“, das erste Mal verkauft und seitdem hat sich das Angebot um viele weitere Produkte erweitert. Aus zwei von ihnen kann der heutige glückliche Gewinner wählen.

    Compagnon Tasche

    Zunächst hätten wir hier die kleine Schwester der ersten Tasche von compagnon: „The little messenger“. Sie ist etwas kleiner, aber dadurch auch etwas leichter und handlicher. Hinein passt zum Beispiel eine DSLR mit aufgestecktem Objektiv (ohne Batteriegriff) und zwei weitere kleinere Festbrennweiten oder ein großes Objektiv sowie ein 10? Notebook in das extra gepolsterte fach im Inneren. Die Vorderseite bietet zusätzlich genügend Platz in diversen Fächern für Eure Objektivfilter, Objektivdeckel, Speicherkarten, Akkus, Smartphone, Schlüssel, Portemonnaie und Ähnliches.

    Compagnon Tasche

    Eine etwas femininere Variante kommt mit der compagnon „the unique“. In sie passt etwas mehr als in „the little messenger“. So könnt Ihr hier neben den Objektiven auch Eure Vollformat-Kamera mit Batteriegriff sowie ein 13?-Notebook in der gepolsterten Innentasche unterbringen. Auch diese Tasche hat noch diverse Fächer für das Smartphone, Objektivdeckel, Speicherkarten und so weiter. Die Tasche muss nicht in der Hand getragen werden, denn man kann auch einen zugehörigen weich gepolsterter Schultergurt anbringen.

    Alle compagnon-Taschen haben kleine Metallfüße an der Unterseite für den optimalen Stand und zum Schutz der Taschen. Das Außenmaterial ist 100 % echtes, naturgegerbtes Büffelleder aus einer italienischen Gerberei.

    Um eine der Taschen zu gewinnen, schreibe einen Kommentar mit Deinem Wunschgewinn unter bürgerlichem Namen und gültiger E-Mail-Adresse bis heute um 24 Uhr. Danach verlosen wir sie per Zufallsgenerator unter allen Kommentatoren. Die genauen Gewinnspielregeln findest Du hier. Viel Glück!


    kwerfeldein – Fotografie Magazin | Fotocommunity

  • Deal 4: Our Best Selling Portraits eBooks are $7 Each

    Today we’re rolling out a deal that our team are very excited about – our best selling Portrait eBooks are just $ 7 each for the next 24 hours!

    Portraits $  7

    Over the last couple of years we’ve worked with talented Aussie portrait photographer – Gina Milicia – to put together this comprehensive library of portrait eBooks.

    There are four in the series that cover everything from taking your shots, lighting your subject, posing your subject through to processing your portraits.

    Every time we’ve added to the series we’ve seen them push our servers to the limits so tonight we’re a little worried as we’ve never discounted all four of them this low at the same time!

    These eBooks normally sell for $ 19.99 but are yours today for $ 7 – a saving of 65%.

    Can’t Stop at Just One? Bundle Them!

    Pick up any of the above eBooks for just $ 7 (USD) or… grab the full set for just $ 21 PLUS we’ll throw in our popular quick reference cookbook – 14 Recipes for Amazing Portraits as a bonus.

    NewImage

    This great little cookbook is the perfect companion to the rest of the bundle and walks you through 14 portraits, how they were shot, how they were lit, how they were styled, the gear that was used etc.

    That’s 5 eBooks worth close to $ 90 that are yours today for just $ 21.

    Grab 1 for $ 7 or Buy the Lot – But Don’t Wait too Long!

    Whether you pick up one of our portrait titles for $ 7 or pick up the full set for $ 21 – just be sure to get in before this deal is gone for good in just 24 hours time.

    Invest in your portrait photography here.

    googletag.cmd.push(function() {
    tablet_slots.push( googletag.defineSlot( “/1005424/_dPSv4_tab-all-article-bottom_(300×250)”, [300, 250], “pb-ad-78623” ).addService( googletag.pubads() ) ); } );

    googletag.cmd.push(function() {
    mobile_slots.push( googletag.defineSlot( “/1005424/_dPSv4_mob-all-article-bottom_(300×250)”, [300, 250], “pb-ad-78158” ).addService( googletag.pubads() ) ); } );

    The post Deal 4: Our Best Selling Portraits eBooks are $ 7 Each by Darren Rowse appeared first on Digital Photography School.


    Digital Photography School

  • Shooting Motorsports with a Micro Four Thirds Camera

    Can you use micro four thirds or other mirrorless cameras to photograph motorsports? Well, the answer is a resounding YES, but with some caveats.

    You can certainly make good and interesting images using any camera at a motorsport event. All of the images in this article were made with either a Fujifilm X100S or an Olympus OMD EM-5 and two lenses – the m.Zuiko 12-50mm f/3.5-6.3 and the m.Zuiko 75-300mm f/4.8-6.7 II.

    Mft motor sport KLP 1

    Planning

    Perhaps one of the most important things to consider when you intend to photograph motorsports with a micro four thirds camera is the pre-planning you need to do before you actually get to the race track. Think about how you’re going to shoot the event. Remember that professional motorsport photographers use high-end dSLR cameras that are both fast and expensive; their choice of lenses is equally fast and expensive! A typical pro photographer covering motorsport may have two or three camera bodies and a selection of lenses ranging from fisheye to wide angle and telephoto. They could easily have $ 35-$ 40,000 worth of camera gear with them at the track – plus their laptop!

    Mft motor sport KLP 2

    You probably won’t have that amount of gear with you, and if you intend shooting with micro four thirds you definitely won’t. Micro four thirds cameras use different focusing systems to dSLR’s and their lenses are often slower, that is they have smaller maximum apertures, than the typical lenses used by professionals. They’re also slower to lock focus due to the type of focusing system they use.

    You’ll need to consider the limitations of the camera system you’re using, as well as many other factors.

    Weather

    Weather will play a big part in how you shoot motorsports. If it’s bright and sunny, you’ll be able to use lower ISOs and higher shutter speeds. Of course, if the sky is overcast and grey, or even stormy, then you might need to raise the ISO or lower the shutter speed. Bright sun creates harsh shadows which also need to be considered when composing your shot, simply because cameras don’t have the same dynamic range that our eyes have. You’ll also have to consider the position of the sun when framing. Even if the sun is coming from behind you, there can often be bright reflections bouncing back towards you and your camera. A few specular highlights on the front fairing of an approaching motorcycle is not usually a problem, but a large super-bright reflection from a sponsor’s sign is certainly going to be distracting and will probably ruin your shot.

    Mft motor sport KLP 3

    ISO

    Modern cameras are able to shoot at relatively high ISO without too much in the way of distracting noise. Micro four thirds cameras are no exception. The noise produced by most cameras manufactured in the last few years is more like film grain, rather than ugly colour noise, and simply isn’t an issue. It’s much better to correctly expose your image with a high ISO than it is to use a lower ISO and end up under-exposing the image. When you increase the exposure of an under-exposed image in post-processing you introduce a lot of digital noise and the image begins to break up and lose detail. There is much more data stored in the highlights compared to the shadows of a digital image. Exposing to the right, or for the highlights, is generally better than underexposing the image and boosting the exposure in software.

    Mft motor sport KLP 4

    Shutter Speed

    You can say a lot in an image by controlling your shutter speed. Using a slow shutter speed while panning a fast moving vehicle will blur the background while keeping your subject sharp. The slower the shutter speed, the more blur in the background and the more you convey a sense of speed. Conversely, if you use a high (fast) shutter speed you’ll probably have a nice sharp image, but the vehicle will look like it’s stationary, or parked on the track. With a high shutter speed the background will be sharp, unless you’ve used a large aperture to send everything behind the vehicle into soft focus, and the wheels will also be frozen in time.

    Mft motor sport KLP 5

    Moving Towards / Away / Across

    When a vehicle is moving towards you, you can get away with using a much faster shutter speed than if it’s moving across your path from one side to the other. Most race vehicles use slick tires on the track, which means there is no tread pattern. If the wheel/tire is frozen in time by a fast shutter speed it doesn’t really matter. There will be no visual clues that the tire is frozen because the tire is smooth anyway. Unless you’re zoomed right in on the tire you can’t tell whether it’s rotating or not. However, If you’re photographing something like a motocross bike or an open wheel race car in the rain, which do use treaded tires, then you should keep the shutter speed slow enough that the tires are blurred but the rest of the bike or car are still sharp. Blurring the tires helps to show motion rather than having the vehicle appear to be stationary on the track.

    Mft motor sport KLP 6

    When you’re panning with a vehicle as it moves across the frame it’s much better to use a slower shutter speed because then the rotation of the wheel is still visible. You get a nice blur of the spokes or writing on the tire’s sidewall. The rotation of the wheel, combined with the blurred background as you move the camera while following the vehicle, really adds a sense of speed and motion. The slower the shutter speed, the more dramatic the effect.

    Mft motor sport KLP 7

    Aperture

    When photographing sports such as football, a large wide open aperture is beneficial to isolate your subject from the background. However, when shooting motorsport, that’s generally not necessary. Remember, as you pan with the moving vehicle, the background remains stationary. By using a small aperture, which means you’ll have a much larger depth of field, you’ll also lower your shutter speed. Having a large depth of field means you don’t have to be as critical on your focus point. It won’t matter whether you focus on the rider (driver) or the vehicle, there will be sufficient depth of field to ensure the entire vehicle is in focus. Even if the background is in sharp focus with a stationary shot, it will become blurred due to the movement of the camera and the slow shutter speed.

    Mft motor sport KLP 8

    Manual Focus

    Expensive dSLR cameras, and their similarly priced prime telephoto lenses, focus very quickly. That’s why you pay a lot of money for them. But micro four thirds cameras and lenses aren’t as fast. They use a different focussing system which is very good, but not as good at tracking focus of fast moving subjects, particularly when they’re moving towards or away from you. So, how do you get around that? You focus manually!

    You can focus completely manually or use autofocus and then switch to manual focus. Either method is easy to do. If you’re going to use the autofocus first method, simply choose something that is the same distance from your camera as the subject you will be photographing, and use the camera’s focus system to lock onto that; then switch off the autofocus and wait for your subject to appear.

    Pre-Focus

    Mft motor sport KLP 9

    Pre-focussing is another form of manual focus. An example of pre-focus in motorsports would be to focus on the apex of a corner using either of the manual focus methods above, then waiting for your subject to appear. In this case, you would wait for the motorcycle or car to approach the apex, then make your photograph. Most cameras have a burst or continuous shooting mode, so as your subject approaches the apex you can begin capturing images. Keep the camera still and capture numerous frames as the vehicle travels through the corner. In this case you can use a high shutter speed because your subject will be travelling towards you. You should get at least one sharp image as the vehicle passes through the corner. By using a small aperture you will have a reasonably large depth of field allowing the motorcycle or car to be within the zone of focus.

    Mft motor sport KLP 10

    Stationary – Motion

    There are numerous ways to show motion on the racetrack. Using a small aperture and slow shutter speed as you pan with your subject is one method. Another method involves keeping the camera still and using a slow shutter speed, combined with a small aperture for a large depth of field. Keep the camera stationary as you make your image and let the motorcycle or car pass through the frame. The slower the shutter speed, the more blurred the racer will be. Try to capture the racer as they enter the frame on the left and allow plenty of space on the right of the frame for them to travel through.

    Mft motor sport KLP 11

    Of course, you can break the rules and have the vehicle on the right side of the frame, but it will generally look better and feel more natural if you capture it on the left, or perhaps both left and right.

    Mft motor sport KLP 12

    Autofocus

    While most of your action shots will probably be made using manual focus, if you choose the right locations you can still capture sharp images using the camera’s autofocus system. Choosing a very tight corner on the track will mean the racers will be travelling at their slowest as they travel through the bend. That may mean they’re going slow enough to capture without switching to manual focus. You’ll need to experiment because even the slowest part of some tracks will be too fast for your camera. Of course, some cameras are better at focusing than others too. The Olympus OMD EM-1 tracks focus better than its sibling the OMD EM-5, for example.

    Conclusion

    You certainly need to think about how you’re going to shoot a motorsport event when using micro four thirds and other mirrorless cameras, but it’s possible to achieve very good results. Plan your shots and position yourself so you can pre-focus; use manual focus, and pan with your subject.

    Mft motor sport KLP 13

    Don’t forget to also make images with some background or foreground elements that help to tell the story. Images of track marshals, medical staff, and signage help your audience to appreciate the whole event, not just the action happening on the track.

    Mft motor sport KLP 14

    You should also try to make images of things that are happening off-track. Photograph the fans enjoying themselves and the crowd after the main event. Think about your shots and make them happen, but above all, have fun at the event!

    Mft motor sport KLP 15

    Mft motor sport KLP 16

    Mft motor sport KLP 17

    Mft motor sport KLP 18

    Mft motor sport KLP 19

    Mft motor sport KLP 20

    googletag.cmd.push(function() {
    tablet_slots.push( googletag.defineSlot( “/1005424/_dPSv4_tab-all-article-bottom_(300×250)”, [300, 250], “pb-ad-78623” ).addService( googletag.pubads() ) ); } );

    googletag.cmd.push(function() {
    mobile_slots.push( googletag.defineSlot( “/1005424/_dPSv4_mob-all-article-bottom_(300×250)”, [300, 250], “pb-ad-78158” ).addService( googletag.pubads() ) ); } );

    The post Shooting Motorsports with a Micro Four Thirds Camera by Ken Lyons appeared first on Digital Photography School.


    Digital Photography School
  • Das Licht der Dämmerung

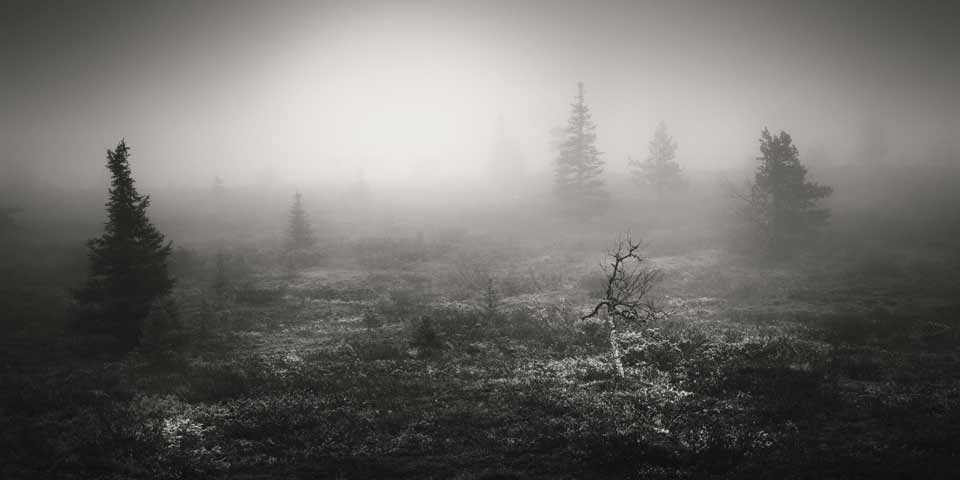
    Eine karge Landschaft im Nebel

    Ein Beitrag von: Vesa Pihanurmi

    Obwohl Fotos eigentlich nur Ausschnitte aus meiner Realität sind, basiert meine eigenen Philosophie beim Fotografieren nicht auf dem Konzept der Dokumentation. Stattdessen versuche ich, eine Interpretation der Realität zu erschaffen, eine Interpretation eines bestimmten Ortes zu einem bestimmten Zeitpunkt.

    Ich versuche, etwas festzuhalten, was nicht leicht gesehen werden kann oder sogar gar nicht mit dem menschlichen Auge wahrnehmbar ist. Ich strebe danach, eine einzigartige Beschreibung der Stimmung in visueller Form zu erschaffen.

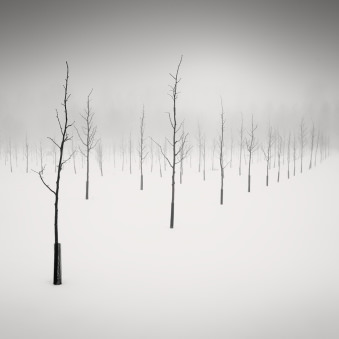
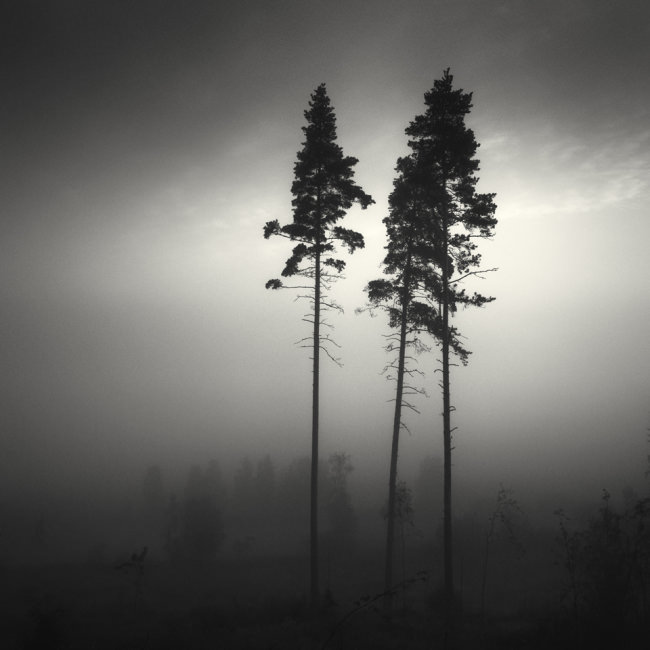
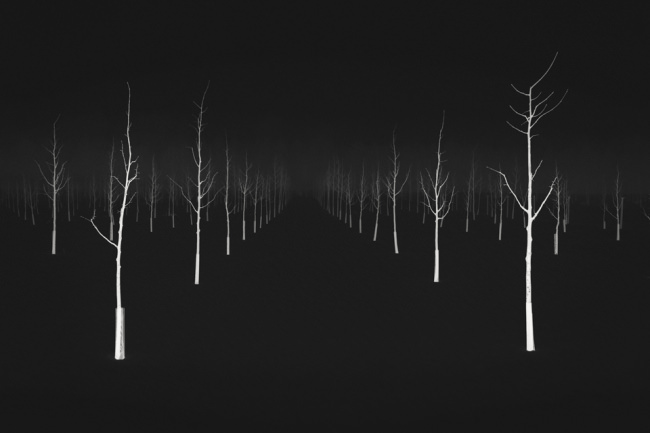
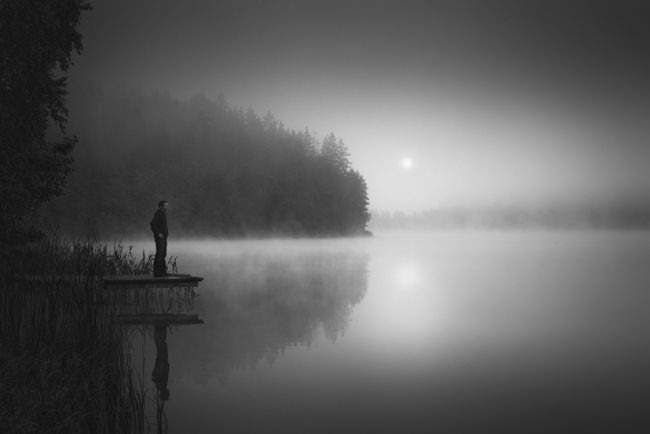
    Walking Dead III © Vesa PihanurmiWalking Dead IV © Vesa Pihanurmi

    Es fällt mir leichter, diese Atmosphäre mit der Hilfe von Schwarzweißfotografie zu erreichen als mit Farbe. Der Grund könnte sein, dass Farben für mich zu nah an direkter Dokumentation sind. Ich denke oft, dass Farbe zu ablenkend ist und zu viel Aufmerksamkeit in einem Bild auf sich zieht. Ich würde sogar so weit gehen, zu sagen, dass Farbe für mich gar kein visuelles Element ist.

    Statt die Qualität des Lichts oder der Atmosphäre zu repräsentieren, repräsentiert Farbe nur die Beschaffenheit des Subjekts oder der im Bild befindlichen Gegenstände. Mich interessiert dagegen vor allem die Qualität des Lichts. Wie es ein Objekt formt oder auf die Bildelemente fällt und etwas Unerklärliches über die Geheimnisse der Existenz offenbart. Heutzutage ist Farbe meiner Meinung nach vor allem in abstrakter Fotografie notwendig.

    T h r e e s o m e © Vesa Pihanurmi

    Meistens fotografiere ich Landschaften, Natur und Architektur. Nur Landschaft und Architektur zu dokumentieren ist nicht interessant für mich. Stattdessen versuche ich, etwas Verborgenes offenzulegen – wie eine Perspektive, die nicht selbsterklärend ist oder eine Stimmung, die man nicht sehen, sondern nur fühlen kann.

    Ich versuche, Schönheit und Ästhetik in den Szenen zu finden, die vor mir liegen. Ich baue wenige Elemente in meine Bilder ein und ziele immer auf den Minimalismus, um die Essenz in der Atmosphäre herauszuarbeiten. Deswegen nutze ich Langzeitbelichtungen, um verschiedene Bildelemente weicher werden zu lassen und alles Ablenkende, alle unnötigen Details verschwinden zu lassen.

    Nowhere  © Vesa Pihanurmi

    Weil ich vor allem Schwarzweißbilder veröffentliche, ist die Nachbearbeitung ein sehr wichtiger Teil meines Workflows. Ich versuche immer, einen unnatürlichen Look zu vermeiden bei der Schwarzweißkonvertierung. Meine Bilder sollen wie Fotos aussehen, nicht wie überbearbeitete Computergrafiken. Ich glaube, das gilt sogar für die extremen Fälle, in denen ich monochrome Bilder invertiere, um sie abstrakter werden zu lassen.

    Immortal Junkies © Vesa Pihanurmi

    The Light That Never Goes Out © Vesa Pihanurmi

    Ich habe mit der Fotografie als Hobby, das ich sehr leidenschaftlich betreibe, 2010 angefangen und in den letzten beiden Jahren wurde ich mir deutlich darüber klar, wohin ich damit will. Ich bin jetzt auch endlich teilweise mit meinen Bildern zufrieden.

    Ich sage bewusst „teilweise“, weil ich glaube, dass man immer etwas besser machen kann oder zumindest anders. Das treibt mich an und motiviert mich. Ich glaube, dass es immer möglich ist, eine frische, visuelle Geschichte zu erzählen und sich jedem Subjekt auf eine neue, alternative Weise zu nähern.

    4.55 am © Vesa Pihanurmi

    Momentan fotografiere ich vor allem in der Dämmerung und im Morgengrauen. Der frühe Morgen ist mit Abstand eine meiner Lieblingszeiten, um zu fotografieren. Ich liebe die natürlichen Lichtverhältnisse und die Schönheit des Dunstes. Auch bei nebligem Wetter könnte ich den ganzen Tag fotografieren. Von den Jahrteszeiten her bevorzuge ich den Winter, weil er mir hilft, alles Unnötige wegzulassen.

    Changing Hours © Vesa Pihanurmi

    Für mich ist es von unschätzbarem Wert, für Einflüsse offen zu sein, während man seine eigene Vision der Fotografie entwickelt. Ich könnte zahllose Fotografien aufzählen, die für mich und meine Arbeit eine große Inspiration waren und sind. Diese sind vor allem die üblichen „Starfotografen“ wie Michael Kenna, Michael Levin, David Deny und Josef Hoflehner, deren Arbeiten ich sehr bewundere.

    Von den klassischen Meisterfotografen könnte ich Bill Brandt, Jeanloup Sieff und Harry Callahan nennen. Auch sehr einflussreich auf meine Arbeit war der finnische Fotograf Antero Takala, der in den 60er und 80er Jahren sehr eindrucksvolle, dunkle Schwarzweißfotos der Polarlichter in Lappland gemacht hat.

    The Drowning © Vesa Pihanurmi

    Somewhere © Vesa Pihanurmi

    Vor allem will ich aber die vielen Amateur- und Profifotografen nennen, die meine Kontakte im Netz und auf den verschiedenen Social-Media-Kanälen sind. Sie posten nicht nur sehr inspirierende Bilder, sondern geben mir oft auch wertvolles Feedback und liefern Ideen.

    Leider kann ich hier nicht alle davon auflisten, aber der künstlerische Ausdruck von zum Beispiel Rohan Reilly, Stephen Cairns, Steve Landeros, Darren Moore, Martin Rak, Håkan Strand, Jeff Gaydash, Noel Clegg oder Andy Lee ist sehr inspirierend für mich in den letzten Jahren geworden und ich würde jedem wärmstens empfehlen, sich ihre Arbeiten anzusehen.

    Dieser Artikel wurde von Sebastian Baumer für Euch aus dem Englischen ins Deutsche übersetzt.


    kwerfeldein – Fotografie Magazin | Fotocommunity

  • Huawei Honor 6 Plus offers three 8MP cameras

    Huawei has announced the Honor 6 Plus with not one, not two, but three 8MP cameras. One serves as a selfie-capture unit at the front while the other two are lined up side-by-side on the rear of the device. As on the HTC One M8 the dual lens setup allows for refocusing of already captured images. Read more

    Articles: Digital Photography Review (dpreview.com)