Month: December 2014

  • Horror Islands: 7 Legendary Haunted & Contaminated Wonders

    [ By Steph in 7 Wonders Series & Travel. ]

    poveglia

    Murder, deadly biological weapons, the torture of prisoners never formally charged with crimes and one of history’s largest mass suicides are just a few of the violent events that took place on these 7 notorious islands, leading to legends of hauntings in the ensuing years.

    Poveglia: Venetian Island of the Dead
    1799885035_258a86b131_z

    poveglia 2

    poveglia 3

    IMG_1067

    poveglia 6

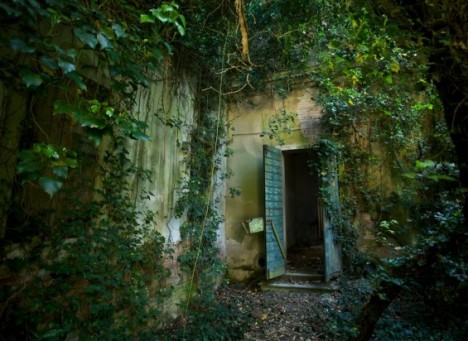
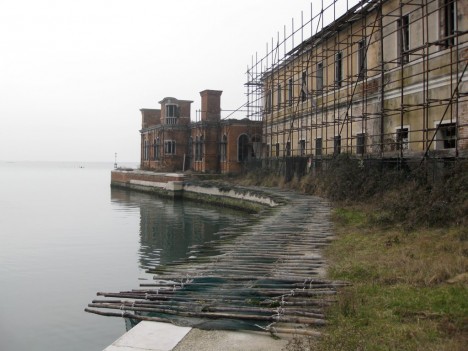
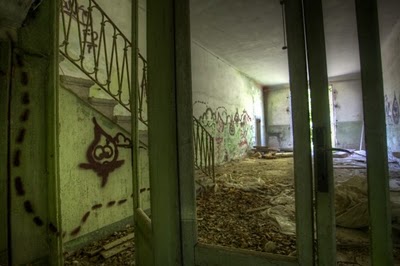
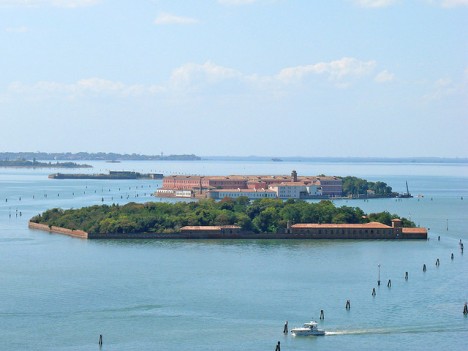
    A mysterious-looking, tree-covered island visible from both Venice and Lido in the Venetian Lagoon houses the mass graves of thousands of plague victims who were quarantined there between 1793 and 1814. Locally known as The Island of Venetian Dead, Poveglia hosted over 160,000 infected people whose remains were eventually dumped into ‘plague pits,’ resulting in an unusually high amount of human remains on such a tiny island. The existing buildings were converted into an asylum for the mentally ill in 1922, with many patients reportedly claiming to be haunted by the spirits of the dead; rumors flew around Venice that the island was the setting for all manner of psychiatric experiments and that particularly troublesome patients were taken to the bell tower for lobotomies. If this sounds familiar, it’s because the legends about Poveglia partially inspired the Dennis Lehane novel Shutter Island, which was adapted for film by Martin Scorcese. After the hospital closed in 1968, the island was abandoned altogether. Today, it’s strictly off-limits to tourists, though some people manage to sneak in to take photographs.

    Gruinard Island: Biological Warfare and Animal Testing

    gruinard island

    Gruinard_Island

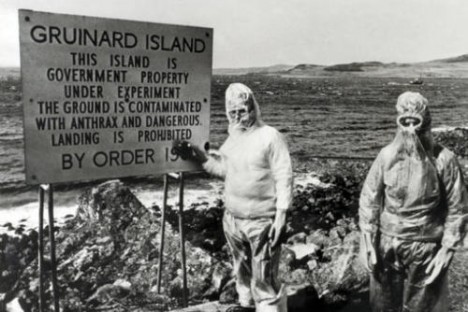
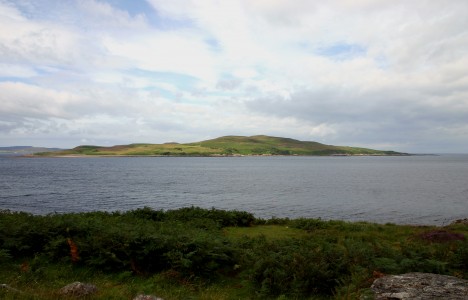
    Warning: if you’re sensitive to cruel animal treatment, you may not want to watch the video above. Sheep tied to a line are exposed to deadly weapons as part of the X-Base Anthrax Trials of 1942 and 1943, held on Scotland’s Gruinard Island. The tests proved that airborne anthrax is highly infectious – a little too well. While the island is uninhabited, spores eventually made their way to the Scottish mainland, causing an outbreak. The island had to be completely sealed off to visitors, and locals report that the animals that remained on the island after the tests displayed genetic abnormalities for generations. The soil remained contaminated for decades until a group calling itself ‘Operation Dark Harvest’ began sending samples of it to government facilities across the UK, demanding that it be cleaned up. The entire island was sprayed with a solution of formaldehyde and seawater to inactivate the remaining anthrax, and by 1990, it was declared safe.

    Clipperton Island: Idyllic Atoll with a Murderous Past
    SobrevivientesClipperton

    Carteactuelle

    Clippertonisland

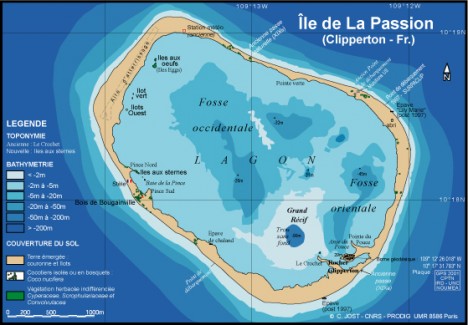
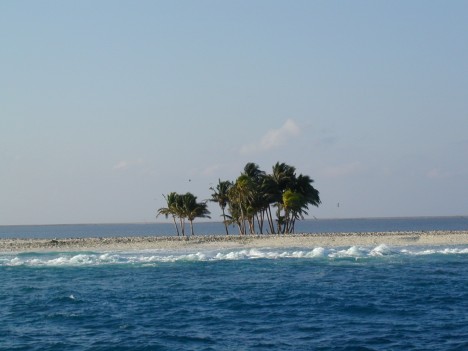
    Imagine being shipped off to a beautiful island in the Pacific Ocean to mine guano, relying on shipments from mainland Mexico for survival, only to be abandoned and left for dead when the people sending the supplies you need are distracted by war. That happened to the one hundred men and women who began working on Clipperton Island in 1906 up until the Mexican Civil War, with all but one dying of malnutrition or failed escape attempts in the ensuing years. The lone male survivor, Victoriano Alvarez, proclaimed himself ‘king’ over the 15 remaining women and children, and began a reign of terror, raping and murdering them one by one until the widow of the former ship captain finally killed him. Three women and seven children were rescued by a passing ship in 1917. Since then, the island has been largely abandoned, though it has occasionally served as a wildlife research station.

    Next Page – Click Below to Read More:
    Horror Islands 7 Legendary Haunted Contaminated Wonders

    Share on Facebook


    [ By Steph in 7 Wonders Series & Travel. ]

    [ WebUrbanist | Archives | Galleries | Privacy | TOS ]


    WebUrbanist

  • 20 Dos and Don’ts for Shooting the Moon

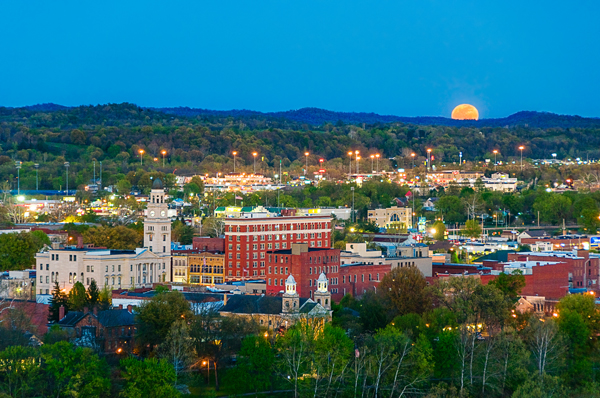
    Here the April moon called the "Pink Moon" rose over Marietta, Ohio. The setting sun lit the city in a warm glow.

    The April moon called the “Pink Moon” rose over Marietta, Ohio. The setting sun lit the city in a warm glow.

    The moon is a very popular subject for photographers of all skill levels to shoot. But if you’ve ever tried to photograph the moon, you’ve probably discovered that it’s not that easy to accomplish. In this article let’s look at some dos and don’ts to take your moon shots from snapshot to artwork.

    To begin, the first and most important DON’T is: Don’t assume that photographing the moon is going to be easy.

    #1 Do use a tripod

    One of the most important pieces of equipment for any low light photography is a good tripod. Since the moon is so far away, it is very important to have a sturdy base as even the smallest movement of the camera will cause your image to blur. You might be tempted to think that if you use a fast enough shutter speed you can hand-hold the camera, but you need to realize that your subject is 238,900 miles away and even the slightest movement will be exaggerated.

    #2 Don’t use a slow shutter speed

    The moon is actually moving very quickly around the earth at a speed of 2,288 miles per hour (3,683 kilometers per hour). The moon is so distant, it doesn’t appear to be traveling very quickly to the naked eye. Because of the moon’s speed and the long focal length necessary to capture an image of the moon, you need to use the fastest shutter speed possible. A good rule of thumb for tack sharp moon photos is nothing slower than 1/125th of a second.

    #3 Do use a telephoto lens

    To successfully shoot any kind of detail of the moon in your image, you need at least a 300mm telephoto. For a full frame image, you will need around an 800mm lens.
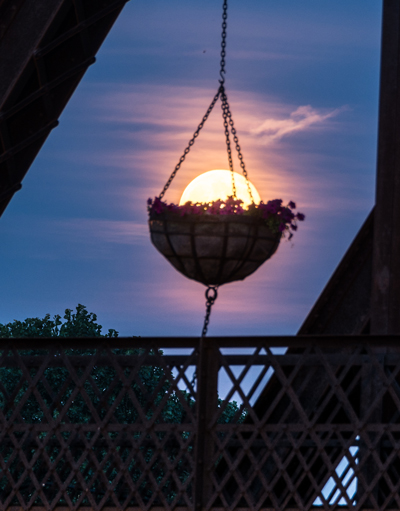
    Capture the moon

    #4 Don’t use any filters on your lens

    Remove ALL filters from your lens! To prevent any chance of distortion, don’t use any filters. Yes, even remove the UV filter. This may sound scary if you never remove the UV filter from your lens, but it’s best to remove to do so in this case. Some may suggest using a neutral density (ND) filter for moon photography to cut back the bright light of the moon. But, all this will do is require you to use a slower shutter speed, and you want to use the fastest shutter speed possible to get that crisp, tack sharp, image.

    #5 Do try the Looney 11 rule

    The Looney 11 rule is similar to the Sunny 16 rule. Set your f-stop to f/11, then match the shutter speed to your ISO. For example, if your ISO is set at 100, set your shutter speed to 1/125 of a second. (This is not an exact science but will give you a good starting point.)

    #6 Don’t touch the camera to start your exposure

    Do not manually press the shutter release or even touch your tripod when initiating your moon shot. Remember that even the slightest touch could add enough vibration motion to blur the image. Using a cable release or remote trigger is the best way to start your exposure. If you don’t have either of these gadgets, use the self-timer feature on your camera to begin your shot.

    #7 Do use Mirror Lock-up

    If your camera gives you the option to lock up your mirror this can greatly increase your chances of getting a tack sharp image. Even the slightest shake of your camera’s mirror can be enough to blur your image. If your camera has this option, use it! Lock the mirror up and wait a few seconds to allow any vibration to settle before beginning your exposure.

    #8 Don’t use Image Stabilization

    Canon’s IS (Image Stabilization) or Nikon’s VR (Vibration Reduction) must be turned off anytime your camera is on a tripod. Turning on any vibration reduction feature with your camera mounted on a tripod will actually create blur in your image.

    #9 Do know the cycles of the moon
    Use Photographers Ephemeris to predict the location of the moonrise

    Use The Photographer’s Ephemeris app to predict the location of the moonrise.

    There are 29.5 days between full moons. There are many online and smart phone applications that can help you track the phases of the moon. One must- have app is The Photographer’s Ephemeris which will not only give you the phases of the moon, but also show you when and where the moon will appear in the sky. This is especially useful when planning your moon shoots in advance. By far the most photographed stage is the full moon, which is also the brightest and the most difficult to expose correctly. The side lighting of the Gibbous stage produces some interesting shadows which may allow you to capture craters and mountains. The crescent moon is, of course, the darkest stage, but one which may create some interesting effects when added to a nighttime landscape.

    #10 Don’t always place the moon in the center

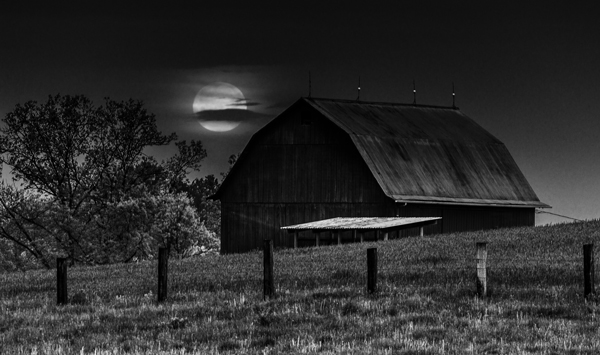
    While you can use all the usual rules of composition for your lunar photography, don’t be afraid to break the rules if the shot calls for it. Don’t just put the moon in the center of your image with nothing else –  it’s been done a million times before and there is nothing exciting about this. Try to include other objects in the frame with the moon.
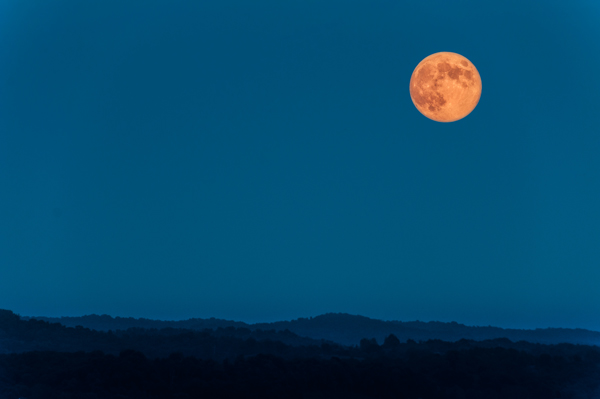
    Don't just place the moon in an empty sky, including a foreground object will create a more dramatic image.

    Don’t just place the moon in an empty sky. Including a foreground object will create a more dramatic image.

    #11 Do switch to manual focus

    There are a couple of different methods you can use to focus on the moon: First, try using your camera’s autofocus, and once you have a desirable focus, turn off the autofocus and switch to manual focus. Alternatively, you can set your camera on manual focus, and with your live view feature turned on, zoom in on the moon and turn the focus ring until the moon becomes sharp. Then do not touch the ring again.

    #12 Don’t just shoot the moon at night

    The best time for photographing the moon is just after it rises or just before it sets, when it is very low in the sky. When the moon is near the horizon, it is closest to Earth and will appear larger in your images. Also, as the full moon rises the sun will be setting, and as the full moon sets the sun will be rising. This may give you great lighting to include or accentuate foreground or landscape objects. Shooting the moon in the day time will give you opportunity to include foreground objects, and you also may be able to capture some craters on the moon’s surface.
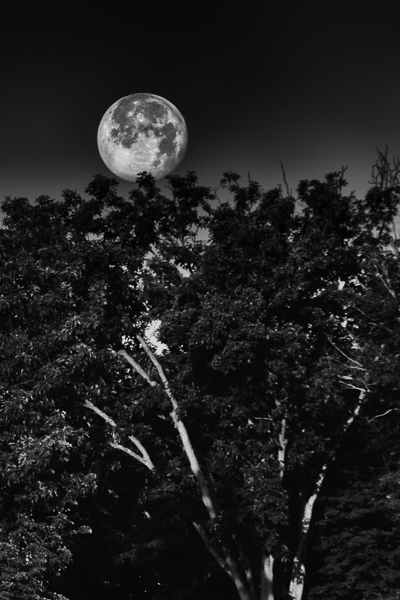
    The June full moon called the "Honey Moon" captured here setting at sunrise

    The June full moon, called the “Honey Moon”, captured as it sets at sunrise.

    #13 Do use exposure bracketing

    Once you have found the exposure that you feel happy with, it is best to bracket around that setting. The view of your images in the dark, on the back of your camera, can often be deceiving. In the dark, images always appear brighter on the LCD of camera than they actually are when opened on your computer. After you are satisfied with the exposure you have dialed in, bracket two stops under and two stops over, just to ensure that you get an exposure you will be happy with later.

    #14 Don’t use Auto White Balance

    Using auto white balance will give you very inconsistent results. What is the source for the light of the moon? That’s right, the sun! So try daylight white balance, but if you are looking for a different effect, try tungsten or cloudy. Don’t be afraid to experiment, but also remember that if you are shooting in RAW you can change the white balance in post-production.

    #15 Don’t depend on your meter

    Most likely your camera’s light meter will be fooled by the amount of light reflecting off the moon. Also it is important to note that as the moon rises, the exposure will continual change. It gets brighter as it rises, so you need to keep adjusting your shutter speed.

    #16 Do shoot in RAW mode

    Shooting in RAW will allow you to capture more details of the moon’s surface, and also give you more latitude for adjustments in retouching. So, unless you are not at all comfortable with using camera RAW software, always shoot the moon in RAW.

    #17 Don’t be afraid to crop your image

    Unless you are shooting with a very large telephoto lens, you will want to crop your image to display the moon at a decent size. But remember, the more you crop, the smaller the final image can be printed at high resolution.

    #18 Do tweak and sharpen

    Most moon photography is going to require some post exposure retouching in Photoshop or other photo editing software. Adding clarity and contrast will help bring out details which will enhance the craters and mountains of the moon. As mentioned above, white balance and exposure may also be tweaked to finish your optimal image, as both are somewhat difficult to perfect in camera.
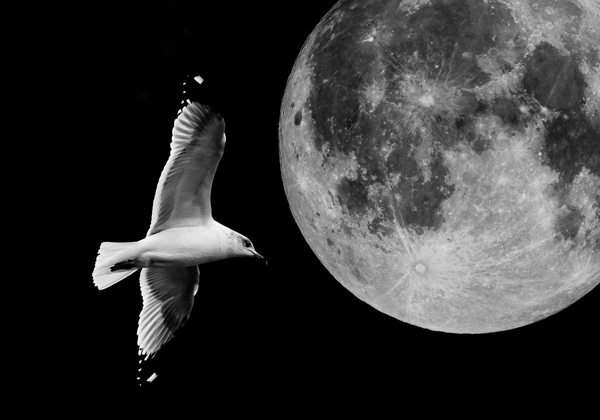
    Be creative: two images are combined together here to create this final image

    Be creative: two images are combined to create this final image.

    #19 Don’t be afraid to be creative

    Don’t be afraid to get creative with your images of the moon. Most great moon images have been manipulated in post-production because of the difficulty of capturing a great moon shot in one image. HDR or exposure blending are great methods to enhance the captures of otherwise impossible moon images. A popular method used by many photographers is to combine two exposures: one set to bring out the best of the foreground landscape and a second exposed for the moon only. When combining these two images, try enlarging the moon slightly to achieve a more dramatic effect, but don’t overdo it to the point that it looks fake. It needs to look believable unless you are going for a science fiction affect (which isn’t a bad idea, creatively speaking!).
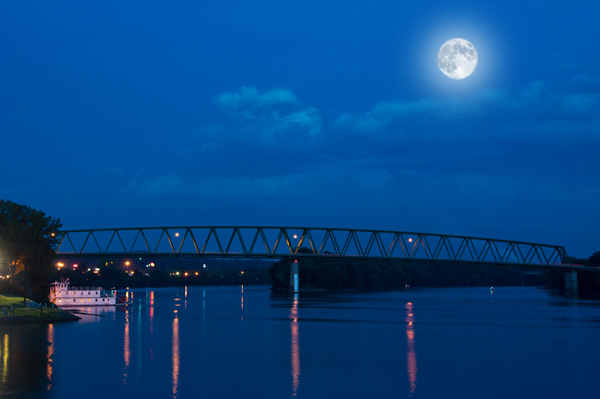
    Two exposures were combined to make this final image. One image was exposed for the landscape and the other for the moon. The moon was enlarged slightly for dramatic effect.

    Two exposures were combined to make this final image. One image was exposed for the landscape and the other for the moon. The moon was enlarged slightly for dramatic effect.

     #20 Do Practice, Practice, Practice

    Now get out there and shoot the moon! Remember it is not as easy as it looks, so keep trying if your first results are not as dramatic as you expected.

    If you have any moon images or other dos and don’ts that work for you, please share them in the comments below.

    The post 20 Dos and Don’ts for Shooting the Moon by Bruce Wunderlich appeared first on Digital Photography School.


    Digital Photography School
  • Von Hamburg bis Palermo

    Ein Beitrag von: Fabian Schreyer

    Die besten Geschichten schreibt das Leben selbst. Sie liegen sprichwörtlich auf der Straße und warten darauf, (auf-)gelesen und weitererzählt zu werden. Gemeinsam mit neun weiteren Straßenfotografen versuche ich, besondere Alltagsepisoden zwischen Norddeutschland und Sizilien aufzuspüren, um sie für andere sicht- und erlebbar zu machen.

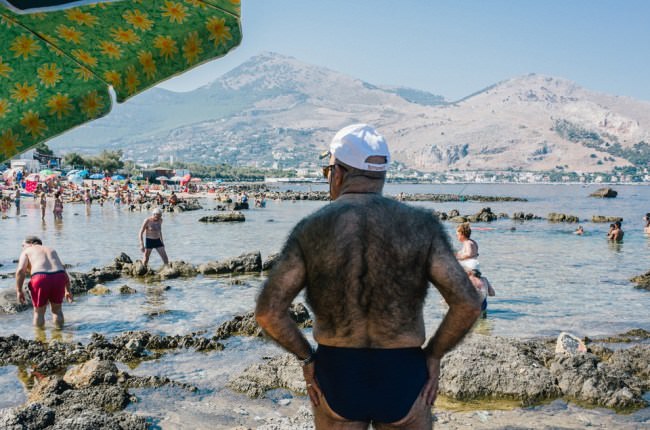
    Ein stark behaarter Mensch steht am Stand in Palermo.

    Giorgio Scalici, Palermo

    Ich bin im Süden von Deutschland aufgewachsen, aber meine Kindheitserinnerungen sind untrennbar mit dem Urlaubsland Italien verknüpft. Auch heute stellt sich jedes Mal ein besonderes Gefühl der Vorfreude ein, wenn ich an den obligatorischen Zwischenstopp an der Autobahnraststätte auf Höhe des Gardasees denke – samt dem ersten Espresso auf italienischem Boden.

    Das Sehnsuchtsland Italien hat vor ein paar Jahren auch mein fotografisches Interesse geweckt. Auf Reisen suche ich meine Motive als Straßenfotograf regelmäßig im Alltagsleben italienischer Städte. Meistens vertreibe ich mir die Zeit von früh bis spät auf öffentlichen Plätzen, besuche Märkte oder Cafés.

    Das Tatoo eine Mannes sorgt für Verwirrung

    Michele Liberti, Napoli

    Ich stehe vor Sonnenaufgang auf, um auf der Suche nach etwas, von dem ich vorher noch nicht weiß, was es ist, stundenlang durch bekannte oder unbekannte Straßen zu streifen. Beim Fotografieren bin ich am liebsten allein, mit meiner Leidenschaft jedoch nicht.

    Oft lerne ich unterwegs andere Straßenfotografen kennen, denen das Gefühl sehr vertraut ist, das sich einstellt, wenn man nur mit der Kamera im Gepäck versucht, die Magie eines Ortes und vor allem eines besonderen Augenblickes festzuhalten.

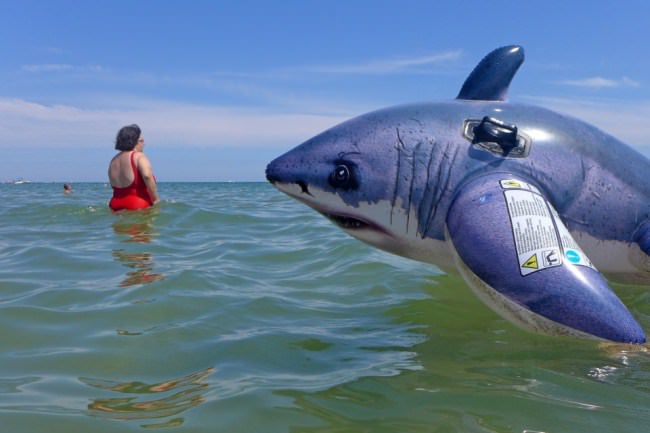
    Ein aufblasbarer Hai im Wasser.

    Mary Cimetta, Cervia

    Wenn ich aus Italien nach Deutschland zurückkomme, ergreift mich meist bald wieder das Fernweh. Um den Kontakt zu den befreundeten Fotografen in Italien von Deutschland aus nicht nur zu halten, sondern viel mehr zu intensivieren, kam mir während einer Romreise im Sommer 2013 die Idee für ein länderübergreifendes Fotoprojekt: „VIA! – Straßenfotografie von Hamburg bis Palermo“.

    Der Grundgedanke des Projekts, das mit Unterstützung des Goethe-Instituts derzeit Wirklichkeit wird, ist einfach: Jeweils fünf Straßenfotografen beider Nationen zeichnen durch Aufnahmen aus ihrer Region über den Zeitraum von 54 Wochen ein Stimmungsbild des Alltags zwischen Hamburg und Palermo.

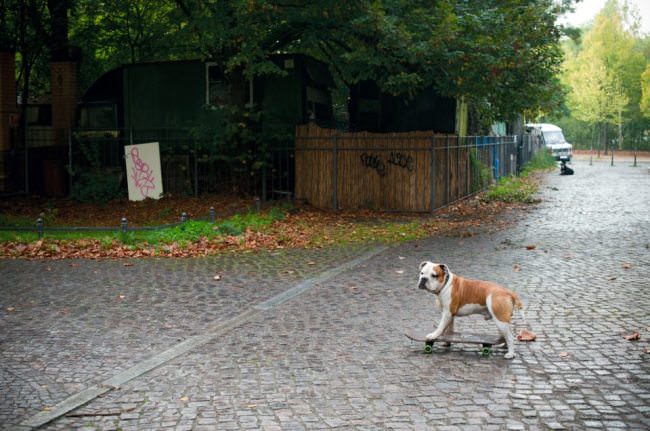
    Ein Hund steht auf einem Skateboard.

    Marga van den Meydenberg, Berlin

    Die Zwischenergebnisse werden während der Projektlaufzeit in einem wöchentlich aktualisierten Blog und anschließend per Wanderausstellung gezeigt.

    Für mich war es wichtig, mit dem Projekt eine Kommunikationsplattform zu schaffen, die den beteiligten Fotografen einen grenzüberschreitenden Austausch über Fotografie ermöglicht. Was die inhaltliche Ausrichtung des Projektes anbelangt, sollten sich die unterschiedlichen Lebensmittelpunkte, Perspektiven und Herangehensweisen der Beteiligten in den Fotografien widerspiegeln.

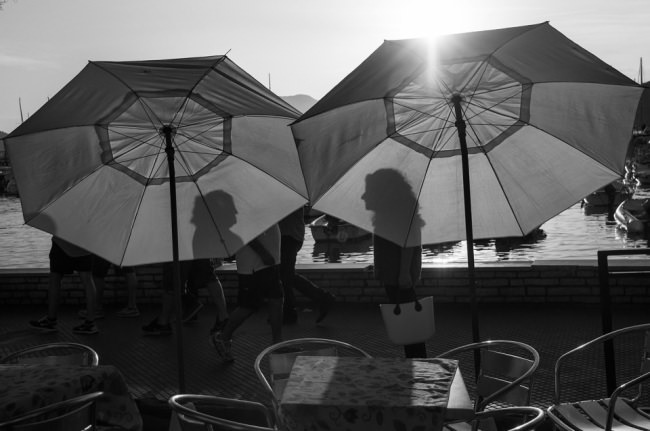
    Zwei Frauen werfen Schatten auf zwei Schirme.

    Umberto Verdoliva, Lerici

    Abgesehen davon gab und gibt es keine klaren Einschränkungen oder Zielvorgaben. In meiner Vorstellung ist „VIA!“ ein ergebnisoffenes Experiment, nach dessen Abschluss sich zeigen wird, ob die Unterschiede zwischen Deutschland und Italien deutlich sichtbar hervortreten oder ob Landesgrenzen eher verschwimmen.

    2014 habe ich mit der Suche nach passenden Fotografen begonnen, wodurch das Projekt langsam klarer Form angenommen hat. Mit Umberto Verdoliva aus Treviso und Stefano Mirabella aus Rom, deren Fotos ich schon länger online verfolge und die ich beide im Frühjahr persönlich auf Reisen getroffen hatte, zeigten zwei meiner Wunschkandidaten Interesse.

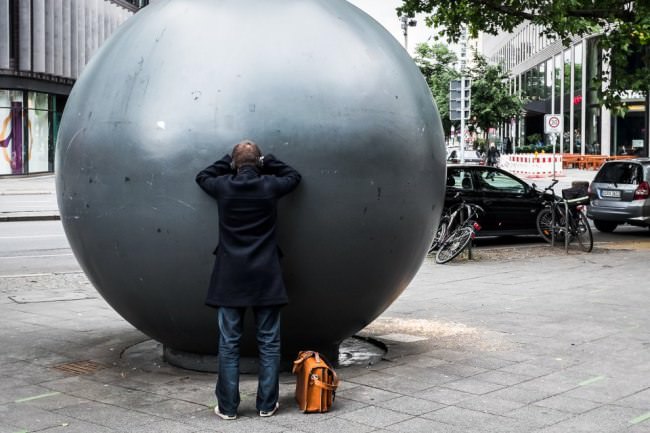
    Ein Mensch schaut in eine große Kugel.

    Berlin, Guido Steenkamp

    Beide sind Mitglieder des italienischen Straßenfotografie-Kollektivs Spontanea, an dem auch Mary Cimetta aus Bologna beteiligt ist. Ihr gelingt es regelmäßig, mich zu verblüffen, indem sie durch clevere Perspektivenwahl unzusammengehörige Bildelemente fantasievoll miteinander in Verbindung bringt, sodass neue Inhalte geschaffen und Geschichten erzählt werden.

    Mit ihrer besonderen Wahrnehmungsfähigkeit ringt sie auch einer vermeintlich langweiligen Alltagsumgebung humorvolle Szenen ab.

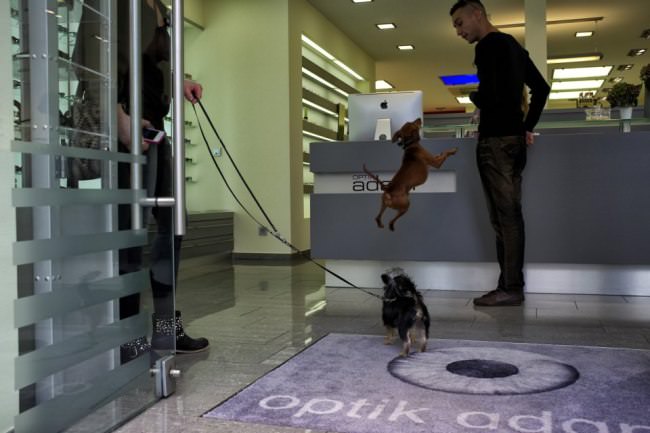
    Ein Hund springt einen Mann an.

    Michael May, Iserlohn

    Mir war es wichtig, dass möglichst viele Teilnehmer aus unterschiedlichen Regionen stammen, sodass durch die entstehenden Aufnahmen große Teile des jeweiligen Landes abgedeckt werden. Mit Michele Liberti aus Neapel und Salvatore Giorgio Scalici, der aus dem sizilianischen Palermo kommt, habe ich zwei passende Kandidaten gefunden, die beide in ganz besonderen süditalienischen Städten leben und fotografieren.

    Auf deutscher Seite hatte ich das Glück, als ersten Eckpfeiler In-Public-Mitglied Siegfried Hansen aus Hamburg für das Projekt gewinnen zu können. Er zählt meiner Meinung nach nicht nur wegen seines besonderen Gespürs für Komposition zu den herausragenden zeitgenössischen Straßenfotografen.

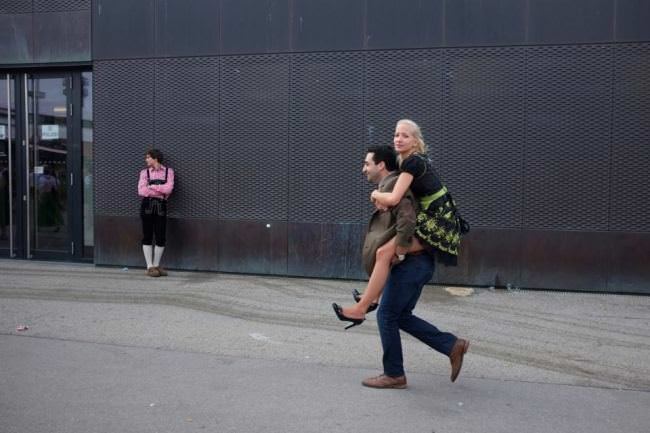
    Ein Mann trägt eine Frau auf dem Rücken.

    Fabian Schreyer, München

    Observe-Mitglied Michael „Monty” May aus Iserlohn, der Berliner Guido Steenkamp sowie die ebenfalls in der Hauptstadt lebende Niederländerin Marga van den Meydenberg vervollständigen das zweite Fünferteam, in dem ich auch selbst als einer der Fotografen mitwirke.

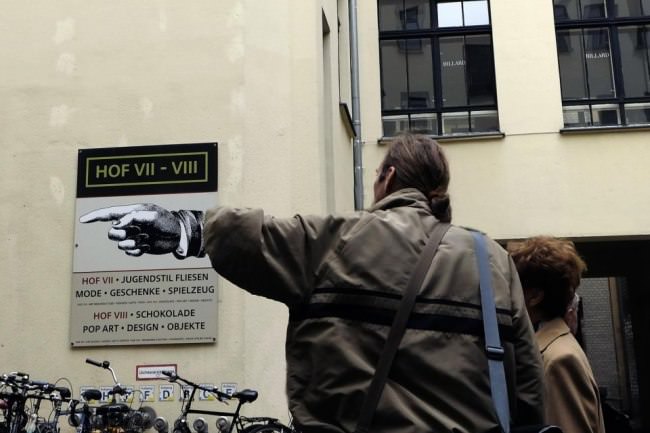
    Straßenfotografie: Eine Hand an einer Wand sorgt für einen Bildwitz.

    Siegfried Hansen, Berlin

    Seit Anfang Oktober läuft das Projekt und noch ist es zu früh, um ein Fazit zu ziehen. Aber schon jetzt freue ich mich auf die Fotoauswahl für die Ausstellung und vor allem auf das persönliche Zusammentreffen mit den anderen Fotografen, von denen ich manche bisher nur via Internet kenne.


    kwerfeldein – Fotografie Magazin | Fotocommunity

  • Review Of The Rugged Pelican 1510 Carry-On Case

    If you own a lot of photography gear, you’ll likely want to protect it from any environmental dangers as well as possible. Pelican claims that the 1510 is a hardcase that is water-, dust- and crushproof while still meeting carry-on restrictions of international airlines. The Pelican 1510 can be carried with a handle or rolled with the integrated wheels. Here’s Continue Reading

    The post Review Of The Rugged Pelican 1510 Carry-On Case appeared first on Photodoto.


    Photodoto

  • Seabed City: Chinese Company Designs Underwater Ocean Spiral

    [ By WebUrbanist in Conceptual & Futuristic & Technology. ]

    ocean city side view

    Slated to cost over $ 25 billion and take 5 years to complete, this incredible proposal starts a with a living sphere that spans over 1,500 feet below the surface of the ocean.

    ocean city surface view

    ocean city spherical center

    Designed by the Shimizu Corp’s, the spherical portion of the so-called Ocean Spiral forms a residential and commercial core from which a winding path spirals 9 further miles into the deep, ultimately terminating at the ocean floor.

    ocean city sketchi dea

    ocean spiral earth factory

    Occupants would live and work both in triangular neighborhoods along the periphery as well as within a tapering, hourglass-shaped, skyscraper-like segment stretching up from the bottom to the top of the sphere’s center.

    ocean city section diagram

    ocean city core rendering

    The ‘Earth Factory’ portion of the project below is set to use generate eco-friendly energy from temperature differentials and organically-driven chemical conversion processes.

    ocean spiral underwater city

    ocean spiral concept drawings copy

    ocean thumbnail

    For anyone wondering just when they can expect this marvel to materialize: its would-be creators concede the technology is just not in place yet to make it a reality, but hope and presume it will be soon.

    Share on Facebook


    [ By WebUrbanist in Conceptual & Futuristic & Technology. ]

    [ WebUrbanist | Archives | Galleries | Privacy | TOS ]


    WebUrbanist

  • 7 Tips for Better Beach Photography

    The beach can be a great place for photography. You are in a scenic environment. You typically have friends or family members with you. You are usually there on nice days. All these can contribute to great photographs.

    But the degree of photography problems you will face on the beach might surprise you. Exposure can be tricky given the bright environment. Often, there is nothing but sand, so the composition can be dull. And of course there are elements like sand and salt-water that do not mix well with electronics. So I want to give you some tips for beach photography, dealing with these potential problems and make it a great place for photography.

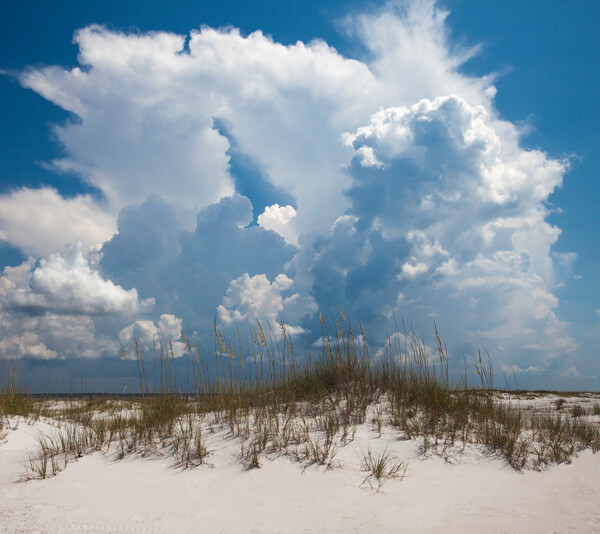
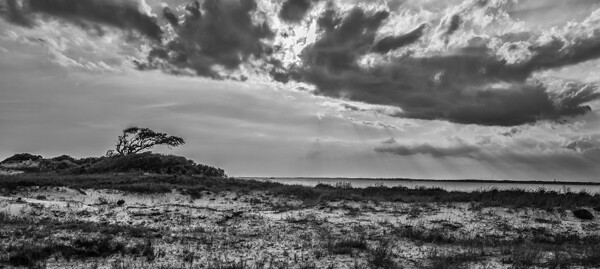
    SantaRosa

    1.  Control Your Exposure

    If you are shooting in automatic mode, you might find that your pictures are darker and flatter than you anticipated. That is because your camera will try to reduce all things to a middle grey. Try shooting in Manual or Aperture Priority mode, which will give you additional control over your exposure. Use that control to slightly overexpose your picture. Set the exposure so that the meter in your camera is a little to the right of zero. If your camera uses numbers instead of a scale to show your exposure, start by setting it at +1. This will make your picture accurately capture the bright scene that you see in front of you.

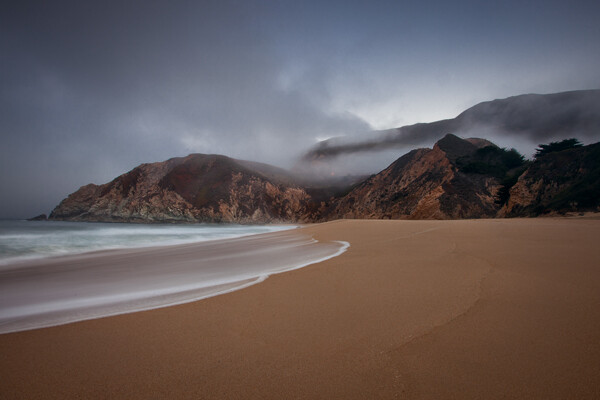
    GreyWhaleCove

    2.  Watch the Dynamic Range

    At the beach, you will almost always be looking at a bright sky. Even though the foreground may be well lit, the sky will usually be much, much brighter. That can cause a dynamic range problem and, if you are not careful, your sky will be blown out or pure white.

    To deal with this problem, break out a graduated neutral density filter. This is a square filter that fits on a holder in front of your lens. The top of the filter is be dark, while the bottom of the filter is clear glass. When you attach the filter to the front of your lens, it will darken the top portion of your picture while keeping the bottom portion at the same brightness level. This keeps everything within the dynamic range of your camera. The upshot for you is that it will darken your sky a bit to bring it in line with the foreground and keep the sky from blowing out. The beach is an ideal place to use these filters because the horizon is typically a straight line with nothing sticking up over it (such as trees or buildings).

    If you do not have such a filter, try bracketing your exposures. You can then merge them later using Photoshop or an HDR software.

    3.  Use Fill Flash

    It might seem counter-intuitive to you, but the beach on a bright sunny day is a great place to break out your flash unit. You can expose your picture with an eye on the brightness level of the sky, and brighten up the person or thing in the foreground using the flash. Because the overall scene is so bright, the flash should not overpower it. I personally find that the beach on a sunny day is one of the best times to use a flash unit. Adding fill flash can dramatically improve your beach photos.

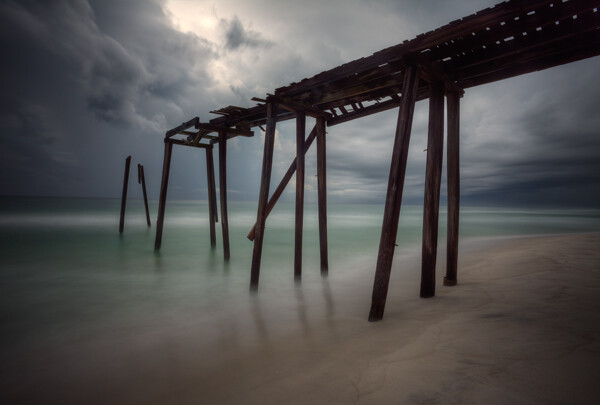
    Pier

    4.  Seek Out Subject Matter

    I once complained to a friend that I was having difficulty taking good pictures at the beach. He responded, “Of course you are, there’s nothing but a bunch of sand.” Sometimes, that sentiment is right. So you will have to work on finding a good subject to add to your composition. If you do so, you can turn your beach photos something great.  Some ideas to look for are:

    • Piers
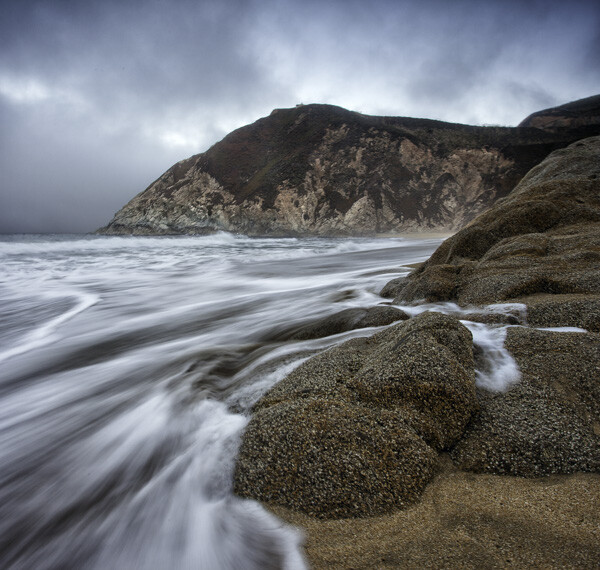
    • Rocks
    • Driftwood
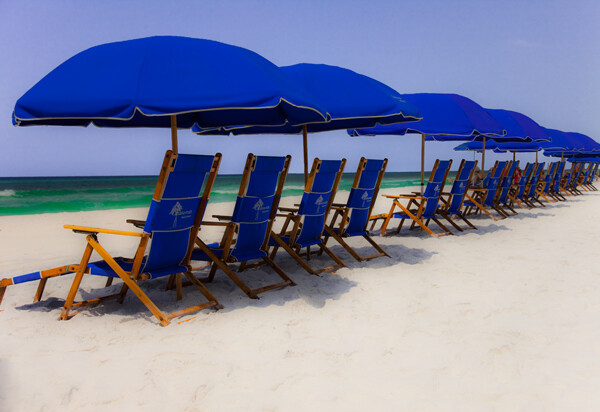
    • Beach chairs
    • Beach umbrellas
    • Fences
    • Sea oats
    • Abandoned boats
    • And, of course, people

    GreyWhale

    5.  Work the Foreground

    At the beach, you already have a ready-made background for your photos; that being the ocean and the sky. What will separate a great photo from a snapshot will frequently be the foreground. Focus nearly all your energy on making the foreground look as good and as interesting as you possibly can.

    Using the subject matter set forth above can help you with your foreground. Having any of those elements in the frame will usually go a long way in making the foreground an interesting part of the photo. If none of those items are available, a lot of times interesting formations in the sand can also create a good foreground. Look for a pattern. They can be difficult to see though, sometimes you will need to have your eye to the viewfinder or be looking at the LCD to find them. Take a test shot if time permits.

    Once you find your subject matter, consider your angle of view. Very often, we tend to shoot directly out towards the ocean. However, there are usually much more interesting views looking down the coast. Sometimes it is actually best to put your back to the ocean and get the sand and land formations in your frame. Just be sure you’ve considered all the angles.

    PensacolaPanorama

    6.  Get the Best Light

    As with most other forms of outdoor photography, the best light is usually predawn, or just after sunset. Try to get up early or stay late. These are virtually always the best times for photography, and many serious shooters will not shoot at any other time of day.

    Of course, getting up before dawn or staying after sunset is not always possible. Rather than just put the camera away, you might want to try some midday shots. If you do, there are a few ways you can make your photos look as good as possible. I already talked about using a fill flash, and that can be a great way of cutting down on the harsh shadows you might encounter. In addition, to make your sky look as good as possible, consider using a polarizing filter. This will make your sky appear a deeper, richer, blue. Polarizers actually work best near midday, so you will get the maximum benefit from it if you are shooting at that time.

    One final tip if you are shooting at midday and dealing with harsh contrasts is to consider converting your photos to black and white; it loves contrast. The overly contrasty light of midday photography can go from a liability in a color photo to an asset in a black and white photo. Once you’re back in front of your computer, try converting a few photos to black and white and see how you like them.

    DestinChairs

    7.  Beware of the Elements

    Sand and salt water do not mix well with expensive electronics. It is difficult to keep them away from your camera sometimes. Sand seems to get in everything.

    Further, a crashing wave can send spray into the air and get into your camera. You will want to take a few precautions to avoid any such problems. You could actually buy a waterproof case for your camera, but these are amazingly expensive. The cases can cost more than the camera itself. They are often more than is necessary, particularly if you are making efforts to keep away from the water and sand. In normal situations, you can get a rain sleeve to cover your camera for just a few dollars. You might use one of these if there’s any chance that sand or spray get near your camera.

    Another idea is to purchase a waterproof point-and-shoot camera. I normally recommend that you steer clear of point-and-shoots because of the inherent problems with them, largely stemming from the small sensor size. However, because you are typically shooting in bright light at the beach, a lot of the limitations of point-and-shoots are somewhat muted. Further, you can use the camera with confidence, even taking it into the water. They can be a lot of fun, and they are pretty cheap (relatively speaking).

    Conclusion

    These tips should make photographing the beach the fun occasion that you expect. If you know how to deal with the bright light, your pictures will look better. Finding good subject matter and using an interesting angle will make them interesting. And finally remember to keep your equipment safe from the elements to keep your day from being ruined.

    The post 7 Tips for Better Beach Photography by Jim Hamel appeared first on Digital Photography School.


    Digital Photography School
  • How to Balance Off-Camera Flash and Ambient Light on Location

    In this Adorama TV video Gavin Hoey takes you on location to learn how to balance flash and ambient light to create some stunning portraits in the forest.

    After going through three different setups outdoors he takes you inside for the post-processing stage so see how he completes the images in Photoshop.

    Some of the items Gavin used and demonstrated in the video for your convenience:

    • Canon 70-200mm f/2.8L lens
    • BlackRapid Curve RS-7 camera strap
    • Flashpoint RoveLight 600ws monolight
    • Glow ParaPop 28″ R Series
    • Sekonic L-308S Flashmate light meter

    You can get the free light ray brushes he mentions in the video here.

    In Practice

    Have you tried any location portraits using both the natural or ambient light combined with flash? If you have any other tips or want to share your images, please do so in the comments below.

    The post How to Balance Off-Camera Flash and Ambient Light on Location by Darlene Hildebrandt appeared first on Digital Photography School.


    Digital Photography School

  • Wax Off: 12 More Abandoned & Closed Car Washes

    [ By Steve in Abandoned Places & Architecture. ]

    abandoned-car-wash-hempstead-1
    Abandoned car washes are oddly abundant – you’d think they invented the self-cleaning car! Here are 12 more car-less washes left high, dry and brushed-off.

    abandoned-car-wash-hempstead-2

    abandoned-car-wash-hempstead-3

    abandoned-car-wash-hempstead-4

    This opening quartet of images depict a VERY dry-looking abandoned car wash located on Hempstead Rd. – that’s all Flickr user Edna J Sandoval is stating and that’s fine with us. Why give vandals, graffiti-artists and possibly even arsonists (more on that later) a gift-wrapped invitation to destroy somebody else’s property? Sandoval snapped a dozen choice views of the unnamed car wash on May 9th of 2011.

    Wash Out

    abandoned-car-wash-lomography

    Flickr user Wayne Wilkinson (wayne’s eye view) applied some freaky faux-lomography processing to this photo of an lonely abandoned car wash taken in June of 2012. While many photos of abandoned buildings and businesses stand on their own when it comes to evoking a certain atmosphere, skillful image processing can enhance the emotional content to near-palpable levels.

    Yet Another BP Disaster

    abandoned-car-wash-wesumat-1

    abandoned-car-wash-wesumat-2

    At least no wildlife was made to suffer when operators of a Mobil/BP petrol station near the Bramham Crossroads, North Yorkshire, UK decided to close and abandon its Wesumat Soft Wash W86.1 car wash system. Credit Flickr user AquaValet with this pair of strikingly gloomy yet inexplicably beautiful images of the car wash as it looked on October 1st of 2009. “The petrol station is in a fairly rural location and not fenced off at all,” explains AquaValet. “Inside the actual wash bay I had to be careful not to fall down the sludge pit, which was full of nasty fluids.” BP… bringing you nasty fluids since 1908.

    Home For The Homeless

    abandoned-car-wash-Lone-Star-Auto

    Lone Star Auto on Broadway St. in San Antonio, TX has been abandoned since December of 2009 according to The Sample Spoon. In the above image taken in mid-April of 2012, it can be seen that some life does stir amid the stilled brushes and congealed wax at the ex-business’s car wash as local homeless folks have taken advantage of the structure’s protective overhang and plentiful hooks and shelves.

    Next Page – Click Below to Read More:
    Wax Off 12 More Abandoned Closed Car Washes

    Share on Facebook


    [ By Steve in Abandoned Places & Architecture. ]

    [ WebUrbanist | Archives | Galleries | Privacy | TOS ]


    WebUrbanist

  • 30 November, 2014 – Uniqball, A Unique Approach To Leveling


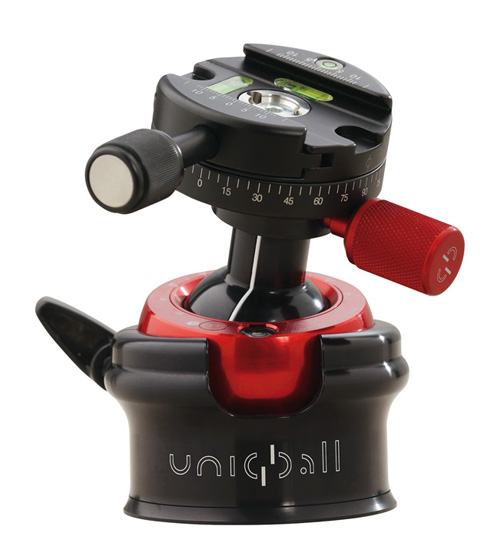
    We have been trying some pretty cool new gear out over the last few weeks.  Michael has already shared his First Impressions of the Samsung NX1.  A lot of the products we are now working with and will report on soon were announced at Photokina.  One of these products was a new style ball head.  Just when you didn’t think you could improve on a ball head concept any further we see a new player from Hungary introduce a new style ball head.  Today, Nick Devlin gives us a look at the Uniqball, A Unique Approach To Leveling.  This ball head is available at B&H Photo.  I ordered one.

    We also have a new advertiser on board as of today, DXO.  DXO has three very cool applications for working on images.  Check them out!

    We have a single cabin on our first Antarctica Trip in January available as well as 2 berths on our second trip.  It’s not too late to be part of an amazing adventure to one of the most beautiful places on earth.  Check It Out!

    Also until the end of today you can get 25% off of our entire Video Catalog.  Ends at 11:59 November 30th.


    The Luminous Landscape – What’s New