Ein Beitrag von: the decent exposure

[ By WebUrbanist in Conceptual & Futuristic & Technology. ]

Using the magnetic levitation technologies employed in high-speed trees, the MULTI elevator system conveys people horizontally as well as vertically at record speeds and without ropes, all while allowing multiple elevators to traverse the same shafts.

Allowing fast vertical interior transportation, the elevator has already revolutionized the shape of cities once – this breakthrough may enable them to do it again, not only cutting down on wait and travel times but also by enabling versatile sideways travel through structures. As illustrated above, a single car can go both up or down and then left or right, moving in a three-dimensional fashion within a building.
The creator of the MULTI, ThyssenKrupp AG, expects to have a fully-functional prototype by the end of 2016 with cars capable of moving at speeds of up to 16 feet per second when unoccupied. The various advantages of this system will increase elevator capacity in a given building by as much as 50% and help reduce the amount of space required (as much as 40% of a building’s footprint with traditional elevator arrangements).

Whether through looping systems (like the one proposed above by Hitachi) or maglev technologies or, most likely, a combination of the two, the “days of one cabin, in one shaft on one rope traveling up and down” which “hasn’t changed for 160 years” are soon to be over. Imagine the possibilities for architects and engineers no longer constrained to simply building up but now free to build out in fresh new ways as well. Of course, there are always some potential dark sides to new technology, but here’s hoping no one decides to build The Cube (or Cabin in the Woods) in real life.

Two-person monorail pods zoom down from the sky at a command from your smart phone in a futuristic commercial transit system set to be installed in Israel. The …
Click Here to Read More »»

A complex spanning in seemingly all directions, this sky-oriented, cloud-shaped, forward-thinking design has just won the Shenzhen Super City Competition in …
Click Here to Read More »»

Combining ancient earthen-architecture approaches and cutting-edge robotic technologies, this contour crafting process promises a revolution in how we address …
Click Here to Read More »»


[ By WebUrbanist in Conceptual & Futuristic & Technology. ]
[ WebUrbanist | Archives | Galleries | Privacy | TOS ]
Perhaps the greatest challenge you will face in outdoor photography is the high contrast created by the sun and the bright sky versus a darker foreground. That is one of the reason photographers try very hard to shoot at dawn or sunset. Otherwise, the sky is virtually always so much brighter than anything on the ground that it is hard for your camera to deal with the contrast. Either your camera exposes the sky correctly, which makes everything on the ground look black, or the camera exposes the foreground correctly resulting in a blown out (or pure white) sky. If you try to expose in the middle, you will have problems with both highlights and shadows.
The challenge is constant and great, but there are some things you can do to create great pictures no matter what the light. This article will walk you through some ideas for doing that.
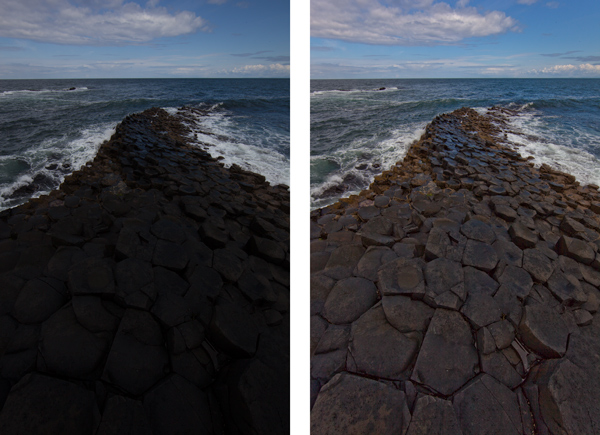
The first thing you can do is try to fix the problem in post-processing. Both Lightroom and Adobe Camera Raw (used in Photoshop and Photoshop Elements) have sliders that can help bring your sky back or add detail to a dark foreground. They won’t bring back a truly blown out sky or pitch black foreground, but you might be surprised at what they can do.
For an overly bright sky, try pulling the Highlights slider down (in other words, pull it to the left). That will usually add detail. If you have blue portions of your sky, another trick is to target the blue portion and make that darker, while keeping the clouds white. To do that, go to the HSL/Color/B&W panel in Lightroom, or the HSL/Greyscale tab in ACR, and find the Blue slider. Click on the Luminance tab, and pull the Blue slider down (to the left). That will preserve good highlight tones in the clouds but darken the blue tones to make the sky look much better.
If your foreground is too dark, you can brighten it up using the Shadows slider in the Basic tab of Lightroom or ACR. Pull that slider up (to the right). That will brighten up the darker tones. You may find, however, that lightening the shadows in this fashion makes the foreground look too flat or washed out. There is a simple cure for that though. Find the Blacks slider, which is just below the Shadows slider, and pull the Blacks slider down (to the left) a little bit. It may seem counter-intuitive to darken the Blacks since you just lightened the Shadows, but this adds contrast back to your foreground. So the foregound will be lighter due to the increase you made to the Shadows, but will still have contrast because of the decrease you made to the Blacks.

The problem you’ll encounter most of the time when you convert your pictures to black and white is a lack of contrast. Very often, photographers convert their pictures to black-and-white only to find that they look dull and flat. You want tones ranging from pure white all the way to pure black. The high contrast you are combating can actually be an asset in black and white photography.
One problem with shooting with a bright sky or at midday, of course, is usually the high contrast. In addition, people are just plain used to seeing the middle of the day, so when they see a picture taken at midday viewers can find it uninteresting. Converting to black and white can solve both of these problems. As mentioned above, the high contrast can be an asset in black and white. Further, black and white is not how people are used to seeing the world, so the photo may look more interesting to them. Of course, this is not a cure-all, and a blown out sky is still a blown out sky, but converting to black and white can occasionally save a really high contrast picture. So, try converting toblack and white if your picture is overly contrasty.
People often think about using a flash only in low-light situations. But perhaps a better use for flash is in very bright situations like those we are talking about here. It doesn’t seem to make sense at first, but what you are doing is letting the flash fill in some of the harsh shadows and thereby deal with your high contrast problem.
If you use fill flash, set your camera’s exposure settings so that the sky is properly exposed. You might take a shot or two without the flash to make sure you have it set properly. Then add the flash to brighten up the foreground and keep it from being black. Dial back on the power of the flash unit or the flash exposure compensation to make it look more natural. That should result in a properly lit subject with a sky or background that looks good as well.
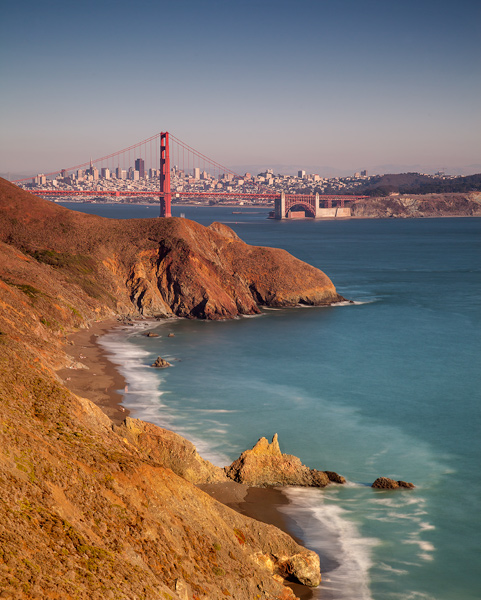
The scenes we are talking about in this article stem from an overly bright background and a dark foreground. The previous tip addressed a way for you to brighten the foreground. Now let’s reverse that and talk about a way to darken the sky so that it is roughly the same exposure as your foreground.
To do that to, you will want to buy a graduated neutral density filter. These are square filters that fit in holders attached to the front of your lens. The top portion of the filter is dark, and it fades to clear glass at the bottom. That way it darkens the sky while having no effect on the foreground. Use one to darken the sky and keep the brightness values within the dynamic range of your camera.
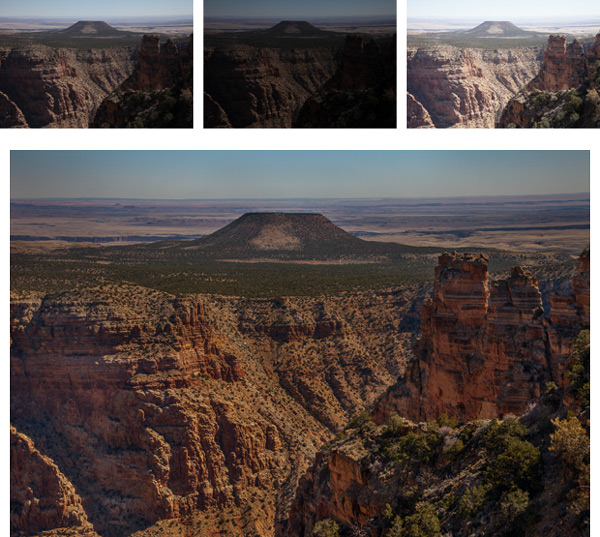
Another way to deal with contrast that goes beyond the dynamic range of your camera is to bracket your pictures and blend them later. Most cameras have a function in the menu that allows you to set the amount you would like to overexpose or underexpose your pictures. That way when you press the shutter button it will take three pictures: One at normal exposure, one underexposed, and one overexposed. Some cameras will actually allow you to take five or even seven photos.
You can blend these three pictures later in Photoshop by using parts of each exposure for your final photo. For example, you may want to use the sky from the darker, underexposed photo. You may want to use the foreground from the brighter, overexposed photo. There may be elements of each that you want to take from the normally exposed picture. By blending them all together in Photoshop, you will have a picture that is properly exposed across the board.
To accomplish the blending, here’s a quick primer on the process:
Thus far, I’ve avoided the option of using High Dynamic Range (HDR) software to deal with the dynamic range problem you face. Of course, you can bracket your photos (as set forth above) and process them using Photomatic Pro, HDR Efex Pro, Photoshop, or other HDR software. That is a topic in and of itself.
For purposes of this article, consider using an HDR file as part of the blending process discussed above. In other words, first bracket your exposures. When you are in front of your computer, create an HDR file using your preferred method. Now, bring your original three exposures and the HDR image into Photoshop using the method outlined above. When you bring them all in, you should have four layers showing.
Then just do the blending process described above. Put the file you think looks the best on top. Next, follow the process set forth above for blending in each of the other layers. If it turns out you don’t want to use one of the layers you can just delete or hide it. Using this method, you should have complete control over the exposure levels in your picture. In addition, this process will provide you the benefit of HDR software without that HDR-look that many photographers try to avoid.
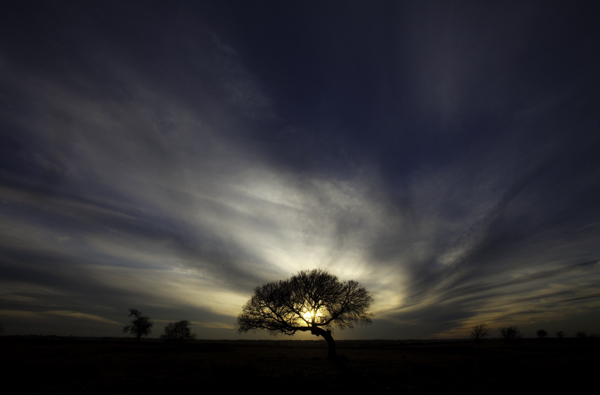
This might sound like giving up, but you might consider using the high contrast for effect. For example, you can use the brightness by adding sun’s rays into the picture. You can use the darkness by creating a sillouette. Think about effects like these at the time you are shooting. Sometimes you can turn a problem into an interesting feature of your photograph.
Or, if there is no way to use the high contrast as an effect, you can sometimes minimize it by shooting away from the sun. Not having the sun in your picture will keep the sky from being too bright. If you are lucky, the sun will lighten up the foreground enough to keep it within the dynamic range of your camera without creating any harsh shadows.
Dealing with this problem of dynamic range is perhaps the greatest challenge of the digital photographer. Unless you have thousands of dollars to buy a medium format camera and get the increased dynamic range that the larger sensor size offers, you will need to take steps such as those above when you are shooting outside. Use these tips to overcome this obstacle and make your photos stand out.
The post 7 Ways to Handle High Contrast Scenes by Jim Hamel appeared first on Digital Photography School.
An inventor from Bristol in the UK is developing an LED-based light source for high speed photography, promising to produce a burst of flash with a duration short enough to freeze a bullet. The Vela One, which will be priced at a similar level to standard hotshoe flashguns, uses nine LEDs arranged in a bank that generates a million lumens and is powered by just four AA cells that the inventor claims will last a full day’s shooting. Learn more
Ein Beitrag von: Alexander May
Ewig davon geredet. So oft erträumt. Sich ausgemalt, wie es sein könnte. Dann, im Februar dieses Jahres, die Flugtickets gebucht. Sechs Monate lang ausharren; abwarten, endlich dem Berliner Großstadt-Moloch entfliehen zu können. Die Monate vergingen, glühendes Entgegenfiebern breitete sich aus und im August war es dann endlich so weit. Acht Tage nur wir zwei und die westlichen, schottischen Highlands.
Da wir schon einmal in Glasgow gewesen sind, fiel es uns glücklicherweise nicht schwer, unseren Mietwagen nach der Ankunft zu finden. Ehe wir uns versahen, saßen wir schon in unserem „cozy“ Kleinwagen auf dem Motorway Richtung Fort William, unserem Ziel in den westlichen Highlands.
Wir waren kaum eine halbe Stunde unterwegs und schon erstreckte sich östlich von uns der größte See Schottlands, Loch Lomond. Noch nicht einmal in den Highlands angekommen, dachten wir, dass es gar nicht mehr besser werden könne. Obwohl ich aus Mecklenburg-Vorpommern stamme und mit der Müritz der größte See Deutschlands quasi vor der Haustür lag, hatte Loch Lomond doch eine so eigentümliche, seltsame Wirkung auf uns, dass wir dort hätten ewig verweilen können.
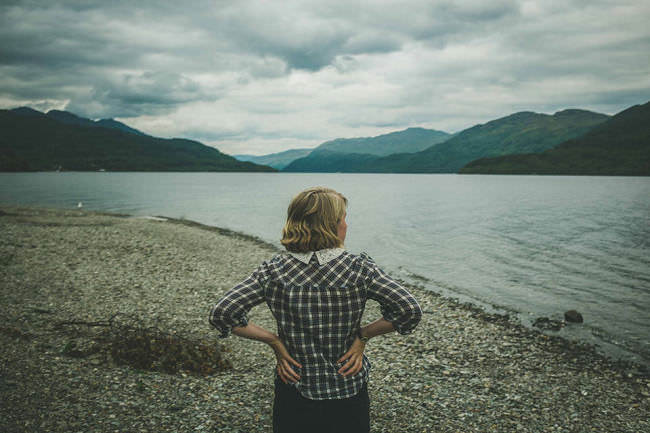
Weiter auf der A82 passierten wir die Bridge of Orchy und somit den Übergang von den Low Lands in die Highlands. Man kann das Gefühl schwerlich beschreiben, das uns während unserer Fahrt durch kilometerweite Ebenen durchströmte. Wir hielten gefühlt alle 50 Meter an, um auszusteigen, inne zu halten und dieses Gefühl langsam einzuatmen und nie wieder rauszulassen.
Ein Anblick, den ich nie vergessen werde, denn entgegen vieler Meinungen gleicht sich in Schottland kein Glen oder Ben dem anderen. Nach 5 Stunden Fahrtzeit (eigentlich waren zweieinhalb angedacht, aber Linksverkehr und die schottische Landschaft machten es uns dann doch ziemlich schwer, die Strecke in aller Kürze durchzuziehen) erreichten wir unsere kleine aber traumhafte Holzhütte am Fuße des Ben Nevis.
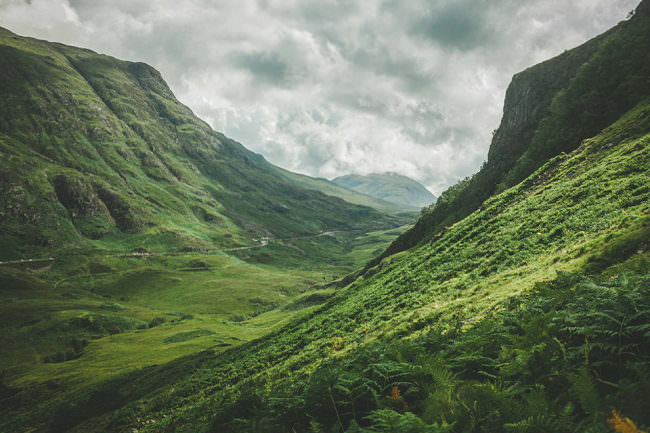
Ohne großartig die Tage bis ins kleinste Detail durchzuplanen, machten wir uns an unserem ersten richtigen Tag dann in das Tal der Tränen, Glen Coe, auf. Da wir schon auf der Hinfahrt durch dieses Tal gefahren waren, konnten wir kaum abwarten, es zu erkunden und diese mächtige, eigentümliche Natur auf uns wirken zu lassen sowie auf Fotos festzuhalten.
Wer einmal hier gestanden hat, möchte nicht mehr weg. Das garantiere ich. Dieses bizarre und doch wunderschöne Bild von der kleinen zweispurigen Straße, die sich endlos lang durch das Tal zu ziehen scheint, mit dem seichten Gras, das sich durch das komplette Tal zieht, an dessen Rand sich die Three Sisters wie unüberwindbare Hindernisse erheben, verzaubert einen auf den ersten Blick.
Leider gehört Glen Coe zu den Touristen-Attraktionen in Schottland überhaupt. Überall begegneten uns Wandergruppen, die versuchten, sich schnell an uns vorbei zu drängen, ohne stehen zu bleiben, die Natur auf sich wirken zu lassen und einfach nur zu genießen.
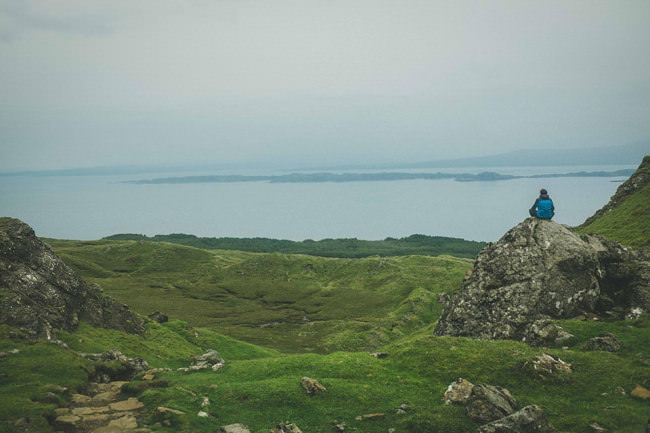
Das nächste Ziel unserer Reise war die Isle of Skye. Allein wenn ich diesen Satz schreibe, weiß ich, dass ich nicht ansatzweise beschreiben kann, wie sehr diese Insel, im Westen Schottlands gelegen, Deinen Geist verändert. Wie sehr sie Dich zur Ruhe bringt und Dich gleichzeitig in ehrfürchtigem Staunen verweilen lässt.
Die Erhabenheit, die sie ausstrahlt, scheint unendlich. Unser erster Halt war der Old Man of Storr im Norden der Insel. Eine massive Felsformation mit einer 50 Meter hoch ragenden Felsnadel, dem Old Man, der seit Jahrtausenden schweigend über seine Familie, den Storres, wacht.
Der Aufstieg schien nicht enden zu wollen, die Mücken trugen ihr Übriges dazu bei, aber als wir uns entschieden hatten, nicht den vollen Touristenweg weiterzugehen, sondern einem kleinen ausgetretenen Pfad zu folgen, erschloss sich uns erst die Magie, die diesen Ort so besonders macht.
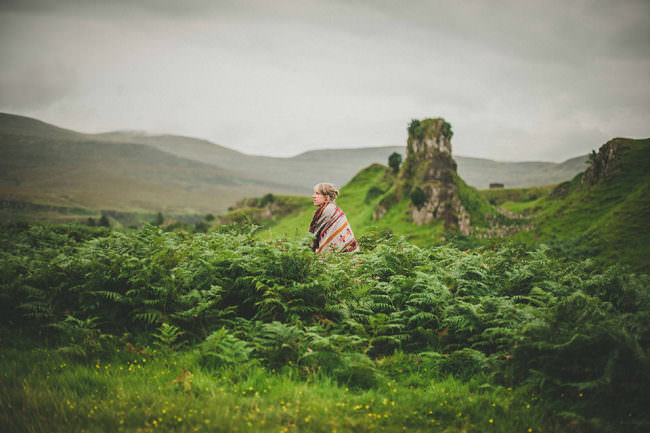
Für zwei Stunden – völlig allein, durch Schluchten, über steile, bemooste Felsvorsprünge – nur wir beide. Da die Fahrt zur Insel jedoch schon drei Stunden in Anspruch genommen hat, waren wir ein wenig zur Eile gezwungen und so ging es weiter quer über die Insel nach Uig zu den Fairy Glens.
Ein wunderbar mystischer Ort, von dem die Schotten glauben, dass das Tal mit seinen stufigen Hügeln von Feen erschaffen worden ist. Ein wirklich schöner Gedanke, dass sich diese Mythen bis heute in den Köpfen der Menschen tradieren können.
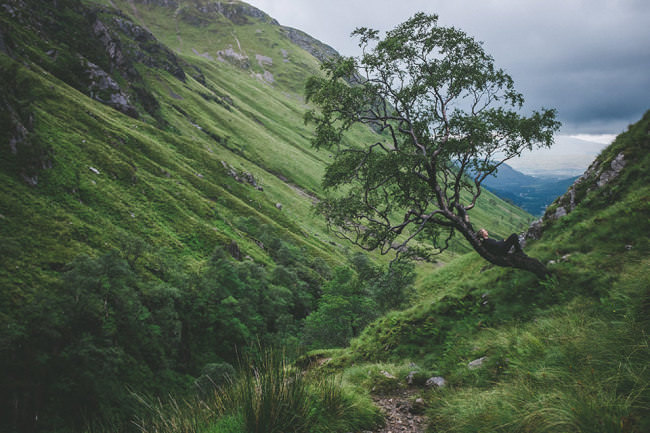
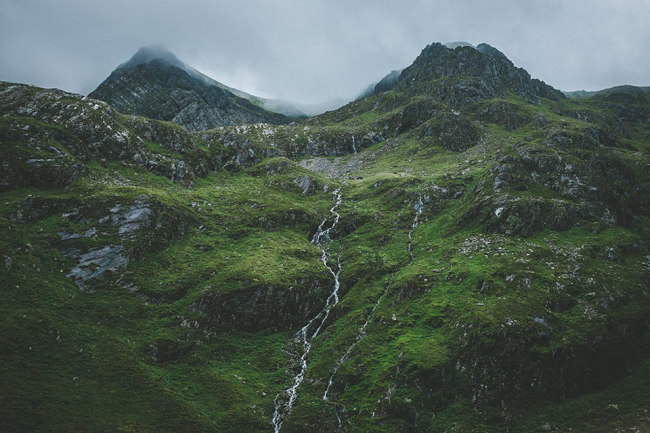
Der nächste Tag wurde für mich zum schönsten der ganzen Reise, auch wenn es unglaublich schwer fällt, sich bei all dem Erlebten auf einen Höhepunkt festlegen zu wollen. Unweit unserer Hütte fuhren wir durch das Glen Nevis bis zum Startpunkt einer Gratwanderung um Stob Ban, einen der Munros, also Gipfelspitzen, die über 1000 m hoch sind, zu erklimmen.
Die Wanderung nahm fast den ganzen Tag in Anspruch. Der Aufstieg bis 900 m war arg beschwerlich, es war rutschig und wir mussten drei reißende Flussläufe überqueren, bis wir kurz vor dem Gipfel ankamen, nur um festzustellen, dass der dichte Nebel es uns unmöglich machte, eine Gratwanderung ohne Risiko einzugehen. Also machten wir kehrt. Doch auf der gesamten Wanderung waren wir für uns allein.
Das Gefühl abgeschotteter Zweisamkeit ist so kostbar, wenn man aus einer übervollen Stadt wie Berlin kommt. Die endlos tiefen Schluchten, das satte Grün und die schroffen Felsen machten dieses Ereignis atemberaubend einzigartig. Auch, wenn wir bis auf die Socken durchnässt waren, waren wir einfach nur glücklich, dieses wirklich persönliche Erlebnis nur für uns geteilt haben zu können.
Unsere Zeit in Schottland neigte sich langsam dem Ende und wir entschieden uns, noch einmal auf Skye zu fahren. Man kann sich ihrem Zauber einfach nicht entziehen. So fuhren wir erneut auf die Insel, vorbei an Eileen Donan, einer Burg, die ich jedem Schottlandreisenden von Herzen empfehlen kann!
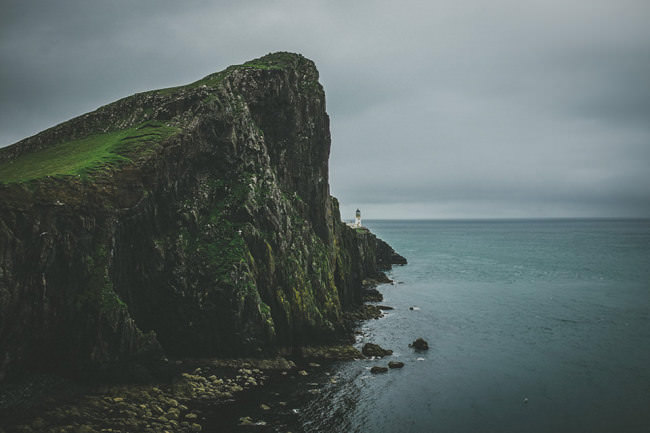
Unser Ziel war dieses Mal Neist Point Lighthouse im Westen der Insel. Die letzten 20 km bis zum Leuchtturm waren nervenaufreibend. So schön es auch ist, die single road tracks entlangzufahren, so anstrengend ist es auch, wenn Dir unzählige Wohnwagen entgegenkommen, die auf einer einspurigen Straße in beide Richtungen nicht gerade viel Platz zum Rangieren bieten.
Als wir an unserem Ziel ankamen, war der Stress der Anfahrt vergessen. Unvergesslich: Die Steilklippen, die tief im atlantischen Ozean wurzeln, der kalte, nasse Wind, der Dir ins Gesicht schlägt und über das Meer peitscht und der kleine Leuchtturm, der einsam auf einer kleinen Landzunge wohl noch ewig sein Licht scheinen lässt.
Ich glaube, dass hier die für mich schönsten Fotos meiner Reise entstanden sind, da sie für mich unglaublich gut das Gefühl dieser endlosen Weite und den Respekt vor diesem Ort einfangen, der einen packt, wenn man seinen Fuß aus dem Auto setzt.
So sind acht Tage Schottland für uns wie im Flug vergangen. Dieser Bericht enthält bei Weitem nicht alle Erlebnisse, der Fokus sollte auf denen liegen, die uns am meisten auf dieser Reise geprägt haben. Seither vergeht kein Tag, an dem wir nicht an Britanniens schönen Norden denken und das Fernweh wird von Tag zu Tag größer. Ich kann es kaum erwarten, nächstes Jahr erneut von seiner Schönheit gefangen zu werden.
[ By Steph in Art & Drawing & Digital. ]

Whisky enthusiast and hobbyist photographer Ernie Button was about to wash a glass when he noticed that the scotch residue at the bottom had dried into a series of chalky, delicate lines. This chance discovery eight years ago led to a series of experiments that have used booze as an art medium, with different brands and varieties of scotch producing different effects calling to mind imagery of outer space.


“It’s a little like snowflakes in that every time the Scotch dries, the glass yields different patterns and results,” says Button. “I have used different color lights to add ‘life’ to the bottom of the glass, creating the illusion of landscape, terrestrial or extraterrestrial.”


“Some of the images reference the celestial, as if the image was taken of space; something that the Hubble tellscope may have taken or an image taken from space looking down on Earth.”


Any aged scotch will make the rings, Button reports, but what seems to effect the patterns most is where the spirits are produced. Scotches with smoky flavors made on the islands of Islay and Skye in western Scotland were inconsistent, while those from the valley around the River Sprey in northeastern Scotland produced more predictable results.


The series, entitled ‘Vanishing Spirits: The Dried Remains of Single Malt Scotch’ includes dozens of images combining science with art. If you’re interested in learning more about the physics behind this unusual art form, check out this feature at The New York Times.
No smoke-and-mirrors or post-production here, just fleeting vignettes swiftly staged on steamed windows and set against natural outdoor backgrounds. Jim …
Click Here to Read More »»
Bird’s-eye views of cities around the world, from Paris to Hong Kong, are visualized in the form of surgical tools like scalpels and skin graft blades …
Click Here to Read More »»

Encyclopedias in English and Chinese are eroded into landscapes by artist Guy Laramee, in a narrative about a dystopian vision of the 23rd century.
Click Here to Read More »»
[ By Steph in Art & Drawing & Digital. ]
[ WebUrbanist | Archives | Galleries | Privacy | TOS ]
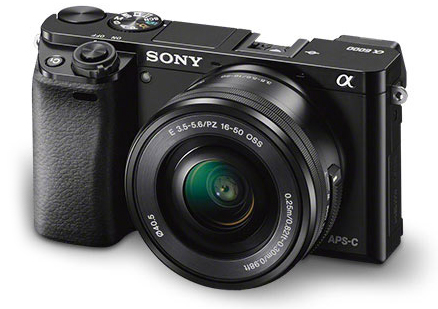
If the Sony A7R is a champion heavyweight in its prime, the Sony A6000 is the scrappy younger brother with a leaner frame, faster feet and a few tricks up its sleeve that big brother hasn’t bothered to learn.
Having spent almost a year with the A7R as my main camera, I’ve become very familiar with the current Sony Alpha system, so I hit the ground running with the A6000. Here is my Sony A6000 review along with a load of example images from my most recent road trip.
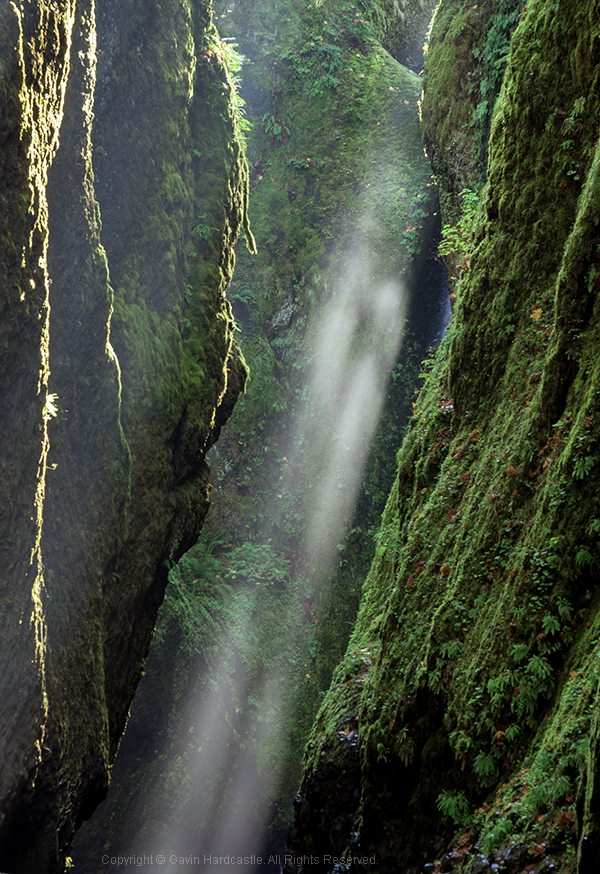
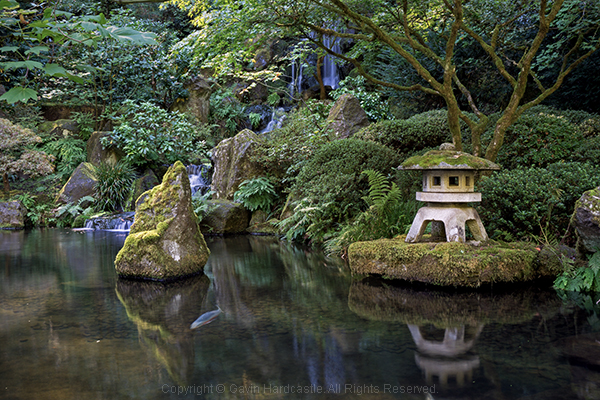
For this shot I used my Canon 24-105mm with the hated Metabones Adapter.
Sporting a 24.3 Megapixels APS-C sensor, this mirrorless camera crams a lot of horsepower into a tiny little box and the E-Mount (like the A7R) means you have some nice Sony/Zeiss glass to choose from. You can also use an adapter for the E-Mount which will allow you to use a wide variety of lenses. If you already own some nice Leica, Nikon, or Canon glass for APS-C cameras, you can throw those on the A6000 with the right adapter.
For just under $ 800 you can walk away with the Sony A6000 and the 16-50mm kit lens, or get the body only for around $ 600. For image quality like this in a tiny package that boasts a lot of versatility, that’s a keen price. When you compare it to the likes of the full frame A7R and the A7S, it’s a total bargain.
Lets face it, Sony are the world leaders when it comes to image sensors and they know how to get the most out of them. While you won’t get ultra low noise, or A7R-like sharpness out of the A6000, you’ll certainly get great image quality and enough sharpness to suite most requirements. This sensor has the same ability to pull up shadow detail like the A7R (although with more noise than its counterpart), while keeping the file sizes at a much more manageable, yet very print-worthy level.

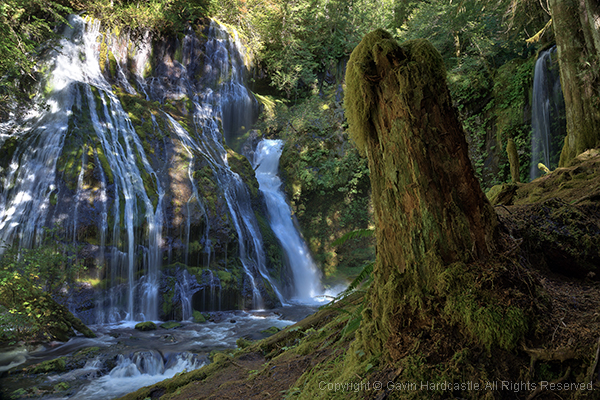
This shot was made with the E PZ 16-50mm F3.5-5.6 OSS kit lens
One of the main selling features of the A6000 is its super fast hybrid autofocus and focus tracking. While these are features I would rarely use, I can see the attraction for sport, wildlife shooters and parents hoping to capture images of their kids at play. With a burst rate of 11 fps, you’ll have a good chance of catching those golden moments.
I actually prefer the feel of the A6000 to the A7R. This camera is clearly all about being small, lightweight, and discreet. The A7R was designed to take advantage of big wide angle and telephoto lenses so it never felt big enough. The A6000 however, feels exactly right for its purpose and for me, that is to get the best image quality out of the smallest package possible.
With the 16-50mm kit lens this camera looks and feels wonderfully miniature. As more premium E-mount lenses become available from Sony/Ziess you’ll be able to get much better image quality but still retain that perfect small form factor. I doubt the prices of that premium glass will be small though.
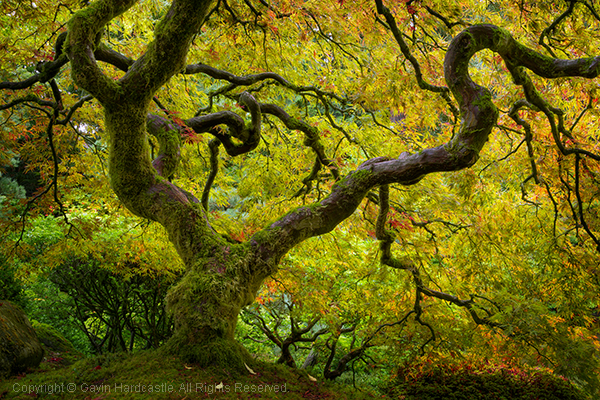
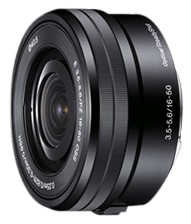
I often find that kit lenses get a bad rap. They are deliberately made to feel shabby next to their more deluxe siblings, but if you know how to squeeze the best out of your glass you’ll be able to get some decent image quality from the 16-50mm.
The sharpest aperture was f/8 with a very noticeable drop in image quality when you select wider or narrower apertures. Sadly there is a very noticeable edge vignette even at f/8, which I thought very shabby of Sony. It’s not a great lens at this price but if you’re prepared to do a bit of tweaking in post, you’ll achieve some decent shots. The main challenge with this budget lens is getting tight focus with the pathetic focus ring of misery.
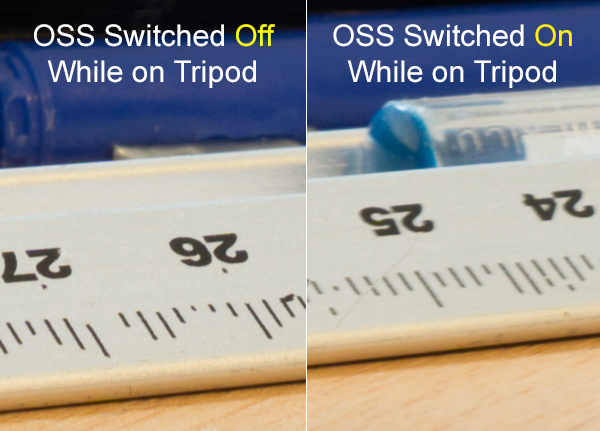
Apparently, image stabilization is performed inside the Sony lenses that have this feature but enabling/disabling the OSS has to be done in the menu. I much prefer a switch on the lens to turn this feature on and off.
If you plan on shooting on a tripod you’ll want OSS switched OFF. It’s really only any use for hand held shots. Here’s an example of the OSS on and off while used on a tripod. You can see that the numbers on the ruler look much sharper with OSS switched OFF. You’ll find the same results of most cameras that have some form of image stabilization.
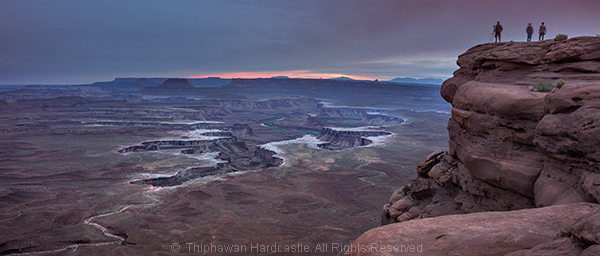
While the A6000 records superior video to the A7R, it’s actually not as good as the video quality you can get with the even cheaper A5100 mirrorless camera which boasts the XVID codec. You’ve got to wonder what Sony is playing at with these silly configurations. I’m sure it would have been a small thing to include XVID video recording on the A6000 but Sony in their wisdom decided to forego it to make the A5100 more attractive.
The one thing that stopped me from choosing the A5100 over the A6000 was the lack of dedicated buttons and dials for controlling your settings. Although it has the exact same 24.3 MP sensor, the A5100 is even smaller than the A6000 and that means you’re forced to dig into the menu system in order to play with your settings. This would have resulted in me having a full blown frustration tantrum on a mountaintop and launching the A51000 off a cliff, so I chose the A6000 due to its two dials and three customizable buttons, way more user friendly but man I miss that XVID codec.
If you’re switching from DSLR to a Sony Mirrorless, be prepared to be completely underwhelmed by the horrifically pixelated joke of an electronic viewfinder. DSLR users will look through that thing and feel that there is no chance their image will turn out well. Don’t be dismayed. Just use the viewfinder to set your focus and view your settings but don’t for one second think that your lovely RAW file will remotely resemble the grainy atrocity on display through that poxy peephole.
Apparently the viewfinder on the RX1 is infinitely better, but at almost $ 2800 it should be. If you can live with the lame EVF of the A6000 which is the same as on the much more expensive A7R, you’ll be fine. It took me a bit of getting used to when I switched from DSLR but once you’ve seen those gorgeous RAW files, you’ll come around.
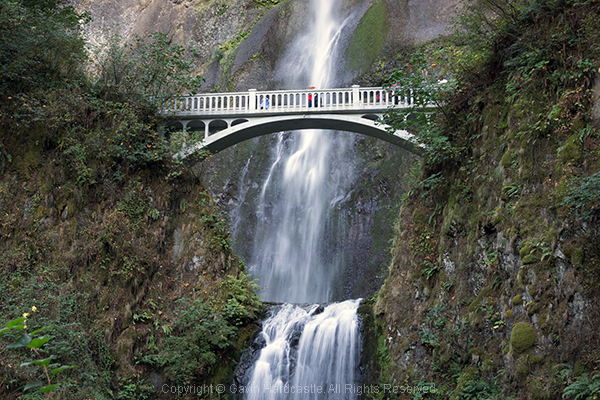
Flash fanatics will be delighted to learn that the A6000 has a multi-interface hot shoe slot on the top of the camera. This is also great for videographers who want to add the external mic. Sadly there are no software audio level controls when recording video on the A6000 and that is a MAJOR let down. Again, Sony could have included that software which is available on the A7R but in their wisdom, decided not to.
Like all of the current alpha range, the A6000 allows you to install Sony apps for extended functionality (and cost). The Time Lapse app had an update a few months ago that has made it much more usable. Other apps include remote control, star trails and a bunch of other awful ideas I’ll never bother to download or use.
The A6000 does have a built in flash that pops up dramatically. You can even angle the flash to point up at the ceiling to bounce the light.
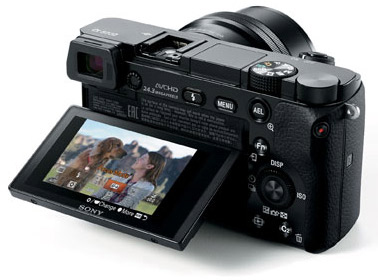
Like the A7, A7R and A7s, the A6000 has a tilt screen which you can angle for low or high shots and still be able to view the screen comfortably. I love this feature and although the A6000 has a smaller screen than the A7R, it works well while fitting into the smaller frame of the chassis. When cameras at this price point all seem to be able to include this technology it baffles me why the likes of Canon and Nikon exclude this feature on their high end cameras.
While I’m delighted that the A6000 does have a tilt screen, it has to be said that the screens image quality is pretty shabby compared to the screens you’ll see on the likes of the Olympus OM-D EM1. I heard a rumour that Sony makes those screens for Olympus so why not include that technology in the A6000? Perhaps that would have jacked up the price to a place where Sony didn’t feel comfortable.
Although nowhere near the longevity of a Canon DSLR battery, the FW50 batteries last longer in the A6000 than they do in the A7R. Just like the A7R, you won’t get a battery charger with the A6000 either so your options are to connect the charger cable directly to the camera or buy a third party charger. I’d recommend the latter as you’ll soon wear out the multi/charge socket on the camera.
This is a non-issue with the A6000. Unlike its noisy big brother the A7R, which has a super loud shutter noise (that I love), the A6000 has a very quiet shutter so you won’t startle the koala bears.
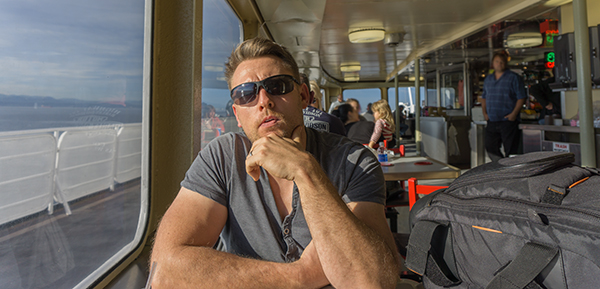
Yours truly. Dynamic range is surprisingly good with great highlight recovery and shadow detail.
That depends on your needs. If like me, you use the A7R as your main camera, the A6000 is the logical choice for your backup camera. It shares the same menu, batteries, lens mount and can be configured to be almost identical in operation to the A7R.
If you’re a DSLR user that’s used to the APS-C sensor size, the main thing you’ll struggle with is the EVF. Once you’ve gotten used to that, you’ll enjoy the superior image quality, customizable controls and most of all, the adorably small size of this wrist saving camera. Shoot with one of these for a week and then try going back to your clunky DSLR. Your old camera will feel like a breeze block.
Canon videographers will find little reason to switch due to the average codec and lack of audio level controls on the A6000.
First time camera buyers will love this camera because of its image quality, portability and price.
With that well considered summary, I’m awarding the Sony A6000 four out of five stars. They could have achieved five stars with a better quality LCD that included touch screen functionality.
The post Sony A6000 Mirrorless Camera Review and Example Images by Gavin Hardcastle appeared first on Digital Photography School.
The Canon EOS 7D Mark II is the long-awaited replacement to the 7D, which was launched in 2009. It features a 20.2MP APS-C CMOS sensor and dual DIGIC 6 image processors. It has a new 65-point, all cross-type autofocus system as well as an updated version of Canon’s Dual Pixel CMOS AF system that provides continuous phase detect focusing during video recording. We’ve just updated our first impressions review with analysis of the camera’s performance in our studio scene. See how it compares

Wir öffnen vorsichtig unser erstes Adventskalendertürchen und zum Vorschein kommen digitale Prints im Vintagestil. Mit der Firma PhotoLove aus Hamburg starten wir unseren Adventskalender 2014.
PhotoLove? Ja, wir alle lieben Fotos. Und am schönsten ist es doch, sie auch in der Hand zu halten oder sie an die Wand bringen zu können. Bei PhotoLove kann man seine digitalen Fotos ganz einfach auf Vintagepapier im typischen Polaroidstil drucken lassen. Man kann seine Fotos direkt vom PC hochladen oder sich mit einem Klick zu den Diensten Instagram, Facebook, Google, flickr oder EyeEm verbinden und dann die persönlichen Lieblingsbilder auswählen.

Anschließend kommen die Bilder je nach Anzahl der Prints in einem schicken Umschlag oder einer Kraft-Paper-Box zu Euch nach Hause. Die Prints sind stabil, die Vorderseite glänzt und der Rahmen lehnt sich mit seiner gedruckten Struktur an die originalen Polaroids an.
Die Rückseite ist je nach Wahl entweder wie beim klassischen Polaroid schwarz mit weißem Rahmen oder mit dem Aufnahmeort und sämtlichen Informationen rund um das Foto versehen. Für ganz individuelle Rückseitengestaltung mit Firmenlogo und ähnlichem gibt es den gesonderten Dienst Photolebrity.

Da die Prints auch ein großartiges Geschenk sind, gibt es die Möglichkeit, sie in einer exklusiv handgefertigten Geschenkbox zu versenden.
In unserem Türchen liegt eine dieser wunderschönen Geschenkboxen im Wert von 11,90 € sowie die PhotoBox mit 24 Vintage-Prints im Wert von 24 €. Damit hättet Ihr also schon ein großartiges Weihnachtsgeschenk für Eure Liebsten. Oder Ihr beschenkt Euch einfach selbst.
Um die Photobox inklusive Geschenkbox zu gewinnen, schreibe einen Kommentar unter bürgerlichem Namen und gültiger E-Mail-Adresse bis heute um 24 Uhr. Danach verlosen wir sie per Zufallsgenerator unter allen Kommentatoren. Die genauen Gewinnspielregeln findest Du hier. Viel Glück!