RSS
 

Archive for May, 2014

Tour Tiny Worlds: 6-Camera Cube Creates 360-Degree Video

02 May

[ By WebUrbanist in Gadgets & Geekery & Technology. ]

3d bike ride video

The ultimate at-home hacker project, this strange small-world effect was created using a half-dozen GoPro cameras, a 3D printer and a technique that turns ordinary panoramic shots into a surreal world-warping wraparound experience.

German photographer, journalist and inventor Jonas Ginter cobbled together his cubic ball of cameras then mounted this oddball creation above his bike, all to generate the effect you see in the video above. Given the accessibility of the constituent technologies (and his helpful instructions), suddenly the idea of 3D video capture is within reach of any enthusiastic hobbyist.

cubic 360 degree camera

The stereographic distortion, while a neat effect, is also helpful in rendering a three-dimensional view into a two-dimensional frame. As for the idea, here is a bit more from the creator (summary translation to follow): “Ich habe mir seltsame Konstruktionen mit Spiegeln angeguckt und frustriert festgestellt, dass das absoluter Quatsch ist. Stück für Stück kam die Erkenntnis, dass ich 360-Grad-Videos nur realisieren kann, wenn ich das Bild in einem Take aufnehme. Die logische Konsequenz hieß also: Viele Kameras.”

3d printed and go pro parts

panoramic creation process illustration

Above, Ginter explains his slow realization that to realize a 360-degree video he would have to do everything in a single take, which in turn means having multiple cameras.  While his takes so far are interesting in themselves, the possibilities are amazing – but consider just the fun consumer applications, like capturing a three-hundred-and-sixty-degree skydive or mounting this on the car roof for a road trip. You can read his summary on Ginter’s website, either in the original German or using Google Translate.

Share on Facebook


[ By WebUrbanist in Gadgets & Geekery & Technology. ]

[ WebUrbanist | Archives | Galleries | Privacy | TOS ]


WebUrbanist

 
Comments Off on Tour Tiny Worlds: 6-Camera Cube Creates 360-Degree Video

Posted in Creativity


Create your own DSLR external battery pack

02 May

Screen_Shot_2014-04-30_at_12.07.51_PM.png

Anyone shooting HD video on a DSLR knows how quickly the battery can drain. You can get AC power adapters for some cameras, but where there’s video, there’s not always an outlet. In this tutorial on DIYPhotography.com, camera hacker Chris Winter shows you how to make an external battery pack system with about nine times the runtime using a $ 40 battery pack, DC coupler, hot-shoe plate and some Velcro. Learn more

News: Digital Photography Review (dpreview.com)

 
Comments Off on Create your own DSLR external battery pack

Posted in Uncategorized


Newbie Tips for Working with a Model

02 May

Fashion photography model tips

If you’ve ever tried taking pictures of someone (or something) that isn’t extremely cute and fluffy like a baby or a puppy, you’ll know it can sometimes be difficult to capture people in a flattering way. Some people are extremely shy or don’t like getting their picture taken. Others really do like having their pictures taken. Some even make a living getting their picture taken. They are called models, and today we are going to consider what it is like working with models.

Where can you find a model to practice with?

There are two ways to go about working with a model.

One way to find a model to work with is by going to a model website like Model Mayhem that connects models, photographers, makeup artists, etc. In fact, Model Mayhem is the best resource for up and coming photographers to find models, because a lot of beginning models are on there looking to build their portfolio and will trade their time for pictures (see section below). Check it out today and see who is in your area, ready to shoot. Be clear and specific about times, what you want to shoot, and what they will be receiving. Some sites have a lot of models to choose from, and if you are courteous and professional through correspondence, you can connect with a model and set up a shoot.

Fashion photography model tips

Another way to find a model is to ask around your town or city. There is a good chance there is someone in your town who has the looks or aspirations to do some modeling, whether it’s on a national scale or a local one. If you don’t know someone directly, simply ask around or a make a call out on Facebook. I remember when I was taking a lighting class and needed someone on short notice due to a cancellation. I put out a request on Facebook for a model as replacement and I had two subjects willing to step in within an hour. Some people really love having their pictures taken, it’s simply a matter of putting yourself out there.


Either way, if you have someone who is interested in posing for you, now you have to decide what arrangement benefits both of you.

Trading Time for Pictures or Prints

There is a great rule of thumb that goes something like this – if the model is benefitting the photographer’s portfolio only, the model should be getting paid. If the photographer is benefitting the model’s portfolio only, then the photographer should be getting paid. But if you are both benefitting each other, meaning you both are trying to build up a portfolio of images and you are both more at less at the same stages in your career, then you can do what is called Time for Prints, or TFP.

Fashion photography model tips

Time for prints means the model is giving up his or her time in exchange for images at the end of the collaboration. This could be called a “trade” or, in the commercial modeling world a “test shoot.” It is not expected that you are actually printing images and delivering them to the model. I believe that is a term left over from the glory days of film.

Model Release

When working with a model, it would be wise for you to obtain a model release form. You can find them easily on the web (here’s a PDF you can download immediately), and there are even a few great apps that you can download. I use an app called Easy Release, which is powerful and lets you and the model sign right on your smart phone or tablet.”

A model release form, when signed by the model, grants you the photographer legal permission to use the photos online or in advertising.

If you don’t get a model release, the model has the right to ask you to remove images from websites and even sue you if you end up making money using those photos without permission. I’ve personally never had issues when I’ve forgotten to bring along a model release, but it is always better to be prepared.

Fashion photography model tips

Picking a Location and an Outfit

Now that you’ve done all the prep work, where do you shoot? What should the model wear? This is where the fun begins!

It makes the most sense to either start planning with an outfit or with a location (assuming you aren’t shooting in a studio). If you start with an outfit, say a summery dress on a girl, then the location should probably match the outfit. Maybe think about shooting in a field, or the beach, or in the forest. If you have an amazing location in mind, like a great old building with Victorian architecture, then think about what outfit would match that setting best, in terms of colors, shape, patterns, etc.

Just to give you a few ideas about location, I’ve shot in abandoned buildings, under piers, in wheat fields, in flower fields, at vineyards, against brick walls, yellow walls, graffiti walls, in studios, in parks, on carousels, in casinos, and more.

fashion photography model tips

Working with a Model

The next (and final) step in working with a model is to simply begin shooting. If you have an experienced model, you won’t have to say much to them in terms of posing, because they will already know what to do. The best models I’ve worked with will actually change poses or expressions every time they hear the camera click, so you’re never getting duplicate images.

If you have an inexperienced model consider getting some posing inspiration from sites like Pinterest,fashion magazines, and right here on dPS. Do your homework. Look at lots of images, practice those poses yourself so you can articulate what you want from your model. Here are a few to get you started:

  • Striking the Pose – dPS eBook
  • 67 Portrait Posing Printables – a PDF you can print and take with you to go with the eBook above
  • Posing guide for women part one – 21 different pose ideas
  • 8 Posing guides – for women, men, children, groups

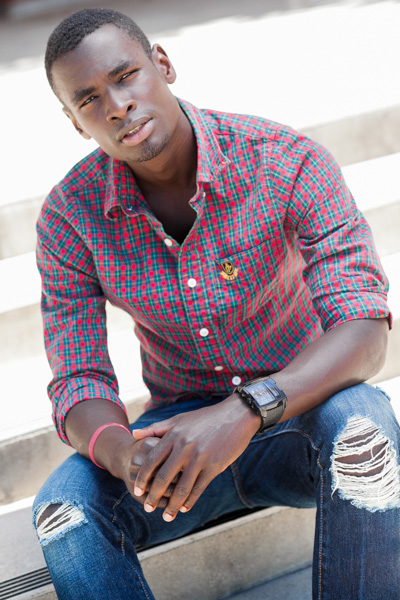
A fun and easy rule to remember is “make triangles with the body” (see photo below). How many triangles can the model make using legs, arms, and body? This advice works better on women than on men, by the way. Sometimes working with models means stretching them in ways that might not feel natural but can look awesome. The best thing you can do is practice, practice, practice. The more you shoot, the easier directing models becomes.

Fashion photography model tips

Now let’s see some of those model photos, please share your images in the comments below and if you have any questions please ask.

The post Newbie Tips for Working with a Model by Phillip VanNostrand appeared first on Digital Photography School.


Digital Photography School

 
Comments Off on Newbie Tips for Working with a Model

Posted in Photography


Floating Finnish Sea Sauna: Relaxing Multistory Steam Boat

02 May

[ By WebUrbanist in Technology & Vehicles & Mods. ]

floating sea sauna finnland

Northern Europe is known for its sauna culture, evolved to combat the cold and gather people in the dark of winter, but this seaworthy version adds a mobile twist to a longstanding tradition.

floating sauna rooftop deck

floating sauna at night

Built from recycled wood, floating on salvaged plastic barrels and powered by an outboard motor, the Saunalautta was created by friends who have since decide to rent out the structure.

floating sauna interior space

floating sauna to go

More than just a nautical sauna, onboard amenities include a barbecue as well as tents and hammocks for overnight adventures and relaxation outside of the super-heated central space.

floating sauna recycled barrels

floating sauna trampoline test

The crow’s nest at the top provides a lookout point and diving platform as well as shelter for the cooking space located directly below. They have even tested putting a trampoline on the second story, but safety concerns won out in the end.

floating sauna upper levels

floating sauna docked port

More from Architizer on the long cultural history of saunas in the region: “The chilly Nordic country of Finland is known for its deeply-rooted sauna culture. Dating back to as early as the 16th century, saunas became a popular way to beat the dangerously frigid winter temperatures. In a country with around 5.5 million inhabitants, there are more than 2 million saunas scattered about the land — that’s an average of one sauna per household. In Finland, these heated refuges are not thought of as a luxury, but rather, a necessity to protect people against the cold. Before modern healthcare, most Finnish mothers even gave birth in saunas, as the warm rooms were thought to have hygienic, purifying qualities.”

Share on Facebook


[ By WebUrbanist in Technology & Vehicles & Mods. ]

[ WebUrbanist | Archives | Galleries | Privacy | TOS ]


WebUrbanist

 
Comments Off on Floating Finnish Sea Sauna: Relaxing Multistory Steam Boat

Posted in Creativity


5 Tips for a Powerful Picture Every Time

02 May

Play-At-First.jpgYou see plenty of landscape, portrait and commercial photographs every day on the web and in magazines. You can tell by the lighting, staging and seemingly overall perfection of everything in those pictures that days, maybe even weeks of planning were needed to pull of such amazing photographs.

With that much planning, all that is left to do when it is time to take the picture is press the shutter. The photographer behind the lens probably even knew exactly what time she was going to press the shutter. In short, the photographer did everything necessary to prepare for the picture.

But what about the other side of photography?

You have also seen equally powerful pictures that captured something spectacular in the spur of the moment. These are the kind of photographs that you may think you could never plan for because they present themselves with no prior notice or warning.

Van Wreck

Have you ever heard the saying that “luck favors the prepared”? No truer statement could ever be said about photographers and photography.

It’s true that luck can find anyone at any given time, but if you want to be able to pull off amazing photos with just a moment’s notice you need to be as prepared as a studio or commercial. But this approach to photography takes a completely different type of preparation.

Here are five photography tips for a powerful picture every time. These tips will help prepare you to perfectly capture once in a lifetime pictures time and time again.

1. Always have a camera

A prepared photographer needs to have a camera close by at all times. It sounds elementary, but any good top five list is going to start off with the basics first. If you don’t have a camera with you, you will not be able to capture that picture of a bald eagle in your backyard. Without your camera, you are left only with your story of a bald eagle. Odds are you have already have a camera on you or near you right now. Your phone! The first tip in photography preparation; always have your camera (any camera) close by.

Eagle

2. Study light

Photography is all about light (and having a camera). Without light there is no photography. But there is so much more to light than just having it. As a photographer you must become a student of light. What color is the light? How strong is the light? Where is the light coming from? How long until the light changes? Where can you find more light right now?

Cowboy Lights Up

As you move through your day (camera at your side), take the time to notice the light sources around you. If you are in a meeting, look around the conference room. Is there light coming through the window? What kind of lights are in the ceiling? Are there desk lamps? What about the light coming from everyone’s computer screens? Could you open the curtains to let in more light?

By reminding yourself throughout the day to recognize and understand your lighting situation you are learning how to master light rather than have it master you. Then you are on your way to taking better pictures at a moment’s notice.

3. Visualize

While you are studying the light around you take a moment and pretend that you are taking a picture. While in that same theoretical meeting, look across the table at your colleagues. Imagine taking a picture of them. Which side of their face has more lighting? Are they backlit? How would you overcome that? Would your picture be better if you moved across the room? Is there a ray of sunlight that, if you could, you would ask your boss to step into because it would highlight her hair color so well?

By taking the time to play pictures out in your mind you are actually training your mind to think like a photographer. You are preparing your mind to be ready. It’s called visualization and athletes do it all the time. Ever wonder why a golfer takes so long to hit the ball? It’s because he is envisioning his swing, and the ball going where he wants it to go before he hits it.

Photographers and photography are no different. Train your mind by constantly imagining that you are taking a picture.

4. Think ahead

This tip goes hand in glove with tip number 3. You should always be thinking ahead, be it five seconds, five minutes or five hours. To be ready to take a photo at the drop of a hat you have to put yourself in a situation that has yet to happen.

Fire Chief On Truck

It’s like the pre-flight safety instructions you hear before a plane takes off. It does no one any good to get that information when the plane is in distress. Knowing where the exit doors are ahead of time saves lives. Knowing what ISO setting you will need if your kids break out in a song and dance routine for the grandparents can save Christmas.

Always be thinking ahead and absorbing your surroundings to better anticipate action that hasn’t yet taken place. Sports photographers may do this better than anyone. The better they understand how the sport is played the more likely they will be to capture the key moments in a game. A photographer covering a baseball game recognizes that there will be a play at first base and he will instinctively put his focus on the first base bag and wait for the play to get to him.

Play At First

To always be ready to capture a picture at the drop of a hat you have to be a student of life, and a student of movement and moments. Learn to anticipate and not just react.

5. Practice

The final tip is one that combines the other four and that is to practice being ready at all times. It may sound silly, but why do you think golfers, baseball players and airplane pilots practice? So that when it comes time to hit the ball, catch the ball or avoid a crash they have already placed themselves in that situation and performed the needed mind and body movements over and over again. Come game time (or in an emergency) instincts take over.

Luck favors the prepared and trust me, if my plane loses an engine I want a pilot who has already thought through what needs to be done to prevent the plane from crashing. I don’t want him fumbling over buttons and dials trying to figure out how to keep the plane in the air. I want him to instinctively know what must be done to save the plane.

As a practical matter, have a friend change your camera settings so that you have no idea how your aperture, ISO and shutter speed are set. Have your friend point at something (it doesn’t matter what because this is practice).Then quickly grab your camera and adjust your settings to best capture that object. Then, do it again with another object or person or passing car. Take your camera on walks with you and have your friends constantly test your skills. Make a game out of it until you instinctively know what to do.

Men In Dresses

To be ready to take a powerful picture at any moment you literally have to be ready to take a picture at any moment. Keep a camera near you at all times. Be aware of your light because it is always changing. Constantly visualize taking pictures. Always be aware of your surroundings to better anticipate action, and to perfect all of this, practice.

Remember, luck favors the prepared. Luck is not a strategy. Do you have any other tips you’d like to share? Please do so on the comments below.

The post 5 Tips for a Powerful Picture Every Time by Scott Umstattd appeared first on Digital Photography School.


Digital Photography School

 
Comments Off on 5 Tips for a Powerful Picture Every Time

Posted in Photography


1. Mai 2014

02 May

Ein Beitrag von: Lisa-Marie Kaspar

escapism © Lisa-Marie Kaspar


kwerfeldein – Fotografie Magazin | Fotocommunity

 
Comments Off on 1. Mai 2014

Posted in Equipment


Pressy gives your Android phone an extra button

02 May

Screen_Shot_2014-04-30_at_11.41.29_AM.png

The power button and volume rocker are typically the only physical controls you’ll find on a smartphone as almost all functions are accessed via soft-buttons on the touchscreen these days. The Pressy button is a new accessory that adds an additional programmable hard button to your Android device. It slots into your smartphone’s headphone socket and once inserted is hardly visible. Learn more

News: Digital Photography Review (dpreview.com)

 
Comments Off on Pressy gives your Android phone an extra button

Posted in Uncategorized


Eine Hommage an den Wellensittich

01 May

Foodstylistin Anna Keville Joyce hat eine großartige Serie geschaffen, die den liebevollen Namen „A Tribute to Budgie“ (Eine Hommage an den Wellensittich) trägt. Die Serie besteht aus 100 Prozent essbaren Dingen und ist tatsächlich ihrem verlorenen Wellensittich gewittmet. In jedem Bild wurde eine andere Vogelwelt auf einem Teller erschaffen. Ein Flamingo tanzt auf Radieschenscheiben, während eine Eule den Betrachter aus großen Pilz- und Porree-Augen anstarrt.

Beim Anrichten der Elemente achtete Anna auch sehr auf die passenden Farben, Formen und Texturen. Ihre Kompositionen wurden von Fotograf Agustín Nieto zentriert von oben dokumentiert.

Da es sich um Lebensmittel handelt, habe ich nur wenigen Stunden, um die Bilder zu erstellen. Ich beginne immer mit dem Lebensmittel, das (hoffentlich) am längsten hält und arbeite mich dann nach hinten zu den heikelsten durch.

© akj foodstyling,  Agustín Nieto

© akj foodstyling, Agustín Nieto

© akj foodstyling, Agustín Nieto

© akj foodstyling, Agustín Nieto

© akj foodstyling, Agustín Nieto

Anna Keville Joyce ist Food-Stylist und Illustratorin und kommt ursprünglich aus den USA, lebt derzeit jedoch in Buenos Aires. Sie arbeitet für kommerzielle sowie künsterische Fotografie- und Filmaufnahmen. Anna ist auch auf Facebook und Instagram vertreten.


kwerfeldein – Fotografie Magazin | Fotocommunity

 
Comments Off on Eine Hommage an den Wellensittich

Posted in Equipment


Sony announces SLT-A77 II high-end APS-C A-mount fixed-mirror DSLR

01 May

a77-II_w1650_front-1200.png

Sony has announced the SLT-A77 II – its latest enthusiast-grade, APS-C fixed-mirror DSLR. The Mark II features the same pixel count as its three-year-old forebear, but delivers it using a new 24MP sensor. The camera also gains a 79-point autofocus sensor, which it combines with the most sophisticated autofocus system on a Sony camera yet. Other upgrades include the customizable ‘Quick Navi Pro’ function menu but the biggest change is the improved autofocus, which combines with the ability to shoot up to 60 JPEGs at 12 frames per second. The SLT-A77 II will be available this June for $ 1199 body only.

News: Digital Photography Review (dpreview.com)

 
Comments Off on Sony announces SLT-A77 II high-end APS-C A-mount fixed-mirror DSLR

Posted in Uncategorized


DIY: Camera Brooch

01 May
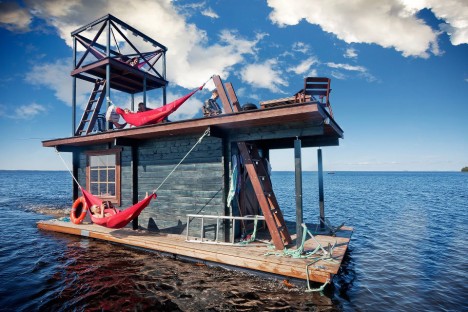
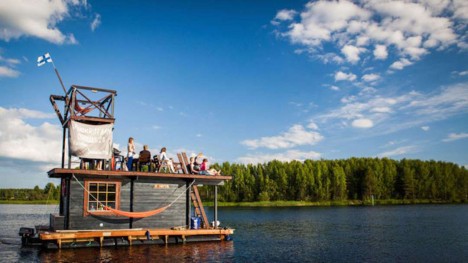
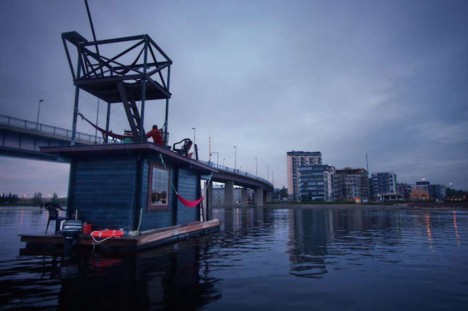
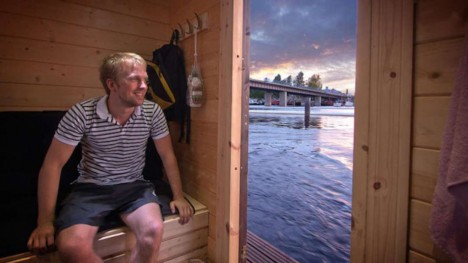
Extra photos for bloggers: 1, 2, 3

Boring Blazer? Tiresome Trench? Stupid Suit?

No need to rush out for a full-on makeover. Give your stale clothes a splash of character with a DIY Camera Brooch.

All it takes are a few supplies and your kindergarden coloring skills.

You’re just twenty minutes away from adding fashionable flair to your wearisome wardrobe.

Learn How to Make a Camera Brooch

(…)
Read the rest of DIY: Camera Brooch (418 words)


© laurel for Photojojo, 2014. |
Permalink |
No comment |
Add to
del.icio.us

Post tags:


Photojojo

 
Comments Off on DIY: Camera Brooch

Posted in Equipment