RSS
 

Archive for February, 2014

Do You Need to Upgrade to the Latest Camera?

21 Feb

Camera-envy is the bane of many photographers. Discussion forums are filled with conversations about the benefits of the latest and greatest camera gear, and our commercial-driven societies fill us with the deep-seated need for more, more, more! But do you really need to upgrade to the latest camera?

By Portrait / Wedding Photographer

What matters more: the camera or the photographer?

This is the question truly at the heart of most photography gear debates: what really matters? Is it the camera or the photographer?

You know what you want the answer to be. When you show someone a favourite picture, you are looking for compliments and congratulations for yourself, not your equipment. You likely don’t post an album on Facebook hoping to get a “Way to buy that new camera!” style of comment. If you compare yourself to a chef and use the analogy that no one would think to praise the frying pan for an excellent meal.

But yet. . .

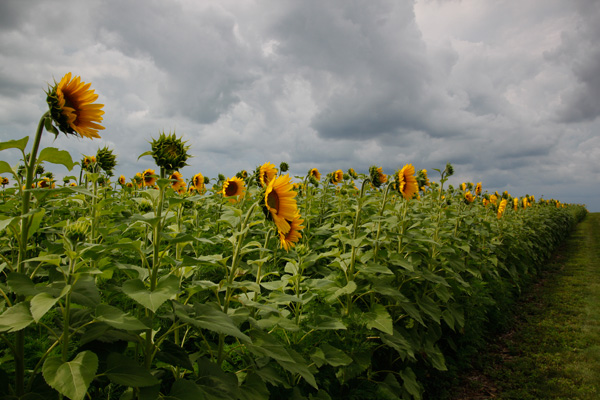
You see the photographs of others and immediately start making excuses. “Oh, well, he has a 400mm zoom lens” or “Well, she has a full frame sensor,” and at the same time we overlook the years of training or the hours of planning that went into that shot or that set-up. You choose not to wake up early or to stay up late and then wonder why your sunrises or sunsets do not have the same pizzazz or punch as another’s. You choose to shoot quickly and move on, rather than staying around, observing, and find that ‘decisive moment.’

sunflowers, field, flowers, nature, clouds, storm, photography, CanonT1i

You are the variable that matters. If you want to take better pictures, there are unlimited steps you should be taking before you worry about upgrading to the latest and greatest. Think about the time and energy that you put in to your photography. Are you truly pushing your camera to its maximum potential?

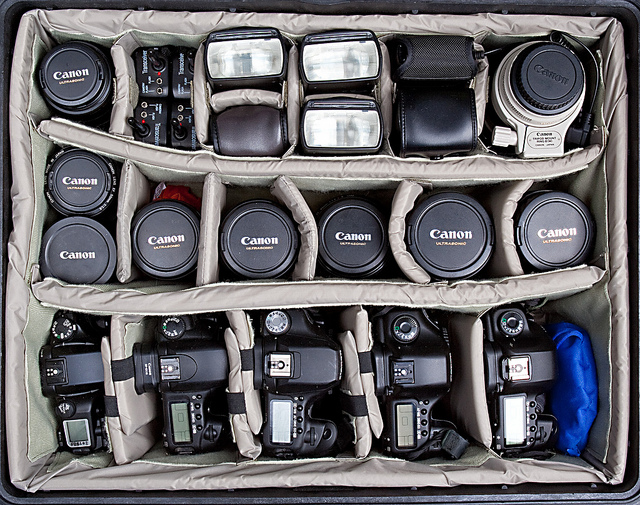
Many of the latest and greatest benefits touted by newer model cameras are those that will rarely be used or exploited by the vast majority of camera owners. 61 compared to 9 possible focal points are not necessarily useful if you consistently use the center point to focus-and-recompose or if you rarely use auto-focus or servo-focusing modes for moving subjects.

water crown, splash, drip, drop, water photography

A faster frame rate of 6 compared to 3 frames per second is useful, perhaps, if you are shooting a rapidly changing subject like a bird in flight or kids jumping into a pool, but you do not need six (or even three) identical photographs of a rock formation or a bouquet of flowers. Ask yourself how often you even shoot in such a burst mode.

You should also think about the strengths and limitations of the current lenses that you own. A fast prime lens can open up a wide-range of new shots and opportunities. If you do not already have at least a 50mm f/1.8 lens, then you have not even begun to explore the potential of your current camera body. Many photographers recommend putting your purchasing power into lenses, especially ones that you can hold on to and use down the line.

What I shoot

Full disclosure, I shoot with a Canon T1i (500D for the European naming system), a camera that went on the market in early 2009 and has since been upgraded four additional times. At nearly a year-old, the current Canon T5i is likely due for an upgrade in the near future: the Canon T5 was just announced February 12th. In many photography circles the T1i would be considered a nearly ‘ancient’ digital model. It is also in the entry-level line of Canon DSLRs, with multiple tiers of both cropped and full-frame sensor cameras above it. All photographs in this post (other than the shots of cameras and gear) and my other articles on dPS, were taken with this camera.

camera, canon, CanonT1i, T1i, photography, rebel, EOS, 500D

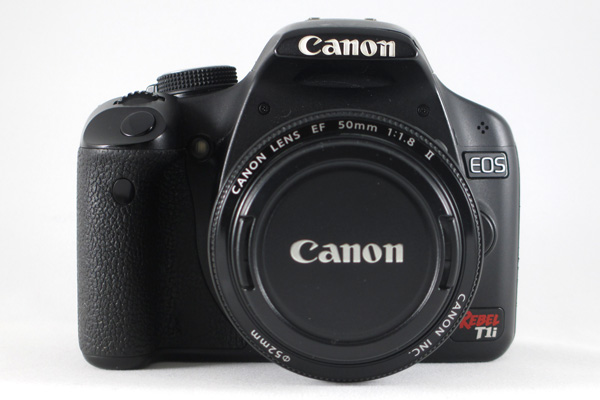
I will readily admit that there are trade-offs and limitations to my camera. I know that I cannot push the ISO very high without introducing significant noise into the final images. I know that my buffer will fill quickly and then stall if I take a series of RAW shots in rapid succession. I know that I cannot adjust my LCD screen or see myself while standing in front of the camera for a selfie. Has that ever negatively impacted a shot that I was trying to take? Not often.

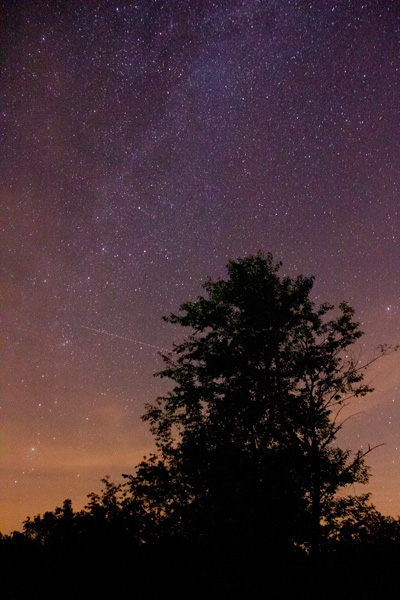
I also know that I can carry a tripod and use it if shooting in low light. I know that I can switch into just JPEG if I am trying to take a hurried sequence of shots. I know that I can use cues from a test shot to figure out how to tweak a self-portrait and use a remote to set the focus when I am in position. I know that 15 MP can look great at web sizes as well as printed on canvas or aluminum and hung on my wall.

What frustrates you about your current camera? Think about whether it is something that you could change or whether it really an issue with your camera.

Milky Way, silhouette, night, star photography, astrophotography, stars

Agree or disagree: will you upgrade your camera?

Are you a frequent camera-upgrader or are you shooting with an “old” digital camera too? Share your constructive thoughts or an example photograph in the comments below.

Some other options to buying more stuff:

  • Start Feeling GOOD About YOUR Photography
  • A Year of Photographic Lessons – Journey of a Novice Photographer
  • 5 Photography Rules Moms [and Dads] Can Ignore

The post Do You Need to Upgrade to the Latest Camera? by Katie McEnaney appeared first on Digital Photography School.


Digital Photography School

 
Comments Off on Do You Need to Upgrade to the Latest Camera?

Posted in Photography


Deep Roots: Underground Farm in London Air-Raid Tunnels

21 Feb

[ By WebUrbanist in Culture & Cuisine & Global. ]

underground tunnel london gardening

100 feet beneath the surface, below even the level of the London Underground, there is another layer of World War Two shelters where something amazing is coming to life.

underground hyrdoponic garden farm

underground farming campaign idea

Richard Ballard and Steven Dring are behind Growing Underground, experimentally introducing hydroponic systems to 2.5 acres of abandoned subterranean passages right in the UK’s capital city.

growing subterranean tunnel space

growing underground urban context

The closed-loop nature of their approach means that weather and environmental factors (like rodents and runoff) are nothing to worry about. There are other advantages of their situation, too: 70% less water is needed to grow below ground, and their agricultural system is self-recycling, low-maintenance, pesticide-free and carbon-neutral.

underground crowdfunding green produce

Their unique and central location means they can provide ultra-local micro-greens to restaurants, wholesalers and retail vendors right above where they grow, all in a matter of hours.

underground vegetable growing hyrdoponics

growing underground package design

Their planned crops so far range from pea shoots and broccoli to garlic chives and mustard leaf, not to mention edible flowers and miniature vegetables. Mushrooms and tomatoes are also on the horizon.

grown underground farming example

growing underground founder pair

From the company: “Because we have total control over their environment, each tiny leaf tastes as amazing as the last and because they are unaffected by the weather and seasonal changes, we can reduce the need to import crops and drastically reduce the food miles for retailers and consumers.”

Share on Facebook


[ By WebUrbanist in Culture & Cuisine & Global. ]

[ WebUrbanist | Archives | Galleries | Privacy | TOS ]


WebUrbanist

 
Comments Off on Deep Roots: Underground Farm in London Air-Raid Tunnels

Posted in Creativity


Touch to Open: Kinetic Doors Unfold Like Life-Sized Origami

21 Feb

[ By WebUrbanist in Design & Furniture & Decor. ]

flip-animated-kinetic-doorw

Made of rubber, metal, glass and wood, these dynamic flip panel doors tackle perhaps the world’s original architectural invention in a series in a fresh, new and interactive fashion.

flip-panel-door-loop

Each member of the Evolution Door set by Austrian artist, designer and builder Klemens Torggler involves a multi-panel contraption the flips open and re-closes in a fantastic feat of kinetic motion.

flip-steel-door-design

The steel version of the door is particularly ingenious as its space-saving method of action. Like its sliding cousins, it avoids the in-and-out motions of a typical doorway to minimize the space you need to set aside in front of or behind it.

klemens toggler glass door

The glass design uses a minimalist framework of structural supports, all of which then disappears entirely into a secret wall space hidden alongside it.

With steel and glass variants in particular, though, viewers are sure to wonder how one avoids getting a finger pinched if they are not paying full attention,  hence this short video regarding benefits of the softest member of the Evolution family.

flip panel door design

Aside from the finger-friendly end result, there is something brilliant in the common approach of these works: each bypasses all positions outside of the binary ones – these doors are either opened or closed between uses, never resting anywhere in between.

Share on Facebook


[ By WebUrbanist in Design & Furniture & Decor. ]

[ WebUrbanist | Archives | Galleries | Privacy | TOS ]


WebUrbanist

 
Comments Off on Touch to Open: Kinetic Doors Unfold Like Life-Sized Origami

Posted in Creativity


20. Februar 2014

20 Feb

Ein Beitrag von: Tom Hegen

Tom Hegen


kwerfeldein – Fotografie Magazin

 
Comments Off on 20. Februar 2014

Posted in Equipment


Landscape Photography and Hyperfocal Distance

20 Feb

Salinas Grandes, Argentina

I can remember when autofocus was relatively new and many photographers distrusted it. Now it’s the other way around – autofocus has become so good and so ubiquitous that manual focus lenses are a rarity. It’s easy to forget that sometimes it’s better to turn it off and use manual focus instead.

A good example of this is when you use a wide-angle lens to take a landscape photo. In this situation, you probably want to record the entire scene as sharply as possible. But how do you do this when the nearest part of the scene may be only centimetres (less than an inch) from your camera?

The answer is that you need to understand depth of field and be willing to take control and decide exactly where you want to focus the lens, rather than leave it up to the camera.

What is depth of field?

Depth of field is the area either side of the point of focus that appears to be sharp. The amount of depth of field depends partly on camera settings (the focal length of the lens and the aperture) and partly upon other factors such as the size of the photo and the eye of viewer. Sharpness is subjective – what might appear to be sharp to one person may not appear so to another. Keep this point in mind as we progress through the article.

Hyperfocal distance diagram

This diagram shows the depth of field when you focus on infinity. You can see that most of the zone of sharpness (another term used to describe the areas that are in focus) extends beyond the point of focus and is effectively wasted.

Depth of field in action

The best way to understand how depth of field works is with a practical example. Imagine that you are using a 24mm lens (or a zoom lens set to 24mm) on an APS-C camera focused on a point exactly one metre (3.3′) from the camera. You want a nice sharp image so you have set the aperture to f/11 (the sharpest aperture settings on most lenses are f/8 and f/11). In this case everything between around 73cm (28.75″) and 157cm (5’1″) will be sharp.

Hyperfocal distance diagram

This is what happens if you focus too closely to the camera. You will get the area around the point of focus sharp, but anything close to the horizon will not be sharp.

In reality, what is happening is that anything one metre (3.3′) from the camera (the point the lens is focused on) is sharp, and then everything either side gradually becomes less so until it reaches the point where it no longer appears to be in focus to the human eye.

Where did I get the above figures from? I used the depth of field calculator at DOF Master and selected EOS 7D as the camera. The camera is important as depth of field as affected by sensor size, as well as lens focal length and aperture.

We have already seen that focusing on infinity effectively wastes depth hyof field. You’ll get a better result using the hyperfocal distance.

What is hyperfocal distance?

The depth of field calculator throws up another figure – the hyperfocal distance. This is the closest point at which you can focus the lens at this focal length and aperture settings, and still keep everything from the focusing point to infinity in focus.

In this example the hyperfocal distance is 2.7m (8’11″). Focus on this point and everything from 1.34 metres (4’5″) to infinity is in focus. That maximizes depth of field and helps you get the entire scene sharp.

Hyperfocal distance diagram

This diagram shows what happens when you focus on the hyperfocal distance. Depth-of-field is maximised, helping you to create a sharp image.

Note that the near focus point (1.34 metres or 4’5″) is half the hyperfocal distance of 2.7 metres (8’11″). This ratio holds true no matter the hyperfocal distance of your lens, aperture and sensor size combination.

Hyperfocal distance in action

The easiest way to use the hyperfocal distance is to print out or photocopy some hyperfocal distance tables to take with you on a shoot (the DOF Master website has tables you can print out here).

Alternatively, there are several smartphone apps that will perform the calculations for you such as these (do a search for DOF or hyperfocal distance, there are plenty of others)

  • Simple DoF
  • DOF Master
  • Tack Sharp
  • DoF Viewer
  • Digital Photo Calculator

Once you have the information, you need a lens with a depth of field scale on the barrel to tell you the distance at which the lens is focused. Many lenses have these, but some don’t (including lots of kit and pancake lenses). Distance scales aren’t precise, so be prepared to work with approximate measurements.

Canon lens with distance scale

An example of a lens with a distance scale.

Canon lens without distance scale

A lens without a distance scale.

If your lens doesn’t have a distance scale, your only option is to guess the distance (or use a tape measure!). Luckily, it’s not hard to guess distances. In the above example, you would know that focussing on a point around 3 metres (approx. 10′) from the camera will maximize depth of field, so it’s not that hard to make a guess.

After you have taken a photo you can double check sharpness by playing it back on the camera’s LCD screen and enlarging it as much as you can. The usefulness of this depends on the clarity and size of your LCD screen, but you should be able to tell if the parts of the scene closest to you are unsharp. You will only really know for sure once you get home and look at the photo on your monitor, but checking the LCD screen reveals any major errors in your calculations.

Given all the variables and potential for mistakes, one way to apply hyperfocal distance is to use the calculations for one aperture setting (e.g. f/8) but set the camera to a smaller aperture (such as f/11). This gives you margin for error.

Notes on using hyperfocal distance

A couple of things to be aware of:

First, the depth of field calculations in this article are based on something called the circle of confusion. This is the maximum size at which an out of focus dot appears to be sharp to the human eye. Circles of confusion are necessary because they form the basis of depth of field calculations. Each camera and lens manufacturer makes its own judgement as to which size circle of confusion they will use for their calculations. That means the figures in depth of field calculations and hyperfocal distance tables vary according to the circle of confusion size the figures are based on.

If you didn’t understand that, don’t worry. This video explains it perfectly:

Second, you will often read that depth of field extends 1/3 in front and 2/3 behind the point being focused on. This isn’t true. Focus on something close to the camera and the split is closer to 50/50. Focus on something far away from the camera and the split may be 10/90. Advice that you should focus 1/3 of the way into the scene to maximize depth of field is well intended, but inaccurate.

More reading on this topic at Getting Landscapes Sharp: Hyperfocal Distances and Aperture Selection


Understanding Lenses ebooks

Understanding Lenses ebooks
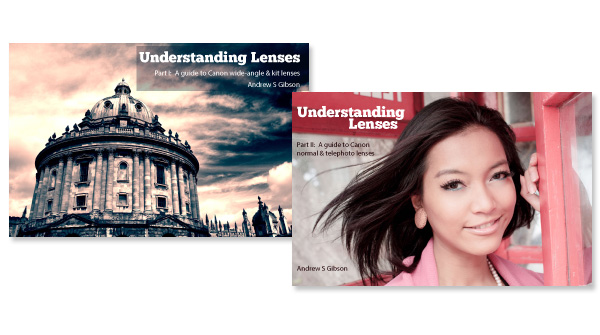
My ebooks Understanding Lenses Part I and Understanding Lenses Part II will help Canon EOS owners decide what lenses to buy for their cameras. They are both filled with lots of tips to getting the most out of your Canon lenses. Click the links to learn more.

The post Landscape Photography and Hyperfocal Distance by Andrew S. Gibson appeared first on Digital Photography School.


Digital Photography School

 
Comments Off on Landscape Photography and Hyperfocal Distance

Posted in Photography


Amazing Little Pocket Portfolio

20 Feb

Extra photos for bloggers: 1, 2, 3

There is something to be said about an object that fits in the palm of your hand.

Small things have that cool ability to be precious while at the same time not taking themselves too seriously.

They are quiet and understated and beg us to take a second look.

We’ve got a handy little tutorial for you that will show you how to easily make a tiny portfolio to showcase your large talent.

Good things come in small packages. Oh, heck yeah they do!

Create Your Very own Pocket Portfolio(…)
Read the rest of Amazing Little Pocket Portfolio (482 words)


© Karla for Photojojo, 2014. |
Permalink |
No comment |
Add to
del.icio.us

Post tags:


Photojojo

 
Comments Off on Amazing Little Pocket Portfolio

Posted in Equipment


Spuren des Handelns

20 Feb

Ein Beitrag von: Florian Thein

„Was fotografierst du eigentlich?“ – die Frage nach dem fotografischen Schaffen ähnelt der Frage nach musikalischen Vorlieben. „Eigentlich alles!“ will man vielleicht vorschnell entgegnen, was jedoch die Gefahr birgt, der Gruppe jener zugeordnet zu werden, denen es egal ist, was sie hören oder fotografieren.

Als es nun darum ging, meine fotografische Motivation in Text zu fassen, war der Auseinandersetzung mit dem eigenen Tun nicht mehr länger aus dem Weg zu gehen. Was fotografiere ich eigentlich? Lässt sich da ein Muster erkennen?

© Florian Thein

© Florian Thein

Was haben eine rosa Elefantenrutsche, eine informelle Siedlung in Usbekistan, skulptural aufgetürmter Sperrmüll, eine technische Wandbeschriftung und eine Straßenkreuzung aus der Vogelperspektive miteinander zu tun? Nur in wenigen meiner Fotos sind Menschen zu sehen oder einzelne Personen zentrales Thema. Man könnte meinen, dass ich an Menschen kein Interesse habe.

Das Gegenteil ist der Fall – was mich jedoch besonders interessiert, sind von Menschen hinterlasse Spuren. Das achtlos weggeworfene Brötchen, ein Autoaufkleber, ein dilettantisch repariertes Objekt, aber auch Architektur, ein Graffiti – all das sind Produkte von Entscheidungsprozessen und Handlungen.

© Florian Thein

© Florian Thein

Auf gewisse Weise sind diese Zeugnisse menschlicher Existenz ehrlicher als ein Portrait, sie zeigen unmittelbar den aktiven Einfluss des handelnden Menschen, des Individuums auf unsere Umwelt. Jede einzelne Handlung folgt einer Motivation, sei sie politisch, idealistisch, hedonistisch oder zufällig – ihre Spur bildet unmittelbar den Wesenszug des Handelnden ab.

Entscheidung und Handlung, ob unbewusst oder bewusst getroffen und ausgeführt, lassen die Umwelt zur gelebten Umwelt mit dem Menschen als Benutzer und Gestalter werden. Treffen Spuren sozialer Akteure verschiedener Herkunft, Bildung, oder mit unterschiedlichem Gestaltungsanspruch aufeinander, entwickelt sich aus der Verdichtung der Handlungsstränge oft eine besondere Ästhetik. Die Summe der individuellen Handlungen bildet letztlich die Beschaffenheit unserer Gesellschaft ab.

© Florian Thein

© Florian Thein

Spuren verfügen über narrative Anhaftungen, ihnen wohnt die Geschichte der Handlung zu einem vergangenen Zeitpunkt inne. Sie weisen unterschiedliche Qualitäten auf und sie sind stetiger Dynamik und Transformation erlegen. Spuren im Raum liegen als Skulpturen des Handelns direkt vor uns, jeden Tag, jede Sekunde – sie wollen nur herausgeschält, herauspräpariert werden.

In diesem Sinne begreife ich Fotografie als eine Art anthropologisches Werkzeug, das es ermöglicht einen Zustand dieser sich permanent fortschreibenden Spuren festzuhalten. Gleichzeitig versucht meine Fotografie oft eine alternative Lesart, indem sie die Bildwirksamkeit im Chaos, die Ästhetik im Unort sucht.

© Florian Thein

© Florian Thein

Stundenlanges Inszenieren, geduldiges Arbeiten mit Stativ, Hochglanzfotografie und ausgefeilte Postproduktion liegen mir nicht, ich fotografiere eher als aufmerksamer Flaneur und lasse mich gern von Situationen überraschen. Die vielbemühte Authentizität sehe ich mit einfachen Mitteln adäquater umgesetzt.

Dennoch versuche ich, möglichst sauber zu arbeiten, das Vorgefundene präzise zu komponieren und die von mir empfundene Besonderheit herauszuarbeiten. Klassische Ordnungsprinzipien bestimmen dabei oft den Bildausschnitt. Ziel ist für mich die gleichwertige Behandlung verschiedener Spuren und ihrer gestalterischen Auswirkung im direkten Kontext.

© Florian Thein© Florian Thein

Wenn das scheinbar Banale etwas Erhabenes bekommt und als Kulturproduktion wahrnehmbar wird, erfüllt das Foto für mich seinen Zweck.


kwerfeldein – Fotografie Magazin

 
Comments Off on Spuren des Handelns

Posted in Equipment


Hands-on with the GoPro Hero 3+ Black Edition

20 Feb

Go-Pro-Hero-3_-1.jpg

GoPro’s latest fleet of little action bricks are fortified with several advanced features that cannot be found elsewhere in the market. The GoPro Hero 3+ Black Edition ($ 399.99) is the newest flagship model, replacing the GoPro Hero 3 by adding some key upgrades. Having owned the first HD Hero and Hero2, our writer Mike Perlman wanted to know if the Black Edition was worth the extra cash. Read our review

News: Digital Photography Review (dpreview.com)

 
Comments Off on Hands-on with the GoPro Hero 3+ Black Edition

Posted in Uncategorized


Architekturfotografie in schwarzweiß

20 Feb

Ein Beitrag von: Martin Schmidt

Als ich im vergangenen Jahr anfing, mich intensiver mit Fine Art in der Architekturfotografie auseinanderzusetzen, war ich total begeistert von den fremdartigen und so eigenständigen Bildstilen derjenigen, die ich als „die Großen“ in diesem Genre ansehe.

Ich wollte auch solche Fotos erschaffen und verschlang alles, was ich im Netz zum Beispiel von Joel Tjintjelaar oder Julia Anna Gospodarou finden konnte.

Kein Video-Tutorial und kein Blog-Eintrag war vor mir sicher. Dies führte dazu, dass ich mich wesentlich intensiver mit Architektur, Fotografie und Bildbearbeitung auseinandersetzte und so vor allem drei Sachen lernte:

1. Welcher Architekturstil interessiert mich und wo finde ich ihn?
2. Wie kann ich die Gebäude fotografieren, so dass die architektonischen Aspekte, die für mich bestimmend sind, auch das Bild bestimmen?
3. Wie kann ich das Foto nachbearbeiten, um diese Aspekte noch stärker zu betonen?

Da der letzte Punkt – die Nachbearbeitung – bestimmt viele vor die Frage „Wie machen die das?“ stellt, möchte ich in diesem Artikel eine kleine Einführung in die Technik geben, die ich mir von „den Großen“ abgeschaut und selbst angeeignet habe.

© Martin Schmidt

Dabei ist mir wichtig, dass nicht der Eindruck entsteht, ich hätte mir all dies selbst ausgedacht – keineswegs! Aber ich denke, dass ich inzwischen einen sehr guten Überblick geben und damit so manchem den Einstieg erleichtern kann.

Denjenigen unter euch, die noch mehr über das Warum und die Inspiration hinter dieser Art von Fotografie wissen und lesen möchten, empfehle ich das Interview mit Julia Anna Gospodarou hier auf kwerfeldein oder diesen kürzlich von mir veröffentlichten Artikel.

Fast alle meiner Architekturfotos sind schwarzweiß und alle Bearbeitungstechniken, um die es im Folgenden gehen soll, beziehen sich dementsprechend auf Schwarzweißfotos.

© Martin Schmidt

Eine wesentliche Eigenschaft guter Schwarzweißfotos ist in meinen Augen, dass ihr Histogramm in möglichst jedem Bereich Grautöne enthält – von tiefem Schwarz bis hin zu echtem Weiß. Oftmals ist es jedoch nicht einfach, dies alles in einer Belichtung zu erreichen, manchmal sogar unmöglich.

Ich habe mir daher die Technik von Joel Tjintjelaar abgeguckt, die folgendermaßen funktioniert: Ich versuche zunächst bereits bei der Aufnahme eine sehr ausgewogene Belichtung zu erreichen. Diese bearbeite ich dann in Lightroom so, dass das Histogramm möglichst alle Werte von 0 bis 255 abdeckt. Dabei achte ich darauf, dass weder die Tiefen absaufen noch die Höhen ausbrennen.

Anschließend erstelle ich mir verschiedene Schwarzweißversionen desselben Fotos. Hierzu verwende ich das NIK-Plugin Silver Efex Pro 2. Meistens werden es drei oder mehr Versionen: Eine extreme High-Key-Version, eine extreme Low-Key-Fassung und zusätzlich einige Zwischenstufen.

© Martin Schmidt

Mit diesen verschiedenen softwaregenerierten Belichtungen desselben Fotos habe ich dann das Rüstzeug beisammen, um das Bild zu erschaffen, das mir anfangs vorschwebte.

In der Schwarzweißfotografie – und insbesondere in der Architekturfotografie – spielen vor allem Kontraste und Grautonverläufe eine wichtige Rolle. Da ich unterschiedlich helle und dunkle Versionen des Fotos habe, kann ich durch entsprechendes Zusammenfügen dieser Versionen an von mir bewusst gewählten Stellen genau die Kontraste und Grautonverläufe erzeugen, die ich im Bild haben will. So erziele ich die gewünschte Bildwirkung.

Das darf natürlich nicht willkürlich geschehen! Am wichtigsten ist, dass man sich bereits bei der Aufnahme überlegt, welche Linien, welche Formen und welche Kontraste im Endergebnis dominieren sollen.

© Martin Schmidt

© Martin Schmidt

Dieses Endergebnis gilt es, jetzt herauszuarbeiten. Aber wie? Hätte man nicht mehrere Belichtungen zur Verfügung, wäre die Standard-Antwort wohl sicher: Mittels Abwedeln und Nachbelichten.

Dies kann aber, gerade wenn man sehr genau arbeiten will, und sehr weiche Verläufe zwischen den Höhen und Tiefen erzielen möchte, extrem zeitaufwändig sein. Joel Tjintjelaar hat daher die von ihm so genannte Technik der selektiven Verlaufsmaskierung (eng.: selective gradient masking, kurz: SGM) entwickelt, mit der es möglich ist, extrem weiche Verläufe durch die Überblendung verschiedener Belichtungen zu erzeugen.

Aber wie geht das genau? Okay, gehen wir Schritt für Schritt vor: Angenommen, wir haben ein Gebäude, das von unten nach oben heller werden soll, damit es an seiner Spitze in einem deutlichen Kontrast zu einem dunklen Himmel steht. Das Auge des Betrachters soll also gezielt an diese Stelle im Bild geführt werden.

© Martin Schmidt

Zunächst erstellen wir uns in einem Bildbearbeitungsprogramm unserer Wahl eine Auswahl des Gebäudes, denn der Verlauf soll ja nicht auf das gesamte Bild, sondern nur auf das Gebäude angewandt werden.

Anschließend erstellen wir zwei Ebenen, wobei die obere Ebene die dunkle Version des Gebäudes und die untere Ebene die helle Version enthält. Für die obere Ebene (dunkle Version) fügen wir jetzt eine leere, also weiße Ebenenmaske hinzu, laden die Auswahl des Gebäudes und klicken auf das Symbol der Ebenenmaske, in die wir gleich zeichnen werden.

Für das Zeichnen in der Ebenenmaske nutzen wir das Verlaufswerkzeug im linearen Modus. Wenn wir jetzt in der Ebenenmaske einen Verlauf von oben nach unten und von Schwarz nach Weiß mit dem Verlaufswerkzeug zeichnen, blenden wir von unten nach oben immer stärker die untere Ebene, also die hellere Version des Gebäudes, ein.

© Martin Schmidt

Diese Technik wendet man natürlich selten auf ein ganzes Gebäude an. Oft hat man sehr viele Auswahlen von bestimmten Teilen des Bauwerkes und arbeitet jeden einzelnen Teil so heraus, wie man ihn darstellen möchte. Dabei ist persönlicher Geschmack und Kreativität gefragt.

Ich hoffe, Ihr konntet einen guten Überblick kriegen, wie die SGM-Technik funktioniert, mit der ich schwarzweiße Architekturfotos bearbeite. Wer an einem noch tieferen Einblick anhand anschaulicher Beispiele interessiert ist, dem empfehle ich die Video-Masterclass von Joel Tjintjelaar, in der er die von mir kurz skizzierten Techniken ausführlich vorstellt und demonstriert.


kwerfeldein – Fotografie Magazin

 
Comments Off on Architekturfotografie in schwarzweiß

Posted in Equipment


5 Easy Photoshop Tips for Beginners

20 Feb

Photoshop CC iconPhotoshop has changed the way we transform our imagination. If you are into any digital workplace, learning Photoshop can be a great help. Photoshop today is certainly a centre of creativity to which almost every digital domain; from web designing to animation; from photography to digital magazine, is deeply connected. Today, when it comes to photography, it is not possible to imagine it without Photoshop.

Good Photoshop skills can’t make a mediocre picture perfect unless you are into manipulation. However, it can certainly help you to enhance your best photo into an amazing masterpiece. Learning Photoshop is a slow process, and you should try it with enough practice, after all it is a digital art.

In this article I will walk you through some basic Photoshop retouching skills. These 5 easy Photoshop tips for beginners will be a great start to learning to proces your photographs.

1. Learning Keyboard Shortcuts

Learning keyboard shortcuts will help you to speed up your processing workflow. There are few key shortcuts for different tools in the tool bar. A few of the most widely used shortcuts are:

Photoshop keyboard shortcuts

  • V = move tool
  • F – toggles through display screen modes
  • Space bar = temporary hand key
  • B – paintbrush tool
  • D – sets the foreground/background colorss to default
  • X – swaps between background and foreground color
  • E – eraser tool
  • S – stamp or cloning tool
  • W – quick selection tool
  • Ctrl+j – duplicates the selected layer

There are just few of the most regularly used Photoshop shortcuts. When you start using the program more, your knowledge of shortcuts will gradually increase. Once you are aware of the most used shortcuts retouching pace will be faster than ever.

2. Color Enhancing – Saturation versus Vibrance

Photoshop tips vibrance

Color is another domain you can try while enhancing your photographs. Generally when you are beginning in photography, enhancing the color of every image looks good, as if the colors are speaking out of the photographs. It will be lot more helpful if you can understand the difference between how saturation and vibrance works. Go to Image menu and choose Adjustment under the menu

As shown in the image to the right, select the Vibrance option. You will get two options under the menu – Vibrance and Saturation. Vibrance increases the saturation of less saturated colors. This option avoids yellow and orange skin tones. Basically vibrance works best for portraits.

Photoshop tips saturation color adjustments

On the other hand, saturation increases the intensity of all the colors in your image equally. This may not be a good option for portraits or peoples photos. What I can recommend is this: slowly start with vibrance for the color enhancement and use saturation later if you want to pump up the color more.

If you compare the two photos below, you will understand how vibrance is only responsible for increasing the intensity of less saturated colors, where as saturation increases the intensity of all colors equally.

Photoshop vibrance adjustment

Photoshop saturtation adjustment

3. Adding a Vignette

Photoshop vignette

Vignetting is basically a technique to darken the edges of your frame so that the eyes move to the subject more easily. This procedure works best when you have a subject in the center. Our eyes tend to move towards the brighter part of the image and recede on the darker side. This technique will result in dark space around the subject.

There are lots of manual ways you can add vignetting in your photos but I will talk about how to easily add vignetting in your images via Photoshop. Go to Filters Menu at the top and select “Lens Correction”, then choose the Custom Tab on the right. The third section down is for adding a vignette. Slide the Amount to the left to darken, and Midpoint to adjust the size of the circle.

Photoshop tips vibrance Photoshop tips vignetting

4. Adding Sharpness and Details

Photoshop filter lens correction vignette

Adding sharpness is another technique for beginners in Photoshop. This will make your image look more detailed. I would suggest detailing most of your images with appropriate values. But make sure you sharpen, or detail your images with a small value if you are going to upload images on Facebook because it compresses the images and adds some detail to make it took a bit sharper. So when an already sharpened image is uploaded in Facebook, there is a change of it looking too edgy.

Like any other technique, there are many ways you can add details in Photoshop. I will show you a very simple technique. Once you understand how this works you can experiment with some of the other techniques.

  • Photoshop high pass filterStep 1. Duplicate the selected layer with a keyboard shortcut Ctrl+J (PC) or Command+J oP MAC
  • Step 2. Open the High Pass filter: Filter > Other > High Pass on the top layer
  • Step 3. Apply an appropriate value (just to see the edges in the image) and click Okay
  • Step 4. Change the blending mode of the top layer to Overlay
  • Step 5. Adjust the opacity of that layer to your taste
Photoshop-tips-layer-blend-mode

Layer blend mode

5. Photoshop Filter Gallery

Photoshop tips filters

Filters are basically automated effects that you apply to your images with a few clicks. Filters can help you to achieve certain special effects or looks. There are various filters in Photoshop, which you can pick individually, each filter results in different effect when applied to different images. You an also apply more than one and stack them. Though I don’t use filters much, it’s good to explore if you are just starting out in Photoshop. Later, when you are more familiar with advanced tools and techniques you can try to create the similar effect from manual options and controls.

To apply a filter select the layer and go to Filter > Filter Gallery. Before you apply any filter in the gallery make sure to change your image to 8 bit. You can do that by going to Image > Mode > 8 bits/channel

Photoshop filter gallery

I hope these 5 basic Photoshop tips will help you to retouch and enhance your photos. If you have others suitable for beginners please share in the comments below.

For further reading on Photoshop head to:

  • Photoshop Tips
  • Photoshop “blend if” feature
  • 18 Useful Photoshop shortcuts
  • How to replace a face in 6 easy steps

The post 5 Easy Photoshop Tips for Beginners by Anup Ghimire appeared first on Digital Photography School.


Digital Photography School

 
Comments Off on 5 Easy Photoshop Tips for Beginners

Posted in Photography