RSS
 

Archive for June, 2013

Berlin Foto Festival features smartphone images in Berlinstagram exhibit

14 Jun

berlinstagram.png

The Berlin Foto Festival is again highlighting mobile photography at this year’s show. A new exhibition, Berlinstagram, features the work of Berlin smartphone photographer and prolific Instagrammer Michael Schulz. Schulz uses a smartphone to capture both the street scenes and architectural structure of Germany’s capital city. See more of his striking photos on connect.dpreview.com.

News: Digital Photography Review (dpreview.com)

 
Comments Off on Berlin Foto Festival features smartphone images in Berlinstagram exhibit

Posted in Uncategorized


Understanding Evaluative Metering on Your EOS Camera

14 Jun

01

Photo by Flickr user MiNe

By Andrew S. Gibson – the author of Understanding Exposure: Perfect Exposure on Your EOS Camera (currently 36% off at SnapnDeals).

Imagine that it is early 1959. Alaska has just been admitted as the 49th state in the USA. Fidel Castro has become premier of Cuba. Elvis Presley and Buddy Holly are in the charts. And Canon releases the Flex – its first SLR camera in a time when only eight other SLR camera models were in existence.

The Flex (pictured above) was so basic by today’s standards that it didn’t even have a built-in light meter. Instead, it used an external selenium photocell coupled to the shutter speed dial for metering. Most photographers back then used external light meters and dialled the exposure settings into their cameras, so I guess to some folk even this primitive system seemed like magic.

The first Canon camera with through-the-lens (TTL) metering came in 1965. The Pellix had just one way of reading light levels – a 12% spot meter in the centre of the viewfinder.

Centre-weighted averaging came along later and served photographers well until the evaluative metering system we are familiar with today was invented in the late eighties.

Evaluative metering arrives

The first Canon camera to feature evaluative metering was the EOS 650, released in March 1987. It was also the first Canon camera to use the newly designed EOS mount.

The EOS 650 had a six zone evaluative metering mode. Evaluative metering has come a long way since then, and now most EOS cameras use a 63 zone metering system and advanced micro-processors to analyse the information gathered.

02

The auto exposure sensor from the EOS 60D. Note the grid of seven by nine black squares in the centre. These are the 63 metering zones of the EOS 60D’s iFCL evaluative metering system.

Understanding evaluative metering

Evaluative metering is the most sophisticated metering mode on your EOS camera. As it is the one you are most likely to use at any time, it’s useful to know how it works. Indeed, if you use your EOS camera in any fully automatic mode, it is the only metering mode the camera lets you use. You can only switch to one of the others in Program, Shutter Priority, Aperture Priority or Manual modes.

Other metering modes

Most EOS cameras have four metering modes: evaluative, partial, spot and centre-weighted metering (One series cameras also have multi-spot metering).

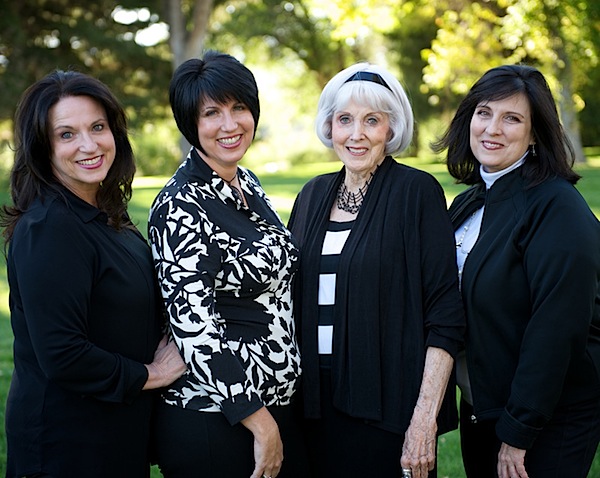
Partial, spot and centre-weighted metering all have a single characteristic in common – they take an exposure reading from the centre of the viewfinder.

03

This is fine if, as in the photo above, that’s where your main subject is.

04

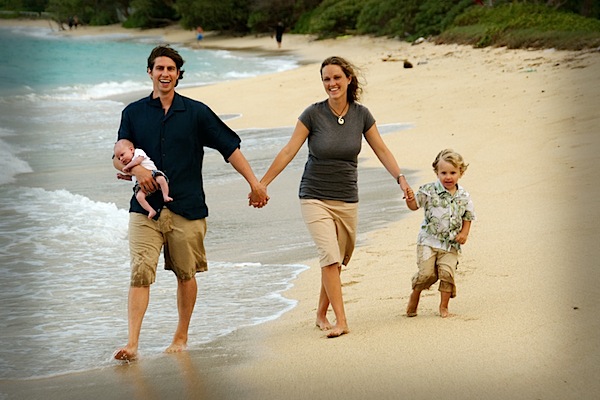
But if your subject is off-centre, like in this portrait, you have to point the centre of the viewfinder at your subject, press the shutter button half-way to lock in the exposure setting, then recompose. This is bit of a pain to say the least and wastes time.

Evaluative metering was developed as a way of accurately metering off-centre subjects. It works by dividing the viewfinder into zones, each giving a separate reading that the camera analyses to calculate exposure. It also co-operates with your camera’s autofocus system. The reading is weighted towards the active autofocus point on the basis that it is most likely to be covering the main subject.

05

This is the 35 zone evaluative metering pattern used on the EOS 300D, 350D, 400D, 450D, 500D, 1000D, 10D, 20D, 30D, 40D, 50D, 5D and 5D Mark II. Note how each AF point occupies a different square.

iFCL evaluative metering

Canon introduced Intelligent Focus, Colour and Luminance (iFCL) evaluative metering on the EOS 7D. It has been included on every new EOS camera since then (excluding One series models).

The premise behind this new system is that exposure meters that react to the brightness of the subject only are more sensitive to the red light than the human eye. They may think that a red coloured subject is brighter than it really is and return a false reading that underexposes the subject.

06

To counter this, the exposure meter used by iFCL evaluative metering has two layers. The top one is sensitive to green and blue light and the bottom one to green and red. Each layer measures the colours that it is sensitive to and the camera combines the readings to calculate exposure settings.

In addition, iFCL metering uses information from multiple autofocus points. It knows which AF points have achieved focus, and which ones have nearly achieved focus, and weights the exposure reading towards the zones those AF points are in on the basis they are likely to be covering the subject.

07

The 63 zone evaluative metering pattern used by the EOS 100D, 550D, 600D, 650D, 700D, 750D, 1100D, 60D, 7D and 6D. All but the last two models use the 9 point AF pattern in the diagram.

Evaluative metering and Speedlites

Evaluative metering really comes into it’s own when used in conjunction with a portable Speedlite flash unit. It is important that the camera meters the light reflected from the subject in order to accurately calculate the exposure required from the flash. Centre-weighted, spot or partial metering can only do this if the subject is in the centre of the frame. Evaluative metering can cope regardless of which part of the frame the subject occupies.

Understanding Exposure

08

That’s a brief overview of how evaluative metering works on your EOS camera. Hopefully it helps you understand how your camera’s metering system works and will help you take better exposed photos.

If you’d like to learn more about how exposure works on your EOS camera my ebook Understanding Exposure is available on special now over at Snapndeals.

Post originally from: Digital Photography Tips.

Check out our more Photography Tips at Photography Tips for Beginners, Portrait Photography Tips and Wedding Photography Tips.

Understanding Evaluative Metering on Your EOS Camera


Digital Photography School

 
Comments Off on Understanding Evaluative Metering on Your EOS Camera

Posted in Photography


Sky Park: Design Idea Floats City Block Over Penn Station

13 Jun

[ By WebUrbanist in Architecture & Public & Institutional. ]

sky park penn station

Out of four recent proposals for a radical overhaul of Penn Station in New York City, this concept by Skidmore, Owings & Merrill LLP is far and away the most dramatic – and arguably the most inspiring as well.

sky park new york

Drawing on the success of The High Line, an elevated park in the same city, this project solution from SOM proposes lifting city life to new heights and integrating a new version of Madison Square Garden, boldly suspended in midair.

sky park section slice

Below, the main station itself sits as a dome over the underground transit hub. Meanwhile, the mega-block is anchored by towers at its four corners, with offices occupying the lower floors and residential stories above.

sky park from below

On the one hand, this multi-layered result consolidates central activities around a newly-refocused core. On the other, it opens up shared green park space on a series of levels, blending intentionality with optionality.

sky park som diagrams

While conceptually simple, the design is … challenging from an engineering standpoint, to put it mildly, and more idealistic than realistic at this point. Hanging so much structure over such a distance stretches the limits of the imagination, but that practical weakness is also the visionary strength of the proposal, for better and worse.

Share on Facebook


[ By WebUrbanist in Architecture & Public & Institutional. ]

[ WebUrbanist | Archives | Galleries | Privacy | TOS ]


WebUrbanist

 
Comments Off on Sky Park: Design Idea Floats City Block Over Penn Station

Posted in Creativity


The Latest in Photo App Hacks — An App That Teaches Your Cat Photography & More!

13 Jun

Late at night, we slide on our headphones and furiously type a succession of zeros and ones.

It’s by the end of the first Prodigy track that we realize we have absolutely no idea what we’re doing.

That’s why we leave the hacking to the hackers. Just a couple days ago, Photo Hack Day 2013 brought the best of them to a 24-hour hackathon in Berlin.

Last time, we told you all about Helmut, the fastest film scanner in the world, before it was even released.

In this edition, you’ll find out about all the raddest new photo apps thought up by clever young developers.

We’re talking apps that’ll teach your cat to shoot selfies and apps that turn your photos into spectacular light shows. Hackers were cool in 1995, but we think they’re even cooler in 2013!

The Best from Photo Hack Day 2013

p.s. Our pals at Inkling (they make rad photography how-to eBooks) are dropping knowledge with a free chapter on any topic you dig. Check ‘em out here.(…)
Read the rest of The Latest in Photo App Hacks — An App That Teaches Your Cat Photography & More! (672 words)


© lisbeth for Photojojo, 2013. |
Permalink |
No comment |
Add to
del.icio.us

Post tags:


Photojojo

 
Comments Off on The Latest in Photo App Hacks — An App That Teaches Your Cat Photography & More!

Posted in Equipment


Samyang announces 16mm f/2.0 and 300mm f/6.3 Reflex lenses

13 Jun

16mm-thumb1.png

Samyang has announced two manual focus lenses for cameras with APS-C or Four Thirds type sensors, a 16mm f/2.0 wideangle for SLRs and mirrorless, and a 300mm f/6.3 for mirrorless. The 16mm f/2.0 ED AS UMC CS offers a 24mm-equivalent angle of view with an unusually bright maximum aperture, and comes in a wide range of mounts to fit almost every brand of camera. Its RRP is €395, or €435 for the Nikon mount ‘AE’ version. Meanwhile the Reflex 300mm f/6.3 ED UMC CS is a compact catadioptric or ‘mirror’ lens to fit Micro Four Thirds, Canon, Sony and Fujifilm models, and comes in a choice of silver or black for €259. Both will be available in July.

News: Digital Photography Review (dpreview.com)

 
Comments Off on Samyang announces 16mm f/2.0 and 300mm f/6.3 Reflex lenses

Posted in Uncategorized


13. Juni 2013

13 Jun

Ein Beitrag von: Felix Pacholleck

Peppermints-©--Felix-Pacholleck


kwerfeldein – Fotografie Magazin

 
Comments Off on 13. Juni 2013

Posted in Equipment


Kreativ-Neurose

13 Jun

Ich bin kein weißes Blatt Papier, so wie jenes, das gerade vor mir liegt und auf dem sich ganz zaghaft Worte bilden. Es gibt aber manchmal Momente, in denen wünschte ich mir das. Innerlich komplett weiß zu sein und dann einen Stift zu nehmen und anzufangen.

Meine Welt aber ist gefüllt. An den Moment, als alles noch weiß in mir war, erinnere ich mich nicht. Und das ist auch gut so. Ich bin angefüllt mit Gedanken, die nicht immer ordentlich nebeneinander liegen. Mit meinen Händen versuche ich oft das, was nicht in Worte zu fassen ist, festzuhalten – mit meiner Kamera.

Und weil ich eine Kamera habe und weil man oft nach Orten sucht, an denen es Gleichgesinnte gibt, kenne ich jetzt einen Haufen Fotografen. Anfangs ist das noch toll. Da hilft man sich gegenseitig oder steht zusammen in der Dunkelkammer. Bringt sich unterschiedliche Sachen bei, lernt vom anderen. Wenn man dann fast alles kann und seine Richtung gefunden hat, verdichtet sich plötzlich alles.

Ich lasse mich gern inspirieren, nicht ausschließlich von Fotografen, aber eben auch. Manchmal sammle ich zu einem Thema verschiedene Bilder, weil ich an einer bestimmten Serie arbeite. Man nennt das bei den Kreativen auch gern „Moodboard“. Ist was ganz Normales. Ja.

Aber letztens packte mich die Kreativ-Neurose bzw. -Depression. Ich konnte plötzlich nicht mehr fotografieren. Alles, was mir vorschwebte, alles, was ich dachte zu beginnen, braute sich zu einem übel stinkenden Brei zusammen.

Da saß ich nun mit meiner Neurose und sagte ihr erst einmal nett guten Tag, fragte höflich, was das denn jetzt solle, ob wir nur einen Tee zusammen trinken oder sie gedenke, länger zu bleiben.

Sie blieb zwei Wochen. Es waren für mich die schlimmsten. Alles, was ich sah, wurde bewertet, ob Arbeiten im Netz oder Arbeiten von Freunden. Das alles im meinem Kopf gab es schon, war schon verbildlicht.

Woher kam diese Neurose nur? Hatte ich zu viele Bilder gesehen? Warum dachte ich in allem, was ich anpackte, nur eine Kopie von einer Sache zu sehen? Und ja, ich hatte auch Angst vor Plagiatsvorwürfen, denn diese findet man zu Hauf im Netz und das fängt schon bei ganz kleinen Dingen an. Da liegt die Haarsträhne zufällig genauso wie bei einem anderen Bild oder es wurde eine ähnliche Technik benutzt oder ganz ähnliche Materialien.

Die Einzigartigkeit kannst Du Dir gleich mal aus Deinem Köpfchen kratzen, dachte ich mir. Das war der erste Paukenschlag, den ich der Neurose um die Ohren pfefferte. Der zweite folgte auf dem Fuße, denn es muss nicht immer sofort ein unglaublich tolles Werk aus meinen Händen fließen für das mir ein Kunstsammler vor die Füße fällt. Ich kann auch einfach machen, stehe nicht unter Erfolgsdruck und wenn auf einem Film mal nix ist, dann ist da halt nix.

Ich legte also alles erst einmal schön zur Seite, denn so konnte das ja nicht weitergehen. Ich fing an, zu schreiben und zu zeichnen. Das lockerte das Nervenkostüm schon einmal erheblich. Ich fing auch an, leckere Kekse und Kuchen zu backen, meine Wand erhielt in dieser Zeit einen neuen, taubengraublauen Anstrich und ein paar Pflänzchen machten sich auch ganz gut auf der Loggia.

Nach zwei Wochen war dann der Spuk vorbei. Ich füllte die Kowa mit einem Rollfilm, spannte ihn und freute mich über das säuselnde Geräusch. Ich legte auch ein paar Materialien zurecht, mit denen ich arbeiten wollte und freute mich über den Menschen, der da neben mir stand und Lust hatte, ein bisschen mehr in meine Welt einzudringen.

Was auf dem Film ist, verrate ich Euch natürlich nicht. Meine Bilder verschwinden jetzt immer in einem schwarzen Kasten mit Datum, der verschlossen wird. Damit Plagiatsvorwürfe erst gar nicht entstehen können.

Scherz.


kwerfeldein – Fotografie Magazin

 
Comments Off on Kreativ-Neurose

Posted in Equipment


Family Portraits Dos and Don’ts

13 Jun

Pin Itfamily-portraits.jpg

For a photographer, skills in family portraits are are essential and are usually the bread and butter for up and coming photographers. Looking at the history of photography, one of the first popular uses the camera was not for abstract art, or photographing the family pet, but for photographing people and their families. Because of the expense and difficulty of each photo taken, they became masters at getting things right the first time and being able to fit in as many people as possible into the frame. In order to hone in on the small things that make a difference in this classic and often overlooked form of photography, I have come up with my five DOs and five DONT’s of Family Portraits. I’ve also included a few examples from portrait sessions we have done.

Family Portraits DOs

1) Do squish your groups together

Most likely, even though they are family they won’t be getting close enough. Maybe it’s an American personal space thing, but it’s always been an issue for me and having everyone in tight truly makes a difference in the tone of the picture. When families are physically close, it emits a warmth and visually shows what families should be like…close. Even if you are photographing the Adam’s family, when you get everyone rubbing shoulders they look like a model family and the overall composition is more finished than a typical snapshot. As a starter, try having people stand at slight angles with shoulders overlapping. Also, consider the age of your family. If Grandma is present, make sure you have a chair for her. If grandma and grandpa are both there, you’ll will need two chairs.

family-portraiture.jpg

2) Do coordinate clothing

Before you meet with your family you should guide them in a wardrobe choice. Ultimately it is up to them and their families style to choose what they wear but simply reminding them to possibly overlap in a color scheme, avoid extreme colors, prints and logos on their clothing can make a big difference. This will give you an easier time post production, and you will have both options in color and black and white. As I said, it’s their picture and their choice, but a casual recommendation from a professional is usually appreciated.

3) Do check the screen for blinking

Shooting and shooting is OK for one or two people, but in a larger group it can be hit and miss and you may miss that one photo where everyone has their eyes open. I used to think “Hey, its digital. I’ll use the rapid fire method and surely I’ll get one right.” After a few sessions of transplanting eyes from one photo to another in Photoshop, I’ve changed my methods. You can get away with a weak smile but if someone looks like they are sleeping or on drugs in their first family portrait in 10 years, the customer may not be too happy. With experience you learn to quickly scan across everyone’s eyes in an instant.

4) Try and be funny to get some genuine smiles

A few cheesy jokes work surprisingly well to break the tension. A typical photographer joke might be saying “Ok, I need everyone to get in focus.” Or asking everyone to strike their best glamor pose. Other ways to get a smile is to get them doing something they don’t normally do. Have them try jumping, running, human pyramids or whatever comes to mind. If you have a one-liner you’ve used SUCCESSFULLY, or a creative and fun pose, sound off in the comments for the rest of us.

family-portraits.jpg

5.) Do try and blur the background

Choose the largest aperture setting you can, while still keeping everyone sharp. An aperture of 2.8 might make the trees and shrubbery look silky smooth, but it might make Uncle Bob at the end of the line look fuzzy. This is especially a problem when everyone is standing on different focal planes. The solution is often to shoot a few clicks smaller than the lenses widest aperture, then use the preview screen and zoom button on your camera to make sure everyone is looking good. Then adjust and continue. If you’re really serious about this, I’ve even heard of photographers setting out cups length-wise on a picnic table to estimate the distances you start to loose focus. Seems extreme to me, just don’t forget about Uncle Bob.

family-portrait-tiops.jpg

Family Portraits DON’TS

1.) Don’t forget to check ALL your basic camera settings before clicking away

ISO (go as low as possible), Image Size (RAW, fine), Exposure Compensation, Metering etc. It would be sad to get to the end of a great session and realize you didn’t change the low quality settings from the last time you used your camera shooting Garbage Pal Kids you planned on selling on Ebay. Of course in-door and out-door settings will differ as will naturally lit an artificially lit.

2.) Don’t let your subjects tilt their heads into each other

This is fine for your everyday Joe at the family Bar-b-que, but not a paid photographer. Subjects tend to think they will fit into the picture better if they tilt and lower their heads. Funny thing is, I’ve even caught myself doing this when I was being photographed. Watch for it and avoid it. There is always the lovey-dovey pose where they intentionally lean heads in, but that’s not what I’m talking about.

3.) Don’t sound insecure

Don’t say things like “This isn’t working.” Rephrase it into a positive, “Great, lets try a few more positions.” The more you tell them the pictures are looking great the better looking the pictures will get. Think high fashion cliche’s like, “Love it,” “Your beautiful,” “What a great one.” If you act like you have never seen such great photos the energy will give you just what your looking for and they will show confidence in their smiles.

family-portraits-tips.jpg

4/5.) These last two may seem to contradict each other so I want to put them together. 4.) Don’t let Mom run the show. 5.) Don’t be afraid to let Mom, Dad, and kids come up with ideas and posing.

First about Mom. We all remember the drill, no running, no jumping, no dirt, and pretty much no fun until after the pictures. If you do this you can get a treat on the way home. This is probably the best way to ruin family picture day for the rest of every 8 year old’s life. Besides the fact that it is almost impossible to control what 8 year old’s do, it makes for bad portrait sessions. If you are sensing a strong arm from Mother, make sure to get the squeaky clean formals done right off the bat. They are easy and traditional. After that let mom know that you’ve got it covered and now you want to have fun with the kids. Let them be kids, let them wrestle and play and capture them at their best. Once in awhile you will find families that are more relaxed. They may have seen fun family photos of their friends and want do do some in a similar fashion. Take their suggestions without letting them think you have none of your own and work them in. Often they will turn out great and they’ll feel like they had a little more to do with the pictures than just a pretty face.

Pin It

Post originally from: Digital Photography Tips.

Check out our more Photography Tips at Photography Tips for Beginners, Portrait Photography Tips and Wedding Photography Tips.

Family Portraits Dos and Don’ts


Digital Photography School

 
Comments Off on Family Portraits Dos and Don’ts

Posted in Photography


Floating Egg-Shaped Office is a Self-Sustaining Work Space

13 Jun

[ By Steph in Architecture & Offices & Commercial. ]

Egg Shaped Mobile Office 1

A highly unusual houseboat bobs on the surface of the River Beaulieu in Hampshire, UK. ‘Exbury Egg‘ is a floating, mobile live-in laboratory used to study the wildlife of the estuary. Made of cedar using traditional boat-building techniques, this egg-shaped office includes a hammock, a desk, a stove and a bathroom.

Egg Shaped Mobile OFfice 2

Egg Shaped Mobile Office 4

Artist Stephen Turner collaborated with Perring Architecture & Design to develop the concept for the office and bring it to life. Measuring 6×3 meters (about 10×20 feet), the Exbury Egg is just large enough to house the necessary functions, including integral storage and display areas.

Egg Shaped Mobile Office 3

The egg is constructed mostly from reused and reclaimed cedar and other local, often scavenged materials. While the exterior is laminated, it will be allowed to take on a natural patina over time from exposure to sun and water. It is anchored to the shore, and rises and falls with the tide.

Egg Shaped Mobile Office 5

Turner intends to stay within the egg as he immerses himself in the natural setting, observing the cycles and processes that keep the estuary healthy. “The artwork created will stem from Stephen’s occupation, developing through direct experience an understanding of local natural cycles and processes and the relationship of the environment to the narratives of human activity in the unending calendar of seasonal life,” says the design team.

Share on Facebook


[ By Steph in Architecture & Offices & Commercial. ]

[ WebUrbanist | Archives | Galleries | Privacy | TOS ]


WebUrbanist

 
Comments Off on Floating Egg-Shaped Office is a Self-Sustaining Work Space

Posted in Creativity


12. Juni 2013

13 Jun

Ein Beitrag von: Joern Stubbe

Mach mir mal den Ballotelli © Joern Stubbe


kwerfeldein – Fotografie Magazin

 
Comments Off on 12. Juni 2013

Posted in Equipment