RSS
 

Archive for March, 2013

Tokina to ship 12-28mm F4 DX lens in April 2013

15 Mar

tokina_12_28dx.png

Tokina has announced it will be shipping the AT-X 12-28 F4 PRO DX lens from April 2013 in Nikon mount, and June 2013 for the Canon version. Announced at the CP+ tradeshow, the lens is a replacement for the company’s existing 12-24mm F4 wideangle zoom for APS-C cameras. But rather than making the lens wider to match its competitors, Tokina has chosen to extend it further into the ‘normal’ range, to give an 18-42mm equivalent zoom. The Japanese RRP of ¥90,000 is the same as that for the existing AT-X Pro DX 12-24mm F4 II lens. (via DCWatch)

News: Digital Photography Review (dpreview.com)

 
Comments Off on Tokina to ship 12-28mm F4 DX lens in April 2013

Posted in Uncategorized


15 March, 2013 – The Story of The Phase One IQ260 Sensor

15 Mar

The just-announced Phase One IQ260’s sensor is a breakthrough in long exposure capability. Doug Peterson of Digital Transitions has just written an in-depth look at what went into designing a 60MP sensor capable of up to 1 hour exposures.

 Don’t forget our "win-an-iPad
with all our software included" contest.

Win a New 128GB iPad with Retina Display
Including all Major Luminous Landscape Videos
– Pre-Installed –

Find Out More 


The Luminous Landscape – What’s New

 
Comments Off on 15 March, 2013 – The Story of The Phase One IQ260 Sensor

Posted in News


Hands-on with the Samsung Galaxy S4 smartphone

15 Mar

samsunggalaxys4.png

We had a close look at the the much-anticipated Samsung Galaxy S4 smartphone at the New York launch event and have put together a brief hands-on report detailing the device’s overall design and software features. We’ll be updating our story shortly with information about the S4’s 13MP camera and photographic features. Read about our first impressions at connect.dpreview.com

News: Digital Photography Review (dpreview.com)

 
Comments Off on Hands-on with the Samsung Galaxy S4 smartphone

Posted in Uncategorized


Tentsile: Extreme Travel Tree Tents Hang Like Hammocks

15 Mar

[ By WebUrbanist in Global & Travel & Places. ]

tentsile hanging hammock tent

Hikers and campers have long been used to hanging food packs out of reach of bears and scavengers, but these tensile treehouse shelters take things a few steps further, allowing you to loft your entire portable residence amid any forest.

tentsile three legged tent

No more worrying about the weather or extreme landscapes like muddy swamps and desert sands. “Due to the unique design, the tent provides a level trampoline style floor in any terrain or inclination. It’s elevated position does away with the need to clear the site of foliage and provides separation from flood, sand storms, earth tremors, cold and lumpy ground as well as offering increased protection from wildlife, including insects, snakes and other predators.”

tentsile deployment models options

In theory, you could suspend these off the sides of cliffs or hover them above lands and streams since (setup, entry and exit excepted) the ground conditions are irrelevant. Tentsile describes their product line as being “the world’s most versatile tents. Whether you are looking for an all terrain camping solution, a safari safe house, a mountain or beach retreat, or a portable treehouse that avoids all planning restrictions, with Tentsile the sky really is the only limit.”

tentsile night setup detail

The various models have side and bottom entries in various configurations, with sleeping sections along the spokes and a central communal area familiar from many typical tents. Like a three-legged stool, the frame is held in tension from three points and is thus essentially self-balancing within the right tolerances. “The structure comprises a collapsible frame of webbing straps with fire retardant, UV PU and water resistant polyester fabric infill panels.” 

Share on Facebook


[ By WebUrbanist in Global & Travel & Places. ]

[ WebUrbanist | Archives | Galleries | Privacy | TOS ]


WebUrbanist

 
Comments Off on Tentsile: Extreme Travel Tree Tents Hang Like Hammocks

Posted in Creativity


15. März 2013

15 Mar

Ein Beitrag von: Bernd Rettig

8557487532_3018342819_b


kwerfeldein – Fotografie Magazin

 
Comments Off on 15. März 2013

Posted in Equipment


5 Tips for Improving Your Portrait Photography

15 Mar

Here are some techniques that you may not be aware of if you’re new to portrait photography. It takes practice, but being aware of these ideas can get you experimenting, and inspire you to try shots you might not have otherwise tried.

1. Frame Tight

Next time you’re watching a movie, pay attention to the close-up shots. See the top of anyone’s head? Probably not very often.

Tightly framed natural light portrait

Tightly framed natural light portrait

Leaving too much space above the head is a common mistake in portrait photography. For a close-up portrait, just cut off the top of the head. You don’t need it. I know it feels weird at first, and to be honest, I would never have tried this if someone hadn’t told me to. But it works because we connect to faces, not the tops of people’s heads. Also cropping out the top of the head (either in camera or in post) brings the eyes higher in the frame and helps you achieve rule of thirds or golden section placement of the face in the frame.

Tight portrait with golden-section crop overlay to show composition.

Tight portrait with golden-section crop overlay to show composition.

2. The eyes have it

The eyes often look best when the iris is centered in the eye. Direct the subject’s gaze to position her eyes such that the iris is about centered. By centered, I mean centered from the camera’s point of view, not the subject’s point of view.

Natural light portrait

Natural light portrait with good eye position and catchlights

I do this one of two ways, depending on the situation. If possible, I raise my left hand and have the subject follow my hand with her eyes until her eyes are positioned favorably. If this isn’t possible, I give directions like “keep your head still and just move your eyes a tiny bit to the left.”

In addition to directing your subject’s gaze to position the eyes, also take note of the catchlights in the eyes. A large, soft light source will create the most attractive catchlight. Windows without direct sunlight shining through them work great, as well as clear open sky.

3. Let the kids run wild!

You’ve heard this before but I’ll mention it again. When photographing children, one of the best ways to get natural smiles and fun photos is to shoot them in their natural habitat, which probably isn’t a photo studio.

Boy on a swing

And he only kicked me once.

Aside from a great portrait tip, this is also good all around practice to improve your photography skills. Kids at play are fast and unpredictable. Learning to frame, focus, and shoot before the moment has passed takes practice and patience.

4. Watch the hands

When it comes to portrait photography, hands are rarely neutral. Usually they are either adding to your photo, or taking from it. Make it a point to pay attention to your subject’s hands.

When photographing women, showing the hand in profile with the fingers curled works well. Often this looks more feminine and alluring than showing the back of the hand. Consider this example:

Natural light portrait

For portraits of women, showing the hand in profile with the fingers curled often works well.

Have you ever heard a subject complain “I don’t know what to do with my hands?” If you’ve ever stood in front of a large group of people to give a speech, then you know this feeling. When we’re put on the spot, it’s hard to do know what to do with our hands.

If idle hands are messing with your portrait, then put them to work. Sometimes solving the hand problem is as simple as handing the hands something to handle. Think creatively about using a prop to give your subject something to do with her hands.

Woman trying on an earring

Woman trying on an earring

Woman playing with a classic Konica

Woman playing with a classic Konica

5. Shoot into the sun

Morning and evening are great times for backlit portraits. When the sun is low in the sky, you can use it as a rim light to highlight the subject’s hair. This works best if you can position your subject against a darker background, like a shaded area, without loosing the light on the subject’s head.

Backlit portrait using the sun as a rim light

Backlit portrait using the sun as a rim light

I hope I’ve given you a few new ideas to try next time you set out to shoot a portrait. Let me know your thoughts on this article by commenting below or reaching out to me on my Facebook page. I do my best to respond to questions and comments.

Post originally from: Digital Photography Tips.

Check out our more Photography Tips at Photography Tips for Beginners, Portrait Photography Tips and Wedding Photography Tips.

5 Tips for Improving Your Portrait Photography


Digital Photography School

 
Comments Off on 5 Tips for Improving Your Portrait Photography

Posted in Photography


Windswept Clouds Over El Capitan, Yosemite

15 Mar

When you first enter Yosemite National Park it is impossible to miss El Capitan. Towering some 3,000 feet above the valley floor with a peak elevation of 7,573 feet its a feast for the eyes and an attractive challenge for several hardy rock climbers. The more I visit Yosemite the more I see visitors accept the walls of the valley as an unmoving constant, but if you stop to really watch the valley walls you’ll notice that the they’re alive with movement. It’s not just waterfalls that create dramatic scenery in the park, but fast moving air currents and rapidly changing cloud formations. The granite monoliths are only half the story as long as you open your eyes other subtleties of the environment.

Pictured are clouds flowing around El Capitan in the late morning. This long exposure helped highlight the cloud movement bringing El Capitan to life.

Copyright Jim M. Goldstein, All Rights Reserved

Windswept Clouds Over El Capitan, Yosemite

The post Windswept Clouds Over El Capitan, Yosemite appeared first on JMG-Galleries – Landscape, Nature & Travel Photography.


JMG-Galleries – Landscape, Nature & Travel Photography

 
Comments Off on Windswept Clouds Over El Capitan, Yosemite

Posted in Equipment


Das 1 X 1 für kleine Fotografen

15 Mar

Es gibt einen Grund, warum meine große Tochter gerade in der Küche steht und Erdbeerkuchen fotografiert. Er heißt: „Das 1 X 1 für kleine Fotografen“. Dieses Fotobuch für Kinder möchte ich Euch und vor allem Euren Kleinen ans Herz legen.

Wenn man selbst fotografiert, dauert es nicht lange, bis sich auch ganz besonders die eigenen Kinder für die Kamera interessieren. Aber wie erklärt man ihnen die Blende und Belichtungszeit? Und wie kann man dazu motivieren, auch nach anfänglichen Schwierigkeiten weiter mit der Kamera zu experimentieren? Dieses Buch bietet eine wunderbare Möglichkeit für Kinder, im Selbststudium den Einstieg in die Fotografie zu wagen.

Olaf, der haarige Rotfuchs, ist Fotograf und kennt einige Tipps und Tricks. Mit seinem Assistenten Gustav, einer kleinen Grasmaus, führt er durch das Buch, das zunächst einen kurzen Abriss über die Geschichte der Fotografie bietet. Nach einer kleinen Einführung in die Grundlagen wie Blende, Fluchtpunkt und Schärfentiefe geht es mit dem ersten von insgesamt neun Fotokursen los.

Kurs3

„Fotografiere dein Lieblingsdessert“, „Schminke und frisiere deine Mama und fotografiere sie dann“ und „Erzähle deine Ferien mit Fotos“ sind nur drei Beispiele dieser Kurse und zeigen, dass das Buch Einblick in sehr verschiedene Fotosparten gibt.

Jeder Kurs ist mit vielen Beispielbildern versehen und enthält Tricks, so dass die Kinder nach und nach mehr Erfahrung sammeln können und nicht gleich mit einer Flut an Möglichkeiten überfordert werden. Auch wenn ich selbst kein Fan von beengenden Regeln innerhalb der Fotografie bin, so sind diese für den Anfang sicher nützlich. Ohnehin neigen Kinder naturgemäß dazu, Regeln zu durchbrechen und Neues zu testen.

Olaf gibt auch ganz praktische Tipps, wie zum Beispiel auf die Wettervorhersage zu achten oder an den aufgeladenen Akku und die leere Speicherkarte zu denken, wenn man wieder losziehen will. Ihr merkt, so ein paar Tipps hat Olaf auch für die alten Hasen…

kurs3b

Nach jedem erfolgreich absolvierten Kurs ist Platz für die eigenen Bilder und zum Schluss gibt es ein „Diplom für kleine Fotografen“. Auch findet sich auf den letzten Seiten noch ein kleines Fotolexikon sowie ein kurzes Kapitel zum Thema Bildrechte mit Vordrucken zum Unterschreiben für die Modelle.

So, nun muss ich aber den übriggebliebenen Kuchen vom Fotoshooting essen und helfen, die entstandenen Bilder auf den PC zu übertragen, um sie anschließend zu drucken. Vielleicht habt Ihr ja auch bald das Vergnügen?

~

„Das 1 X 1 für kleine Fotografen“*
von Lumi Poullaouec
erschienen im Addison-Wesley Verlag
Altersempfehlung: 7 – 14 Jahre
Preis: 19,95 €

* Das ist ein Affiliate-Link zu Amazon. Wenn Ihr darüber etwas kauft, erhalten wir eine kleine Provision, Ihr zahlt aber keinen Cent mehr.


kwerfeldein – Fotografie Magazin

 
Comments Off on Das 1 X 1 für kleine Fotografen

Posted in Equipment


DEAL: Phil Steele’s ‘Lightroom Made Easy’ Course at 33% Off

15 Mar

NewImageThe new deal over on SnapnDeals this week is one I know many dPS readers are going to enjoy – it’s 30% off Phil Steele’s Lightroom Made Easy Course – that’s just $ 33 (normally $ 47).

Phil’s videos have made regular appearances here on dPS and are always really popular and this course contains 24 videos with hours of great instruction on using Lightroom (it covers both Lightroom 3 and Lightroom 4).

If you’re new to Lightroom or feel overwhelmed by it – this course is for you!

Here’s what you’ll learn in the course:

Create Stunning Images

Make your photos “pop” like the shots you see in magazines.

Get More Done in less time

Dramatically increase your photography output—zipping through photo processing tasks in minutes that used to take hours or days.

Protect Your Copyrights

Automatically embed hidden data in your photos to protect your images from theft or misuse—and to guarantee you get paid.

Never Lose Another Photo

Get your photos organized—whether you have one hundred or 100,000—so that you’ll never lose another image again.

Retouch Portraits Like a Pro

Quickly and subtly retouch portraits to remove imperfections, enhance beauty, and keep clients coming back.

Create Instant Web Galleries

Display your photos for clients or the public in impressive, customized galleries on your own web site—with just a few clicks.

Remove Flaws and Defects

Remove unwanted objects, blemishes, or unsightly sensor dust from photos.

Share Photos Easily

Instantly upload your edited photos to social sharing sites like Flickr, Facebook, Picasa, and more.

Attract Search Engines

Tag your photos with keywords to lure Internet search engines and boost your sales.

Make Beautiful Slideshows

Quickly create stunning slideshows, with music, for friends, clients, or presentations.

Find the Right Photo When You Need It

Use ratings, labels, categories, keywords, and names to make it easy to always find your best shots, or those most suited to a particular job or client.

Do It All From One Easy Place

Easily handle your entire photography workflow all from one place, quickly and efficiently. Use my secret ninja tricks and techniques to boost your productivity even more!

This course is normally $ 47.00 USD but for the next 12 days Phil is offering it for just $ 33 along with a couple of great bonus videos.

Get full details and pick up your copy here.

Post originally from: Digital Photography Tips.

Check out our more Photography Tips at Photography Tips for Beginners, Portrait Photography Tips and Wedding Photography Tips.

DEAL: Phil Steele’s ‘Lightroom Made Easy’ Course at 33% Off


Digital Photography School

 
Comments Off on DEAL: Phil Steele’s ‘Lightroom Made Easy’ Course at 33% Off

Posted in Photography


Nikon D5200 Review

15 Mar

Nikon D5200 front.jpg

No matter what your ambitions or skill level are, this camera could arguably be an ideal option for many when it comes down to plonking the plastic on the counter or tapping the computer key to order offline. For many a budding photographer with ambitions a DSLR is the best game in town.

None of those pesky MILCs or compact digicams can satisfy the hunger!
Nikon D5200 LCD Front.jpg

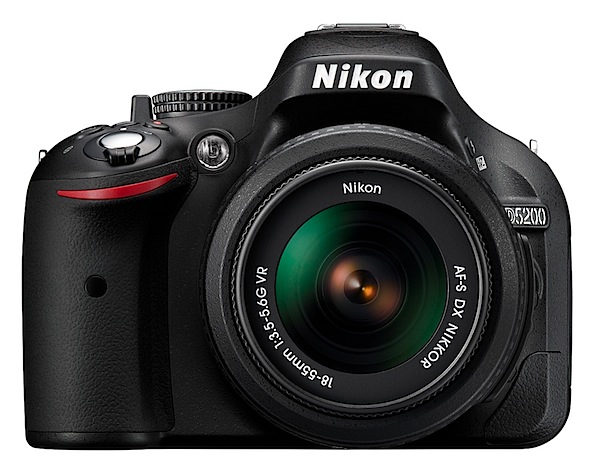
Besides, it’s a Nikon. And the specs are damn fine.

Nikon D5200 LCD back.jpg

Nikon D5200 Features

True, the sensor is close to half the area of a 35mm full frame but, unless you’re going to indulge in heavy cropping or demand an enormous print output, the 23.5×15.6mm CMOS will work fine for many.

Besides, the maximum image size of 6000×4000 pixels can lead to a print of 51x34cm at 300 dpi.

Video in MPEG4 can be recorded at Full HD and 1920×1080 resolution.

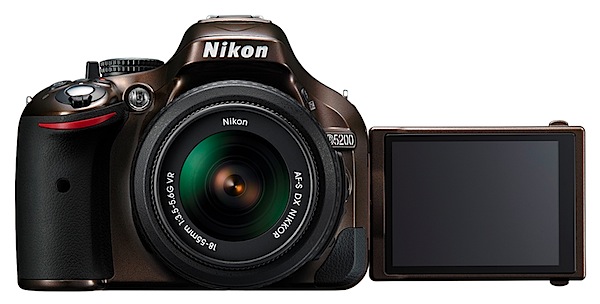
With the help of the vari-angle screen I made some nice, controlled camera movies in shooting video, with the AF system tracking accurately throughout the moves. However, shoot a still and the video shuts down!

More

  • AF system: 39-point AF system with nine cross-type sensors.
  • Metering: the 2016 pixel RGB metering sensor provides data to the camera’s Scene Recognition System, which optimises exposure, autofocus and white balance immediately before the shutter is released.
  • Optical viewfinder.
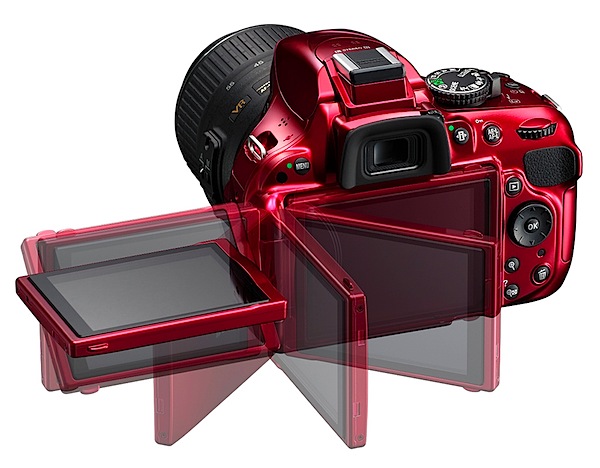
  • 7.5cm (3-in) vari-angle LCD monitor has 921,000 pixel resolution which can be swung 180 degrees laterally and through a 90 degree vertical arc.
  • Compatible with Wireless Mobile Adaptor WU-1a.
  • Compatible with WR-R10 Wireless Remote transceiver and WR-T10 Wireless Remote transmitter to control key camera functions from a distance.
  • ISO range from 100 to 6400 with expansion to ISO 25,600.
  • Continuous shooting up to 5fps.
  • High dynamic range (HDR) using two images.
  • GPS compatible: records exact location when using the optional GP-1 unit.
  • 16 scene modes: night portrait, beach/snow, food etc.
  • Seven effects modes: night vision, colour sketch, miniature effect, high and low key etc.

Cafe.jpg

Church interior.JPG

Figures and beach 2.JPG

Nikon D5200 Handling

First, an anecdote: I like to grab a new camera, manual unread, and get shooting as soon as I pull it out of the box. OK all clear, nice, crisp display of the camera status on the rear LCD, here’s the ISO setting, current aperture, auto white balance in play etc etc.

Look through the optical viewfinder, all clear and sharp. And I’ll bet you that this is the reason you’re reading this review and considering a DSLR!

Now, where’s Live View?

In my office’s subdued light it was hard to see at first: a small black lever hanging off the mode dial. And it works, summoning up the view on the LCD. And what a brilliant place to put it! I also found that you must be in Live View to record video.

Back to the walk around: as befits its price level there’s not a jungle of external controls to bewilder the newbie or the timid.

Left and near the top: menu button.

Right and on top: power/shutter button; mode dial (PASM, scene modes, effects, macro etc); info button; exposure compensation; video record; single/continuous shooting and of course the Live View lever.

Back off the top edge: information edit button which pilots you through the rear screen menu options; exposure and AF lock button.

Rear: the multi selector wheel navigates around the rear screen options; replay; memory card access lamp; trash; screen zoom.

Overall, the camera is quite compact for a DSLR and even with the review f3.5/18-55mm lens attached was not a big bundle to carry and handle. The prominent speed grip helps handling and most controls are close to an operative right forefinger. Sorry, southpaws!
BTW in Live View the four way jog dial at the rear moves the AF outline around the screen. A big help.

The screen menu layout is typically Nikon: clear and unmistakable without being a forest of text.

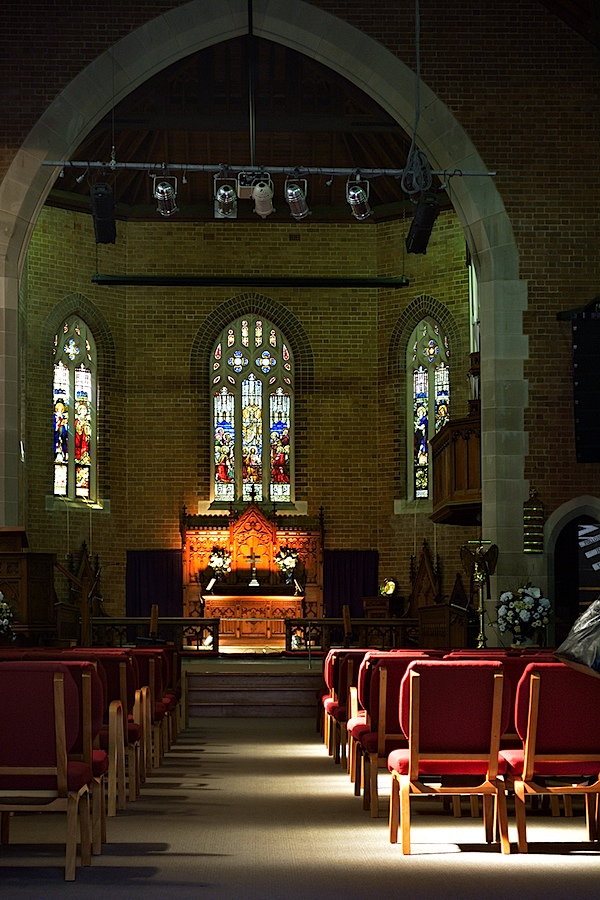
Nikon D5200 ISO Tests

Nikon D5200 ISO 100.JPG

Nikon D5200 ISO 400.JPG

Nikon D5200 ISO 800.JPG

Nikon D5200 ISO 1600.JPG

Nikon D5200 ISO 3200.JPG

Nikon D5200 ISO 6400.JPG

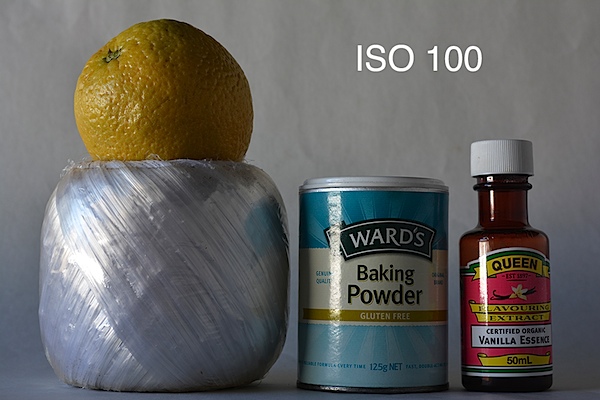
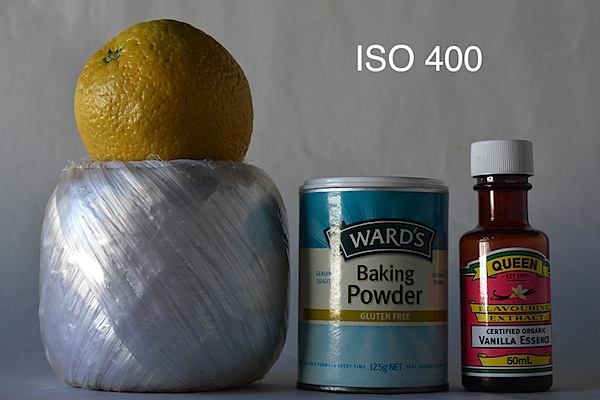
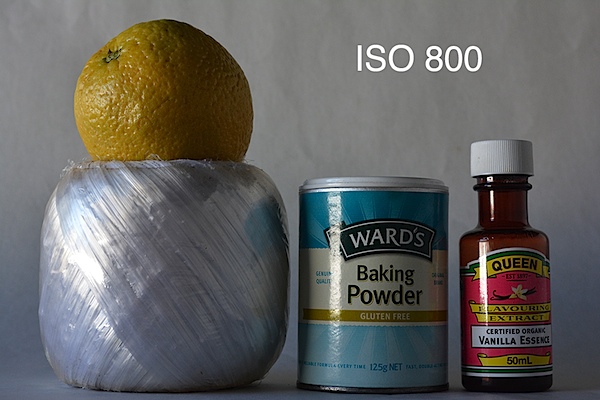
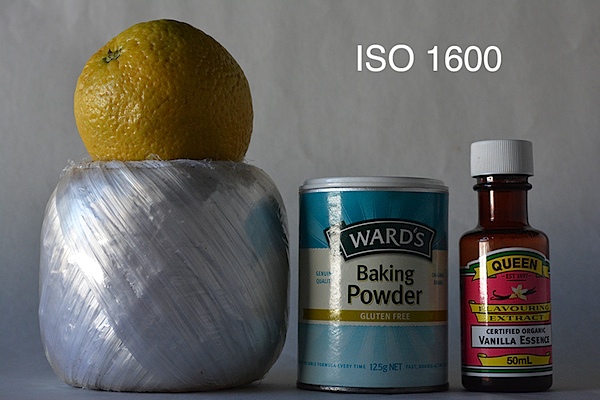
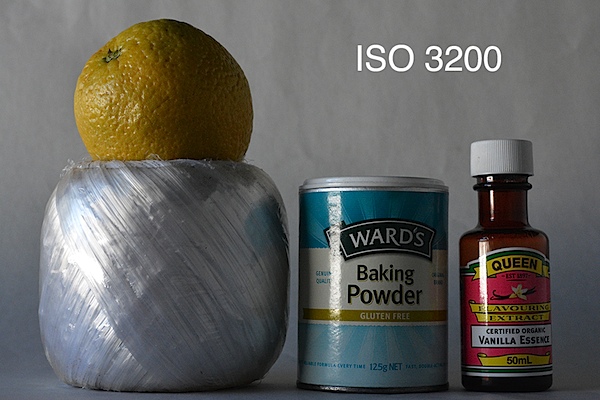
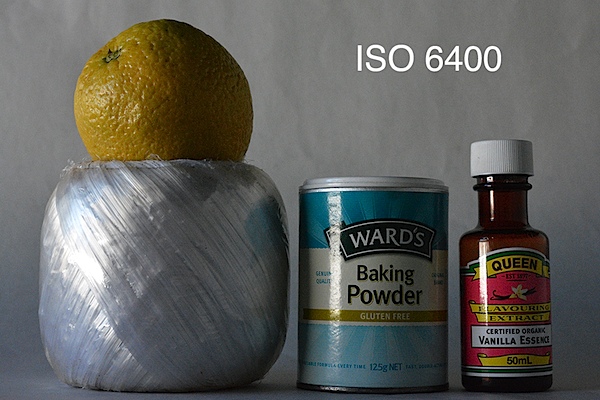
In my view, the D5200 performed very well all the way up to ISO 3200 and I could quite happily use ISO 6400 for certain subjects that could ‘live’ with increased noise and a drop in sharpness, such as city lights etc.

Nikon D5200 Review Verdict

Quality: excellent.
Why you would buy it: it’s a Nikon; well-priced DSLR; excellent video capture.
Why you wouldn’t: you don’t want a DSLR!

For a camera that I figure is very affordable for many people this has to be one of the best buys around: 24.1 megapixel capture, vari-angle screen; Full HD capture. Very appealing!

Nikon D5200 Specifications

Image Sensor: 23.5×15.6mm CMOS. 24.1 million effective pixels.
Metering: Matrix, centre-weighted, averaging and spot.
A/D processing: 14-bit.
Lens Mount: Nikon F.
Exposure Modes: Auto, Program AE, shutter and aperture priority, manual.
35 SLR Lens Factor: 1.5x.
Shutter Speed: Bulb, 30 to 1/4000 second. Flash X-sync: up to 1/200 sec.
Continuous Speed: up to 5fps.
Memory: SD/SDHC/SDXC cards.
Image Sizes (pixels): 6000×400 to 2992×2000. Movies: 1920×1080 to 640×424.
Viewfinders: Eye level pentaprism and 7.5cm LCD (921,000 pixels).
File Formats: NEF (RAW), JPEG, NEF (RAW)+JPEG, MPEG4.
Colour Space: Adobe RGB, sRGB.
ISO Sensitivity: Auto, 100 to 6400. With expansion up to ISO 25,600.
Interface: USB 2.0, AV, HDMI mini, DC input, external stereo mic, remote.
Power: Rechargeable lithium ion battery, AC adaptor.
Dimensions: 129x98x78 WHDmm.
Weight: Approx. 555 g (with battery).
Price: get a price on the Nikon D5200 (body only) or Nikon D5200 with 18-55mm f/3.5-5.6 AF-S DX VR NIKKOR Zoom Lens or Nikon D520018-105mm f/3.5-5.6 AF-S DX VR ED NIKKOR Zoom Lens or Nikon D5200with 18-55mm f/3.5-5.6G AF-S DX VR and 55-300mm f/4.5-5.6G ED VR AF-S DX NIKKOR Zoom Lenses + EN-EL14 Battery + 10pc Bundle 32GB Deluxe Accessory Kit.

Post originally from: Digital Photography Tips.

Check out our more Photography Tips at Photography Tips for Beginners, Portrait Photography Tips and Wedding Photography Tips.

Nikon D5200 Review


Digital Photography School

 
Comments Off on Nikon D5200 Review

Posted in Photography