A Guest Post by Tom Di Maggio from Tom Di Maggio Photography.
My use of composite pictures has been drastically increasing in the last few months. It started with locations that got cancelled due to unavailability, then bad weather made it impossible to shoot at certain location and as of lately people came to me asking specifically for composite photographs. And to be honest I really enjoy doing them, it gives my imagination a lot more freedom, and there is certain flexibility that I really enjoy.
As with the preparation of any shoot, the most difficult part is finding the right setting. In this case the right background. I try to shoot them myself whenever I can but I tend to rely on stock photography as well. Basically I usually split a composite into three main parts: the subject or model, the background and the post processing.
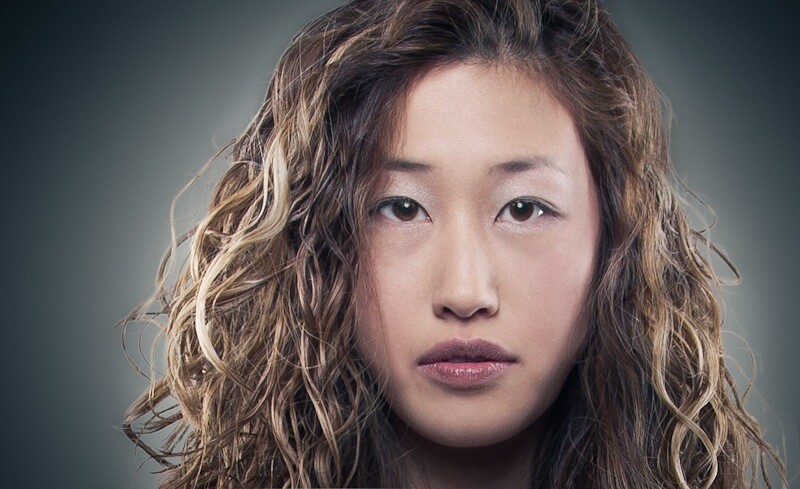
The Subject
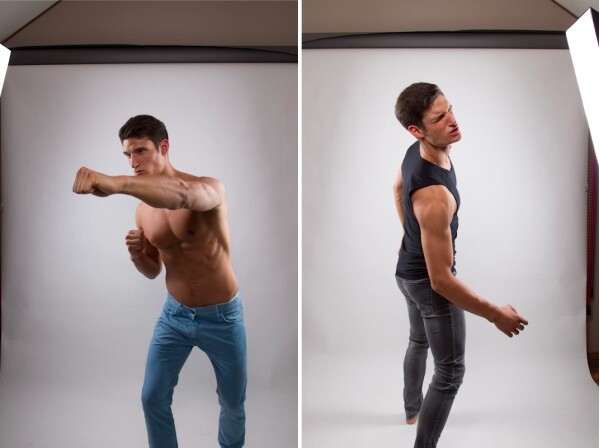
These are the images as they were captured.
The base for a good composite is obviously a correctly exposed subject. I adapt that light to the theme or mood that I want to convey in the final picture. It is really important that you have your final image in mind at all stages of the creation of a composite. It will dictate the lighting scheme you will have to use and at which angle you will need to photograph your model.
Which lighting setup to use usually varies from one to four lights? It really depends on the expected result. No matter which setup you choose lighting position and exposure are key factors here, they need to be spot on or you will spend a great amount of time in Photoshop trying to correct this. At this stage I try not to build too much contrast, so I like the light to be on the soft side.
I can only stress the fact that even though I will be using Photoshop to a certain extent, I will always want to work with a correctly exposed subject. Exposition and position are crucial in every kind of photography. Something you can solve in a few seconds during the shoot might take hours to correct in Photoshop. I don’t have any preference as to the background from which I will extract the subject from. As long as there is enough contrast between the subject and the background it won’t be a problem.
The Background
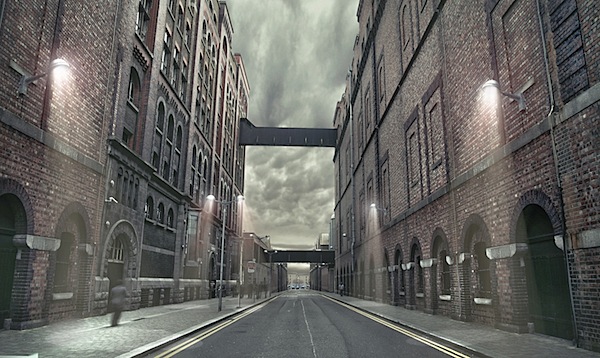
Original Background
Even when I shoot on location I really put a lot of effort into the choice of the background. The background is what gives the picture a context; it is an integral part of the story the picture is supposed to tell. You can photograph a very beautiful model in front of a dumpster; it will have a lot less impact as if you photograph the same model on a beach or in a nice hotel room. It’s the same when working with composites. If I have the chance to photograph the background for my composite myself I have a lot more flexibility in terms of angles.
A bought background gives you very little leeway as to perspective in Photoshop. When I photograph the background myself I usually have the idea for the subject shoot already in mind. Should I find myself in a situation where I see a nice background and I have my camera with me, I shoot it three times: ground height, belly height and chest height. I resort to stock photography when a shoot is booked and I don’t have the possibility to photograph the background myself.
As I mentioned earlier in the article angles is one of the key elements here. There’s no point in choosing a background that was shot at a dramatically different angle that your subject. It will look fake. I give my backgrounds a light HDR touch but I actually don’t use any HDR technique. I apply tonal adjustments and basically the same treatment as for the subject. It will nicely blend the subject and the background together.
The Post Processing
Like most of us out there I didn’t invent the wheel when it comes to post processing. All of my techniques are a mixture of things I picked up in books, on the web, trainings and so on.
To start with I shoot everything in RAW; the techniques I will explain below will suppose that you do the same. To be honest, and this cannot be said enough, with the pricing on memory cards nowadays there is absolutely no reason not to shoot in RAW. The advantages of doing so are just to enormous to ignore.
I usually start in Lightroom by taking out as much contrast from the picture as I can. The way I work I will build up the needed contrast during the post processing in Photoshop. Why do I remove contrast only to add some back later? It’s all about control.
I basically use a combination of two techniques that include Blur, High Pass filters and the Apply Image function. This allows me to add contrast and sharpen my images to the pixel and thus I can use it to create a clean smooth skin or a grungy style image with one workflow only. (see the portrait of Bora) I spend as much time here as I need to until the image is 100% the way I want it to.
Any imperfection here will be amplified once I put the Color Efex Pro layer on top of it. I created a few Color Efex Pro recipes that I use as a starting point on my images. I will then tweak them slightly to fit the image. I will intentionally push this process way over the top in order to give me more flexibility on the final image. Once I am happy with the result I save it as a layer on top of my image and then adjust the opacity of that layer accordingly.
Below the two Layers after my Color Efex treatment. You can see that the effect is way to strong here, but a slight adjustment on the opacity solves this. And it’s always easier than to go back into Color Fx and redo the effect until it fits.
At this stage I proceed with the extraction of the subject from the background. Personally I think that there is no perfect solution for this. I use whatever tool fits the need. It ranges from the refine edge tool to the smudge tool and even a normal brush.When I am done with the extract I drag the subject onto the prepared background and tweak both again so that the color tones and temperature match each other.
This portrait of Bora was processed with the same technique. All I did differently, was to apply different opacities to the correct layers.
Feel free to get in touch if you have any further questions regarding the subject. Below the two Layers after my Color Efex treatment. You can see that the effect is way to strong here, but a slight adjustment on the opacity solves this. And it’s always easier than to go back into Color Fx and redo the effect until it fits.
See more of Tom Di Maggio’s work at Tom Di Maggio Photography, InFocus Photography and on his Flickr Account.
Post originally from: Digital Photography Tips.
Check out our more Photography Tips at Photography Tips for Beginners, Portrait Photography Tips and Wedding Photography Tips.
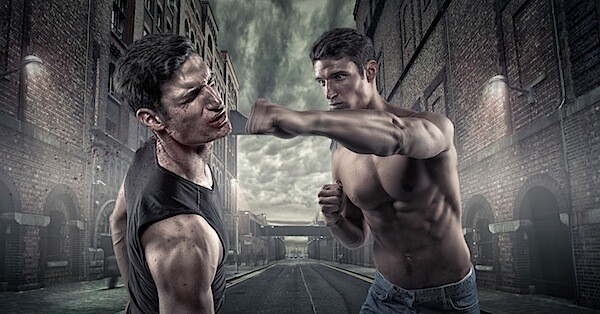
A Guide to Create Eye Catching Composite Images


Digital Photography School