RSS
 

Archive for the ‘Photography’ Category

Joby Mobile Vlogging Kit Review: A Great Deal for Vloggers

16 Oct

The post Joby Mobile Vlogging Kit Review: A Great Deal for Vloggers appeared first on Digital Photography School. It was authored by Suzi Pratt.

As smartphones advance, mobile vlogging and filmmaking continue to rise in popularity. Thankfully, camera accessory brands have come up with whole systems to support phone vloggers. The Joby Mobile Vlogging Kit is the latest system to hit that market, and it is chock-full of accessories that you can use with your phone (or with other camera setups).

But what’s in the Joby Mobile Vlogging Kit? And how does it perform?

In this Joby Mobile Vlogging Kit review, you’ll discover the pros (and cons) of this product.

And you’ll leave knowing whether the Vlogging Kit is right for your needs.

Joby Mobile Vlogging Kit review

What’s in the Joby Mobile Vlogging Kit?

Here’s what’s included in the Vlogging Kit package:

Tripod

First off, Joby is the brand behind GorillaPods, the bendy-arm tripods that have been popular with vloggers and photographers for many years.

The base of this kit is the GorillaPod Mobile Rig: a small version of the GorillaPod that perfectly complements the size of modern smartphones. I used my copy with a Samsung Galaxy S10 and it fit perfectly.

The GorillaPod has a standard 1/4″ tripod screw, so you could also use it with another camera if you chose to.

Smartphone clamp

The Joby Mobile Vlogging Kit also comes with a smartphone clamp that has two extra bendy arms attached. The clamp is very sturdy and adjusts to fit just about any smartphone out there. The bendy arms are great for attaching accessories such as a light and/or an external microphone, but the arms can be removed.

One of the best features of the smartphone clamp is its ability to easily flip between portrait and landscape orientations. All you have to do is loosen the lock and the clamp swivels. This is especially helpful for those wanting to shoot vertical content for Instagram Stories or TikTok.

Joby Mobile Vlogging Kit review

Another great addition to the smartphone clamp is a cold shoe mount on top for mounting an accessory. Truth be told, I prefer using the Joby Mobile Vlogging Kit without the extra bendy arms; I simply attach my main accessory (usually the microphone) via the smartphone clamp cold shoe.

LED light and microphone

With this vlogging kit, Joby is branching out of the tripod market and debuting two other camera accessories: the Beamo Mini LED light and the Wavo Mobile microphone.

Both products are incredibly solid and perform very well. The Beamo light is reminiscent of other rugged light competitors such as the LitraTorch 2.0. It’s waterproof and rugged, has two cold shoe mounts to attach accessories, charges via USB-C, has multiple brightness settings, packs a magnetic attachment, and comes with a silicone diffuser to produce a flattering beam of light.

Joby Mobile Vlogging Kit review

The Wavo microphone looks like a clone of the Rode VideoMicro. But the nice part about the Wavo mic is that Joby includes two different cables: a TRRS cable so that the mic can be used with a smartphone, and a TRS cable for use with a regular camera.

Note that you have to use the correct microphone cable. Otherwise, sound will not be captured properly.

Using the Joby Mobile Vlogging Kit in practice

This vlogging kit comes with a lot of camera accessories.

But how do they perform?

The GorillaPod is as steady as ever, although parts of the legs can sometimes snap off if they are bent in one direction too forcefully. It’s easy to snap the legs back into place if that happens, but it’s just something to be aware of.

If you like to use multiple compact cameras, it’s very easy to take off the included smartphone clamp and stick another camera on the GorillaPod. I did this a lot with my GoPro when I wanted to change my filming style.

Joby Mobile Vlogging Kit review

Sound-wise, it’s tough to trust a microphone not made by a reputable sound company. Cheap mics often show their true colors via bad sound quality. However, the Wavo mic has very clear sound, and the windscreen does an excellent job of blocking out wind. The Rode VideoMicro has a slight edge in sound quality, but for the price and the fact that the Wavo mic is included as part of a kit, it’s a great deal. Plus, it can be used with a regular camera, which is even better.

After the sun went down, the Beamo light came out to play. After using similar light products made by Litra and Lume Cube, I have to declare the Beamo my favorite compact rugged light. It has a solid feel that is still lightweight, and the light quality is incredibly strong.

In fact, you must use the silicon diffuser if you plan to vlog with the Beamo light. Otherwise, the light is so powerful that it will wash out the video (and strain your eyes).

Joby Mobile Vlogging Kit review

Joby Mobile Vlogging Kit review: Conclusion

Now that you’ve finished our Joby Mobile Vlogging Kit review, you know all about the power of this handy little kit.

Overall, the Vlogging Kit is a great deal that gives you three high-quality products in a single package. You can use them together with a smartphone, or you can trade the phone for another compact point and shoot or action camera. You can even mix and match each accessory with different camera setups.

So whether you intend to vlog or simply want a good deal on three awesome camera accessories, you can’t go wrong with this kit.

To see the Joby Mobile Vlogging Kit in action, check out my video review:

The post Joby Mobile Vlogging Kit Review: A Great Deal for Vloggers appeared first on Digital Photography School. It was authored by Suzi Pratt.


Digital Photography School

 
Comments Off on Joby Mobile Vlogging Kit Review: A Great Deal for Vloggers

Posted in Photography


11 Things to Experiment With When Starting Out in Digital Photography

15 Oct

The post 11 Things to Experiment With When Starting Out in Digital Photography appeared first on Digital Photography School. It was authored by Megan Kennedy.

Starting out in digital photography can seem a little daunting. With so many avenues to explore, it can be hard to pinpoint exactly where to begin. Here are 11 things to experiment with when first taking up photography.

experiment when starting out in digital photography wattle flower
Canon 5D Mark II | Canon EF 50mm f/1.8 II with extension tubes | 1/250 sec | f/7.1 | ISO 100

1. Semi-automatic and manual modes

When first getting started in photography, it can be tempting to switch a camera over to Auto mode and forget about making manual adjustments, especially when starting out in digital photography. Why make manual adjustments when the camera can do it all for you, right?

The truth is that shooting with Auto mode sacrifices experience, flexibility, and control. If you can avoid Auto mode, you should.

Now, the prospect of shooting in Manual can prove overwhelming to start with. Fortunately, there are often semi-automatic modes available in-camera to bridge the gap between Manual and Auto.

Shutter Priority allows you to alter shutter speed while the camera automatically adjusts the aperture. Aperture Priority is similar, but it allows you to change the aperture while the camera adjusts the shutter speed instead.

experiment when starting out in digital photography spider's web
Canon 5D Mark II | Canon EF 50mm f/1.8 II with extension tubes | 1/125 sec | f/1.8 | ISO 800

Shutter Priority and Aperture Priority facilitate a creative approach to photography while allowing the camera to manage some of the load in maintaining a decent exposure. This balance of functionality allows you to experiment, which in turn helps you develop a good sense of the right settings for any circumstance.

And after becoming familiar with the dynamics of semi-automatic modes, graduating to Manual is a lot more fluid, when you can finally take full advantage of the camera as a creative tool.

2. ISO

ISO is a little misunderstood; there’s a great video about it here. But in basic terms, ISO is a setting that brightens an image in-camera. As the ISO value is increased, images grow progressively lighter. It’s a function that is useful for photography in darker environments.

However, raising the ISO value also increases noise, which can compromise the quality of a digital image.

Experimenting with ISO will give you a sense of how your images will turn out in low-light situations. By becoming familiar with ISO and its trade-offs, you can learn to anticipate the outcome of a photograph, maintaining as strong image quality as possible in a variety of environments.

3. Metering modes

In-camera metering is how a camera determines the appropriate exposure for a given situation. Metering modes refer to the method the metering system uses to evaluate a scene.

starting out in digital photography metering modes

Different metering modes allow photographers to select the ideal settings for a particular situation. For example, Matrix metering (Nikon)/Evaluative metering (Canon) measures the light intensity at several zones in a scene, then combines the results to find the average settings for the exposure. Spot metering, on the other hand, measures only a very small portion of a scene to determine exposure settings.

While Matrix/Evaluative metering is useful for situations with evenly-distributed tones, Spot metering is ideal for metering in high-contrast scenarios. Experimenting with metering modes exposes a user to effective ways of working in different lighting conditions, leading to greater creative and technical control.

4. White balance

Different lighting conditions can impact the color temperature of the overall photo. For example, fluorescent lights can generate a different color cast than the afternoon sun. To rectify this, many digital cameras offer a function that balances the whites in a scene in order to make images appear more natural.

Experimenting with preset or custom white balance modes can help achieve a more aesthetically pleasing result in-camera. Although white balance can be set to Auto, the camera doesn’t always get it right. Trying out custom or preset white balance functions prepares a photographer for tricky lighting situations down the track.

5. Manual focus

As a beginner photographer, achieving sharp images can be a challenge. Although a camera’s autofocus function is quick and relatively easy to use, shooting with manual focus can sometimes be the difference between successful and unsuccessful images.

Often, manual focus is much more effective than autofocus in low-light and low-contrast conditions, and shooting through objects (like glass or fencing) with autofocus engaged can be a frustrating experience. The autofocus system may even get confused when the user is trying to focus on a fast-moving subject.

starting out in digital photography manual focus
Canon 5D Mark II | Canon EF 50mm f/1.8 II with extension tubes | 1/125 sec | f/4.0 | ISO 800

While autofocus may be convenient in some situations, switching to manual focus can play a vital role in creating quality images. Experimenting with manual focus when starting out in digital photography builds and reinforces technical experience. Using manual focus also fosters a greater awareness of camera capabilities and generates a more diverse range of images.

6. Composition

Throughout the history of visual art, concepts have emerged to aid in the formulation of impactful imagery. Composition refers to the organization of visual elements within an artwork. Whether it’s a painting, a photograph, or a sculpture, all art hinges on composition.

Experimenting with composition allows photographers in the early stages of their practice to arm themselves with helpful knowledge that has been passed down by artists. By experimenting with compositional elements (such as perspective, the rule of thirds, and leading lines), new photographers can quickly start to identify and utilize key visual aspects of a scene.

7. Abstraction

Wikipedia defines abstract photography as “a means of depicting a visual image that does not have an immediate association with the object world and that has been created through the use of photographic equipment, processes, or materials.”

Basically, abstract photographers generate subject matter that prioritizes aesthetic experience over conventional discernibility.

starting out in digital photography abstraction
Left: Canon 5D Mark II | Canon EF 24-105mm f/4L IS USM | 1/250 sec | f/8.0 | ISO 100
Right: Canon 5D Mark II | Canon EF 24-105mm f/4L IS USM | 1/250 sec | f/6.3 | ISO 100

Abstraction is a unique facet of photography in that it encourages a more experimental approach to the photo-making process.

By taking advantage of abstraction, those starting out in digital photography are free to experiment beyond the conventional notion of a photograph. This experimentation will inevitably inform other areas of a new photographer’s practice, building experience and developing individual perspective.

8. Subject matter

There is nothing wrong with specializing, but tackling a range of different photographic fields expands your photographic experience. And it can also completely alter the way you approach your preferred subject matter.

For example, landscape photography can reveal opportunities for beautiful outdoor portraits. Abstract photography can impact the way motion is expressed in action shots. Street photography can help you develop an eye for subtle photographic opportunities. Macro photography will help you notice small details.

In short, experience with different photographic subjects can feed into one another in surprising ways. Experimenting with a variety of subjects is a solid means of developing a well-rounded photographic approach.

9. Perspective

One of the reasons photography is so effective is because it challenges both the photographer’s and the viewer’s comprehension of the world. However, it can be easy to get into the habit of photographing subjects from the same eye-level viewpoint, especially when starting out.

starting out in digital photography plane
Canon 5D Mark II | Canon EF 24-105mm f/4L IS USM | 1/160 sec | f/9.0 | ISO 100

We all know the saying, “Show, don’t tell.” Moving around with the camera is one of the simplest ways to convey a unique photographic experience. You can shoot from above your subject, below your subject, or off to the side.

And by experimenting with different camera positions, you explore the nature of photography and the world we live in. By photographing from interesting or unusual perspectives, the physicality of the image-making process is emphasized, providing a unique insight into the world through the experience of the photographer.

10. Post-production

Getting it right in-camera is ideal, but sometimes a bit of work in post-production is necessary. Becoming familiar with digital post-production techniques can be very handy, especially because even minor adjustments can create a positive impact. In addition, editing can affect your overall approach to digital image-making by revealing photographic techniques that work well or need improvement.

Photoshop is a great tool for editing images, but there are also free applications such as GIMP to make use of. With practice, you can develop a sense of how to bring the best out of a photograph.

11. Accessories

There are plenty of ways to expand your creative image-making through economical accessories.

For example, extension tubes are a cheap way of getting into macro photography. Filters can significantly alter the outcome of a photograph. And a budget tripod will help you achieve sharp images. Renting or buying second-hand is also a viable option. In some cases, digital photographers can even make use of old lenses designed for film cameras.

Investing in economical accessories allows new photographers to experiment with engaging techniques without breaking the bank.

starting out in digital photography flower
Extension tubes are a cheaper alternative to a macro lens. Canon 5D Mark II | Canon EF 50mm f/1.8 II with extension tubes | 1/2000 sec | f/2.5 | ISO 500

Starting Out in Digital Photography: Conclusion

While there are plenty of considerations to take into account when starting out in digital photography, experimenting with technical settings, creative approaches, and accessories gives you a strong foundation for future photography endeavors.

And this allows for a more comprehensive skillset and well-developed creative instincts.

Now over to you:

Have you tried experimenting with any of these items? What are you going to experiment with first? Leave a comment and let us know!

The post 11 Things to Experiment With When Starting Out in Digital Photography appeared first on Digital Photography School. It was authored by Megan Kennedy.


Digital Photography School

 
Comments Off on 11 Things to Experiment With When Starting Out in Digital Photography

Posted in Photography


Introducing the New dPS Editor and Content Manager, Jaymes Dempsey

15 Oct

The post Introducing the New dPS Editor and Content Manager, Jaymes Dempsey appeared first on Digital Photography School. It was authored by Darren Rowse.

Introducing the New dPS Editor and Content Manager, Jaymes Dempsey

We’ve had a quiet change of guard in the editorial role here at dPS. And the reason it’s been so smooth is that our new editor Jaymes Dempsey will be familiar to you as one of our current writing team members. He has been an understudy to Caz for a while now and has easily slipped into the editing role. Before I introduce you to Jaymes, a quick word from Caz

From Caz:

All the changes taking place on a worldwide scale have led me to do a lot of soul searching (as I’m sure it has for many). This exploration has made me realise I need to be focussing on my creative pursuits as they make my heart truly sing. While I have enjoyed being the Managing Editor of dPS and interacting with you all, I’m looking forward to continuing my traveling around Australia and creating as I go.

You are now in great hands with Jaymes Dempsey and the dPS team. I wish Jaymes all the best in his new role and I wish all of you the best on your photography journey!

A very big thanks to Caz for the energy she brought to the team and her role. We wish her all the best for her adventures around Australia and will always look forward to her latest updates.

About Jaymes Dempsey

Jaymes is a photographer and writer from Ann Arbor, Michigan. At 13, Jaymes decided he wanted to become a bird photographer; at 14, he decided that macro photography was the better option; now, over a decade later, he’s passionate about pretty much all photography, no matter the genre.

That said, Jaymes loves getting outdoors with his camera, and nature photography of all sorts (including bird, macro, and landscape photography) will always hold a special place in his heart. He also spends his evenings photographing downtown Ann Arbor, where you can often find him struggling to lug around an unreasonably large tripod and camera setup.

But Jaymes isn’t just passionate about photography; he also loves to help other photographers learn and grow. Jaymes believes that everyone is capable of being a great photographer, no matter their background or equipment, which is why he continues to do what he does!

Jaymes brings years of writing, editing, and content management experience to the table. He runs his own instructional photography blog, and his work has been published in popular photography magazines across the internet. In fact, it was Digital Photography School that first inspired Jaymes to starting writing about photography, and he has spent the last several years as a regular dPS contributor, which is one of the many reasons he is delighted to be coming aboard as Editor and Content Manager!

Jaymes is thrilled to take on a larger role within dPS, and he looks forward to interacting with the wonderful community that is Digital Photography School.

We hope you join us in welcoming Jaymes into his new role.

The post Introducing the New dPS Editor and Content Manager, Jaymes Dempsey appeared first on Digital Photography School. It was authored by Darren Rowse.


Digital Photography School

 
Comments Off on Introducing the New dPS Editor and Content Manager, Jaymes Dempsey

Posted in Photography


Easily Create 2D Illustrations from Photographs Using GIMP

14 Oct

The post Easily Create 2D Illustrations from Photographs Using GIMP appeared first on Digital Photography School. It was authored by Ana Mireles.

From advertising campaigns to cartooning your profile photo, 2D illustrations are used much more than you realize. Creating 2D illustrations can be a lot of fun, but they aren’t necessarily easy to do. Here’s an uncomplicated way to use photography as a template to get great 2D illustration results.

Create 2D illustrations from a photograph

Create 2D illustrations in GIMP

There are tons of programs for visual artists and graphic designers that specialize in digital drawing and 2D illustrations, but have you ever tried to actually create an illustration from scratch?

Graphic design software can be amazing and, for some great professionals, this can be the way to go. But many of us need a starting point to get us going, especially if our talent is in photography and not design.

That’s why I’m going to show you how to use GIMP to create 2D illustrations out of a photograph.

1. Draw the subject

First, choose the photo you want to draw. There are no restrictions here; you can use a portrait, a landscape, still-life, or anything else you want. I do suggest you start with images that are simple and don’t have too many details.

Create 2D illustrations using photographs

Imagine you’re creating an illustration from a photo in real life. You would place some tracing paper on top of your image and then start tracing and coloring on it, right? Well, this is the same thing.

First, create a new transparent layer. You can do this by going to Layer (in the menu) and then choosing New Layer. Make sure you select Fill with Transparency and press OK.

Next, you need to select the outer part of your subject. You can use any selection tool that works best for you; GIMP has many solutions for this.

For example, you can use the Path tool because it gives the most control. Just click every time you want to create an anchor point around your subject. Then move the path handles to adjust the curvature.

Make a selection with the Path tool

Once you’re done outlining your subject, click Selection from Path on the left-side Options panel. This will turn your path into a selection, which is what you want. But note that this is only necessary if you used the Path tool; with any of the other selection tools, you can skip this step.

Now you can use the Bucket tool to color your entire subject. You can use the color picker to select a color that matches the original color from the photo.

Of course, you can also use a color different from the original object. Get as creative as you want.

Finally, click inside the selection to fill it with your chosen color.

2. Color the inside shapes

Now that you have your main shape, you can start adding some shapes on the inside of your subject using different colors.

To do this, disable the top layer by clicking on the eye icon next to it. That way, you can see the original image.

Select the area you want to color. Then come back to the top layer and use the Bucket tool with a new color to fill it.

Draw shapes to create a 2d illustration

Repeat this process for all the shapes you want. Keep in mind that 2D illustrations are not as detailed as a realistic 3D model. So keep going only to add enough information to your subject to make it recognizable.

You don’t have to be extremely precise with your selection when you’re working inside a shape. GIMP will automatically stop at the edge. Notice in the next image how my selection is over to the yellow part, but the new color doesn’t spill there; it stops at the edge of the dark brown shape.

Selecting and coloring shapes

3. Add some details

Working on the top layer, turn down the Opacity so that you can see the original image underneath to use as a template for drawing details. Keep in mind that only you will see both versions (the illustrated and the original), so you don’t have to copy everything exactly as it is.

If you want to add details with thin lines and you don’t have a steady hand, you can use the Path tool to trace them. Then choose Stroke Path from the Options Panel. This will draw a line using the current Brush or Pencil settings.

Stroke path to simulate pencil lines

Of course, you can draw the details freehand using the Pencil or the Brush tool, as well.

To add some thicker decorations, you can use the selection tools again to make things faster. In this example, I used the Color Selection tool to select the blues on the original photo. I then painted the flower:

Use the selection tools to paint the details

The specific tools and strategies that you use will depend on the illustration you are creating and your own drawing skills.

4. Fill the background

If you want to draw a background, then add a New Layer in between the original photograph and the first drawing layer.

Choose the color you want, then go to Edit>Fill with FG color. FG stands for “foreground.”

You can leave the background as a solid color or add some decoration by drawing lines and shapes the same way you did for the subject.

Create 2D Illustration with creative backgrounds

Final thoughts

As you can see, by using a photograph as a template it’s really easy to create 2D Illustrations.

When you’re saving your file, remember that GIMP has its own format that will be the default setting when you use the Save or Save As choices. To use a universal file format such as JPEG or TIFF, you need to select Export As.

I hope you enjoyed the tutorial! The next time you want to create 2D Illustrations, let your photography skills help you out.

The post Easily Create 2D Illustrations from Photographs Using GIMP appeared first on Digital Photography School. It was authored by Ana Mireles.


Digital Photography School

 
Comments Off on Easily Create 2D Illustrations from Photographs Using GIMP

Posted in Photography


21 Settings, Techniques and Rules All New Camera Owners Should Know

13 Oct

The post 21 Settings, Techniques and Rules All New Camera Owners Should Know appeared first on Digital Photography School. It was authored by Darren Rowse.

In this article, we’re going to share 21 photography settings, techniques, and rules you should know as a beginner photographer.

Some are very basic while others go a little deeper, but all have been selected from our archives specifically for beginners and new camera owners.

Enjoy!

Introduction to useful modes and settings on your digital camera

Photography settings, techniques, and rules

1. Digital Camera Modes Explained – I spoke with a family friend recently who had just bought a new point and shoot camera. She came up to me with her camera when no one was watching and embarrassedly asked me if I could tell her what all the little icons on the dial on top of her camera meant. This article explains what each of the most common digital camera modes means and does. Knowing these photography modes can take your shots to the next level.

2. Aperture and Shutter Priority Modes – This introduction takes you through these two very useful settings that can be found on many digital cameras. Aperture and Shutter Priority mode take you off of Auto mode, giving you more control over your images without thrusting you fully into Manual mode. They are great settings to explore and master.

3. Introduction to White Balance – One of the most common problems that I see in beginner photography is shots with incorrect colors. We’ve all seen them: portraits where your subject’s teeth and eyeballs (and everything else) have a yellowish tinge. Learn what causes this and how to combat it with this tutorial on white balance.

Photography settings, techniques, and rules histogram 
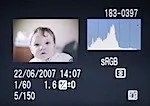
4. Understanding Histograms – “Histograms are scary.” This is what one reader said to me recently when they discovered that they could view these little graphs on their camera. While histograms might seem a little technical, it is amazing how simple a histogram is to interpret. Know what to look for, and with just a glance you can tell if your image is under- or over-exposed. It’s a useful tool to master.

5. Automatic Exposure Bracketing (AEB) – This feature is another of those often-unexplored settings that many cameras have built into them. It will allow you to get well-exposed shots in even the trickiest of lighting situations.

Other basic camera techniques

Photography settings, techniques, and rules: how to hold a camera

6. How to Hold a Digital Camera – This beginner tutorial covers a topic that most camera owners skip over without realizing that it is a foundational lesson in photography. Get this wrong and it can dramatically impact the quality of your shots.

7. Shutter Release Technique – Another basic tip that many do intuitively, but which can drastically improve your photography if you don’t do it.

8. How to Use Focal Lock – Yet another beginner technique that many of us take for granted, yet is at the core of how all digital cameras focus automatically. Get this wrong and you’ll take a lot of shots of out-of-focus subjects and in-focus backgrounds!

9. How to Take Sharp Digital Images – “My shots are fuzzy.” It’s a problem we’re frequently asked about, so we wrote this tutorial to help you get the sharpest images your camera can take.

10. Shooting with an In-Camera Flash – Flash photography with a built-in flash can lead to some terribly blown-out images. This article offers a few tips on how to avoid this. And here are 7 Strategies for Avoiding Flash Blow Out.

11. How to Get Shallow Depth of Field in Your Digital Photos – A great technique to learn if you’re into many types of photography (portraits, macro, etc.) is how to control the depth of field in your shots. That way, you can make your main subject pop by making your background nicely blurred. This tutorial walks you through how to do it.

12. Understanding Exposure – This post takes new camera owners through the three main elements of exposure. Once you’ve read it, also check out our introductions to ISO, aperture, and shutter speed.

Camera care and maintenance

camera care broken camera

13. How to Avoid a Dirty DSLR Sensor – One of the fastest ways to ruin every single shot you take with your new DSLR is to end up with a dirty image sensor. This tutorial gives some basic tips on how to ensure it stays as clean as possible.

14. How to Clean a DSLR Lens – As much as you try to protect them, lenses tend to get grimy over time. This tutorial shares some basic tips on how to clean lenses so that your shots will be as clear as possible.

15. 7 Digital Camera Predators and How to Keep them at Bay – This tutorial takes you through 7 of the most common ways that digital cameras get damaged, what to look out for, and what preventative actions you can take.

Composition tips

rule of thirds composition tips

16. The Rule of Thirds – Whether you follow it or break it, the rule of thirds is a topic you should at least know about.

17. Points of Interest – An image without some visual point of interest is unlikely to hold the eye of anyone viewing it.

18. Getting Horizons Horizontal – The perfect way to ruin that lovely sunset or landscape shot is to make it lean to one side. Get your horizon horizontal!

19. Fill Your Frame – This is not applicable to every shot you take, but many photographers could drastically improve their photography by getting in close to their subject and filling the frame.

20. Getting Backgrounds Right – The background can make or break an image. This tutorial walks you through a number of things to look out for and techniques to use to get the background just right.

21. Adding Randomness to Your Photos – Learn how to set your images apart from everyone else’s by injecting creativity, variety, and a little randomness into your shots.

Of course, these 21 photography settings, techniques, and rules for beginner camera owners just scratch the surface of all there is to learn about the art of photography. Subscribe to our blog here to get more free daily tips to help you keep learning and improving.

Our guide to getting creative control over your camera

If you’re looking for a complete guide to taking control of your camera, then you might like to check out our course, Photo Nuts and Bolts, which walks you through everything you need to know to start taking beautiful photos.

Here’s the intro:


Grab this great dPS course here.

The post 21 Settings, Techniques and Rules All New Camera Owners Should Know appeared first on Digital Photography School. It was authored by Darren Rowse.


Digital Photography School

 
Comments Off on 21 Settings, Techniques and Rules All New Camera Owners Should Know

Posted in Photography


Canon to Release 16 New RF Lenses Before the End of 2021

12 Oct

The post Canon to Release 16 New RF Lenses Before the End of 2021 appeared first on Digital Photography School. It was authored by Jaymes Dempsey.

Canon new RF lenses

Canon’s full-frame mirrorless lineup has seen the addition of two incredible camera bodies this year, but Canon is determined to keep shooting for the stars. 

According to Canon Rumors, we’ll likely see the addition of a whopping 16 new lenses to the RF lineup before 2021 is out. These will round out Canon’s existing set of RF lenses and fill in key gaps, while doubling the native options for Canon’s full-frame mirrorless shooters. 

While the 2021 lens roadmap isn’t confirmed, Canon Rumors claims  that it “comes from a great source” and that “most, if not all [is] accurate.”

So what are these 16 lenses we’ll be getting over the next year?

First, we should see the Canon RF 70-200mm f/4L IS USM, which is supposedly “about the size of a coke can;” if this is accurate, then Canon shooters are in for a treat. A compact 70-200mm f/4 lens that you can carry everywhere is a dream come true for plenty of photographers, including landscape photographers after intimate nature shots, as well as some portrait photographers and potentially even street snappers.

We’ll also get the Canon RF 50mm f/1.8 STM. This is the RF version of the ultra-popular Canon EF 50mm f/1.8 STM, and Canon Rumors claims that it will be “better optically and in build quality than the EF version.” Expect that it’ll be relatively affordable, giving hobbyist shooters a clear-cut entry point into the Canon mirrorless world and giving more serious photographers a lightweight prime to keep on the camera when shooting casually. 

Honestly, these two lenses are alone worth the hype, but add to it 14 additional lenses and you’ve got yourself a truly robust lens lineup. 

Here are the other Canon RF lenses you can expect to see before 2021 is out:

  • Canon TS-R (tilt-shift) 14mm f/4L
  • Canon TS-R (tilt-shift) 24mm f/3.5L
  • Canon RF 10-24mm f/4L
  • Canon RF 14-35mm f/4L IS USM
  • Canon RF 24mm f/1.8 IS STM Macro
  • Canon RF 35mm f/1.2L USM
  • Canon RF 100mm f/2.8L Macro IS USM
  • Canon RF 135mm f/1.4L USM
  • Canon RF 100-400mm f/5.6-7.1 USM
  • Canon RF 400mm f/2.8L IS USM
  • Canon RF 500mm f/4L IS USM
  • Canon RF 600mm f/4L IS USM
  • Canon RF 800mm f/5.6L IS USM
  • Canon RF 1200mm f/8L IS USM

Key among these new lenses are a slew of super-telephoto primes, including a 400mm f/2.8, a 500mm f/4, and a 600mm f/4, all of which will serve wildlife and bird photographers well. And the ultra-wide zooms (the 10-24mm f/4 and the 14-35mm f/4) should certainly be compelling for landscape photographers of all stripes, especially if Canon can keep the price down to a reasonable level.

For Canon shooters, this has been a good year. 

And next year is shaping up to be even more exciting. It’s clear that Canon is now all-in with regard to their full-frame mirrorless lens lineup. 

So if you’ve been thinking about grabbing a Canon mirrorless body, now’s a great time! 

Now over to you:

What do you think of these 16 new RF lenses? Which lenses interest you the most? Are you impressed by Canon’s dedication to its RF-mount? Share your thoughts in the comments!

The post Canon to Release 16 New RF Lenses Before the End of 2021 appeared first on Digital Photography School. It was authored by Jaymes Dempsey.


Digital Photography School

 
Comments Off on Canon to Release 16 New RF Lenses Before the End of 2021

Posted in Photography


10 Ideas for Photographing Nature in your Backyard

11 Oct

The post 10 Ideas for Photographing Nature in your Backyard appeared first on Digital Photography School. It was authored by Karen Quist.

Have you noticed how many photographers are fascinated with nature? Even if we specialize in another genre, few of us can resist a gorgeous flower or a branch of autumn leaves.

One of the best things about photographing nature is that it is so accessible. You don’t need to travel far to find it, because it’s all around you. You may take it for granted because you see it every day, but your own backyard is a treasure trove. Every hour of every day and every season brings something new.

lavender flowers photographing nature in your backyard

Summer lavender | 1/200 sec | f/3.5 | ISO 100

The term “backyard” needn’t be taken literally here. If you don’t have a backyard, you’ll find plenty of nature to photograph just by wandering the streets or public parks and gardens.

Tech details: All of the photographs in this article were shot on my Canon 5D Mark III. Unless otherwise stated, I have used my Canon 100mm f/2.8 macro lens. I have included details of ISO, aperture, and shutter speed settings.

1. Flowers and leaves

Flowers and leaves are often the first things that come to mind when we look for subjects in our own backyards. They offer an endless variety of colors, shapes, and textures for you to photograph. You could create a collection based on a single color scheme, or try to find as many different leaf or flower shapes as possible.

orchid nature photo

Cymbidium orchid | Canon 5D Mark III | Canon 100mm f/2.8 Macro | 1/100 sec | f/4 | ISO 640

photographing nature in your backyard

Violet leaves | Canon 5D Mark III | Canon 100mm f/2.8L IS Macro | 1/30 sec | f/8 | ISO 800

photographing nature in your backyard

Geranium leaves | Canon 5D Mark III | Canon 100mm f/2.8L IS Macro | 1/40 sec | f/8 | ISO 320

You should also experiment with different lighting and conditions. I love backlighting for leaves and flowers, as it creates a luminous, almost three-dimensional effect, and you can see details such as veins. Some shapes look better with strong, directional light, and I love how colors are enhanced by water droplets.

photographing nature in your backyard daffodils

Erlicheer daffodils | Canon 5D Mark III | Canon 100mm f/2.8L IS Macro | 1/640 sec | f/4 | ISO 100

photographing nature in your backyard daffodils

The same flower shot with the sun at my back | Canon 5D Mark III | Canon 100mm f/2.8L IS Macro | 1/800 sec | f/4 | ISO 100

photographing nature in your backyard backlit leaf

Backlighting a leaf reveals details you wouldn’t see if you lit it directly | Canon 5D Mark III | Canon 100mm f/2.8L IS Macro | 1/250 sec | f/4 | ISO 100

Flowers are seasonal, and in temperate zones, spring and summer offer the widest variety. There are still flowers to be found in winter, although you may need to look harder. Don’t forget that weeds, such as dandelions, are also beautiful! Autumn provides the greatest color spectrum in leaves.

photographing nature in your backyard

Liquidambar leaves photographed en masse | Canon 5D Mark III | Canon 100mm f/2.8L IS Macro | 1/80 sec | f/4 | ISO 640

photographing nature in your backyard

A single leaf isolated against a dark background | Canon 5D Mark III | Canon 100mm f/2.8L IS Macro | 1/30 sec | f/4 | ISO 640

2. Fruit, berries, and seed pods

When the summer flowers disappear, fruits and berries are nature’s way of providing for birds and animals throughout the colder months. Many berries and seed pods ripen towards the end of autumn, bringing color to the winter garden. Citrus trees bear fruit in winter, and persimmon trees lose their leaves to reveal branches of shiny orange fruits. Think also of acorns, pine cones, and nuts.

photographing nature in your backyard kumquat

Kumquat | Canon 5D Mark III | Canon 100mm f/2.8L IS Macro | 1/50 sec | f/4.5 | ISO 2500

photographing nature in your backyard

Canon 5D Mark III | Canon 100mm f/2.8L IS Macro | 1/500 sec | f/8 | ISO 800

photographing nature in your backyard

Canon 5D Mark III | Canon 100mm f/2.8L IS Macro | 1/1250 sec | f/5 | ISO 500

photographing nature in your backyard rosehip

Orange rosehip | Canon 5D Mark III | Canon 100mm f/2.8L IS Macro | 1/160 sec | f/5 | ISO 500

photographing nature in your backyard berries

Bunches of red berries | Canon 5D Mark III | Canon 100mm f/2.8L IS Macro | 1/100 sec | f/5 | ISO 500

3. After the rain

Raindrops are fascinating through the lens. Try photographing them from various angles and in different lighting.

When photographing a single droplet, or a string of them, isolate them by keeping the background uncluttered. You can do this by creating distance between the droplets and the background, and by using a wide aperture to ensure the background is blurred. Notice also how water sits in nice round droplets on some types of leaves, but on others it disperses.

photographing nature in your backyard arthropodium leaves

Arthropodium leaves after the rain | Canon 5D Mark III | Canon 100mm f/2.8L IS Macro | 1/80 sec | f/4.5 | ISO 800

photographing nature in your backyard raindrops

Raindrops hang from the slats on the back of a garden chair | Canon 5D Mark III | Canon 100mm f/2.8L IS Macro | 1/125 sec | f/4 | ISO 1000

photographing nature in your backyard

Canon 5D Mark III | Canon 100mm f/2.8L IS Macro | 1/125 sec | f/4 | ISO 640

photographing nature in your backyard raindrops

Canon 5D Mark III | Canon 100mm f/2.8L IS Macro | 1/125 sec | f/4 | ISO 1000

4. Mushrooms, toadstools, and fungi

These are abundant in autumn and winter, but some species pop up throughout the year after rain. Look in damp, mossy places, on the sides of trees, and in log piles for them.

My personal favorites are the red toadstools with white speckles. They are evocative of fairy tales and magic, and their colors are a nature photographer’s dream!

photographing nature in your backyard toadstool

Toadstool | Canon 5D Mark III | Canon 100mm f/2.8L IS Macro | 1/250 sec | f/6.3 | ISO 1000

photographing nature in your backyard

Canon 5D Mark III | Canon 100mm f/2.8L IS Macro | 1/160 sec | f/6.3 | ISO 1000

But don’t ignore the tiny, dull-colored mushrooms and fungi. The mushrooms in the photo below were growing in a crevice on the side of my herb garden. You can see by the scale of the woodgrain how tiny they were. From above, they were nondescript, but when I laid on the ground beneath them and shot into the backlight, they became translucent and I could see their delicate structure.

photographing nature in your backyard

These tiny mushrooms were no bigger than the fingernail on my pinky finger! | Canon 5D Mark III | Canon 100mm f/2.8L IS Macro | 1/160 sec | f/8 | ISO 800

5. Look up; look down

We have a gigantic tree in our backyard. It was probably planted when our house was first built in the 1920s, and its canopy is as big as the house itself. One of my favorite things to do in the warmer months is to put a picnic rug on the lawn and lie on my back gazing up into the tree’s branches. It is free therapy!

Watching the leaves change from bright spring green through to darker green in summer, the first blush of color in autumn, through to a rich claret just before they drop, never ceases to delight me. I have photographed it time and time again through the seasons. Even lying on the ground with my 35mm lens, I can only capture a small portion of the canopy.

photographing nature in your backyard tree

Sigma 35mm ART lens | 1/60 sec | f/11 | ISO 160

photographing nature in your backyard tree

Sigma 35mm f/1.4 lens | 1/100 sec | f/11 | ISO 160

If you are lucky enough to have trees in your garden, try standing or lying directly underneath them and shooting up into the branches. Notice how the light changes from early morning throughout the day into late afternoon and evening. Branches, whether they are naked or covered with leaves, contrast beautifully against a blue sky. They are also stunning at sunrise and sunset and on moonlit nights.

photographing nature in your backyard tree

Sigma 35mm f/1.4 lens | 1/200 sec | f/11 | ISO 200

If you don’t have any trees, look for interesting cloud formations to photograph. You can create a collection of skies to use as Photoshop overlays, which can add interest to other outdoor photos such as portraits. Look for vertical cloud formations, fat white fluffy clouds, and those lovely soft colors around the edge of the clouds at dusk and dawn.

You can also turn your attention downward. On the ground are a million microcosms among the moss, the lawn, between the paving stones, and in the fallen bark and leaves. You won’t see them until you get down to ground level, so lie flat on your tummy and peer into another world.

photographing nature in your backyard moss

The moss on a tree trunk | Canon 5D Mark III | Canon 100mm f/2.8L IS Macro | 1/40 sec | f/4 | ISO 640

6. Black and white beauty

We tend to think of color photography when we think of nature, but don’t dismiss the idea of black and white images. Nature provides sculptural shapes and contrasting textures that make great black and white subjects. If you have succulents or cacti in your garden, they are often more interesting in black and white than they are in color (except on those rare occasions when they flower). Ditto with white flowers against a dark background. Smooth pebbles, rough bark, snail shells, acorns, and pine cones all look fabulous in black and white. Try strong, directional lighting and a high contrast edit.

photographing nature in your backyard

When I converted this file to black and white in Lightroom, I played with the sliders in the B&W panel. The photo on the left has the blue slider pulled all the way down to -100 to darken the sky. On the right, the blue slider is set to zero.

photographing nature in your backyard

 Canon 5D Mark III | Canon 100mm f/2.8L IS Macro | 1/100 sec | f/8 | ISO 100

7. Experiment with sun flare and haze

Your backyard is one of the best places to experiment with effects and new techniques. Firstly, you can become familiar with how things look at various times of the day and throughout the seasons. Secondly, you don’t need to travel far, so you can respond to anything on a whim. If you spot something amazing while you’re sipping your morning coffee, you needn’t even get out of your pajamas to capture it!

The subjects in the two photographs below are both visible from my desk. Every morning last summer, I noticed how this shaft of hazy sunlight would hit the planting of succulents on a pedestal, so I knew exactly what time to capture it at its best. Also sitting at my desk, I saw how the sun caught a spray of orchids just after the rain, and I rushed outside with my camera.

photographing nature in your backyard sun flare

Canon 85mm lens | 1/800 sec | f/4 | ISO 100

photographing nature in your backyard

Shot with sun flare and no lens hood | 1/1000 sec | f/4 | ISO 100

photographing nature in your backyard

For comparison, this is the same scene shot with a lens hood to reduce flare | 1/320 sec | f/4 | ISO 100

8. Snails, bugs, and spiders

For nine months out of the year, there are a million creepy-crawlies in my backyard. This includes butterflies, cicadas, crickets, praying mantises, caterpillars, moths, bees, wasps, and spiders (I could happily do without the latter two). At the time of writing, it is winter in Melbourne, so most bugs are hiding or dormant.

9. Birds and other wildlife

I’m going to begin this section with honesty.

Confession number one: Photographing wildlife of any kind requires more patience and a longer telephoto lens than I possess.

Confession number two: I have the greatest admiration for those who do wildlife photography. I have a Pinterest board just for animal photos (I have a clear bias towards squirrels), and on 500px I follow a number of photographers, one of whom only photographs squirrels!

The kinds of animals and birds you’re likely to find in your backyard obviously depends on which part of the world you live in and how built-up your neighborhood is. You will know which kinds of critters visit your backyard and what their habits are. With that in mind, find a spot where you won’t be too conspicuous and be prepared to wait. If you’re using a long lens, you might consider working with a tripod or a monopod to avoid camera shake. Have your ISO and aperture all set to go, plus a fast shutter speed to freeze motion. If you have been watching an animal’s behavior over several days or weeks, it may be possible to focus roughly on the area you expect them to appear (for example, the birdbath).

Also read: Guide to Attracting Critters to Your Garden for Backyard Wildlife Photography

10. Portraits in nature

Nature provides us with the perfect canvas for portraiture. Look for a bank of flowers, a bed of autumn leaves, or just a green hedge. The colors in nature never seem to clash.

When photographing children and pets, in particular, I almost always prefer an outdoor location over a studio. My eldest daughter usually runs a mile when she sees the camera, but the chance to roll around with the dog in glorious leaves was clearly too much for her to resist (see the image below).

I love how the soft hues flatter my daughter’s skin tone. If you are shooting outdoors with lots of colors, such as flowers or autumn leaves, pay attention to your subject’s outfit. These portraits might have been too busy if my daughter had been wearing a patterned outfit.

photographing nature in your backyard portrait with dog

Not even teenage daughters can resist these leaves! | 1/400 sec | f/4 | ISO 320

photographing nature in your backyard portrait with dog

1/320 sec | f/4 | ISO 320

Conclusion

So there you have it: Plenty of inspiration to get outdoors and photograph nature in your own backyard. It’s time to stop reading and get out there with your camera.

Here are some additional articles that will help improve your outdoor and nature photography skills:

  • 3 Habits Every Outdoor Photographer Should Develop to Avoid Missing Shots
  • 5 Tips for Better Nature Photography
  • 27 Serene Images of the Natural World

The post 10 Ideas for Photographing Nature in your Backyard appeared first on Digital Photography School. It was authored by Karen Quist.


Digital Photography School

 
Comments Off on 10 Ideas for Photographing Nature in your Backyard

Posted in Photography


5 Must-Have Lenses for Wedding Photographers and Why

11 Oct

The post 5 Must-Have Lenses for Wedding Photographers and Why appeared first on Digital Photography School. It was authored by Lily Sawyer.

Have you ever wondered which lenses for wedding photographers are best?

There is a plethora of choice when it comes to lenses, and lens companies come up with new products all the time. Many photographers are attracted to these bright and shiny things and end up with a huge collection of lenses, many of which hardly see the light of day.

But if you have to pare back to the absolute necessities and are allowed five lenses in your wedding photography bag, these are the ones that I would recommend. I have been a professional wedding photographer for seven years now, and deciding on these five lenses took some time and serious consideration over the course of my career.

They are:

  1. The 70-200mm f/2.8
  2. The 24-70mm f/2.8
  3. The 85mm prime
  4. The 35mm prime
  5. A macro lens (105mm or 60mm for Nikon, 100mm or 60mm for Canon)

Let’s look at each lens individually to see why.

lenses for wedding photographers

1. 70-200mm f/2.8

It’s big, bulky, and heavy, but I wouldn’t do a wedding without this lens. The 70-200 f/2.8 is my workhorse when it comes to weddings. It is a versatile lens that gives you amazing sharpness at all focal lengths. The bokeh is beautiful, especially at 200mm and even with a stopped-down aperture (thanks to the compression created by the long focal length).

A 70-200mm f/2.8 makes a wedding photographer invisible. You don’t have to be close to people’s faces; you can capture candid expressions and serendipitous moments from a fair distance away. This lens is especially useful during the wedding ceremony, when you would rather be far away and out of sight or hidden behind a wall or door. It allows you to capture the exchange of rings, the vows, and the kiss discreetly.

lenses for wedding photographers example photo

If you require an even longer zoom while staying at the same distance, you can choose to photograph using Crop mode (if you shoot full-frame and your camera offers this option). This will generally give you a 1.5x crop factor (it only uses a portion of the image and enlarges it approximately 1.5x). If you do this, make sure that you have enough pixels for the crop in case you feel the need to straighten or change your composition in post-processing.

For example, if you are shooting with a 12 MP camera in its full-frame mode, when you convert to your Crop mode the camera becomes a 5 MP camera. This is below the minimum amount of pixels you need (generally around 6 MP) to enlarge prints to a decent size.

And if you have to crop in post-processing, 5 MP will not offer enough pixels to do so without compromising print output sizes.

lenses for wedding photographers wedding program

However, if you are photographing with a 36 MP camera in Crop mode, it drops to 15.3 MP. While this is a significant resolution reduction, it still leaves you enough wiggle room for minimal and sensible cropping if necessary.

If you use Crop mode, don’t forget that when photographing on a full-frame camera, or when using a lens designed for APS-C cameras, the camera only uses the center of the sensor. So if you forget to compose accordingly in-camera, you will get a nasty surprise after you have taken the image: cut off heads and limbs, and badly cropped compositions are two examples.

When using APS-C lenses on a full-frame body, the rest of the unused sensor area is blacked out. But when using full-frame lenses in Crop mode, this is not the default. You will still see the entire full-frame sensor if you don’t change your settings.

lenses for wedding photographers married couple

70-200mm is an excellent focal length for flattering portraits. When photographing at 200mm, I typically stop down to around f/4 or f/5.6 at a shutter speed of 1/200-1/400th, and the sharpness of the image is stunning against a creamy bokeh background. My 70-200mm f/2.8 lens also has a built-in lens collar you can use to steady your setup when hand-holding (and you also have the option to attach it to a tripod).

Without a tripod, you can steady yourself as much as possible by leaning against something strong like a wall or a stable surface such as a table. You can also keep your arms pinned against something sturdy to reduce camera shake, especially when using your lens for portrait work at the longer end of its focal length.

lenses for wedding photographers couple in golf cart

lenses for wedding photographers beautiful venue

There are also 70-200mm f/4 lenses, which you can purchase at vastly cheaper prices compared to the f/2.8. I personally do not have the f/4 version, but if you’re on a budget and you don’t mind not having the option to photograph at a wider aperture, then I see no reason why you should avoid the 70-200mm f/4. It is lighter and smaller (it has fewer glass elements compared to its more expensive counterpart) which lessens the weight you have to carry around at a wedding.

lenses for wedding photographers golf cart venue

lenses for wedding photographers just married sign

2. 24-70mm f/2.8

The 24-70mm f/2.8 offers the focal length versatility needed when you are photographing on the go, which is what wedding photographers require for most of the day. You can use this lens to capture wider location scenes, candid photos of people, guests arriving, people milling and chatting while waiting for the ceremony to start or during the wedding breakfast, some decorations and details, the first dance, and the leaving photos, to cite just a few.

lenses for wedding photographers 24-70 example

lenses for wedding photographers 24-70 example

I use this lens for photos that do not require close portrait work, although it can definitely be used for that type of image. The 50-70mm range will yield pleasing results, like the image directly below. However, my preference is to use prime lenses for portraits.

The 24-70mm lens sees a whole lot of action on the wedding day, and is definitely my other workhorse for capturing people, wider shots, and behind-the-scenes images.

lenses for wedding photographers girl with flowers

lenses for wedding photographers

Many photographers use a much wider lens for location photographs, such as a 14-24mm f/2.8. But while I would love to add this lens to my arsenal, this is not an absolute necessity. With the 24-70mm, you can photograph location scenes wide enough. And should you need to capture a wider scene, you could photograph a few images and stitch them together in Photoshop as a panorama. This is easy enough to do by making sure the exposure setting for the series of shots is the same, standing on a fixed point, then capturing a set of images while adjusting your composition slightly.

You can do the same for a photograph of all the guests, too. In fact, the two times mentioned above are the only times I need an ultra-wide lens for a wedding, so I cannot yet justify adding it to my list of must-haves.

lenses for wedding photographers people dancing

lenses for wedding photographers people dancing

3. 85mm prime

This is my all-time favorite lens, and the one I use for portraits of the bride and groom, bridesmaids and groomsmen, individual guests and small groups (the list goes on!).

As a fixed lens, an 85mm prime requires more work on your part; you have to zoom in and out with your feet. But the extra effort is worth it. The portraits are cleaner, the backgrounds are creamier, and it is a fabulous lens in very low-light conditions.

lenses for wedding photographers married couple

The best thing about this lens is that it is tack sharp from the sweet spot on. Accurate, light-sensitive, with great results; this is my go-to lens, and it never leaves my bag. As a prime lens, the 85mm is fast, small, and extremely reliable.

lenses for wedding photographers married couple silhouette

I have photographed an entire wedding of a relative (as a guest) using only an 85mm lens. I was asked on the day if I could cover the wedding and I agreed, with only the D700 and my 85mm lens in hand (I generally carry that combination with me for personal snapshots and photos of my family).

The photos from that wedding are published on one of the UK’s top wedding blogs, which is proof that you can photograph a wedding with what you have, given that you know your gear well enough.

lenses for wedding photographers

The 85mm for Nikon F-mount cameras comes in either as an f/1.8 version ($ 480 USD) or an f/1.4 version ($ 1597 USD), with a huge price difference between the two due to the glass elements and optics. You can also purchase the 85mm f/1.8 S for Nikon Z-mount cameras for just under $ 800 USD.

Canon has an 85mm f/1.2 available for $ 1999 USD, as well as an f/1.4 version ($ 1599 USD) and an f/1.8 version ($ 419 USD). For Canon mirrorless users, there’s the Canon RF 85mm f/1.2 (for an admittedly premium price). And Sony offers an 85mm f/1.8 for $ 598 USD and an 85mm f/1.4 for $ 1798 USD.

I have the Nikon 85mm f/1.8 and it has always performed marvelously for me. The f/1.4 has been on my lens list forever, and while I could buy it I have held off, given that I have never felt the need to upgrade.

lenses for wedding photographers

4. 35mm

One of my early serious lens investments was the amazing 35mm f/1.4. If there is a lens I can always rely on, it’s this one.

It’s an ultra-versatile lens that you can use to photograph the bride getting ready, which is the time when wedding photographers are usually under pressure to capture everything. This includes the location, the many accessories, any small details, candid shots, the dress, the natural interactions between the bride and her loved ones, and group portraits. Plus, you must do this in a very short amount of time, often in small spaces like cramped hotel rooms.

A 35mm lens is also perfect for photographing wider scenes, because you can get images without the exaggerated distortions caused by a wider focal length.

lenses for wedding photographers 35mm example

lenses for wedding photographers 35mm example

This lens is super fast and sharp. It has yet to fail me. With this lens, you can get close, which is very handy when you are in a crowded space.

As if that weren’t enough, my 35mm lens opens up to f/1.4, which allows you to photograph in extremely low light, especially if you are too pressed for time and space to use off-camera flashes.

Even though the 35mm focal length is already covered by the 24-70mm f/2.8 (discussed above), the difference between f/1.4 and f/2.8 (two extra stops for four times the light) cannot be underestimated.

lenses for wedding photographers

lenses for wedding photographers

The 35mm is also offered as an f/1.8 version by Nikon, but it’s a DX lens that you can purchase for cheap (under $ 200).

You may wonder about the astronomical difference in price compared to the professional f/1.4 counterpart. First of all, you cannot use the DX lens on a full-frame camera without losing pixels, and the lens becomes 52.5mm which can be very limiting in tight spaces.

Secondly, the 35mm view is close enough to what the eye naturally sees, and I like that view. It allows you to capture images that give the viewer the impression that they could have been there seeing the scene themselves. This is an important element in any wedding photography, specifically wedding photography with a documentary style.

lenses for wedding photographers

If you ever get to physically hold each lens in your hands at the same time, the enormous price difference between the f/1.4 version and the f/1.8 version won’t even be in question. The f/1.4 is considerably heavier and much bigger than the pocket-sized f/1.8. But don’t be fooled by appearances; the f/1.8 is also an outstanding lens with exceptional capabilities in its own right, and for crop-sensor cameras may be more than sufficient. It is definitely easy on the budget.
lenses for wedding photographers

lenses for wedding photographers

If you already have a 50mm lens and your budget is constrained, then a 50mm prime could replace the 35mm prime on this list. It is also an incredible lens.

Although a 50mm doesn’t give you as much room to maneuver in smaller spaces as a 35mm, the bokeh on the 50mm is stunning and it’s impressively sharp too, which is one of the top benefits of prime lenses. Like the 35mm lens, the 50mm is available as an f/1.8, f/1.4 or, for Canon cameras, an f/1.2 maximum aperture. The price difference is small between the f/1.8 and the f/1.4, but it jumps up to a huge number for the f/1.2.

lenses for wedding photographers details

lenses for wedding photographers church

5. 105mm (100mm) or 60mm macro lens

A macro lens is the last of my must-have lenses for wedding photographers. It’s absolutely key if you want to capture detailed images of rings. You can also use your macro lens for photographing jewelry and other accessories while the bride is getting ready.

If the bride’s dress is adorned with jewels, a macro lens would also be ideal for photographing the details.

In addition, macro lenses are also great for portraits if you do not require an aperture wider than f/2.8. This makes macro lenses versatile options to carry around, especially 60mm macro lenses, which look and feel minuscule compared to the 105mm options (100mm for Canon). These macro lenses can generally stop down to f/32, which is handy, especially when photographing location landscapes in extremely bright sunlight.

lenses for wedding photographers

lenses for wedding photographers rings

Some photographers even use the 105mm macro lens as a substitute for the 70-200mm lens if the latter is just too out of reach. You can use the 105mm in Crop mode, which gives you 157.5mm; this is long enough to still be very inconspicuous at a wedding. A 105mm lens is also smaller and lighter, and it opens up to f/2.8. Plus, it doubles as a macro lens.

lenses for wedding photographers details

lenses for wedding photographers

The post 5 Must-Have Lenses for Wedding Photographers and Why appeared first on Digital Photography School. It was authored by Lily Sawyer.


Digital Photography School

 
Comments Off on 5 Must-Have Lenses for Wedding Photographers and Why

Posted in Photography


Weekly Photography Challenge – Iconic

10 Oct

The post Weekly Photography Challenge – Iconic appeared first on Digital Photography School. It was authored by Sime.

This week we want to see something iconic, that can be a landmark or place or just something that you think people will immediately recognise, like… A certain brand of toothpaste, for example, photographed in an interesting way (Bonus points if you try that!) or the London Eye! (This was a photo I made of the Eye in 2007… on a 6mp camera… those days were fun!) It just has to be instantly recognisable to the viewer. Do your best and have fun! #dPSIconic – Think outside the box!

Weekly Photography Challenge – Iconic
London Eye by night | Canon 30D f/4.5 for 4 seconds at 17mm

If you don’t have an iconic building handy, think smaller like ‘Lego’ for example, most people know what Lego is! (Or have stepped on it in the dead of night while checking on the sleeping kids!) The goal is to photograph something instantly recognisable and try to do it in an interesting way!

Weekly Photography Challenge – Iconic

Great! Where do I upload my photos?

Simply upload your shot into the comments field (look for the little camera icon in the Disqus comments section) and they’ll get embedded for us all to see. Or, if you’d prefer, upload them to your favourite photo-sharing site and leave the link to them.

Weekly Photography Challenge – Looking Up

Share in the dPS Facebook Group

You can also share your images in the dPS Facebook group as the challenge is posted there each week as well.

If you tag your photos on FlickrInstagramTwitter or other sites – tag them as #DPSIconic to help others find them. Linking back to this page might also help others know what you’re doing so that they can share in the fun.

Follow us on Instagram?

The post Weekly Photography Challenge – Iconic appeared first on Digital Photography School. It was authored by Sime.


Digital Photography School

 
Comments Off on Weekly Photography Challenge – Iconic

Posted in Photography


Try the Full-Frame Nikon Z 5 for 30 Days With the Yellow Program

09 Oct

The post Try the Full-Frame Nikon Z 5 for 30 Days With the Yellow Program appeared first on Digital Photography School. It was authored by Jaymes Dempsey.

Nikon Yellow Program Z 5

If you’re thinking about purchasing the Nikon Z 5 but you’re just not sure whether it’s the right fit, then you’re in luck:

Nikon has reintroduced its Yellow Program, which allows US-based consumers to order the Z5 and, if not satisfied before a month is out, return the camera for their money back.

As Nikon explains:

“We’re so sure you’ll be thrilled with the performance you’ll get with your new full frame mirrorless Z 5 camera that we’ll let you try one at home for 30 days. If you aren’t totally impressed with the Z 5 (we’d be surprised), send it back to us for a full refund.”

The return offer even includes a prepaid shipping label, so there truly is no cost to you; if you’re not completely satisfied by your purchase, you’ll have lost nothing at all.

If you do decide to take advantage of the Nikon Yellow Program, note that your Z 5 will be inspected if returned (it must be sent back in “like-new condition”). Also note that all Nikon Yellow customers will need to pay in advance, rather than after the thirty-day trial period is over.

So what options does the Yellow Program offer?

You can choose from three kits:

  • The Nikon Z 5 body only (for $ 1399.95 USD)
  • The Nikon Z 5 with a 24-200mm f/4-6.3 VR lens (for $ 2,199.95 USD)
  • The Nikon Z 5 with a 24-50mm f/4-6.3 lens (for $ 1699.95 USD)

You can also grab the FTZ adapter for a few extra dollars; this will allow you to mount Nikon F-mount lenses onto the Z 5. The adapter is invaluable if you have a collection of lenses for your Nikon DSLR and, fortunately, Nikon includes a special provision in the Yellow Program to account for FTZ adapters: If you purchase an adapter along with a Yellow Program Z 5, you can return the adapter as well as the camera at the end of the trial period for a full refund.

Nice, right?

All in all, the Z 5 is a powerful, entry-level, full-frame option from Nikon, one that’s perfect for hobbyists and semi-professionals of all types, from landscape shooters to travel photographers to portrait snappers and more.

So why not give it a try?

You can read more about the Nikon Yellow Program here, but don’t dawdle; the offer ends on November 30th.

The post Try the Full-Frame Nikon Z 5 for 30 Days With the Yellow Program appeared first on Digital Photography School. It was authored by Jaymes Dempsey.


Digital Photography School

 
Comments Off on Try the Full-Frame Nikon Z 5 for 30 Days With the Yellow Program

Posted in Photography