Category: Photography

  • Panasonic Lumix FZ60 Review

    Panasonic Lumix FZ60.jpg

    I remember some years ago lusting after a (then) new Kodak (remember them?) digicam that had a 10x zoom. Wow! I thought what photographic horizons it would conquer.

    Now, you can put your mitts on a 50x zoom digicam (thanks to Canon) but, as you will quickly find out, it’s not a dream holiday with such a powerful lens, with handholding at extreme tele settings a no-no.

    Panasonic Lumix FZ60-front.jpg

    IMHO the 24x zoom on the FZ60 is arguably a better length for average shooting in the hands of the average and lesser-skilled photographer.

    Panasonic Lumix FZ60-top.jpg

    Panasonic quaintly describes the camera as one that ‘caters to the camera buyer who wants that zoom reach, but doesn’t need the bright constant aperture, and the drawbacks it brings. If you’re willing to forgo the extra light capture, it could provide a compelling option.’

    Eh?

    It seems the company is comparing the FZ60 with another model which had an aperture of f4.5 as opposed to the FZ60′s smaller f5.2 at the tele end. For me, there’s little sense in the comparison.

    The big plus is that the 24x zoom ranges from a 35 SLR wide equivalent of 25mm to a tele equivalent of 600mm. As I’ve mentioned many times before, try and get, use and lug a 35 DSLR lens of that focal length!

    And it’s a Leica-designed optic.

    Panasonic Lumix FZ60 Back.jpg

    Panasonic Lumix FZ60 Features

    The camera is set in the by now established bridge camera format: looks like an interchangeable DSLR, works like one but doesn’t allow lens switching and cannot take pictures equal in quality to a DSLR. So there!

    But for many people, especially those on a foreign (or even domestic!) holiday this is the ideal single camera for the purpose: it’s relatively compact, won’t stow in your pocket but will hang quite happily on from your neck regions on a shoulder strap and few subjects, however distant, will be beyond your reach.

    Panasonic Lumix FZ60 Menu_1.jpg

    Panasonic Lumix FZ60 Scenes.jpg

    The mode dial carries well-identified settings for intelligent Auto, PASM, creative movie, two custom settings, scene modes (soft focus, dynamic monochrome, cross processing etc) and creative control setting.

    Creative movie allows you use Program AE, aperture and shutter priority settings plus manual when shooting video.

    Creative control lets you select a variety of image effects in stills shooting, along with examples of how they look.

    Topside carries a selection of buttons to shoot a burst of shots, a Function button, movie record and the zoom lever.

    Move to the rear side and we see the four way jog dial, with the menu button set into its centre, along with another Function button, trash plus AF options.

    The 16.1 million pixel CMOS captures a relatively largish maximum image size of 4608×2592 pixels or, in print terms, an output of 39x22cm output.

    Movies in Full HD 1920×1080 can be recorded to a Class 4 SD card in the AVCHD format or MPEG4 at a lower resolution. This clip was shot with a stills pan head, which accounts for the jerky panning!

    Overall, the camera offers a surprising level of manual and over-riding control as well as the useful ability to capture on RAW and JPEG.

    A special note: I had a great time shooting some beach action in movie mode. The zoom’s full tele setting is perfect for such a subject.

    Startup Times

    I could shoot the first shots about two seconds after powering up, while follow on shots came in at about a second apart, until the buffer memory filled.

    Distortion

    No sign of any distortion at the wide or tele ends of the zoom.

    Panasonic Lumix FZ60 ISO Tests

    Panasonic Lumix FZ60 ISO 100.JPG

    Panasonic Lumix FZ60 ISO 400.JPG

    Panasonic Lumix FZ60 ISO 800.JPG

    Panasonic Lumix FZ60 ISO 1600.JPG

    Panasonic Lumix FZ60 ISO 3200.JPG

    At ISO 1600 some artefacts were beginning to appear and by ISO 3200 these made picture taking a tricky chore.

    (insert Full wide 2 and Full tele 2

    Panasonic Lumix FZ60 Review Verdict

    Panasonic Lumix FZ60  wide.JPG

    Panasonic Lumix FZ60  tele.JPG
    Quality: excellent.

    Why you’d buy the Panasonic Lumix FZ60: above average as a stills camera; perfect for video.

    Why you wouldn’t: a vari-angle screen could have made a difference.

    Great camera, excellent zoom reach.

    Panasonic Lumix FZ60 Specifications

    Image Sensor: 16.1 million effective pixels.
    Sensor: 11mm CMOS.
    Metering: Multi, centre-weighted, spot.
    Lens: Leica DC Vario-Elmarit f2.8-5.2/4.5-108mm (25-600mm as 35 SLR equivalent)
    Exposure Modes: Auto, Program AE, shutter and aperture priority, manual.
    Shutter Speed: 4-1/2000 second.
    Memory: SD/SDHC/SDXC plus 70 MB internal.
    Image Sizes (pixels): Stills: 4608×2592 to 480×480.
    Movies: 1920×1080, 1280×720, 640×480.
    Viewfinder: Turret (202,000) and 7.6cm LCD screen (460,000).
    File Formats: JPEG, MPO 3D, MPEG4, AVCHD.
    Colour Space: sRGB.
    ISO Sensitivity: Auto, 100 to 6400.
    Interface: USB 2.0, HDMI mini, remote control, DC input.
    Power: Rechargeable lithium ion battery.
    Dimensions: 120.3×80.8×91.9 WHDmm.
    Weight: 493 g (with battery and card).
    Price: Get a price on the Panasonic Lumix FZ60 at Amazon.

    Post originally from: Digital Photography Tips.

    Check out our more Photography Tips at Photography Tips for Beginners, Portrait Photography Tips and Wedding Photography Tips.

    Panasonic Lumix FZ60 Review


    Digital Photography School

  • Brilliant DIY Underwater Strobe Triggering System

    Oh, this is just genius.

    JP Danko of blurMEDIA photography has created a captive, optical syncing system for his Pelican-encased SB-800s using cheap, off the shelf TOSLink fiber-optic cabling.

    More vids, pics, etc at DIYPhotography.net.

    -30-


    Strobist

  • StickyAlbums Mobile Portfolios [REVIEW]

    StickyAlbums is, at its heart, a tool for generating word-of-mouth referrals for professional photographers. As you will see in this review, the system is not set up for the casual photographer, as the free version is more of a means of introduction and trial than it is a full blown service, like gmail or Flickr.

    StickyAlbums is a way to create a mobile portfolio of images, either in general or for a specific client. The creation of the portfolio takes place on stickyalbums.com and the viewing is optimized for mobile devices, such a tablets or smartphones. While the portfolios are known to be 100% compatible with iOS devices, not every single version of Android can be tested, although I was informed the app should work on just about any Droid phone or tablet.

    Albums are created by uploading images to stickyalbums.com, creating a couple of splash pages, some simple formats and then delivery to clients. Clients will receive a link which will ask them if they want to download the album, which will show up as an ‘app’ on the desktop of their mobile device. From there, clients can browse, zoom and share albums. The service has basic features, like stats for number of downloads, and is ready for prime time, while still under development and improvement based on customer feedback.

    Getting Started

    Let me start by pointing out the free version is good for one album of 12 images as a trial.  If you want to skip this review and give it a try yourself, go to http://www.stickyalbums.com/pricing/. The next level up is a monthly subscription ($ 21/mo) which allows for use of youtube videos as well as images and lifetime hosting. The highest level offers everything the monthly subscription offers plus the option to use your own branding on albums, unlimited uploads, password protected albums and lifetime hosting of albums. It is appropriately called the “Professional” version and runs $ 189/year.

    The basic process is this:

    • Pick a number of images for the album you want to create. The album shouldn’t be much more than 10-40 images because there is a 50MB download limit for most devices.
    • Resize the images to be 1600px on the long edge.
    • Now gather some special images. These will be a logo (rectangular), desktop icon and two splash screen, or ‘loading’ images. The loading images can be of anything and created using Photoshop to include your logo as well.
    • Start stepping through the album creation process where it will ask for your images, desktop icon, logo, email address, phone number, web address and loading pages.
    • Create the album and share!

    I found the process to be easy once I ran through it a couple of times. It helps that logos and other info (my website, email, etc…) can be stored on the site for easy entry when creating an album.

    I’m not going to give a step-by-step tutorial here because they already have a well organized page that describes how to arrange files and use the service to create an album. That can be found here http://www.stickyalbums.com/create-your-branding-files/

    In The Real World

    What it is like using StickyAlbums? With a recent upgrade to the site, it is easy and useful. Not that it wasn’t useful before, but some small issues with organizing images have been fixed and the ability to see basic stats (how many downloads) was added. The Professional version also allows for password protected albums.
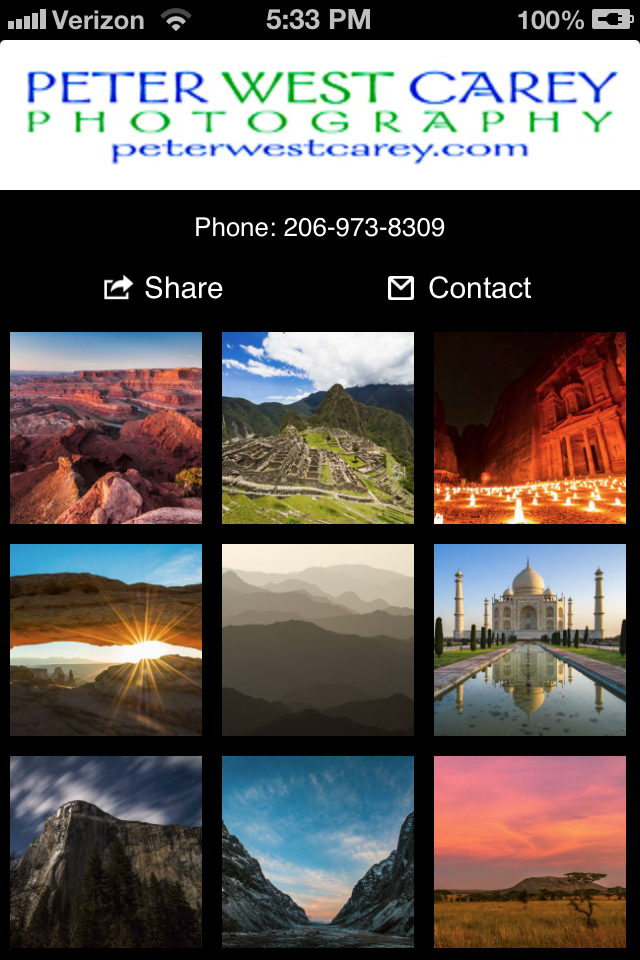
    How can you use StickyAlbums? If you are a pro, there are a number of ways. I have used it as a basic means to share images with clients, such as wedding clients, before and after delivery of final images. Brides with smartphones are an excellent market for this app as it place their wedding images in an easy to carry package to show friends. No need for your clients to save all the images and page through them inside their phone’s ‘Photos’ album. This product stands by itself as a desktop icon.

    It can be used as a basic portfolio to send to connected clients. It can also be used as a promotional tool. For instance, let’s say you perform a studio shoot with a client, such as a high school senior. Inside the album you send to the senior and their parents you include 20 images from the shoot. Also included is an image you create in Photoshop that is a 20% off coupon for another shoot, complete with your phone number and email address, either for them or for a friend. Referrals are the lifeblood of many studio photographers and this app helps put your name and contact info right into the hands of your client when they are showing their friends how great they look during your studio shoot.

    There is some downside to the app. It can become large, the downloads I mean. A lot of devices demand use of wifi if a download is more than 10MB and these albums can quickly become large with 20 images, even at 1600px and 72PPI. Clients will often need to accept an exception request on their phone allowing them to download the larger package and that’s an extra step for users not always familiar with the process.

    On the plus side, there is no need to use the iTune Store or Google Play as the service uses HTML5 to deploy. This means no need to learn coding nor application to either service. Also, as the service will download images the first time a client clicks on their desktop icon and then caches it, opening after the first time is fairly quick for users. Even better, the albums can be updated by you on the website backend and the next time your client opens that album, it will grab the new images.

    If you are a kids sports photographer, this can be a great tool. Imagine creating a ‘living’ album that starts off with an image of the teams season schedule. The next pictures are highlights from the latest game which can change each time you shoot the team. Or a “highlights reel” where you simply add new images of great catches or game wining shots and build the album as the season goes on. Even more so, you can create an album for each player on a basketball team, for instance, and then add photos of them in action each week simply by sorting by jersey number.

    I have already used the service to deliver albums to previous wedding clients as a thank you and a friendly reminder that I still shoot weddings. It can also be used as an add-on for wedding photographers who want to charge for the download as an additional service. Many wedding photographers like to send a thank you on the one year anniversary of their clients’ weddings and this plays perfectly into that idea for connected clients.
    Conclusion

    With the Professional version of the site allowing for complete branding based with your company’s logo and contact info, StickyAlbums is an easy, out-of-the-box solution for photographers looking to get their images into the hands of their clients in a way clients will utilize over and over. The concept is simple; make it easy for your clients to show their friends how great of a photographer you are.

    The app allows clients to share links via text message, email, Pinterest, Facebook or Twitter. It will also sense orientation and rotate images accordingly (tip: group your horizontal images together and your portrait images together so your clients don’t have to keep rotating their phone).

    I like what I’ve found so far and plan on continue to use the service to help generate more referrals. I like that the images can not be copied directly (although any device allows screen shots).

    If you would like to see a sample album, I have one of 30 images from my current ‘Best Of…” folder. Click on this link from your mobile device http://moblalbum.com/vlQw7rfYBo/gallery/30843 You can click on that link in a web browser from any machine and get a web-based version as well.

    Post originally from: Digital Photography Tips.

    Check out our more Photography Tips at Photography Tips for Beginners, Portrait Photography Tips and Wedding Photography Tips.

    StickyAlbums Mobile Portfolios [REVIEW]


    Digital Photography School

  • The 15 Most Popular DSLRS Among Our Readers

    Every few months we like to report back to the dPS community which cameras (and other gear) are most popular with our readers. Today we’re going to take a look at the highest selling DSLRs among our readers over the last 4 months (as ranked by the reports that Amazon gives us*).

    As usual you’ll see it is largely a battle between Canon and Nikon (who dominate this class of camera) and that at the top of the list we see entry level DSLRS most popular (mainly due to their price). Further down the list we see more serious (and expensive) contenders.

    Note: Amazon currently have some great specials at the moment on cameras and gear as part of their Holiday Promotions.

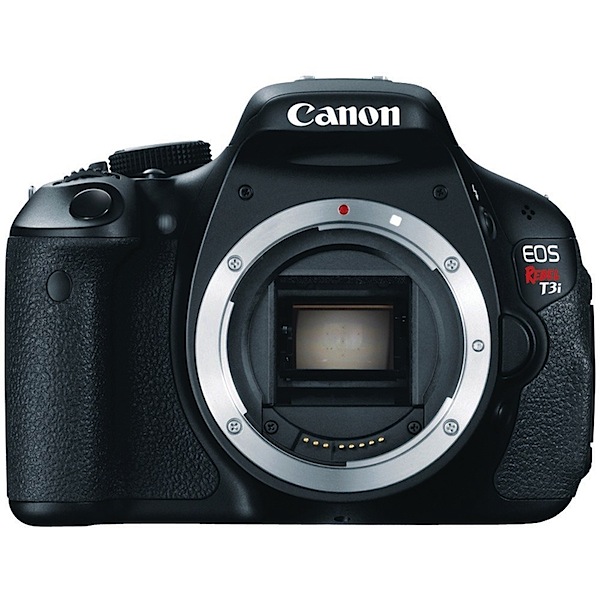
    1. Canon EOS Rebel T3i

    _images_I_71lbwO52tvL._AA1000_.jpg

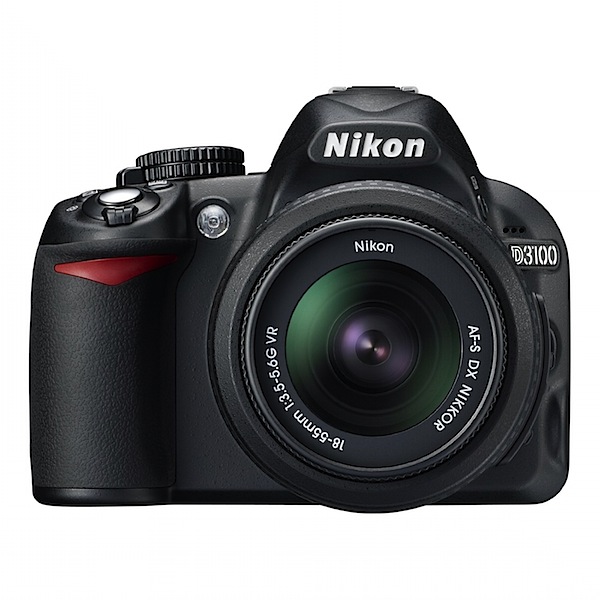
    2. Nikon D3100

    _images_I_713u2gDQqML._AA1500_.jpg

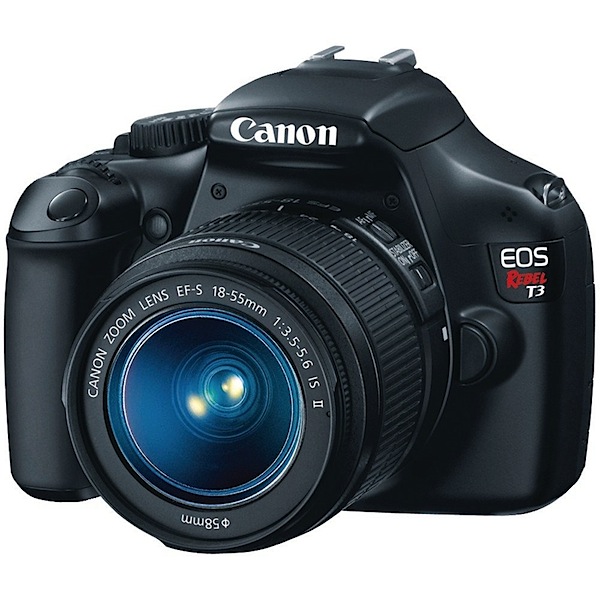
    3. Canon EOS Rebel T3

    _images_I_71AKBVTvZdL._AA1000_.jpg

    4. Canon EOS Rebel T4i

    61W0knoTL2L._SL1500_.jpeg

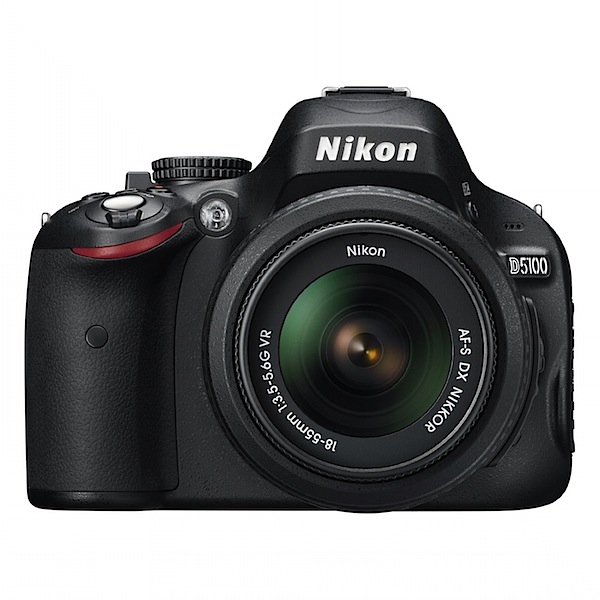
    5. Nikon D5100

    _images_I_81PnDu4O7tL._AA1500_.jpg

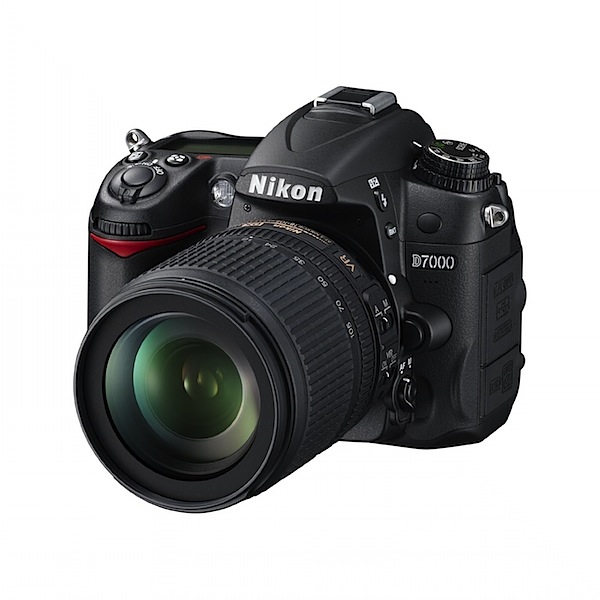
    6. Nikon D7000

    _images_I_71yf785aBmL._AA1500_.jpg

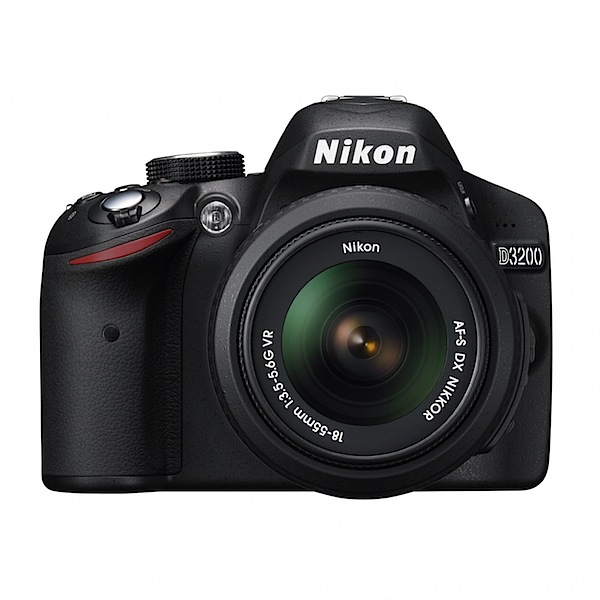
    7. Nikon D3200

    _images_I_91WSe2OKasL._AA1500_.jpg

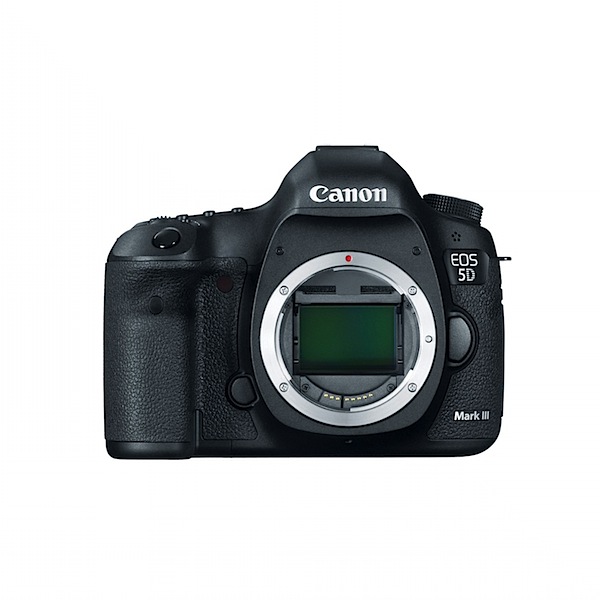
    8. Canon EOS 5D Mk III

    _images_I_71X9b9JhO8L._AA1500_.jpg

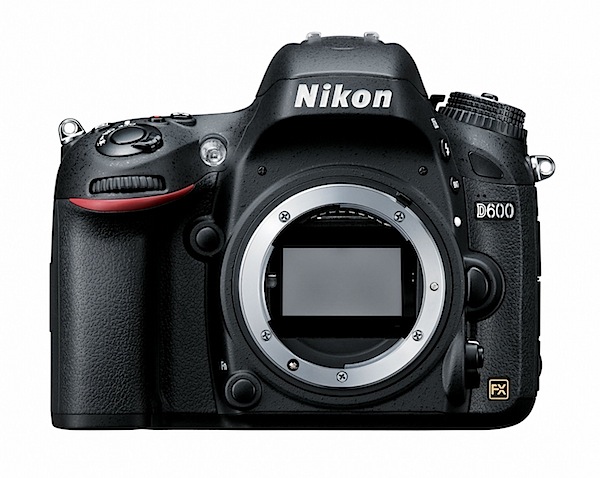
    9. Nikon D600

    91-hCPz5MoL._SL1500_.jpeg

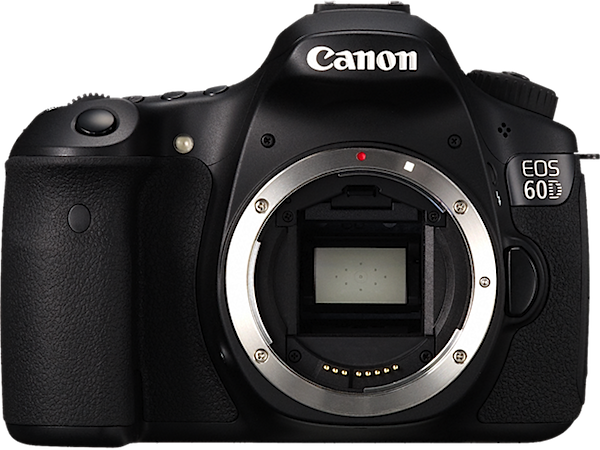
    10. Canon EOS 60D

    60D_07_AUS.png

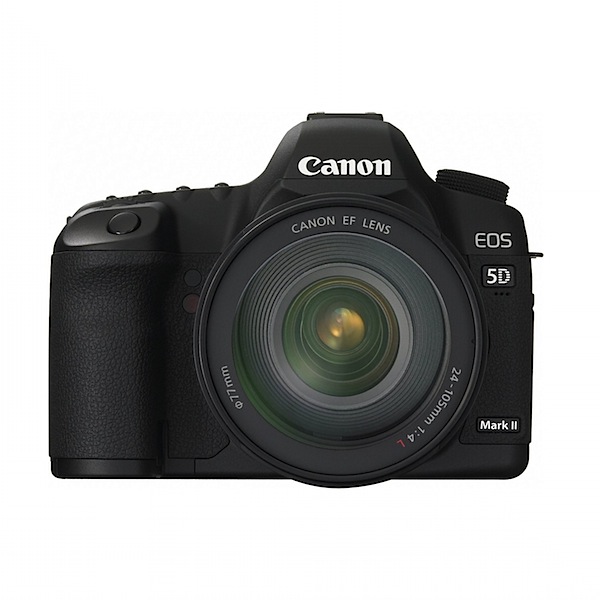
    11. Canon EOS 5D Mk II

    _images_I_81CeBRtBEjS._AA1500_.jpg

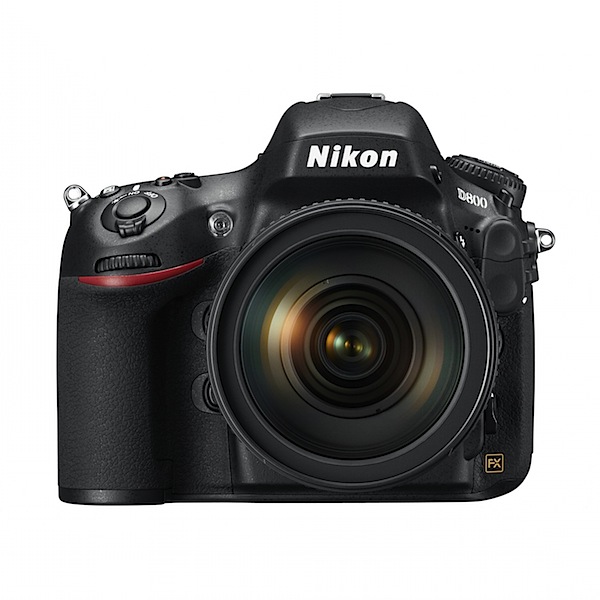
    12. Nikon D800

    _images_I_91vKOc7nfNL._AA1500_.jpg

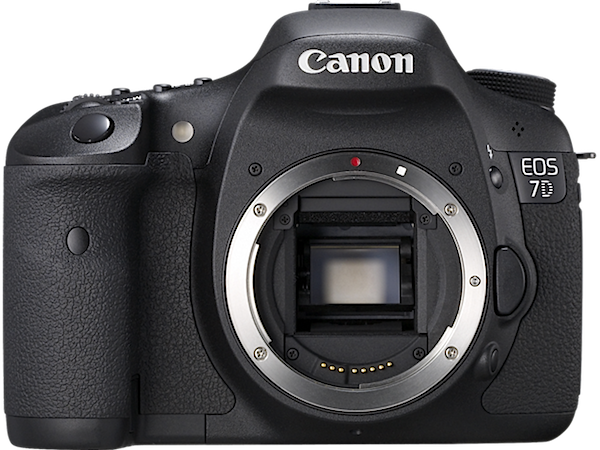
    13. Canon EOS 7D

    Canon_EOS_7D_image01.png

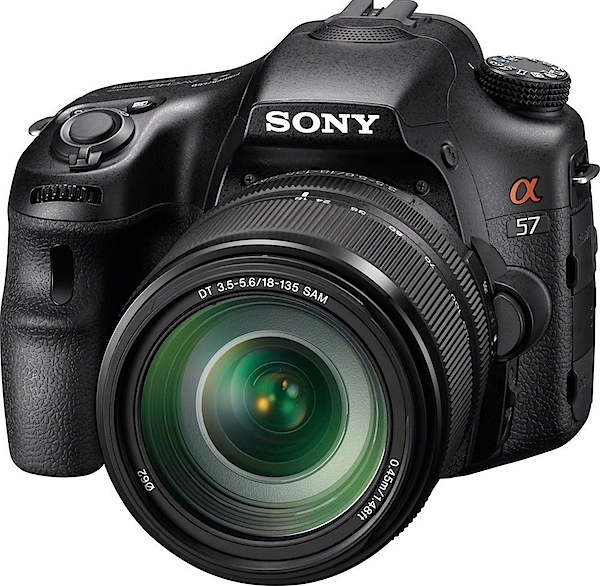
    14. Sony Alpha SLT-A57M

    71-X96zbUiL._SL1000_.jpeg

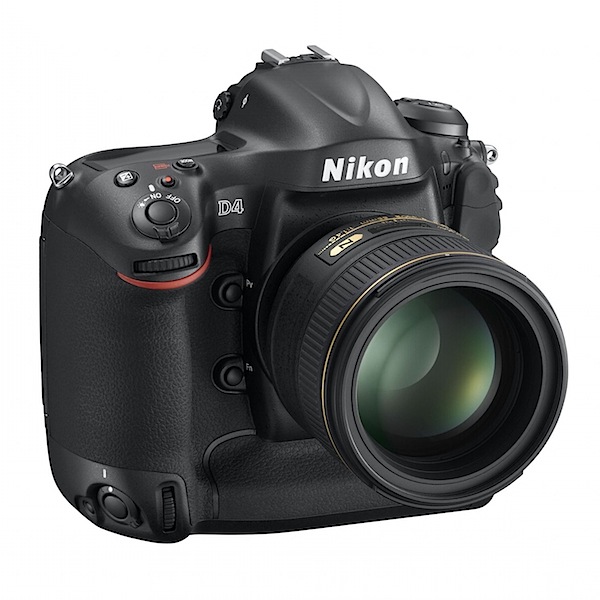
    15. Nikon D4

    81uHm3yG-%2BL._AA1500_.jpeg

    *Note: this list was compiled from reports supplied to us from Amazon.com where we are affiliates. One of the ways dPS is able to cover its costs and be a sustainable business is that we earn a small commission when readers make a purchase from Amazon after clicking on our links (including those above). While no personal details are passed on we do get an overall report from Amazon about what was bought and are able to create this list.

    Post originally from: Digital Photography Tips.

    Check out our more Photography Tips at Photography Tips for Beginners, Portrait Photography Tips and Wedding Photography Tips.

    The 15 Most Popular DSLRS Among Our Readers


    Digital Photography School

  • Was That Photoshopped? It Doesn’t Matter!

    Often times when looking at an image, people will ask “Was that Photoshopped?” or “Did that scene REALLY look that way?”  They say this as if the camera, left to its own devices, is going to display an unedited, “truthful” image.  The truth is, that any image coming out of one of today’s digital cameras has been manipulated.  The only question is how.

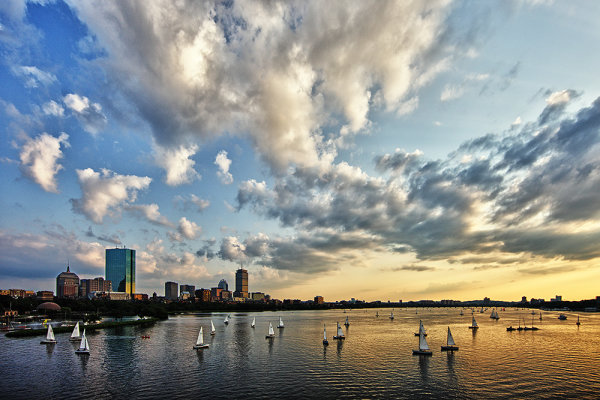
    Boston Skyline shot from Longfellow Bridge. This was a difficult exposure due to the darker foreground and bright sky. Processing in a RAW development application gave me the flexibility to get the image in line with what I was seeing.

    I’m not talking about cases where things have been moved, or added to an image after capture.  While that certainly has a place, that becomes more the realm of a graphic designer or illustrator.  The manipulation I’m discussing refers to color, contrast, saturation, and white balance.  Photoshop, and other image editing tools certainly make the adjusting of those things much simpler than in the past, when a darkroom, chemicals, and paper was required, but they don’t change the fact that it all starts in-camera.  Photography starts with the push of the shutter button.  It doesn’t end there, and it never has.

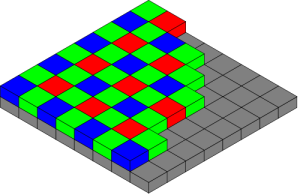
    First of all, understand that all digital images are manipulated in some way.  Just because one takes the JPEG files straight from the camera, and never even opens a photo editing program, does not mean that image has been manipulated.  Digital imaging sensors record only the brightness data for each pixel. The color is interpreted either in-camera in the camera’s image processor, or using RAW processing software such as Adobe Camera Raw. A Bayer filter, composed of a repeating pattern of two green light filters, one red

    The typical bayer filter lays over the imaging sensor to allow the camera to determine the color of each pixel. The camera then "debayers" the image in its image processor.

    light filter, and one blue light filter, overlays the imaging sensor.  Through the image processor, the colors each pixel represents is determined through this filter. Color intensity values not captured by the pixel are guessed, or interpolated, by the image processor using the color values of neighboring pixels.   For JPEG files, this information is baked into the file. RAW files store this color information separate from the brightness data, making it available for manipulation in RAW processing software.

    So before you even remove the memory card from the camera, if you’ve shot JPEG files, the camera’s image processor has decided what color each pixel is. In addition, it’s finalized settings for contrast, white balance, saturation, and sharpness for the image, using the camera’s built-in image styles such as Standard, Portrait, Landscape, Neutral or others.  While the user may not have used an image editing program, the image was still edited according to the camera settings.

    If you shoot RAW files, you’ve left yourself some room to play, because those settings are able to be adjusted.  The image will display in the software based on the camera’s settings at the time of exposure, but settings such as White Balance, Contrast, Saturation, and Sharpness are all adjustable via the RAW processing software.

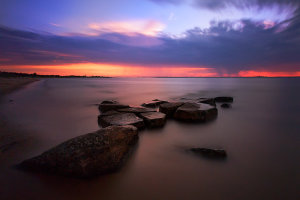
    The dark foreground and brighter sky again proved difficult, but by manipulating the image in Adobe Camera RAW, I was able to achieve a result that pleased me.

    None of this is really any different than traditional film photography. The major difference is the point at which certain decisions are made. With film, many decisions must be made prior to shooting.  The choice to shoot black and white or color, the choice to shoot with a vivid color film such as Fuji Velvia, or something more natural such as Kodachrome 64, all had to be decided before focusing the lens. Now these choices can come after.  In addition, things such as contrast and saturation could also be manipulated using masks, dodging and burning, and even by choosing different types paper.

    Want an example?  One of the best examples is one of the most famous photographs in the world- Ansel Adams’ “Moonrise, Hernandez, NM”. The negative was not an easy one to print, and Adams pulled out all the stops in working with it to achieve the finished masterpiece.  His discussion of the process, as well as his finished print, and the contact print, can be found HERE. It’s quite easy to see how much work actually went into the final print when comparing the contact print with the finished version.

    The bottom line is that the creative process in photography does not end when the shutter button

    By adjusting the white balance in Adobe Camera RAW, I was able to warm up the sun to give it the soft golden glow it had when I was shooting.

    is depressed, and a knowledge of the process can only enhance your images.  All images go through some form of processing.  It’s just a question of whether you make the decisions yourself, or you allow the camera to choose for you.  I’m a huge advocate for shooting RAW files and allowing yourself the choices the RAW format requires.  It’s much like working with a negative in the darkroom. The skill needed in Photoshop is no less than the skill required in the darkroom, it’s just different.

    So the answer to “Was that Photoshopped?” is up to each individual photographer to choose how to answer.  Mostly, the answer will be “Yes, to some extent” for all images.  Ultimately, let your creativity drive you. Unless you are a photojournalist, where realism is key, the only limits are your creativity, your skill with the camera, and your skill in the digital darkroom.

    Post originally from: Digital Photography Tips.

    Check out our more Photography Tips at Photography Tips for Beginners, Portrait Photography Tips and Wedding Photography Tips.

    Was That Photoshopped? It Doesn’t Matter!


    Digital Photography School

  • Food: Weekly Photography Challenge

    Red Velvet Cup CakeThis week we published a post with 5 simple tips to get a strong image of Food to go with the many Food Photography articles in our archives (see below for some links) so we thought ‘Food’ might make a good theme for this weeks challenge.
    Feel free to take images of any type of food you wish. It can be breakfast, lunch, dinner or a snack. It might be food being eaten or styled on a plate. It might be a mouth watering cake, a sizzling steak or a tempting treat – it’s totally up to you.

    I really can’t wait to see what you come up with this week!

    Once you’ve taken and selected the ‘FOOD’ image that you’d like to share – upload it to your favourite photo sharing site or blog and either share a link to it or – embed them in the comments using our embed tool to do so.

    If you tag your photos on Flickr, Instagram, Twitter or other sites with Tagging tag them as #DPSFOOD to help others find them. Linking back to this page might also help others know what you’re doing so that they can share in the fun.

    Also – don’t forget to check out some of the great shots posted in last weeks challenge – Family challenge where there were some great shots submitted.

    Looking for some Food Photography Inspiration or Instruction?

    Here’s just a few of the food photography tutorials and articles in our archives.

    • Food Photography – an Introduction
    • 11 Great Camera Angles for Food Photography
    • 10 Tips to Improve Your Food Photography Styling
    • 7 Tips for Aspiring Food Pornographers
    • Food Photography Techniques and Tips
    • 10 Tips for Mouth Watering Food Photography
    • 10 More Food Photography Tips
    • A Basic Food Photography Kit
    • Holiday Food Images and Thoughts to go with Them

    Post originally from: Digital Photography Tips.

    Check out our more Photography Tips at Photography Tips for Beginners, Portrait Photography Tips and Wedding Photography Tips.

    Food: Weekly Photography Challenge


    Digital Photography School

  • How To Create Photography Website That You Can Be Proud Of

    Without this post you will either overpay for your photography website or perhaps just go with the solution which is at best “okay” rather than “outstanding“. In fact there are lots of “IT guys” among photographers, but still the vast majority doesn’t have any clue about where to start. And so it happens: You stumble upon a brilliant photo and Continue Reading

    The post How To Create Photography Website That You Can Be Proud Of appeared first on Photodoto.


    Photodoto

  • 5 Big Tips to add Impact and Variety to your Wildlife Images

    A Guest Post by Piper Mackay from www.pipermackayphotography.com.

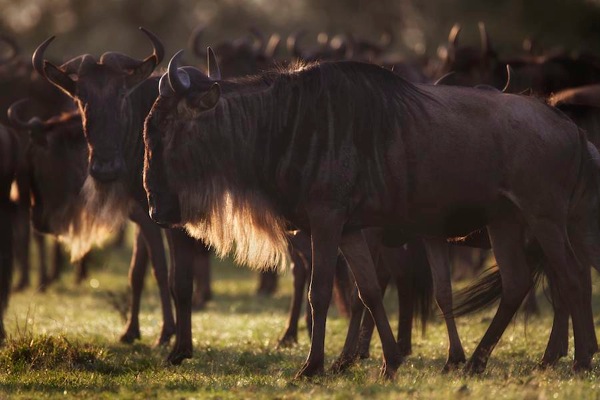
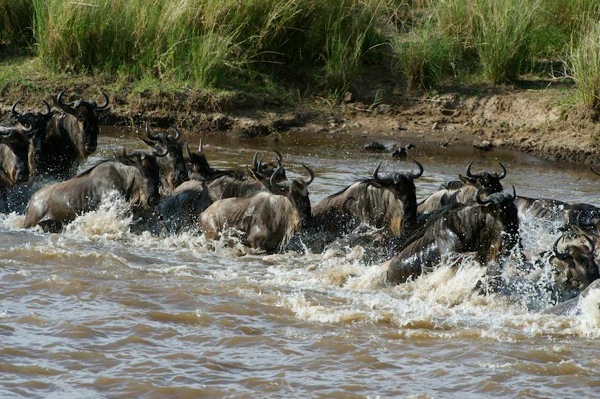
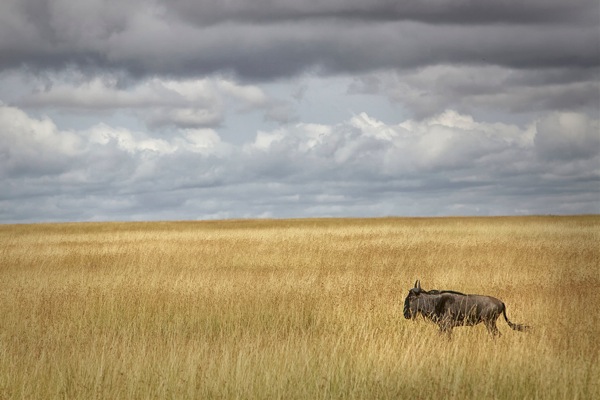
    Wildlife photography can be very exciting, which generally means your adrenalin is running on overdrive. It is too easy to be caught up in the action of the moment and just snap away at what you are witnessing. What you saw was so great, yet when you view your images they just don’t seem to have the impact that you experienced. I have put together a series of images of wildebeest, generally a very boring animal that is quite drab in color. This is to help illustrate how light, mood, and motion can bring powerful visual impact to your images.

    Wildlife Variety

    This is a Wildebeest for those of you who have not seen one.

    Plan to go at the Best Time

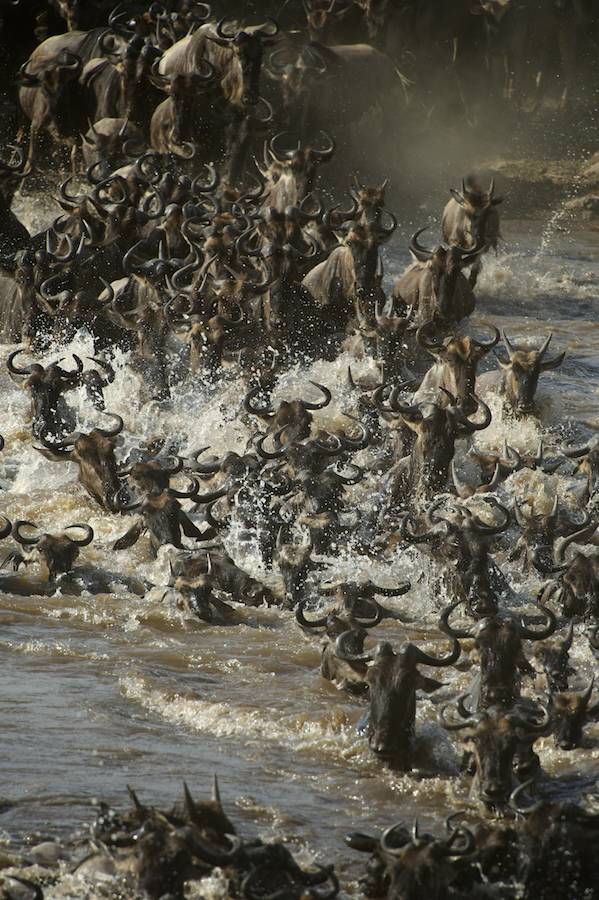
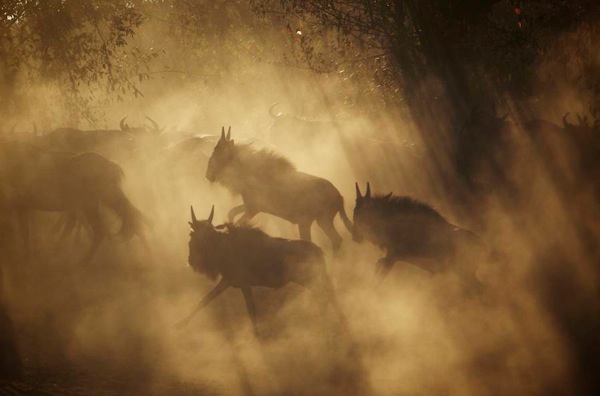
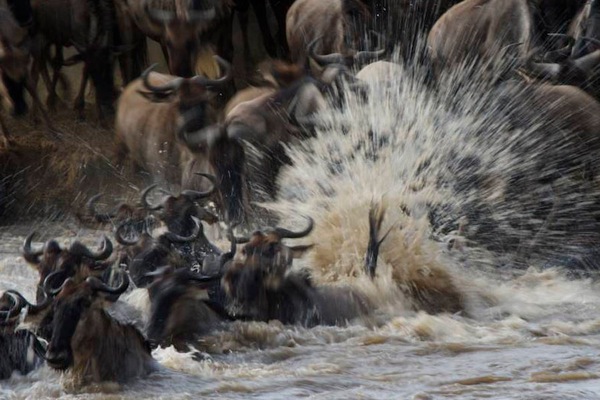
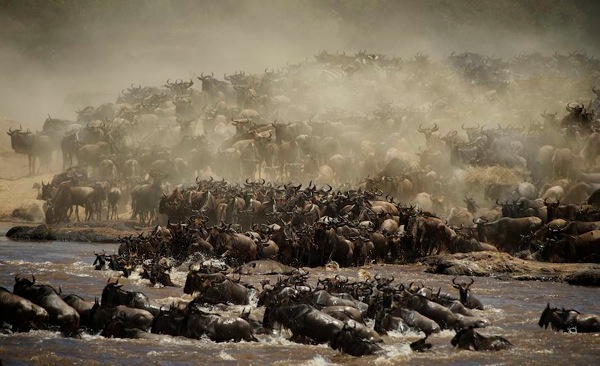
    Many species migrate or give birth at particular time in a particular location. Plan you trip around these extraordinary events. This was photographed during the annual wildebeest migration crossing the Mara River in Kenya. It has been said to be the greatest wildlife show on earth. The mass of the animals and the dust kicking up gives big impact to this image. Large numbers of any species will add impact.

    Wildlife Variety 1

    Backlighting and Side Lighting

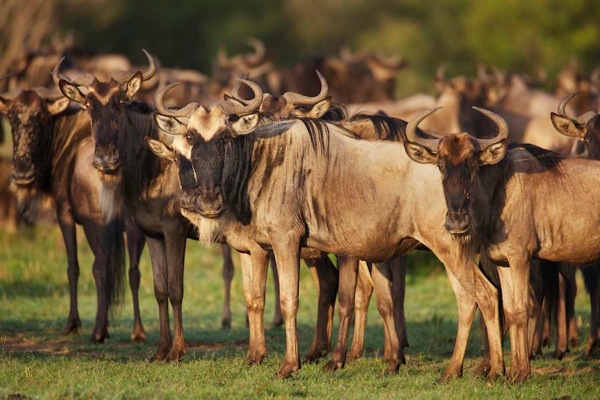
    It is natural to want the beautiful golden light on a wildlife subject as you see in the first photograph, but more dramatic can be adding backlighting or side lighting shown in the image below it. Take the safe shot and then get creative. Backlighting works great on the wildebeest beards and it also creates some rim lighting. Rim light is when backlighting creates a lit edge around the subject.

    Wildlife Variety 2

    Wildlife Variety 3

    Wildlife Variety 4

    Look for Moody Elements such as Dust and Fog

    This is another great time to add backlighting or side lighting. Backlighting will generally create a silhouette so I generally prefer to use side lighting in these situations. The light filters thought the elements for dramatic light and you can still see the details in your subject.

    Wildlife Variety 5

    Add Motion to your Image with a Pan Blur

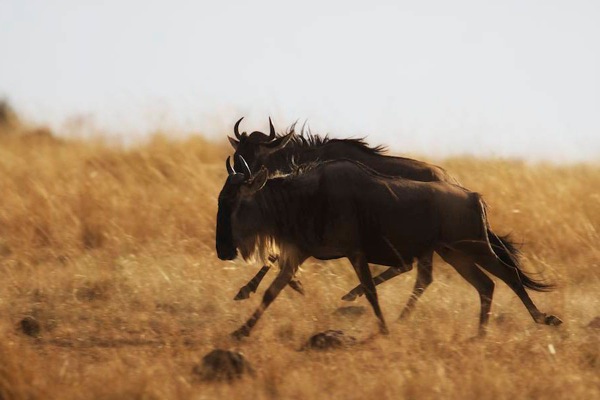
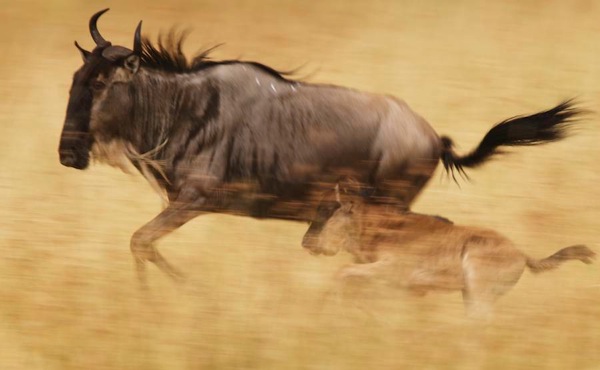
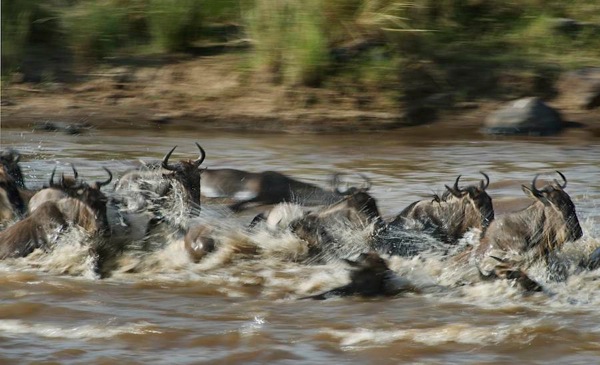
    In the first image you can see the animals are in motion; notice I have a little backlighting going for added impact. However, by panning with the animals to create a blur in the background it shows a more dramatic sense of speed and motion.

    Wildlife Variety 6

    Wildlife Variety 7

    To shoot a pan blur you need to slow down your shutter speed, 1/60-1/30 generally works, depending on the speed of your subject. You need to focus on the eye’s/shoulder of your subject, pan at the same speed as your subject while holding down the shutter. Yes, this takes lots of practice and you will delete hundreds of images, but when you get one that works it is very exciting. This is something you can practice anywhere so when the opportunity comes you are ready.

    Here is another set of images to show the impact and difference between a fast shutter speed stopping the action and a pan blur to show motion. Notice in the second image the front wildebeest are in focus while the rest of the images has a slight blur giving the viewer a more powerful sense of motion.

    Wildlife Variety 8

    Wildlife Variety 9

    Slow Down your Shutter Speed

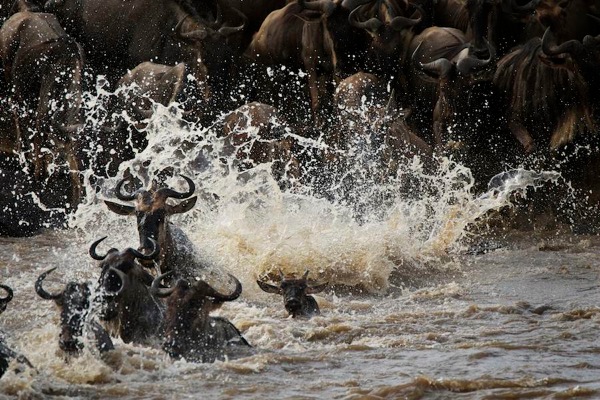
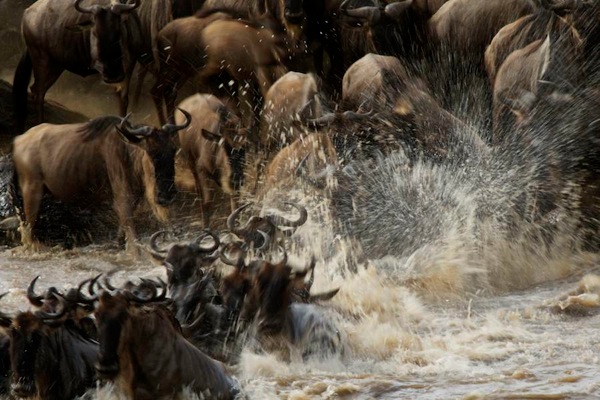
    Stopping the action of animals running through water with a high shutter speed makes a dramatic image, but slowing down the shutter speed will add a different impact and variety to the story. Different from a pan blur, here you hold the camera still and slow down the shutter letting the moving element create the effect of motion. Water works great as well as tall grass that is blowing or branches moving is a tree. In the first image my shutter speed was very high to stop the action and the explosion of water. In the second I showed down the shutter to create a different mood and show the spray of the water. In the third I slowed down the shutter just a little more to really show the blast of the water.

    Wildlife Variety 10

    Wildlife Variety 11

    These simple tips will not only add impact and variety to your images but will make them stand out in a sea of imagery on the same subject.

    Wildlife Variety 12

    Piper Mackay is a professional travel and wildlife photographer whose work is heavily based in Eastern Africa. She is currently leading both wildlife and cultural safaris in Kenya, Tanzania, Rwanda and Ethiopia. Her work is represented by Getty images and she is and instructor for the Travel and Editorial track at Calumet. View her work at www.pipermackayphotography.com.

    Post originally from: Digital Photography Tips.

    Check out our more Photography Tips at Photography Tips for Beginners, Portrait Photography Tips and Wedding Photography Tips.

    5 Big Tips to add Impact and Variety to your Wildlife Images


    Digital Photography School

  • Using Image Watermarks In Lightroom

    Custom lightroom image watermark opener1

    The Watermarking feature in Lightroom was significantly overhauled in Lightroom 3. As a result you can now add sophisticated watermarks to your images on export either to disk or via the Print and other modules.

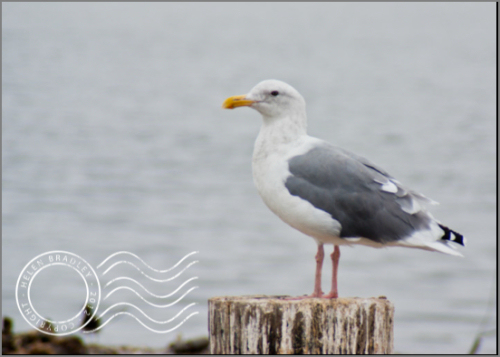
    Not only can you add a text watermark to an image but you can also add an image watermark – and that’s what this post is all about – making and using images as watermarks in Lightroom 3 and Lightroom 4.

    Create the Image

    To use an image watermark in Lightroom you will need an image and for that you’ll need an image editor. You can use anything that can create .png images – Photoshop and Photoshop Elements are obvious contenders but basically any photo editor or painting program will do.

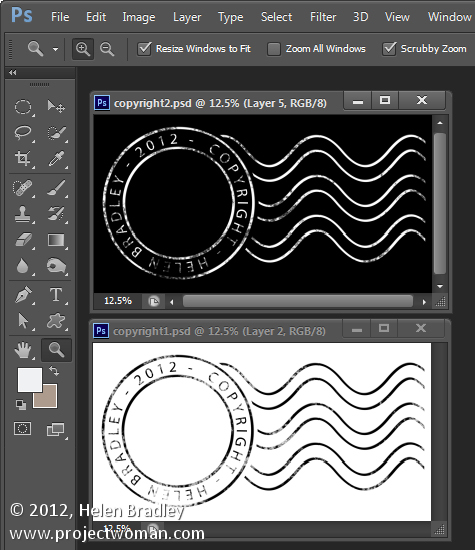
    Unlike text watermarks you can’t set the color of an image watermark in the Watermark dialog so you need to get it right before you begin. For that reason I create two – one black and one white – which cover most situations.

    Custom lightroom image watermark 1

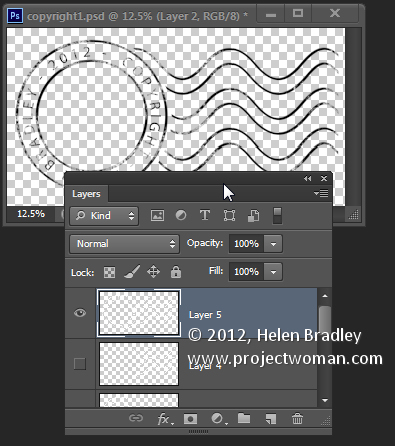
    I do this in Photoshop working on a transparent layer – the reason is that I want this transparency to appear in the watermark when it is placed over the image. So, even if I use a fill layer behind the watermark so I can see the design as I work, I’ll hide this before saving the image.

    Custom lightroom image watermark 2

    When saving the image I’ll save it as a .png format file – this flattens the image to a single layer but retains transparency – something that the .jpg format does not.

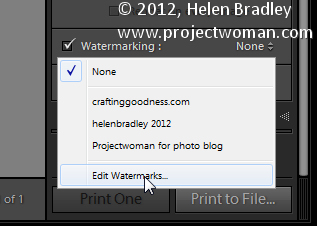
    To create the image as a watermark open a module that has Watermarking such as the Print module. Click it to enable it and then choose Edit Watermarks from the dropdown list.

    Custom lightroom image watermark 3

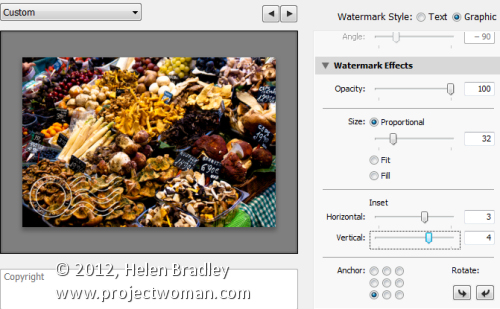
    Click Graphic in the top right corner to select that as the Watermark Style. When prompted select the image to use. This image is dark so I chose the white version of the copyright watermark image.

    If you cannot see the image, scroll down to the Watermark Effects area and adjust the Size so you can see the image. Set the desired size and placement using the Size, Anchor and Inset settings. Typically you will use the bottom left anchor point (or the bottom right) and move the image a little in from the edge of the photo.

    Custom lightroom image watermark 4

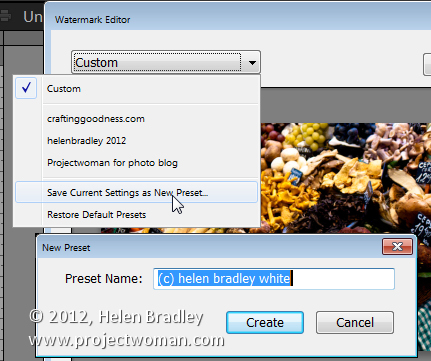
    Once you have the position and size correct you can save this as a Watermark you can use anytime in future by clicking the Custom dropdown list and choose Save Current Settings as New Preset and type a name for the preset.

    Custom lightroom image watermark 5

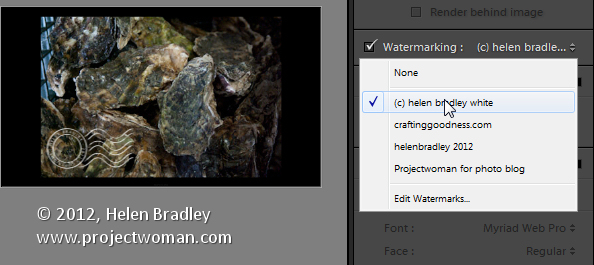
    In future you can select and use this watermark in any of the panels in Lightroom that support Watermarking such as the slideshow module here:

    Custom lightroom image watermark 6

    Post originally from: Digital Photography Tips.

    Check out our more Photography Tips at Photography Tips for Beginners, Portrait Photography Tips and Wedding Photography Tips.

    Using Image Watermarks In Lightroom


    Digital Photography School