Category: Photography

  • 1 Subject 3 Shots: Weekly Photography Challenge

    untitled.jpgThis week your photography challenge is to shoot the one subject in three different ways.

    The idea came off the back of our recent post – Make Your Last Shot Your Best Shot – in which Anne McKinnell challenged us to not stop shooting after we get our first good shot but to look for new ways to photograph a scene or subject in the hope of making the followup shots even better than the first.

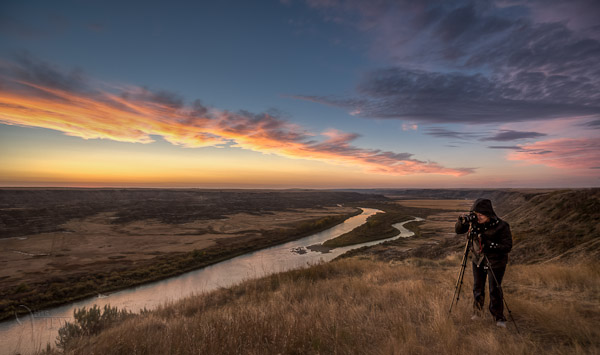
    She showed some great examples (pictured) of how she went beyond the first ‘obvious’ shot in a scene to take some interesting shots from different angles and perspectives.

    So here’s the challenge – choose a subject (it could be a portrait, landscape, cityscape, still life, glamour shot…. anything) and aim to take at least 3 different shots of the one subject.

    You might like to add variety to your shots by:

    • shooting from a different angle or direction
    • shooting with a different focal length
    • changing up your settings
    • trying a new technique (panning, slow sync shutter etc)
    • changing the composition

    Once you’ve taken your shots we’d LOVE to see them so please share 3 or so shots in your series and tell us a little about how you progressed them and changed things up!

    Once you’ve taken and selected the ’1 Subject 3 Shots’ images that you’d like to share – upload them to your favourite photo sharing site or blog and either share a link to it or – embed them in the comments using our embed tool to do so.

    If you tag your photos on Flickr, Instagram, Twitter or other sites with Tagging tag them as #DPS3SHOTS to help others find them. Linking back to this page might also help others know what you’re doing so that they can share in the fun.

    Also – don’t forget to check out some of the great shots posted in last weeks challenge – Food challenge where there were some great shots submitted.

    Post originally from: Digital Photography Tips.

    Check out our more Photography Tips at Photography Tips for Beginners, Portrait Photography Tips and Wedding Photography Tips.

    1 Subject 3 Shots: Weekly Photography Challenge


    Digital Photography School

  • Tips for Great HDR Sunsets

    HDR is a bit of a buzz word in photography in the last while and there is much debate about it, whether it’s good or bad, appropriate or not, or even real photography or not.  Even right here on Digital Photography School, you can find articles for, and against, doing HDR.   I’m not going to get into any of that today, I’m just going to speak to those of you that do enjoy doing it and would like some tips for doing HDR sunsets, which is one of the toughest subjects to handle with this technique.   So if you are anti HDR, just carry on, or perhaps this may sway you a little to want to try it.

    HDR or High Dynamic Range, why it’s great for sunsets

    When we talk about a scene having a High Dynamic Range, it simply means that there is wide range of contrast from the darkest area, to the brightest area.  Sunsets exemplify that because we are usually shooting into the sun, a bright light source, and the landscape is often so dark it’s in a silhouette.  By shooting correctly and processing well you can achieve a result that has detail in both those areas.

    Tips for shooting the right images

    There are a few things you need to get right in camera when you’re at the scene so follow these tips.

    • Make sure to bracket your images far enough on both ends of the exposure scale , but dark enough and bright enough.  What I mean by that is your darkest image should have a gap on the histogram to the right side (meaning there are no white areas, and no blinkies on your camera display) and your brightest image should have a gap on the histgram’s left edge (there are no black areas)
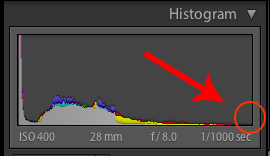
    Your darkest image’s histogram should look something like this with a gap on the right side.
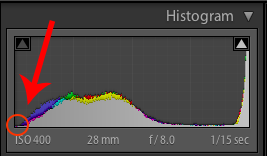
    Your brightest image’s histogram should look something like this with a gap on the left side.

    • shoot raw files, they will give you the most amount of data to work with
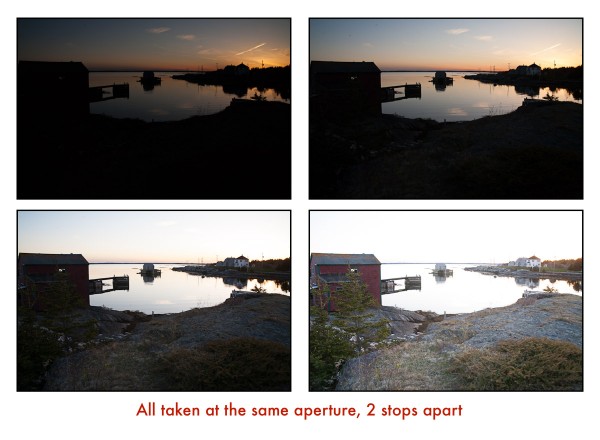
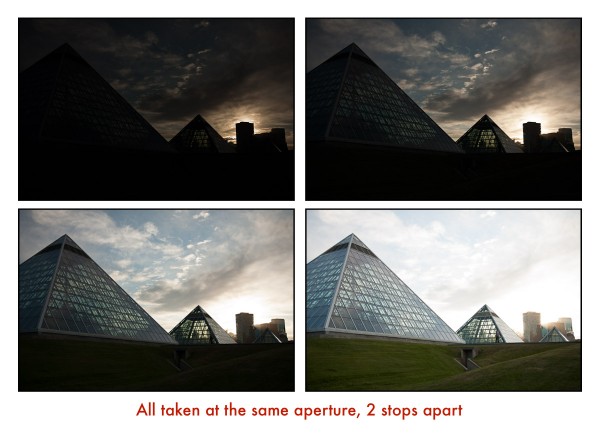
    • bracket your images 2 stops apart, because assuming you followed the tip above and have shot raw files, they carry plenty of data at least 2 stops either direction so shooting 1 stop apart will cause you to shoot more images than you need and just end up bogging down your computer in processing, OR you won’t shoot enough range
    • shoot at low ISO, ideally 100.  HDR processing introduces a lot of noise into your image so start with a lower ISO to minimize that problem.
    • use a tripod as your shutter speeds will likely be fairly slow, and it also allows you to get all your bracketed shots perfectly aligned for a sharper final image.  For the image above my settings  are:  ISO 400 (I did that because the light was fading fast and I wanted to shoot a bit faster), f8 at 1/1000, 1/250, 1/60, and 1/15th of a second
    • use a remote trigger (cable release) to fire the camera, so you aren’t touching it during the exposures to reduce camera shake and a blurry image
    • change only the shutter speed, NEVER the aperture.  If you change the aperture in your bracketed images you are changing the focus from one to the next and your resulting blended HDR image will likely have some odd focus issues or halos.

    This is what your bracketed set should look like.  Good coverage on both the dark and light ends of the light scale.  Notice the darkest image has lots of nice colour in the sky, whereas the brightest one has a ton of detail in the foreground area but none in the sky.  This is normal, and exactly what you want.
    Tips for processing the bracketed images

    I use Photomatix as my HDR tone mapping software of touch.  I find it gives me the flexibility to be able to produce both natural looking and surreal results.  Whatever software you use for your tone mapping, try some of these tips for better sunset results:

    • if there are moving clouds in the scene or trees blowing, use the software’s deghosting feature to remove of minimize those.  It will make the final result look much sharper.
    • when adjusting the tones in your software of choice keep your saturation settings low, don’t overdo it.  In Photomatix I always (let me repeat that word), ALWAYS, keep my saturday under 50!  When I pull it back into Lightroom afterwards and punch my blacks and contrast up the saturation increases with it, so it’s really easy to take it too far.
    • watch the sky for halos (white areas glowing around the edges of things) especially if the sky cloud free against something dark like a tree or building.  Halos are generally an affect that is thought of as poorly done HDR and why many people do not like the technique.  Sure you can create a surreal look but I do think you can take it too far.  Just as an example, here’s what “too far” looks like in my opinion. Do NOT make something that looks like this. Notice the extreme noise and graininess in the sky? This is caused by pushing too far.
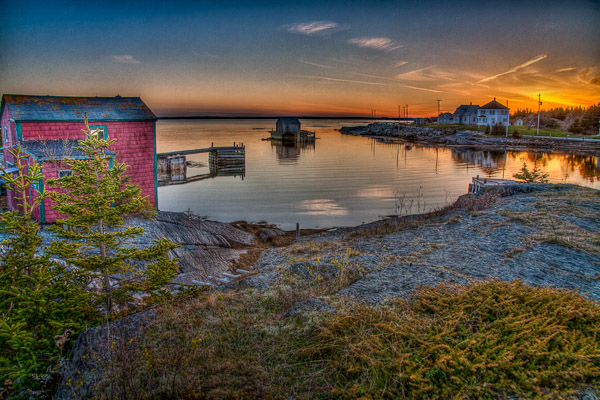
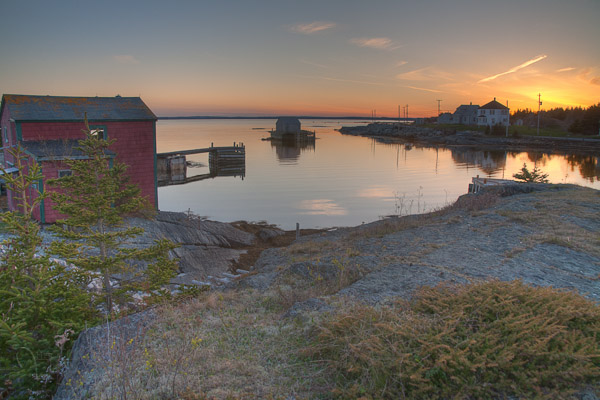
    This is straight out of Photomatix. Notice how flat and drab looking it is?

    Often when shooting a landscape in HDR you’ll find that one area looks good if you push it a little further, but the other half doesn’t.  Such is the case here.  I find that I can push the land and foreground area a bit further to get more detail out, but then the sky looks bad or has halos.  So you can mask back in one image of the sky if necessary, or blend the two together using Photoshop and pick which areas are best from each version.  See below for an example. Version #1 processed for a nicely blended sky.
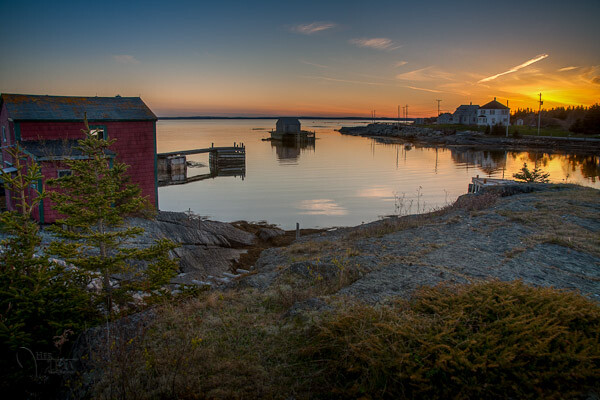
    Version #2 in the middle is our over processed one from above but the foreground land looks pretty good.
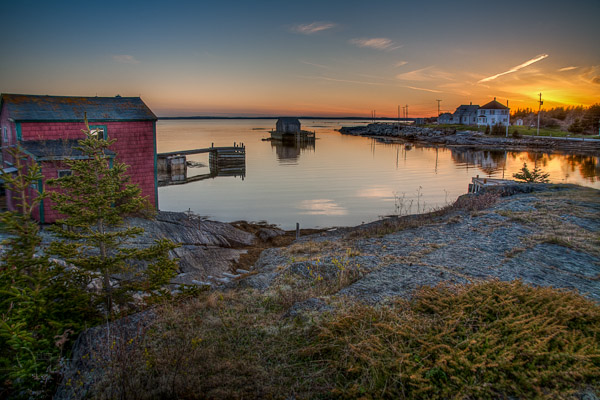
    The final version above is #1 and 2 above blended together using layers and masks in Photoshop. Notice how it takes the best of both images and combines them.

    HDR sunset with a person?

    Let’s look at another example.  Some people say you can’t do HDR when you have a person in the shot.  Can you?   Take a look at the images below and you tell me if it works or not.
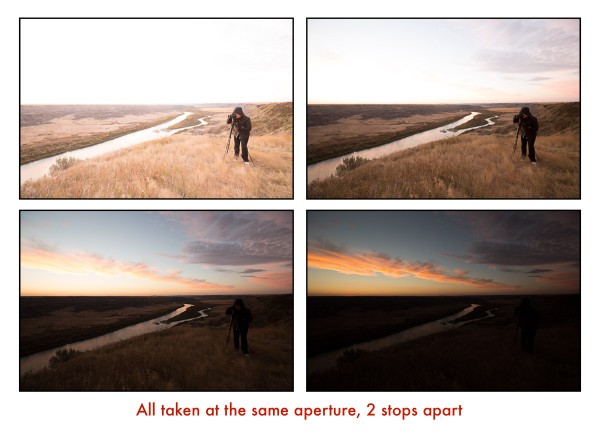
    There has been no image blending on this final version, just tone mapped and tweaked in Lightroom. I do confess though that this is not  sunset, it is in fact a sunrise.  But you get the idea, it’s the same because the sun is on the horizon in both cases.

    How to handle a sky with lots of fluffy clouds

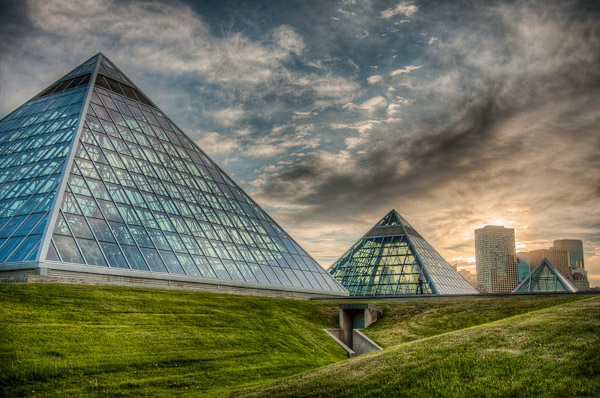
    Another common problem when doing HDR for landscapes is when there are lots of big white fluffy clouds, they often tend to come out looking rather dark and foreboding.  This is another good time to use the masking technique.  In the images below I’ve processed the HDR how I like it for the foreground, nice and crisp.  But my clouds have gone too dark.  If I choose to pull back on the surreal look I lose that nice detail in the grass and pyramids.  So I’ve taken the best of both and combined them once again.
    Version #1 above, processed for detail in the grass, but notice how dark the clouds are.  They were not storm clouds but they sure look like it now.   I want to get those soft fluffy ones back so I took one of the original single images from my bracketed series and combined it with this one to get the following final image which I think is much softer looking.
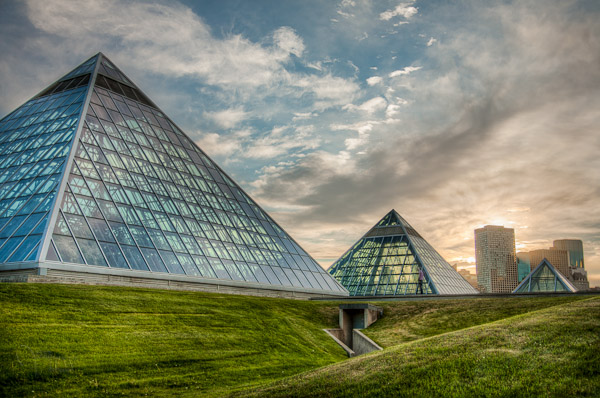
    Final blended version above.  See the difference?  It’s subtle but I think it makes a huge difference to the final appearance and feel of the image.

    Summary and action plan

    So where to go from here is to get out and try this for yourself.  If you have some bracketed series that you’ve already shot you can go back and try processing them with these tips and see if it makes a difference.   Or better yet, get out there and go shoot tonight’s sunset or tomorrow’s sunrise if you’re a morning person.

    One other unrelated tip I’ll leave you to get better sunsets in general is to find an interesting subject in front of your sunset.  Notice in these cases I have a great scene or something with a great foreground or shape (pyramids) to add some interest to the scene.  A plain old sunset on a flat horizon is really not that interesting no matter how great the colours are.  So find a suitable scene during the daytime and come back at dusk and work your magic on it.

    If you want some other HDR tips you can read 10 Tips on how to do HDR photos without a tripod, for those times when you don’t have one with you, or you aren’t allowed to use it.

    Have you got other little secrets or tips for creating HDR sunsets?   I’d love it if you shared with in the comments below and as always if you have a question please ask as I read and answer ALL the comments.

    Post originally from: Digital Photography Tips.

    Check out our more Photography Tips at Photography Tips for Beginners, Portrait Photography Tips and Wedding Photography Tips.

    Tips for Great HDR Sunsets


    Digital Photography School

  • Our iPhone Photography eBook is Now Available for Kindle

    iphonephotography3d350.jpgA few months back here at dPS we launched our iPhone Photography eBook. It had some great reviews from readers but we had a lot of requests from readers asking if we had a version for Kindle?

    At the time we didn’t but due to popular demand we now do! Your wish is our command (at least this time).

    Head over to Amazon to get a kindle version of iPhone Photography. How to Shoot, Edit and Share Great Photographs today.

    Or if you’d prefer it as a PDF or ePUB version (for iPads or other devices) grab yours here.

    Post originally from: Digital Photography Tips.

    Check out our more Photography Tips at Photography Tips for Beginners, Portrait Photography Tips and Wedding Photography Tips.

    Our iPhone Photography eBook is Now Available for Kindle


    Digital Photography School

  • Google+ Launches “Communities” — Will Compete Directly With Flickr Groups for Photographers

    This morning Google+ launched communities. It will be rolling out to users over the course of today. I don’t have it yet this morning but my Pal Trey Ratcliff does and has written a blog post about it here.

    Over the past year, the photographic community has come together on Google+ probably more than any other site on the internet. Many of the most active of these social photographers early on migrated over from Flickr to Google. While there have been some great conversations that have gone on in many Google+ posts by individuals, what Google has lacked is a town square sort of feature where individuals could congregate around a shared idea. Today’s launch of communities addresses that and it also offers photographers a direct competing platform for Flickr groups for the first time.

    I haven’t tried communities yet, so I don’t know how robust it is compared to Flickr groups, but one thing Google seems to do really well is quickly innovate and improve new features on G+ after they launch them. I’ll write a follow up post once I get a chance to try them out. I’m sure I’ll be joining Trey’s new community and probably creating one of my own. Stay tuned. :)


    Thomas Hawk Digital Connection

  • 5 Ways to Get Creative with a Fisheye Lens

    A fisheye lens is easily one of the best ways to get creative and have a blast with photography. As far as lenses go, a fisheye is relatively cheap (around $ 650) making them accessible to a wide group of photogs. It’s important to know what a fisheye lens is, where it came from, and where the uses of a fisheye lens begin and end.

    Originally used for meteorology to study the sky and cloud formations, fisheye’s were originally called “whole-sky lenses.” These lenses quickly became popular in the general photography field because of their fun and unique uses, and of course their incredibly distorted lines. They can be used for many different purposes, both professional and for fun (but mostly for fun). Here are 5 creative ways to use a fisheye lens that you can implement immediately…

    1. Radial Blur

    Shooting a wedding reception with a fisheye lens can be an absolute blast. These receptions are usually in low light and are a challenge to get great images out of. When I’m shooting a reception, I get right in the middle of the dance floor and just shoot away. To get this radial-blur effect, simply slow down your shutter speed to around 1/25th of a second. Next, you need to spin the camera 90 degrees counter clockwise. To do this, simply cradle the lens with your left hand while using your right hand to pivot the camera body around. Not every image is going to come out, but you can almost always walk away with a few keepers.

    2. Exaggerate the Curvature of the Earth

    One thing to note when using a fisheye lens is this: The further you move an object or line to the edge of the frame, the more distorted it becomes. If you place the horizon in the middle of the frame, it will be perfectly straight across the entire image. The exaggerate this distortion, place the horizon dangerously close to the top of the frame. Just be careful, you might get home and find your legs in the bottom of the frame ;-) .

    3. Shoot Super Wide Landscapes Without The Fisheye Look

    Sometimes, a fisheye can be used simply to capture everything you want in a scene. Sometimes, you don’t want distorted lines but still need that super wide angle. If you have a landscape without straight lines (buildings, trees, telephone poles, etc) you can sometimes position the lens in a way that it simply looks like a wide angle lens. Just make sure your horizon is towards the middle of the frame. Doing this will allow you to capture a nearly 180 degree view of a scene while avoiding the distorted, crazy look of a fisheye lens.

    4. Capture Entire Ceilings

    There’s no way you could capture this much of a ceiling with a normal lens. This was taken at the Gaylor Texan in Grapevine, Texas and this ceiling is absolutely massive. With symmetrical architecture like this, a lot of times there will be a clear marker on the ground to signify the exact middle of the room. When I looked up and saw this site, my fisheye was the only lens that crossed my mind!

    5. Change Your Perspective and Embrace Those Lines!

    The most important thing is to have fun Whether you’re shooting for fun, or for clients (as pictured above). A fisheye is a prime lens, meaning that you can’t zoom in or out with it. Therefore, it’s up to you to act as the zoom for the lens. Be sure to change perspectives and experiment with different angles and lines. Get down low to the ground, even if it means laying on your stomach in the gravel on a railroad track. Lean up against a wall and use the distortion of the lens to wrap the wall around the frame. Just have fun!

    If you have examples of fisheye photography that you’d like to share, be sure and leave a link in the comments below!

    Also – Check out these 15 Fun and Fabulous Fisheye Photos for a little more inspiration!

    Post originally from: Digital Photography Tips.

    Check out our more Photography Tips at Photography Tips for Beginners, Portrait Photography Tips and Wedding Photography Tips.

    5 Ways to Get Creative with a Fisheye Lens


    Digital Photography School

  • Become a Better Photographer By Asking One Simple Question

    A Guest Post By: John Davenport

    Let’s be honest whether it is coming up with portrait posing ideas, photographing the stars, or avoiding danger in the field we all have a common goal here – gain more knowledge and put it to use in our photography – but there comes a time when we must be our own teachers.
    We must venture out away from the tutorials, the guidebooks and those YouTube videos to simply do something for ourselves, without fear, and without guidance. Just with the knowledge that we already have in our heads. My friend, that is what this question is all about. 

    What Happens When I Do This?

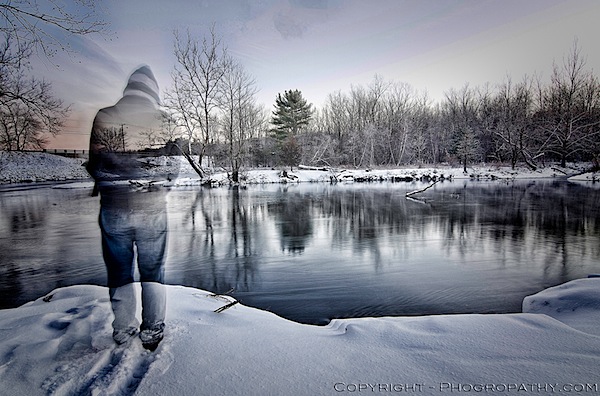
    Image One.jpg

    If I had not tried something different, something out of my comfort zone, I wouldn’t have been able to capture this photograph. I was attempting to create an HDR composite, but I wanted to see if I could create one with me in the frame. I’d never done this, I hadn’t even attempted it, so I just set my camera up to capture the brackets, put it on a timer, and walked into where I thought would be a good place to stand. However, while the camera was still taking the shots, I left the scene before the shutter had closed for the final time, and thus – a ghostly figure.

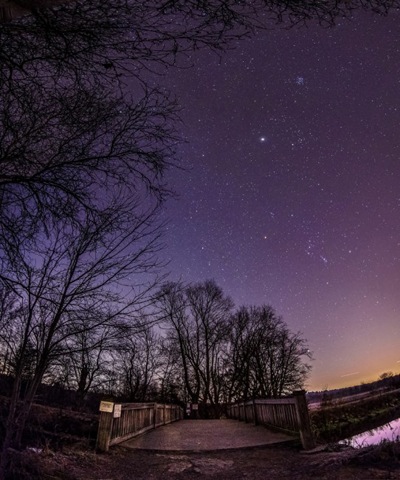
    Image Two.jpg

    Another example is this photograph of the night sky. It actually consists of four separate landscape orientated images stitched together to create a vertical panorama with a fisheye like effect to boot. I talk in a bit more detail about how I created this vertical panoramic image on my own site, but if you’re listening to the message of this post, you probably shouldn’t have clicked on that link ;) .

    It Takes Courage

    Tutorials and guides make life easy. Follow the steps and you’ve got a great photograph, but is it original?
    It takes courage to be able to do this style of learning and even more so to share your photographs with the world. You have to accept the fact that you’re going to make mistakes, you’re going to feel like you’ve wasted some time, and you’re going to have people tell you that you’ve done it all wrong, but to that I say all this is part of a good learning process.

    Don’t Stop With Taking the Photo

    Apply this no-holds-bars-experimentation-attitude to all aspects of photography and yes, maybe even to life as well.

    Whether you’re using Instagram or Photoshop to edit your photographs asking, what happens if I do this?, is key to creating something different. Sure there’s a lot more to experiment with in the latter, but if you’re always using the same filter and the same blur effect in Instagram are you really learning anything?

    What Do You Think?

    Is it more important to get out in the field and forget the books once you’ve got the basic knowledge or should you stay up-to-date with all the knowledge that’s being shared on the web every-single-day and miss the possible shot of a lifetime?

    John Davenport is an enthusiastic amateur photographer and blogger who shares daily photos on his site Phogropathy. You can also find him on Facebook and Twitter.

    Post originally from: Digital Photography Tips.

    Check out our more Photography Tips at Photography Tips for Beginners, Portrait Photography Tips and Wedding Photography Tips.

    Become a Better Photographer By Asking One Simple Question


    Digital Photography School

  • 29 Most Popular DSLR Lenses Among Our Readers

    Over the weekend we released a list of the 15 most popular DSLRs judged according to what our readers have been buying on Amazon over the last 4 months*. Today we’re turning our attention to the most popular DSLR lenses.

    As usual – Canon and Nikon lenses were by far the most popular so I’ve divided them into two lists but I’ve also included a third list of lenses from other manufacturers below.

    Nikon Lenses

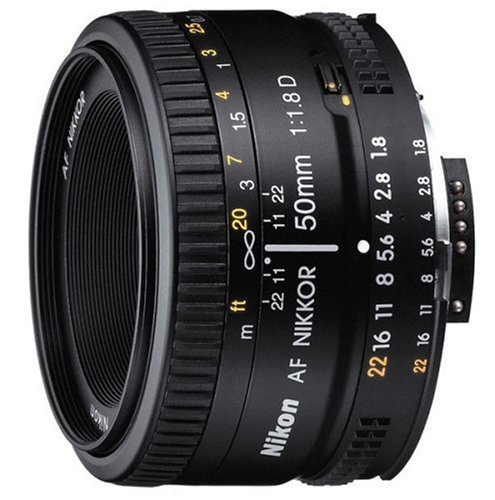
    1. Nikon 50mm f/1.8D AF Nikkor Lens for Nikon Digital SLR Cameras

    _images_I_51CnjgPJ+jL.jpg

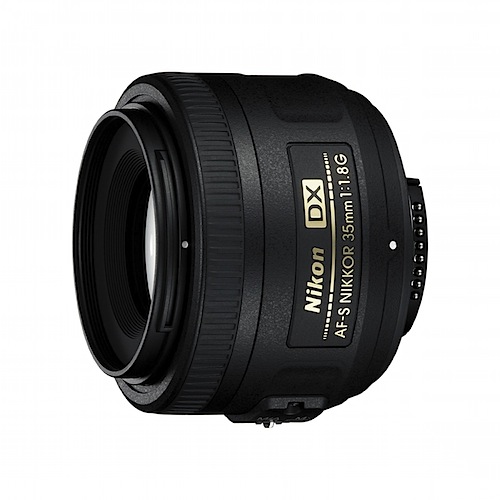
    2. Nikon 35mm f/1.8G AF-S DX Lens for Nikon Digital SLR Cameras

    _images_I_71fojgW-K5L._AA1500_.jpg

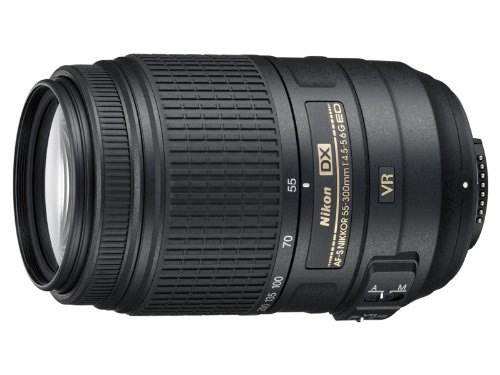
    3. Nikon 55-300mm f/4.5-5.6G ED VR AF-S DX Nikkor Zoom Lens for Nikon Digital SLR

    _images_I_41BQhxfleTL.jpg

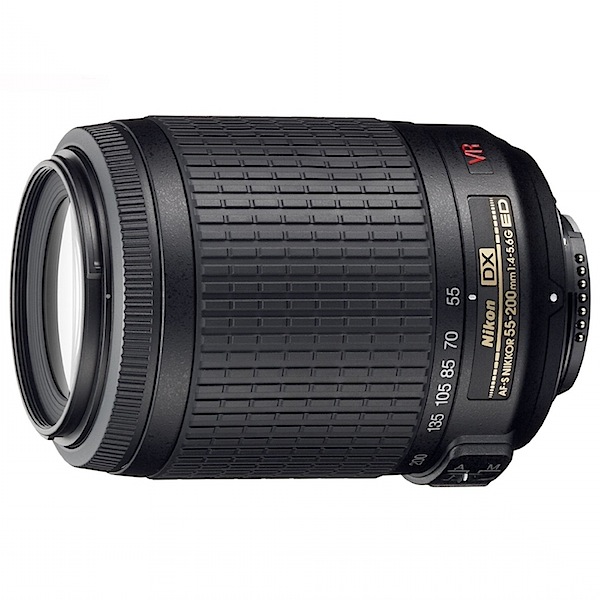
    4. Nikon 55-200mm f/4-5.6G ED IF AF-S DX VR [Vibration Reduction] Nikkor Zoom Lens

    81aelpm45eL._AA1500_.jpeg

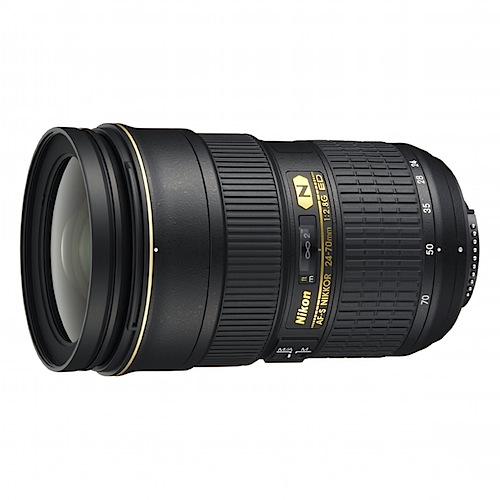
    5. Nikon 24-70mm f/2.8G ED AF-S Nikkor Wide Angle Zoom Lens

    _images_I_71NFmoXyeGL._AA1500_.jpg

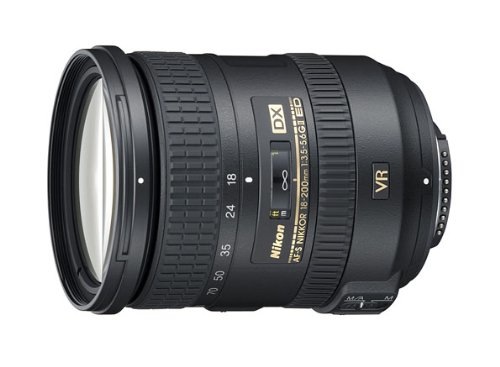
    6. Nikon 18-200mm f/3.5-5.6G AF-S ED VR II Nikkor Telephoto Zoom Lens for Nikon DX-Format Digital SLR Cameras

    _images_I_41Evnjjp6mL.jpg

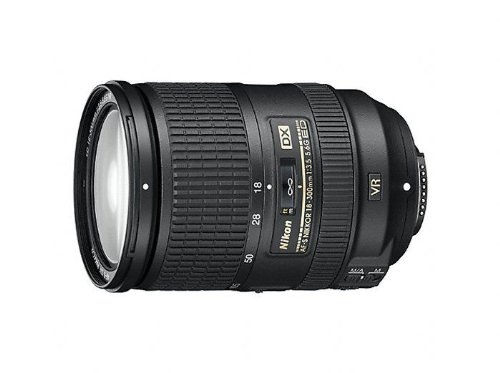
    7. Nikon 18-300mm f/3.5-5.6G AF-S DX Nikkor Lens

    41rXcOrwyoL.jpeg

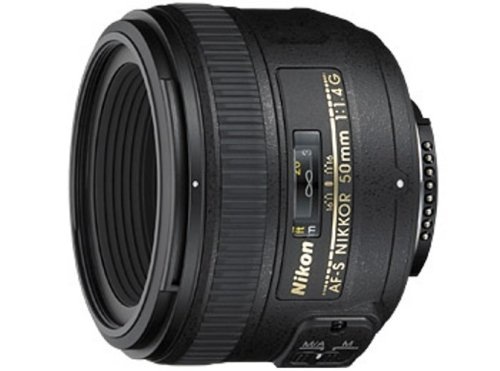
    8. Nikon 50mm f/1.4G SIC SW Prime Nikkor Lens for Nikon Digital SLR Cameras

    _images_I_41lq816JqzL.jpg

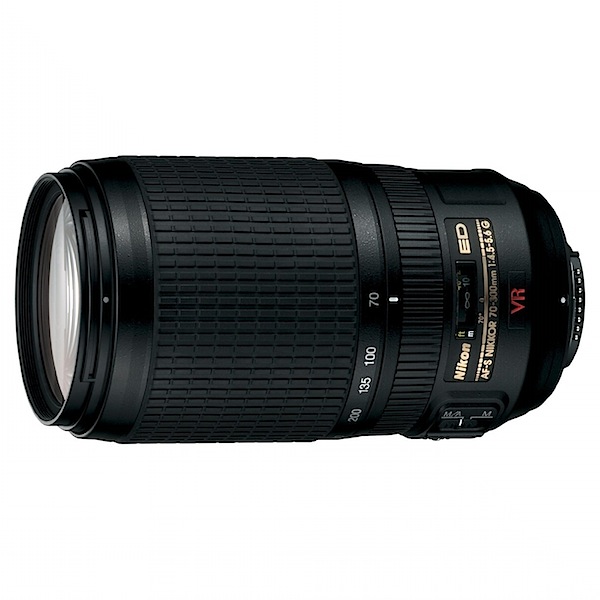
    Nikon 70-300mm f/4.5-5.6G ED IF AF-S VR Nikkor Zoom Lens

    71DmoFcpcfS._AA1500_.jpeg

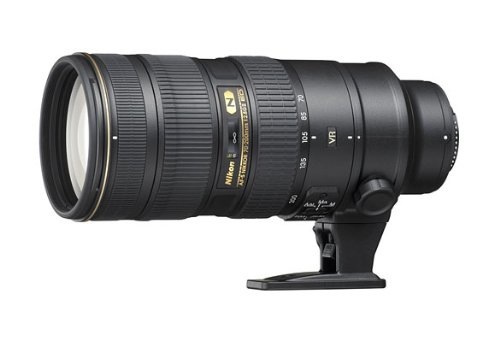
    10. Nikon 70-200mm f/2.8G ED VR II AF-S Nikkor Zoom Lens For Nikon Digital SLR Cameras

    _images_I_41lLtMR4hlL.jpg

    Canon Lenses

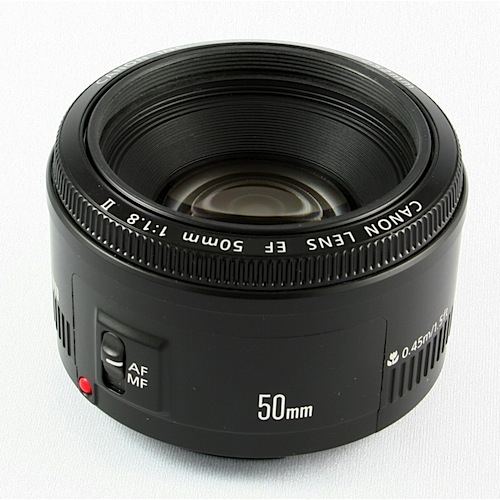
    1. Canon EF 50mm f/1.8 II Camera Lens

    _images_stories_50mm18.jpg

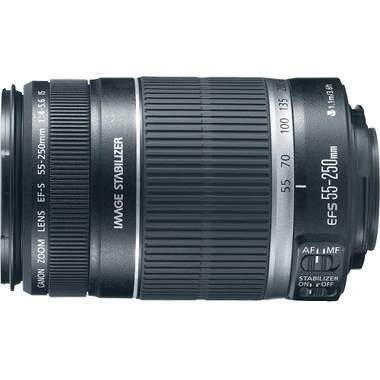
    2. Canon EF-S 55-250mm f/4.0-5.6 IS Telephoto Zoom Lens for Canon Digital SLR Cameras + Lens Cleaning Kit

    _images_I_41iFOthf-oL.jpg

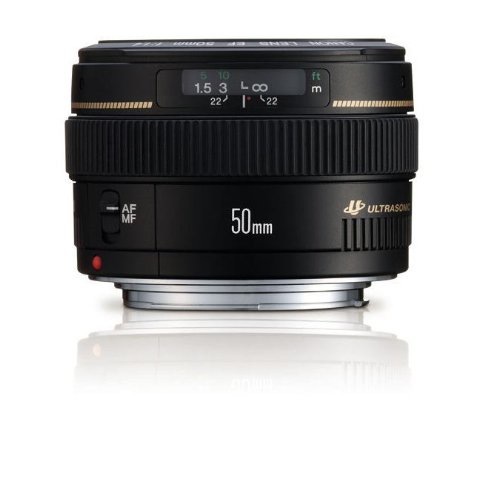
    3. Canon EF 50mm f1.4 USM Standard & Medium Telephoto Lens for Canon SLR Cameras

    _images_I_41QZeK5lgrL.jpg

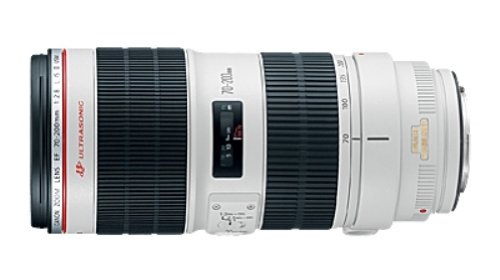
    4. Canon EF 70-200mm f/2.8L IS II USM Telephoto Zoom Lens for Canon SLR Cameras

    _images_I_41nW4a0AjAL.jpg

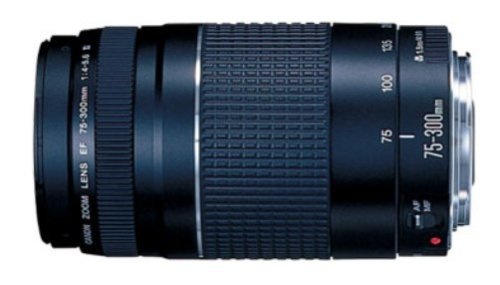
    5. Canon EF 75-300mm f/4-5.6 III Telephoto Zoom Lens for Canon SLR Cameras

    _images_I_41KD00SN1gL.jpg

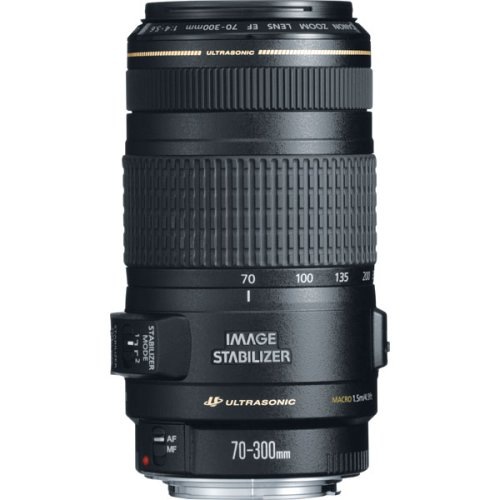
    6. Canon EF 70-300mm f/4-5.6 IS USM Lens for Canon EOS SLR Cameras

    _images_I_41ECW2G8TWL.jpg

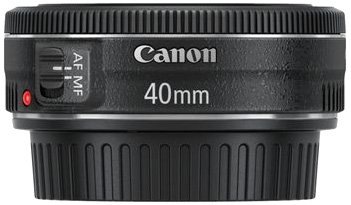
    7. Canon 40mm EF f/2.8 STM Lens

    _images_I_41dMgVaaPlL.jpg

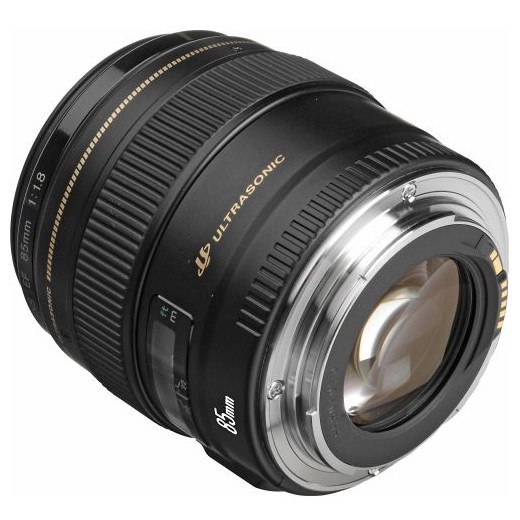
    8. Canon EF 85mm f/1.8 USM Medium Telephoto Lens

    canon-85mm.jpeg

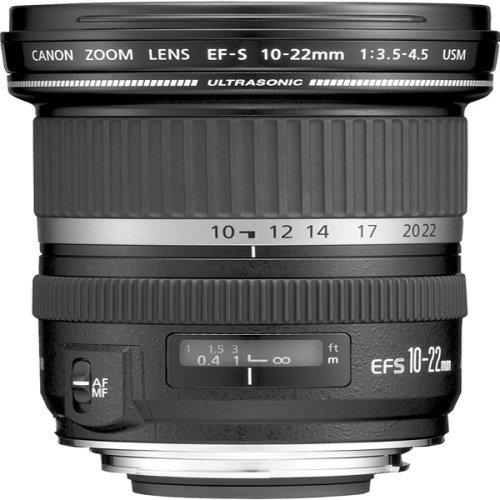
    9. Canon EF-S 10-22mm f/3.5-4.5 USM SLR Lens

    canon-10-22.jpeg

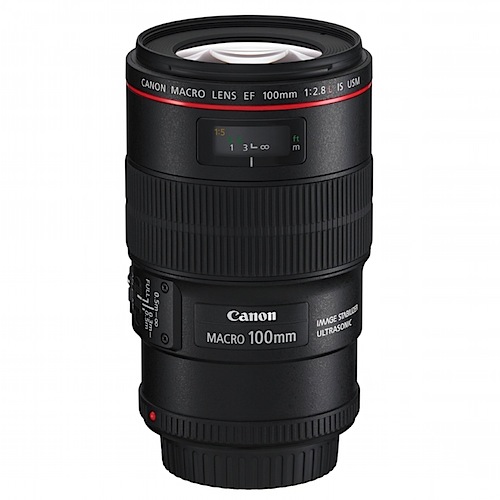
    10. Canon EF 100mm f/2.8L IS USM 1-to-1 Macro Lens for Canon Digital SLR Cameras

    _images_I_819FZMQPWfL._AA1500_.jpg

    Other Brands

    Normally we don’t see a lot of lenses from other brands purchased but in the last 4 months we’ve noticed a spike in sales of lenses from Signma, Tamron and Tokina who each make quality lenses for DSLRS of different brands – many times at more affordable prices than the equivalent lenses from the main brands. Here’s the ones that we saw decent sales of:

    1. Sigma 10-20mm f/4-5.6 EX DC HSM Lens for Canon Digital SLR Cameras (also available for Nikon, Samsung and Sigma DSLRS)

    _images_I_41lE6crotiL.jpg

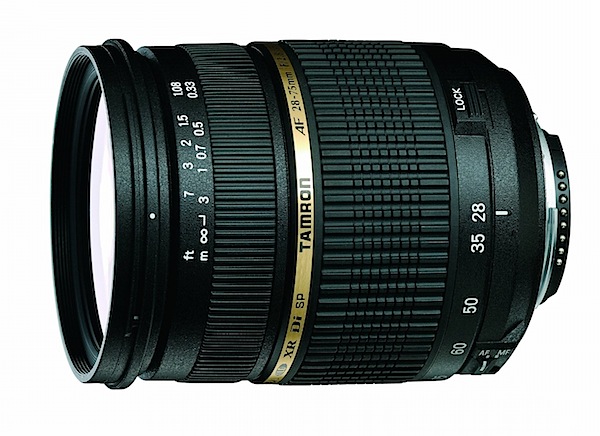
    2. Tamron AF 28-75mm f/2.8 SP XR Di LD Aspherical (IF) for Canon Digital SLR Cameras (also available for Minolta and Sony Pentax, and Nikon DSLRs)

    91EjMKKW3-L._SL1500_.jpeg

    3. Sigma 70-300mm f/4-5.6 SLD DG Macro Lens with built in motor for Nikon Digital SLR Cameras

    _images_I_71bTTzWv3hL._AA1500_.jpg

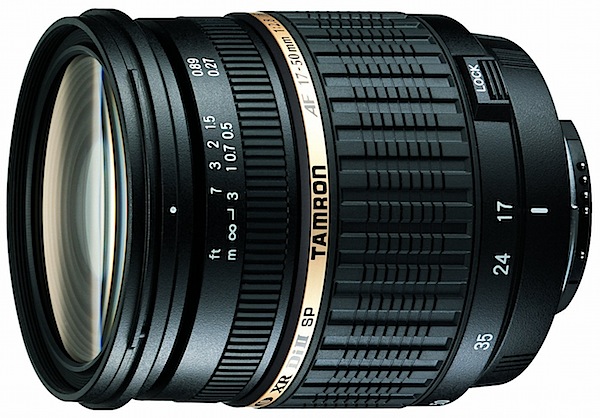
    4. Tamron AF 17-50mm F/2.8 XR Di-II LD SP Aspherical (IF) Zoom Lens for Canon Digital SLR Cameras (also available for Nikon and Minolta and Sony DSLRs)

    tamron

    5. Sigma 70-300mm f/4-5.6 SLD DG Macro Lens with built in motor for Nikon Digital SLR Cameras

    71bTTzWv3hL._AA1500_.jpeg

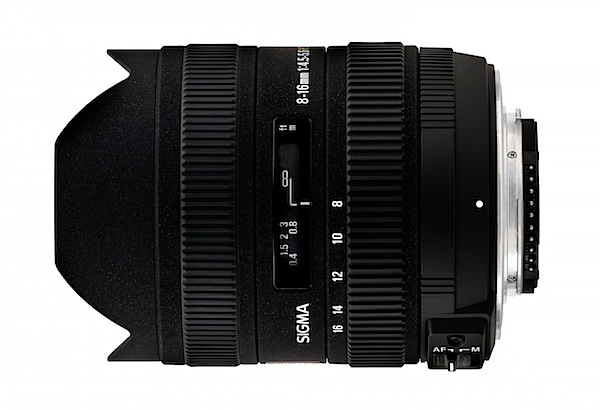
    6. Sigma 8-16mm f/4.5-5.6 DC HSM FLD AF Ultra Wide Zoom Lens for APS-C sized Canon Digital DSLR Camera (also available for Nikon, Pentax, Sigma and Sony DSLRs)

    81kS1-KqfiL._SL1500_.jpeg

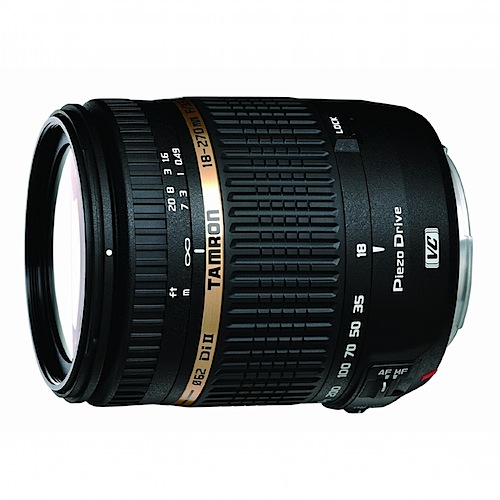
    7. Tamron AF 18-270mm f/3.5-6.3 Di II VC PZD LD Aspherical IF Macro Zoom Lens for Canon DSLR Cameras (also available for Nikon and Sony DSLRs)

    _images_I_81sE17h2DXL._AA1500_.jpg

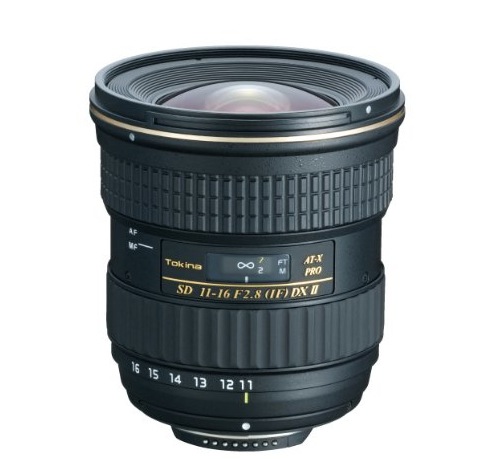
    8. Tokina 11-16mm f/2.8 AT-X116 Pro DX II Digital Zoom Lens (for Canon EOS Cameras) (Tokina also make a similar lens for Nikon DSLRS

    412tBLShXmL.jpg

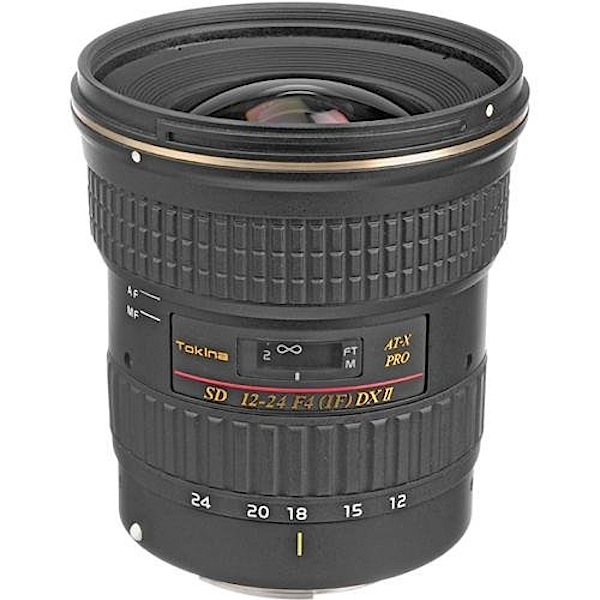
    9. Tokina 12-24MM F/4.0 Pro II Zoom Lens for Digital Canon SLR Cameras (Tokina also make a similar lens for Nikon DSLRS)

    51kjX6Z-VuL.jpeg

    *Note: these lists were compiled from reports supplied to us from Amazon.com where we are affiliates. One of the ways dPS is able to cover its costs and be a sustainable business is that we earn a small commission when readers make a purchase from Amazon after clicking on our links (including those above). While no personal details are passed on we do get an overall report from Amazon about what was bought and are able to create this list.

    Post originally from: Digital Photography Tips.

    Check out our more Photography Tips at Photography Tips for Beginners, Portrait Photography Tips and Wedding Photography Tips.

    29 Most Popular DSLR Lenses Among Our Readers


    Digital Photography School

  • Have You Ever Taken a Photography Class or Course? POLL

    It is time for our next reader poll – have you ever taken any kind of online or offline photographic training class or course?

    Note: There is a poll embedded within this post, please visit the site to participate in this post’s poll.

    If so – tell us about what course/class you took and how you found it in comments below.

    Post originally from: Digital Photography Tips.

    Check out our more Photography Tips at Photography Tips for Beginners, Portrait Photography Tips and Wedding Photography Tips.

    Have You Ever Taken a Photography Class or Course? POLL


    Digital Photography School

  • Call Me Crazy: LS Lens DSLR Adapter Tube Concept

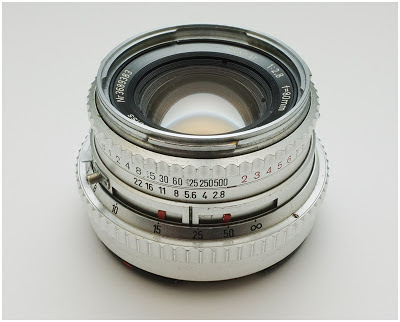
    See this? This is an 80mm lens from my old Hasselblad film camera. It was built 50 years ago. The leaf shutter is built into the lens. It syncs at 1/500th of a second.

    My current 80/2.8LS is a PhaseOne leaf-shutter lens. It syncs at 1/1600th. And it would be very possible—perhaps even simple—to manufacture an inexpensive tube to marry a PhaseOne LS lens to a Nikon or Canon DSLR.

    Why, and how, inside. Read more »


    Strobist

  • 20 Digital Cameras for a Kid or How to Become a Photographer from an Early Age

    In this article I talk about why you should stay away from “made for kids” cameras and get a “real” camera instead. It’s easy to find a great camera that your kids and your wallet can be happy with. And by getting an actual camera instead of a toy, you’ll be buying a product that will last longer than a week and that has capabilities that your child can grow into over time.

    The post 20 Digital Cameras for a Kid or How to Become a Photographer from an Early Age appeared first on Photodoto.


    Photodoto