Category: Photography

  • A Perfectly Valid Choice: Light That Isn’t There

    I'm as guilty as the next guy when it comes to over-the-top lighting. And why not? It's fun, it's cool and it can amp up an otherwise boring scene.

    But that kinda stuff is not always necessarily the best choice. Often the best light is light that doesn't call attention to itself, but rather allows your camera to see a scene the way your eye would normally see it.

    Take this biz portrait for example, which looks pretty natural but in fact is lit by three different sources. Read more »


    Strobist

  • Capturing the Quintessential Travel Portrait

    You’d be hard-pressed to find many people who don’t love to travel – especially amongst camera wielders. We love exploring new places around the globe and bringing back photos to share with all our friends. It’s exciting, and a look at the world outside our own perspective.

    There are three questions I always find myself being asked when returning from a travel assignment – where did you go, what did you eat and who did you meet? A key component in any good travel photo story is capturing portraits and the daily interactions of the people wherever you go. The astounding diversity across the world is what makes us so fascinating to each other. For this article, we’ll focus specifically on interaction based portraiture instead of candid captures.

    Here are a few tips and tricks I use for capturing the quintessential travel portrait.

    Ego is Irrelevant

    Perhaps my favorite phrase and one I pass along to anyone looking to create better people-based photography is this, “Check your shame at the door.” What that simply means is never be afraid to ask, dance or make a complete fool of yourself in pursuit of a great photo.

    There’s no room for ego in this business and you need to get over any worries you may have about asking people for photographs. The photographer who asks for a portrait will capture 100% more than the one who doesn’t. After all, all they can say is no. If you have plans on making a career in the photo industry you’ll need to get over your discomfort of the word “no.” Because you hear it – a lot.  Take the negativity out of it and think of “no” as merely a stepping stone to another “yes.”

    When you get that critical yes – or sometimes the hand gesture or smile that says to conveys an ok – it’s time to jump into action.

    Context is King

    Travel portraiture relies heavily on context. You don’t want someone to look at an image and think you captured it right outside your house – you want to show portraiture that tells the story of this person’s culture. What makes this person unique and interesting to you and your audience? Part of answering that question is knowing the main audience for your images. To a Tibetan a portrait of one of their fellow villagers may be nothing special – but to a Western audience it could be incredibly unique. It’s all about context.

    Travel portraiture is more than just up and tight shots. Often it’s half bodies, full bodies, people as small figures in a broad scene and more. The general rule is that an individual is connecting with the photographer/camera or is clearly the immediate subject of the photo.

    Showing environment is a great way to add context. Look for backgrounds that interest you and wait for just the right person to come around. Alternatively, grab someone who really interests you and if you can convince them to go to a nearby location even better.  Add variety to your images not only through different environments, but also different poses, expressions and actions. Get that mountain man to smoke his pipe, the chef with a plate of food, the business person with their notepad or the kite surfer holding her board. Use different lighting – front, side, backlit, shade, etc. All these build toward a body of work.

    Connecting the Vision

    Travel portraiture is all about telling a story. The question is, which story are you telling? Coming back from travels with a lot of portraits that convey a cohesive vision is much stronger than a random collection. It’s all about your perspective and vision.

    Do you want to show all smiling, warm and inviting faces… or the grief a recent strife has caused in a region? No answer is right or wrong; it’s simply up to you what kind of photographer you are and the type of images you enjoy capturing. Depart on your travels with a plan for vision-based portraiture and you’ll return with a set of images you’ll be much happier to share with friends and family.

    Post originally from: Digital Photography Tips.

    Check out our more Photography Tips at Photography Tips for Beginners, Portrait Photography Tips and Wedding Photography Tips.

    Capturing the Quintessential Travel Portrait


    Digital Photography School

  • The New Flickr iPhone App is Really, Really, Really, Really, Really Mind Blowingly Fantastic

    My Photos and the New Splash Screen for the New Flickr iPhone App
    My photostream and the new Flickr splash screen for their new iPhone app.

    Hot damn. Well Christmas is coming early this year for Flickr iPhone users. This morning Flickr is rolling out a brand spanking new Flickr iPhone app and it is that good — really, really, really, really mind blowingly fantastic good. It not only smokes every other previous mobile version of Flickr it smokes every other mobile photo sharing app on the market today.

    I had some time to play around with the app yesterday and it is pretty much does 100% exactly what you’d want a Flickr mobile app to do. It’s nice to finally see a decent Instagram competitor out there.

    First the basics. The app takes photos. It has some pretty good simple editing tools powered by Aviary. You can crop photos, straighten photos, increase contrast, stuff like this. You can select different points for focus and exposure when you snap your photo. You can then apply one of about 15 different Instagrammy sort of filters that are all named after animals in the app. This stuff is probably super important to the average minor league user, but is actually pretty boring to me. It’s a solid decent camera app.

    Where the app starts to get exciting for me though is the browsing of photos. Here Flickr delivers and delivers big. The best basic view is of your contacts’ most recent photos. As you vertical scroll down the screen it shows the last photos uploaded by all your favorite people that you follow. You can just keep scrolling down the page (infinitely) to see new photos by all your contacts or at any individual contact you can stop and start scrolling horizontally (infinitely) to go through their entire photostream, very, very fast.

    Group Discussions and Faving a Contacts' Photo in the New Flickr iPhone App
    Browsing group discussions and faving a contacts’ photo in the new Flickr iPhone app.

    For newer users who don’t have a lot of contacts yet that might browse through their entire contacts list, new recommended photographers are added so that a user never runs out of contacts’ photos to see. Who and how these individuals are selected and included is Flickr secret sauce, but it should make sure that you never have a shortage of photos to see even if you’re new.

    EVEN BETTER. Tap tap = fave. Yep, Instagram gave us the first big fave inflation tool by allowing us to tap tap fave our way through life and Flickr now has adopted that protocol allowing you to tap tap fave photos by all your favorite photographers.

    What does this mean? It means that all of a sudden you are going to start noticing a ton more faves on your Flickr photos. Every time your friends have 10 minutes in line at the bakery they are going to be all up in your Flickrstream faving things like crazy. It’s so easy now. Flickr is also now going to begin counting mobile views of your photos as views for your photo stats (previously mobile views were not counted) so expect both the views and faves on your photos to sky rocket.

    In addition to viewing your contacts’ most recent photos and going fave bombastic Billy Wilson style you’re also now able to view all kinds of other areas of Flickr in a beautiful mosaic photo layout — your own photostream and sets, group photo pools, other people’s sets, Explore, all have a justified photo layout that just invite you to go tap tap crazy.

    Speaking of Flickr groups, with this new app Flickr introduces a really nice basic thread reader that will allow you to stay on top of all of your favorite threads while you’re mobile. The reader is super simple and does exactly what it’s supposed to do, it lets you easily read your threads and respond if you want from mobile. The previous version of Flickr’s mobile app lacked this important feature. Some of Flickr’s biggest power users live in these threads and this is an important improvement because it will help keep people plugged into their Flickr groups more often.

    Another nice feature of the new app is that if you want to see any photo you are looking at full screen size you just tilt your iphone sideways and the photo immediately fills up the entire screen. You can then swipe from photo to photo as you scroll your way through whatever stream, set, group, etc. you are in. Flickr also uses a larger higher res version of your photo for this view so you get to see the photo with amazing clarity even if you pinch in to see a section in detail.

    Flickr also includes lots of other detail on a photo page that you can access if you want to see it — EXIF data, location data, people tags, etc. Flickr also partnered with Foursquare to give you a list of venues to easily geotag your own photos as you upload them.

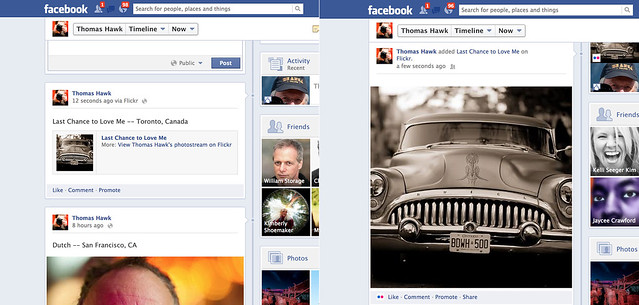
    Flickr Photos Now Show Larger on Facebook, Before and After
    Flickr photos are now full-sized when you share them to Facebook and Twitter — before vs. after.

    What about sharing your photos beyond Flickr? Yes! What about sharing your photos beyond Flickr? With the new Flickr app you can now share your Flickr photos to Facebook, Twitter, Tumblr or by email. Where it gets exciting though is how your photos are shared on these other sites. Beginning today, photos shared from Flickr to Facebook will now be shared full sized just like your Facebook photos are. In the past Flickr photos were given the downsized thumbnail treatment. Now your Flickr photos shared to Facebook will look as gloriously large as your photos shared directly on Facebook. This not only applies for your photos shared from the new app by the way, but from your photos shared via the web as well.

    Likewise Flickr has now adopted Twitter’s envelope and your Flickr photos posted to Twitter will be seen full sized as well. What Twitter/Instagram taketh away Twitter/Flickr giveth back.

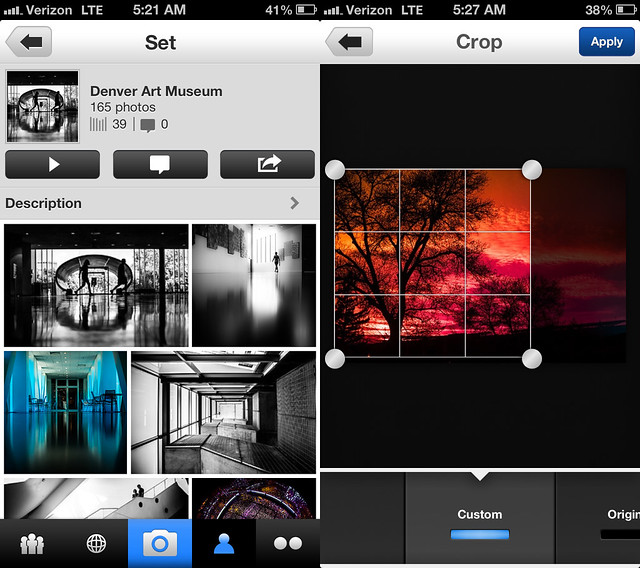
    Sets and Editing Photos With the New Flickr iPhone App
    A Flickr set and editing a photo in the new Flickr iPhone app.

    The only downside to today’s announcement is that as is usually the case, iPhone users get all the love while us Android fan boys get left out in the cold yet again. Flickr Product Head Markus Spiering did confirm that Flickr is working on future versions of their app for both Android and iPad though and said that Flickr hoped to have feature parity with today’s new iPhone app, but couldn’t confirm what the time frame might be on these future apps. He did emphasize that Flickr and Yahoo both are very committed to mobile going forward.

    Flickr is also rolling out a few new enhancements to the web version of Flickr today as well. They’ve redesigned the global navigation and menus so that they are more intuitive and added their new justified photo view that they’ve been rolling out to various areas earlier this year to Explore. Explore is much easier to browse now as one big infinite scroll mosaic to go through each day. Hopefully Flickr’s awesome justified photo mosaic layout will be coming to sets and search next. :)

    The new Flickr for iPhone app is available to download in Apple App Store this morning. Run, don’t walk and get it NOW! Trust me, you won’t be disappointed.

    Stephen Shankland’s review over at CNET here. Review at the Next Web here. A blog post from the Flickr blog here.

    Update: Pro Tip. Anil Dash points out that with the new “Find Friends” feature on the app you can find Facebook and Twitter friends’ flickr accounts that you may not know about. Try this feature and you many find a whole bunch of new Flickr contacts to add.


    Video on the new Flickr app.


    Thomas Hawk Digital Connection

  • Exposing to the Right

    Exposing to the right (often refferred to as ETTR) is a technique that seems to polarise opinions across the internet so you can find plenty of examples of people supporting its use and an equal number of people claiming it adds no value.  The principles of the technique however do hold value and are valid to consider when out taking images.  As it is a technique that I regularly employ when photographing landscapes I wanted to share the reasoning behind it, and show an example of the benefit it can bring.

    The term ‘expose to the right’ refers to the histogram associated with an image.  Typically, for a shot to be well exposed, we are taught to aim for an even spread of tones across the histogram, peaking in the middle, and tapering off at the edges.  When ‘exposing to the right’, the idea is to push the peak of the histogram as far to the right hand side as possible, i.e. overexpose the image, without clipping any highlights.  The resulting file, when processed back to the correct exposure, will contain more tonal information and less noise in the shadow areas, maximising your image quality.

    Expose to the right - histograms

    Left: A histogram showing a 'correct' exposure. Right: An 'exposed to the right' histogram

    Let’s consider the CCD or CMOS sensors found in most digital cameras.  Typical DSLR sensors can capture seven stops of dynamic range and produce 12-bit raw image files, capable of recording 4096 tonal levels in each red/green/blue channel.  The ability to record such a large number of tones should guarantee smooth transitions between the tones within the resulting image, however it is not quite that simple.

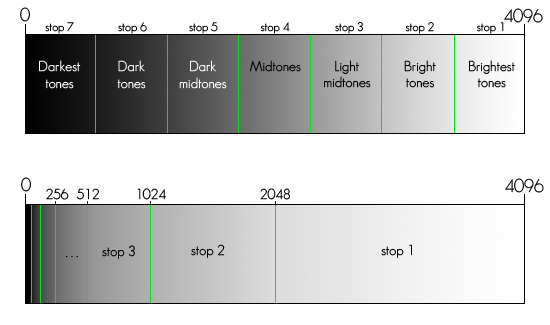
    Whilst you might think that each of the seven stops in the range of the sensor record an even number of tones throughout the dynamic range, you would be mistaken.  F-stops are logarithmic in nature meaning that each stop records half of the light of the previous one.  Practically, this means that the brightest stop records half of the possible number of tones, i.e. 2048, the second stop records half again, i.e. 1024, and so on until the seventh stop that records only 32 tonal levels.  Therefore, if you underexpose an image and correct the exposure during in post processing, the tonal transitions in the darker areas will not be as smooth, and the risk of degrading your image quality is much higher.  If you overexpose your image, by pushing the histogram to the right, you will capture much more tonal information that results in much better image quality when correcting the exposure in post processing.

    The diagram below tries to illustrate the distribution of tones for each stop of the dynamic range of the sensor.  The top image shows the seven different stops capturing different portions the dynamic range from the darkest through to the brightest tones, however the bottom diagram shows those stops but sizes them relative to the number of tonal levels that each stop captures.  As you can see, number of tonal levels captured by the brighter stops is significant compared to the stops at the lower end of the dynamic range.

    Expose to the right - tonal distribution

    A tangible way of demonstrating the difference in the amount of tonal information recorded is to take two images of the same scene, one underexposed, one overexposed and compare the file sizes: the overexposed raw file will be larger that the underexposed shot as it contains more data.

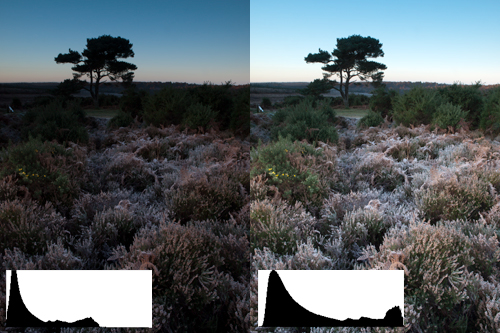
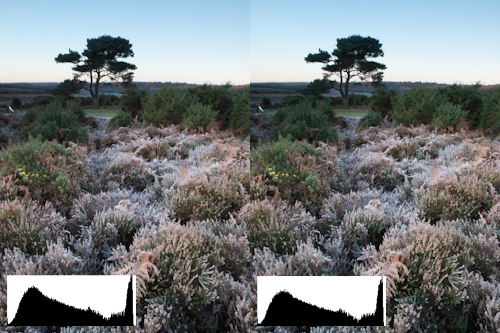
    Let’s look at an example.  The image below shows two unprocessed shots taken within seconds of one another, with their associated histograms.  The shot on the left is underexposed and the shot on the right is exposed so that the histogram is pushed up to the right hand side, as far as practically possible wihout losing any highlight detail.

    Expose to the right comparison image 1

    Left: Underexposed image. Right: Exposed to push the histogram to the right

    During processing, the exposure of each shot can be adjusted to give what seem to be two identical images.

    Expose to the right comparison image 2

    Left: Underexposed image. Right: 'Exposed to the right' image. Both undergone exposure correction during post processing

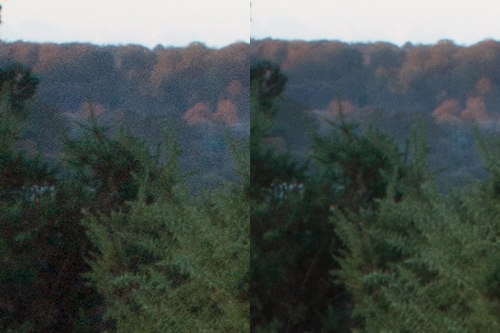
    However, when you look in detail at a 100% crop of an area of each image, you can see a huge difference in the quality of the final image.  The shot that was underexposed (i.e. exposed to the left) shows much less smooth transitions between tones and much more noise in the darker areas than the image that was exposed to the right.

    Expose to the right comparison image 3

    Left: Underexposed image. Right: 'Exposed ot the right' image. 100% crops to demonstrate diference in image quality.

    Images that have been exposed to the right will need some additional post processing to correct the exposure, but as you can see, a bit of extra thought when determining your exposure and some extra steps to correct it during post processing can result in image files with smoother tonal transitions and reduced image noise.

    It is not a technique that is universally applicable to all types of photography, as there is a risk of clipping highlights if care is not taken when exposing your image.  Exposing to the right is most suited to when photographing in a controlled environment, for example, when shooting landscapes, using graduated filters to ensure that all highlights are contained within the dynamic range of the sensor.  The last thing you want to do is to lose highlight detail when trying to maximise your image quality.

    So give it a go, take two images at different exposures (one exposed normally, one exposed to the right) and see if you can see a difference.  Understanding the performance of your individual sensor in such a way is a step further to knowing how to get the most out of your camera.

    Post originally from: Digital Photography Tips.

    Check out our more Photography Tips at Photography Tips for Beginners, Portrait Photography Tips and Wedding Photography Tips.

    Exposing to the Right


    Digital Photography School

  • 100 Amazing Gifts for Photographers Handpicked from All Over the Web

    Christmas is coming. This time of year everyone beats the brains out on what to give friends and relatives for the occasion. The art of photography as well as the art of giving needs some source of inspiration. Forget about hundred-dollar filters and thousand-dollar lenses, try your luck with these amazing gifts for photographers I’ve collected below. Even if the Continue Reading

    The post 100 Amazing Gifts for Photographers Handpicked from All Over the Web appeared first on Photodoto.


    Photodoto

  • 5 Impressionist Photo Techniques

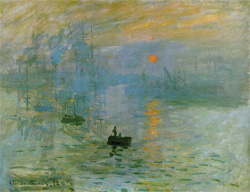
    Impression, Sunrise

    Impressionism is an art movement that began in the 19th century with the works of Monet whose painting "Impression, Sunrise" gave rise to the name of the art movement.

    I often think of photography as two different art forms.

    There is the traditional style that depicts a literal representation of a scene by showing how it actually appears to the person who is present – the style used in photojournalism and travel images.

    Then there is another style when the photographer tries to convey the feeling of a scene, a general impression, or suggestion of a scene.

    Lacking in detail these impressionist images emphasize colour over line and are often soft, dreamy, and have a painterly feel.

    Think of the impression a scene leaves in your mind when you glance at it quickly and then look away before giving your eyes a chance to focus. Usually it is an impression of colour and shapes and maybe an idea of some things that were in the scene with little detail – just the essence of a subject.

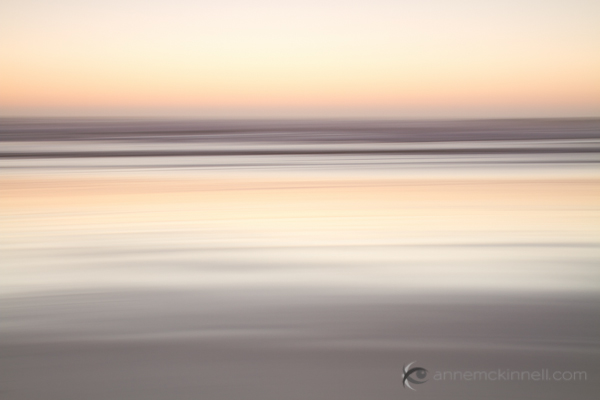
    Beach blur using the intentional camera motion technique.

    Beach blur using the intentional camera motion technique.

    When it comes to creating these dreamy sorts of images where things are out of focus it should be obvious to the viewer that the photographer intended it to be out of focus. If it’s only out of focus a little bit it looks like a mistake.

    Try to capture the feeling or mood of the scene rather than a literal representation.

    Now, on to the techniques.

    1. Intentional Camera Movement

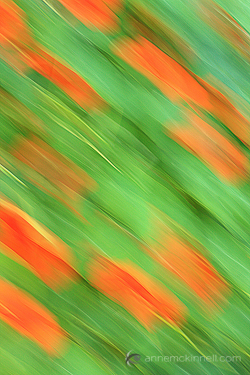
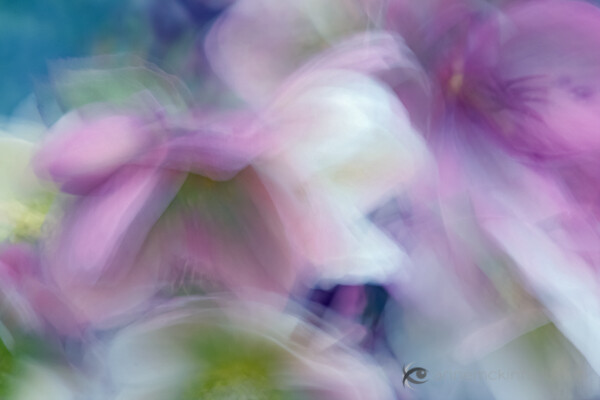
    Flower blur using the intentional camera movement technique.

    For this image I moved the camera in a diagonal direction. I also sharpened the image in post-processing which is what gives it the appearance of brush strokes.

    This technique works great on landscapes with strong lines such as the horizontal lines in a beach scene (shown above) or the vertical lines in a forest scene but you can do it anywhere.

    You will need to experiment quite a bit before you get a result you like but that is all part of the fun. Every frame will turn out differently.

    • * Start on shutter priority and pick a long shutter speed such as 1/20 to 1/2 a second.
    • * Point your camera at the middle of the scene and hold the shutter half way down to lock in the exposure.
    • * Pan in the same direction as any strong lines that exist in the scene.
    • * Start the panning before you completely press the shutter and continue after the shutter closes. That will make the movement smoother.
    • * Experiment with shutter speeds.


    2. Zooming

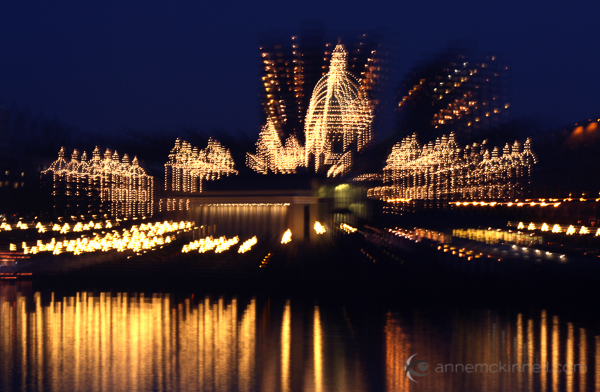
    Similar to the above technique, this one is intentional camera movement too, but instead of panning you zoom your lens in or out during the exposure. I like how this technique looks on city lights.

    The Legislature in Victoria, British Columbia using the zoom blur technique.

    The Legislature in Victoria, British Columbia using the zoom blur technique.

    • Set your camera to shutter priority and pick a shutter speed of at least a couple of seconds.
    • I find it easier to do this technique at night to allow for a really long exposure. If you do it during the day you might need to use a neutral density filter to block out some of the light to allow for the long exposure time.
    • While the shutter is open slowly zoom the lens. Try to make the zoom as smooth as possible.
    • You will probably have to try a number of different exposure times and try zooming quickly and slowly for different results.

    3. Selective Focus

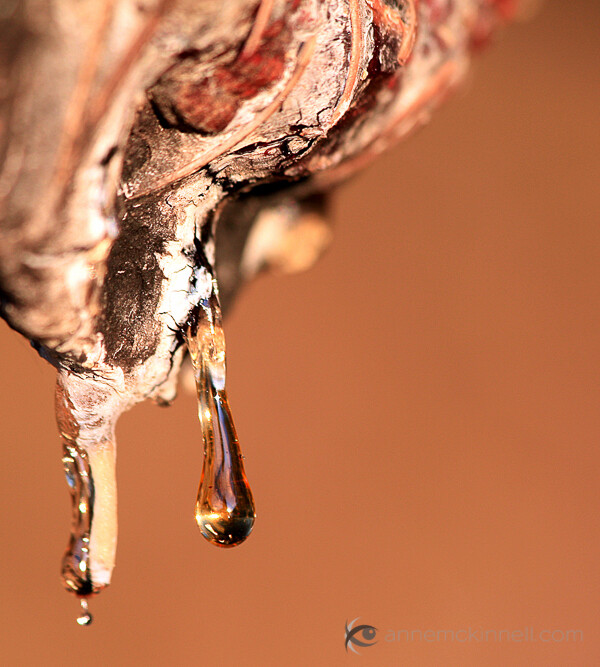
    With this technique only a very very small portion of the frame will be in focus. The rest will be extremely soft and painterly. You will need to use a lens that has a very wide aperture opening (f/1.8 or 2.8 for example). It will work best if you move away from your subject and use a telephoto lens to zoom in.

    Sap abstract using the selective focus technique.

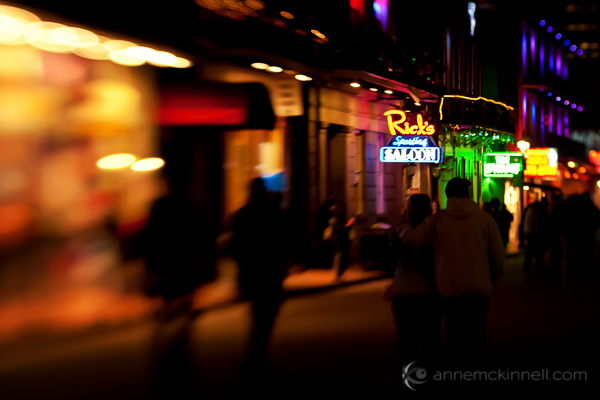
    Or you can use a specialty lens like a Lensbaby.

    Bourbon Street, New Orleans during Mardi Gras captured with a Lensbaby.

    Bourbon Street, New Orleans during Mardi Gras captured with a Lensbaby.

    • Use the aperture priority setting on your camera and set it for the widest aperture (lowest F stop number).
    • You might have to focus manually to get the right part of the frame in focus.
    • This technique tends to works best when you have good colour in the frame.

    4. Long Exposures

    I always remember the day I made this image because what I really wanted to do that day was the selective focus technique. But when I got to the location it was super windy and there was no way I was going to get anything in focus.

    At first I was disappointed until I decided to go with the flow. The flowers blew all over the place while the shutter was open for half a second and I was delighted with the result.

    Flowers using the long exposure blur technique.

    • Set your camera to shutter priority and pick a long shutter speed like half a second or longer.
    • Find a subject that is in motion.
    • You will probably have to try lots of different shutter speeds before you get one that is just right depending on how quickly your subject is moving. I like it when the result is very abstract yet there is still enough detail to identify the subject.

    5. Focus Through

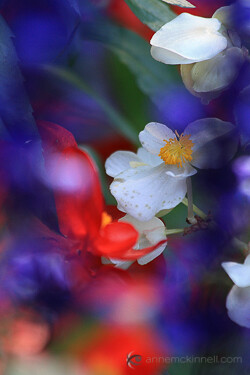
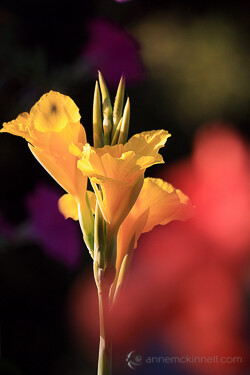
    This technique works great with flowers because the petals are semi-transparent and light shines through them. What you want to do is focus on a flower that is a couple of feet away and allow another flower to be extremely close to the end of your lens, so close that it could never be in focus.

    Flowers using the shoot through technique.Flowers using the shoot through technique.

    • Use a telephoto lens.
    • Find an object that is semi-transparent that you can place in front of the subject which is in focus.
    • Use manual focus so your camera isn’t confused by the object in the foreground.

    The reason I like these techniques is because it gives me a real sense of freedom when there are no rules and I can play around as much as I like.

    Even if these sorts of images aren’t your thing, I really encourage you to try it out for a day just for fun, just to release yourself from the obligation of making everything super sharp all the time.

    Remember – you are the artist and you can do whatever you want.

    I would love to hear about your experience with these techniques! Let me know how it worked out for you in the comments.

    Post originally from: Digital Photography Tips.

    Check out our more Photography Tips at Photography Tips for Beginners, Portrait Photography Tips and Wedding Photography Tips.

    5 Impressionist Photo Techniques


    Digital Photography School

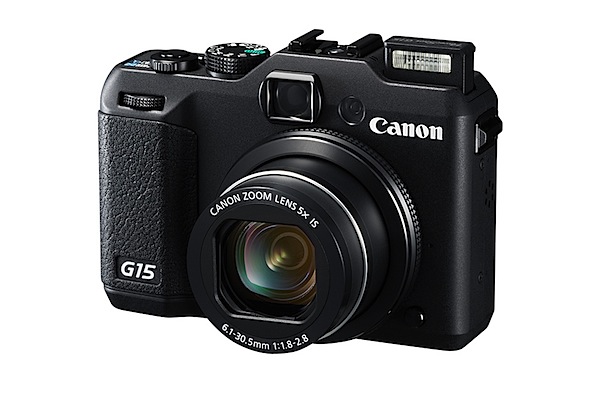
  • Canon Powershot G15 Review

    Canon G15 Review

    Don’t know about you, but I shudder when I read that a camera company has described a lens or a camera as being ‘bright’.

    I presume they mean that the lens involved is what used to be described as ‘fast’ … you know, with a maximum aperture of f1.5 or f2 or nearby. But bright …?

    Anyway, this G series model – the Canon Powershot G15 – is the latest in what Canon used to describe as its top level, fixed lens series of cameras, with specs generally above the run of the mill models.

    So, here they go: ‘Canon introduces its fastest and brightest compact camera. The Canon PowerShot G15 camera delivers enthusiast and professional photographers the fastest auto focus and brightest lens in Canon’s compact camera history.’ Whew!

    Time was when the G series sat as Canon’s premier compact line of cameras. Before DSLRS became common-place, a G series camera was the one to go for. So how are things these days?

    But before we head into the present it’s interesting to observe that the pioneering G1 of 2006 measured 119.7×76.8×63.8cm and weighed 420g as against the G15′s 125x87x110cm and 310g in weight. So the veteran G1 camera was almost precisely half the size of the new G15 but, weightwise, the G1 was a third heavier. Lenswise, the G1 had an f2 optic, so the new boy is (very) minimally faster.

    BTW the ISO options went only to 400 — boy those were the dim days! And it used CompactFlash cards!

    Enough of the past.
    G15_04.jpg

    Canon Powershot G15 Features

    I have to say the camera got me immediately, with its classy matte black body and clearly-picked out in white control points. You can see at a glance what the mode dial settings are, along with any exposure correction you may have dialled in on the camera’s top surface. Power and shutter buttons as well as zoom controls are only millimetres away.

    The speed grip is smallish but enough to securely wrap your fingers around.
    Menu.jpg

    Mode dial.jpg

    The rear area carries little, aside from the four way rocker which gives access to ISO, macro mode, display options and flash variations with the function button set in the centre. Nearby are buttons for menu, metering options, AF selection and aperture selection. In my book, this setup makes the camera a dream to use without any need to dive into the menu ‘jungle’ which is, in typical Canon fashion, a very friendly jungle.

    For me, there are very few ‘downers’ but I feel the widest end of the zoom (at a 35 SLR equivalent of 28mm) is not wide enough for most punters … 25mm makes me smile, 28mm forces me to step back a bit!

    Overall, the camera could make a pro or enthusiast very happy as a backup to DSLR kit.

    Maximum image size is 4000×3000 pixels, enough to output a 34x25cm print.

    Movies: Full HD capture in MPEG4 at 1920×1080 resolution. Shooting movies is dead easy, simply by pushing the by now familiar red button, found at the top right corner of the camera; no stills capture, mid movie, unfortunately … do so and the move recording will stop, so there! However the AF and auto exposure functioned flawlessly during movie shooting.

    All the moving shots were taken with the camera at waist level. Head high video was shot with the camera held still. All of this is a great help for the in-camera stabiliser.

    The optical turret viewfinder is matched happily to the zoom’s operation, so you can enjoy flare free viewing/shooting even in bright sunlight. The bad news is that there is no indication of focus.

    And then I noticed a tiny button at the front of the camera and just beneath the lens: this is to release the lens ring, enabling attachment of a tele-converter lens. Not sure if there is a wide adaptor available.

    One gripe: the continuous shooting speed is a measly 2.1 fps, with so many lesser-specced cameras offering much faster rates.

    MacDonald's interior 3.jpg

    McDonald's interior 4.JPG

    McDonald's interior 5.JPG

    McDonald's interior 6.JPG

    Startup Times
    About a second after power up I caught my first shot; follow-ons came in at a little over a second apiece. Not rapid, I would say.

    Distortion
    I could discern very little barrel distortion at the zoom’s wide end, with no aberrations apparent at the tele end.

    Canon Powershot G15 ISO Tests

    Canon G15 ISO 80.JPG

    Canon G15 ISO 400.JPG

    Canon G15 ISO 800.JPG

    Canon G15 ISO 1600.JPG

    Canon G15 ISO 3200.JPG

    Canon G15 ISO 6400.JPG

    Canon G15 ISO 12800.JPG

    It’s all good news, all the way up to ISO 3200, with excellent definition and relatively low noise.

    By ISO 6400 we start to fall off the edge with noticeable noise and a drop in sharpness. By ISO 12800 the image is nasty: lots of noise, poor colour fidelity, poor definition. But hey! How about ISO 3200!

    Canon Powershot G15 Review Verdict

    Quality: the images I took leapt off the screen. These are some of the best I have ever seen from a digital compact. Stunning video as well.

    Why you’d buy the Canon Powershot G15: easy to follow control layout.

    Why you wouldn’t: a tilting LCD screen would make it a much better camera for stills and movie work.

    A little beauty! It could happily sit in my kit bag.

    Canon Powershot G15 Specifications

    Image Sensor: 12.1 million effective pixels.
    Sensor: 15mm CMOS.
    Metering: Evaluative, centre-weighted, spot.
    Lens: f1.8-8.0/6.1-30.5mm (28-140mm as 35 SLR equivalent)
    Exposure Modes: Auto, Program AE, manual.
    Shutter Speed: 15-1/4000 second.
    Memory: SD/SDHC/SDXC.
    Image Sizes (pixels): Stills: 4000×3000 to 640×480.
    Movies: 1920×1080, 1280×720, 640×480.
    Viewfinder: Optical turret and 7.5cm LCD screen (922,000).
    File Formats: JPEG, RAW, MPEG4.
    Colour Space: sRGB.
    ISO Sensitivity: Auto, 80 to 12800.
    Interface: USB 2.0, HDMI mini, AV output, DC input.
    Power: Rechargeable lithium ion battery.
    Dimensions: 125x87x110 WHDmm.
    Weight: 352 g (inc card and battery).
    Price: Get a price on the Canon PowerShot G15 at Amazon.

    Post originally from: Digital Photography Tips.

    Check out our more Photography Tips at Photography Tips for Beginners, Portrait Photography Tips and Wedding Photography Tips.

    Canon Powershot G15 Review


    Digital Photography School
  • Creative Color Processing (Part 1/3 – White Balance)

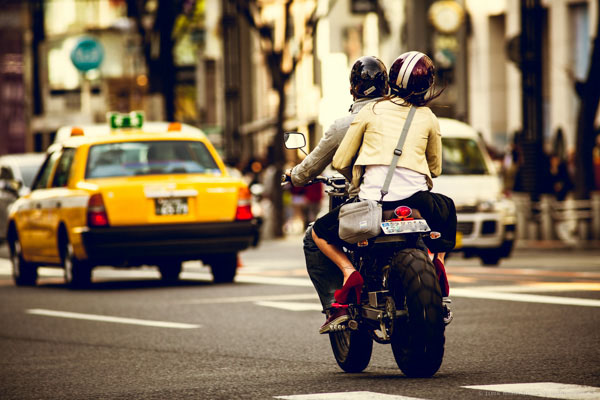
    It is often said that photography is a visual language. Through our photographs we tell stories, share experiences, and communicate emotions. Aside from journalism, where faithful captures are important for ethics reasons, photography is often about creatively interpreting a scene, rather than simply recording what is in front of the lens.

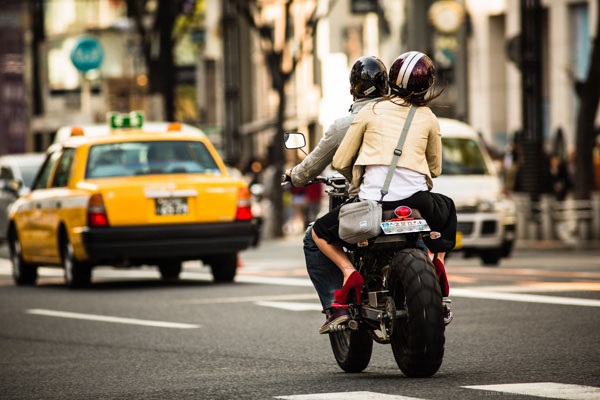
    Tokyo street scene with creative color

    Tokyo street scene with creative color

    Tokyo street scene with 'normal' color

    Tokyo street scene with ‘normal’ color

    Creative use of color can be a powerful tool for controlling the mood in your photographs. In a series of three posts I will discuss three Lightroom controls that can be used to control color and mood in your photos:

    1. White Balance
    2. Split Toning
    3. Tone Curve

    In this first article in the series I will discuss white balance, the simplest of the three tools.

    Note: I shoot Raw and import my photos into Lightroom, converting to DNG on the way into Lr. Shooting Raw gives me much more flexibility to make creative color decisions in post processing. The screenshots from are from Lightroom 4, but with the exception of the Tone Curve technique that I will cover in Part 3 of the series, these techniques can be used in previous versions of Lightroom.

    White Balance

    White balance allows you to control the overall color temperature of your image, and adjust for different light sources like tungsten, daylight, flash, etc. If you’ve never heard of white balance take a look at this post.

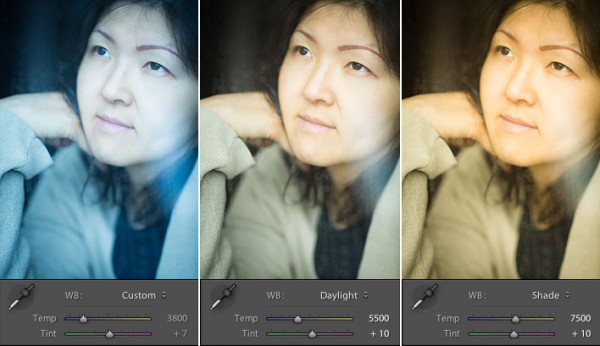
    White Balance Example

    Example of different white balance settings

    Most of the time you’ll read that white balance is there to help you get accurate color in your photos. This article is not about accurate color. For the next few minutes, forget about accurate color and let’s just look at how white balance can be used to change the mood in a photo. I like to think of white balance as just another tool for controlling color image my images. Thinking of white balance this way is liberating and encourages experimentation.

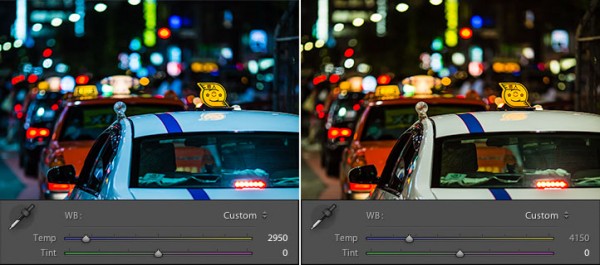
    Tokyo Taxi White Balance Example

    Tokyo Taxi White Balance Example

    Notice how a cool white white balance creates a totally different mood than a warm white balance for the same scene? Which of the above images do you prefer? When you feel like getting creative with your images, try shifting the white balance either cooler or warmer for creative effect.

    I hope this article has encouraged you to think creatively about white balance, and to experiment with shifting white balance for creative effect. I love hearing your feedback, please comment below or feel free to connect with me through Facebook or Google+.

    In Part 2 of the Creative Color series I will discuss Spit Toning, and demonstrate how white balance and split toning used together for even more creative control over color.

    Post originally from: Digital Photography Tips.

    Check out our more Photography Tips at Photography Tips for Beginners, Portrait Photography Tips and Wedding Photography Tips.

    Creative Color Processing (Part 1/3 – White Balance)


    Digital Photography School

  • Tell us About the Best Shot You Never Got Due to Malfunction & WIN a JOBY UltraFit Sling Straps

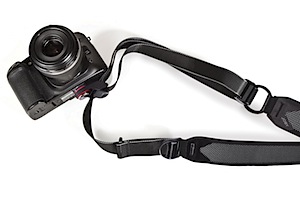
    UltraFit_SlingStrap_iso.jpgI’m excited today because one of our sponsors – and good friends – JOBY are offering to give 5 of our readers 2 of their UltraFit Sling Straps in a competition today.
    To win all you need to do is to leave a comment below telling us about:

    The Best Shot You Never Got Due to a Malfunction with your Gear.

    That’s right – if you’re mourning a shot you never got due to a dead battery, a lens cap not taken off, a broken camera or a camera strap that got in the shot now is the time to get some pay back!

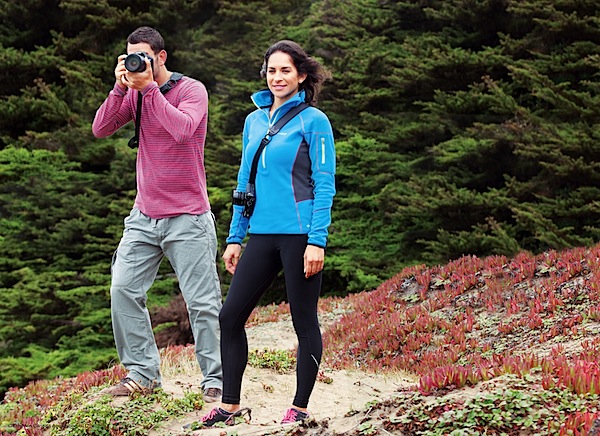
    Our friends at JOBY have launched their revolutionary UltraFit Sling Strap that adapts from cinched to shooting so you never miss a shot and now they are offering it for you.


    UltraFit_SlingStrap_Family_0185.jpg

    To win the prize of 2 straps (1 for you and 1 for a friend) simply tell us about your photography malfunction in 50 words or less in comments below and JOBY will provide YOU with the straps for the holidays.

    About JOBY UltraFit Sling Strap

    Never miss a shot with the new UltraFit Sling Strap from JOBY that makes your photography comfortable, quick and more fun.  The SpeedCinch system allows for easy extension and quick ability to cinch to your body for stability; you can also lock the strap in cinched position for added security. The comfort is all in the design; male and female straps with the UltraFit Layered Pad Technology and S-curve designed specifically for the female body.  The strap easily and securely attaches to your DSLR or CSC camera with the LockSafe ¼”-20 Attachment™. See it in action.

    Check out a demo of the straps by JOBY in this video:

    UltraFit Sling Strap for Women by JOBY from JOBY Inc on Vimeo.

    The Prize and Conditions of Entry

    5 dPS readers will be chosen from the comments left below. Each winner will receive 2 UltraFit Sling straps. One for them and one to give to a photography loving friend! To enter leave a comment below telling us about the shot you missed due to a gear malfunction before midnight US Eastern time on Friday 21st December. JOBY will choose the winners and we’ll publish their names here on the dPS blog in the following week.

    Conditions: There is one entry per person and entries are open to our global audience (we’ll get your prize shipped to you anywhere in the world).

    So get to it – in comments below tell us about the best shot you never got due to a Malfunction with your gear! Good luck!

    Post originally from: Digital Photography Tips.

    Check out our more Photography Tips at Photography Tips for Beginners, Portrait Photography Tips and Wedding Photography Tips.

    Tell us About the Best Shot You Never Got Due to Malfunction & WIN a JOBY UltraFit Sling Straps


    Digital Photography School

  • Photography SEO And The Power Of Local Relationship Building

    Previously we talked about Photography SEO and link building. Today we’re going to talk about the relationships you have to make to get the ball rolling for links. I am going to use a bakery as an example.

    Photography SEO  local relationship building

    Photography SEO & Local Relationship Building

    There are three steps to local relationship building. Below I will discuss each one.

    Identify

    Identifying your local relationships is step one. If you know that a local bakery is preparing food for many local events, then they are a the perfect place to start.

    Outreach

    Once you have identified that the bakery is your first relationship to build, it is time to reach out Stop in to the bakery and talk with the employees, meet the owner and bakers. Become friendly and spend some money buying some food if you can afford it or have it in the budget. Visit the bakery’s website and comment on their blog articles. Visit their social media channels and interact with more comments, Likes, Tweets, +1s, etc.

    Build

    After the engagement becomes a two-way street, it is time to send your letter. Here is a template to get you started:

    Hi Tom,

    I have really enjoyed the food that your bakery has prepared and the kindness from your employees. I honestly feel your bakery is the best around.

    I was thinking that I could start a partner section on my photography website where I refer clients vendors I believe it, like you.

    Would you consider having a similar page and exchanging links? I think it can benefits both of us and it would be fun to work together at events.

    Let me know your thoughts.

    See you Monday morning,

    Scott

    You might even offer for them to guest post on your blog.

    There you have it. A simple three-step approach to photography seo relationship building.

    Feel free to comment with questions,

    Scott

    dslrBlog