Category: Photography

  • Correcting For Under Exposure and Boosting Dynamic Range with an Environmental Portrait in Lightroom 4

    Introduction

    This tutorial is a demonstration of the SLR Lounge Lightroom 4 Preset System. With over 200 presets, the LR4 Preset System has been critically acclaimed as the most powerful and intuitive preset system available for Lightroom 4. DPS users can get 10% off by using the DPS10 coupon code upon checkout. Click the link above to learn more/purchase.

    Overview

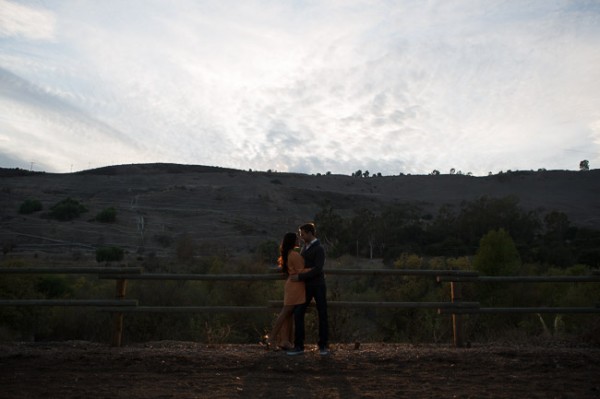
    Often times when shooting environmental portraits we “expose to the right”, meaning we are pushing our highlights to the right of the histogram without blowing out too much of our highlights, or clipping too much of our shadows. Depending on the type of scene, this can lead to what looks like an underexposed image directly out of the camera since we are trying to preserve the majority of our highlight detail. However, since most of the range in the highlights and shadows are still retained, we can bring it out through post production. In this step-by-step tutorial, we will demonstrate how to not only correct the exposure in this type of portrait, but also how to increase its dynamic range.

    Lightroom 4 Preset System Mixology

    This effect can be achieved quickly in under a minute with the SLR Lounge Lightroom 4 Preset System, If you don’t own the preset system, please skip to Step 1 to learn how to do it manually.

    1. MY MIXOLOGY > 25 HDR Strong
    2. BASE ADJUSTMENTS > 23 Light Soften Skin (Detail)
    3. BASE ADJUSTMENTS > 34 Medium Boost (Contrast)
    4. BASE ADJUSTMENTS > 62 Light Noise Reduction (Noise Reduction)
    5. Add +.30 Exposure
    6. 13 Nature | Color Adjustment Brush
    7. 12 Sky | Cloud | Ocean Adjustment Brush

    The Original Image
    Step 1. Applying our Basic Adjustments

    What we usually recommend when working in Lightroom is to work your way down the Develop Module Panels starting from the Basic Adjustment Panel.

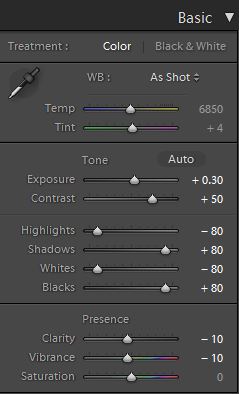
    Because the image is underexposed, one of the first steps that we need to do is to correct the exposure by adding +0.30 stop to Exposure. In order to increase the dynamic range, we are also going to bring down the Highlights and Whites by -80 and lift up the Shadows and Blacks by +80. When applying this technique to your own photos, you may be better off dialing in your Highlights, Whites, Shadows and Blacks and then adjusting the Exposure as necessary.

    At the same time, when we increase the dynamic range, the contrast flattens out, so we do need to add Contrast to compensate.

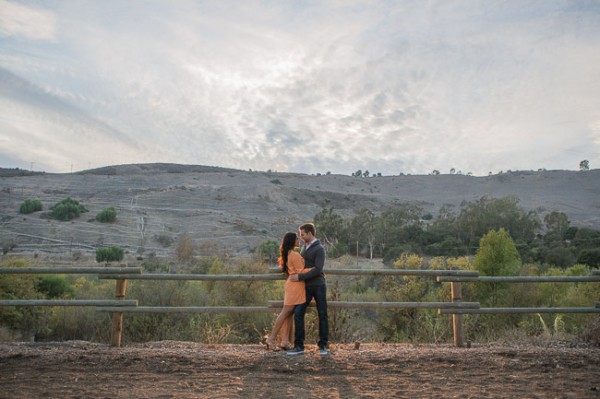
    Because we are working with a portrait, we want to have nice, smooth skin tone that is not overly saturated, so let’s decrease Clarity and Vibrance by -10. Your Basic Panel adjustment and image should look like the following:
    02 Basic Adjustments

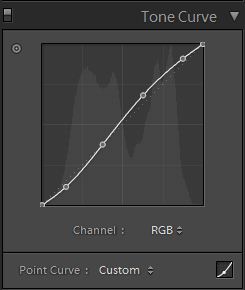
    Step 2. Adding Additional Contrast via Curves

    The image can still use some more contrast, so let’s add a subtle contrast-boosting “S” curve.
    03 Tone Curve

    Step 3. Sharpening and Noise Reduction

    With the SLR Lounge Preset System, we typically apply the following Sharpening setting to our image:
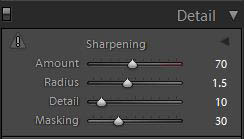
    Detail

    We are also going to add Noise Reduction because we to smooth out any noise that is introduced from the dynamic range boost. We use this setting for Noise Reduction:
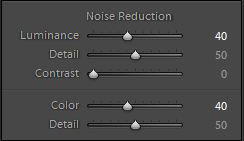
    Noise-Reduction

    Here is how your image should look like after applying all of these adjustments.
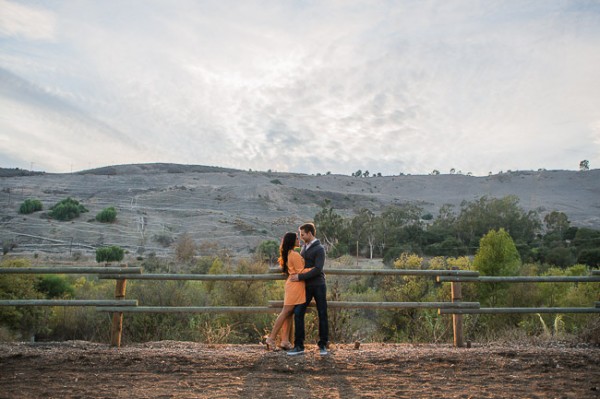
    04 Detail

    Step 4. Using Adjustment Brushes for Sky and Landscape

    Even though we boosted the dynamic range of this image, the sky is still overblown. The LR4 Preset brush we use for the sky is called “Sky | Cloud | Ocean.” This brush lowers the exposure, highlights, and shadows, and increases contrast, clarity, and saturation in the sky. Here is our settings for this brush.
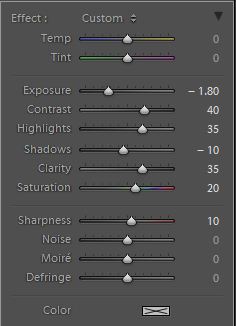
    Sky Cloud Ocean Brush

    Finally, we want to add more midtone contrast and saturation to the foliage in order to make them pop. Here is how the settings look like for the “Nature | Color” LR4 Preset Brush that we applied to the landscape. This also increases contrast, clarity, and saturation.
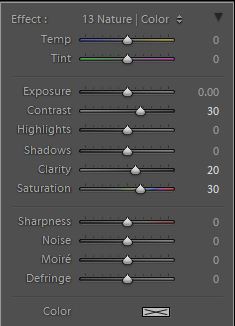
    Nature Color Brush

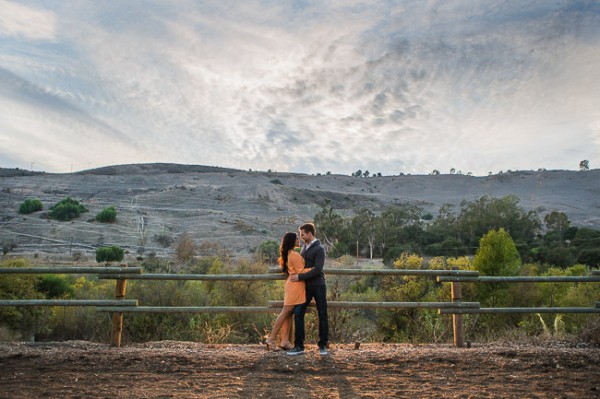
    Now that all our adjustments have been applied, let’s take a look at the before and after images to compare the original underexposed image against the final image.

    ORIGINAL

    HIGH DYNAMIC RANGE PORTRAIT
    05 Finished

    The Lightroom 4 Preset System

    The SLR Lounge Lightroom 4 Preset System is designed to enable users to achieve virtually any look and effect within 3-5 simple clicks. From basic color correction, vintage fades, black & white effects, tilt-shift effects, faux HDR, retouching, detail enhancing, and so much more. The sky is the limit with what has been dubbed the most powerful and intuitive preset system available. Click the link above to learn more/purchase.

    Post originally from: Digital Photography Tips.

    Check out our more Photography Tips at Photography Tips for Beginners, Portrait Photography Tips and Wedding Photography Tips.

    Correcting For Under Exposure and Boosting Dynamic Range with an Environmental Portrait in Lightroom 4


    Digital Photography School

  • For Beginners – Learning to See

    A granite shoreline on a local lake offers endless opportunities for images.


    Photography is about vision – real or perceived.

    Before we take the camera out of the bag we must first learn to look at what we are seeing, and to see at which we are looking.

    Often times beginning photographers will stop dead in their tracks and in haste put the camera to their eye. Then the search begins, the human form will go through contortions resembling those of Gumby and Pokey while the lens is zoomed in and out, raised up and down, and enough gadgets are incorporated to leave any mechanical engineer in awe.

    The fact of the matter is that once we have recognized a scene worthy of photographing, the one element that often fails in the process is the inability to see, to really see, what it was that stopped us in the first place.  Once the camera is raised to the eye you should be looking at what it was that you had earlier seen, thus, the camera simply becomes a mechanical device to record the image that the grey matter located four-inches behind the viewfinder has already registered.

    So, “how do we learn to see,” you might ask?

    This is a million dollar question, and hopefully, the answer is one that you will chase for as long as you are physically able to hold a camera. As we learn to see we incorporate a vision or style, and as you journey along this wonderful path you will find that you will revisit that same subject in a different light as your vision and style evolves. This is healthy and shows a maturity and progression.

    But first we must give our eyes exercises so the act of seeing becomes an intuitive process.

    As we learn to read, we read slowly by studying each syllable of each word, and annunciating those syllables aloud. As our reading skill improves we learn to read silently, and eventually will often be speed-reading by skipping or scanning words in our left-to-right habit instilled form. We don’t see every word, we just intuitively know what noun, verb or adjective is next simply by scanning that line.

    This is a problem for the new photographer. For years we have trained ourselves to not only read, but also to look from left-to-right, and as such we often skip over pertinent details.

    A backyard garden is a prefect training ground for the nature photographer. Get down low and study those flowers to see what surprises may be waiting.


    One of the first tricks I learned many years ago had nothing to do with photography, but was drilled into me by an army sergeant. It only took a few smacks up the back of my head to learn how to look from right-to-left when scanning a landscape in an effort to see the hidden “enemy” in our mock battles. This process of reverse reading forced me to slow down and read each tree as if it were a syllable I was seeing for the first time. Even today, about thirty years after I called that sergeant every adjective not found in a descent dictionary, I still find myself scanning a landscape from right-to-left.

    If you don’t believe this will help in your visual acuity, just read the first line of any paragraph in this column. Notice how your eyes skip and jump ahead of what your mind is absorbing? Now read that same line from right-to-left, I’ll bet you are even turning your head with your eyes as you slowly study each word.

    Now put this skill to practise. When you are out at your backyard bird feeder, or at the neighbourhood park, start scanning those trees looking for birds from right-to-left. Soon this will become an intuitive process, and you will see more birds in the forest or spiders on flowers than you ever imagined. Only by seeing that bird or spider can you then make a picture of it.

    As the great purveyor of quotes, professional baseball player Yogi Berra, once said: “You can observe a lot by just looking around.”


    By training our imagination at the same time as our eyes, a whole new world of opportunities can open. This lake is a centuries-old canoe route for the indigenous aboriginal community. By rotating the image I imagined the Great Earth Mother with arms and hands holding her pelvis and the unborn child in her womb.

    Post originally from: Digital Photography Tips.

    Check out our more Photography Tips at Photography Tips for Beginners, Portrait Photography Tips and Wedding Photography Tips.

    For Beginners – Learning to See


    Digital Photography School

  • 12 Myths About Photography And Photographers

    Myth #1 “I’m not going out to shoot today because the light is bad.”

    There is no such thing as bad light. As long as there is light, there is opportunity to make amazing images. There is also no reason to limit yourself to the golden hours on each end of the day. The most adverse weather conditions are perfect for making the most beautiful pictures. So get out there!

    Myth #2 “I need to bring several lenses with me on my photo walk, just in case…”

    Well, that’s fine if you don’t mind carrying around heavy equipment all day “just in case.”  Depending on what you shoot, if you limit yourself to just one lens for the day you can improve your skills, especially if you decide on a fixed focal length lens such as a 50mm. This simple decision will slow you down which will help you see better and allow you to compose more carefully. Plus you won’t miss the shot while you’re busy switching lenses.

    Myth #3 “I shoot 1,000 frames in a day so that I increase my chances of having a lot of keepers!”

    The ‘spray and pray’ approach sounds like a good idea, but it is no guarantee that you’ll have more keepers at the end of the day. Instead, pretend you are shooting film and limit yourself to a 24 or 36 exposure that day. You will quickly discover the creative power of limitation.  Shoot with intent, make every single frame count, and you will have plenty of keepers at the end of the day with the added benefit of not having so many images to process.

    There is no bad light. Foggy days are my favorite days to shoot landscapes.

    Myth #4 “I can’t shoot, I forgot my tripod.”

    The tripod is a useful tool, but can also become a bit of a crutch. Unless you are on a paid job assignment that requires a tripod, liberate yourself and shoot hand held. There are other ways to stabilize your camera if necessary, you can use a wall or a boulder for example. Tripods are definitely useful, but the problem is that photographers tend to set them once and rely on them to shoot everything from the same level.  Be creative and shoot your subject from different perspectives. Unless you are shooting long or multiple exposures or macro, liberate yourself from that tripod once in a while and try new perspectives.

    Myth #5 “I‘m in a creative rut, I need to go to an exotic location to get out of it.”

    Everyone gets into a rut. One solution is to learn to see the extraordinary in the ordinary, see the new in the familiar. Go out into your own backyard and see it with fresh eyes.  Give yourself an assignment such as a photo-a-day project for a month or a year.  Create a theme for your photo walk and it becomes a treasure hunt. Shoot with fellow photographers. Give a camera to a child and see the world “fresh” through their eyes. Once you get out there and use your imagination, you’ll be free from that rut!

    Myth #6 “I would take better pictures if only I had a better camera.”

    Okay, I’m not going to give you a lecture here. It’s true that more expensive equipment, when used skillfully, will yield better images than a point and shoot camera. The mistake, however, is upgrading before using your current gear to its full potential. Believe me, gear lust is easy to catch, yet most of us never outgrow our equipment. Invest into education, attend a photo workshop or go on a vacation instead of spending thousands on the latest and greatest gear. If you can do both, that’s terrific, but it’s not always necessary. Also, there is a lot of bad photography made with very expensive gear and some stunning images shot with iPhones… Food for thoughts!

    Myth #7 “I’m too old to learn how to use a digital camera.”

    If you have the strength to hold a camera and press the shutter, you can learn to use a digital camera.  Photography is a life long passion. It’s never too early or too late to start!

    Myth #8 “I’m making money with my photography. I learned everything there was to learn about the craft.”

    Nothing could be further from the truth! Once you think you know it all, you will stop growing. The world of photography is so exciting and is changing at the fastest pace ever. All you have to do is to keep current with the latest technology and embrace it.

    Myth #9 “I need hundreds of pictures in my portfolio before I can show my work to clients.”

    This is just not true. What is true, and important, is to be discerning about your selection, show only your best work. Quality over quantity is your guideline here.

    Myth #10 “Being a photographer is a glamorous job.”

    Maybe in the movies, but not in real life.  Most photographers don’t realize at first how much nitty gritty work is required once you turn your passion into a profession. For most of us, it’s 80% business and 20% shooting. This is true for just about any artist, so you need to be realistic.

    Myth #11 “All you need to be successful as a pro is talent.”

    Wouldn’t that be nice? Ever heard of the expression “starving artist?”  Talent is definitely an important ingredient, but solid business skills are also important. Business and marketing are a vital part of being a successful working photographer, but if that’s not your forte, be sure to get help or hire someone for that.

    Myth #12 “Pro photographers are better than amateurs.”

    Just because some photographers make money with their pictures doesn’t make them better shooters. A successful pro will be able to offer quality and consistency. I see the work of so-called amateur photographers every day that far exceeds the work of many pros. Actually, pro photographers run the risk of losing the passion for their craft if the work becomes a routine and this can adversely affect the quality of their work. It is very important for pro photographers to make time for personal projects in order to keep their passion alive.

    The list could go on! Feel free to add a myth or two in the comment section.

    Post originally from: Digital Photography Tips.

    Check out our more Photography Tips at Photography Tips for Beginners, Portrait Photography Tips and Wedding Photography Tips.

    12 Myths About Photography And Photographers


    Digital Photography School

  • Jay P. Morgan on Feathering Grids

    Using a KESSLER slider and a TAMRON lens and a DYNALITE flash and some NIK software, human Nascar* Jay P. Morgan will now give you some pretty darn good advice on grid spots.

    But the real gem here is the feathering, which will almost always make your light more interesting.
    __________

    * I kid, Jay. Props to you. And also to LENS PRO TO GO. And GLIDECAM. And PHOTOFLEX. And VANGUARD. And AAZDEN. And ROSCO. And TRIPLE SCOOP MUSIC. And PHOTOGRAPHY TALK.

    (Seriously, someone make this guy a jacket. This needs to happen.)

    -30-


    Strobist

  • Learn the Secrets of a Pro Photographer’s Workflow: 33% Off Today Only

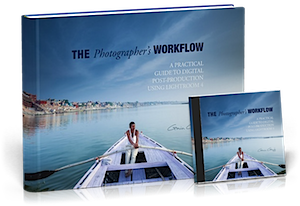
    photographers-workflow.pngIt’s time for Deal #3 in our 12 Days of Christmas and today is a great brand new product that we’re really excited about from renowned Freelance Travel Photographer Gavin Gough.

    Gavin has recently released an eBook (with some other great bonuses) that is getting great reviews by the name of The Photographers Workflow. and for the next 24 hours you can get it with a 33% discount by using the coupon code of photowork33 when checking out.

    This great resource is perfect for anyone looking for a system to manage the digital photos that they take and if you’re anything like me, that’s quite the task due to the number of images that I take on a given week!

    What Gavin describes is based upon use of Lightroom (an amazing tool that I use and recommend) and once you set yourself up with the principles described in this eBook you’re going to save yourself a heap of time and will also put your mind at ease your images will be safe and backed up too!

    What do You Get with the Photographers Workflow?

    This is more than just an eBook – here’s what you’ll receive:

    1. a 10 chapter eBook (130 pages) – a comprehensive guide to establishing a reliable and consistent digital photography workflow.
    2. 65 Lightroom 4 Development Presets to help give your processing a more consistent linear structure
    3. A series of Lightroom Smart Collections which build a step-by-step workflow for managing digital photographs
    4. Links to a series of free, online video tutorials to help you visualise what Gavin teaches in the eBook

    The thing that I particularly love about Gavin’s approach is that he not only gives you the theory but he gives you tools and also scatters through his eBook practical exercises for you to DO that will help you set up your own workflow.

    Not only that you get to see what he’s talking about with the videos and many diagrams and screenshots in this eBook.

    The Photographers Workflow_wp-content_uploads__2012_12_400x1600.png

    Download Your Copy Today and Save 33%

    The Photographers Workflow is normally priced at $ 30 but today you can pick it up with a 33% discount and get all of the above parts of this great resource for just $ 20 when you use the coupon code photowork33 during the checkout process.

    The Photographer’s Workflow is Gavin’s professional workflow. It’s the system he use every day to manage his digital photographs. In it he shares the structure, principles, presets that he’s acquired over ten years as a professional photographer and it will literally save you hours of time and give you a lot of peace of mind!

    Revolutionize the way you store, manage and backup your photo’s today with this great new resource at this special 12 Days of Christmas price.

    Get full details of what is included and order your copy at this special price here (remember to use the coupon code photowork33 as you checkout to get the 33% discount).

    As with all the deals this week – this one is available for just 24 hours!

    Post originally from: Digital Photography Tips.

    Check out our more Photography Tips at Photography Tips for Beginners, Portrait Photography Tips and Wedding Photography Tips.

    Learn the Secrets of a Pro Photographer’s Workflow: 33% Off Today Only


    Digital Photography School

  • Environmental Portraits: Weekly Photography Challenge

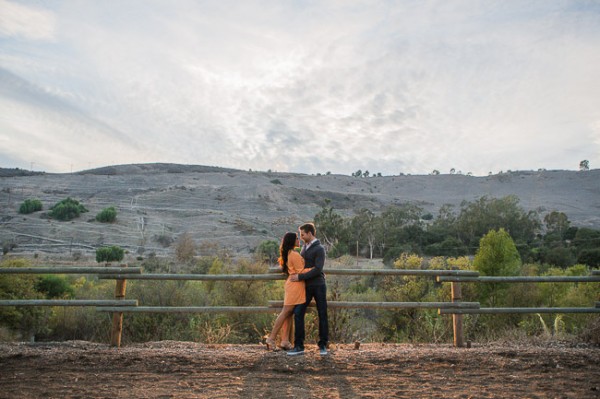
    This week your photographic challenge is to take an ‘Environmental Portrait’ (or a portrait that is as much about the surrounds of your subject as it is the subject themselves).

    Untitled

    The idea came from my post last week – ‘How to Create Portraits that Captivate and Intrigue‘ where I explored the idea of portraits often becoming more interesting when you pay a lot of attention to the background (and foreground) of your portraits and place your subject within an environment that adds to the image.

    The cask merchant

    You might also like to take a look at my previous Introduction to Environmental Portraits tutorial.

    "I Am..." An Engineer

    The key is to take a great portrait – but instead of going for a background that is not distracting or blurred it out or zooming in to remove it – put that subject in a setting which tells something about your subject.

    Perhaps you’d like to photograph someone at work, or a child in their bedroom, or someone in a sporting dressing room preparing for a game…. really it is totally up to you!

    Proud X in his bedroom

    Once you’ve taken and selected the ‘Environmental Portrait’ image/s that you’d like to share – upload them to your favourite photo sharing site or blog and either share a link to it or – embed them in the comments using our embed tool to do so.

    Ricky's world

    If you tag your photos on Flickr, Instagram, Twitter or other sites with Tagging tag them as #DPSENVIRONMENTALPORTRAIT to help others find them. Linking back to this page might also help others know what you’re doing so that they can share in the fun.

    Also – don’t forget to check out some of the great shots posted in last weeks challenge – 1 Subject 3 Shots challenge where there were some great shots submitted.

    Post originally from: Digital Photography Tips.

    Check out our more Photography Tips at Photography Tips for Beginners, Portrait Photography Tips and Wedding Photography Tips.

    Environmental Portraits: Weekly Photography Challenge


    Digital Photography School

  • Thinking of Starting a Photo Community on the Web? Should You Do It on Flickr or Google+?

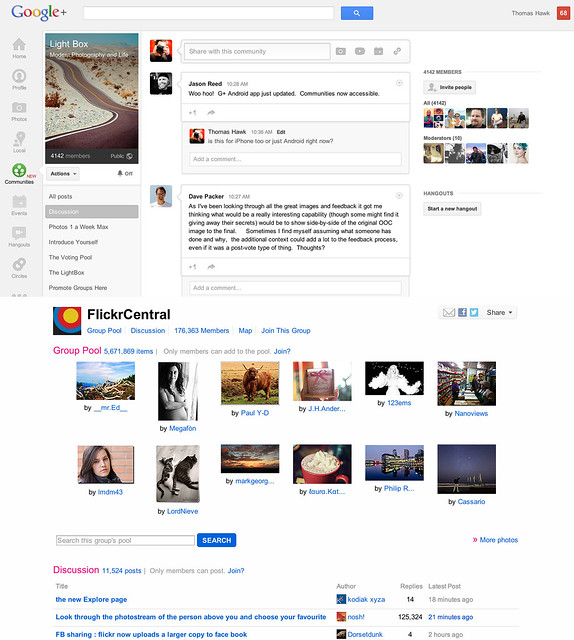
    Google+ Communities vs Flickr Groups

    Google+ launched their new communities last week and I’ve spent a lot of time exploring how they work since launch. I’ve also spent quite a bit of time super active over the past eight years in Flickr groups. Google+ communities are a lot like Flickr groups, but there are key differences, advantages and disadvantages to both. I thought I’d write a post comparing the two. I’ve long held that Flickr groups represent Yahoo’s best chance for social going forward.

    So here’s the smackdown.

    1. Thread bumping. Flickr wins. Probably the most significant problem with G+ communities is that they do not bump threads. With Google+’s new communities discussion topics are only shown by most recent post. Unfortunately the most recent post is not always the most interesting/engaging post. What’s more, because threads are not bumped upon a new comment, almost every thread over 24 hours in an active community on Google+ dies. Good conversations should last more than 24 hours. Flickr solves this problem by simply bumping each thread back to the top of the discussion forum anytime someone makes a comment on it. This is a far better way to keep a discussion forum active and engaged.

    2. Muting discussions. Google+ wins. One of the problem with Flickr is that there is no way to screen out discussions that you are not interested in. If I don’t care about football, why should I have to see a thread about football in my favorite photography forum. At Google+ the answer is simple. Just go to the thread and choose to “mute this post.”

    3. Photo pools. Flickr wins. At G+ you are forced to try to use typical discussion threads to post photos. Flickr, by contrast has a group photo pool that is associated with each group. Although it’s tempting to see photo pools as more of a photography niche feature, I’d argue that every community potentially has photos to share. Even if the photos are not artistic oriented photography, every group of people will potentially want to share photos with each other. Ideally, a group/community should be allowed to have more than one photo pool/album with settings to allow how content can be shared in those pools.

    4. Community activity. Google+ wins. Even less than two weeks old, communities on Google+ are far more active than Flickr. Individuals are far more engaged and the rate of velocity around community conversations is much higher at Google+.

    I started a new community called Light Box on Google+. It’s based on a voting game similar to voting groups I’d created on Flickr in the past. On Google+ the group already has over 4,000 members in less than a week. At Flickr it would take me months to build a group up that large. The G+ community is already 20x more active than any voting group/game I’ve ever seen on Flickr. When it comes to community velocity there is simply no comparison. Google+ communities are some of the most active I’ve ever seen anywhere on the web.

    5. Invite process. Google+ wins. Google allows you to invite participants in circles up to around 195 people max. Sending out one invitation to 195 people is a lot easier than the way that Flickr allows you to invite people. On Flickr you can only invite a single member one by one by one by typing their individual name — wayyyyy too much work.

    6. Sticky threads. Flickr wins. One of the thing Flickr allows a group owner/moderator to do is to make certain threads sticky so that they always stay at the top of the discussion threads. This is helpful if you have a group/community FAQ or other material that is important to stay prominent to the membership. At present you cannot make sticky threads at Google+.

    7. Adult oriented communities. Flickr wins. Although there are some deep underground private communities on G+ focusing on nudes, G+ by TOS doesn’t allow nudity and this content is subject to being removed. On Flickr, they do allow nudity as long as it is properly flagged as nudity. In Flickr’s case this has resulted in both communities discussing artistic fine art nudes, but also a pretty seedy amateur underground porn network as well. Flickr routinely deletes many of the most offensive adult oriented communities, but if fine art nudes are your thing, you’re probably more likely to find these communities on Flickr than G+.

    8. Moderating community membership. Flickr wins. It’s much easier to moderate community members in Flickr groups than in Google+ communities. On G+ you must scroll through an entire list of community members in order to find the person you wish upgrade to moderator or ban from your community — page after page after page after page. With any large community on G+ this is a very cumbersome process. Flickr by contrast has a powerful search tool which allows you to search for a member my name to upgrade or ban them.

    9. Blocking members. Google+ wins. It cannot be overstated how important a good blocking tool is to community management. Inevitably some community members will not get along. Especially since Flickr allows obvious anonymous troll accounts to inhabit communities, users need some way to immediately protect themselves against bullying and harassment. Flickr’s community blocking tools are weak and non-existent. By contrast Google+ provides users a powerful blocking tool which turns anyone invisible that you choose to block.

    Even more important than this user option is the tone that is set in communities because of it. When you know that you can be blocked by other people you are nicer and more polite. I wrote a post a while back about how Google+ is the nicer community for photographers on the web. Flickr groups are routinely full of trolls, jerks and assholes. Even the ones who are tolerable oftentime pride themselves on abusing other community members with their snide, disparaging comments. They think it’s cool to be “snarky.” On Google+ these people are routinely dismissed and blocked and the overall tone is far more positive.

    10. Mobile tools. Google+ wins Earlier this week Flickr rolled out a new version of their iPhone app that has a simple thread reader for Flickr groups. The app is AWESOME by the way. When Google+ rolled out communities last week they did not have support for mobile, but today they added it for both iPhone AND Android. I would suspect that a group thread reader will be coming to a future Android app for Flickr.

    11. Group/Community recommendation. Google+ wins. On Flickr I am recommended groups that are years old, super dead and with zero activity in them. These are old groups that some Flickr employee chose to highlight years ago. By contrast on G+ I’m recommended communities that really are personally directed and targeted towards me. These are communities that are thriving and active. I’m guessing that there may be some Google curation of these recommendations, but what I’m seeing feels much more algorithmically based and the algorithm recommending communities on G+ feels super smart and personalized to me.

    12. Hangouts. Google+ wins. From time to time you will want to get more involved with the members of your community than just discussion threads. With Google+ you can hold a hangout and do live video/voice interaction with other members through Google’s hangout feature. Flickr doesn’t have anything like this.

    13. SEO. Google+ wins. While both Google+ and Flickr offer you private communities with an option to not index the community for the web, both also allow public communities that can be indexed for the web. With any public community you will want to have your community index well in search on the web. Google promotes Google+ posts by the people that you follow — if you are searching for a group on the web, there is a much better chance that you will find groups by your friends on Google+. Already my new Light Box group indexes for the first page search results for Light Box when I search regular Google and am logged in. Personalized search gives your group an advantage for being found on Google by your contacts and friends.

    The final verdict? Google+ communities win. In my opinion Google+ communities are far more engaging, active, positive places to hang out than Flickr groups. As much as I enjoyed Flickr groups in the past, I think all of my community time going forward will be happening on Google+ instead. While I’m optimistic that team Flickr can/should create a better group experience for users, it may be too little too late at this point.

    While Flickr does have Google+ beat on some important features like thread bumping and photo pools, these features are not enough to make up for the current velocity and dynamic advantage that Google+ communities have. Social photographers have been leaving Flickr groups over the past few years as they’ve been setting up camp at G+. Now G+ gives them the one thing that they missed from Flickr, a solid community experience. I suspect that communities on G+ will only get better and better in the weeks ahead. Google+ tends to release things in beta form, bugs and all, and then iterate very rapidly. I’m confident that some of their limitations today will be improved in the future. Hopefully they even give us thread bumping and photo pools like Flickr. :)


    Thomas Hawk Digital Connection

  • Deal 2: 30% off Phil Steele’s Flash Portrait Course

    On the 2nd day of Christmas dPS gave to me – 30% off Phil Steele’s Flash Portrait Course!

    Regular readers of this site will know of Phil Steele because we’ve regularly featured videos from him over the last few months (among our most popular posts this year).

    So when we were putting together our current 12 Days of Christmas campaign this year Phil was a no-brainer of to ask to participate as the reviews from readers on his courses are excellent.

    In todays deal Phil is kindly offering a 30% discount on his popular Flash Portrait Course – a video course designed to help you take professional headshots and and portraits using a DSLR and basic flash.

    Not only will this course save you from spending a fortune on gear you might not need, for the next 24 hours you can own this practical flash portraits guide for just $ 33.

    phil steele.png

    Here’s what you’ll learn in the course:

    • Learn how you can save money and take amazing photos with off-camera flash—the new, easy, inexpensive, portable way to take professional photos without expensive studio gear!
    • Discover the four crucial, inexpensive pieces of equipment you need to get the flash off your camera (and don’t worry, if you don’t have a flash yet, Phil will tell you which kind to buy to avoid over-spending)
    • Watch Phil go through 4 photo shoots with live models, revealing all his off-camera flash secrets.
    • Learn advanced techniques using multiple flashes, colored filters, reflectors, and other optional equipment, for creating photos that make viewers say “Wow!”
    • Watch over Phil’s shoulder as he edits the photos in post-production, adjusting them to look their best.
    • Learn from Phil’s mistakes! He shows you the reality of each shoot, including what goes right and what goes wrong and how to fix it.
    • Discover the foolproof 4-Step-Formula for choosing the perfect ISO, Shutter, and Aperture for your flash photos. Never wonder what to do in “M” mode again!

    There’s a lot more – check out the full details of this course on Phil’s site where you can grab it today (and today only) for just $ 30 (a bigger discount than Phil has ever offered on this one before).

    PS: Phil is throwing in some free bonus videos in this deal including one on using Reflectors for outdoor portraits and another with one of his portrait retouching techniques for post processing.

    Plus it all comes with a money back guarantee – so you can try it and see if it’s right for you with confidence.

    Grab this great course here while the deal lasts (it is live for just 24 hours).

    Post originally from: Digital Photography Tips.

    Check out our more Photography Tips at Photography Tips for Beginners, Portrait Photography Tips and Wedding Photography Tips.

    Deal 2: 30% off Phil Steele’s Flash Portrait Course


    Digital Photography School

  • 29 Stunning Staircase Images

    Scala

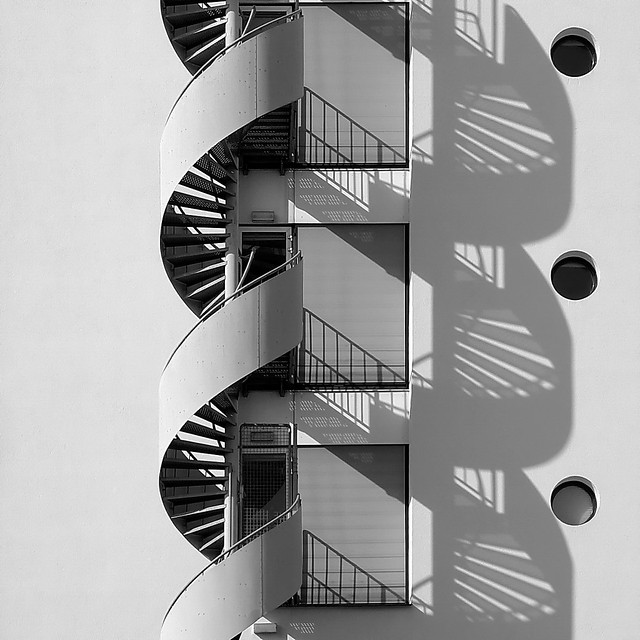
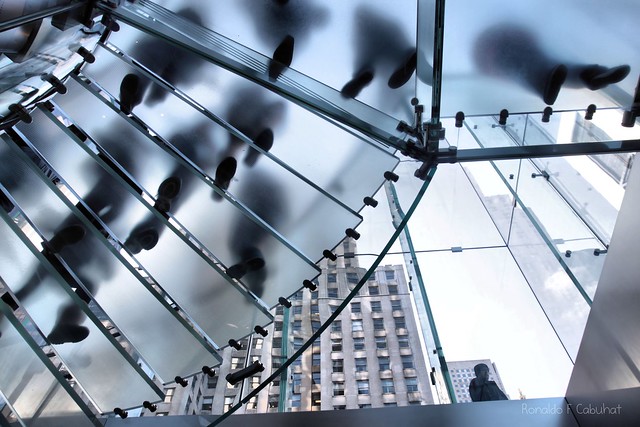
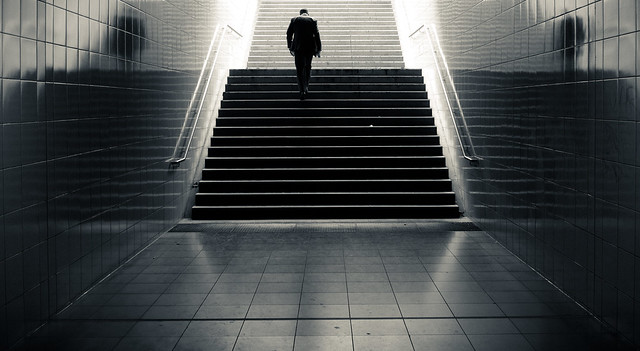
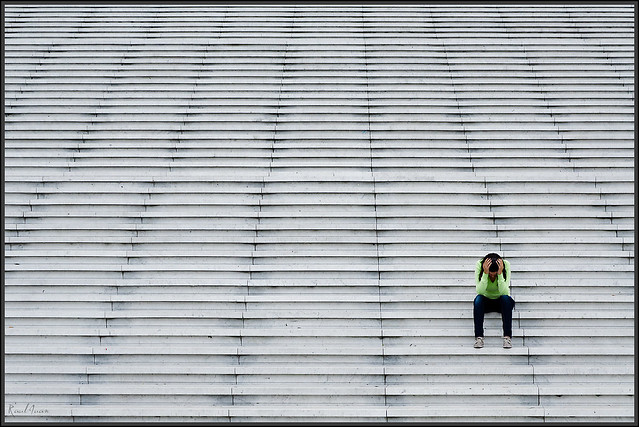
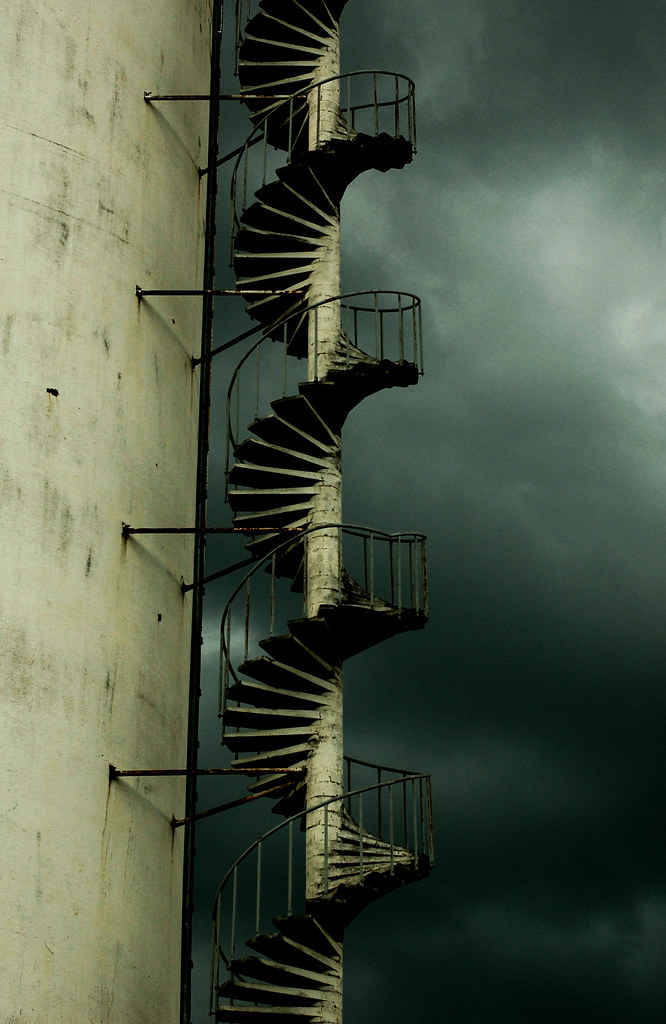
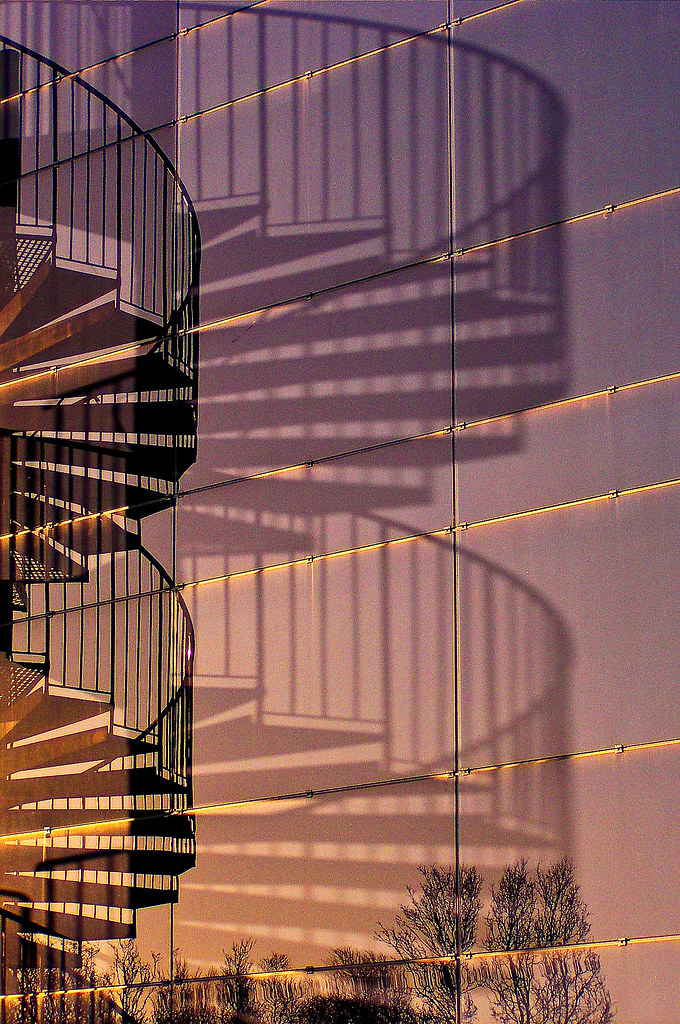
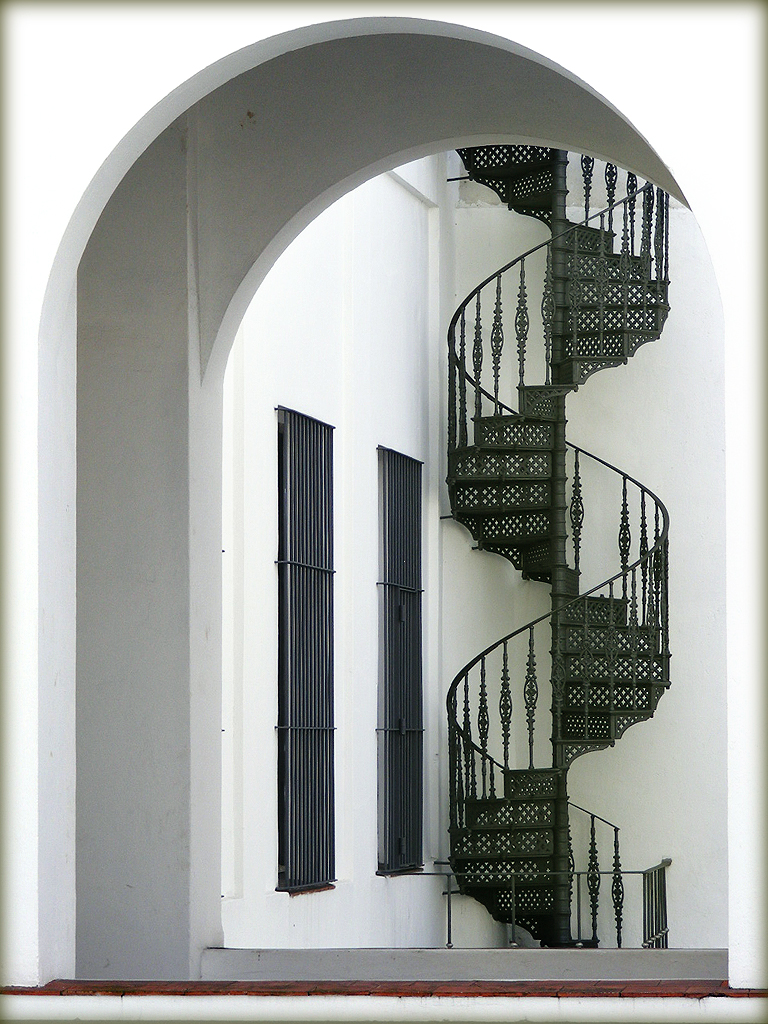
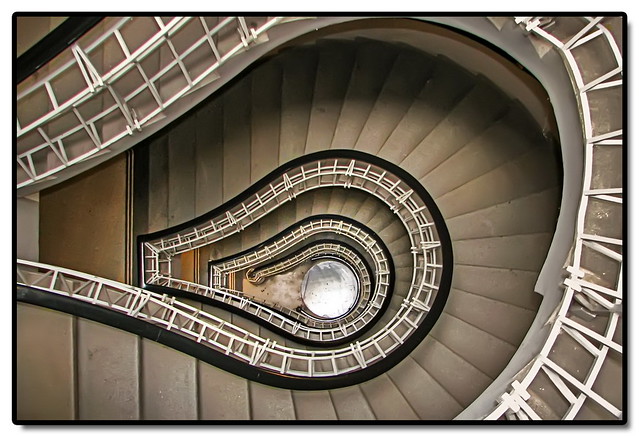
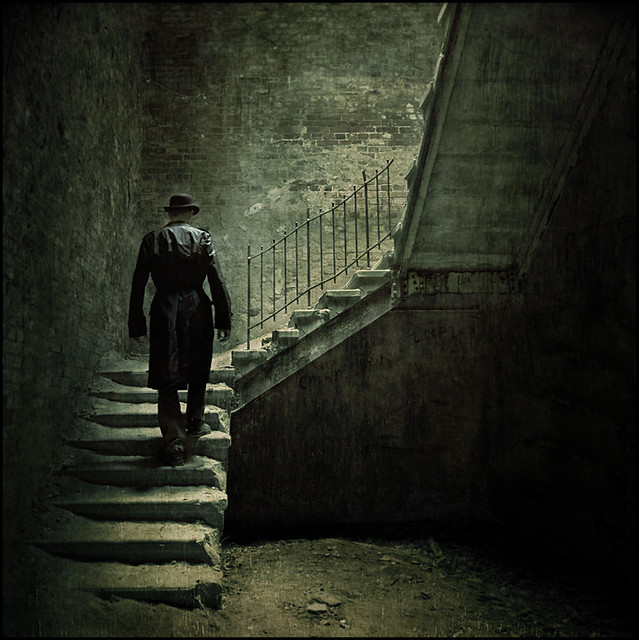
    There is something about a good staircase that seems to draw photographers to shoot it. Perhaps it’s the repetition and patterns in the steps or it could be the geometric shapes that often appear around them. Whatever it is – staircases present some cool possibilities when you’re out shooting so keep your eye open for them. Here are a few to get you thinking about how to photograph staircases.

    Staircase Texture

    Well the Ocean Took My Baby

    Double Helix

    Stairway to...

    Footprints

    arne jacobsen, aarhus town hall 1937-1942

    A Mirror on the Ceiling

    leisure time.

    Da geht mir ein Licht auf - enlightenment

    098/365 - ALONE

    dark clouds and a staircase

    Green

    I believe I can fly........

    Interior Architecture of the Deutsches Museum II

    Organ staircase Saint Mary's Studley Royal, Yorkshire UK

    Reflection and Shadow - Spiral Staircase

    The Lobby stairs  ::

    Staircase

    Black Madonna Stairs, Prague

    Steps

    Up

    nightcrawler

    The colors of life

    wishbone spiral

    When a Girl goes Down the Staircase

    6 Stunden Berlin | Niere/Ohr

    Paranoid

    Oyonnax revisited

    Post originally from: Digital Photography Tips.

    Check out our more Photography Tips at Photography Tips for Beginners, Portrait Photography Tips and Wedding Photography Tips.

    29 Stunning Staircase Images


    Digital Photography School

  • Get Our Kids Photography eBook at 50% Off – Today Only

    day1.pngFor the next 24 hours you can grab ‘Click! How to Take Gorgeous Photos of Your Kids’ at half price! Read on to find out how.

    Introducing dPS’s 12 Days of Christmas for 2012

    Two years ago in 2010, in the lead up to Christmas, we ran a little experimental promotion for dPS readers where we offered you 12 photographic deals over the 12 days before Christmas. The deals were a mix of discounts on our own products as well as some great deals from other photographic brands.

    The campaign was just going to be a one off and we planned it as a small gift to our readers but the response from readers was huge and months out from last Christmas people started asking us if we were going to run it again.

    We ran an even bigger version in 2011 by doing some bigger deals on our own products and used the success of the first year to convince some other brands to offer bigger discounts too.

    So what’s happening this year?

    I’m excited to announce that starting today we’re doing it all again and it is going to be bigger than ever.

    This year we have lined up 12 new deals on products that we’ve not featured before in our previous Christmas campaigns. It will again include a few of our own newer products but also some fantastic deals from photographic brands you know and love.

    24 Hours to Grab Each Deal

    Each deal lasts for 24 hours only so you need to be quick. To make sure you get notified of each deal you can signup to receive an email by adding your email address here:

    Are you ready for Deal #1? Here it is…

    Deal #1: 50% off our Kids Photography eBook – Click

    Just over a year ago we launched Click – one of our most popular eBooks ever – an eBook about how to take gorgeous photos of your kids.

    In this deal it is yours for just $ 15 – 50% off the normal price.

    Written by professional child photographer (and 3 times mum) Rachel Devine it is written for parents, grand parents, teachers or anyone else with children in their lives to help them capture the daily lives of the amazing little people living with us.

    This book will solve the challenges many of us have including:

    • how do I make photographing my kids fun again?
    • how do I go beyond the ‘click and hope’ approach?
    • how do I avoid taking staged and fake looking photos?
    • How do I add style and emotion to my shots?

    Inside: Beautifully Illustrated and Packed with Information

    Taking Gorgeous Photos of your Kids is Child’s Play

    In Click! Rachel explores her unique approach to the photography of children in seven charmingly illustrated chapters:

    • THINK: Forget the “spray-and-pray” approach to kid photography, and learn to spot better opportunities to capture young ones experiencing everyday life.
    • PREPARE: With the right equipment on hand, and an understanding of essential photography concepts—from shot setup, to styling and safety—you’ll be ready to have some serious fun taking fabulous kids photos.
    • SMILE: Consciously develop your intuitive skills to ensure making photos is fun for kids of all ages and personality types—and for the photographer, too!
    • REFINE: Learn the photo processing tricks and techniques that’ll ensure every photo in your album, and on your wall, is truly unforgettable.
    • RESEARCH: Experiment with different styles and equipment, so you so you never miss a chance to capture a special moment, at any time, in any setting.
    • PUSH: Expand your creative boundaries with a series of practical challenges, each of which shows you new ways to make more evocative shots.
    • LOOK: Get inside the heads of five extremely innovative kids photographers, and benefit from their personal tips and advice.

    This inspirational ebook is more than just a starting point—it’s a detailed resource you’ll come back to again and again as your photography practice and family grow.

    What Others Are Saying about Click!

    We’re super proud to have published eBook because we regularly hear from readers about what a massive impact it has had upon their photography – and more importantly their families.

    Here’s just a small part of the reader feedback we’ve had about this eBook.

    “I didn’t get to the end of chapter 2 before I was in the living room with the kids and my camera. This eBook has given me a whole new way of looking at photographing my kids – as well as the tools to make my dreams a reality” — Sally Raymond, Mother of 3.

    “As a professional photographer myself, I am always on the lookout for resources to help me extend myself and develop my craft. Rachel’s ebook Click! is fantastic. It is beautifully written, informative and packed full of gorgeous photos. This book will teach you the mechanics of how to capture children beautifully with your camera, but also the importance of just recording the moment. It is a perfect balance of information and heart.” — Dale Taylor, professional photographer.

    “Finally, information and practical ideas for taking natural photos of kids just being kids. Forget about making your children smile and say “Cheese!”After reading Rachel’s ebook you will never again settle for forced poses, and instead delight in capturing your kids as they really are.” — Catherine Oehlman, mother, teacher, blogger (squigglemum.com)

    Download it today only for just $ 15!

    Each deal in our 12 Deals of Christmas lasts for just 24 hours so to grab your copy of Click! at this never before offered price grab it here quickly before it ends.

    Post originally from: Digital Photography Tips.

    Check out our more Photography Tips at Photography Tips for Beginners, Portrait Photography Tips and Wedding Photography Tips.

    Get Our Kids Photography eBook at 50% Off – Today Only


    Digital Photography School