Category: Photography

  • Newlywed Portraits by Wayne Murphy

    jmk-photography-1

    © Wayne Murphy

    What do you say when a beautiful bride with a killer dress and a groom with Superman like rugged good looks ask you to drive an hour and a half to one of their favorite and most significant spots on the planet, take a “short” hike to some water falls and give you complete creative freedom to take their photo when they get back from their honeymoon in Mexico? You scream YES, of course, I’d love to and what time! Ema and Trevin originally wanted to have their ceremony at Morell Falls in Seeley Lake Montana but decided against it in favor of the much more family friendly and accessable Conrad Mansion in Kalispell.

    jmk-photography-5991

    © Wayne Murphy

    When we arrived at the falls the first thing I did was thank God that I wasnt too much of an old man to keep up with the youngsters on the “short” three-mile hike. Then with light meter in hand I got down and prayed that I would’nt royally screw this up, it was kind of a one shot deal. I took quite a bit of time to meter the light in the area that Ema had picked out months before, and then meter it again. I never thought I would love my light meter so much, thank you CPP for forcing me to get one and learn to use it! I had packed in a battery pack, flash, light stand, a parabolic and small assortment of lenses, mostly primes to save on pack space and weight, not really sure what would work since I had only seen photos while researching the area on Google. I ended up settling on the last lens I ever thought I would use, a 16-35 f/4 wide-angle. Not exactly a portrait lens by any stretch of the imagination and if you’re not careful you can easily make people look pretty uh… strange with it. In this case I was sure it would work.

    jmk-photography-1049

    © Wayne Murphy

    A fairly large crowd had gathered while Ema and Trevin were off in the woods changing curious what was going on with the fancy camera, light stand and they seemed really curious as to what the heck the parabolic umbrella was used for (massive light source with huge output to fight back the sun). When the newlyweds emerged from the woods all dressed up we got started right away, had a blast and laughed a bunch. I would do this kind of portrait session again in a heartbeat and so a new category was born! Newlywed Portraits.

    Wayne Murphy is a portrait and wedding photographer from Kalispell Montana with a passion for flash and a love for natural light.

    Website: http://www.jmkphotography.net


    dslrBlog

  • 5 Quick Tips for Coastal Photography

    There’s nothing like a great coastline to get me excited about photography. Whether it be unmarked sand dunes, sea grasses blowing in the sea breeze, rugged outcrops of rocks and cliff faces or a beach scene complete with all the color of families on their day at the beach – coasts can present photographers with some great opportunities.

    Here’s 5 tips for your next coastal photography outing!

    1. Look for Reflections

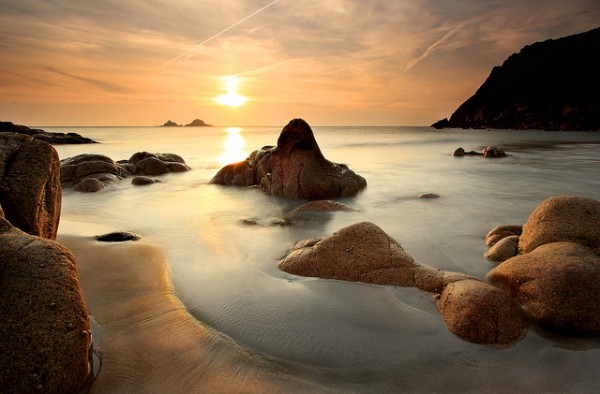
    Image by midlander1231

    Any time you’re shooting around bodies of water you should be aware of the potential for enhancing your image with reflections. This is particularly relevant when shooting at sunrise or sunset where your images can be brightened and have interest added to them by reflecting those pretty pinks and oranges in the water before you.

    2. Focus in on Details

    Image by Max xx

    What often grabs your attention most on coastal shoots is the grandeur of the landscape – so it’s easy to overlook what might be at your feet as you’re lining up your shot. The coast is full of smaller opportunities for amazing shots – whether it be sea shells on the waters edge, the footprints of an animal in the sand, small wild flowers growing in the dunes or patterns in rock formations. Take the time to look around you at the detail of what surrounds you. Oh… and don’t forget your macro lens!

    3. Add Foreground Interest

    Image by Kyle Kruchok

    When shooting seascape shots its very easy to end up with images that contain few focal points of interest (ie: shots that are half sky and half sand). One way to add interest to these shots is to look for opportunities in the foreground of your shots. If you’re able to place something interesting in the foreground (perhaps some interesting rock pools) you’ll lead the eye into the image. When doing this test shooting from different heights – sometimes getting down quite low and will add more interest to the shot while sometimes a higher vantaage point might work better. Also remember that if you want the foreground and background to be in focus that you’ll want to shoot with small aperture (high f numbers).

    4. Slow things Down

    Image by Matthew Stewart

    Another way to add interest and atmosphere to seascape shots is to slow your shutter speed down so that blur any part of the image that is moving. In this way you might get a misty looking sea that captures the movement of waves or a furry carpet of swaying sea grasses. Of course to do this you’ll want to shoot with a tripod to make sure your camera is perfectly still.

    5. Horizons

    Image by Garry

    Two last tips when it comes to horizons. Firstly – make sure they’re horizontal with the framing of your image. There’s nothing like a horizon that slopes unnaturally down at one edge of the frame to make those looking at your shot a little sea sick. If you’re going to break this ‘rule’ – break it well and make it an obviously intentional thing. Secondly – the convention is to avoid placing your horizon in the middle of your frame but rather to position it nearer one of the thirdway points (depending upon whether there’s more interest in the sky or foreground of the shot). Of course ‘rules’ are made to be broken but for balanced shots keep these in mind.

    Post originally from: Digital Photography Tips.

    Check out our more Photography Tips at Photography Tips for Beginners, Portrait Photography Tips and Wedding Photography Tips.

    5 Quick Tips for Coastal Photography


    Digital Photography School

  • Windows of Julio Bittencourt

    Photos of Brazilian photographer Julio Bittencourt catch your look with their mood, composition, beauty of the subject and project being well-thought. Julio spent almost a year taking pictures of inhabitants of an abandoned skyscraper in Sao-Paolo, all those pictures he combined in his project “In a Window of Prestes Maia 911” I contacted Julio and asked to give me a Continue Reading

    The post Windows of Julio Bittencourt appeared first on Photodoto.


    Photodoto

  • The 15 Most Popular Photography Tutorials from the 2nd Half of 2012

    As we approach the end of 2012 I thought I would post ‘looking back’ post to follow up on a post I did halfway through the year that highlighted The most Popular Photography Tutorials of the First Half of 2012.

    Since posting that earlier list we’ve published 300 more photography tutorials here at dPS – the most popular of them being the following 15.

    1. Why Your Kit Lens is Better than You Think

    Kit lens better than think 01

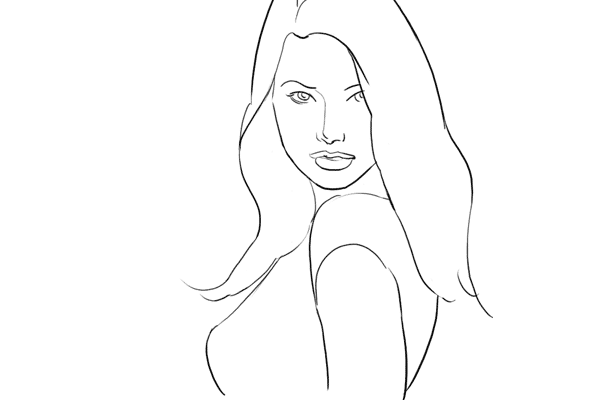
    2. Posing Guide: 21 Sample Poses for Photographing Women – Part 2

    posing-guide-photographing-women-01.jpg

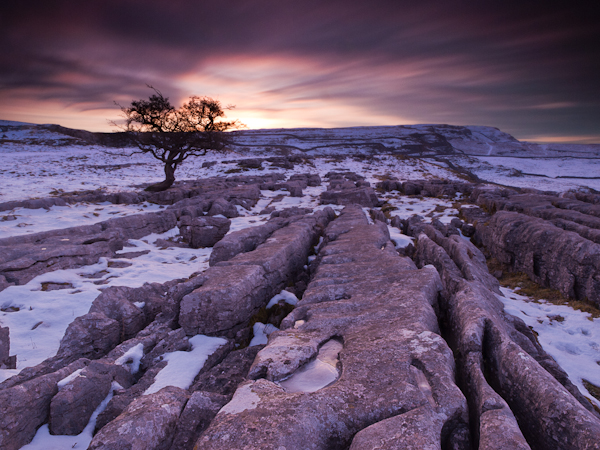
    3. 8 Tips for Long Exposure Photography

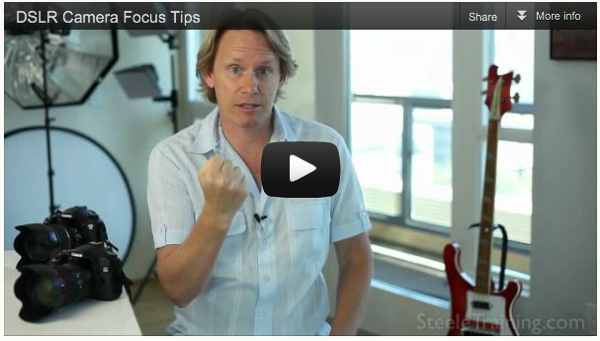
    4. DSLR Camera Focusing Tips for Beginners

    Screen Shot 2012 11 20 at 1 22 55 PM

    5. 14 Ways to Significantly Improve Your Photography Today

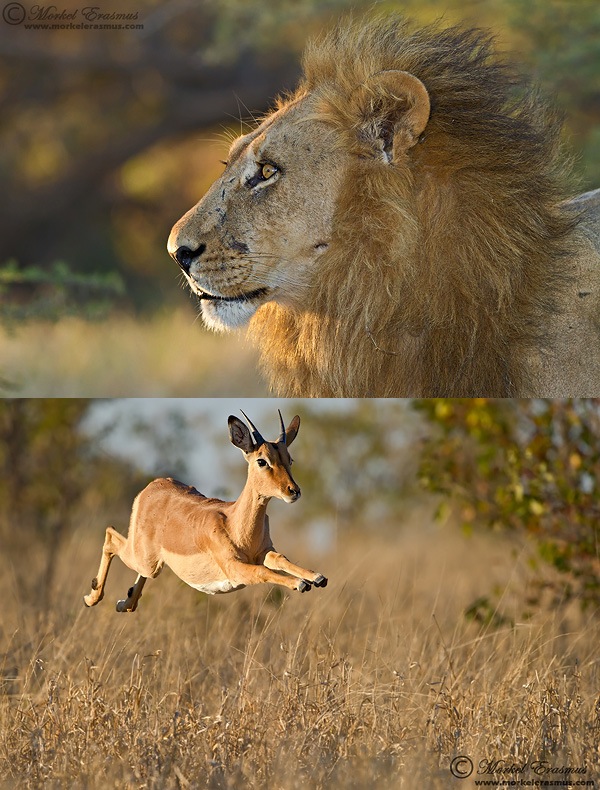
    6. 10 Tips for Improving Your Wildlife Photography

    Lion_Impala.jpg

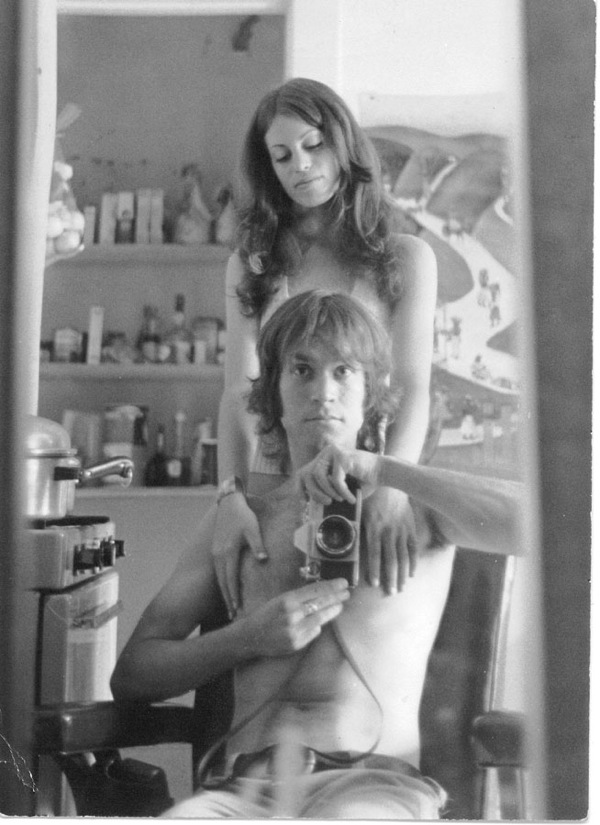
    7. 19 More Creative Mirror Self Portraits

    50807456

    8. One Light Portraits: Simple Elegance

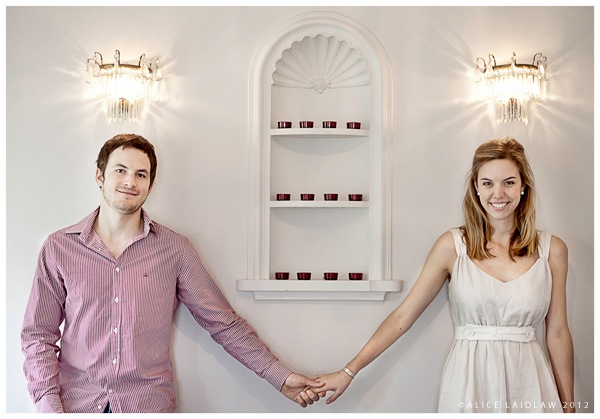
    9. How to Take Creative Couples Portraits

    Creative-Couples-Portraits-2.jpg

    10. Posing Guide: 21 Sample Poses to Get You Started with Photographing Groups of People

    posing-guide-groups-of-people01.png

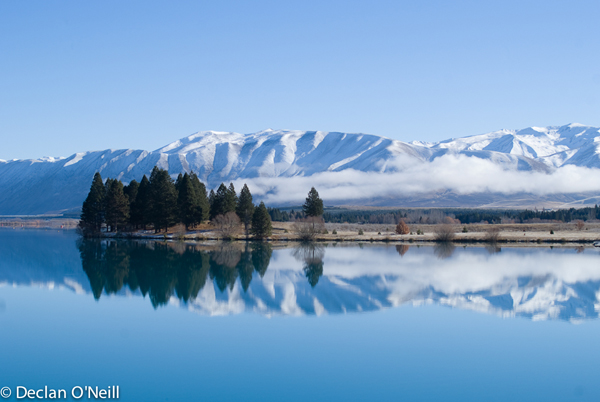
    11. 10 Tips for Landscapes Photographers

    9b

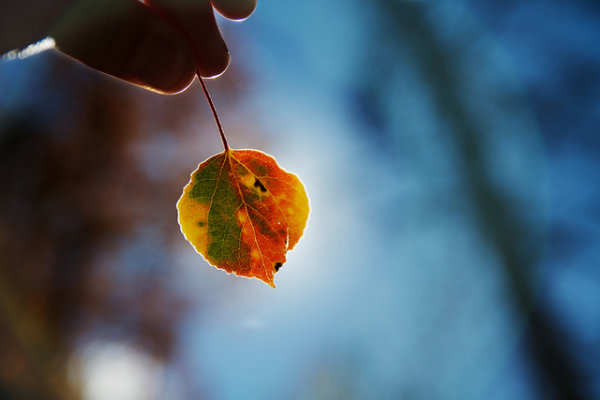
    12. 12 Ways to Capture the Colors of Fall

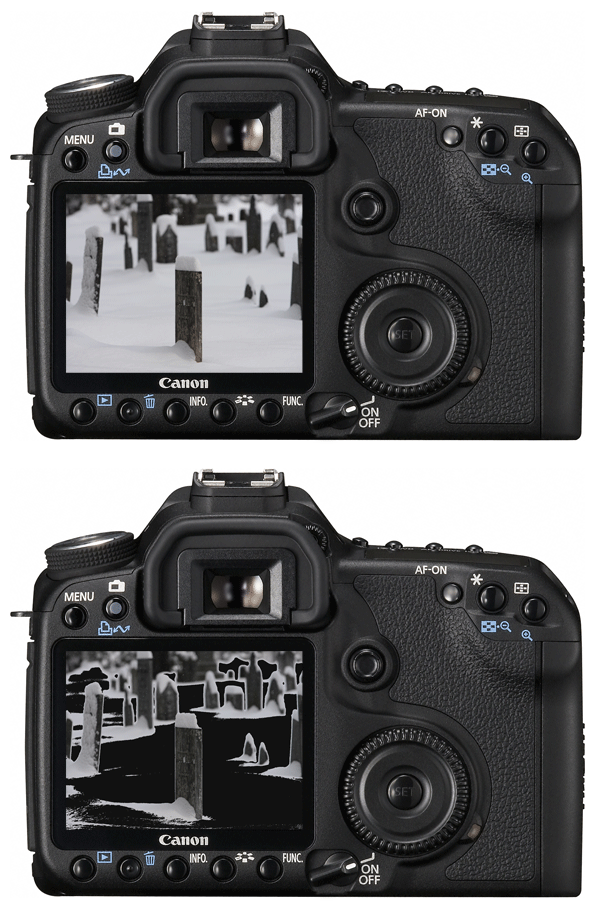
    13. How to Read and Use Histograms

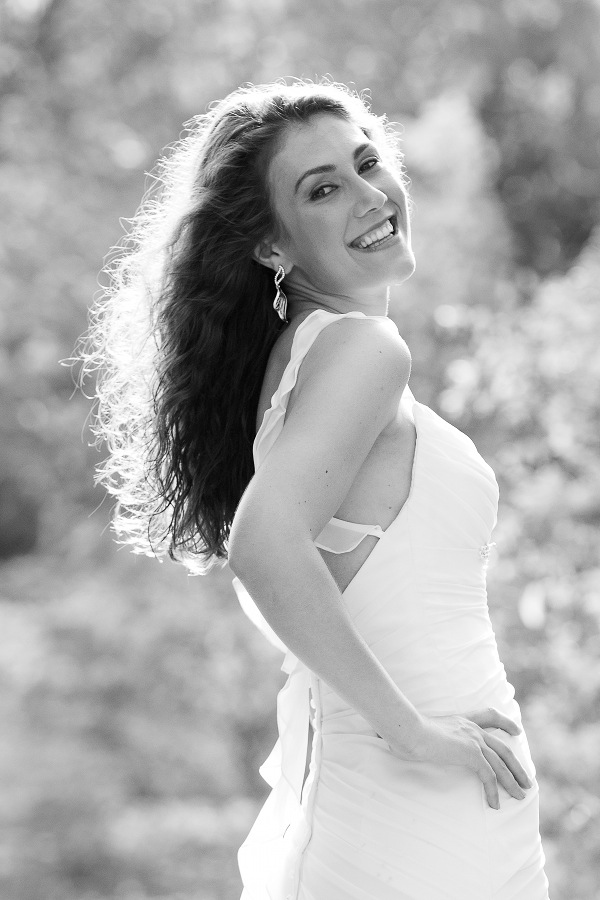
    14. How to Create Backlight or Hairlight Outdoors with Natural Light

    backlight01.jpg

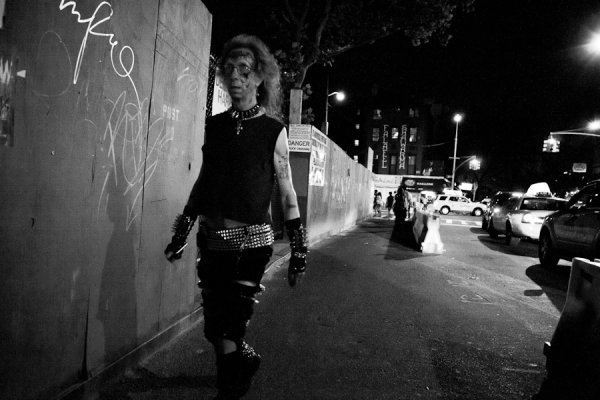
    15. 7 Steps to Get Over Your Fear of Street Photography

    Astor Place

    Lastly – the other page on the site that got a load of attention in the last 5 months was our newest eBook – our iPhone Photography eBook which we launched a few months ago which is still available in both PDF and ePUB formats.

    Page fan layout4

    Post originally from: Digital Photography Tips.

    Check out our more Photography Tips at Photography Tips for Beginners, Portrait Photography Tips and Wedding Photography Tips.

    The 15 Most Popular Photography Tutorials from the 2nd Half of 2012


    Digital Photography School

  • The Night Sky In Landscape Photography

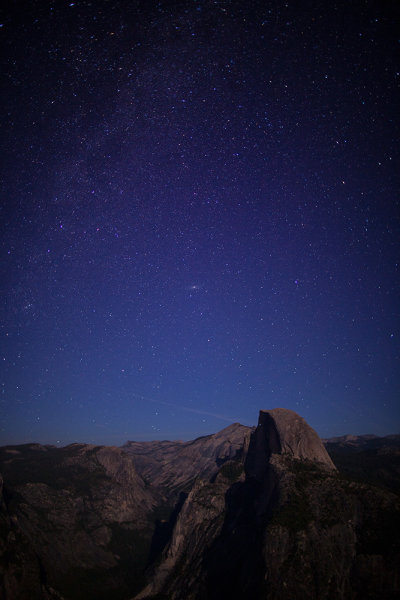
    This shot was taken with an EOS 5D Mark II and EF 24mm f/1.4L II lens. Exposure was 15 seconds, ISO 800, at f/1.4. The exposure for star fields should not be much longer than 15 seconds. Beyond 15 seconds, movement begins to creep in and slight star trails get recorded. In order to get the star fields to be as prominent as they are, I had to wait until the moon set behind me. Light pollution of any kind, be it the moon, street lights, or buildings, will diminish the intensity of the light of the stars. Moonless nights are best for photographing the night sky.

    As a landscape photographer, I typically liked to work at sunrise and sunset.  But the night sky holds its own magic, with countless stars, the moon, and the Milky Way all out there waiting to be photographed.

    Obviously, all night landscape photography happens on a tripod.  What type of shots you go for will depend greatly on your patience.  Night sky exposures can range from 15 seconds to several hours, depending on your goals.  Star fields can be captured with exposures of about 15 seconds, with aperture and ISO varying depending on the lens in use.

    One important thing to be aware of is the available light around you. Any ambient light will diminish the intensity of the stars.  This includes the moon, streetlights, a town or city with buildings that have outside lights on, or even just car lights.  All of these will have negative effects on the exposure of the night sky.  The best thing to do is to find a rural area where there aren’t any street lights, traffic, buildings etc.  The stars will be most intense and easily photographed.

    Because the night sky is best photographed, well, at night, it will be important to have a flashlight or other illumination to light the way while you hike to your location or assemble your gear.  Headlamps work exceptionally well for this.  These lights also come in handy for “painting” the foreground with light, to add some extra depth to your images.

    In addition to the camera and lens, a remote release, or even better, a time controller is a necessity.  The remote release will allow you to trigger your camera without touching it. A timer remote control (such as the Canon TC-80N3) does that and more.  When shooting star trails, the timer can be programmed to take as long an exposure as needed. It can also be programmed to take several exposures in sequence if needed. This is helpful for stacking images, a common technique when shooting star trails.

    I previously mentioned having a flashlight handy for painting the foreground.  Depending on the type of flashlight used, color correction gels can be useful as well.  Newer, LED flashlights have a much cooler light source than traditional flashlights, so a warming gel will help make it more natural looking. For lights using traditional bulbs, a cooling gel may be desired. Experimentation is essential here.  Too much light will ruin the exposure, too little won’t help the foreground the way that was intended. Generally, a quick kiss of light is all that may be needed.  A neutral density gel over the flashlight will help regulate it so just the right amount of light is applied.

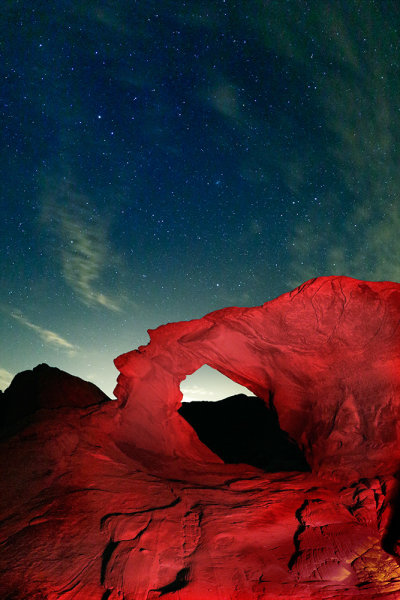
    For this image at Valley of Fire in Nevada, the arch made for the perfect foreground. But it was silhouetted against the night sky. Using an LED headlamp and a warming filter, I was able to illuminate the red rocks and balance that illumination with the ambient exposure for the night sky. This image was taken with the EOS 5D Mark III with EF 8-15mm Fisheye Zoom. Exposure was 15 seconds, ISO 6400 at f/4.

    One problem with night time photography is the long exposures.  Digital imaging sensors generate heat when they capture an image, and that heat manifests itself as noise in a long exposure.   Today’s digital SLRs all have settings for long exposure noise reduction.  This is generally done through a method known as “Dark Frame Subtraction”.  First, the camera takes the image at the intended exposure.  For this case, let’s say it’s a 30 second exposure.  When long exposure noise reduction is enabled, the camera then takes a second exposure, this one with the shutter closed. The imaging sensor is charged, for the same amount of time as the original exposure. This second, dark frame, is then compared to the first frame taken.  Since both frames were “exposed” for the same length of time, the heat generated on the sensor should be the same, and thus the noise generated should be the same. The camera then compares the two frames, and removes the noise that is consistent in both frames. While the camera does this, it is not possible to take another exposure, so this can become a very long process for star trail images that could be as long as an hour or more. Batteries are of paramount importance for this procedure, as the image won’t be recorded if the battery dies before long exposure noise reduction is complete.  If your camera has an AC adapter, and a generator or other power source is available, it will make the stress of wondering if the camera has enough battery power go away.  If you plan on stacking multiple images for star trails, this feature should be turned off, since continuous images are needed to keep the star trails continuous.

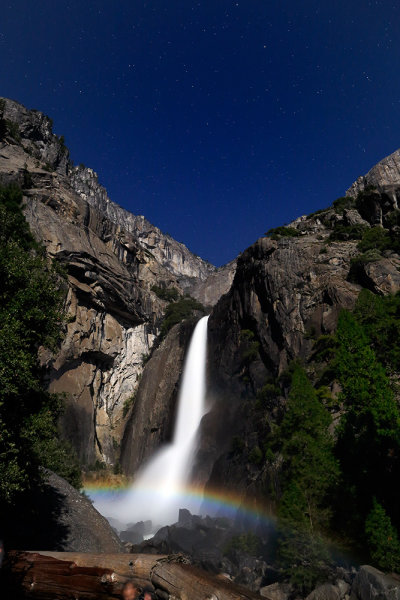
    Every year in the spring, during the full moon, a moonbow is created by the mist at Yosemite Falls. Taken with an EOS 5D Mark III, EF24mm f/1.4L II lens. Exposure was 10 seconds, ISO 1250, at f/4. It is readily apparent that the presence of the moon in the sky reduces the intensity of the stars, as compared to the shot of Half Dome above.


    This image of the skies over upstate New York was made with the EOS-1D X with EF 8-15mm f/4L Fisheye Zoom. Exposure was 15 minutes, ISO 400 at f/4. One 15 minute exposure took 30 minutes due to the long exposure noise reduction setting. If longer star trails are desired, you can use a longer exposure and keep the long exposure noise reduction on, or you can take shorter exposures of about 5 minutes, in succession. Turn off long exposure noise reduction, and combine the images later on in Photoshop or other image editing software.

    Post originally from: Digital Photography Tips.

    Check out our more Photography Tips at Photography Tips for Beginners, Portrait Photography Tips and Wedding Photography Tips.

    The Night Sky In Landscape Photography


    Digital Photography School

  • Cyber Monday: Strobist DVD sets on Sale for $49.99 each

    You snooze, you lose: All Strobist DVDs are on sale today for $ 49.99. (Depending on the version you choose, that's from 50% to 68% off!)

    Deets inside. Read more »


    Strobist

  • Why is This Pepper Smoking?

    Because it's about to blow up.

    Today, a glance into the explosive still life photography of Adam Voorhes. Read more »


    Strobist

  • Ambush Street Studio

    Cool street shooting video from French photographer Philippe Echaroux of his pop-up location studio and an array of impromptu subjects.

    You pretty much need an entourage to do this, but I love the idea of a background-on-a-stick. Totally gonna steal that one, Philippe…
    (Via ISO 1200)


    Strobist

  • Food photography – 5 simple ways to get stronger shot

    Images by BananaGranola and SuperDewa.

    1. Colour Values

    Hinamatsuri sushiPart of the attraction of food is the way it looks, so making sure your images exude the correct colours associated with the product. Before you begin shooting always take a white balance reading from a grey card if you have one or if you’re using a compact set the White Balance to a preset that matches the lighting environment you are shooting in.

    2. Look for the Best Light

    The best light for shooting food is soft and even, which is why a lot of it is shot in studios with large softboxes. But if don’t have expensive studio equipment to hand, position food in front of a clean window for the same effect, or if it’s a particularly bright day and you are getting shadows on your captures, veil the window with a white sheet or net to diffuse the rays or simply move the food further from the light source to diffuse its brightness. Alternatively if the weather is fair, consider pitching up outside and shooting alfresco to add another element of interest to the frame.

    3. Background

    If you’re using a plate or work surface as the backdrop for your shoot, make sure it’s clean, tidy and no smudges of food plague the periphery. After shooting your first shot, zoom in during playback to be sure you haven’t missed anything that will result in hours of Photoshop cloning post-shoot. The backdrop and setting you use can ultimately enhance the message you want to achieve, so use this to compliment the food rather than detract from it; for example a wooden chopping board suggests rustic, an outdoor table says al fresco, square plates suggest minimalism, etc. Typically white backdrops carry connotations of image stock sites, so don’t be afraid to inject colour into the background using coloured sheets or card if item is small enough, for an added element of interest. When choosing the backdrop use a colour that compliments that of the food or reflects the vibe you want to portray, as darker colours can often influence thoughts of comfort and warmth, whereas lighter, brighter colours dictate ideas of freshness and frivolity.

    Soba fusilli

    4. Composition

    Consider what makes the food look appealing and find a way to sell that feature. A wide aperture works well on products that are presented in rows or clusters and are easily identifiable such as; cupcakes, biscuits, and sweets etc.  If the product is small and plentiful, such as coffee beans or nuts for instance, consider cropping in close to fill the entire frame. Also consider your angle to add interest and sense of depth, scale and perspective. Make the most of interesting patterns and shapes by highlighting this as the focus. Including props to present the product can work well to convey a sense of scale or action, such as ladles, bowls, scales, pestle and mortar, or for drinks consider decorating the glass or backdrop with the fruit or flavours used in the ingredients.

    Lunch

    5. Action

    As well as photographing the finished article there is a lot to be said for in-progress recipe shots that show food actually being prepared. Consider shots that feature motion such as chopping, blending, frying, rising in the oven etc and using a longer exposure to convey the sense of motion and speed. But don’t forget the tripod!

    336/365: preparations

    Post originally from: Digital Photography Tips.

    Check out our more Photography Tips at Photography Tips for Beginners, Portrait Photography Tips and Wedding Photography Tips.

    Food photography – 5 simple ways to get stronger shot


    Digital Photography School

  • Travel Inspiration: Bali

    I recently went to Bali for a family holiday. Of course my camera and tripod were never far away. I managed to get a nice range of images that I can share with you today.

    The images below were shot with a Nikon D800 and Nikon 24-70mm 2.8 AFS.

    Falling in love

    We first stayed in Ubud in a villa a little out of town in Jukut Pakur. The locals told us that the neighbourhood was just like Ubud used to be 20 years ago.

    This shot was taken from the deck of our villa early in the morning. All I could hear was the gentle warm breeze and the birds waking up… A that moment I understood why people fall in love with Bali. On the left is the sacred Mount Agung.
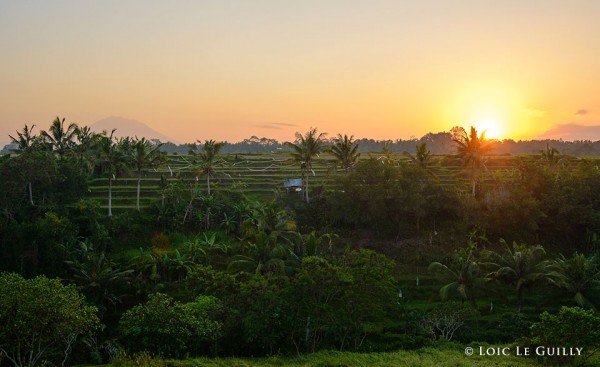

    image available here

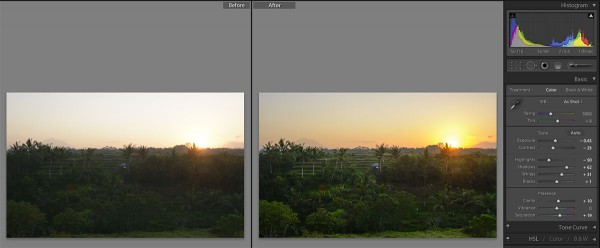
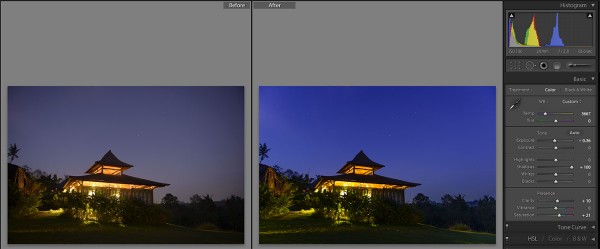
    Tech details : I took a range of bracketed shots on tripod but I ended up using only 1 exposure. The dynamic range of the D800 with the highlight and shadow sliders in Lightroom 4 make for a great combination. Click on the image below to see the Lightroom settings.
    Temples everywhere

    Bali is a highly spiritual place. People make daily offerings all over the place, houses, shops, streets… and of course temples.

    This lotus flower was taken in the centre of Ubud at the entrance of a temple.
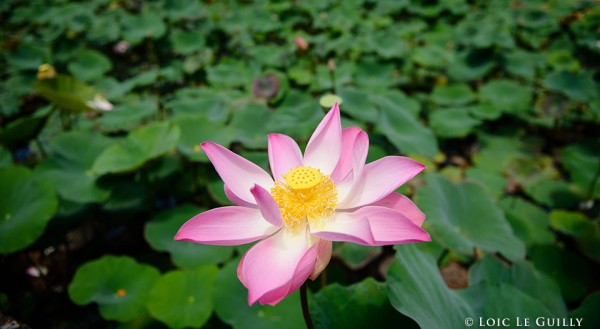

    image available here

    Tech details : f2.8 to isolate the flower from the background and I cropped out the top part of the image as it was a little distracting.

    Joglo at night

    A joglo is a traditional Javanese house. This one was just next to our villa.
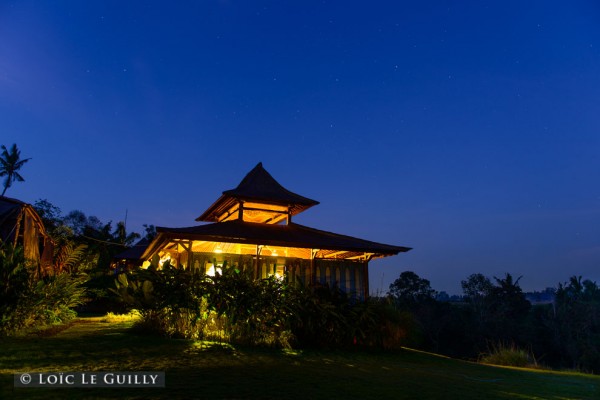

    image available here

    Tech details : 30s at f2.8; I changed the white balance from daylight to 3700K to get more blue in the sky and less orange in the house. I also applied lens correction to get rid of the slight vignetting.
    Monkey forest

    The monkey forest in Ubud is a must see. There were so many of them it was slightly unnerving…

    I got many good shots but this one is my favourite. I love the way he is looking straight at me.
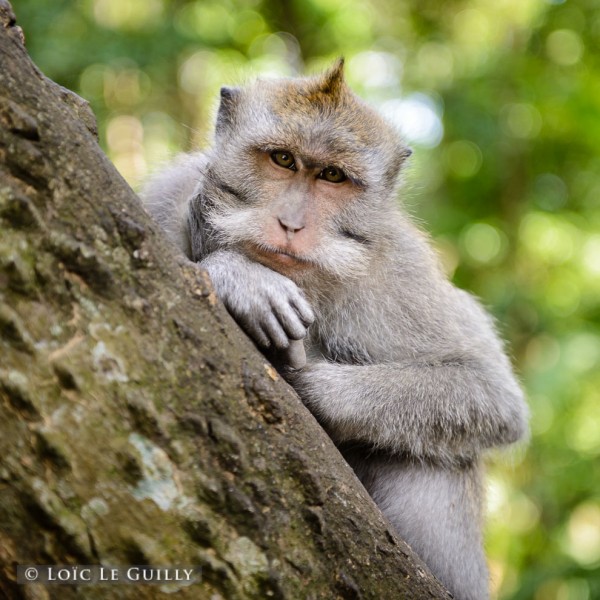

    image available here

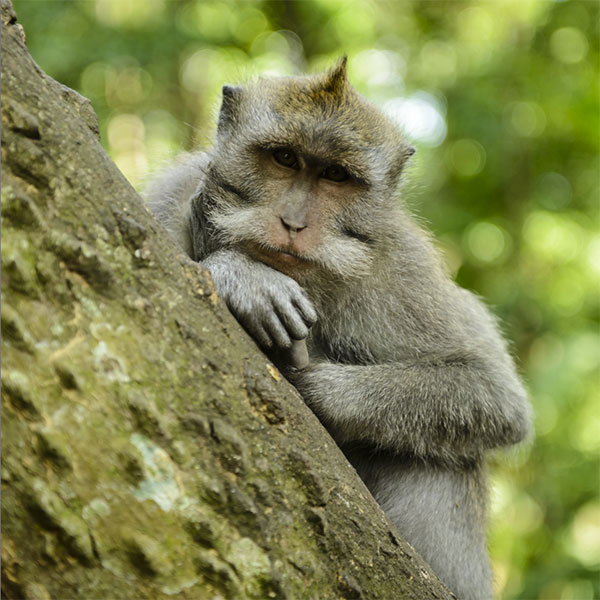
    Tech details : iso 200, 1/80s, f2.8; Square crop, white balance tweak and adjustment brushes in Lightroom (exposure on the monkey and bark and saturation on the leaves). See below the image without the adjustments.
    Street vendor

    In rural Bali, it seems that every second house has a little shop in front of it.

    This lady was close to the villa we were staying at. She is weaving one of the little baskets used for offerings.
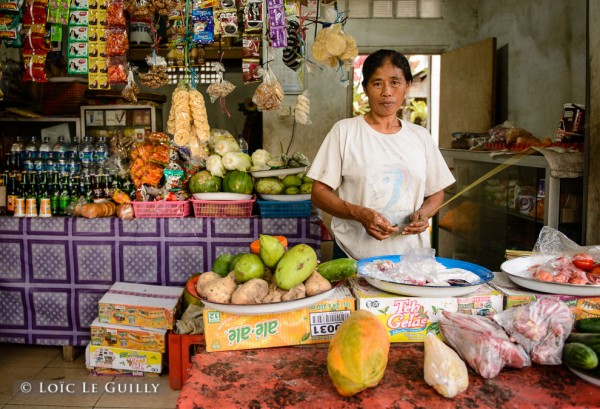

    image available here

    Tech details : iso 500, 1/25s, f2.8; handheld; cropping to get rid of distracting elements. After cropping the image is still 5400 pixels wide which is very usable for publication work.

    Illegal cockfighting

    We came across cockfighting one evening. It is meant to be illegal now but they seem to be still quite common…
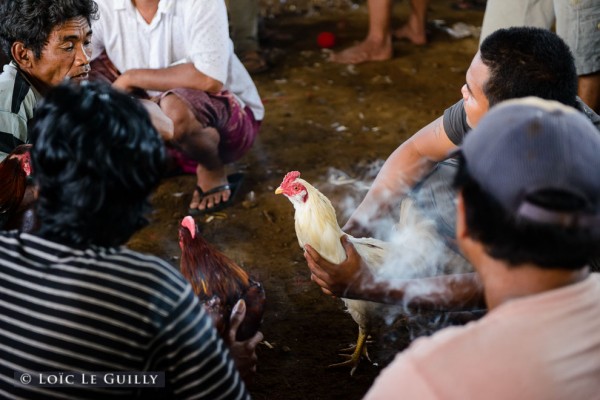

    image available here

    Tech details : iso 2800, 1/80s, f2.8.

    Jatiluwih

    Jatiluwih is recognised as one of the best examples of rice culture in Asia. As we were driving to the place I was hoping I wouldn’t be disappointed after reading so much about it… Au contraire, I was thrilled. The whole foot of the mountain is covered by these rice terraces. It is stunning and next time I visit Bali I will actually stay in the village for a few days to take it all in.

    I was lucky to get a bit of sun between the clouds which made the greens go crazy in this shot.
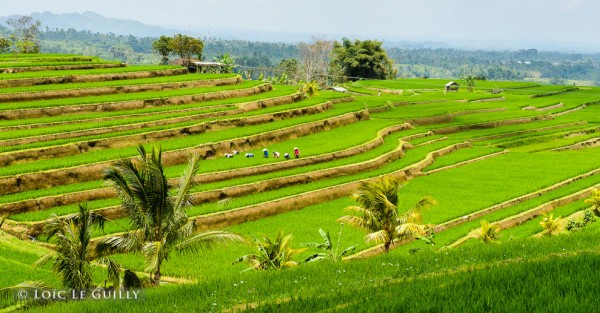

    image available here

    Tech details : f8; in Lightroom : increased contrast, saturation +10 and slight crop top and bottom.

    Uluwatu temple

    Uluwatu is a beautiful temple on the Bukit peninsula. It is perched on a cliff overlooking the ocean.

    Every night there is a traditional Kecak dance for tourists. It is actually very well done and worth a visit.
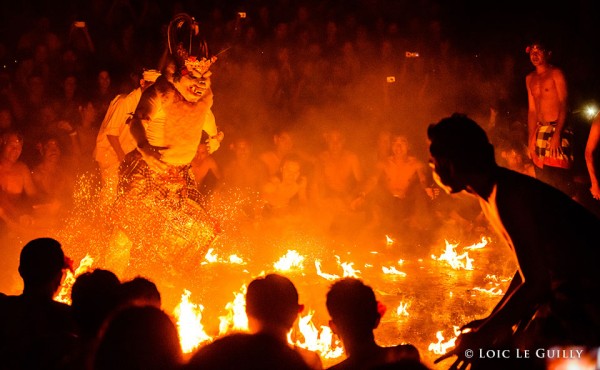

    image available here

    Tech details : iso 6400, 1/400s, f2.8; Slight crop, clarity and saturation in Lightroom. The image is noisy but it looks more like grain and is certainly usable for professional publications.

    Beautiful people

    The best thing about Bali is its people. Friendly, happy, cheeky… they are truly wonderful. I can’t wait to go back and learn more about their way of life.

    I photographed these kids in Uluwatu during a religious festival. The place was crowded with tourists but somehow the Balinese didn’t seem to mind. They just went on with their prayers (the centre of the temple was off limits to tourists).
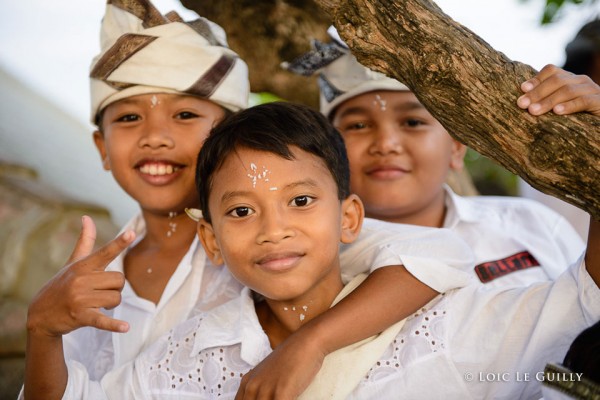

    image available here

    Bali is hot, dirty, crowded… but somehow I loved it. The people are beautiful and there is a general sense of peace around the place. Tourism is huge but according to long time visitors, the Balinese haven’t really changed because of it. Sure, people try to sell you stuff, sometimes a bit of a scam, but overall it is pretty good natured and once you say no they leave you alone. Many times we were genuinely thanked for coming to Bali (tourism represents about 50% of the economy).

    About the author

    Loic Le Guilly is a photographer and web designer based in Hobart, Tasmania.

    When not creating websites or shooting commercialy, he loves to wander in the bush to capture the natural beauty of Tasmania.

    Post originally from: Digital Photography Tips.

    Check out our more Photography Tips at Photography Tips for Beginners, Portrait Photography Tips and Wedding Photography Tips.

    Travel Inspiration: Bali


    Digital Photography School