Category: Photography

  • On Turkey Prep

    Today is Thanksgiving in the US, a day in which we pause to give thanks and then watch football. And turkey, we eat lots of turkey, too. (Except for the vegetarians, who have to eat "tofurkey," adding yet another thing for us omnivores to be thankful for.)

    So on that note, thank you very much for being a reader of this site. Without you, this whole 2,300-post journey would be … awkward.

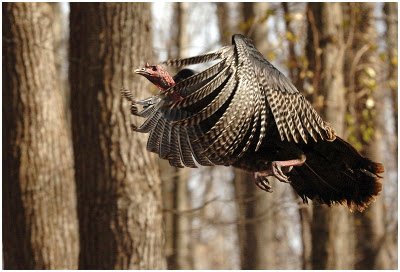
    Today's Thanksgiving Day post is off-topic in that it has nothing to do with flash and everything to do turkeys. And with being a thinking photographer.

    More specifically, being a photographer who thinks like a turkey. Read more »


    Strobist

  • Photographing Crowds at Concerts

    The Maine (Explored #104)

    It’s not just the band on stage that make for interesting subjects at concerts; the crowd can lend itself for painting a vivid picture of the event too. However the trouble with concerts is the lack of available light, so here are a few suggestions to make the best out of the situation to help you capture the throng of revellers.

    N*E*R*D 8

    Push the ISO

    Concerts are typically shrouded in darkness with intermittent lighting, but because of their busy nature they are no place for a tripod, so you’ll have little choice but to ramp up the ISO.  Before you attend the concert take a series of shots of the same low-light scene at different ISOs, you’ll then be able to gauge at what point noise becomes too distracting. Then when you attend the concert be sure not to go too far above this sensitivity. For the best results, team your camera with a fast lens to capture the action at a wider aperture.

    Underoath @ Koko, London 2010

    Forget the Flash

    Although the crowd’s attention will probably be focused on the stage, it’s best not to use a flash otherwise you could give away your intention of capturing candids of the audience which will affect the results achieved, but you may also temporary blind someone stood in close proximity. Instead use the stage’s lighting for illumination and ambience. You can even achieve some striking silhouette shots in this way, particularly if coloured lights are being used. Simply use spot metering, reading from the stage to throw the audience into darkness, shoot towards the stage, catching revellers with their hands stretched high in celebration.

    Do You Realize?

    Use what’s Available

    Pay attention to the lighting choreography and use your knowledge of the band’s music to judge when the crowd will be illuminated. It may take a few verses to notice a pattern emerging between the lighting and music, so expose when your subjects are well lit, de-press to focus on the burst of light and fire at the next opportunity. If the beams of light are short-lived or your camera has a noticeable shutter lag pre-empt the opportunity by firing a second or so before the light falls on the crowd.

    Parkpop 2009 - The girls in the crowd

    If all else fails…

    If after the concert you feel you pushed the ISO too high to get sharp shots and returned home to find your frames riddled with noise, then run it through a noise reduction program like Noise Ninja or even try getting creative by converting it to black and white for film-inspired feel.

    Skrillex, Rialto Theater, Tucson AZ

    Post originally from: Digital Photography Tips.

    Check out our more Photography Tips at Photography Tips for Beginners, Portrait Photography Tips and Wedding Photography Tips.

    Photographing Crowds at Concerts


    Digital Photography School

  • 30 Types of Photographers Exposed – Which One Are You?

    All photographers are equal, but some photographers are more equal than others. Jorge Aurwell Do you often meet a doctor who will cure your teeth, examine your heart, make you fingernails look fine and then help you with your childhood psychological trauma? Possible, but so not typical! Again, if you get to know that a person is a photographer, do Continue Reading

    The post 30 Types of Photographers Exposed – Which One Are You? appeared first on Photodoto.


    Photodoto

  • One Light Portraits Part 2: The Diagrams

    A lot of you have asked for lighting diagrams from my last post on One Light Portraits, so here they are- the finished shot, as well as the arrangement of lights, reflectors, and camera position.  Enjoy!

    For this shot, the flash is on-camera, and bounced into a reflector at camera left.

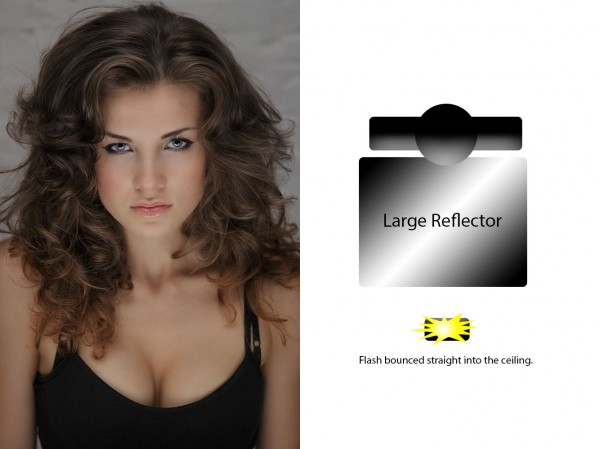
    This is a variation on the previous shot. This time, the reflector is placed at the model's waist, facing up. The flash is bounced at the ceiling, and teh reflector then reflects that light up into the model's face.

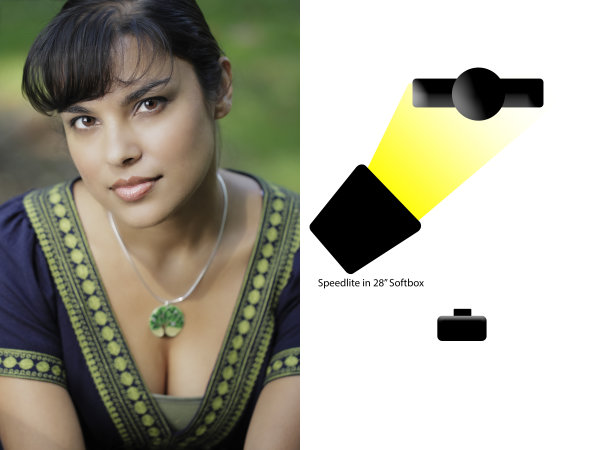
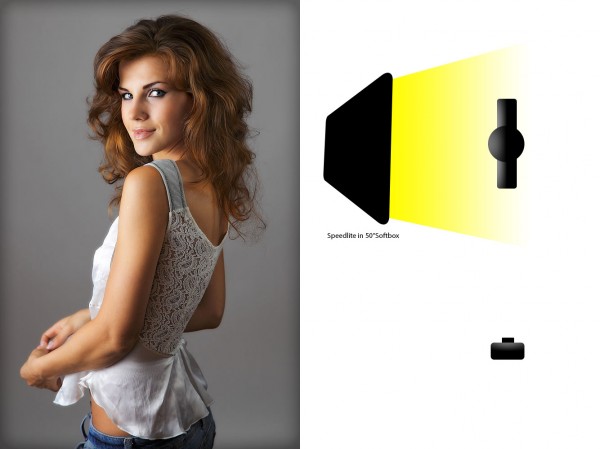
    For this shot, a speedlite in a softbox was used. We are outdoors, and our subject is positioned under a tree for shade. The softbox then becomes the main light on our subject, and the daylight fills the background.

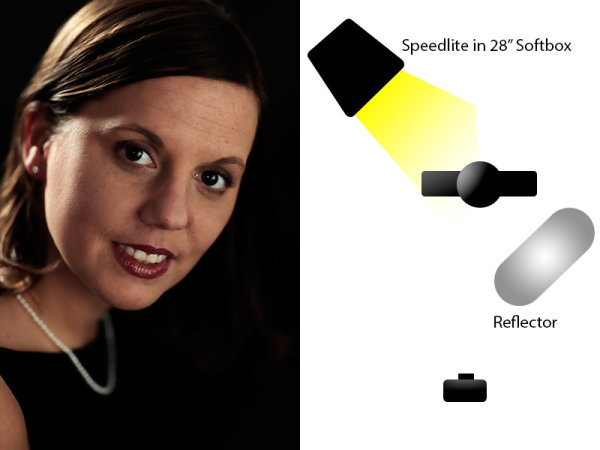
    In this shot, a softbox is set up behind the subject, while a reflector is set up directly opposite to bounce light into the face. In this case, the silver side of the reflector was used.

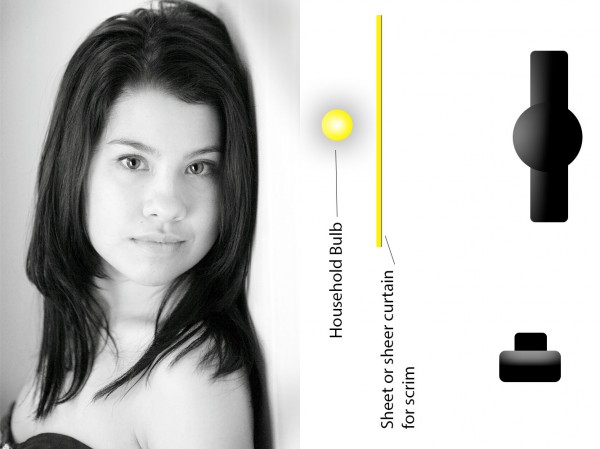
    A household bulb can make a perfectly acceptable light source when nothing else is available. In this case, a household lamp was used, with the shade removed. To soften the light, a white sheet was used as a scrim to allow light to pass through. A higher ISO- ISO 2500 – was used. Keep in mind your white balance must be adjusted for the yellowish cast a household bulb creates.

    This shot uses one large soft box- 50 inches- to create a soft light.

    Post originally from: Digital Photography Tips.

    Check out our more Photography Tips at Photography Tips for Beginners, Portrait Photography Tips and Wedding Photography Tips.

    One Light Portraits Part 2: The Diagrams


    Digital Photography School

  • The Trend Towards Authenticity

    A Guest Post by Rebecca Lily

    A trend commonly has two definitions. The first is a “fashion, style or vogue”. In photography, we see certain cyclical trends that are alike to the fashion industry, for example. What was stylish 25 years ago becomes chic again at some point, a retro revival is born and introduces the cycle all over again. It usually takes a few daring individuals – namely, early adopters or trendsetters – to re-introduce what’s deemed “retro” to the modern world. They become the benchmark that the masses will follow.
    Nikon D700 + Nikkor 50mm 1.8G. Edit: Rebecca Lily Pro Lightroom 4 preset Nautica

    A good example of this “fashion trend” in photography is the revival of retro film cameras. Film is “hip” again, and so are cameras like the Diana, Polaroid and Holga. This trend seems to be especially embraced by Generation Y (the generation beginning in the early 1980‘s) who have grown up in a digital age – and mainly due to heavy social online activity, take twice as many pictures as the average U.S. household.

    For many of these trend adopters, it’s about rejecting modern (and ordinary-looking) digital equipment, opting instead for an old analog film camera that’s unfussy, not to mention unique and eye-catching. For others, it’s about the resultant retro look of the photographs, which is in style at the moment. One evidence of this are the massively popular smartphone apps like Hipstamatic and Instagram, which emulate a retro film camera effect for modern phone snapshots.

    There is a second definition for the word trend, which is described as “a general course or direction”. This is what I refer to when I talk about the trend towards authenticity, which I have observed taking place gradually over the last few years. I believe there is a general movement in photography away from overdone, fake, glossy, polished and plastic, and towards natural, simple, unpretentious, relatable and real.
    Nikon D700 + Nikkor 50mm 1.8G. Edit: Rebecca Lily Pro Lightroom 4 preset Color Me Dramatic

    It’s not the same as retro-hype. It’s not like the film revival. It’s different because it goes deeper than what equipment or medium you’re shooting with; it’s about mindset. Its implications are much further-reaching because it is shaping society’s values, expectations and norms.

    How has this trend towards authenticity affected the world of photography?

    1. People look less fake

    There is a current movement against the extreme Photoshopping techniques of the fashion industry. What used to be commonly acceptable practice of “retouching” is now being termed “fake”, “over-enthused” or “plastic”, where models’ physiques are so altered that they are not at all realistic anymore.

    A very public media backlash has occurred, especially in the last year, where the public begins to verbalize their discomfort over excessive Photoshop alterations and demand change. An example of this: in early July 2012, ‘Seventeen’ Magazine pledged not to digitally alter body sizes or face shapes of young women in their editorial pages – because of eighth-grade Julia Bluhm’s campaign which went viral and resulted in more than 80,000 signatures from around the world.

    Like Julia, many people are realizing the importance of natural, authentic role models for men and women alike. Coinciding with the public’s growing awareness in this regard, many celebrities have supported this movement and started appearing in photo shoots without makeup, and some are requiring published photographs of themselves to be un-Photoshopped. It’s all part of the trend towards natural – towards real – towards authenticity. Plastic over-smoothed skin and unattainable Barbie-like physiques are going out of style. Real photographs of real people start to be embraced.
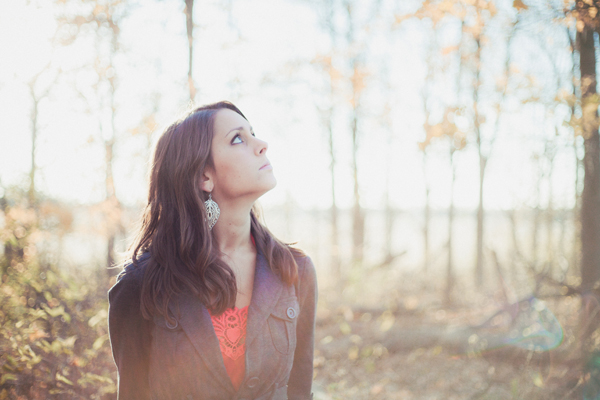
    Canon 5D + Canon 50mm 1.8. Edit: Rebecca Lily Pro Lightroom 4 preset Luminous.

    2. Subject matter looks more organic

    If you pick up a copy of Kinfolk Magazine, you’ll find a style of photography has emerged which celebrates the rudimentary, the casual and unpretentious. Despite the fact that most of Kinfolk’s images are set up (like the majority of images of interiors and tablescapes), the overall style that is presented as aesthetic in their photographs is something much different than what we used to see in House Beautiful magazine. Mismatched table linens and wildflowers in a rusty tin can are now a hip look, rather than gleaming china, polished silver and elaborate flower arrangements. Popular blogs like 3191 Miles also embody this simplistic, organic homey style, where interiors look lived-in and familiar rather than like elegant, stuffy museums. A stained tea towel next to a morning coffee invokes a cozy feel of home, as does fingerprints on a window or wine glass, or flour scattered over a worn kitchen counter. At one time we might have cloned these things out and made them “perfect”. Now, “perfect” becomes unnecessary, and the everyday – from the common to the rustic – is beautiful and comforting. We love to see relatable images, and to be inspired to find beauty in our own homes, no matter how simply they are furnished.
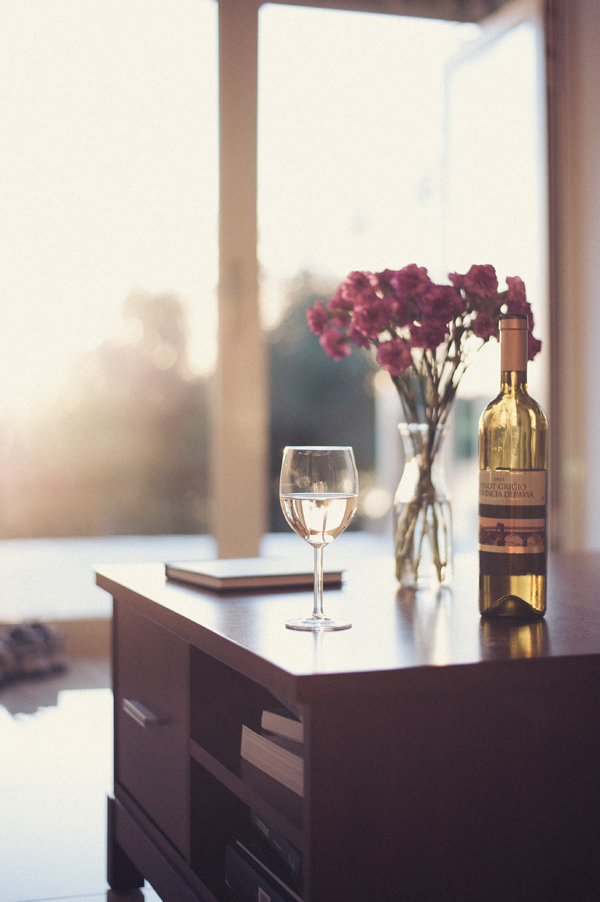
    Nikon D700 + Nikkor 50mm 1.8G. Edit: Rebecca Lily Pro Lightroom 4 preset Midsummer

    3. Colors look more Natural

    As the the trend towards authenticity continues to grow, so does the trend towards softer, more natural colors and delicate highlights and shadows – much more like what we actually see with our eyes. Many of us begin to notice over-saturated colors, fake skin tones, blown-out highlights and harsh contrasts in post work – where it simply doesn’t look at all real anymore. It’s typical now to see comments like “Over-Photoshopped” or “over-processed” simply because people are now more aware of what overdone post-processing looks like. After awhile some of us grow in our awareness that what we were doing before in our post work was simply too much.

    Of course there will be those who argue with this and say that photography is art and post-processing is artistic expression. Regardless of how individual photographers choose to express their style, the predominant trend is moving away from these more extreme looks and towards something more true-to-life.

    Here’s an example with my own work:

    Original image (SOOC):
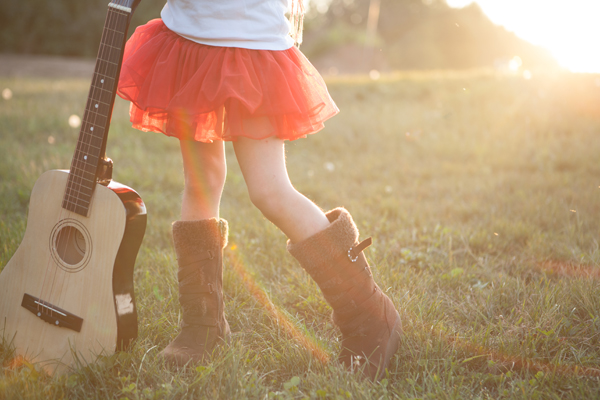
    Canon 5D + Canon 24-70mm 2.8L

    My post-processing 2.5 years ago:
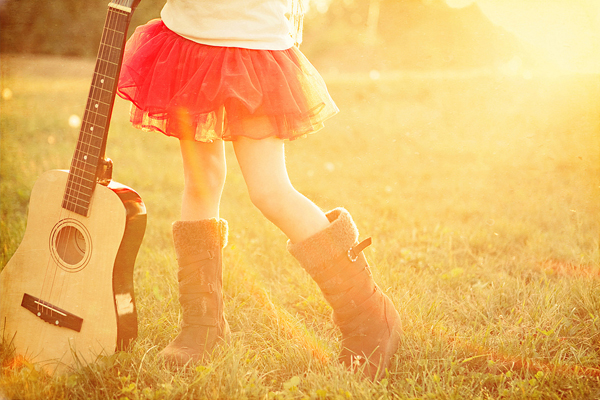
    Canon 5D + Canon 24-70mm 2.8L

    My current post-processing:
    Canon 5D + Canon 24-70mm 2.8L. Edit: Rebecca Lily Pro Lightroom 4 preset California

    As you can see, my own personal editing has undergone a big change. The current post-process is still bright and whimsical, but the colors look nevertheless very natural when compared to the SOOC. One thing that is important to keep in mind is that SOOC does not necessarily equal “natural colors”. Camera manufacturers have their own color palettes, and many times these colors are simply not true to life. Case in point: my Nikon, as much as I love it, gives me too much yellow. Yes, it is possible to get close to true-to-life colors if you calibrate your camera (which many pro photographers do), but my personal goal in post-processing is not to get SOOC’s with realistic colors. It’s to recreate the look and feel of what I originally saw, in an aesthetic, natural-looking and pleasing way.
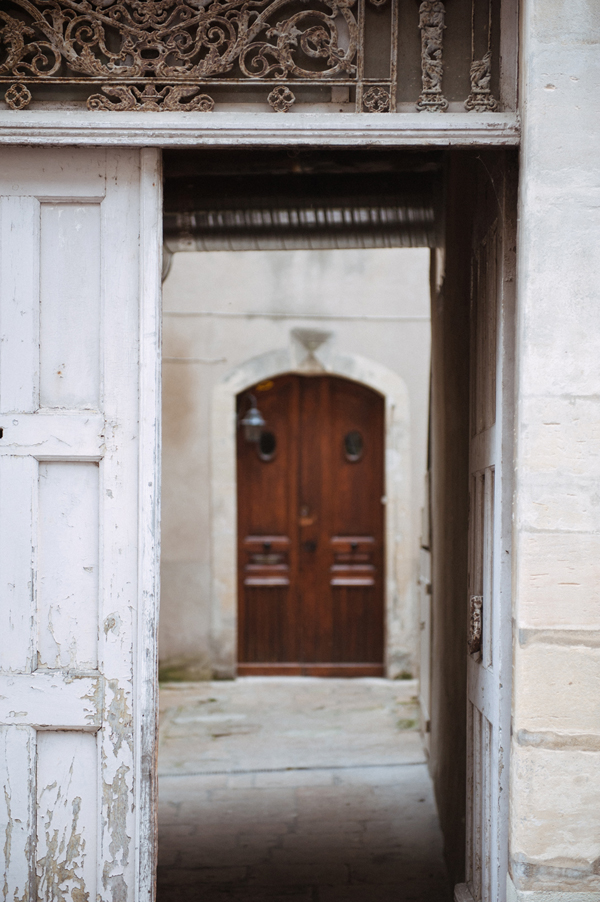
    Nikon D700 + Nikkor 24-70mm 2.8G. Edit: Rebecca Lily Pro Lightroom 4 preset Elixir

    If you incorporate tools like Photoshop actions, Lightroom presets or ACR presets for editing, there are a few products out there that are designed for natural, timeless, aesthetic colors. But they are difficult to find. Most vendors have not caught up with the times yet and are still offering products that are simply outdated.

    The majority of professional photographers do not want drastic effects, loss of detail or heavy alteration of original tones. They aren’t interested in a cotton candy color palette. They want subtle and versatile products that enhance their colors, produce delicate, detailed highlights and shadows and naturally beautify skin tones, but in a way that looks authentic and aesthetic – not fake. This is especially important for wedding and portrait work.

    As a designer of post processing tools such as Lightroom presets and Photoshop actions, I work with the continuous feedback of many professional clients and pay special attention to the growing requirements for this type of product. Especially among fine art wedding and portrait photographers, there is a strong demand for subtle and natural looking, film inspired colors – and the ability to cohesively apply a consistent look to an entire photography session. This reflects the growing movement towards authenticity.
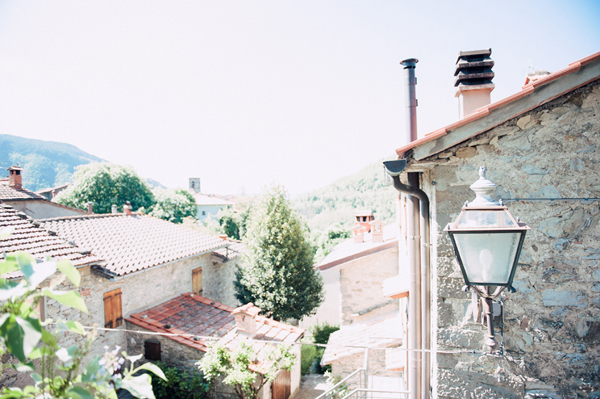
    Nikon D700 + Nikkor 24-70mm 2.8G. Edit: Rebecca Lily Pro Lightroom 4 preset California

    So where does this trend lead us in the world of photography? Someplace better, I believe. As the trend towards authenticity evolves, it inevitably changes the mindset of society for the better. This is part of the influence that we have as photographers, and part of our responsibility. I am always delighted to see wedding and portrait photographers that spend more time learning how to capture a person’s real, natural beauty with good light and a flattering angle – rather than liquifying and plasticizing them in Photoshop. How we as photographers approach our subjects tells a story to the world – and to ourselves – about what we perceive as beautiful and acceptable, and sets a standard to those who are watching us.

    I am hopeful when I stand on my tiptoes and look ahead to where the photography industry is going. I see this trend developing into a new and better way of thinking, of seeing. Publications begin to celebrate the everyday and the common in favor of the glossy. Models begin to look like real people. Homes begin to look lived-in rather than like museums. Nature begins to look like nature and not like Super Mario-world. Authenticity begins to shine.

    And it’s about time.
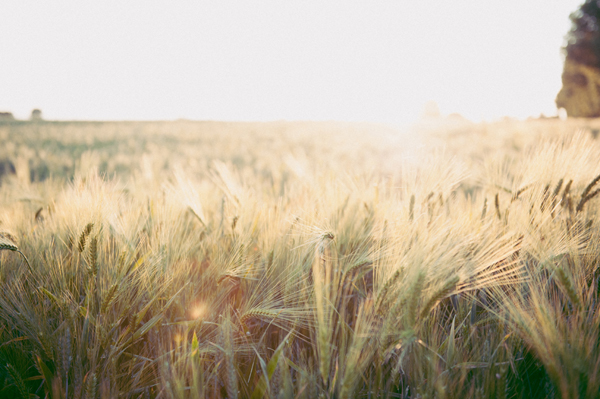
    Nikon D700 + Nikkor 24-70mm 2.8G. Edit: Rebecca Lily Pro Lightroom 4 preset Retro Curve

    Rebecca Lily is a professional destination wedding and commercial photographer under Bondshots, which she founded with her husband, Johnny Patience. She is also a designer of professional post processing tools such as Lightroom presets and Photoshop actions. Rebecca’s work and products have been featured both online and in print.

    Post originally from: Digital Photography Tips.

    Check out our more Photography Tips at Photography Tips for Beginners, Portrait Photography Tips and Wedding Photography Tips.

    The Trend Towards Authenticity


    Digital Photography School
  • 4 Devices to Make Post-Processing Even More Enjoyable

    All photographers dream of new lenses and camera bodies, professional studio lighting, carbon tripods, and so on and so forth. But what is strange, too many of them oversee some not too expensive stuff which will infinitely enhance their workflow – making it more comfortable, safe and productive. Here are a couple of things I personally can’t live without: 1. Continue Reading

    The post 4 Devices to Make Post-Processing Even More Enjoyable appeared first on Photodoto.


    Photodoto

  • 13 Friendly WordPress Photography Themes For Your Photography Business

    WordPress photography themes are designed to show off your photography portfolio. They’re intended to enhance the visual imagery that you create.  In this article, you are going to see a group of WordPress photography themes that are not just friendly for to your photography, but also your business.

    WordPress Photography Themes For Your Business

    We recommend for you to click on each image and view the live demos of the themes before making a decision on which to purchase.

    iFolios

    wordpress photography theme

    WordPress Photography Themes by Photocrati

    photography themes

    Baltimore

    baltimore

    Mater

    mater

    Gleam

    gleam

    Klassio

    klassio

    FlipIt

    Flipit

    360

    360

    Moot

    moot

    MediaBook

    mediabook

    Pallas

    pallas

    Deep Focus

    Deep Focus Photographer Template

    Vitrux

    vitrux

    Which of themes 13 friendly WordPress photography themes is your favorite and why?  Which do you think is best for your photography business and why?

    dslrBlog

  • Flashgun Accessories for Using and Controlling Light

    A flashgun attached to your camera can help to illuminate your subject in low-light scenes and night-time shots, but often the direct nature of the beam can create prominent or unflattering shadows, rob backdrops of ambience, flatten textures, plus dilute the skin’s natural hues and tones.

    One of the solutions is to use a light modifier, which can be attached simply and quickly to a flashgun, and are used to control the strength, shape light and concentrating of light. The portable nature of these accessories also means they can be easily stowed away in a camera bag to be taken on location, and what is more – a growing number of manufacturers are producing these lighting accessories to give amateur photographers more choices to use light creatively to generate more professional looking results.

    Here is a brief guide to some of the more common modifiers for flashguns to help you get started, but there are lots more out there to try:

    Snoot

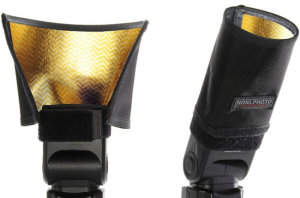
    Like its studio equivalent the flashgun snoot is a dark conical device strapped to the light source to generate a concentrated narrow beam of light. The spill of light is fiercely controlled and can be directed to illuminate areas of a scene shrouded in dim light or darkness like a spotlight. This particular accessory is fantastic for using for boudoir photography and even some stylistic-heavy fashion shoot.

    Example: Honl 8” gold-silver reflector speed snoot, £28/$ 29.95, www.honlphoto.com

    Honeycomb grid

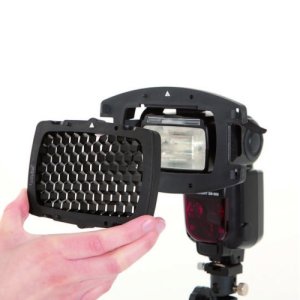
    Like the snoot, the honeycomb grid directs light with minimal fall off but isn’t as strongly controlled, plus instead of creating a circular field of light the result is more rectangular. Photographers can slot in patterned metal sheets to add an extra level of creativity, plus warm, cool or colour the light using coloured gels.

    Example: Lastolite Strobo, £120/ $ 195, www.lastolite.com

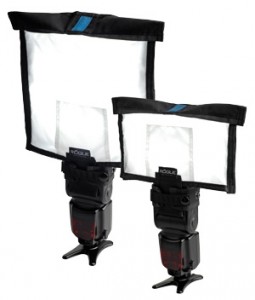
    Softbox

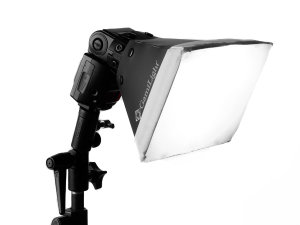
    Just like soft boxes that are used in studio environments, photographers on the go use these shoot-through mini-versions by strapping them on to the head of the flash gun. The large flat white panels of the box diffuse the beam of light cast, spreading it more evenly for a flattering result. Thanks to the delicate nature of the light generated, soft boxes are the perfect accessory for shooting portraits of any kind, indoors and outdoors, and can be teamed with natural light to rid the model’s face of shadows cast by the sun.

    Example: GamiLight softbox, £32/$ 53, www.gamilight.com

    Bounce, Reflectors

    A bounce is usually a flat or slightly angled surface that once attached to the flash gun is used to control the shape and angle of light. Photographers position the bounce so that the beam of light from the gun reflects of the surface and ‘bounces’ either directly on to the model, or for a softer result that comes from another direction, off of a wall or ceiling. Bounce’s can also come in coloured version such as an amber hue, to add warmth to the light.

    Example: Rogue FlashBenders Large reflector, £30.99/$ 39.95, www.expoimaging.com

    Globes, Domes

    Similar to a soft box, globes and domes are made of opaque plastic and are designed to be shot through to diffuse the power of the light, and spread it across the scene more evenly thanks to their globe or dome like design. Depending on the construction of thick plastic, most globes and domes will result in one stop light loss for noticeable softer results. Wedding photographers will often use such devices during the first dance or evening parts of the celebration to gently light the subject’s whilst retaining the ambient light of the location.

    Example: Gary Fong Lightspere Collapsible, £99/$ 59.95, www.garyfongstore.com

    Post originally from: Digital Photography Tips.

    Check out our more Photography Tips at Photography Tips for Beginners, Portrait Photography Tips and Wedding Photography Tips.

    Flashgun Accessories for Using and Controlling Light


    Digital Photography School
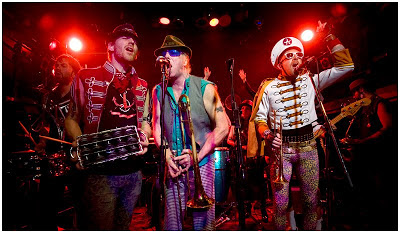
  • M4: Like the Carbine, But With More Power

    About this time last Friday I was in head-scratching mode, trying to figure out my light. Here was the challenge:

    Teeny-tiny stage. Twenty three insane performers. No room to change shooting positions. Complex, low-level and fast-changing ambient.

    I had been looking forward to it for weeks. Because I was getting to photograph MarchFourth, my absolute favorite band in the world. Lighting, pics and video, inside… Read more »


    Strobist

  • Indigo Child Marwane Pallas

    With his photos he proves that you don’t need hundreds of models to implement in reality even the most crazy idea. I thought I would add some type of interview alongside with those pictures, but after reading his formspring and talking to him I understood that he doesn’t bother himself to be serious. Answering question, “How you would characterize your Continue Reading

    The post Indigo Child Marwane Pallas appeared first on Photodoto.


    Photodoto