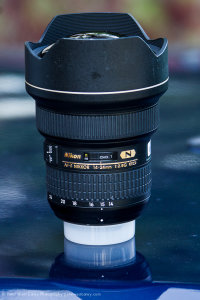
Category: Photography

  • The Best Options for a Great Portable Lighting Kit

    In the last two installments we covered basic three and five light studio lighting and that was good. Studio lighting is great if you have a place to work and provided your subject can come to you. There’s an old Arabic proverb that says when you can’t bring the mountain to your studio, you have to find a way to Continue Reading

    The post The Best Options for a Great Portable Lighting Kit appeared first on Photodoto.


    Photodoto

  • Glitter Portrait: How I Took It

    4406946969.jpeg

    Recently while surfing through some shots on Flickr I came across the shot above – taken by CT Pham (aka Phamster on Flickr).

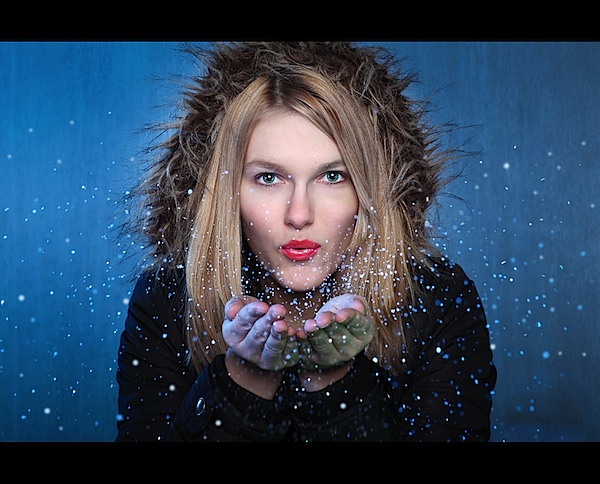
    The shot was eye catching and an interesting portrait and under it was a description of how it was taken with a link to see some behind the scenes shot. I messaged CT Pham to see if he’d be willing for us to share it on dPS and he agreed. Here’s the behind the scenes info. I’d love to see some shots inspired by this in comments below!

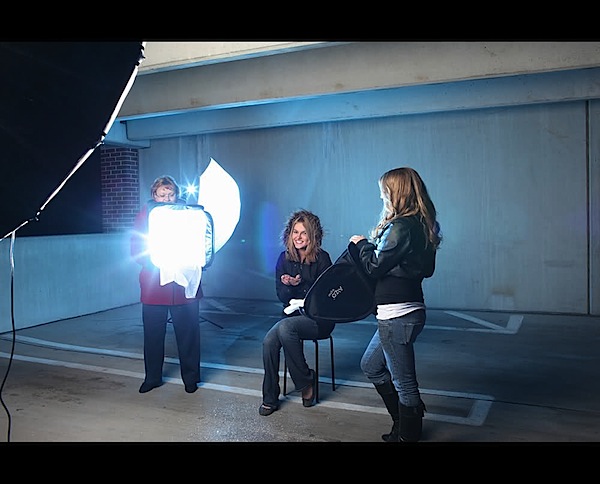
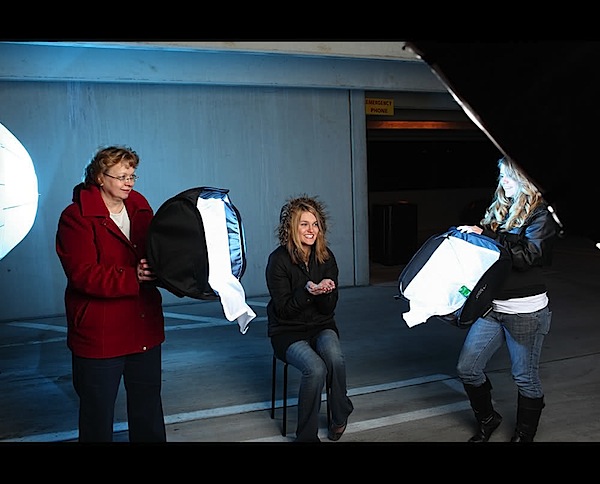
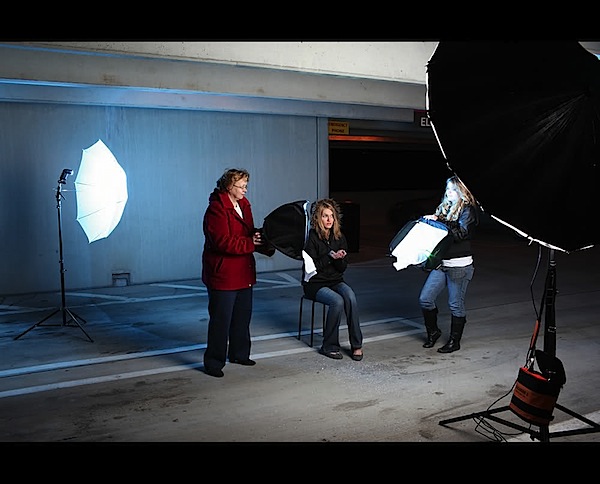
    This shot was done in a parking garage with 3 speed lights and a single alien bee strobe AB1600.

    I had the glitter cross lit by 2 speedlights gelled with blue and green (the green wasn’t showing up too well).

    It is a project I have been thinking of doing for a while and hadn’t had a chance – but last night presented it self.

    Setup:

    • 1 speed light in the rear and a shoot thru for the wall and partial side lighting
    • 2 speed lights for the cross lighting
    • 1 AB 1600 for the key light 64PLM was used
    • all speed lights were full power
    • the AB1600 was just below 1/4 power being it was really close to Katie
    • lots of glitter was used – LOL. Really fun shot!

    Camera: Canon EOS 5D Mark II
    Exposure: 0.006 sec (1/160)
    Aperture: f/9.0
    Focal Length: 85 mm
    ISO Speed: 500
    Exposure Bias: 0 EV
    Flash: Off, Did not fire

    Here are the behind the scenes shots of the setup!

    _o8un1x.jpg

    _vnfq7d.jpg

    _2z5reyr.jpg

    Check out more of Phamster’s work on Flickr or on his site.

    Post originally from: Digital Photography Tips.

    Check out our more Photography Tips at Photography Tips for Beginners, Portrait Photography Tips and Wedding Photography Tips.

    Glitter Portrait: How I Took It


    Digital Photography School

  • Meet The Photographers Who Write For Digital Photography School ~ Matt Dutile

    You’ve been reading their articles for months or years, have you ever wondered “Who are the photographers who write for DPS”? We thought it would be a good time to introduce them to you through a series of interviews. No worries, Darren will get his turn too.

    Today meet travel, lifestyle and hospitality photographer Matt Dutile.

    MDP_3825

    1. How long have you been shooting?

    I’ve been shooting for just over four years now. I picked up a camera in 2008 on a whim while bored in a desk job, and it just started to click for me. I poured myself into it, advancing my technique, honing my perspective and building a business.

    matt_dutile_web22. Do you have a full time job or are you a full time photographer?

    I’ve been a full-time photographer for a little over two years now. I’m on the commercial side of the business shooting primarily travel, lifestyle and hospitality images for various editorials, ad agencies and in-house corporations.

    3. If you had to limit yourself to one genre of photography, what would it be and why?

    Travel. It’s my real passion and I’m fortunate that it takes me all over the globe to meet many amazing people, discover new landscapes and generally marvel at the world’s diversity.

    4. When did you start writing for DPS and why?

    I started writing for DPS in late 2009, about a year after I picked up a camera. It was all rather serendipitous. Back then I used to share some images on the forums and they would be highlighted by Darren in the newsletter as posts by members. After that happened a few times I wrote Darren a thank you note and expressed interest in adding some tips. It worked out well and as I continued to learn and refine my craft I was able to share those thoughts with DPS readers.

    5. What do you shoot with and what’s your favorite lens?

    I rotate between the Nikon D4 and D800. I enjoy the ergonomics, color set and image quality out of those cameras – particularly the large file sizes can be great for big prints with the D800. I don’t have a favorite lens per se, but I’m often using the Nikkor 24-70mm f/2.8 for my travel work. It allows me the flexibility I need to make shots on the go in any space/environment. I always have packed a 70-200 and few primes as well depending on the nature of the assignment.

    6. What would be your number one tip to any new photographer?

    Be an art director for yourself. Always be working to improve your craft and hone your eye. Know what makes a good image and what doesn’t – curate your work and it will help you to improve. Be ruthless in your personal honesty.

    7. What’s your next big project?

    Well I don’t want to announce it quite next, but I’ve been working on a few cool photo projects that tie together an idea from images across the globe. Aside from that I’ve got Belize, Portugal, Spain, Greece, Austria, Germany, the Netherlands and Ireland up on the travel schedule – and we’ll see where else my clients would like to send me. Always an adventure!

    8. Where can people go to find out more about you and your work?

    Best spot is probably my website at mattdutile.com. Other than that I keep up a frequent presence on my Facebook page and on Tumblr.

    MDP_4063

    MDP_5632


    MDP_6008

    MDP_5109

    DSC_2531

    DSC_0120

    MDP_3865

    MDP_2159


    DSC_5919

    MDP_2682

    Post originally from: Digital Photography Tips.

    Check out our more Photography Tips at Photography Tips for Beginners, Portrait Photography Tips and Wedding Photography Tips.

    Meet The Photographers Who Write For Digital Photography School ~ Matt Dutile


    Digital Photography School

  • How I Shot And Edited It – Mesa Arch At Sunrise

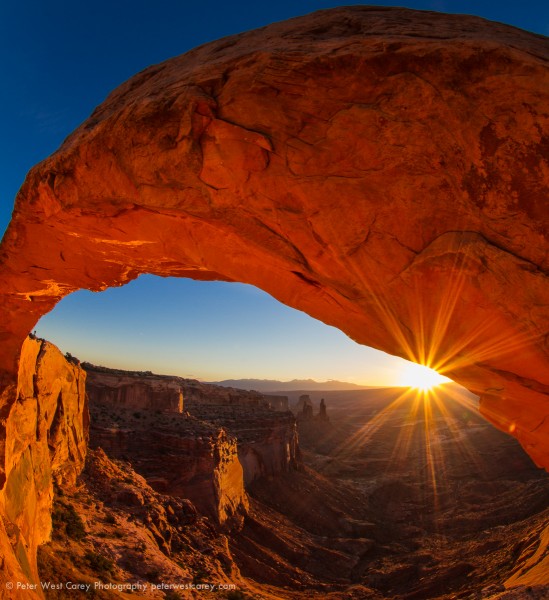
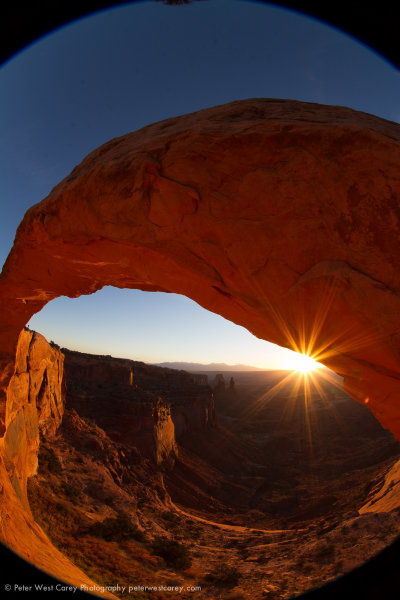
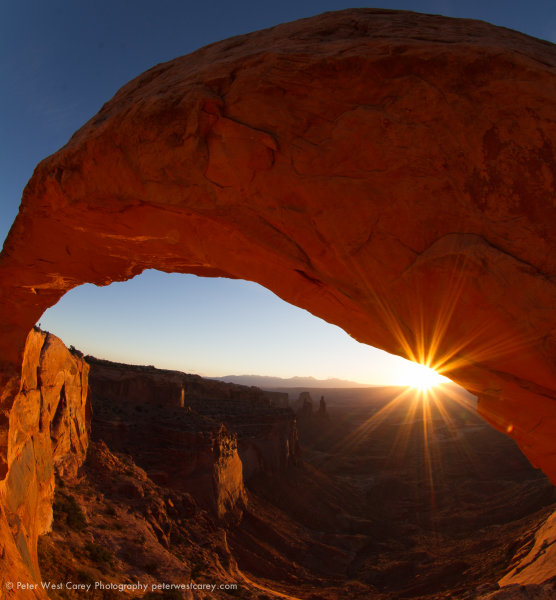
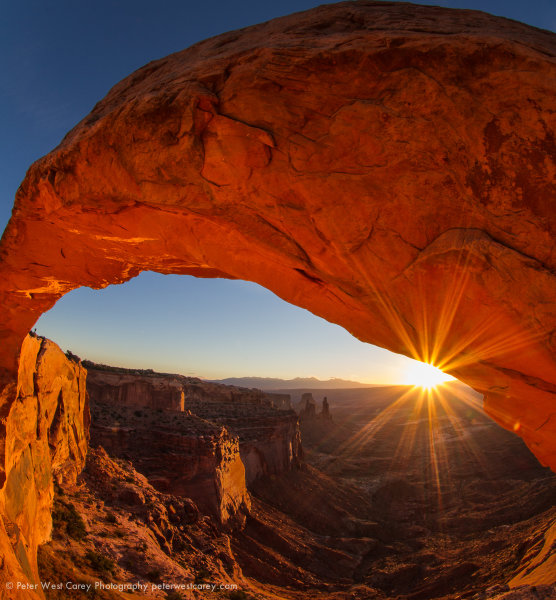
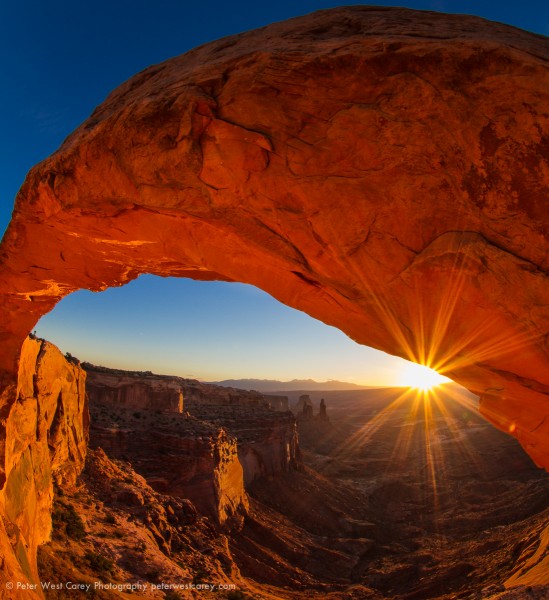
    Of the images I brought back from a trip to Utah’s Canyonlands and Arches National Parks this past Fall, the one above recieved the most comments and requests for info. For starters, this is a shot of Mesa Arch in Canyonlands National Park, which is famous for the fact that the bottom of the arch glows from reflected sunlight just after sunrise on most mornings. Most shots look like this:

    I had seen images of this arch before and was keen to shoot it with fellow Puget Sound photographer Michael Riffle when he suggested it. He made the suggestion and knew the location so I trusted in his judgement (while he noted it would be crowded) and I did little other prep.

    Setup

    Getting to the location is straight forward. But the catch: Michael tells me we need to leave early from Moab, the nearest town where we are staying. I think we left at 4:30am, but the details of the clock are fuzzy. There is a short walk from the parking lot and the whole setup is fairly accessible.

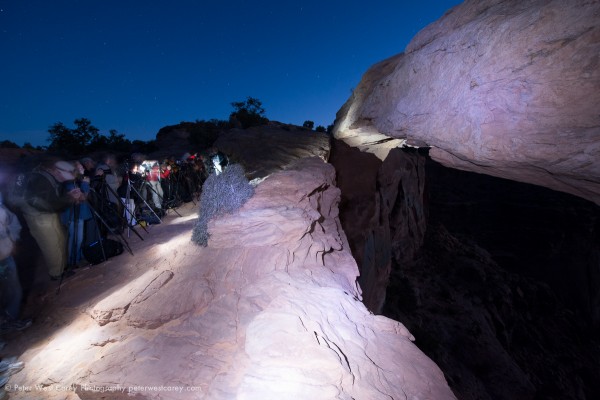
    Why did we need to leave so early? Two reasons: 1) This location is popular and 2) it is small. I didn’t realize how small this arch was. I was thinking it was on the order of Landscape Arch in neighboring Arches National Park, which is at least a hundred meters long. Not so with Mesa Arch. To give you a frame of reference, here is what we were greeted with upon arrival.

    For someone who loves shooting far-off places with not so many people, this scene astounded me. I can count a dozen cameras in this setup. This is at 6:30am and the sun is not due for another hour.

    I decided to set my camera on the far side of the arch in this image and Michael strong armed (politely) his way into the middle of the crowd. By the time I was set up, another six photographers arrived. In the end, over two dozen would be shooting.

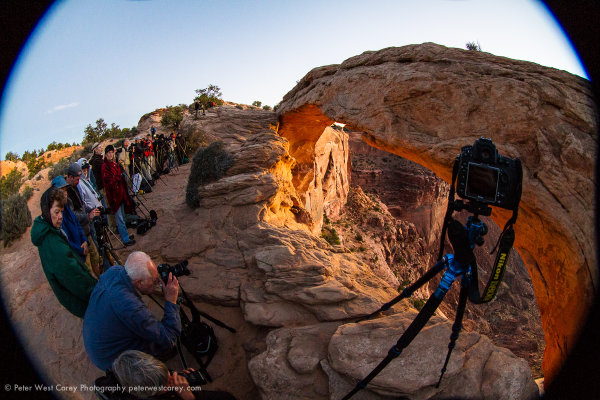
    I was lucky this day as BorrowLenes.com had lent me a Nikon D800E and 14-24mm lens for this trip. As well as a Canon 8-15mm L fisheye. This meant I was able to setup the Nikon at the location you see above and wait for the sun. I was then able to use the 8-15mm on my Canon 7D and walk around for different composures. It is possible the setup kept me sane.

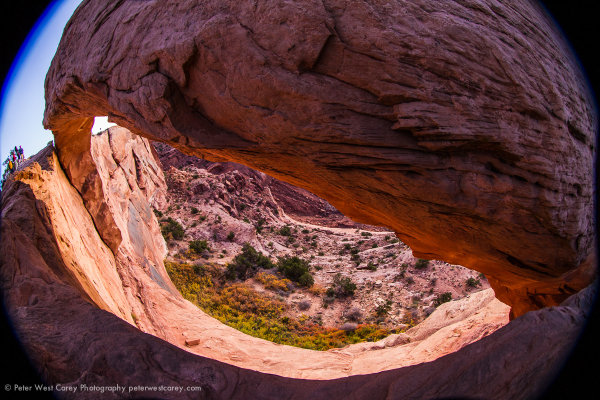
    I tested some shot ideas with the 8-15mm L and liked one where I was right at the edge of the cliff and below and to the right of my tripod as in the picture above. Here’s a test shot before the sun came up.

    Shooting

    After fiddling with the location, the sun finally broke the horizon. You would think Tom Cruise was seen walking naked through LA with the sound of snapping shutters behind and to the side of me. The long, long wait for some was finally paying off. I wasn’t happy with the Nikon shots at the time so I kept experimenting with the fisheye.

    It was then that a local Utahan noted he got great shots by hanging over the edge. I love rock climbing and am comfortable on cliffs so, making sure I wasn’t in anyone’s shot (amazingly enough, it was possible) I leaned to the edge and hung my arm down.

    Taking a couple test shots, I switched to Manual Mode and chose ISO 100 for the best quality image now that the sun was up, 8mm for the widest wide angle I could get, f/20 because I wanted a nice star burst pattern to the sun and 1/10 of a second to balance things out.

    It took a number of tries to get the shot I wanted and I would take a few, move the camera slightly, take a few more. It was really shooting in the dark as my torso was over the edge with my arm hanging down and wrist bent back, while trying to avoid getting my body in the shot (at 8mm, the field of view is 180 degrees).

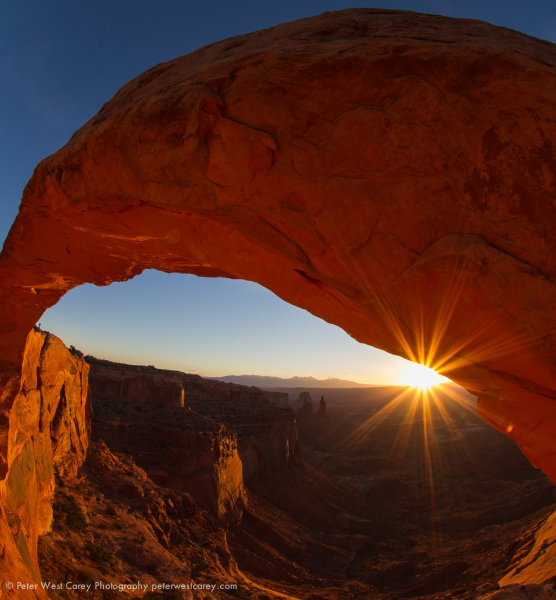
    This is the resultant image, straight out of the camera:

    Satisfied, we shot for a few minutes more and then headed back to town.

    Editing

    Upon arriving home it was time to play with the image. I knew what I wanted and I started by straightening and cropping the image to cut out the black areas. All the edits below are handled in Adobe Lightroom.

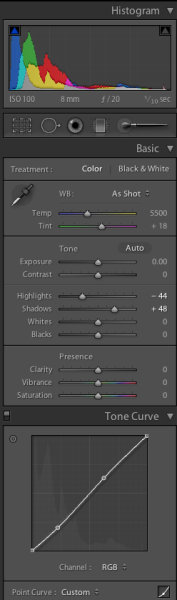
    I then adjusted the Tone Curve to add some contrast, but I didn’t pull in the sides as the image was already pushing the edge of the Histogram. I cut Highlights by 44 and enhanced Shadow detail by +48.

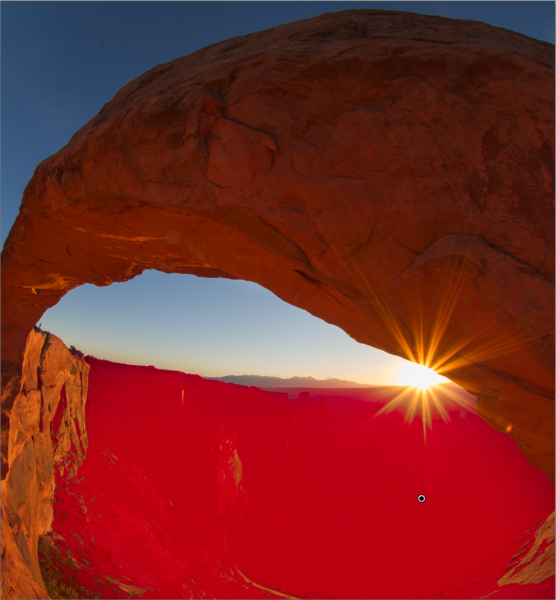
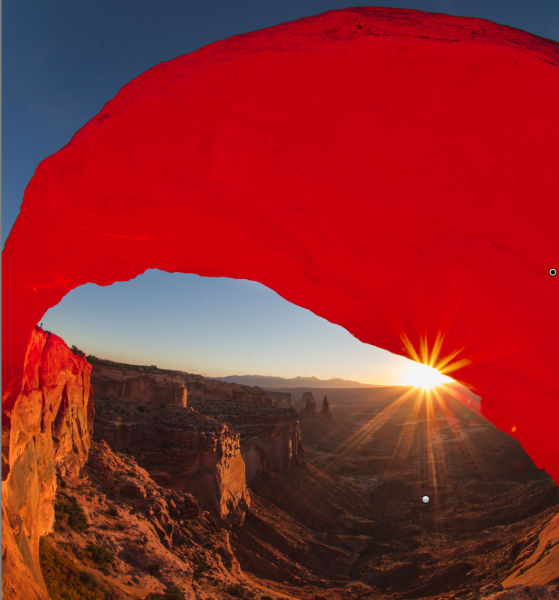
    After that, it was time to liven up the valley floor. Using the Adjustment Brush, I painted over the valley floor and increased exposure by +.73 and Clarity by +48 to add some sharpness. I like to use the Clarity often on rock features to make them ‘harder’. The red in the image below represents the painted area for those settings.

    Now I want more life in the arch itself and I use a new brush to paint that. Exposure is +.73 and Clarity is +43.

    After removing some dust spots (I’ll spare you the screen shots, but if you click through the images above you can probably spot them), I adjusted the crop angle slightly before the last set of adjustments.

    Both the face of the arch and the valley floor are brighter and more vivid. Wanting a little more ‘pop’, I increased the overall Vibrance by +31 (this brings more blue to the sky and orange to the rock and sun) as well as a Blue Saturation of +40 to help the sky.

    And that was it!

    The keys for me for this shot were:

    1. Knowing the space I would be able to crop using the Canon 8-15mm L Fisheye on a cropped sensor camera.
    2. Stopping down my aperture to get the star burst effect.
    3. Placing the sun near the rock to gain the most from the burst (it works best when there is something for the sun rays to contrast with).
    4. Taking a chance and shooting blind from a unique angle.
    5. Listening to the advice of others.
    6. Being courteous to others wishing to get their own shot.
    7. Minor edits to bring the vision to fruition.
    8. Borrowing the right gear (thanks again to BorrowLenses.com)

    If you have question, please ask. I will do my best to address them.


    Post originally from: Digital Photography Tips.

    Check out our more Photography Tips at Photography Tips for Beginners, Portrait Photography Tips and Wedding Photography Tips.

    How I Shot And Edited It – Mesa Arch At Sunrise


    Digital Photography School

  • Natural Light Portraits: Weekly Photography Challenge

    This week with the launch of our brand new Portraits eBook I thought it might be fun to run our weekly challenge with a Portrait theme but focus in on portraits that are ‘naturally lit’ – as it is a very accessible theme (all you need is a person… and some daylight).

    Natural Light

    Hopefully it’ll make a great practice exercise for those of you who picked up the eBook but also be a fun one for those who have not yet grabbed it.

    Feel free to be creative with the theme – you might like to shoot shot of someone indoors by a window, to head into the great outdoors, you might like to shoot a headshot, or a full body shot – whatever you like.

    Also remember that while you’re shooting with only natural light for this challenge that that doesn’t mean you can’t use some kind of reflector to help light your subject (as in the illustrating picture above by Ed McGowan.

    Once you’ve taken and selected your best natural light portrait upload it to your favourite photo sharing site and either share a link to it or – embed it in the comments using the our new tool to do so.

    If you tag your photos on Flickr, Instagram, Twitter or other sites with Tagging tag them as #DPSNATLIGHTPORTRAIT to help others find them. Linking back to this page might also help others know what you’re doing so that they can share in the fun.

    Also – don’t forget to check out some of the great shots posted in our last challenge – Best Shot of 2012 challenge where there were some beautiful shots submitted.

    To help you with this challenge don’t forget to pick up the new Portraits eBook (do so this week and you get a free 2nd Portraits eBook). You might also like to check out our Natural Light eBook too which will have some relevant tips too.

    Post originally from: Digital Photography Tips.

    Check out our more Photography Tips at Photography Tips for Beginners, Portrait Photography Tips and Wedding Photography Tips.

    Natural Light Portraits: Weekly Photography Challenge


    Digital Photography School

  • How to Digitally Add Shallow Depth of Field

    One of the easiest and most common techniques that photographers use to make their photos look more interesting and professional is to use a shallow depth of field. Depth of field refers to the distance between the nearest and farthest parts of an image that appear sharp or in focus. When a photo has a shallow depth of field, only Continue Reading

    The post How to Digitally Add Shallow Depth of Field appeared first on Photodoto.


    Photodoto

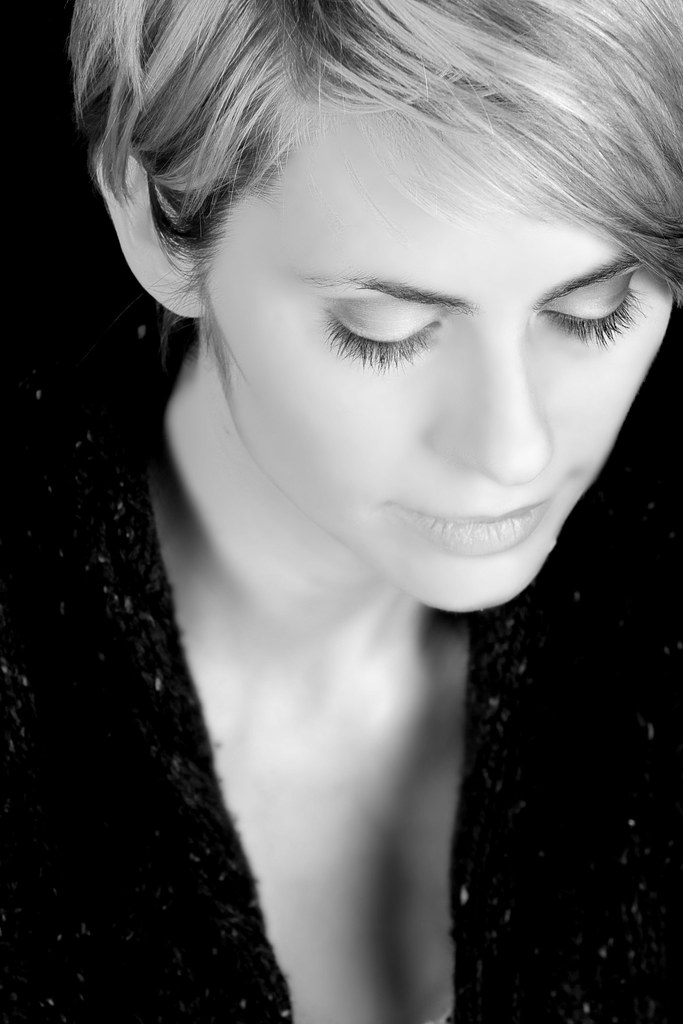
  • 27 Beautiful Black and White Portraits

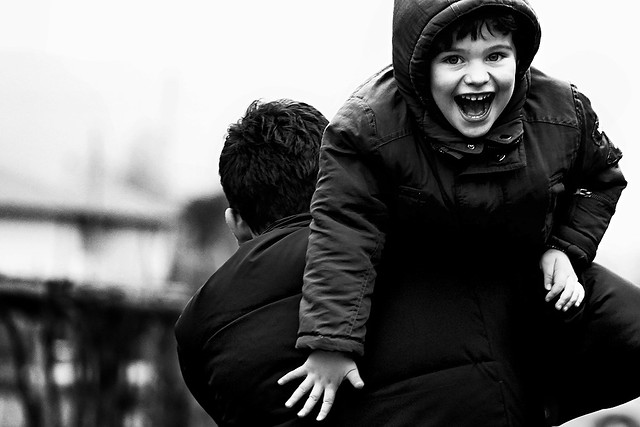
    Following are 27 beautiful black and white portraits to inspire you to take some portraits this week – enjoy!

    Click on images to learn more about it and the photographer behind it on their Flickr page.

    Still Moment B&W

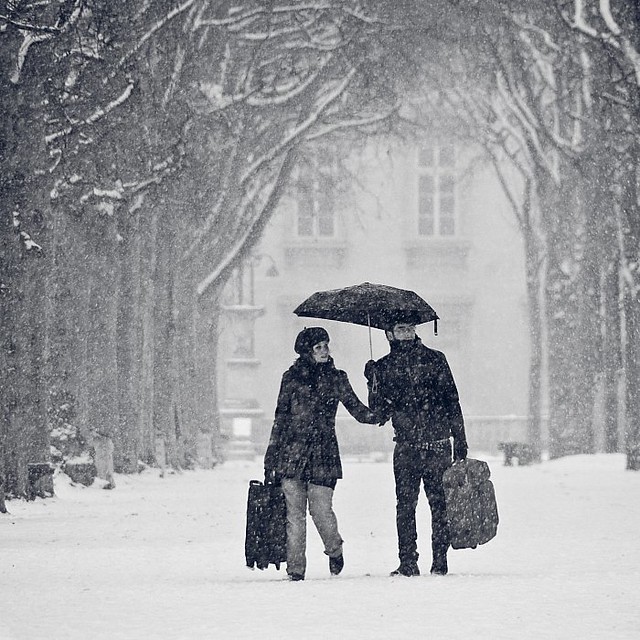
    Paris under the snow
    This little piggy (EXPLORED)
    Shopaholic.
    Portrait de rue - Tattoo, percing, etc.
    lolita
    Portrait de rue - Zeghdoud
    Serie "Life is" #1 (unfair)
    It's Just a Number
    Reflection
    Rockstar Teri
    81/365, l'ombra del vento

    Portraits_468x190px.jpeg

    288/365 - Dotty
    the tatoo man
    That Newsie Smile
    Pentecost
    Angel
    Thomas in the rain.
    Fun Contrast and Light
    JHC
    Face to Face
    Construction Worker
    gotische damen

    Laissé pour compte
    workstation

    Post originally from: Digital Photography Tips.

    Check out our more Photography Tips at Photography Tips for Beginners, Portrait Photography Tips and Wedding Photography Tips.

    27 Beautiful Black and White Portraits


    Digital Photography School

  • Nikkor 14-24mm f/2.8 Lens [REVIEW]

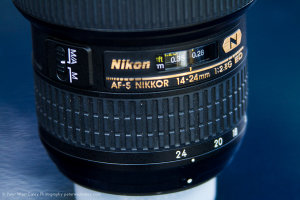
    Nikon’s Nikkor 14-24mm f/2.8 is something of a legend in the realm of ultrawide zooms and after playing with one while traveling to both Utah and Hawaii, The Big Island, I understand better why this lens is coveted. It made me a little jealous and considering moving to a full frame Nikon camera as my main landscape imaging platform. It’s that good.

    I was lent my copy from BorrowLenses.com for the test and this was the piece of equipment that was hardest for me to send back, ever. Even harder than the much more expensive Pentax 645D or Canon 400mm f/2.8 (both of which are fine pieces of equipment in their own right).

    Specifications

    • Mount Type
      Nikon F-Bayonet
    • Focal Length Range
      14-24mm
    • Zoom Ratio
      1.7x
    • Maximum Aperture
      f/2.8
    • Minimum Aperture
      f/22
    • Format
      FX/35mm
    • Maximum Angle of View (DX-format)
      90°
    • Minimum Angle of View (DX-format)
      61°
    • Maximum Angle of View (FX-format)
      114°
    • Minimum Angle of View (FX-format)
      84°
    • Maximum Reproduction Ratio
      0.15x
    • Lens Elements
      14
    • Lens Groups
      11
    • Compatible Format(s)
      FX
      DX
      FX in DX Crop Mode
      35mm Film
    • Diaphragm Blades
      9
    • Distance Information
      Yes
    • Nano Crystal Coat
      Yes
    • ED Glass Elements
      2
    • Aspherical Elements
      3
    • Super Integrated Coating
      Yes
    • Autofocus
      Yes
    • AF-S (Silent Wave Motor)
      Yes
    • Internal Focusing
      Yes
    • Minimum Focus Distance
      0.9 ft. (0.28m)
    • Focus Mode
      Auto
      Manual
      Manual/Auto
    • G-type
      Yes
    • Dimensions
      (Approx.) 3.8 x 5.2 in. (Diameter x Length)
      98 x 131.5mm (Diameter x Length)

    In Real Life

    [Click on an image for a 100% version. Warning: some can be quite big. All images Copyright Peter West Carey Photography and not to be reused without express consent.)

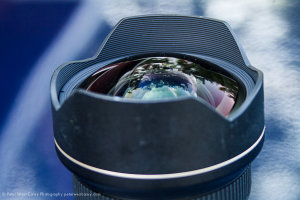
    Functionally the lens is a snap in the field. Only two rings to turn for either zoom or focus. One switch on the side can turn on and off manual focus. That is it. For those not accustomed to wide angle lenses, the hood may look odd but it does help protect the extruding curve of the lens that is needed for a zoom of this nature.

    The lens comes with a hood attached that can not be removed and the front element is convex, meaning it curves forward from the lens body. There is a cup of a lens cap that fits over the hood and it’s best not to lose this as replacements are not as easy to find as a standard 77mm lens cap. A special note here; finding filters for this lens is complicated by the shape of the lens and hood. There are solutions by the likes of Fotodiox that are large enough to fit the unit, but I was not able to procure a set to test with this lens.

    On a full frame body, like the Nikon D800E I tested this lens on, the field of view is from 84° to 114°. For landscape photographers, this range is perfect for typical settings and locations. I have been shooting with Canon gear for over 10 years and loved the 16-35mm, but the 14-24mm Nikon has it beat with the sweat spot for wide angle. And that extra 2mm on the wide end is appreciated.

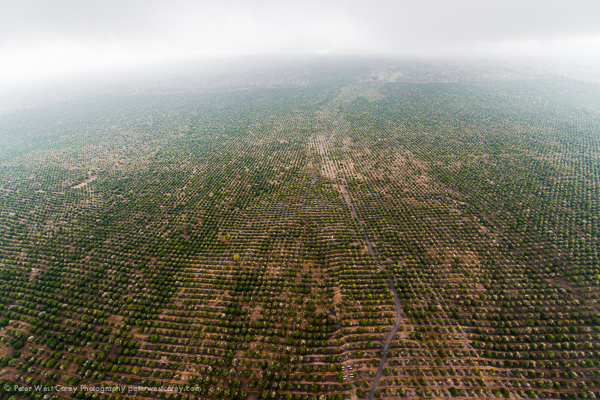
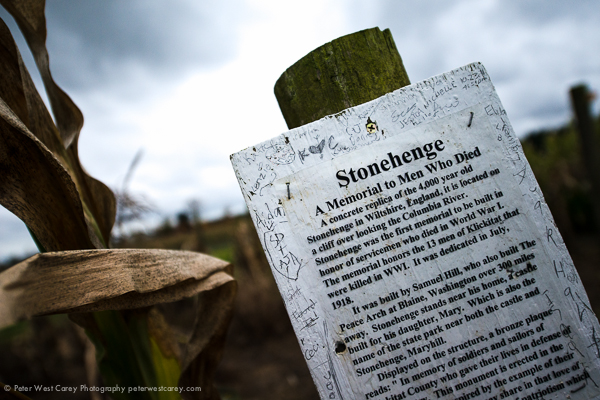
    What this lens does well is not often noticed unless you have used a cheaper wide angle lens. It holds corners well and resists distortion, thanks to the curved front element. At 24mm there is virtually no noticeable distortion while it is noticeable at 14mm. Here are two examples. The macadamia nut farm is at 14mm (thanks to Paradise Helicopter Tours for the lift) and the sign in the corn maze is at 24mm. The original files will be shown in the Samples section.
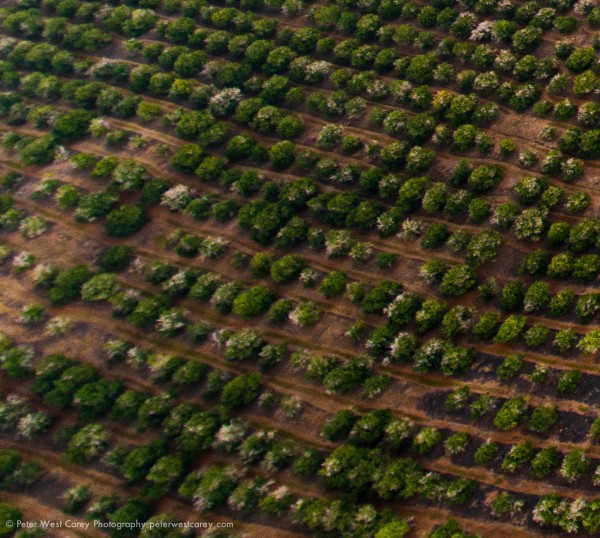

    This is a boon for architectural photographers who don’t want their corners bowing out. Chromatic aberration is also less than I have seen with any other wide angle lens from Canon and it has me seriously thinking of jumping ship, at least for wide angle photography. I was able to push it and recognize some aberration, such as in the image below with 100% crop, but I really had to push it.
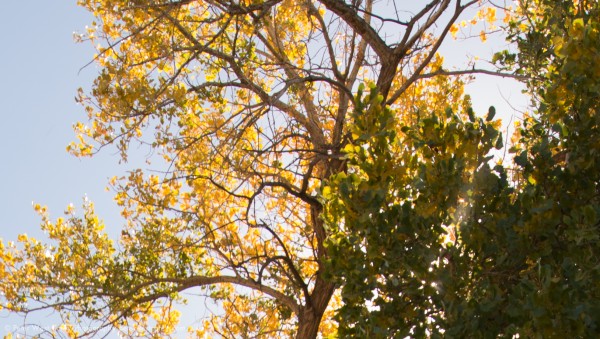
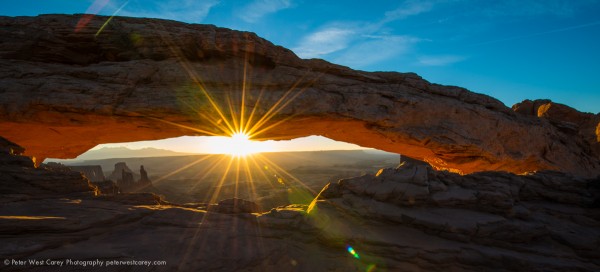
    Here’s another of Mesa Arch at sunrise. This is all easily cleaned in Lightroom.
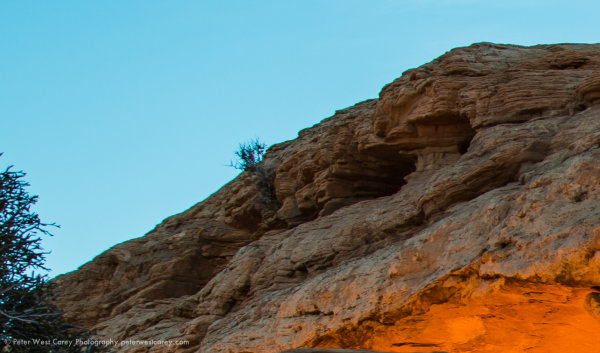
    Lens flare was annoying for sunset shots. There are some prime examples below. I found it beyond distracting, especially in the shot from the rim of Canyonlands with the dead tree. The angle was just wrong but it’s the angle that I wanted. Sharpness was impressive, even closer to the edges. With the huge sensor of the D800E, the enlargements on wide shots was beyond my expectations while remaining sharp. For instance, take a look at the full sized version of Mesa Arch below. Look to the distant towers. This is a testament to the lens’ overall sharpness, which has me drooling.

    Samples

    Below are samples from the Nikon 14-24mm and D800E combo. Some images have been cropped and most have been edited.
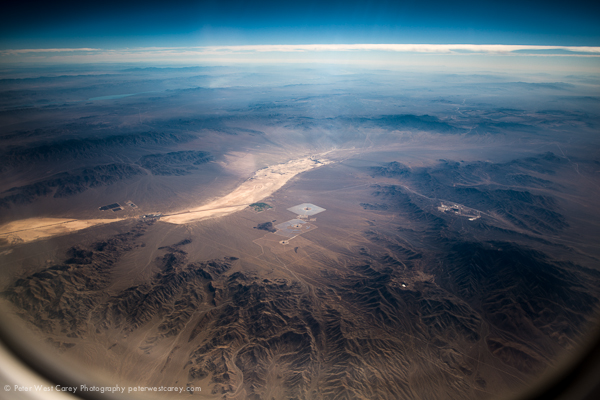
    ISO 50, 24mm, f/3.2, 1/2500
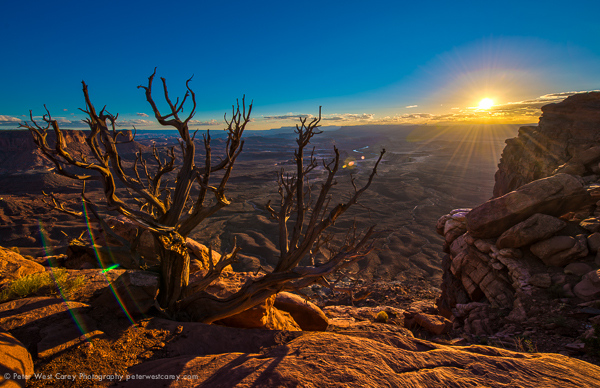
    ISO 100, 14mm, f/8, center shutter speed of 1/40
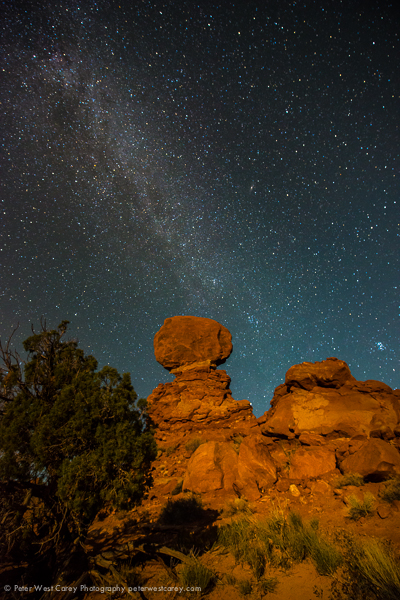
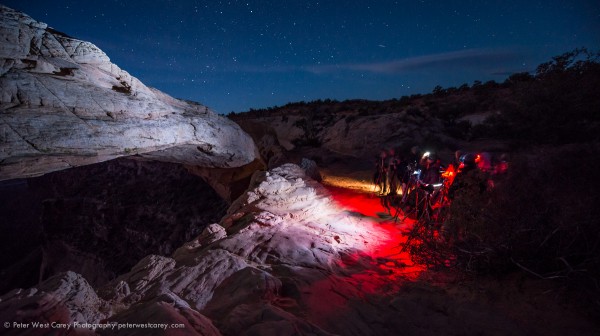
    ISO 3200, 14mm, f/4, 30 seconds
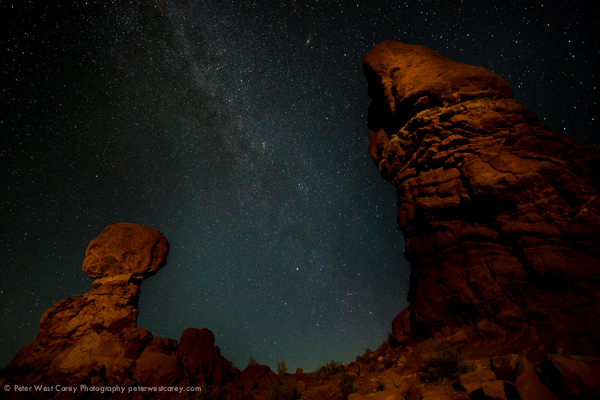
    ISO 3200, 15mm, f/4, 30 seconds
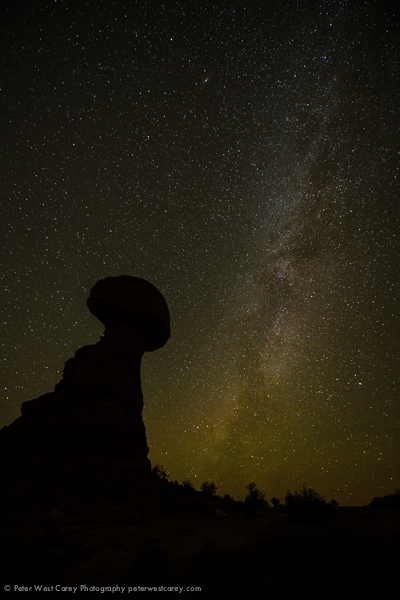
    ISO 2000, 14mm, f/2.8, 30 seconds
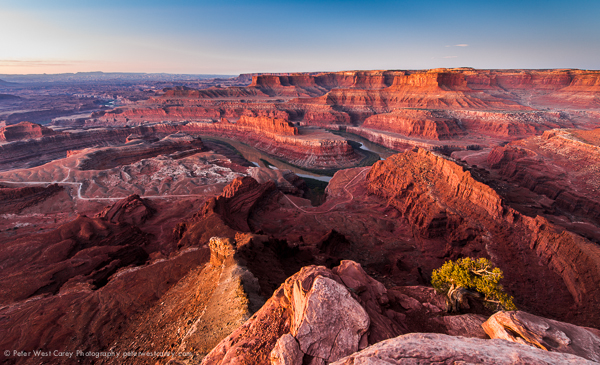
    ISO 50, 14mm, f/6.3, 30 seconds (pre-sunrise)
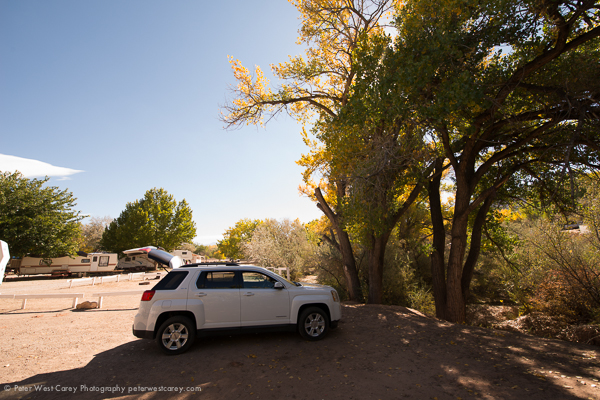
    ISO 50, 14mm, f/7.1, 1/100
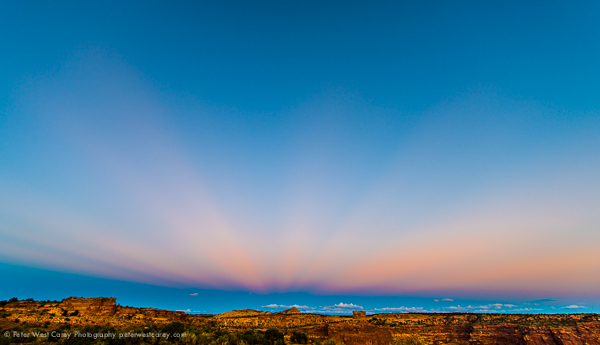
    ISO 100, 14mm, f/4, 1/25
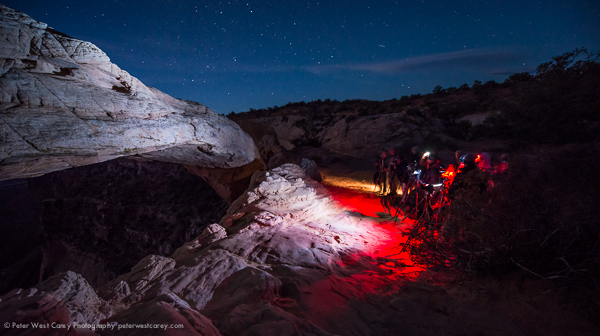
    ISO 2000, 14mm, f/2.8, 5 seconds
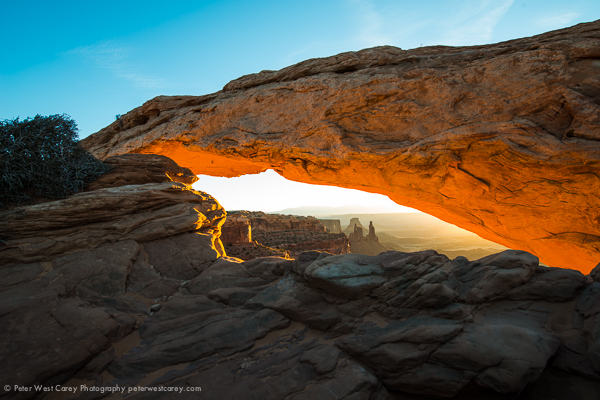
    ISO 50, 16mm, f/8, 1/20
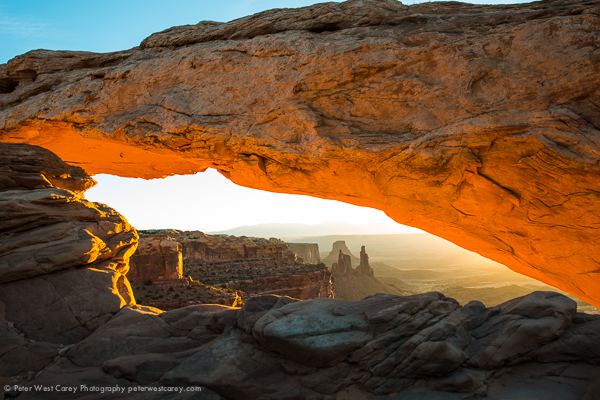
    ISO 50, 24mm, f/8, 1/20 – Zoom in on this one
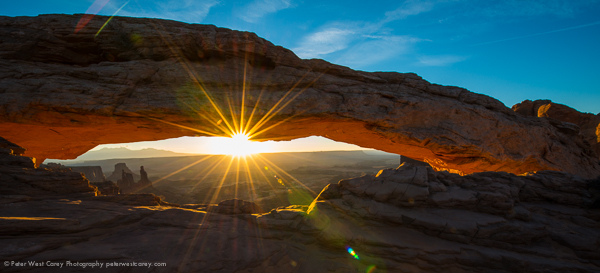
    ISO 50, 14mm, f/22, 1/8
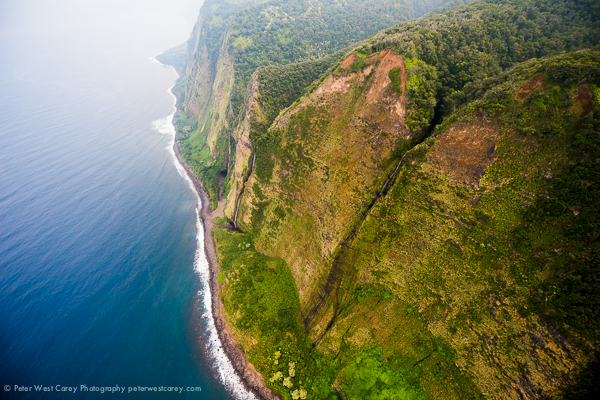
    ISO 500, 14mm, f/4, 1/000
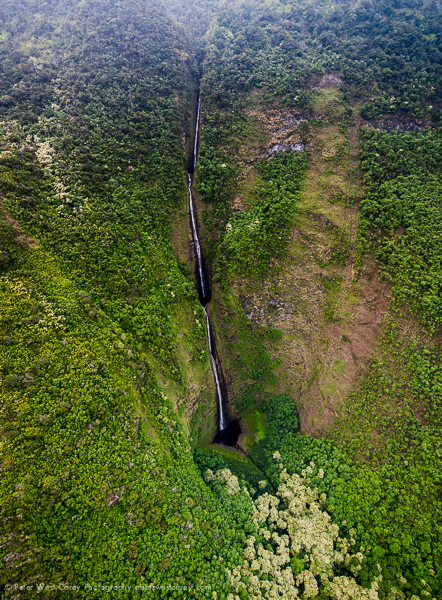
    ISO 500, 17mm, f/4, 1/400
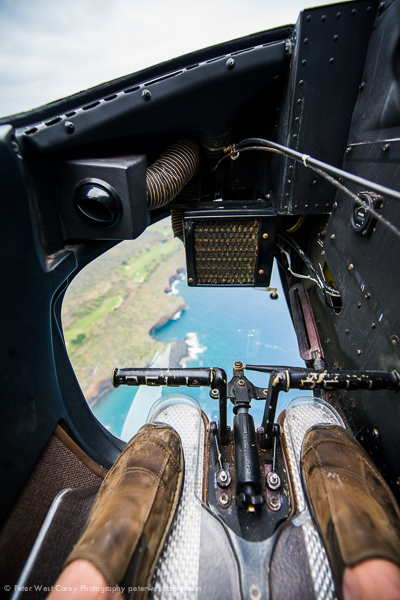
    ISO 500, 14mm, f/2.8, 1/400
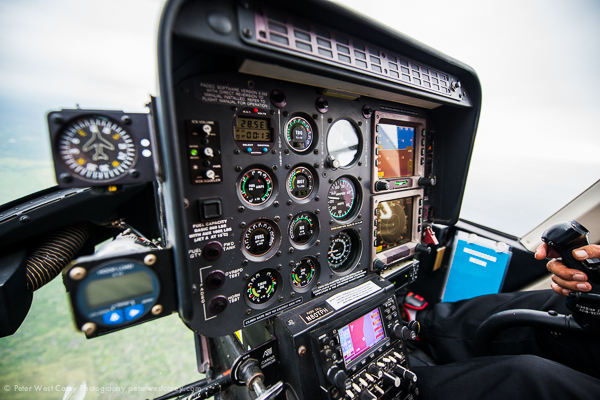
    ISO 500, f/2.8, 1/320
    ISO 500, 14mm, f/2.8, 1/500
    ISO 500, 14mm, f/2.5, 1/3200
    ISO 1000, 24mm, f/2.8, 1/2500

    Conclusion

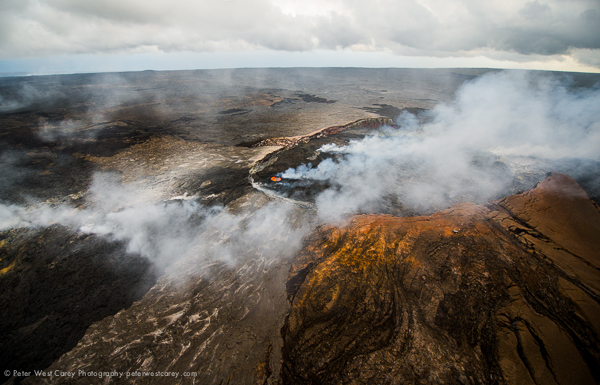
    The lens is a joy to use and the results, to me, are stunning. It has me seriously thinking of adopting a Nikon camera and this lens in the future. It was very useful both in Utah when I had to get a little closer, without getting physically closer, at Mesa Arch. It was also helpful when shooting from a helicopter over Hawaii, The Big Island as the blades and skids started to show as I could zoom in just a little and make it work.

    If I had a Nikon camera body, I would already own this lens and it will be the first Nikon lens I ever buy. It is an excellent lens.

    Post originally from: Digital Photography Tips.

    Check out our more Photography Tips at Photography Tips for Beginners, Portrait Photography Tips and Wedding Photography Tips.

    Nikkor 14-24mm f/2.8 Lens [REVIEW]


    Digital Photography School
  • Photo Project: Why You Should Create a Photo Inspiration Corkboard

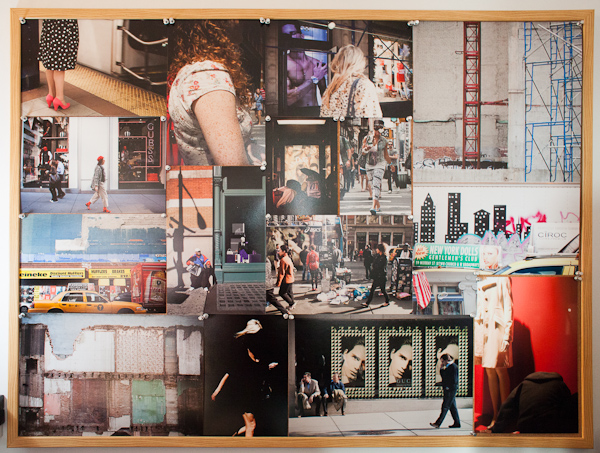
    36x48 inch Photo Inspiration Corkboard

    36×48 inch corkboard.

    Like any project around the house, I thought about doing this almost a year ago and finally put it up in my office last month.  It turned out so well that I wanted to share it with you all.

    This is a 36×48 inch natural corkboard, purchased at the Container Store with silver tacks.  It took some time to plan out the sizes and make the prints, but it was a fairly simple project.  To get a better sense of the size, the print on the top left is 8×12 inches.  I found that instead of planning out the entire thing, it was easier to fill up a third of it with 8×12 prints and then plan how to fill in the rest of the space.

    The best thing is that friends love it, clients love it, and most importantly, my wife loves it.  It’s helped show off my work in an interesting way that engages people and it shows off the prints without any glass in front to show visitors the true quality of the prints and paper.

    Also, framing can get expensive, and especially for areas like your office, your studio, or whenever you do your photo work, you will undoubtedly get the urge to change the photos on your walls constantly.  Framing makes that tough to do, as I have learned the hard way.  With a board like this, all you have to do is print and replace.

    It is a fantastic way to work on a long term project of images that you can play with and change over time to see how the images work with each other.  I chose to organize mine around a specific set of my street photography and even after a month I plan on changing it and adding to it.  I am eventually going to add two more board and put painting lights above them all.

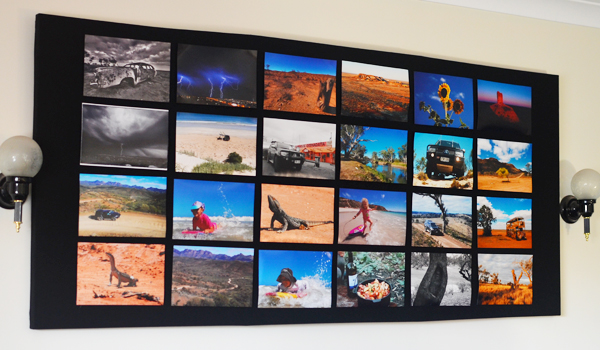
    There are also many other ways to do this.  After I posted about the board on my blog, an Australian reader named Kristen sent me a photo of a version she had created.

    Here’s what she said:

    “I bought three, 40 inch by 20 inch canvases.  Then, I nailed the canvas frames together to make a single 40 inch by 60 inch canvas.  Over the top of that, I attached mat black material and put a hanging string along the back of the frame.

    I used hot glue to stick 4 velcro bits for each photo on the black material, then I put the other side of the 4 velcros bits on the back of each photo.  Every 6 months or so I take down the 24 photos and I can put up new photos or re show old photos, because they all attach via velcro – so I can take down and put up photos to suit.”

    There are so many ways to do something like this.  So get started!  And if you’ve done something similar, please share it with us in the comments!

    Photo Corkboard


    Post originally from: Digital Photography Tips.

    Check out our more Photography Tips at Photography Tips for Beginners, Portrait Photography Tips and Wedding Photography Tips.

    Photo Project: Why You Should Create a Photo Inspiration Corkboard


    Digital Photography School

  • Pick Up Our Brand New Portrait eBooks and Get a Free One [Limited Time Only]

    Portraits_cover-350.jpgToday I have great pleasure to announce a brand new dPS eBook that I know is going to help a lot of people improve their portrait photography!

    Every time we survey our readers on what type of photography they do most – Portraiture comes in as the #1 response.

    So over the last year I’ve been on the look out for a great portrait photographer to write a comprehensive guide to the topic. When I met Aussie celebrity photography Gina Milicia last year I just ‘knew’ she’d be great at it and was so excited when she agreed.

    Gina’s new eBook is available today – it is called Portraits: Making the Shot and if you pick it up during its launch we’ll throw in a special bonus eBook with it for free.

    What this Portraits: Making the Shot Covers

    Gina has broken down her guide to portraiture into 5 great sections:

    • The Rules: learn the 10 commandments that Gina uses to guide her photography to consistency (and brilliance)
    • The Gear: discover the best portrait gear with some tips on buying great second hand additions to your kit.
    • The 3 Amigos: This is where many beginner photographers get themselves into a twist, but it’s a lot simpler than you might think. Learn how aperture, ISO and shutter speed work together.
    • The Lights: Step-by-step instructions on using light meters, balancing daylight and flash and creating beautiful skin tone.
    • The Moves: Every pose you’ll need and how to create it, as well as tips on finding inspiration, the importance of preparation and insider tricks on directing the shot.

    Free Bonus Portrait Recipes eBook

    As a companion to Portraits: Making the Shot Gina also put together a 2nd great ‘Recipes’ eBook in which she shows 14 of her favourite portraits and shows you the ingredients she used to take the shots. In each recipe you’ll learn about how Gina set the scene, what gear she used, how she lit the image, what settings she chose and how she posed her subject.

    Once you understand how these different ingredients work together, you can begin to create your own signature style of shooting portraits.

    This Recipe eBook will normally retail for $ 9.99 but pick up Portraits: Making the Shot today for $ 19.99 and we’ll throw it in for free as an early bird bonus (effectively a 33% discount).

    Pick Up a Copy Today

    As usual Portraits: Making the Shot is covered by a 60 day money back guarantee (if you don’t find it helpful just let us know and we’ll refund your money) so you can have confidence that it and the bonus Recipes eBook will be a worthwhile investment in your photographic learning.

    Learn more about the eBook here or pick up a copy by clicking the ‘Download it Now’ button below.

    // < ![CDATA[ function EJEJC_lc(th) { return false; }

    // ]]>

    Post originally from: Digital Photography Tips.

    Check out our more Photography Tips at Photography Tips for Beginners, Portrait Photography Tips and Wedding Photography Tips.

    Pick Up Our Brand New Portrait eBooks and Get a Free One [Limited Time Only]


    Digital Photography School