Category: Photography

  • How I shot and edited it: The Second Severn Crossing

    Second Severn Crossing - how I shot and edited

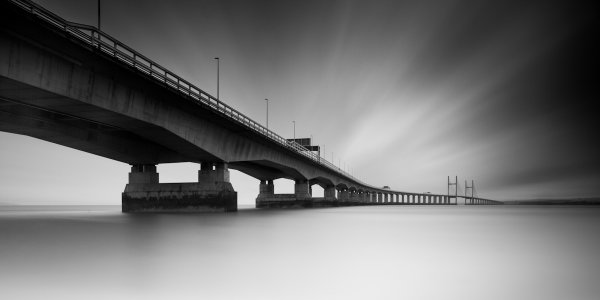
    The image above is a long exposure taken of the Second Severn Crossing, a motorway bridge that crosses the River Severn, just outside Bristol, England.  I have been asked a number of times how this image was processed, what software/plug-ins were used, so I thought it would be a useful exercise to explain it here.

    Shooting the image

    I had been thinking about this shot for a while and I knew that there were a couple of important elements that I needed to consider when trying to capture the image:

    • I was really keen to get low, relative to the bridge, and shoot a wide-aspect image across the river.   Fortunately, there is a footpath that runs along the river bank, under the bridge, that is easily accessible by car (Google maps link).
    • I wanted to capture a long exposure so I could contrast the movement of the clouds against the static structure of the bridge.  Therefore, there was no special planning in terms of weather or time of day, as I was happy with a cloudy sky in the middle of the day, as long as there was a strong wind – fortunately, over the 2012 Christmas period, the UK offered those conditions in abundance.
    • I wanted to fill the frame with silky-smooth water, so as the River Severn is a tidal river with one of the largest tidal ranges in the world, I ensured that I would arrive at the location around high tide.

    The image, as captured straight out of the camera, is shown below:
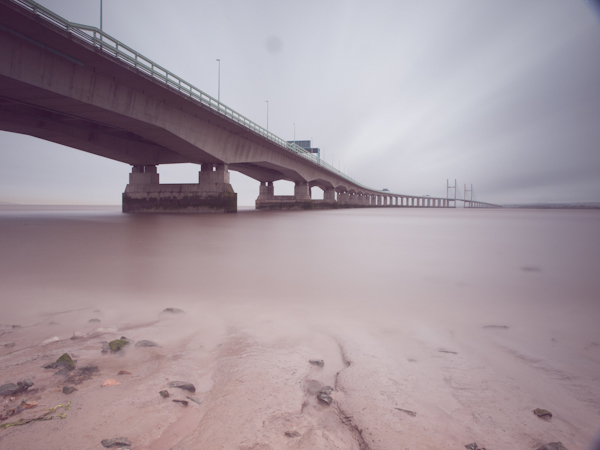
    How I shot and edited - second severn crossing - image 1

    The image was taken at ISO100, 12 mm, f/10, with a 5 minute exposure (299 seconds to be precise).  I used a 2-stop graduated neutral density filter to evenly match the exposure of the sky with the river, and used a 10-stop neutral density filter to produce the long exposure.   As the highlights of the scene were easily contained, I over-exposed the image to ensure that I captured the maximum amount of movement in the clouds, knowing I would be able to correct the exposure/contrast during post processing.

    Processing the image

    The processing of this image was performed in Adobe Lightroom 4.

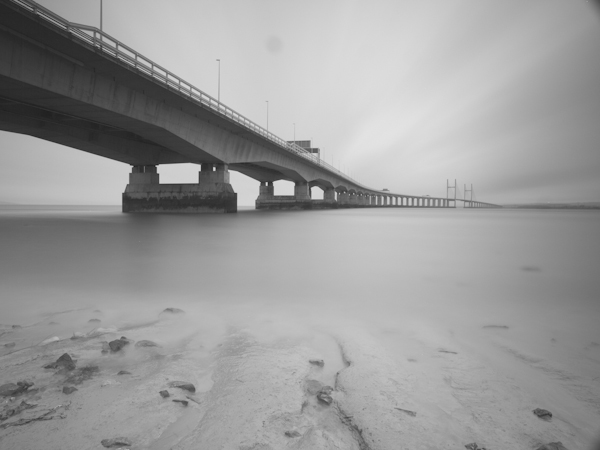
    The first step was to convert the image to black and white using the B&W selector in the colour panel (on the development pane).
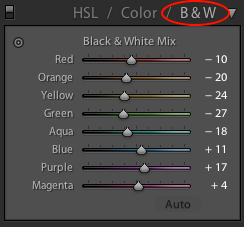
    lightroom BandW selection

    How I shot and edited - second severn crossing - image2

    The initial image after a straight B&W conversion, lacking in contrast

    Given the significant amount of foreground, I decided to crop the image at this point, using a 2:1 aspect ratio, to give the wide-aspect image I was after and to stop the foreground being a distraction during the rest of the processing.
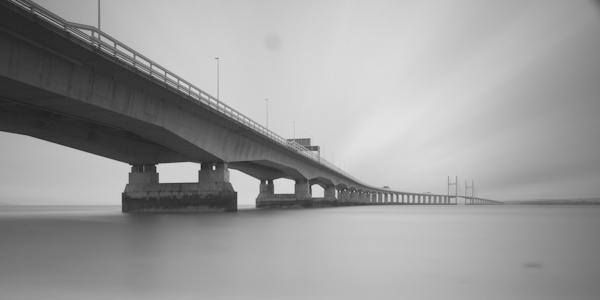
    How I shot and edited - second severn crossing - image3

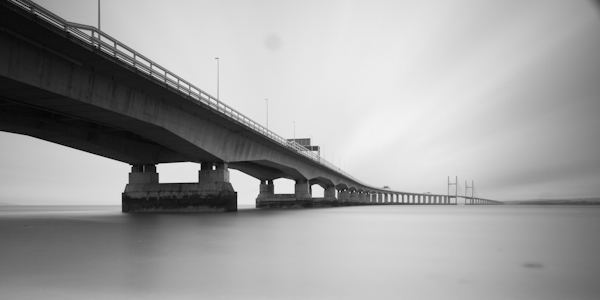
    Cropped to a 2:1 aspect ratio

    I then needed to address the lack of contrast and over-exposure of the initial image.  Therefore, I set the white (+33) and black (-40) points and adjusted the contrast (+40) to set the overall exposure for the image.
    How I shot and edited - second severn crossing - image3-1

    Initial exposure adjustments made

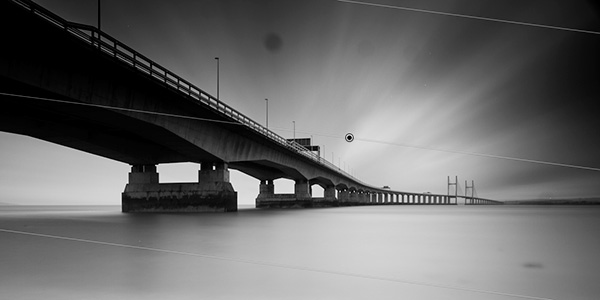
    I then applied a graduated filter to the sky (shown below) to adjust the exposure (-1.74), contrast (+100), clarity (+100) and highlights (+12).  I wouldn’t usually increase either the contrast or the clarity to +100, let alone both, but in this instance doing so acts to bring out a full range of tones within they sky and so emphasise the movement captured in the clouds (the increase in contrast/clarity is also a very good way of highlighting any dust spots present in an image!).
    How I shot and edited - second severn crossing - image4

    Showing the graduated filter being applied to give impact to the cloud movement in the sky

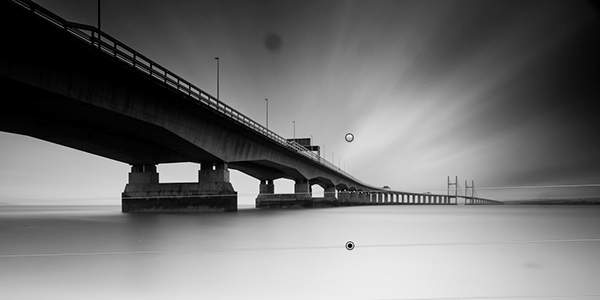
    Next, I applied a graduated filter, from the bottom of the frame, to the water (shown below).  I used it to increase the exposure (+0.80) and reduce clarity (-100) in order to brighten the water and reduce the local contrast to give that bright, smooth water effect that can be key to an image such as this.
    How I shot and edited - second severn crossing - image5

    Showing the graduated filter being applied to the lower section of the image to smooth out the water

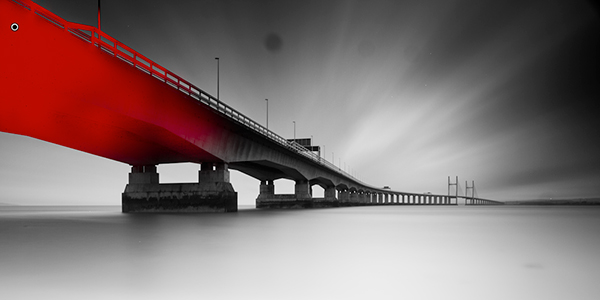
    When applying the graduated filter to the sky, it also acted on the bridge in the top left corner of the frame, making it overly dark, losing detail.  Therefore, I used the adjustment brush to paint a mask over the affected portion of the bridge, using a low flow, in order to be able to build up the desired effect gradually.
    How I shot and edited - second severn crossing - image6

    The mask drawn with the adjustment brush is shown in red

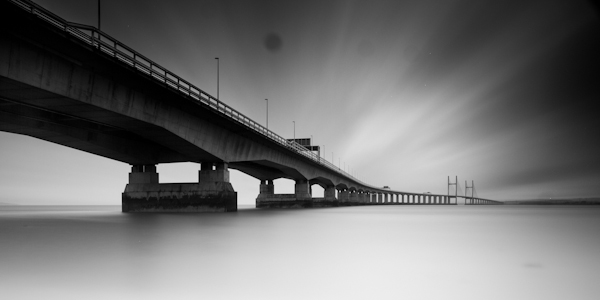
    To the adjustment mask, I applied an increase in the exposure (+1.08) and shadows (+18) to bring out some of the detail in the bridge that was lost after applying the graduated filter over the sky.
    How I shot and edited - second severn crossing - image7

    Nitce the extra detail now visible in the upper left portion of the bridge after application of the adjustment mask

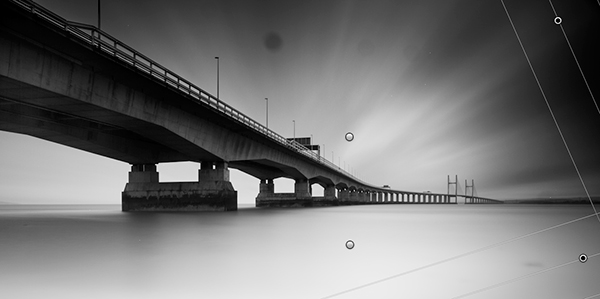
    I then applied a graduated filter to each corner on the right hand side of the image, shown below.  The top graduated filter was required to subtly blend a vignette caused by me stacking the 10-stop filter and the ND filter holder.  The bottom graduated filter was required to tone down the water at the edge of the frame.  The exposure was reduced in both instances.
    How I shot and edited - second severn crossing - image8

    The two final graduated filters shown merged into the same image here)

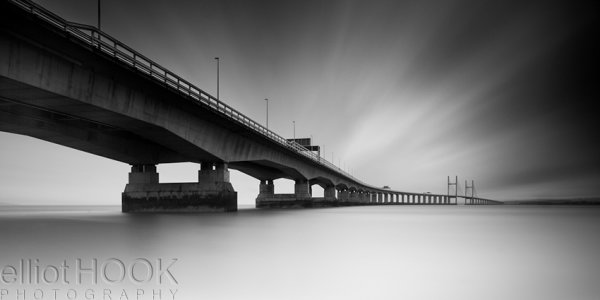
    The final edit that needed to be made to the image was to remove all of the dust spots (you’ll be glad to know I’ve since had my sensor cleaned) and hot pixels (the bright white pixels that result from the extreme exposure time) to give the final image:
    How I shot and edited - the second severn crossing - final image

    The final image (click to enlarge)

    So there you go, using a few relatively simple edits, it was possible to produce this high-contrast black and white long exposure without the need for any additional plug-ins or software packages outside of Lightroom 4.  The initial image may have lacked impact and that can often be the case with long exposure shots, however by shooting in raw, you can exploit the captured detail to create the image you had envisioned.

    If you would like some tips to help you take long exposure images, such as the one above, please check out this earlier post.


    Post originally from: Digital Photography Tips.

    Check out our more Photography Tips at Photography Tips for Beginners, Portrait Photography Tips and Wedding Photography Tips.

    How I shot and edited it: The Second Severn Crossing

    Digital Photography School

  • 8 Years Ago: First Impressions of New Waterproof Camera – Pentax Optio WP

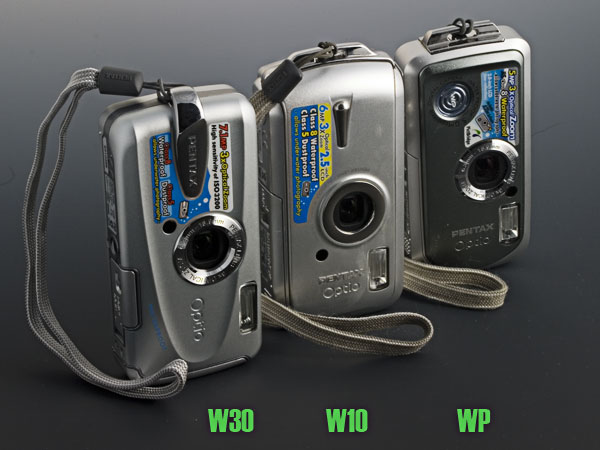
    Pentax Optio W cameras

    In April of 2005 I bought my first digital waterproof camera – Pentax Optio WP. It was pretty unique little camera at that time which really changed my paddling photography and blogging. Since then, I have upgraded through several models of Pentax Optio as seen on the picture above.

    Currently, I am using Pentax Optio WG-2. You can already buy a newer version, Pentax Optio WG-3, and several other similar waterproof cameras from other manufactures. Pentax Optio, whatever version, stays always attached to my life jacket and ready to use.

    Here is what I wrote 8 years ago …


    pentax optio wp
    April 26, 2005
    Canon PowerShot S40 with or without waterproof case has been my main paddling companion. Most pictures on my paddling website are produced by that 3 year old camera. Occasionally, I am also using my digital SLR camera Canon 10D, e.g., in my solo paddler, solo photographer series.

    However, I was thinking about a camera I could take to Texas Water Safari. It would need to be small and waterproof. The Canon PowerShot in the waterproof case would be too heavy, too bulky and too awkward to operate for a tired racer at the edge of hallucination. I am ready to add no more than a weight of one or two power bars to my racing setup. A tiny and waterproof Pentax Optio WP provides some hope here.

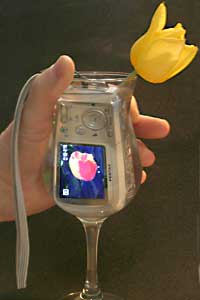
    It is waterproof! The camera has survived a first shooting in a rain during my Big Thompson River paddling and a 15 minute photo session in a glass of water.

    It is small, compact, and it looks pretty solid without any protruding parts. A zoom lens is always inside a waterproof case behind the protective glass. The small size has, however, some downsizes. A grip is much less secure than with my larger Canon PowerShot. It is difficult to operate zoom control when holding the camera in a one hand. I had problems to get sharp pictures when shooting with one hand from my tippy Sisson kayak. No problems when both hands are available for photography.

    The camera turns on very quickly just with a touch of a button. No need to uncover lens and wait for zoom lens to extend as in my Canon PowerShot.

    There is no viewfinder, just an LCD display. It is difficult or impossible to read it in a direct full sun. However, I am ready to accept that compromise in a digital camera, where I can always review the picture and/or histogram after a shot.

    As a somewhat advanced photographer I like to have more control over camera operations that it is possible in the most of “idiotproof” point-and-shoot cameras. So, it is easy for me to point out what I am missing in Pentax Optio.

    Typically, I am shooting my paddling pictures in Av (aperture priority) mode. The aperture (depth of field) is set to a maximum value and the camera automatically selects the exposure time. If the exposure time is too long for a handheld shooting I am adjusting aperture or, as a last resort, sensor ISO speed. There is no Av (or Tv) mode in Optio. Instead, there are numerous (20 or so) automatic shooting modes from landscape, to portrait, to food or museum. I guess it’s not much different than in other similar point-and-shoot cameras.

    I am taking advantage of locking the exposure setting (AE lock) In my Canon cameras – locking the exposure on the specific subject and the recomposing the image. I’ve found that feature extremely useful in my paddling photography. It can be used only in Av or Tv mode, so it’s not available in Optio. There is a exposure compensation in Optio. However, I’ve rarely used it in my Canon cameras. I just prefer to check different parts of my scene with the AE lock until the exposure of the entire picture looks OK. I will need to change my shooting habits … All pictures made with Pentax Optio during my Big Thompson River paddling were shot in the basic picture taking mode – P.

    canoe paddling canoe paddling paddling Colorado

    Judging from my recent paddling on Big Thompson River and Beaver Pond, the camera is not only waterproof but also attracts a wet weather …

    Anyway, Pentax Optio looks promising for my paddling and racing needs. I am going to post next comments after more paddling and shooting in different conditions and after some more systematic exploration of the camera features. The ultimate test for the camera will be the next Texas Water Safari. The Pentax Optio needs not only to survive the race but also to produce a good photo story!


    Pentax Optio WP did really well in 2005 Texas Water Safari and, next, in other ultra marathon paddling races.


    paddling with a camera

  • Silhouettes: Weekly Photography Challenge [With 18 Examples]

    This week your photographic challenge is to shoot and share a Silhouette image.

    lovers moments  +4 inside

    Silhouettes are images that often have a lot of drama and visual punch – yet they are not that hard to take. Here’s how to photograph stunning silhouettes.

    Looking for more inspiration: Check out these 12 great examples of silhouettes.

    Ninja Portrait, Take 2

    Keep in mind that silhouettes can be much more than just a person standing in front of a pretty sunset.

    There need not be people in them at all.

    A Black Sun

    Ladybird Silhouette

    Silhouettes can be Subtle.

    alphaville

    Silhouettes can be shot indoors.

    Untitled

    Let's Pack Our Bags And Fly Away

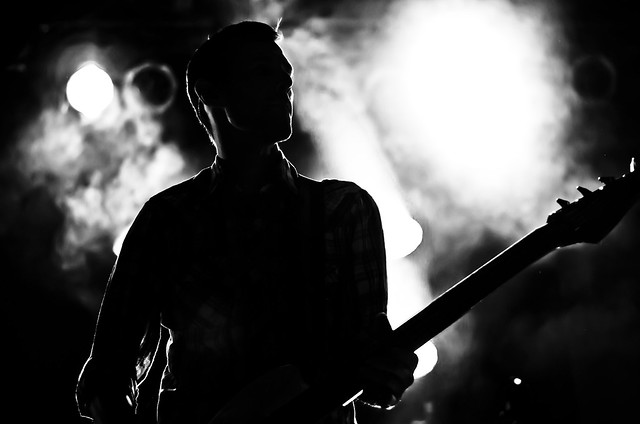
    Silhouettes can be created with artificial light.

    Bassist in the Light

    Hot shoes.

    Silhouettes can be colorful.

    Silhouette Shooter

    Underwater World

    Silhouettes can be in Black and White.

    Revelation

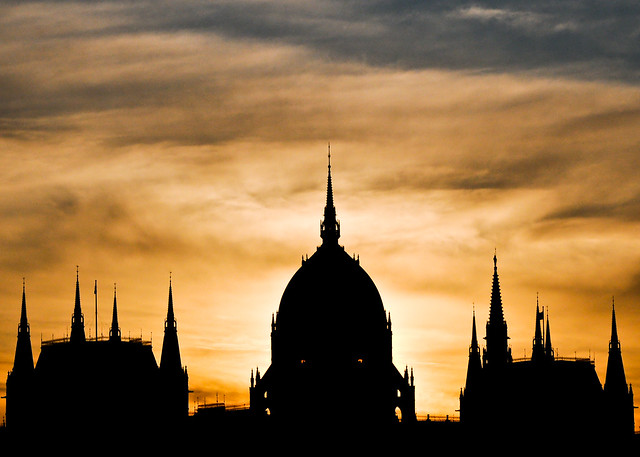
    Silhouettes can be of structures.

    Hungarian Parliament Building Silhouette ~ Explored ~

    Colombian Training Ship ARC "Gloria"

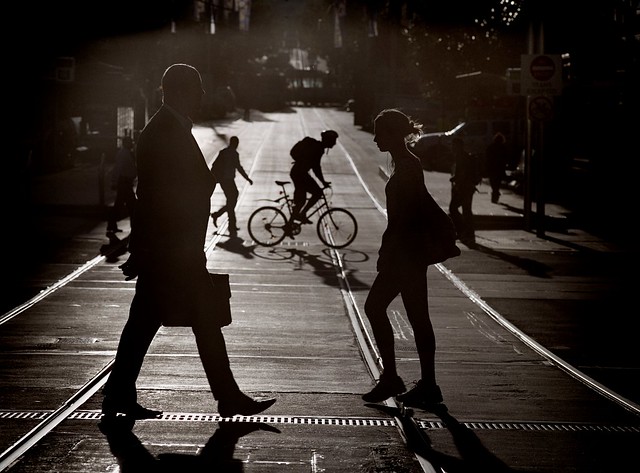
    Silhouettes can be Candid.

    seven thirty bourke street

    Silhouettes can be Posed.

    To Endure or To Abandon ... ?

    Silhouettes can tell Stories

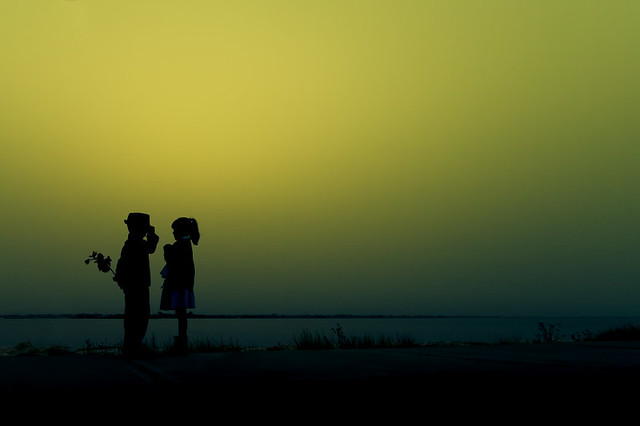
    Day 100/365 "Marry Me?"

    Silhouettes can convey a sense of place.

    Sunday sunset on Rabat beach

    Let your imagination and creativity run wild!

    Once you’ve taken your ‘Silhouette’ image and have upload it to your favourite photo sharing site either share a link to it or – embed it in the comments using the our new tool to do so.

    If you tag your photos on Flickr, Instagram, Twitter or other sites with Tagging tag them as #DPSSILHOUETTE to help others find them. Linking back to this page might also help others know what you’re doing so that they can share in the fun.

    Also – don’t forget to check out some of the images posted in our last challenge – Delicate challenge where there were some great images submitted.

    Post originally from: Digital Photography Tips.

    Check out our more Photography Tips at Photography Tips for Beginners, Portrait Photography Tips and Wedding Photography Tips.

    Silhouettes: Weekly Photography Challenge [With 18 Examples]


    Digital Photography School

  • Color Correction: How to Salvage An Image With Defective Color in 10 Minutes

    Have you ever taken a photograph of something beautiful only to later find that the resulting image lacks the vivid colors and energy that were present in-person? Fortunately, Photoshop offers a plethora of color correction tools that can help you salvage images with defective color. This guide will teach you how to utilize Photoshop’s color correction tools so that you Continue Reading

    The post Color Correction: How to Salvage An Image With Defective Color in 10 Minutes appeared first on Photodoto.


    Photodoto

  • In-Depth: The New Fujifilm X100s

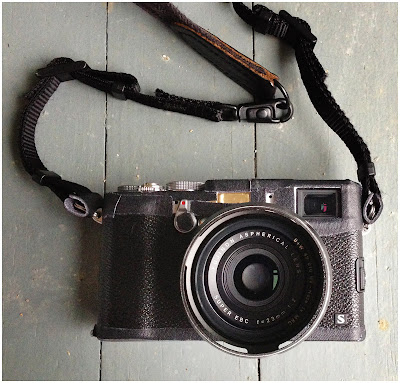
    Those of you who follow on other channels—Flickr, Twitter, G Plus—know I have been getting acquainted with the new Fuji X100s for the past few weeks. Seen above, I have purposely gaffed mine up and trashed the shade to make it look not worth stealing (and otherwise less noticeable) when I travel with it.

    Reader's Digest Version: It's a remarkable, sync-at-any-speed camera with a no-apologies 16mp chip. I'll probably make more pictures with this camera over the next year than all of my other cameras combined.

    Why, below.

    Read more »
    Strobist

  • 5 Easy Ways To Screw Up a Photo

    Over the years I’ve screwed more photos than I can count.  And recently, when I was thinking about it, there have been a few constants behind many of these screw-ups.  They are all easy to fix, but in our fast moving world they are all mistakes that are so easy to make.  Here’s a short list to help us both avoid them in the future.

    1.  You don’t focus exactly on a person’s eye.

    1-anne-marieThis point could be taken further by just saying to always make sure to focus on the specific spot that you want the sharpest.  But I find this mistake hurts the most when doing a close-up portrait of a person’s face.  If you are using a shallow aperture, or even if you’re not, make sure that the focus is right on the dominant eye.  If you screw up focus on the eye in this type of portrait, then you screw up the shot.  When you view the portrait on a small monitor or in a very small print, it may not matter, but if you want to create a high quality portrait, then you need the focus on the eyes to be correct.  The eyes are the key to a portrait.
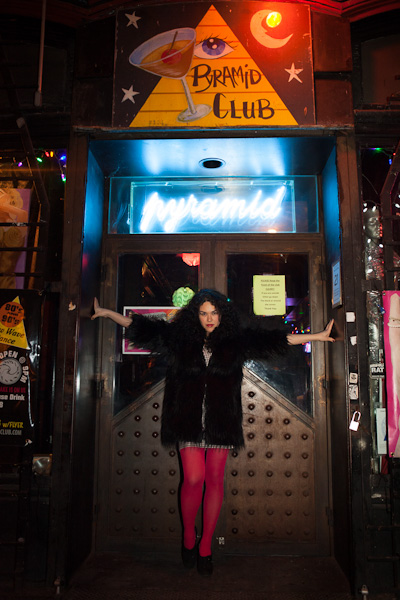
    2.  Not stopping your motion completely before you take a shot.

    I am generally a very calm person, but nothing makes me want to shake people more than when I see them not stop themselves fully before taking a photo.  It can be a tough habit to break, especially on vacation, however, the fact is that your photos will be blurry if you don’t stop yourself.

    If you are traveling and taking photos, try taking less pictures and instead wait for the most interesting moments. Then, take your time on the shots that you do want to take.  If you’re walking around and quickly taking shot after shot without stopping then you might as well just put the camera away and enjoy the view without it.  And anyway, it’s so much better to have 20 amazing shots from your trip instead of 1000 mediocre ones.  Who has time to look through 1000 mediocre shots these days anyway? We have more important things to do, like looking at photos of cats doing ridiculous things on the internet.

    3.  Not stopping a forced smile. 

    Sara

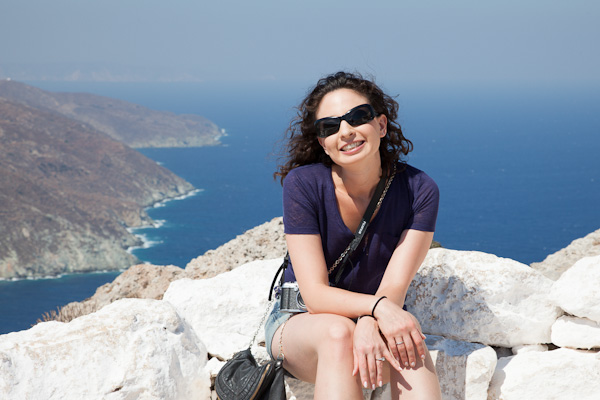
    Here’s a portrait of my wife on our honeymoon.  Isn’t she gorgeous!  The warm lighting on her face, the wind in her hair, the texture in the foreground mixed with the incredible cool blue background are all perfect.  But I wasn’t thinking.  I should have taken her bag and the camera, maybe taken a shot without the sunglasses to see her beautiful eyes, and just taken my time to capture a really good quality portrait.  Most importantly, I should have told her not to smile.  This moment just screams out for a natural expression.

    Most of the time people don’t look better or even happier when they put that forced smile on their face.  It wasn’t necessary here, I should have noticed it, and I should have worked to catch her with a more natural expression.  I like this photograph of her, but I screwed up and it could have been so much better.  One standard smile and a couple small details can be the difference between an average family snapshot and the best shot you’ve ever taken of your wife.

    4.  Using too much straight on flash and not enough natural light.

    One of the cardinal sins of photography is the harsh, direct flash showing every pore and detail of a person’s face with the background completely blacked out.  In a few extremely dark situations this might be the only option.  However, if you have a decent lens and camera and there is even a little ambient light, then there is no reason that a flash needs to do all the work, or in many cases, any of it.  You should own a lens that can shoot at least at F2.8.  I know lenses are expensive, but you can get a prime Canon 50mm F1.8 lens for $ 100 and a 50mm F1.4 lens for $ 350.  Those lenses can shoot in the dark.

    So if you’re shooting an event, a family function, or an environmental portrait in a place with a low level of light, start with a high ISO and a low aperture to see how much of the available light you can use.  Then, set your flash to provide some fill for the main subjects.  Straight on flash, even as a fill can be a terrible look, so if the ceiling is low enough, a good strategy is to bounce the light up and slightly backwards off the ceiling.  Anything but straight on.

    Jacquelyn

    1/50th at F2.8, ISO 1600 – Ambient light mixed with direct flash from a 45 degree angle.

    5.  Not getting the exposure perfect in the camera.

    I know, I know, you can fix it in Lightroom later.  But try this.  Take two shots of the same scene, one exposed correctly and one underexposed by a stop.  Then raise the exposure by a stop on the underexposed shot in Lightroom.  They look different.  The colors and contrast will be slightly off.  It’s not the same.  And yes, maybe you can get it to look similar or equal to the correctly exposed shot with a bit of work and futzing, but what if you don’t have that correctly exposed shot to compare it to?

    Try hard to capture the perfect exposure in the camera.  It’s not always possible, but it’s always important.  And it will improve your images significantly.


    Post originally from: Digital Photography Tips.

    Check out our more Photography Tips at Photography Tips for Beginners, Portrait Photography Tips and Wedding Photography Tips.

    5 Easy Ways To Screw Up a Photo


    Digital Photography School

  • Introduction to Lightroom

    Do you have Lightroom but feel like you’re not using it to it’s potential? Have you heard about the power of Lightroom but are not sure if you’ll be able to learn it?

    The following video is the introduction from Phil Steele’s ‘Lightroom Made Easy’ video which is currently 30% off at SnapnDeals.

    It’ll give you a taste for Phil’s style but also give you a good simple (and free) introduction to what Lightroom is and how it is different from many other types of photo editing software.

    Pick up the full Lightroom Made Easy video course for 30% off (just $ 33) via SnapnDeals for the next few days only.

    Post originally from: Digital Photography Tips.

    Check out our more Photography Tips at Photography Tips for Beginners, Portrait Photography Tips and Wedding Photography Tips.

    Introduction to Lightroom


    Digital Photography School

  • How To Know You Are Ready To Become A Professional Photographer

    By Annie Tao

    Many photography enthusiasts contact me because they want tips on how to make their dream of becoming a Professional Photographer a reality. I am a believer and an example that it is possible to make your life’s passion a profession. The key is to not just start a business, but rather, to sustain it by being profitable and happy. That is success!

    Annie Tao Photography Bay Area Burlingame lifestyle family photography family sitting on a bench in backyard 3

    There are a multitude of books you can study and courses you can take about this very subject. Below is a short list of topline things you should consider based on my own experience. It will give you a starting point of things to think about and do.
    You are ready to make the leap from Aspiring to Professional when…

    1. You know your equipment like the back of your hand.

    You should be well versed in your camera settings, lenses, lighting equipment, etc. Getting a good image is about skill and experience, not luck. So know your stuff before you start charging for your services.

    2. You know that being a Professional Photographer is much more than understanding how to take photographs.

    When you make photography your business, you are actually only shooting a small percentage of the time.

    At some point in your career, you can choose to outsource or hire staff to do some of these activities, but when you start out, a larger portion of your time will be filled with things like, communicating with clients and potential clients, culling and editing images, balancing your budget, selling products and services, marketing yourself and your business, fulfilling orders, and drafting client contracts.

    Being a Professional Photographer means being an Artist and a Business Person.

    Annie Tao Photography Bay Area East Bay lifestyle family photography family laughing on tree branch with sun flare

    3. You have a Business Plan.

    You’ve answered critical questions, such as: Who is your target client? How will you market yourself and your business to your target client? What is your pricing strategy for Year 1? Year 2? What products will you sell? What kinds of services will you provide? How will you differentiate your business from others in your area?

    Do this before you start your business. It will be harder to shift business strategies later.

    Annie Tao Photography East Bay lifestyle couple photography woman laughing while leading man with golden hour sun

    4. You’ve built a portfolio that represents your style and shows consistency.

    Once you start charging money for your services, you have to guarantee a certain level of quality and produce it consistently. A good portfolio would do most of the selling for you.

    5. You have a means of sharing your work and contact info.

    It’s plain and simple: if people can’t find you, you won’t get any business.

    Before launching a website, make sure you’ve put thought into your brand identity and have optimized your site for searches (known as SEO or Search Engine Optimization). In addition to a website, there are a plethora of social media options to get your business and images noticed, such as Facebook, Google+, Twitter, Pinterest, Flickr. You can protect your images by placing a watermark on them and limiting the file size and resolution.

    Annie Tao Photography San Francisco Bay Area lifestyle family beach photography three sisters laughing under a blanket BxW

    6. You have all your documents in order.

    You’ve registered your business, gotten insurance, filed for a business license (ie, LLC, Sole Proprietorship, S-Corp), and have a contract ready to send your clients when they book your services. You have also spoken with a small business attorney and tax accountant, and have opened a separate bank account for your business.

    Annie Tao Photography San Francisco lifestyle family photography mom and dad reading to baby in the livingroom BxW

    7. You know who you are and what kind of photographer you are.

    This may sound ridiculously simple, but it’s often overlooked.

    Know what specialty you want to have before you start, so you won’t waste your efforts growing a side of your business that you do not love. Especially if you are in a saturated market, stick with your own style – whether it’s a style of shooting, processing, or photography – so you can differentiate yourself from others.

    Do what you love, know your own strengths, and be yourself. This will help you attract the right clients for you. (The right client for Business A is not necessarily the right client for Business B.)

    Starting and running a successful business takes a lot of resources — namely, your money, time, and energy. If you aren’t sure about something (ie, the quality of the images you’re producing, how to use your equipment, the profitability of a shoot), people will feel that uncertainty and won’t invest in you.

    Make the necessary preparations before starting your business, so you can be confident when you do.

    Annie Tao ProfileIf you have additional tips for starting out Pros, feel free to share in the comment section.

    Annie Tao is a Professional Photographer in the San Francisco Bay Area who is best known for capturing genuine smiles, emotions and stories of her subjects.

    You can visit annietaophotography.com for more tips or inspiration and stay connected with Annie at facebook.com/annietaophotography.

    Post originally from: Digital Photography Tips.

    Check out our more Photography Tips at Photography Tips for Beginners, Portrait Photography Tips and Wedding Photography Tips.

    How To Know You Are Ready To Become A Professional Photographer


    Digital Photography School

  • The Winners of the NYIP Photography Courses Are…

    NewImageA BIG thank you to everyone who entered our recent competition to win one of two photography courses from our friends at NYIP.
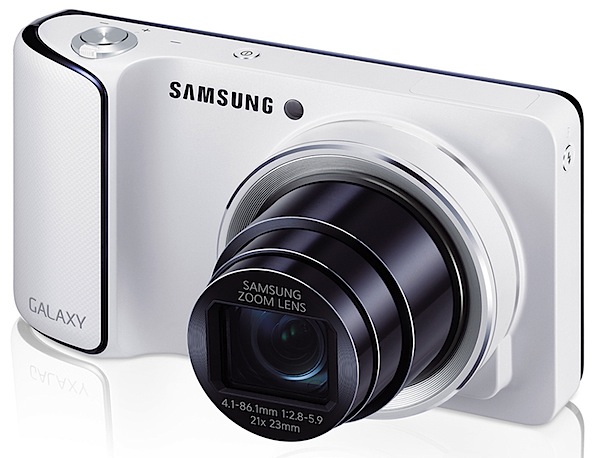
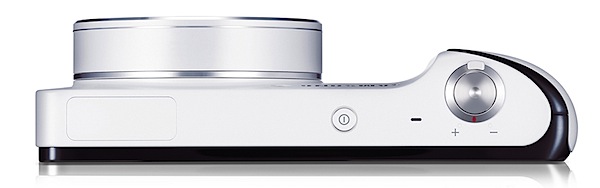
    The response was terrific with over 700 entries. In fact it was so great that the team at NYIP decided to add a bonus 3rd entry for the most creative response!

    They’re also offering a special $ 100 discount on the full price of their two course (details below).

    But first – here’s the 3 winners of the competition:

    • John McClelland wins the Complete Course in Professional Photography
    • Brandon Bethea wins the Fundamentals of Photography Course
    • Stuart Nafey is our bonus winner and also picks up the Fundamentals of Photography Course

    A Message from NYIP (and a $ 100 discount)

    “We’re thrilled with the number of responses we got on this contest. The enthusiasm of DPS readers never disappoints! While the number of winners was limited to one for each course, we want to extend a special discount on our courses to those of you who are still interested in signing up but were not fortunate enough to win.

    From now through the end of the month, you can use the offer code DPS and save $ 100 off the pay in full price for either the Complete Course in Professional Photography or the Fundamentals of Digital Photography. That makes the cost of the Complete Course $ 1099, and the Fundamentals Course $ 299. To take advantage of the offer visit www.nyip.com/enroll/

    Thanks again for all the wonderful submissions,

    The NYIP Team”

    Winners will be emailed with details of how to collect their prize by the team at NYIP.

    Thanks again to everyone for entering and to NYIP for sponsoring this competition.

    Post originally from: Digital Photography Tips.

    Check out our more Photography Tips at Photography Tips for Beginners, Portrait Photography Tips and Wedding Photography Tips.

    The Winners of the NYIP Photography Courses Are…


    Digital Photography School

  • Samsung Galaxy Review

    GALAXY Camera_6.jpg

    As a fan of the Mac I find it hard to avoid news of the constant sniping, litigation and general blazing that is going on between Apple and Samsung over alleged patent infringements, new developments, new products and amazing improvements to existing iDevices.

    However, in a way, I see the Apple vs Samsung barney as a good thing, with the eventual outcomes arriving as radical new devices and/or useful advances in many products.

    So, it is in this environment that I am reviewing a newcomer from the Dark Side! Move over Microsoft, there’s a new boy in town.

    GALAXY Camera_4.jpg

    GALAXY Camera_3.jpg

    As Samsung says: This is the first Galaxy Camera, featuring Wi-Fi connectivity and Android 4.1 (Jelly Bean) software. It combines high performance photography with mobile technology ….

    Straight out of the box, the camera is simply gorgeous in its all-white livery, with dramatic relief as you turn it around to show the enormous 12.2cm rear screen in black (with power off!). Very Apple!

    Whilst it’s pocketable, it is much larger than many compact digicams.

    GALAXY Camera_2.jpg

    If you’re not a patient screen tapper you may find the comprehensive touch screen interface a bit of a challenge at first: you go nowhere unless you tap! External controls are minimal: tiny power button on top, nearby is the shutter button and zoom lever; left edge is where you tap a button to raise the onboard flash cell.

    Flash.jpg

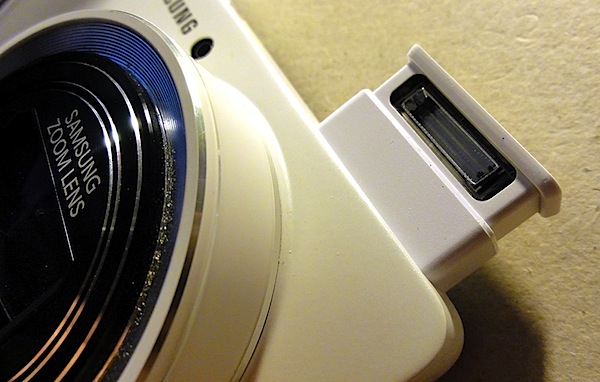
    The camera’s right edge houses a mini HDMI port; beneath the camera is a latch which, when raised gives access to the battery, memory card and SIM card.

    Re the touch screen: once familiar with it I found life to be trés trés easy and much better than many cameras’ convoluted menus.

    To begin with, you must encounter the main screen which has icons for virtually all your needs: apps such as Paper Artist, Instagram and Photo Wizard can be triggered here.

    I immediately went to Camera which took me to the exposure options I needed to run the camera.

    Three on screen options: Auto, Mode and Video.

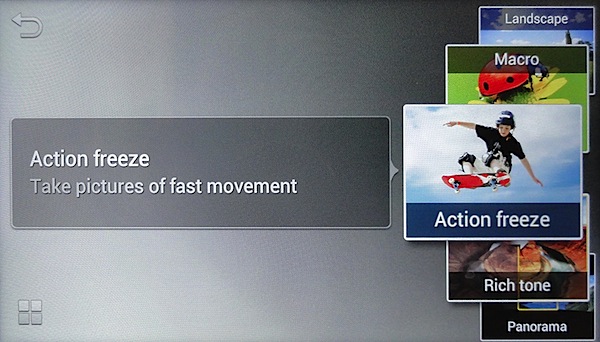
    Mode was my next stop; in this department I could select Auto (again), Smart and Expert. Smart gave me on screen visual examples of image treatments that could impart such effects as Beauty Face, Continuous (a burst of shots), Macro, Rich tone, Light Trace, Panorama etc.
    Expert 1.jpg

    Expert 2.jpg

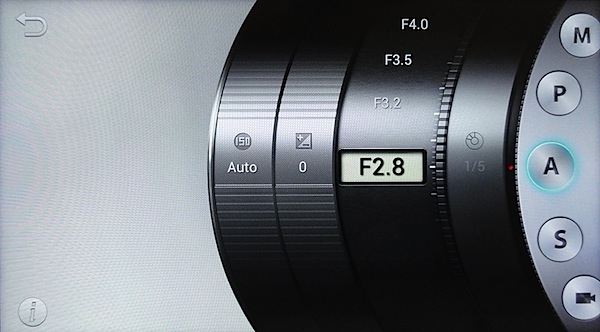
    The Expert option was obviously my next stop if I was to raise my skills above auto shooting: here I could choose Program AE, shutter or aperture priority, manual exposure and video (again). An interesting display: a lens barrel showing choices of ISO setting, exposure compensation and aperture selection.
    Car park full wide 3.JPG

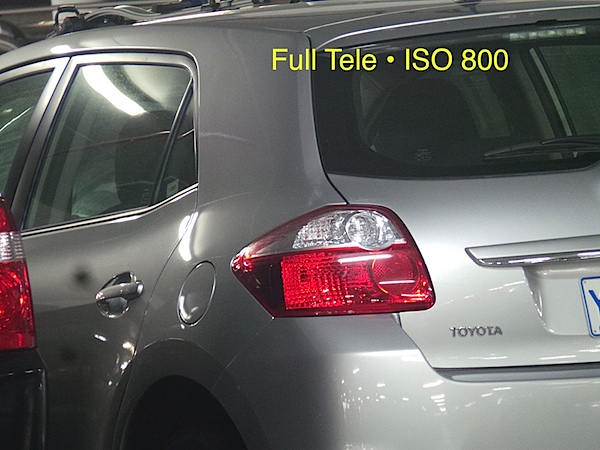
    Car park full tele 3.JPG

    Samsung Galaxy Features

    The maximum lens aperture is f2.8, which shrinks to f5.9 when the 21x zoom is extended to its ultimate 35 SLR equivalent of 481mm.

    Maximum image size is 4068×3456 pixels, leading to a print size of 34x29cm
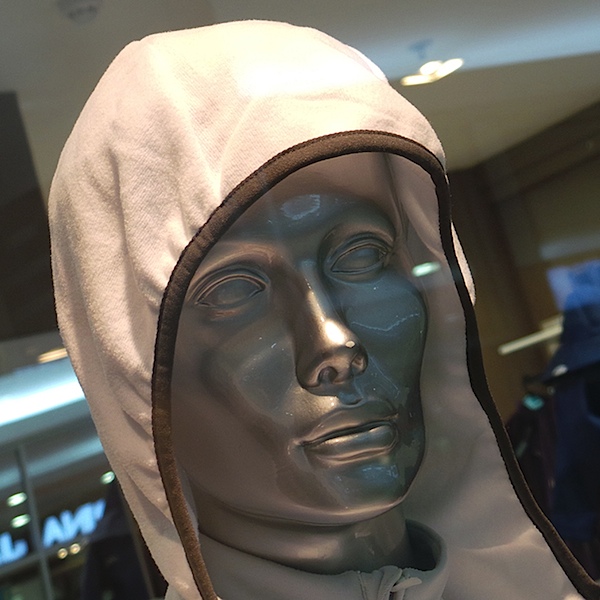
    Shop manikin head 1.JPG

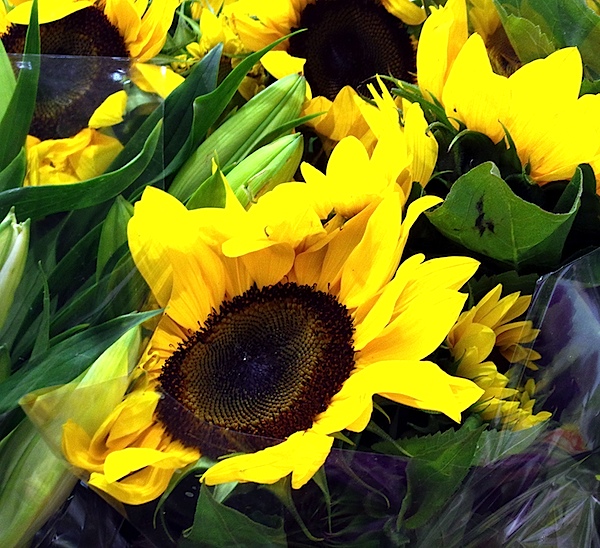
    Sunflowers 2.JPG

    Video can be shot in MPEG4 at 1920×1080 or 720×480 res. I found the Galaxy camera to be excellent as a video camera: it smoothly helped auto focus to sharpen up on subjects as I moved around; the large screen, even held at waist height, made it an excellent viewfinder when on the move.

    There’s a whole heap of fun awaiting for you when you get into the software side of the camera: users can browse the Web and download applications from Google Play or the Samsung Apps stores.

    Voice commands.jpg

    Built in voice control allows you to tell the camera what to do! What a party starter! Simply call out Smile! Shoot! Zoom in! and other commands to get the camera to perform under your control. And it works!

    I did discover that settings such as voice operation on/off, lens aperture setting and ISO and are cancelled after a restart.

    Startup Time

    About 23 seconds before I could fire off the first shot. This possibly because it’s booting the Android operating system.

    Distortion

    No problems at the wide and the tele end of the zoom.
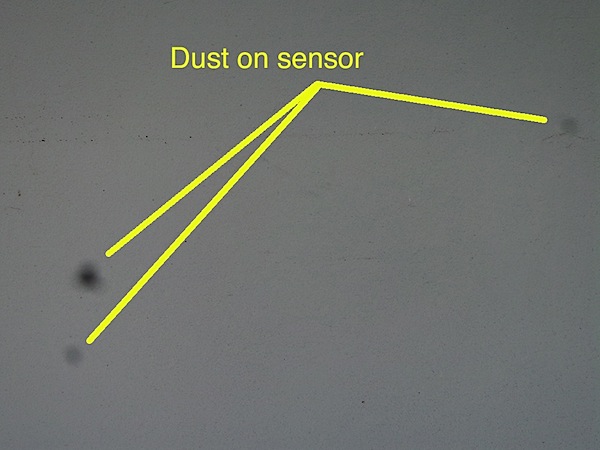
    Dust on sensor.JPG

    Dust Spots

    Hopefully, it was only this camera, but I did find that dust spots appeared when the lens was set at full tele.

    ISO Speeds

    Samsung Galaxy ISO 100.JPG

    Samsung Galaxy ISO 400.JPG

    Samsung Galaxy ISO 800.JPG

    Samsung Galaxy ISO 1600.JPG

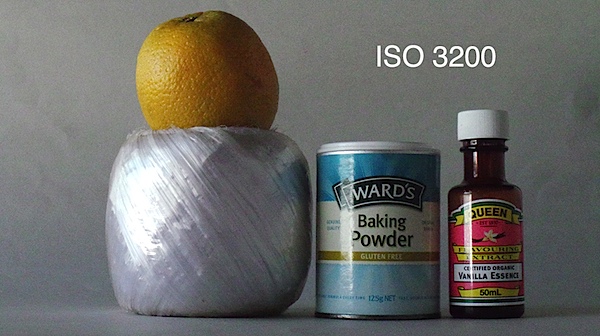
    Samsung Galaxy ISO 3200.JPG

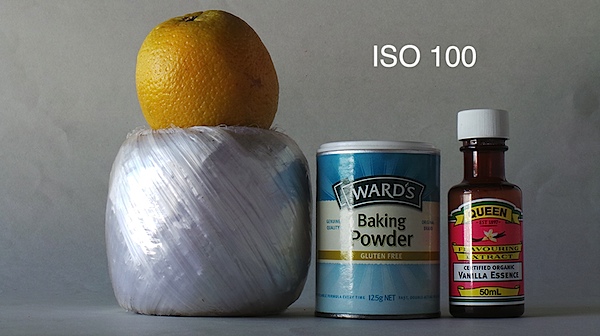
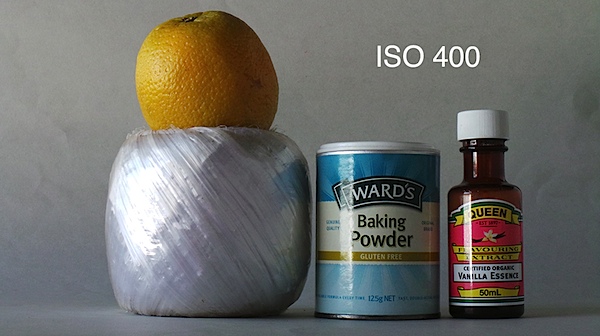
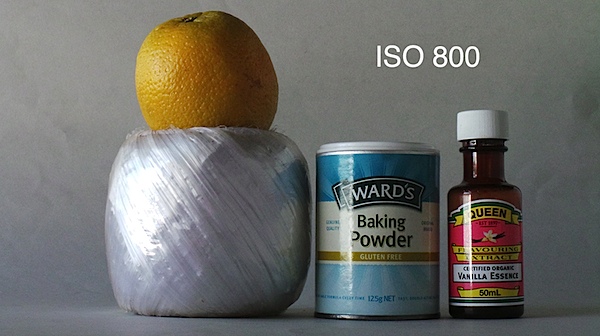
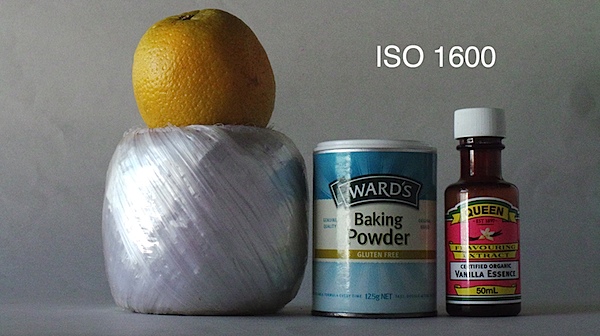
    At ISO 400 a drop in sharpness and a lift in noise is apparent; by ISO 800 these are even worse; by ISO 3200 these problems make the image unusable.

    Samsung Galaxy Review Verdict

    Quality: about average; no more.
    Why you would buy the Samsung Galaxy: it’s the latest iDevice.
    Why you wouldn’t: expensive for a camera; despite its glamorous Android and Wi-Fi trappings it’s no more than a point-and-shoot digicam; you hate touch screens.

    My experience with the Galaxy camera was a positive one. Thrown upon the seeming ‘rocks’ of a totally touch screen menu with no external controls left me with no scars … in fact, it gave me a glimpse of a possible future for digicams totally equipped this way: large screens, no external controls, touch screen operation.

    A few hangups:

    Startup 1.jpg

    Startup 2.jpg

    From a cold start, the camera seemed to take an eternity to get to operational readiness: as I’ve already mentioned, it took about 23 seconds to get going, after a series of glam startup screens.

    The leaflet tucked into the camera box is totally inadequate; go to www.samsung.com/us/support/owners/product/EK-GC100ZWAATT to download a useful 134 page PDF manual.

    Be careful you don’t load a memory card into the SIM slot by accident; it can be difficult to remove.

    If you have difficulty saving images to the memory card, try re-formatting the card. It saved my day!

    Let the fun continue!

    Also in black.

    Samsung Galaxy Specifications

    Image Sensor: 16.3 million effective pixels.
    Sensor Size: 11mm CMOS.
    Lens: f2.8-5.9/4.1-86.1mm (23-481mm as 35 SLR equivalent).
    Image Stabiliser: Optical.
    Metering: Multi, centre-weighted, face detection.
    Shutter Speed: (Auto) 1/8 to 1/2000; (Manual) 16 to 1/2000 second.
    Continuous Shooting: 20 shots at 3.8 fps.
    Memory: micro SD, micro SDHC, micro SDXC cards plus 8GB internal memory.
    GPS Location Tagging: Yes.
    Image Sizes (pixels): 4068×3456 to 1024×768.
    Movies: 1920×1080 and 1280×720 (both 30fps); 640×480 (30 and 60fps) and 320×240 (30fps) and 768×512 (slo mo 120fps).
    Viewfinder: 12.2cm LCD.
    File Formats: JPEG, MPEG4, AAC, WAV etc.
    ISO Sensitivity: Auto, 100 to 3200.
    Interface: USB 2.0, HDMI mini, Wi-Fi, GPS equipped, DC.
    Power: Rechargeable lithium ion.
    Dimensions:129x71x19 WHDmm.
    Weight: Approx. 305 g (inc battery).
    Price: Get a price on the Samsung Galaxy Camera on Amazon.

    Post originally from: Digital Photography Tips.

    Check out our more Photography Tips at Photography Tips for Beginners, Portrait Photography Tips and Wedding Photography Tips.

    Samsung Galaxy Review


    Digital Photography School