Category: Photography

  • Getty Is An Insult To Photographers. Introducing Stocksy [OPINION]

    BadwaterDV-L

    Not Represented By Getty

    I’ve never liked Getty. I’ve gotten through about 80% of the submission process on multiple occasions but could never convince myself to pull the trigger. Sure there are a select and very elite few that make their livings to this day on stock photography. But those photographers have been at this stock game a LOT longer than most of us. Every time I started to submit my work to Getty, I always stopped just short of hitting send. I couldn’t get past the thought of the 20% commission that I would receive for my work. This goes right along with the frustration of getting emails from companies, magazines and the like wanting to use my images for free in exchange for “credit and a link to my website.” But that’s a whole other article…

    We as photographers spend an ungodly amount of money and time on our craft. We spend thousands upon thousands of dollars on camera bodies, lenses, CF cards, SD cards, camera backpacks, camera shoulder bags, straps, extra batteries, laptops, desktops, software, websites, hosting, training, workshops….the list goes on and on and on. We put in all this time and effort and then a company like Getty wants to pay us some slave labor wage of 20%. It’s nothing short of ridiculous. It’s insulting to photographers.

    Thomas Hawk is a very well known photographer in the photo community. He’s one of the most followed photographers on Flickr, Google+ and Facebook. He’s also a very established stock photographer and has had his images licensed/represented by Getty for years now. Well, on Monday Thomas announced (very publicly) that he is quitting Getty and moving to Stocksy. You can read Thomas’ post at his website or over at PitaPixel.

    In his article, Thomas goes over in detail much of what I talked about above. About how absurd it is that Getty is undercutting photographers so drastically. He then goes on to describe the culture behind Getty; how they excommunicate photographers who speak up and express their distaste for what it has become. One photographer who made much of his entire living from Getty recently got ‘fired’ and banned for voicing his opinion. Thomas points out that “At Stocksy; editors and management do Google+ hangouts with photographers. While at Getty all they seem to do is fight.”

    So What Is Stocksy Already!?
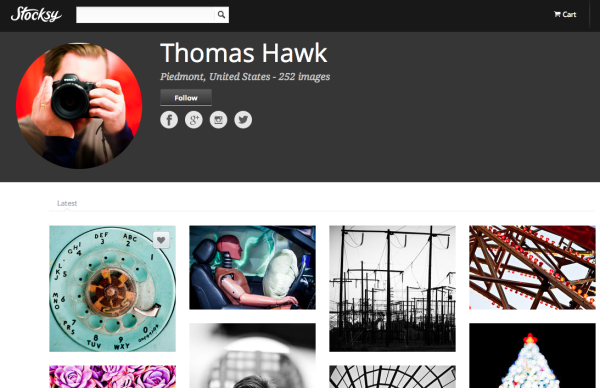
    Screen Shot 2013-03-25 at 4.20.47 PMStocksy could very well be the future of stock photography. Instead of a lousy and insulting 20% for all the hard work that goes in to making stock photographs, Stocksy is going to pay 50%. Right down the middle. You provide the work, they put it in front of buyers. This is fair. Would I like more than 50%? Um, yes. Who wouldn’t? But would I be happy with 50%? Yes.

    Stocksy is also different in the way it’s run. The founder is none other than Bruce Livingstone, the founder of iStockPhoto who sold the company to Getty for $ 50 million (you can read more about that from this article on CNET). According to that article, Stocksy won’t be selling out to large companies like Getty. It doesn’t have a master plan of growing and selling. Livingstone says that Stocksy will be “more like a nonprofit. At the end of the year, we take all the profits and distribute them. We’re not lining our pockets with cash.” It will essentially be a stock agency run by photographers, for photographers.

    Quality Control

    Another way that Stocksy is different is the quality control aspect of it. Let’s face it, Getty pretty much opened the flood gates on Flickr and just about anyone with a camera and some decent images could begin touting that they’re “Represented By Getty.” Stocksy is, at least for now, taking a much different approach. Only letting in very high quality portfolios that meet the level of excellence that Stocksy wants to be known for. I think that’s awesome.

    Conclusion

    Like I said, Stocksy could very well be the future of stock photography. But it’s up to us, the photographers, to make sure that happens. Tell your friends, tell your parents, tell your web designer, your graphic designer, write a blog post, tell everyone. And for the record, I am not part of Stocksy. I submitted my portfolio to them yesterday and am crossing my fingers to make it through. I just think this is a great idea and would love nothing more than to see quality photographers flock from Getty and start getting what they deserve. I think this has been a long time coming.

    Let me know what you think in the comments below or on Twitter. Follow me @jamesdbrandon.

    Post originally from: Digital Photography Tips.

    Check out our more Photography Tips at Photography Tips for Beginners, Portrait Photography Tips and Wedding Photography Tips.

    Getty Is An Insult To Photographers. Introducing Stocksy [OPINION]


    Digital Photography School

  • 3 Ways to get Better Control of Autofocus

    In this post, Steve Berardi from PhotoNaturalist talks about three ways to get better control of autofocus.

    auto-focus.jpgSometimes autofocus can be really annoying. For some shots it’ll focus on the right part of your subject, but then the very next shot it may choose to focus on something far and away into the background.

    Sure, you could avoid this problem by always using manual focus, but autofocus is great when you need to focus quickly or when you’re photographing a landscape and you need to focus on a certain spot in the scene.

    Well, autofocus doesn’t have to be annoying anymore, because here are three ways to get better control of it:

    #1 – Press your shutter button half-way to activate autofocus and then recompose

    Set your autofocus point to the center spot, then point this spot where you want to focus and press your shutter button half-way (don’t press it completely yet) to initiate autofocus. Then, while still holding down the button half-way, recompose your shot and press the button completely down to snap the photo.

    #2 – Switch to manual focus after autofocusing

    Use autofocus as you normally do, but once it focuses on the right spot, just switch off autofocus on your lens to manual focus. Your lens will keep the current focus when you do this. This method works well when your camera is on a tripod and you’re taking multiple exposures from the same spot, like when photographing a landscape.

    #3 – Use back-button autofocusing

    Normally, your camera will autofocus when you press the shutter button, but with back-button autofocusing, you have to press a button on the back of the camera instead, giving you complete control of when autofocus is initiated.

    With back-button autofocusing, you can just set the autofocus point to the center spot, then point that where you want to focus, and finally press the back button to automatically focus on that point. Now for all the shots you take from that position, that focus will be maintained (the camera won’t randomly focus into the background anymore).

    You can do the same thing without this back-button autofocusing by switching to manual focus after the camera focuses properly, but using the back button saves time and this way you don’t have to constantly switch back and forth between manual and autofocus (which can inadvertently move the camera sometimes).

    Back-button focusing is especially helpful for photographing moving subjects, like birds in flight or other wildlife: just switch on the continuous focusing mode, set the autofocus point to the center spot, and hold down that back button. Now you don’t have to worry about accidentally hitting the shutter button while you’re tracking the subject in your viewfinder.

    How to enable back-button autofocusing: Unfortunately, this feature is called something different on each camera, so you’ll probably have to do some digging around in your camera’s manual and “custom functions” to find it. If it’s not labelled clearly on your camera, try changing the settings of the different buttons on the back of your camera (like the AE lock button).

    steve.jpgAbout the Author: Steve Berardi is a naturalist, photographer, and computer scientist. You can usually find him hiking in the beautiful mountains and deserts of Southern California. Read more of his articles on nature photography at the PhotoNaturalist and follow him on Twitter.
    Post originally from: Digital Photography Tips.

    Check out our more Photography Tips at Photography Tips for Beginners, Portrait Photography Tips and Wedding Photography Tips.

    3 Ways to get Better Control of Autofocus


    Digital Photography School

  • Sony Cyber-Shot RX1 Review

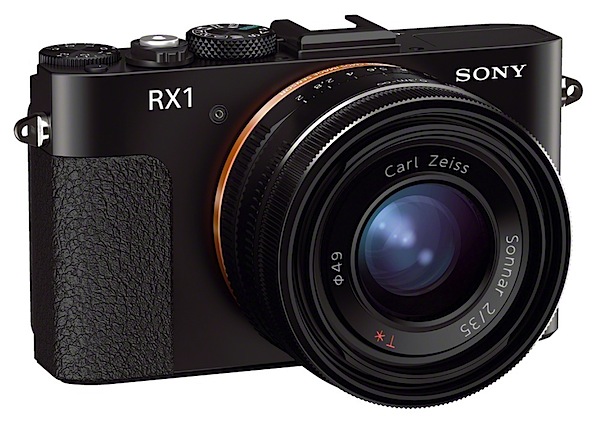
    Sony Cyber-Shot RX1 Review.jpg

    When reviewing this camera’s direct predecessor, the RX100, I remarked that Sony’s claim it was “The best pocket camera ever made” was a bit steep. Part of my scepticism was the company’s claim that its sensor was considerably larger than the rest of the crowd …. In reality, the CMOS’ diagonal figure measured only 15.8mm, packed to the brim with 20.2 million effective pixels.

    But, with the RX1, we really start to talk real figures.

    Sure, the asking price tops out at around $ 3000.

    But, check the specs!

    Sony Cyber-Shot RX1 1.jpg

    Sony Cyber-Shot RX1 back.jpg

    Sony Cyber-Shot RX1 top.jpg

    Sony Cyber-Shot RX1 Features

    The CMOS sensor is within a bat’s whisker of a 35mm full frame, so the fixed f2/35mm Carl Zeiss Sonnar T* lens delivers a full frame image.

    Justifiable claim: “world’s first compact camera with 35mm full-frame 24.3 effective megapixel sensor.

    In size, it is close to many other high end compacts, such as Panasonic’s LX7, Nikon 1 V2, Fujifilm X-Pro1 and others.

    With the RX1 we enter Cartier-Bresson territory as he patrolled the streets of Paris with a Leica and a 50mm lens. He covered the chrome camera in black tape or even a handkerchief to conceal it. With the RX1 you don’t need to disguise it, as it’s already finished in black!
    So it’s a certain type of camera for certain types of photography.

    Not sports! However, fast action can be captured successfully with the 5fps continuous shooting speed. Just keep the subject close!
    Fisherman's beach pano 1.JPG

    Perfect for people pictures. Works exceedingly well for shooting panoramics, thanks to Sony’s excellent Sweep Panorama feature. Scenics? Yes.

    Fisherman's beach winch.JPG

    Macro subjects? Yes but 35mm is far from ideal as a macro focal length, especially as the camera-to-subject distance needs to be just 20cm from image plane.
    Macro lens setting.jpg

    However I quite liked the arrangement with the lens front ring: rollable from 0.2m to 0.35m macro to general purpose 0.3m to infinity.

    The maximum image is 6000×4000 pixels which can be printed out to 51x34cm at 300 dpi resolution.

    Video? Yes. Full HD 1920x1080m AVCHD can be recorded. While the AF tracks sell while on the move you cannot shoot stills mid-video recording.

    The ISO range runs from 50 to 25,600 (using the expanded mode).

    Handling

    Straight out of the box the RX1 is a handsome beast, with external controls clearly id’d with largish white text, easy to see even in dim light.

    The camera seems surprisingly heavy in the hand, but well-balanced. Pocketable, just about. But I could have wished for a larger speed grip.

    After fooling around with an HTML file of the instructions, I eventually sourced a PDF file of the manual.

    The tiny 74 page booklet, enclosed with the camera is intended to serve as ‘the manual’ … but with minuscule type, tiny illustrations, cramped pages … hopeless!
    Custom settings.jpg

    Controls

    Front of camera and to the left is a three position button that takes you from auto to manual focus plus another setting that allows you to drive auto and manual focus at the same time … you use auto to begin with, then fine tune with manual. These options are selectable with a tiny knurled wheel that’s a devil to rotate!

    Top deck: the eleven position mode dial has most of what’s needed to drive the camera: auto exposure; PASM; Scene Modes (portrait, sports etc … seven in all); three preset memory settings; movie shooting; sweep panorama. And a C (Custom) button: to this you assign custom functions such as ISO, white balance etc.

    The power lever and shutter button is right next door. Farther right is the three f stop up/down exposure compensation dial.
    Fn button.jpg

    Back: menu and Fn buttons; the movie record button, which is impossibly located on the extreme right corner of the camera body; control wheel; display and trash buttons; flash button. Plus the AEL button: in aperture or manual settings you hold this button down and manually adjust the aperture on the lens itself. Neat.

    Sony Cyber-Shot RX1 ISO Tests

    Sony DSC-RX1 ISO 400.JPG

    Sony DSC-RX1 ISO 800.JPG

    Sony DSC-RX1 ISO 1600.JPG

    Sony DSC-RX1 ISO 3200.JPG

    Sony DSC-RX1 ISO 6400.JPG

    Sony DSC-RX1 ISO 12800.JPG

    Sony DSC-RX1 ISO 25600.JPG

    Cameras such as this are not ideal for ISO test shooting due to their inability to stand back with a long focal length. However…

    At ISO 3200 noise begins to appear. By ISO 6400 sharpness is still OK, noise not objectionable. At ISO 12800 noise is up but sharpness is still acceptable. As you would expect, ISO 25600 delivers more noise, less sharpness but still useable.

    (insert Bowling 1 ISO 800, Bowling 1 ISO 25600)
    Bowling 1 ISO 800.JPG

    Bowling 2 ISO 25600.JPG

    Check out my bowling alley shots.

    Startup Times

    From startup to first shot took about two seconds; further shots came in as fast as I could hit the button.

    Distortion

    Very slight barrel distortion with the 35mm lens. Strange, in such a highly corrected optic.

    Sony Cyber-Shot RX1 Review Verdict

    Quality: excellent, sharp, accurate colour capture.

    Why you’d buy the RX1: full list of features; nice lens; easy to use.

    Why you wouldn’t: heavy price; could be confusing for the novice; with such a high-specced camera I did feel the LCD screen was far too small (and not a vari-angle either!); video quality not as good as I expected.

    Some will find the RX1 perfect for their needs. Others will find it limiting. It’s really a case of horses for courses. Welcome to a finely engineered, specialist camera!

    If the badge said ‘Leica’ there would be not a murmur at the high price ticket! But with the Sony monicker there will, I’m sure, be some buyer resistance. Top lens though!

    To use a camera with a fixed 35mm lens takes some discipline. As I said, a very precise horse for a very defined course!

    Sony Cyber-Shot RX1 Specifications

    Image Sensor: 24.3 million effective pixels.
    Metering: Multi segment, centre-weighted, spot.
    Lens: Carl Zeiss Sonnar T* f2.0/35mm.
    A/D processing: 14-bit.
    Exposure Modes: Program AE, shutter and aperture priority, manual.
    Effective Sensor Size: 35.8×23.9mm Exmoor CMOS.
    Shutter Speed (stills): 30 to 1/4000 second and Bulb.
    Continuous Shooting: 2.5/5 fps.
    Memory: SD/SDHC/SDXC, Memory Stick Pro Duo cards.
    Image Sizes (pixels): Stills: 6000×4000 to 2640×1488.
    Movies: 1920×1080 (AVCHD), 1440×1080 (MPEG4), check!!!.
    Viewfinder: 7.5cm LCD screen (1,229,000 pixels).
    File Formats: JPEG, RAW (Sony ARW 2.3), JPEG+RAW, MPEG4, AVCHD.
    Colour Space: sRGB, Adobe RGB.
    ISO Sensitivity: Auto, 100 to 25600.
    Interface: USB 2.0, HDMI mini, Eye-Fi.
    Power: Rechargeable lithium ion battery, DC input.
    Dimensions: 113x65x70 WHDmm.
    Weight: 482 g (inc battery).
    Price: Get a price on the Sony Cyber-Shot RX1 at Amazon.

    Post originally from: Digital Photography Tips.

    Check out our more Photography Tips at Photography Tips for Beginners, Portrait Photography Tips and Wedding Photography Tips.

    Sony Cyber-Shot RX1 Review


    Digital Photography School

  • Why I Quit Getty Images and Why I’m Moving My Stock Photography Sales to Stocksy

    Dear Getty, I Quit

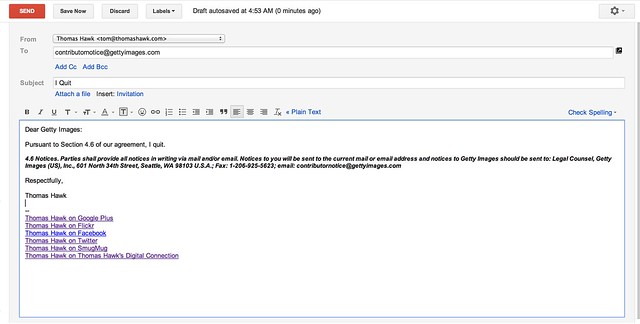
    Dear Getty Images: I quit.

    I just sent Getty Images the email above, which, I think, is how I terminate my relationship with them. Hopefully. I’m not 100% sure, but I can’t seem to figure out any way to do it online, so I’m hoping that email works.

    Why am I quitting?

    Well, I’m sitting here typing this at 4:56 in the morning on my “vacation,” getting ready to get an early up to the top of a mountain in Idaho to shoot sunrise and I’m not a skier. It’s dark, it’s cold — and maybe, just maybe, with $ 10,000 worth of camera gear on my back, I’ll get something that works from this shoot. After I shoot several thousand images today I’ll go home and spend hours and hours processing them. Finally, I’ll upload them online and maybe sell some. If I do sell some though, bottom line is I feel that I’m getting ripped off with Getty’s lousy 20% payout.

    I don’t care how you look at it, for me, 20% is not fair. It’s too low. I’ve been complaining about it for years, but have just grumbled along because Getty felt like the only game in town for stock photo sales. Artists and photographers *deserve* more than 20% payouts. I understand that Getty has the buyers, that Getty is the 800 pound gorilla, but still, photographers deserve a better split than 80/20 against them.

    There are other reasons why I’m quitting Getty Images too though.

    Since the Carlyle Group (read their wikipedia page actually, it’s fascinating) has taken over Getty Images, things seem to have changed. Maybe Getty’s parent is trying to wring as much profit as their stock business as they can, but it feels like artists are getting the short end of the stick even more these days.

    In the private, closed, Getty Photographers group, managed by Getty on Flickr, there were almost 3,500 replies to a thread about Getty’s deal with Google Drive. Whatever you think about this deal, there are ALOT of photographers who are unhappy at Getty about an arrangement where they receive a pittance for their work. The 20% payout is already pretty low, but when you combine it with a $ 12 image buy, some photographers feel that was pushing things too far.

    The fact that Getty made this deal doesn’t bother me as much as how they’ve handled the criticism from their members over it. The above mentioned thread is now closed and locked by Getty Images. As a result of the thread, a member was banned and removed from the group — this is the second time that a Getty photographer has been booted from this group that I know of. An earlier member Alex Hibbert was also banned for criticizing Getty.

    One of the Getty admins in the group, said that the more recent member was booted not because of his criticism, but because he wasn’t respectful with his criticism. I asked the question if respectful criticism would be allowed to stand and was told yes. I’m going to post this blog post into that forum and I guess we’ll see if this is true. For me, while critical, this post is entirely respectful. I’m still not sure it will get to stay there though.

    When you start to see a company fighting with it’s contributors, banning contributors, even FIRING contributors, it makes me feel like maybe it’s time to go. This doesn’t feel like a healthy “relationship” any more. Paying me 20% and keeping 80% already felt a little insulting, but I think we deserve to be treated better.
    So where am I going?

    This has been the hardest part of all about leaving Getty earlier, there didn’t really seem like there was any place good to go — before today.

    Today I’m pleased to announce that I’m going to start selling my stock photos on Stocksy.

    Stocksy is a revolutionary new photo agency started by Bruce Livingstone, the founder of iStockphoto. A lot of my friends are there selling photos now too. I’m pleased to be joining some of the most talented photographers I know in a new sort of photographer-owned coop.

    While Stocksy isn’t exactly “occupy” stock photography, rather than me getting 20% and Carlyle getting 80%, I’ll be paid a much fairer 50% payout. The exciting part about Stocksy though isn’t just the higher payout, it’s that the members of Stocksy actually OWN the agency. That’s right, after paying out costs, Stocksy will distribute profits to it’s members — so members will get dividends and actually hold real equity in the business.

    Now THAT is an idea that I can get behind, and one that’s been long overdue. Fairly compensating photographers while running an agency with some of the most talented photographers in the world today? Sign me up!

    Today Stocksy is launching to the rest of the world. You can read more about that here.

    If you are a photographer, consider signing up. One bit of warning here though, Stocksy is being *very* selective about the photographers that they are adding. I have felt a little bad because some of my good friends and talented photographers haven’t been asked to join.

    Especially early on, Stocksy is trying to build a super premium library of images and sometimes this means making hard choices about who you will launch with. They are also trying to keep Stocksy small where the editors and members can know each other on a personal level. I’ve already made lots of new friends at Stocksy and I’ve appreciated the valuable advice that the editors there share with me about why an image may or may not be right. At Stocksy editors and management do Google+ hangouts with photographers. At Getty all they seem to do is fight.

    If you are an image buyer, consider looking at images on Stocksy the next time you need to buy. Not only will you find some of the best, fresh, and most authentic images in the marketplace today, you can feel good about buying them, knowing that they are treating the photographers fairly.

    As fellow creative professionals, you are one of us — if given a choice, where would you rather your money go — to actual photographers who create the images, or to Carlyle? Even if you don’t care, still give Stocksy a look, because the imagery there really is miles ahead of what you see in the run of the mill stock photography library out there today.

    Let Stocksy make you and your clients look the best they possibly can. You are the ones we need to embrace this idea most of all.

    I’ll blog more about Stocksy as time goes on. For stock photography it will be the primary place where I market my own images (like the other photographer members my images for sale on Stocksy will be exclusively offered there) and I’m looking forward to a long and successful relationship.

    Here’s Stocksy’s announcement on today’s launch.

    Update: well that was fast. I’ve been banned from Getty’s Forum. I’m fine with that as I’m not a member, but I’m told that my post criticizing them has also been deleted. I hope those that are still in the forum can keep up the good fight, demanding more for photographers. I’m disappointed (although not surprised) that after being told that respectful criticism would be allowed that Getty deleted my respectful criticism there.

    Update #2: More from Stephen Shankland over at CNET. PetaPixel republished my article as a guest post here. My good friend Trey Ratcliff is also joining Stocksy.

    Update #3: Fast Company’s article on Stocksy here.


    Thomas Hawk Digital Connection

  • 5 Quick Ways to Improve your Beach Photography

    According to NOAA, over 50% of the American population live within 50 miles of a coastline.  Which means more than half of us are only a day-trip away from the beach.  For photographers, this presents a ton of great photo ops. Living half a mile from one of the top-rated beaches in the country myself, I’ve spent plenty of time Continue Reading

    The post 5 Quick Ways to Improve your Beach Photography appeared first on Photodoto.


    Photodoto

  • 10 Tips for Improving Your Flower Photos

    Spring is here!

    For those of us in the Northern Hemisphere who have been hunkered down for winter, enduring the rain and the snow, the time has finally come to get outside and enjoy some long awaited sunshine.

    As the flowers start to emerge from the soil, all the neighbours begin emerging from their houses with gardening tools in hand. I, on the other hand, have my camera in hand ready to capture the spring flowers and I hope you do too!

    Here are 10 tips that will help you make the most of your flower photography this spring.

    1. Photograph flowers on an overcast day

    Okay, not every day in spring is a sunshiny blue sky day. But that’s okay because the white sky days are perfect for photographing flowers.

    The soft even light of an overcast day compliments the delicacy of the flowers and there are no shadows and no harsh bright spots, which makes it easier to get a good exposure.

    Flowers in soft light by Anne McKinnell

    2. Backlight will make your flowers glow

    Another type of light that is excellent for flower photography is backlight. Backlight happens when the sun is directly in front of you lighting your flower from behind. Because flower petals are translucent, backlight makes flowers appear to glow.

    Try to capture backlit flowers late in the day when the sun is close to the horizon which will cast nice warm light on the rest of your image too. You might even be able to catch some rays of light filtering through the trees.

    Backlit flowers by Anne McKinnell

    3. Watch out for wind

    When it comes to photographing flowers, wind is your enemy. The easiest way to avoid it is to do your photography early in the morning when there is less chance of wind. If there is a bit of wind, you can use a piece of cardboard or your reflector to create a block.

    Your other option is to bring a flower inside. I photographed the flower below by taking it inside and placing it in front of a white sheet.

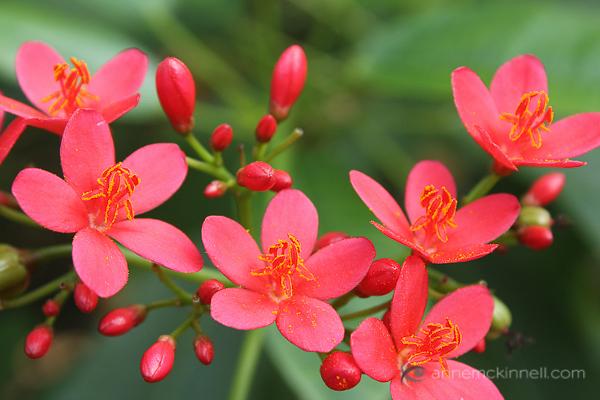
    Gerbera by Anne McKinnell

    4. Get closer

    There are a number of ways to go about making the close up images of flowers we all love.

    First, you can use a telephoto lens and zoom in to the flower. In this case, make sure you take note of the minimum focussing distance of the lens. This is usually marked on the outside of the lens. For example, my 70-300mm telephoto lens has a minimum focusing distance of 1.5 meters (or 5 feet). It simply will not focus on anything closer.

    There are a couple of solutions for getting around the minimum focussing distance problem. One is to use extension tubes which are hollow tubes that you place between the camera and the lens. Essentially the tubes move the lens farther away from the camera’s sensor which allows the lens to focus on closer objects. The other solution is to use a close-up filter which works like a magnifying glass and attaches to the end of your lens.

    Finally, you can use a dedicated macro lens which has the ability to focus on objects that are close to the end of the lens.

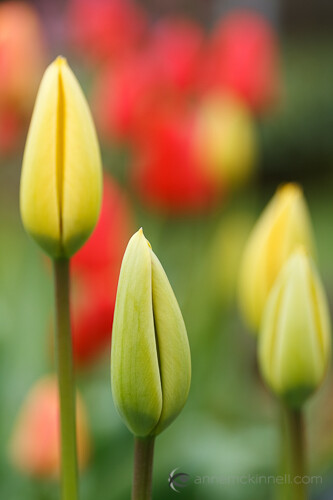
    Spring Tulips by Anne McKinnell

    5. Use a reflector

    If your subject is in the shade, you can use a reflector to bounce some light back towards your subject and make the flower more vibrant.

    6. Avoid a cluttered background

    As with every photograph, the background can make or break the image. Try to change your position so that there is nothing distracting behind your flower.

    7. Use a shallow depth of field

    Shallow depth of field is when only part of the image is sharp and the rest is soft and out-of-focus. You can achieve this by using a wide aperture (low aperture number) such as f/4 or f/2.8. The effect is even more pronounced if you are using a telephoto lens with a wide aperture.

    Flowers and water drops by Anne McKinnell

    8. Make it sharp

    Even if you are using a shallow depth of field, it is essential that at least part of the flower is sharp. Use a tripod, a cable release or your camera’s two second timer, and the mirror lock up function for the best results.

    Remember that even if there doesn’t appear to be much wind, flowers always move. If your flower isn’t sharp, try using a faster shutter speed.

    Finally, check your focus and if necessary use manual focus to ensure the camera is focussed on the most important part of the subject.

    9. Change your point of view

    Move around and try some different angles for more interesting images. Try photographing the flower from behind or underneath to capture a point of view that is different from what we see from a standing perspective.

    Behind the flower by Anne McKinnell

    10. Focus through another flower

    One technique I love is focussing through another flower. Remember how I said in tip #4 that your lens has a minimum focussing distance? You can use that to your advantage! Try positioning yourself so that another flower is in front of your main subject and very close to the end of your lens. The secondary flower will become a blur of colour and your final image will have a more abstract feel.

    Flowers using the shoot through technique by Anne McKinnell

    If your camera has been gathering dust this winter, now is the perfect time to get yourself and your camera outside to enjoy the sunshine and the flowers and make some beautiful images!

    Post originally from: Digital Photography Tips.

    Check out our more Photography Tips at Photography Tips for Beginners, Portrait Photography Tips and Wedding Photography Tips.

    10 Tips for Improving Your Flower Photos


    Digital Photography School

  • Meet The Photographers Who Write For Digital Photography School ~ Jason Weddington

    You’ve been reading their articles for months or years. Have you ever wondered: “Who are the photographers who write for dPS”? Today meet San Diego based photographer Jason Weddington.

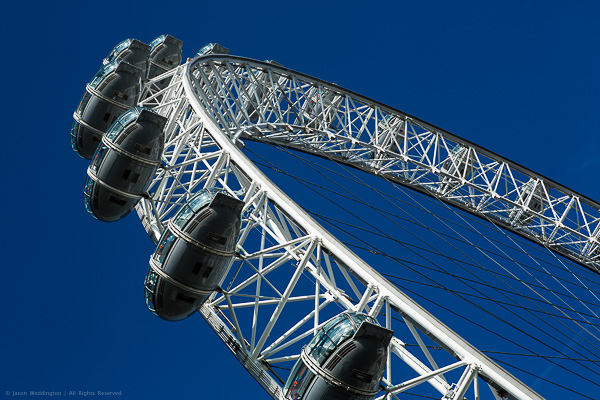
    The EDF Energy London Eye

    1. How long have you been shooting?

    My first camera was a Kodak disk camera, similar to the ones shown here. I must have been 8 or 9 at the time. Around the same time, I took a black and white photography course during summer vacation. I learned how to develop black and white film, as well as how to make prints. I remember being very proud of an image of an empty root beer can that I’d photographed in the street. That photo sat in a frame on my dresser for a few years.

    Then I went several years without having a camera or being exposed to photography (pun intended). In 1998 I joined the Marines and was stationed in Japan. I bought a Kodak Advantix film camera, because I wanted to be able to capture and share scenes from my time in Japan. I wouldn’t say I was interested in photography per se, I was more interested in ‘taking pictures’, if the distinction makes sense. I was happy to point and shoot, and drop the film off at the lab. I would flip through the prints and say things like “too bad that one didn’t come out.” In those days I thought cameras made photos, not photographers. Pushing the shutter was like rolling the dice, sometimes the pictures came out, sometimes they didn’t. It would be a few more years before my awareness changed.

    By 2001, I was really into computers. The Internet was still pretty new, technology was racing forward, and some exciting things were becoming possible. I bought a digital camera, because it was yet another cool thing I could do with my computer. I was more into computers than cameras – digital seemed like the logical camera choice.

    In early 2001, I saw some fine art nude photographs on the Internet. I was amazed and inspired. I hadn’t seen much fine art photography before, or maybe I hadn’t given it much notice. But this time my eyes were opened to a whole new world. I became aware of photography as an art form, rather that simply a tool for capturing moments.

    I’d just married a beautiful woman, and I had a 1.2 megapixel (!!) digital camera. It seemed so simple. Knowing next to nothing about photography, I asked my wife to model for me. The pictures weren’t very good. Suddenly I became aware that photography is a skill, and a skill that I needed to learn.

    2. Do you have a full time job or are you a full time photographer?

    The short answer is “neither one.” The long answer is more complicated. I left my full time job as an IT manager at the end of 2012 to start my own business. My goal is spend more time on my personal photography projects, and more time with my family. I’m building a business around my interest in photography, but I don’t plan to work full time as a photographer.
    Going forward I hope to make a living from a combination of activities. I’ve just finished a book of my photography, and I’m beginning to market prints on my website. I’m also in the process of launching a software company. We’ll be producing products and services for photographers.

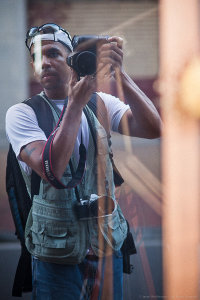
    Me!

    Photographer Jason Weddington

    3. If you had to limit yourself to one genre of photography, what would it be and why?

    That’s a hard question, I hope I’m never in that position. I guess if I had to, I would limit myself to photographing people. I like portrait work, I’m inspired by the idea of creating a portrait that really captures the sitter’s personality. I love it when people are happy with a photo I’ve made of them, since most people don’t enjoy being photographed.

    4. When did you start writing for dPS and why?

    I wrote a trial post for dPS in September of 2012, and was accepted as a regular writer in October. I’d already made the decision to leave my full time job to pursue my own business, and I wanted photography to be a big part of that. I genuinely enjoy teaching and sharing, when the topic is something that I am passionate about. So writing for dPS is a good fit, and the timing was perfect.
    5. What do you shoot with and what is your favorite lens?

    I’m a Canon guy. My main camera is the EOS 5D Mark III. I also have an old Canon AE-1 film body, and a Canon EOS 7s (aka ELAN 7) film body.

    I like prime lenses. My favorites are probably the EF 135mm f/2L and the EF 50mm f/1.2L. Is is cheating to pick two?

    6. What would be your number one tip to any new photographer?

    Become a student of light. Practice visually deconstructing photographs and picturing where the light comes from. Do the same thing in real life, as you walk around your city or neighborhood. Notice what light does to a subject when it comes from above, from the side, from behind, from in front, and from below.

    You can learn the technical stuff as you go, and modern cameras will take care of exposure for you most of the time, at least well enough to get you started. But no camera will teach you how to find the good light.

    7. What’s your next big project?

    I’ve just hired a software and web developer to help me build a social media marketing service for photographers. The goal of the service is to provide a set of online tools to help photographers get more exposure for their work on major social sharing sites like Flickr, 500px, Facebook, and Tumblr. We will start development in March and I hope to launch the first version of the service in May.

    I’m also working on my second photography book which will be a collection of photos from Japan.

    8. Where can people go to find out more about you and your work?

    My Portfolio Site – This site features my portfolio, fine art prints, and my books.

    My Blog – This is my personal blog. The focus going forward will be photography tips and tutorials, information about my photography projects, and eventually some premium training materials.

    Uncovered Beauty – This is the brand for my fine art nude photography. You can see some of my work here, and later this year I will launch a fine art nude photography training course from this site.

    Facebook – Like my Facebook page to get updates when I have something new to share. I post links to my dPS articles here, and also share photos and tips. As my other projects move forward, I’ll post updates from time to time. I try to make sure that the things I share on Facebook are genuinely useful.

    Snowy Day

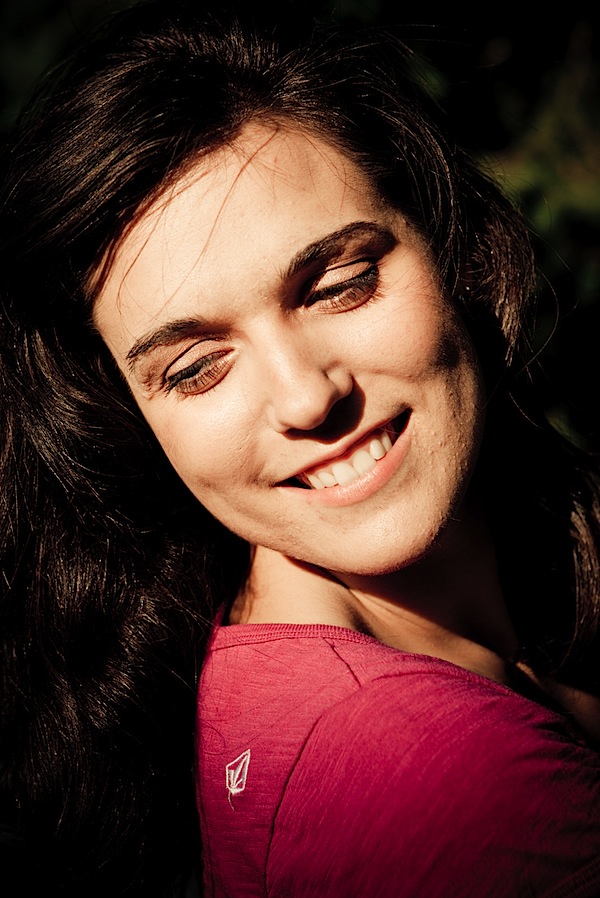
    Joy

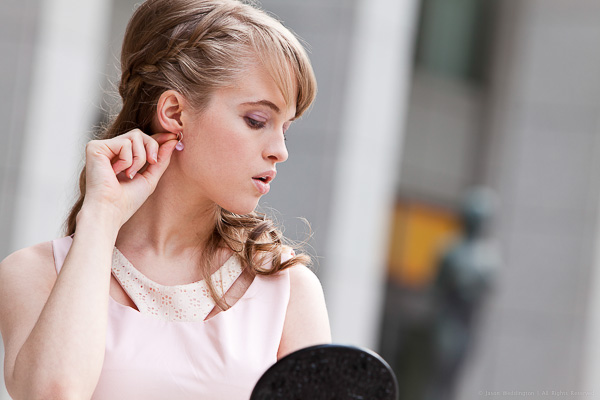
    Fashion Shoot

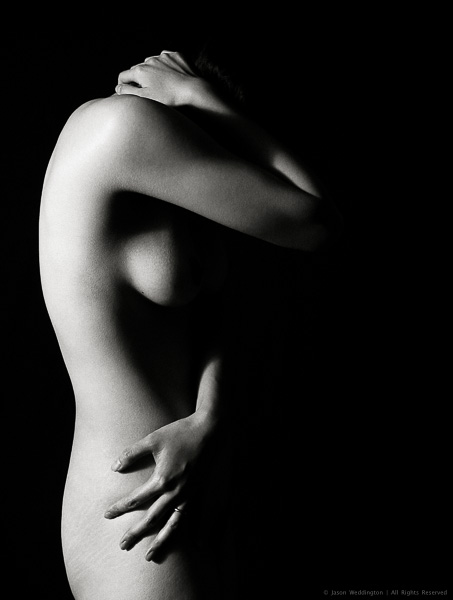
    Figure

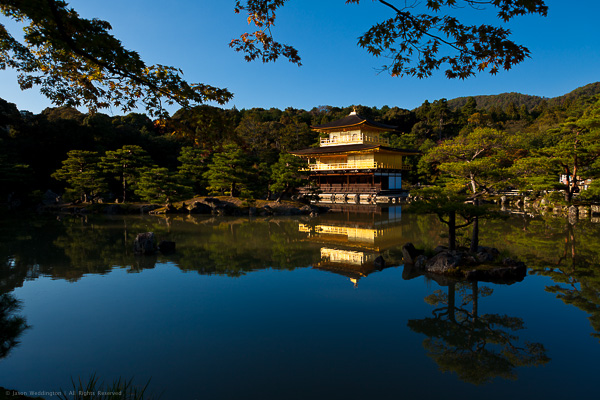
    The Golden Pavilion

    Joss Sticks

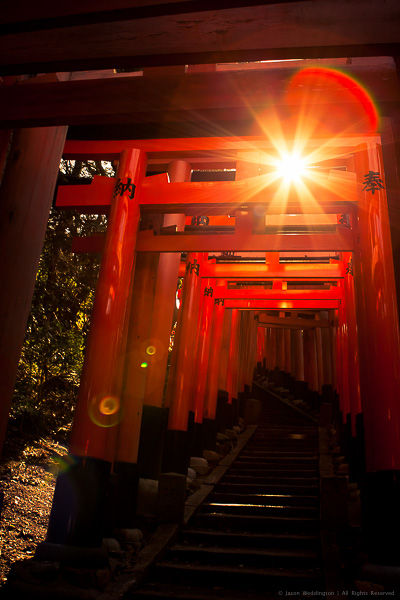
    1000 Torii Gates

    Post originally from: Digital Photography Tips.

    Check out our more Photography Tips at Photography Tips for Beginners, Portrait Photography Tips and Wedding Photography Tips.

    Meet The Photographers Who Write For Digital Photography School ~ Jason Weddington


    Digital Photography School

  • Lightroom 4 Virtual Copies 101

    Introduction

    This tutorial has been transcribed from the SLR Lounge Lightroom 4 Workshop on DVD, a 14 hour Lightroom 4 A – Z guide with over 130 tutorials for mastering Lightroom from start to finish. The Digital download can be purchased from SLR Lounge while the physical copy is available through Amazon Prime.

    Overview

    The way an image is post-produced can drastically change the mood and feel of that image. We often take pictures that would look great in color, black and white or even with vintage effects. Virtual Copies are great for creating duplicates of an image with different develop settings applied to them. In this tutorial, we will go over the basics of Virtual Copies in Lightroom 4 and how they differ from Snapshots.

    What is a Virtual Copy?

    Virtual Copies are not copies of the original RAW file (that’s actually what makes them so awesome to begin with). Instead, a virtual copy is only a copy of the develop settings, represented as a new image within the Lightroom catalog. When you export the image, Lightroom will create outputted images based on each virtual copy of a particular image. Virtual Copies are great because they do not take up much space on the hard drive since only the settings of the photo are saved within the catalog. However, once you export these images out from Lightroom, they will take up more space because Lightroom is creating different versions of the original image.

    Creating Virtual Copies

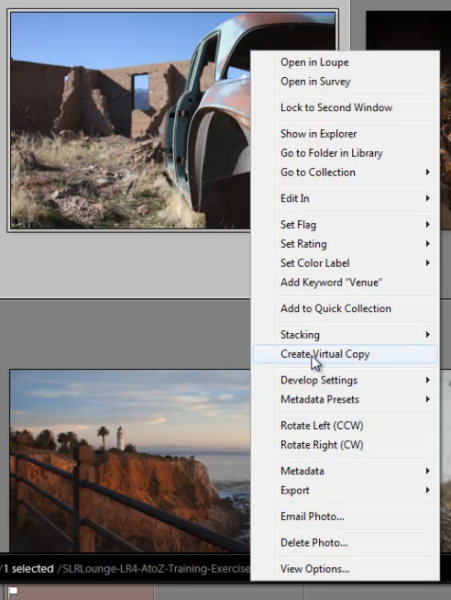
    There are several ways to create a virtual copy of an image. We can right-click on an image and hit “Create Virtual Copy.”

    01_right-click-create-virtual-copy

    But, my favorite method is simply to use the shortcut. To create a Virtual Copy at any point hit (Ctrl + ’) on the desired image.

    Filtering and Deleting Virtual Copies

    At times, it might be beneficial to view all the Virtual Copies within our Lightroom catalog. To aid us, we can actually filter by Virtual Copies in Lightroom. First, you need to bring up your Filter Menu. To do this, you need to be in the Library Module. Once there, hit “\” to bring up the Filter Menu. Click on “Attribute” and on the far right of the panel there are 3 little box icons. To select Virtual Copies, click on the middle box, as shown below. Once you turn this filter on, you can see all the Virtual Copies in your catalog.

    02_virtual-copies-filter

    Filtering by Virtual Copies is very handy if say you wish to clear out all of your Virtual Copies in your catalog. Often times I also like to filter by Virtual Copies when I want to create a “universal look” with the develop settings for all of my Virtual Copies.

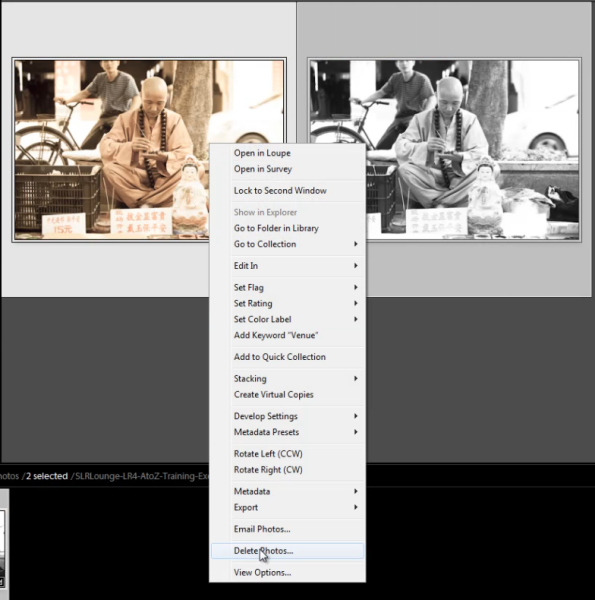
    Remember, if you delete a Virtual Copy, the original file with the original settings will still be in your catalog. Deleting a Virtual Copy has no effect over the original image. Delete Virtual Copies the same way you would a regular image, simply right-click on the images, and hit “Delete Photos.”

    03_delete-virtual-copies

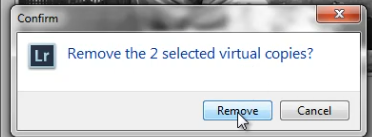
    A dialogue box will then appear, asking if you want to remove the Virtual Copies. Once again, this will not remove your original image from your catalog (so long as the original image isn’t selected for deletion).

    04_confirm-remove-virtual-copies

    Virtual Copies vs. Snapshots

    We are often asked what the difference is between a Snapshot versus a Virtual Copy. Given that both functions are used to create different looks for an image, it can seem similar. However, in reality, these two functions are very different, particularly when it comes to exporting.

    When you create different looks via Snapshots, only the “active” or selected Snapshot develop settings will be exported to the final image. Let’s illustrate with an example.

    Let’s say we have an image with 3 different looks created with Snapshots, and another image with 3 different looks created with Virtual Copies.

    When we export the image with the 3 different Snapshots, Lightroom will create one exported image with the develop settings from the “active” snapshot.

    When we export the image with the 3 different Virtual Copies, Lightroom will actually create 3 separate exported images using the develop settings from each Virtual Copy.

    To keep it simple. Virtual Copies will create additional exported images while Snapshots will not.

    Learn More with the Lightroom 4 Workshop Collection!

    This was a sample tutorial from the Lightroom 4 A to Z DVD which is one of the DVDs in the Lightroom 4 Workshop Collection. A collection of nearly 30 hours of video education teaching everything from Lightroom basics to advanced raw processing techniques.

    The LR4 Workshop Collection also includes the critically acclaimed Lightroom 4 Preset System which is designed to enable users to achieve virtually any look and effect within 3-5 simple clicks. From basic color correction, vintage fades, black & white effects, tilt-shift effects, faux HDR, retouching, detail enhancing, and so much more. Click the links above to learn more.

    Post originally from: Digital Photography Tips.

    Check out our more Photography Tips at Photography Tips for Beginners, Portrait Photography Tips and Wedding Photography Tips.

    Lightroom 4 Virtual Copies 101


    Digital Photography School

  • Hasselblad HD5 Comment Win.

    On Strobist, I try not to merely echo content seen elsewhere. I just don't think rote aggregation adds much to the conversation. But I am making an exception on this Hassy HD5 BTS vid, which you may have seen recently on other sites.

    That's because the video itself (which, to be fair, is quite cool) is not the subject of the post. Nope, this post is about a comment on this video from long-time Strobist reader Duncan Bell. Here's my setup to the video, as I shared it on my G+ stream:
    __________

    Such a simple—and expensive—concept.

    1. Shoot a palace interior. ($ $ $ )
    2. Print it on big-ass vinyl. ($ $ $ )
    3. Suspend big-ass vinyl print in a rented olympic-sized pool. ($ $ )
    4. Light the living crap out of the pool. ($ $ $ $ )
    5. Shoot a model in front of it with Hassy HD5 MF digital camera. ($ $ $ $ $ $ $ $ $ $ )
    6. But make sure that camera is in a waterproof housing that itself probably cost more than my car. ($ $ $ $ )

    Enjoy.

    To which Duncan added the following, most apropos Strobist comment, elevating the video/comment combo into something I simply had to post…

    Read more »
    Strobist

  • How to Use Sunset Light to Light Portraits

    Sunset is arguably the most beautiful time of day for portrait light. But you don’t want to simply take your subject outside and start shooting. Take a few moments to identify “how” to use your light and your portraits will be dreamy.

    Here are three ways you can use the light by setting your subject in relationship to the setting sun.

    1. Front Light:

    Place your subject facing the light. Shoot facing your subject with your back to the light. The light will brightly illuminate your subject, bringing out stunning catchlights. Take note: if the light is too bright for your subjects eyes, simply have them close thier eyes until you are ready to snap the shot – and make that moment count.

    sunset 1 - Front Light.jpg

    2. Side Light:

    Turn your subject so that only one shoulder is facing the light. Then turn thier face 3/4 degrees into the light. This side angle will give you soft transfer edges between the highlights and shadows. This lighting will also add depth to your portrait. Shoot facing your subjects lit shoulder.

    sunset 2 - Side Light.jpg

    3. Back Light:

    For a most unique and artistic shot, place your subject with thier back to the setting sun. On Manual mode, overexpose the portrait so your subject is evenly lit. Remember this will cause your background to be overexposed and your highlights will be blown out.

    sunset 3 - Back Light.jpg

    Experiment with the angle at which you place your subject to the sun and you will be more than pleased with the creative results.

    Post originally from: Digital Photography Tips.

    Check out our more Photography Tips at Photography Tips for Beginners, Portrait Photography Tips and Wedding Photography Tips.

    How to Use Sunset Light to Light Portraits


    Digital Photography School