Category: Photography

  • How to Photograph Snowflakes with a DSLR

    By Don Komarechka

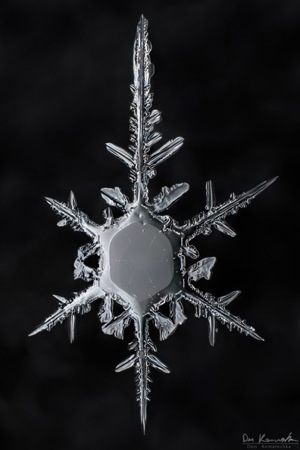
    How to Photograph SnowflakesThe winter months are typically uninteresting for macro photographers. Flowers, insects, and tiny details in nature all but disappear. Only one faithful subject is left in abundance – the tiny snowflake.

    Thankfully, “abundance” is an understatement. For nearly half of the year, you’ll find countless trillions of them mere feet from the warmth and comfort of home. So, how do you start? How do you capture one of these tiny crystalline subjects and fill the frame behind your lens?

    The Gear:

    The first thing you’ll need is an old mitten.

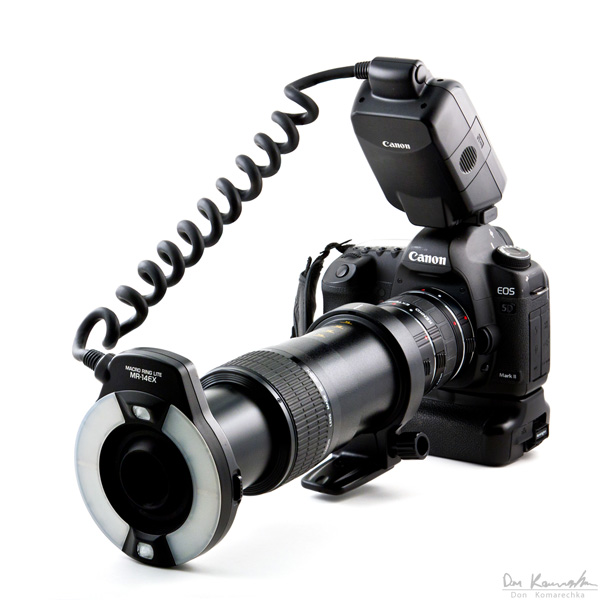
    You’ll need more than that, however. The average snowflake is around 2-5mm across, so filling the frame with one of these crystals will require powerful magnification and good lighting. Any camera will do, as long as you can get close enough. For snowflake photography, you’re going to need to delve into the world beyond 1:1 lifesize magnification.
    Macro setup

    1:1 lifesize is the highest scale of magnification that most macro lenses are capable of. On a full-frame sensor, a 4mm snowflake will only fill about 2% of the image – we need to get closer.

    Adding a set of extension tubes to your macro lens will often get you close to 2:1 life-size, and Kenko makes a great set. These are hollow tubes that sit between the camera and the lens, effectively allowing the camera to focus closer to its front element. This is the most convenient way to increase your magnification, but close-up filters are another good option.

    Close-up filters are basically reading glasses for your camera. They act as a magnifying glass, and multiple can be stacked together for an increased effect. They cause the edges of the frame to get distorted, but when photographing snowflakes you’ll likely be cropping out the edges anyhow. Close-up filters also interfere with the autofocus capabilities of most DSLRs, but we’ll be shooting manual focus for this subject.
    How to Photograph Snowflakes 2

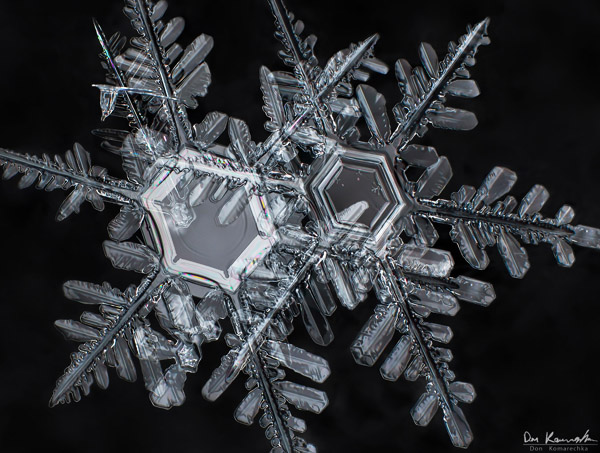
    Lighting a snowflake may seem like a challenge, but it’s fairly simple: use a ring flash. Ring flashes may not be favored in all areas of macro photography because they create a distracting reflection in water droplets and some insect eyes. It’s the perfect solution for snowflakes however, and makes capturing them a little easier. Most ring flashes (I use a Canon MR-14EX) allow you to control two banks of light and make one brighter than the other. I nearly completely turn one bank off and use half of the flash – and I aim for the perfect angle.
    How to Photograph Snowflakes 3

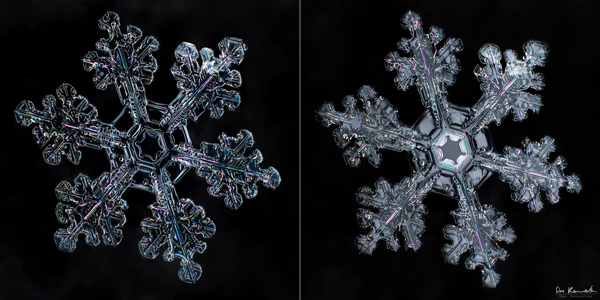
    Getting the right angle can drastically change the outcome. The above image is photographed at two different angles only a few degrees apart. It takes plenty of experimenting in the field to find these angles, and I’ll occasionally use a small paintbrush to nudge the snowflake to the proper angle. I avoid this unless necessary, because the crystals often shatter when manipulated too much.

    So we’ve got a lens, a light, and now we need a stage. All of my snowflake photographs are made on the same old black mitten. It’s an essential component in my images, and there are plenty of reasons why:
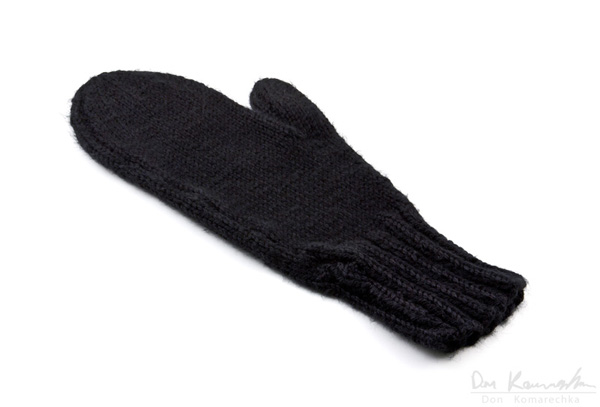
    Mitten

    • Dark background: the mitten creates a darker background for the snowflake and allows for some beautiful contrasts. Choose another color besides black for a different feel to your images – but keep it darker for good contrast.
    • Insulation: If the snowflake were to fall on a flat metal surface, and that surface were to transfer even the slightest amount of heat – the snowflake would be a water droplet fairly quickly. With the mitten, the ice gets caught in the fibers and only makes a few contact points with the surface, keeping it insulated from heat.
    • Subject Isolation: Every shot will have some number of woolen fibers present, but these are far easier to edit out than a flat and detailed surface like felt or a BBQ cover in your backyard.

    The Process:

    Set out the mitten during a snowfall and wait for the snowflakes to land (tip: you shouldn’t be wearing the mitten). Take a close look and see if the snowflakes are of the “beautiful” variety. You’ll commonly see balls of ice or crystals covered in frozen water droplets (called “rime”). It may take a few snowfalls before you see the best crystals for photographing – big, clean snowflakes with lots of branches:
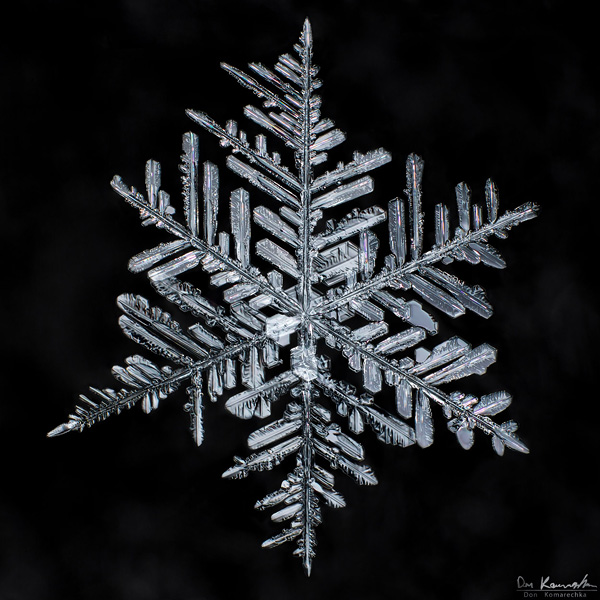
    How to Photograph Snowflakes 4

    It’s very important to photograph the snowflakes during a snowfall. As soon as one hour afterwards, the crystals will begin to melt or sublimate (evaporate without melting first) and the sharp crystal edges will soon disappear. If you’ve just missed the snowfall, try to place the mitten on freshly fallen snow and pick it up again – the fibers will catch the fallen snowflakes like Velcro and you’ll have a chance at photographing a few before they deteriorate too far.

    All of my snowflakes are focus-stacked. This means that I take multiple frames of the same snowflake at many different focus points; I do this by physically moving the camera forward and backward through the focus plane of the crystal, continuously shooting all the while. This process is necessary because they’re often photographed on an angle, giving only a tiny sliver of focus. I photograph them on an angle to bring out surface reflections, prismatic colors and even vibrant center colors as a result of optical interference:
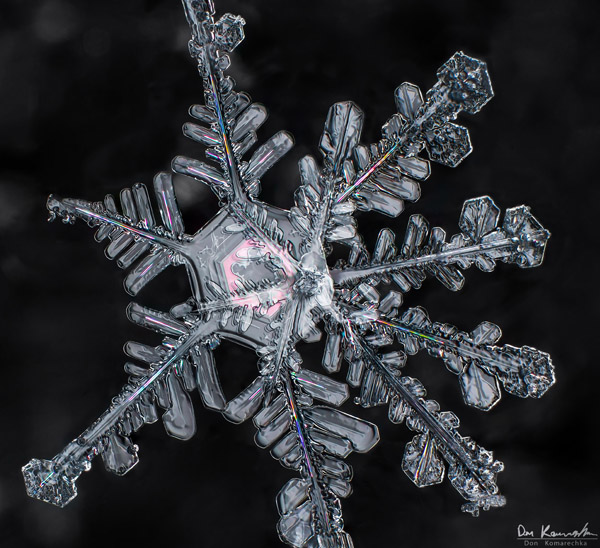
    How to Photograph Snowflakes 5

    This is not, however, how the image comes out of the camera. The below image is one of 33 images used in the final composition. The process of combining the frames is lengthy, in part because every image is done without a tripod – they’re all hand-held. Because I handhold these images, I need to take far more frames than I’ll actually use (I over-shoot to make sure I cover every point). The 33 frames I used in this image were selected out of 112 in total.
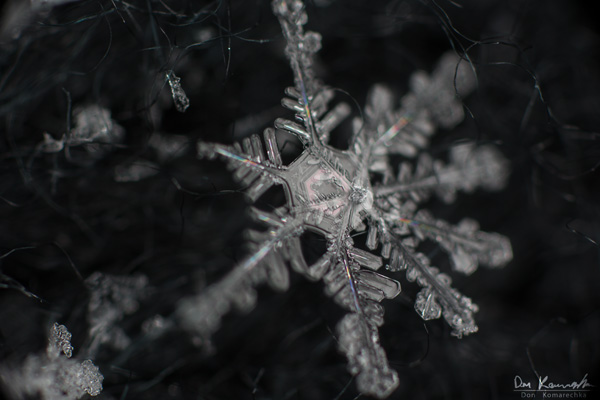
    How to Photograph Snowflakes 6

    I’m often asked why I don’t use a tripod for these photographs. Getting a tripod set up to exactly the right angle and adjusting a focus-rail to get everything set perfectly would take a significant amount of time. I find the snowflake freehand and adjust the angle of the camera to get the desired reflection by taking test shots, something far more time-consuming if a tripod were involved. Time can’t be spent aligning a tripod in this way – I need to move quickly to be sure the snowflake won’t melt, blow away or get smothered by more falling snow. Photoshop does a pretty good job re-aligning the images, as long as your angle doesn’t deviate too much.

    Snowflakes measuring roughly 0.4mm in diameter, photographed at 6:1 magnification and cropped significantly

    Snowflakes measuring roughly 0.4mm in diameter, photographed at 6:1 magnification and cropped significantly

    The editing and focus-stacking process will be discussed in a future article.

    The Book:

    If the tutorial above interests you, it will be spelled out in greater detail in my upcoming book, “Sky Crystals: Unraveling the Mysteries of Snowflakes”. The book is currently being crowd-funded on indiegogo, and a $ 35 contribution will get you a copy when it’s released in October 2013. Support the project and help the book get published!
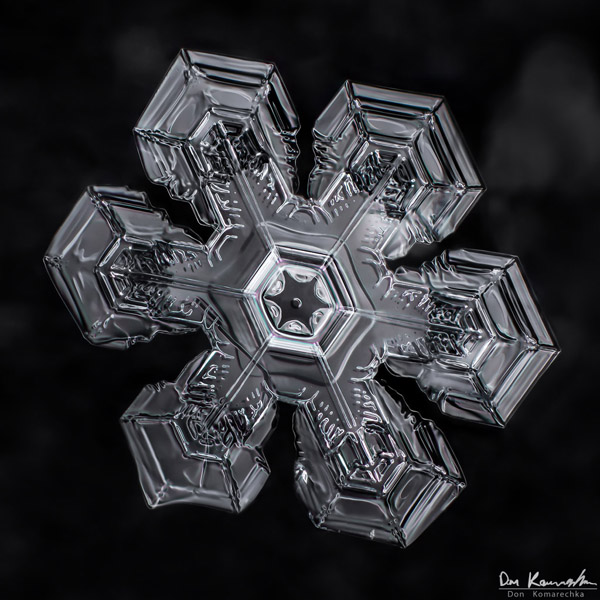
    Mar4 snowflake9

    The book will be 300 pages, hardcover and detail all of the photographic techniques, science & physics, and even the psychology and philosophy of why we find snowflakes beautiful. The campaign ends April 30th 2013.

    Post originally from: Digital Photography Tips.

    Check out our more Photography Tips at Photography Tips for Beginners, Portrait Photography Tips and Wedding Photography Tips.

    How to Photograph Snowflakes with a DSLR


    Digital Photography School

  • 8 Places For Shooting You Have To Master Before Taking Your Camera Elsewhere

    It happens to all of us. Regardless of experience or skill level, at some point, we’ve all thought, “I have no idea where to take pictures!”. We’ve run out of new, fresh ideas and are seriously considering abandoning any photography this weekend. Of course, we know that we haven’t literally run out of locations to shoot, we just aren’t thinking Continue Reading

    The post 8 Places For Shooting You Have To Master Before Taking Your Camera Elsewhere appeared first on Photodoto.


    Photodoto

  • Your Favorite Place To Photograph

    As photographers we all have our favorite locations to take photographs.  Mine happens to be in Philly, PA at an old prison (Eastern State Penitentiary) which has been converted to a museum.  I have been there many times and always look forward to going back for more.

    waiting-game

    So I want to ask you… what is your favorite place to photograph?  Comment below to share.

    dslrBlog

  • The Importance of Location for Outdoor Portraits

    By Annie Tao

    Just like in Real Estate, Photography is about location, location, location. Well, sort of. It’s not as much the beauty of a location, but rather, the quality of the light at a location.

    Case in point, my shoot this past weekend was of a lovely family in a seemingly lovely location. It was a small, narrow park that wrapped around a large lake. Sounds pretty, but the light was not desirable for portraits. Imagine clear skies and a sun that was as bright as can be! There weren’t structures or large trees to provide shade.

    Why is this bad? Direct sunlight on clear, bright days means high contrast, squinting subjects, and unflattering shadows.

    Can you still make this work? Certainly, but the kinds of shots are not as varied because of the location.

    [FYI: For outdoor lifestyle sessions, I shoot entirely in natural light. This is my style of shooting. This article does not apply if you use lighting equipment or accessories outside.]

    Since my clients chose the location for sentimental reasons, it was worth starting
    there. Then we got in our cars to find a different location… one that has objects to diffuse the sunlight as well as add interest to the images.

    First Location

    Even from this one image, you can tell that it is a pretty location, but you can see that the trees are thin and the sunlight is super bright.

    Annie Tao Photography San Francisco Bay Area lifestyle photography family in the bright sun LOCATION ONE

    Second Location

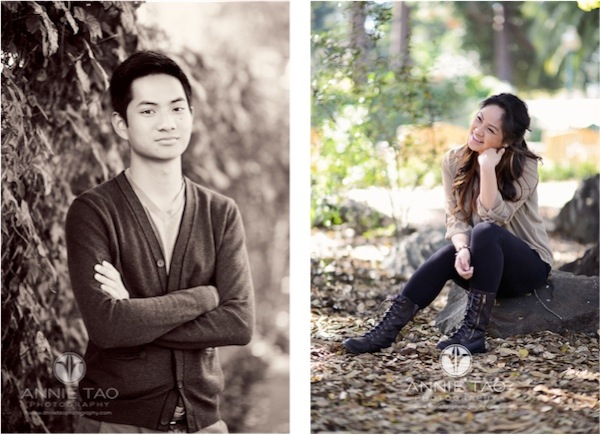
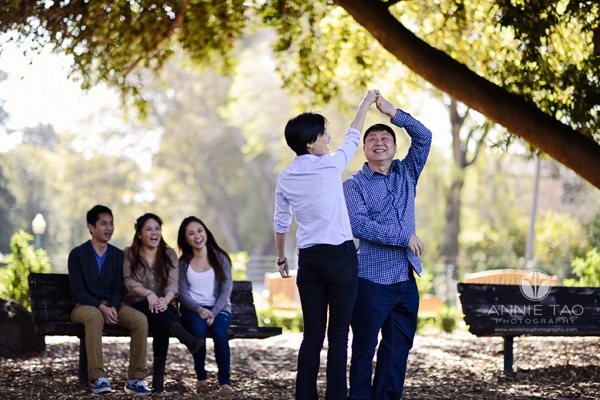
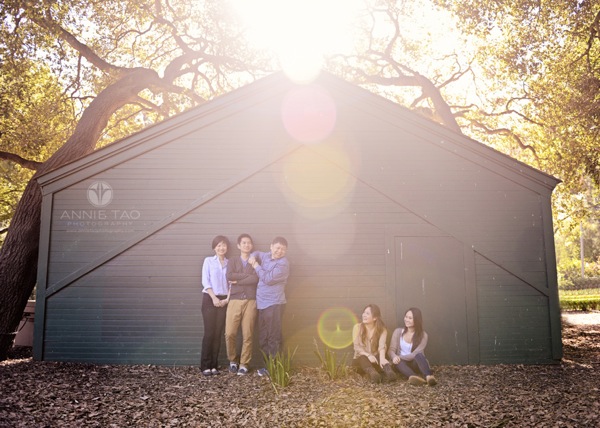
    These images are examples of what can be achievable with the right light and location.

    Annie Tao Photography San Francisco Bay Area lifestyle photography mom with her adult daughters

    Annie Tao Photography San Francisco Bay Area lifestyle photography young adult sitting on rock

    Annie Tao Photography San Francisco Bay Area lifestyle photography parents dancing while their children watch on a bench

    Annie Tao Photography San Francisco Bay Area family photography family against a barn with trees and sunflare

    Photography Tip:

    The key to finding the perfect location for outdoor portraits isn’t to find one that has the prettiest elements, but rather, one that has objects that provide shade when there is bright sun.

    That doesn’t mean you have to shoot in the shade the entire time… or even at all!

    Having these objects around will give you diversity in backdrops as well as a way to diffuse the harsh light on clear days.

    Annie Tao is a Professional Lifestyle Photographer in the San Francisco Bay Area who is best known for capturing genuine smiles, emotions and stories of her subjects. You can visit annietaophotography.com for more tips or inspiration and stay connected with Annie at facebook.com/annietaophotography.

    Post originally from: Digital Photography Tips.

    Check out our more Photography Tips at Photography Tips for Beginners, Portrait Photography Tips and Wedding Photography Tips.

    The Importance of Location for Outdoor Portraits


    Digital Photography School

  • 30 Irresistible Photography Gadgets for Your iPhone

    Imagine what your friends would say, if you could take amazing shots with your iPhone, but not expensive DSLR camera? I want to tell you a secret how to do that. But shhh.. Nobody should know it. These days you take more pictures with your phone than with your 5D Mark III. Sadly, but its lens is far from Canon’s Continue Reading

    The post 30 Irresistible Photography Gadgets for Your iPhone appeared first on Photodoto.


    Photodoto

  • A Simple Exercise on Working with Natural Light in Portraits

    Today I thought it might be fun to share a little exercise that we feature in our Natural Light eBook (by Mitchell Kanashkevich) – both because it gives you a taste for the content but also because I think it’s a useful exercise to do to help you understand light and photograph portraits using it.

    This exercise is particularly useful because one of the differences in shooting with natural light as opposed to artificial light is that with artificial light you’re able to ‘direct’ the light (by moving lights around your subject and changing how much those lights output).

    When it comes to working with natural light we need to learn to direct ourselves and/or the subject in relation to the light source.

    Rather than moving lights around… it is us (and the subject) that may need to be moved.

    The exercise is simple:

    Find a room with a window allowing fairly bright diffused (indirect) light.

    Get your subject to move to different spots in relation to the window. Move around with the subject, take photos, and pay attention to what effect the movement of both of you has on the way that light makes the subject look.

    For the eBook Mitchell did this exercise with his nephew. Below are the images and corresponding diagrams of where the subject was in relation to the window and below are descriptions of the shots, EXIF information and what Mitchell did and what impact that had on the shot.

    3 directions window light

    1. The subject is turned at approximately 45° towards the window.

    Result: A very smooth progression of light to dark tones.

    EXIF: 16-35@35mm, f/2.8, 1/125s, ISO 2000

    2. Subject is at 90° or parallel to the window.

    Result: Very harsh contrast between the side of the face close to the window and the side further away from the window.

    EXIF: 16-35@35mm, f/2.8, 1/200s, ISO 500

    3. The subject is at 90°, parallel to the window, with his head turned towards it.

    Result: Light still works the same way, but instead of one side of the face being dark, the face is well lit and it is the back of my nephew’s head which is dark.

    EXIF: 16-35@35mm, f/2.8, 1/125s, ISO 500

    Mitchell also notes: Having a light source such as a window also gives you control over the intensity of light. The further away you are from the light source, the less intense it is. Less
    intensity also means less contrast between light and dark.

    I did this exercise recently with a family member and was fascinated with the results and was also reminded what an incredible variety of styles of shots that you can achieve – all in the one setting but by simply changing up where you position yourself and your subject.

    Give the exercise a go and let us know how you go!

    Get more exercises and teaching like this from Mitchell in his Natural Light eBook.

    Post originally from: Digital Photography Tips.

    Check out our more Photography Tips at Photography Tips for Beginners, Portrait Photography Tips and Wedding Photography Tips.

    A Simple Exercise on Working with Natural Light in Portraits


    Digital Photography School

  • Doctor Who as Lighting U.

    We have a rule in the Hobby household. If the kids can get ready for bed quickly enough, we get to watch an episode of Doctor Who together. It is one of those rare shows that is equally enjoyed by every member of our family—including two middle-aged parents, a 12-year-old boy and a 14-year-girl.

    That alone is remarkable. And as good as the show is, I've lately found myself watching it for the lighting as much as the imaginative story lines. A look at perhaps the most Strobist-y show on the TV dial, below.

    Read more »
    Strobist

  • Winter Paddling with Sea Wind Canoe on Horsetooth Reservoir

    winter canoe paddling in Colorado

    8 years ago, end of March, 2005 …

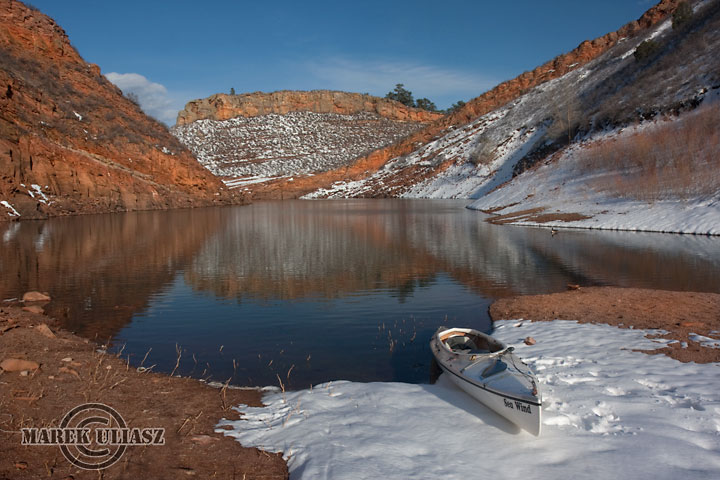
    Sea Wind canoe was featuring in a movie clip from paddling on the Horsetooth Reservoir in a winter scenery.

    I launched from Lory State Park at North Eltuck Cove and paddled south to Orchard Cove and back. Launching was fun since I didn’t have to carry the boat to the water. Water Abstracts come from the same paddling trip.

    I used Canon Optura XI camcorder mounted on a regular tripod on land and on mini tripod in the front of Sea Wind.

    I visited the Orchard Cove a few day later. It wasn’t that nice without snow. When the reservoir was drained during recent years most of cottonwood trees along the shores died. There were cut down and only stumps and piles of wood scraps remained. I remember paddling beyond these trees years ago when the reservoir was full.

    The opening picture in this post, Sea Wind canoe in Quarry Cove of Horsetooth Reservoir, was shot on March 28, 2009 with Canon 40D on a tripod. It is one of Horsetooth pictures in my stock photography portfolio available for purchase and licensing.

    Related posts:
    Thunderbolt Racing Kayak and Ice in Early Spring Paddling
    Icy Horsetooth Reservoir – Opening Lake Paddling Season
    Paddling Horsetooth Reservoir in Winter Scenery


    paddling with a camera

  • 3 Workouts to Improve your Photography

    A Guest post by Jim Harmer of ImprovePhotography.com

    Athletes would never consider showing up to a game without having practiced, so why is it that most photographers shoot for the “wall-hanger” photo every time they go out without ever practicing new techniques? Consider applying these new workouts in your photography routine and you will improve your skills and creativity.

    The EXIF Drilldown

    bayfrontNight_MG_2559.jpgIn my photography workshops, I often show my portfolio to introduce myself before the class begins. After showing a few pictures, someone will inevitably raise their hand and ask, “How did you shoot that one?” I tell them the answer, but then I show them how to practice guessing camera settings so they will know what to use in any situation.

    The very best way to shoot like a pro is to analyse the work of the pros, and Flickr is just the place to look. Most photographers probably know that cameras save information about what camera settings were used to take a photo, and the information is saved in the jpeg image file. Some websites, such as Flickr, make this information easily viewable so photographers can see how other photographers created a photo.

    To view this information on Flickr, find a photo and click the small text link on the top right of the screen that reads the name of the camera that shot the picture. Clicking this link will bring up a new page showing all of the camera settings the photographer used.

    This photography workout simply requires going to Flickr or any other photo sharing website, finding good photos, and then carefully reviewing the EXIF data from the pictures. Ask intrinsically why the photographer chose those settings and what camera settings could change in order to improve the photograph.

    When this photography exercise is implemented, the question, “How did he take that picture?” is asked much less often. With practice, knowing the correct camera settings is easy.

    One Shot

    cabin.jpg
    Most photographers take tens of thousands of pictures over the course of a year, but only a handful of those photos really stand out enough to make their way to your portfolio of best images. Many good images may be captured during each time shooting, but rarely is an image captured that is truly stunning.

    While all photographers understand this fact, their photography techniques rarely reflect it. Most photographers shoot hundreds of images and hope that some of them reach the level of quality necessary to make it into the portfolio.

    Though this method of never missing the moment has some merit, it also teaches photographers that if the first or second photo of a scene does not turn out, it is acceptable to simply forgive and forget the mistakes and move on to something else. Therefore, this straight-forward exercise is designed to work that bad habit out of photographers: Go out and shoot, but do not return home with more than one photo. Click the shutter more times, yes, but delete each photo if it is not perfect.

    Implementing this photography workout will teach photographers not to give up on a shot until it is perfect.

    Ten Shots, One Subject

    owl.jpg
    This workout works almost the opposite of the second exercise, but it has a similar purpose—keep shooting to capture the perfect shot.

    To practice this technique, find one subject and work to capture ten photos of that same subject before leaving. I recognized the need for this exercise while teaching my photography students landscape photography in Naples, Florida. We went to shoot the famous Naples Fishing Pier, but, not to my surprise, all of the students set up their tripods at the exact same spot immediately upon arriving at the beach. Their photo included all of the pier and the sunset behind it. This was a perfectly reasonable composition, but the students had a difficult time thinking of new ways to photograph the pier in an interesting way.

    I asked the students to all take 10 different shots of the pier. They struggled at first, but eventually ended up with beautiful photos. They photographed tiny details on the pier, captured photos of the water splashing up against the pier pilings, and shot the pier as a silhouette against the sunset. Soon the students discovered their initial photo of the subject was not quite as strong as the photos they took as they forced themselves to try new things.

    When something captures your eye, don’t leave until you have shot that same subject in ten different ways.

    As you practice your photography skills rather than simply shooting and hoping to improve, you will feel more confident in your ability to come out of any shoot with creative and technically-correct photos.

    Jim Harmer is the author of five photography instructional books and writes the ImprovePhotography.com photography blog.

    Post originally from: Digital Photography Tips.

    Check out our more Photography Tips at Photography Tips for Beginners, Portrait Photography Tips and Wedding Photography Tips.

    3 Workouts to Improve your Photography


    Digital Photography School

  • Thunderbolt Racing Kayak and Ice in Early Spring Paddling

    I am reviewing my old forgotten paddling video clips and posting them to my YouTube channel. Here is one from March of 2007. First paddling that season with Thunderbolt-X kayak on Beaver Pond in Arapaho Bend Natural Area. I was just playing in a small area of free water and pushing the kayak through a soft ice.

    I bought Thunderbolt designed and built by Doug Bushnell from West Side Boat Shop in December of 2006. You can find a lot of pictures of Tbolt, trip and race reports in this blog and in Fitness Paddling.

    Camera: Pentax Optio W10 mounted on a front or stern deck with the single suction cup
    paddling with a camera