Category: Photography

  • The Architecture of Susan Desko — 30 Cheval, Bellevue, Idaho

    30 Cheval, Sun Valley Idaho
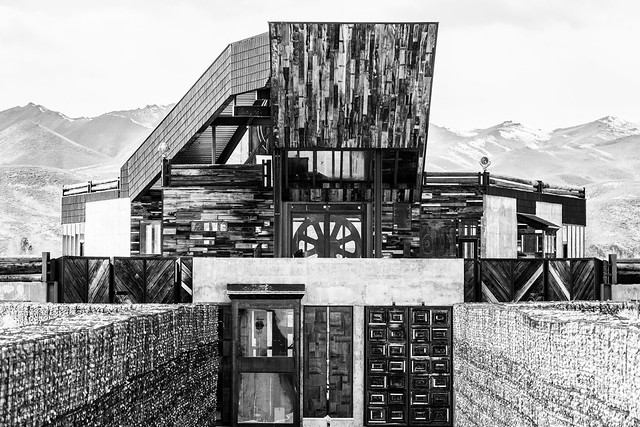
    30 Cheval, Bellevue Idaho, Architect Susan Desko

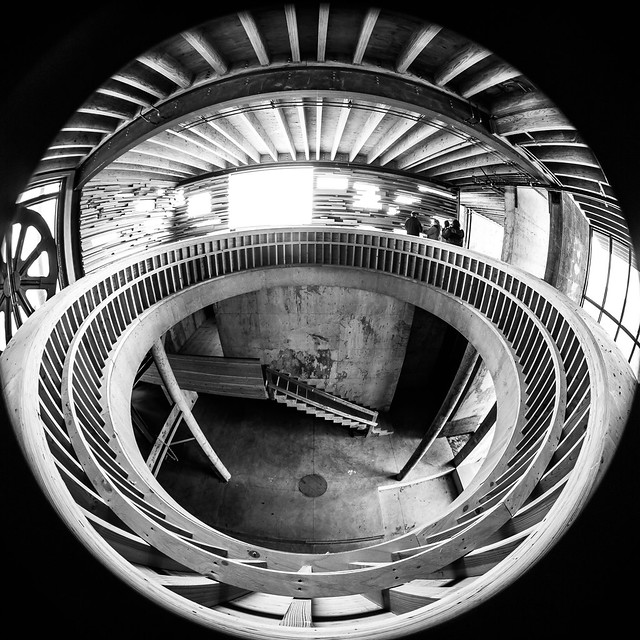
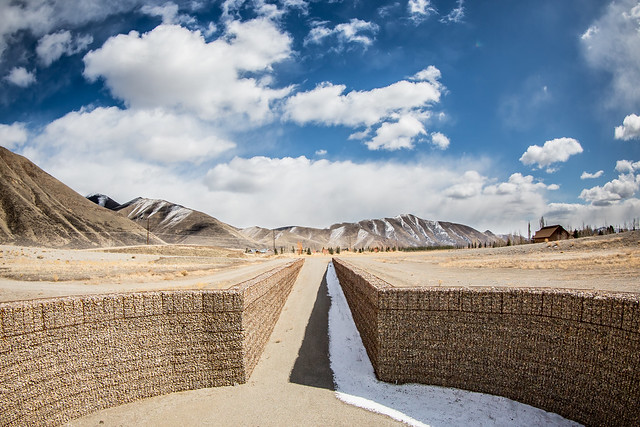
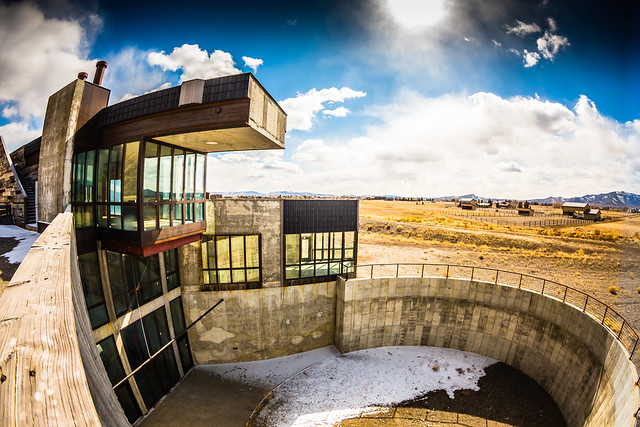
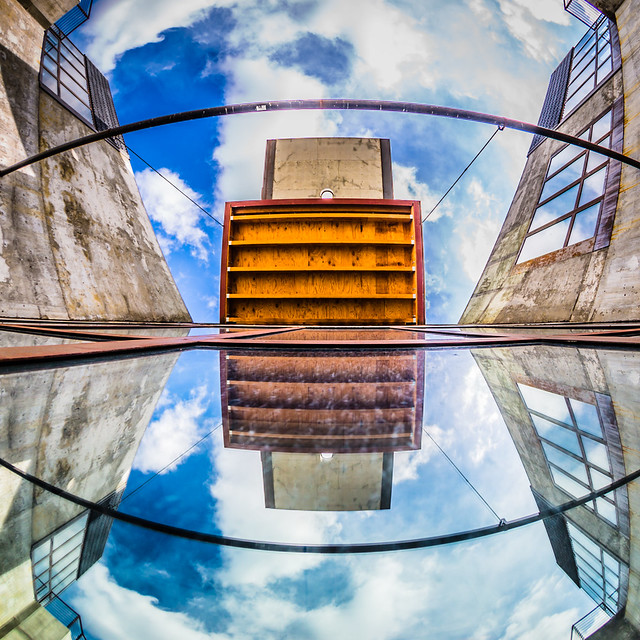
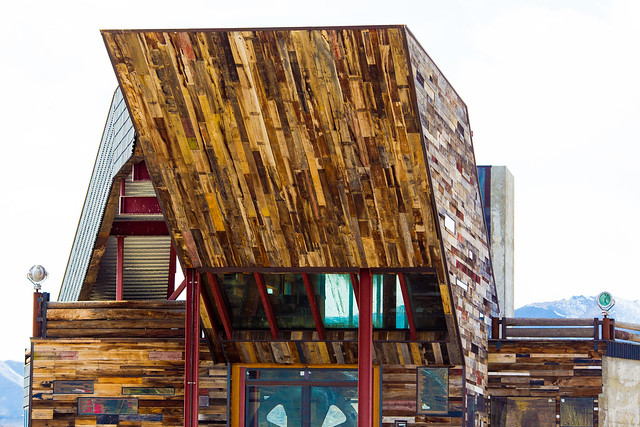
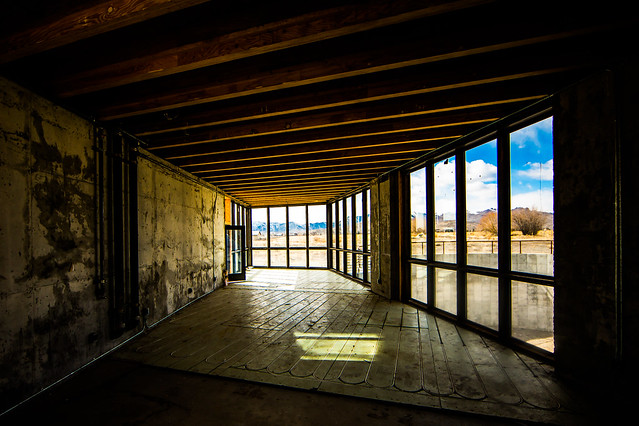
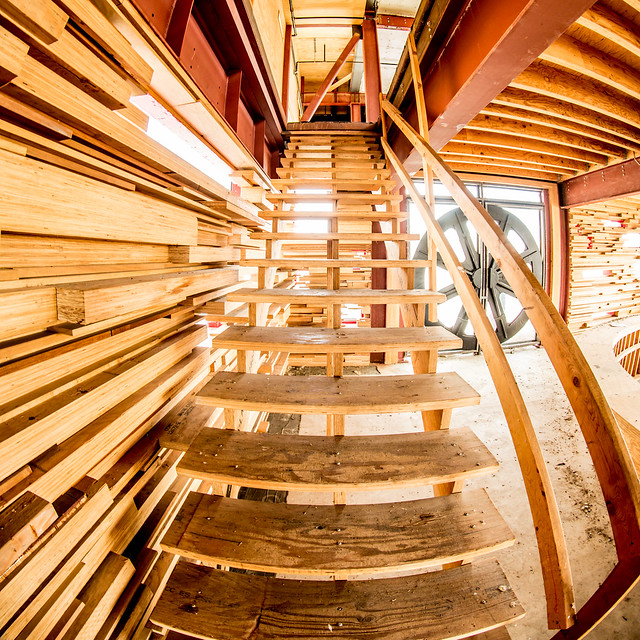
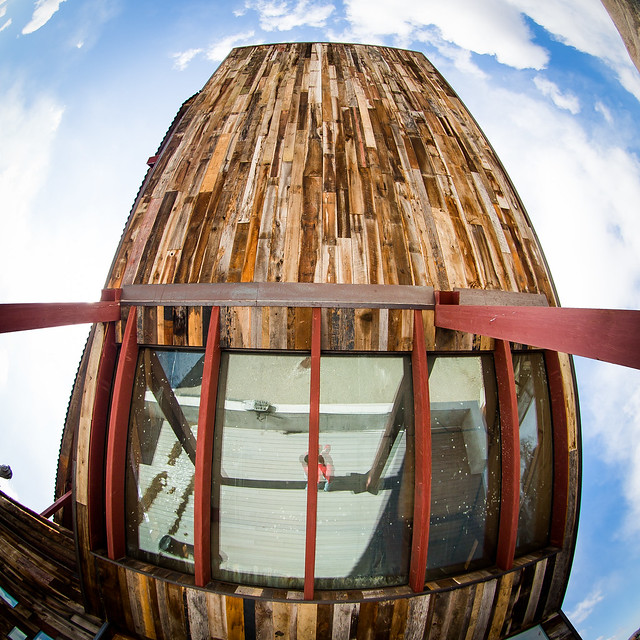
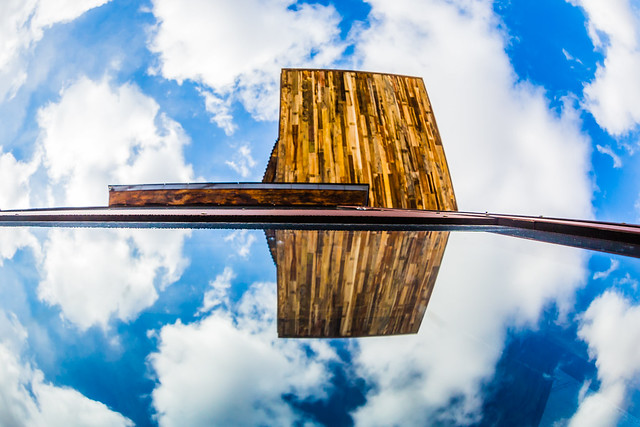
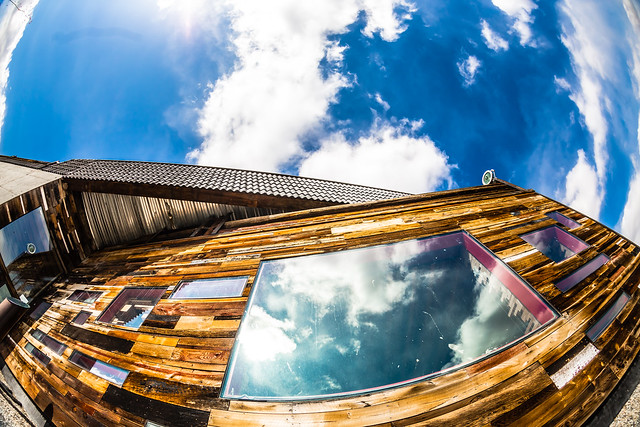
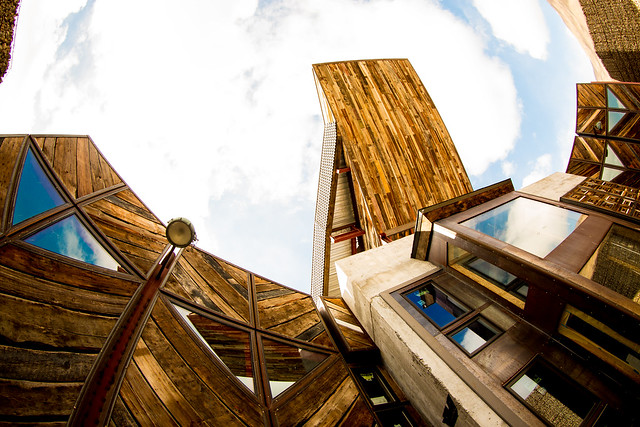
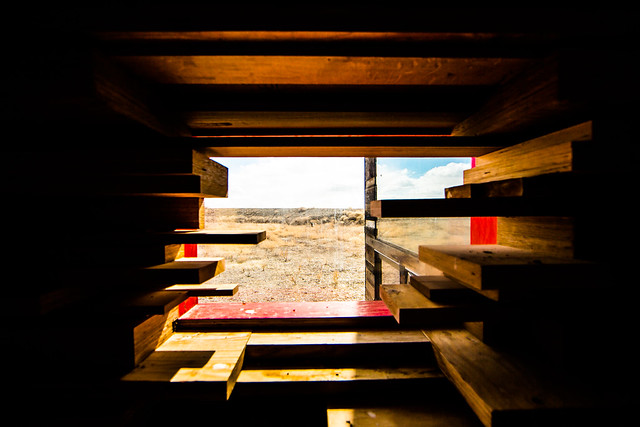
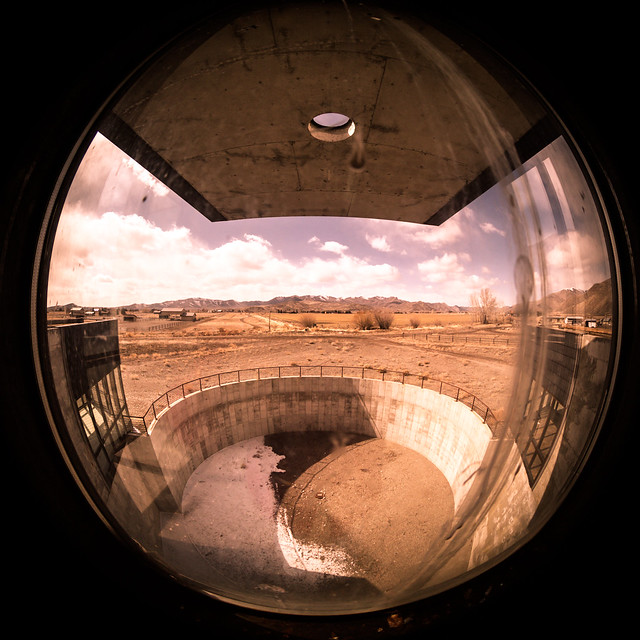
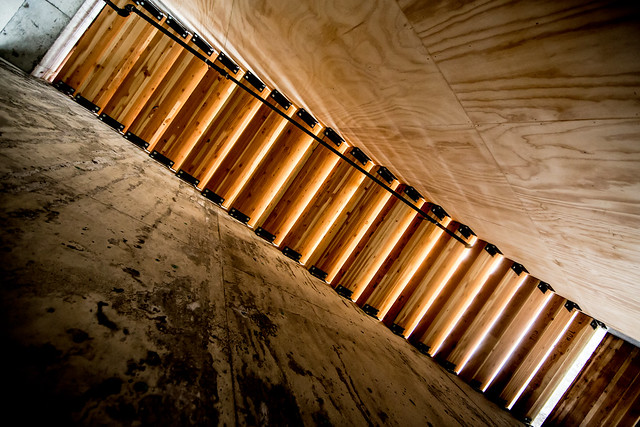
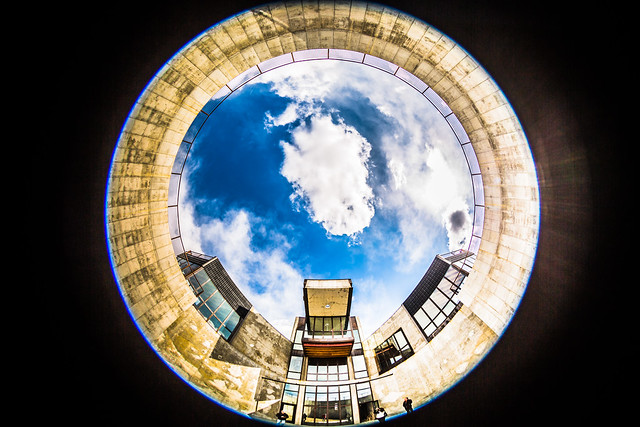
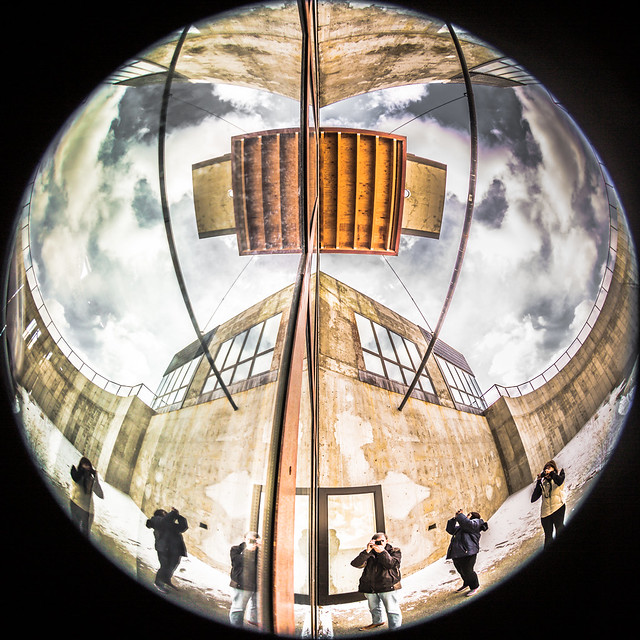
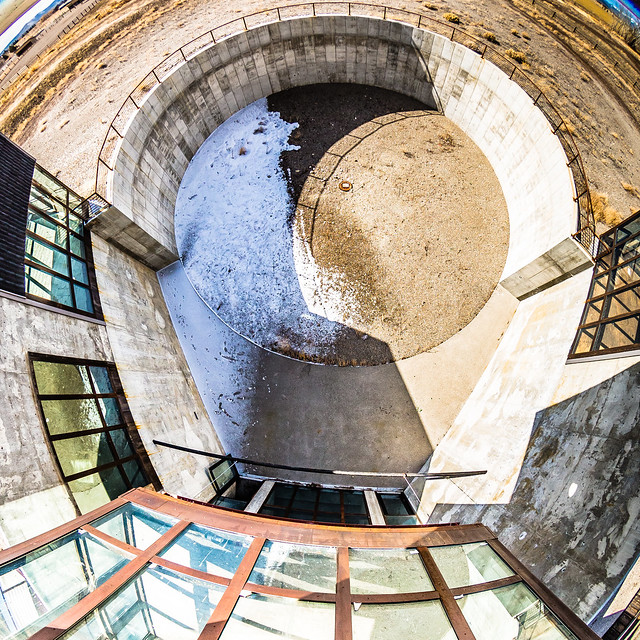
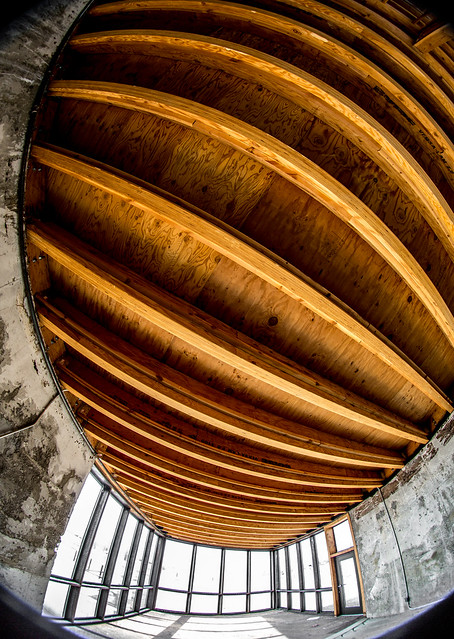
    Last month I had a wonderful opportunity to photograph one of the great unfinished homes of America, 30 Cheval in Bellevue, Idaho.

    The house was designed by architect Susan Desko, a local Sun Valley, architect, who was one of the designers who worked on the famous Frank Gehry project, the Lewis House. For those of you who haven’t seen the documentary on Gehry’s work, A Constructive Madness: Wherein Frank Gehry and Peter Lewis Spend a Fortune and a Decade… End Up With Nothing and Change the World, on the Lewis House, definitely check it out. Susan and her work with Gehry are featured in that film.

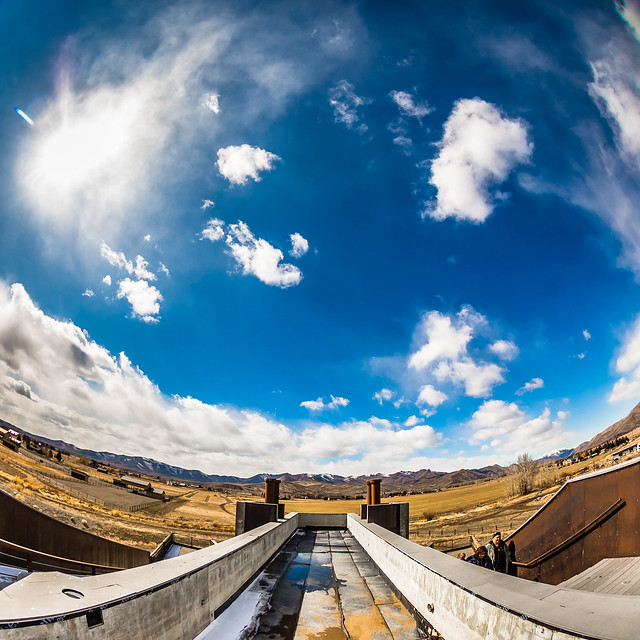
    30 Cheval is a remarkable home that was started but never completed, an unfinished masterpiece in the middle of Idaho. Construction has stopped on the home at this point leaving behind this grand structure high in the mountains of America. Hopefully someday someone will purchase it and finish Susan’s bold designs. The home has spectacular views, especially from the olympic length swimming pool up on the roof cantilevered above the home.

    I’ll upload more photos of the home over time, but here are 25 photographs of this amazing property now. Thanks to my pal Scott Jordan for taking me to this fantastical work of art and introducing me to Susan.

    30 Cheval, Sun Valley Idaho

    30 Cheval, Sun Valley Idaho
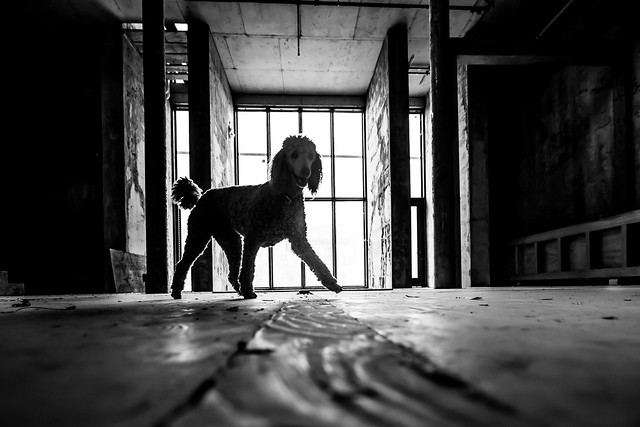
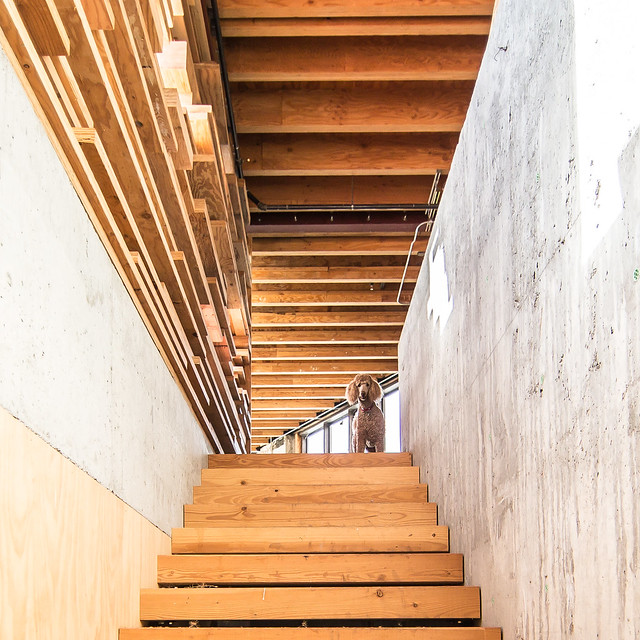
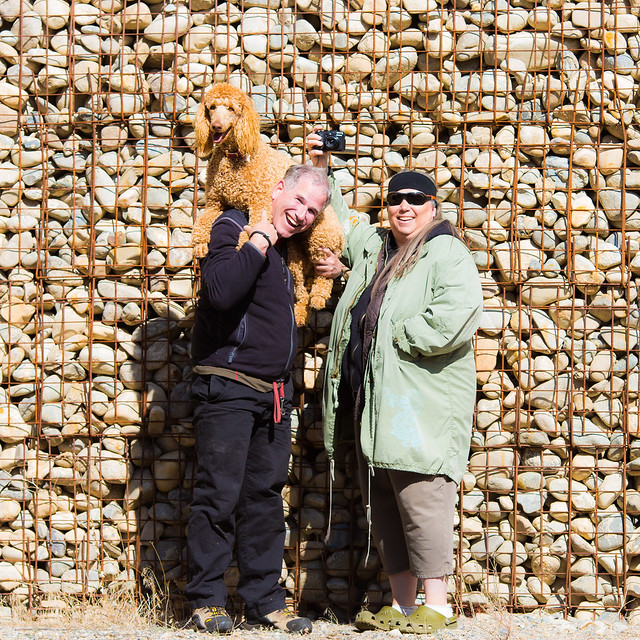
    Scott’s dog Susie visited the home with us. :)

    30 Cheval, Sun Valley Idaho

    30 Cheval, Sun Valley Idaho

    30 Cheval, Sun Valley Idaho

    30 Cheval, Sun Valley Idaho

    30 Cheval, Sun Valley Idaho
    The Idaho view from the full olympic length swimming pool.

    30 Cheval, Sun Valley Idaho

    30 Cheval, Sun Valley Idaho

    30 Cheval, Sun Valley Idaho

    30 Cheval, Sun Valley Idaho

    30 Cheval, Sun Valley Idaho

    30 Cheval, Sun Valley Idaho

    30 Cheval, Sun Valley Idaho

    30 Cheval, Sun Valley Idaho

    30 Cheval, Sun Valley Idaho

    30 Cheval, Sun Valley Idaho

    30 Cheval, Sun Valley Idaho

    30 Cheval, Sun Valley Idaho

    30 Cheval, Sun Valley Idaho

    30 Cheval, Sun Valley Idaho

    30 Cheval, Sun Valley Idaho

    30 Cheval, Sun Valley Idaho

    Scott Jordan and Susan Desko, Bellevue, Washington, 2013
    30 Cheval architect Susan Desko with Scott Jordan and his dog Susie.


    Thomas Hawk Digital Connection

  • Learning to See, Part X

    The limitations in your photography are in yourself.  –Ernst Haas

     Diagonal lines, as we learned in our entry, are the subliminal connectors that keep the viewers eye within and moving around the picture. As you looked at the busy example by Rembrandt we saw how he cleverly positioned his supporting elements to facilitate the movement and study of each subject. Similarly, Karsh utilized exquisite posing and darkroom technique to force the viewer to study Churchill’s piercing eyes, and in so doing we can just imagine his character and wisdom. Both artists used the diagonal line to cleverly create geometric triangulation, and by consequence keep the viewer engaged as the artist intended.

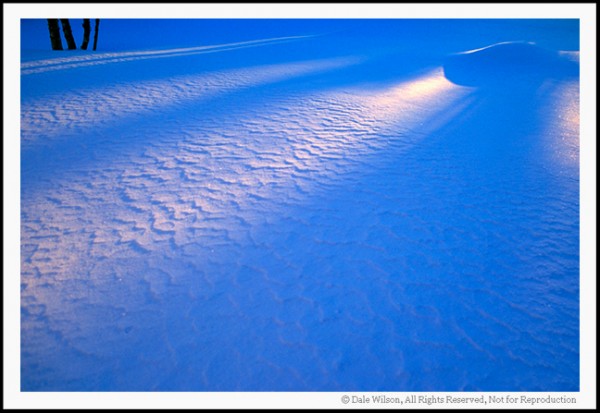
    This image has been cropped to show how diagonals create the element of movement. Casual observation should provide for your eyes to be drawn to the upper right hand corner of the image due to the lighter colour of the diagonal drawing your eyes there.  Incidentally the image is from my front yard and there was a snowman at the convergence of the lines.

    This image has been cropped to show how diagonals create the element of movement. Casual observation should provide for your eyes to be drawn to the upper right hand corner of the image due to the lighter colour of the diagonal drawing your eyes there. Incidentally the image is from my front yard and there was a snowman at the convergence of the lines.


    Should you study classical rules of composition in photography you will inevitably come across tutelage advocating the use of C-curves and S-curves as leading lines — lines to lead the viewer into the picture.  Well, let’s simplify this prospect even further: C-curves and S-curves are little more than a diagonal line that has consumed too much wine! Regardless if the line is a straight or curved diagonal its sole purpose in making a picture to draw the eye to an intended point or place of interest.

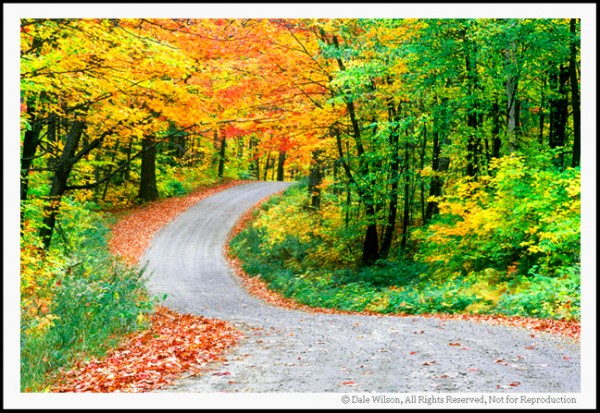
    This image of a country road shows a good example of an S-curve. Just like the C-curve our eye will follow the path to its smallest point, leaving us curious what lies beyond. Diagonals, whether they have been drinking wine or not, provide the direction of travel in an image by moving the eyes around the scene.

    This image of a country road shows a good example of an S-curve. Just like the C-curve our eye will follow the path to its smallest point, leaving us curious what lies beyond. Diagonals, whether they have been drinking wine or not, provide the direction of travel in an image by moving the eyes around the scene.


    I would wager that as you learn to find supporting elements to enhance the impact of your image you will more than likely be able to locate some natural element that could be used as a diagonal traffic director.  Curves are child’s play to the composition; they are easy to find and natural supporting components – we need only look for them.  Finding the straight diagonal is the fun and a challenge in making pictures.

    It has been my experience that diagonals most often work best with wide-angle lenses. The wide-angle lens will allow us to get closer to the diagonal element, such as a low angle camera on a roadway. Consequently the diagonal will oftentimes become the primary element in the picture so care must be taken not to allow the supporting diagonal overpower the intended subject.   With judicious care and placement of the supporting diagonal or curve, we will inevitably  be drawn to the subject that captured our attention and is the intended subject.

    Go to your park, your backyard, or anywhere else the muses may take you. Find a comfortable location to settle in, and leave your camera gear untouched.  Why did you stop here? Of all the possible locations, why did you select this area to sit and ponder? There is a very real possibility that something caught your eye, and you are already composing the picture in your mind. What is it?

    Now that you have located the unique tree, the colourful flower, the man-made structure that made you stop in the first place, start searching for the supporting element. What is nearby that you can use that will draw a line from the front of your picture right back to the attraction that will be your subject?

    Don’t be afraid to move around looking for a fence, a line of rocks, or perhaps cirrus-whip clouds pointing downward, or anything else that will draw the viewers attention into the picture, and eventually to the subject. That diagonal component is here – be it a curved or straight line; you just have to find it.

    Now the practise of photography begins, and with it the ensuing fun. And remember, if you are having fun, you are doing it right.

    Post originally from: Digital Photography Tips.

    Check out our more Photography Tips at Photography Tips for Beginners, Portrait Photography Tips and Wedding Photography Tips.

    Learning to See, Part X


    Digital Photography School

  • Sigma’s DP Merrill Cameras Compared – World-Beating Image Quality In Compact Bodies

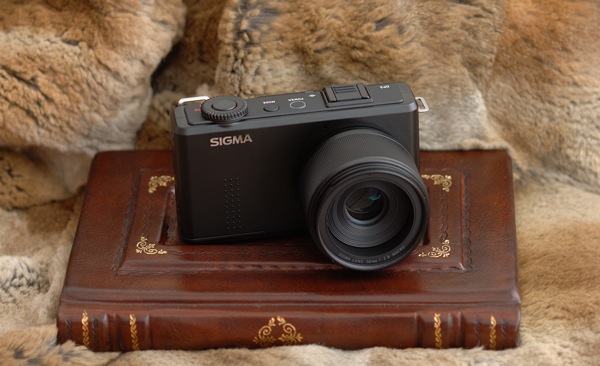
    Sigma, known mainly to photographers for their affordable lenses, recently caused quite a stir among discerning photographers. How? By building three compact cameras around the incredible sensor taken from the SD1, which initially cost $ 10,000. The image quality is simply incredible, and the cameras themselves are small, light and unobtrusive. For photographers seeking the best possible image quality on a budget, they’re unmatched.

    Photo1

    But there are lots of compromises. Foremost among them is battery life. The small batteries don’t last long so you’ll need to buy spares. Fortunately, they’re cheap. Second compromise; usability. It’s pretty good for a compact camera, and the controls are well laid out for photographers, but there’s some shutter lag, the auto-focus can’t match dSLRs and the huge RAW files take a while to write to the card.

    The main compromise we’ll deal with is focal length. Each DP Merrill camera is essentially identical except for the length of the fixed prime lens.

    • The Sigma DP1m has a 19mm lens; equivalent to a 28mm wide-angle on full frame.
    • The Sigma DP2m has a 30mm lens; equivalent to a 45mm standard lens.
    • The Sigma DP3m has a 50mm lens; equivalent to a 75mm short telephoto.

    All three lenses have a maximum aperture of f2.8 and a minimum aperture of f16. In my opinion (and not just mine), they are some of the best lenses ever made, including Leica and Zeiss.

    In use, being restricted to a single focal length changes the camera entirely. This comparison therefore focusses on which of the Sigma DP series will be right for you. For the cameras themselves, I highly recommend Michael Reichmann’s review at Luminous Landscape.

    I’ve used all three cameras for a variety of genres. Now comes time to choose.

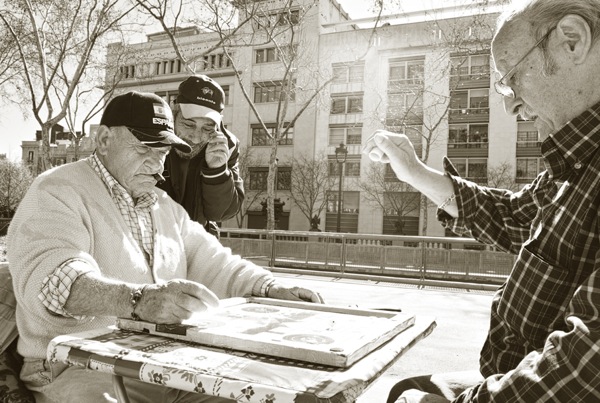
    Photo2

    The Sigma DP1m is very convenient if you want amazing image quality in a tiny package. I was able to take photographs that I otherwise couldn’t have made. This is because it doesn’t look like a serious camera and it’s effectively silent in use. Professional photographers, especially those working where cameras are unwelcome, will appreciate this. Compared to carrying a Nikon pro-body with a wide-angle lens, it’s very much smaller. However, I missed photographs due to the shutter lag and the corners a bit softer than the other two DP cameras.

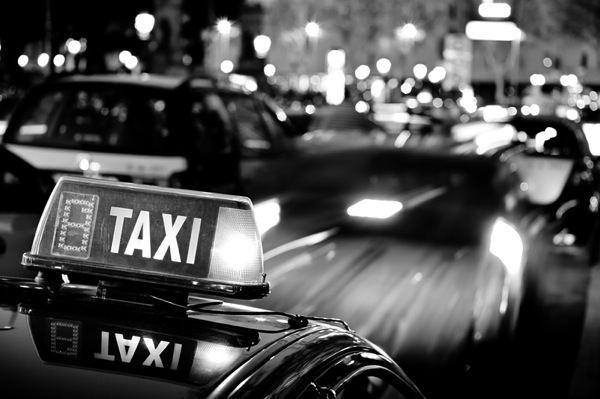
    Photo3

    The Sigma DP3m is specialised. I found a 75mm equivalent lens a bit long in use as an everyday camera. However, it is a pocket portrait monster, delivering incredibly sharp files with beautiful bokeh. It’s also got an amazing macro capability which, while not a true 1:1 reproduction, gets close enough for most applications. And there’s no noticeable distortion. The Sigma DP3m really excels when you fuss about and stitch images. 14.85 megapixels is enough for most applications, but if you want to print enormous files, you can increase the image resolution by making mosaics from multiple pictures using software that can stitch panoramas. Because the image quality is so amazing at a 100% level (because it’s not interpolated like a Bayer sensor), the files can be that much better, rivalling medium format cameras worth tens of thousands. For me, this is the niche use the DP Merrill series excels for. I can carry a tiny compact camera, a few cheap batteries and a lightweight CF tripod when I’m doing fine art photography and create the most amazing results.

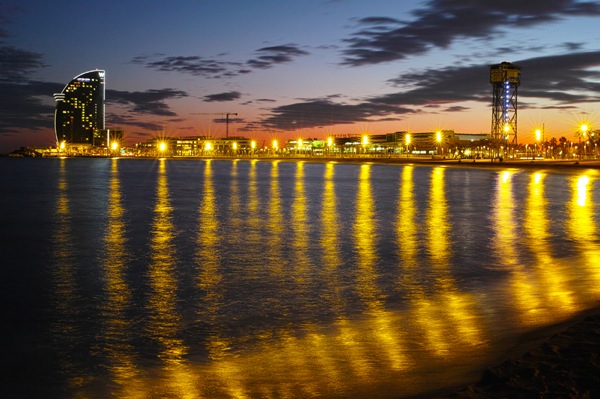
    Photo4

    The Sigma DP2m is a bit of a compromise. I’d recommend getting both the Sigma DP1m and the Sigma DP3m; they work very well together as a pair. But if this isn’t an option, the DP2m is your camera. It’s neither too wide-angle nor too telephoto. You can stitch images if you choose as there’s no real distortion, but the standard-lens approach works well for a range of subjects. The important thing is that you get access to that incredible X3 Foveon sensor. Download some Sigma DP Merrill sample images here; they speak for themselves.

    Ben Evans teaches Barcelona Photography. Learn the most important things about photography in one hour for (and for less than the price of a lunch) with the best-selling ‘Photography: The Few Things You Need To Know’ Audiobook – www.GreatBigBear.com/Audiobook

    Post originally from: Digital Photography Tips.

    Check out our more Photography Tips at Photography Tips for Beginners, Portrait Photography Tips and Wedding Photography Tips.

    Sigma’s DP Merrill Cameras Compared – World-Beating Image Quality In Compact Bodies


    Digital Photography School

  • The Rocket Travel Slider

    Long time no chat! Hello! I’ve been digging about for products that are currently on my radar that I wanted to tell you about!

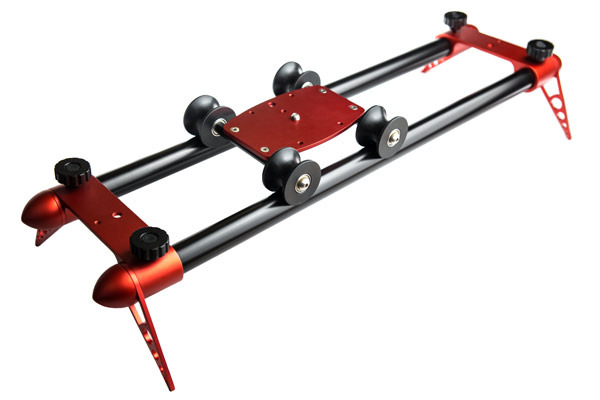
    I’ve posted previously about Kickstarter stuff, the last time was another product from the same group of folk out of Bend, Oregon. Nice Industries are skipping along a sweet looking trail of products for the dSLR video producer, or even the 4/3rds / mirror-less video producer. The last product, the one I wrote about previously, was called “Aviator Travel Jib” So, this time I wanted to tell you about a complimentary product called “The Rocket – Travel Slider” You might hear people talk about a “Dolly shot” that’s the nice smooth slide shot – left to right, back and forward… It really does add an extra “something” to your film making that you can’t typically get when handheld or on a static tripod.

    Have a look at the THE ROCKET – These guys are doing something right – the Kickstarter was already funded less than 24 hours after launch!

    If you’re going to the 2013 NAB Show you can see The Rocket Slider in action at booth 12141, and Zeke may even make you a nice cup of tea!

    So I have my very own Aviator Travel Jib now and i’ll be working on an article / review for you all [When I get better at film making!] it is a great little product that has added SO much ‘dynamics’ to my current film making. As well as the Canon 5D MK3, I’ve started using the Olympus OM-D (which I’ve fallen in love with!) and the two together are fantastic! – more on that later… Much more! I’m very much looking forward to getting The Rocket and finishing my film project!

    The_Rocker_Travel_Slider_Dolly

    The simplicity is what makes it that little bit more epic… You take the bar ends, the rocket sled and stick them in any old bag, your pipe goes wherever and you’re away! I’ve just priced up some extra light galvanised steel pipe here in Melbourne, it’s $ 38 for a 6.5M length – that’s with 2mm walls, so you’re going to be able to get a great dolly shot by cutting that in half and using the center support. Pretty excited about where dSLR cameras are taking independent film making right now, much more accessibility for the regular person (me!) to try this and that with the gear a lot of us already have.


    The_Rocket_Travel_Slider

    Enjoy!

    –Sime

    Post originally from: Digital Photography Tips.

    Check out our more Photography Tips at Photography Tips for Beginners, Portrait Photography Tips and Wedding Photography Tips.

    The Rocket Travel Slider


    Digital Photography School

  • SEO For Photographers Part 3: 5 Great Link Building Strategies

    Why are link building strategies important? This is a common question and the answer has everything to do with how much weight the search engines place on different aspects of our SEO activities. Although paying attention to your on-site search engine optimization is important, and it’s vital to select and use the right keywords for your photography business (see “SEO Continue Reading

    The post SEO For Photographers Part 3: 5 Great Link Building Strategies appeared first on Photodoto.


    Photodoto

  • Window Light Portraits: Weekly Photography Challenge

    During the week we posted a simple exercise here on dPS to practice working with Natural Light (from a window) when taking portraits.

    Today we thought it might be fun to make the exercise this weeks photographic challenge as it’s both simple to do and something that has the potential to teach you a lot (and all you really need to do it is a camera and a window (or even a door would do).

    3 directions window light

    Read the exercise here and then get to taking some window lit portraits!

    Once you’ve taken your ‘Window Light Portrait’ image and have upload it to your favourite photo sharing site either share a link to it or – embed it in the comments using the our new tool to do so.

    If you tag your photos on Flickr, Instagram, Twitter or other sites with Tagging tag them as #DPSWINDOW to help others find them. Linking back to this page might also help others know what you’re doing so that they can share in the fun.

    Also – don’t forget to check out some of the images posted in our last challenge – Sunlight challenge where there were some great images submitted.

    Post originally from: Digital Photography Tips.

    Check out our more Photography Tips at Photography Tips for Beginners, Portrait Photography Tips and Wedding Photography Tips.

    Window Light Portraits: Weekly Photography Challenge


    Digital Photography School

  • Photoshop Basics: Working with Layers

    Photoshop.  For photographers, web developers and graphic designers alike, its the go-to program for creating and editing professional grade graphics.  And like every beloved piece of software, it has to have a strong foundation to build upon; a base system that supports all other operations.  For Photoshop, it’s layers. Operations we describe here are performed using Adobe Photoshop CS5, but Continue Reading

    The post Photoshop Basics: Working with Layers appeared first on Photodoto.


    Photodoto

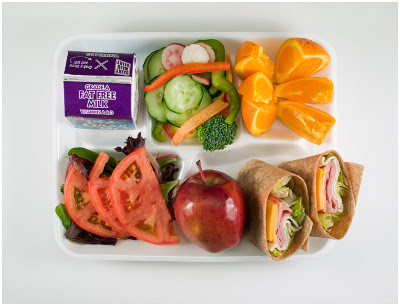
  • BTS: Cafeteria Lunches

    One of my favorite things about being a photographer is that if you pay attention, stories are everywhere. But the trick is paying attention—even if that story is presenting itself after you have had a drink or two at a New Year's Eve party.

    That's where I met Judith Schardt-Shure, a cafeteria manager at a local public middle school. We asked each other the typical "So, what do you do?" party questions, and the 30-minute discussion about cafeteria food that followed left me wanting to know more—and wanting to make sure other local parents knew, too.

    Which is exactly why I have developed HoCo360 over the last three years. It has now turned into what I had for 20 years as a newspaper photographer: a license to be curious.

    Read more »
    Strobist

  • How To Sync Multiple Camera Time Stamps In Lightroom 4

    Syncing the time stamp on multiple cameras is best done ahead of time. Every six months or so I take all of my digital SLR camera bodies and sync the clocks in them. This is important because if you use multiple cameras on a photo shoot like a wedding, you want to be able to sort the photos by the time they were taken so you can give the client a set of photos that are organized from start to finish. If your cameras time stamps are off, this can become very annoying in post because you’ll notice images being out of order. This becomes amplified the more your cameras are out of sync.

    Well, none of us are perfect and I certainly don’t claim to be! I recently shot a wedding with my good buddy Cliff Baise and I totally forgot to sync our cameras ahead of time. When I got his images on my computer to start editing everything together I was getting frustrated because I wasn’t seeing ANY of my images in Lightroom. Everything was sorted by time like it always is and I double checked everything. Well, it turns out our cameras were a full hour out of sync with my camera being an hour ahead of Cliff’s. So my images weren’t showing up in the timeline until much later in the wedding. This was pretty nerve racking because I hadn’t run into this problem before. I’ve always synced my own cameras (my wife usually shoots with me and uses my other main camera) so I’ve never had to deal with this before. I thought I was out of luck. So I started rummaging through the menu options in Lightroom and eventually figured out a way to sync the two cameras very quickly and very easily. Here’s how to do it:

    Find Images You Know Were Taken At The Same Time
    Screen Shot 2013-03-29 at 9.05.11 AM

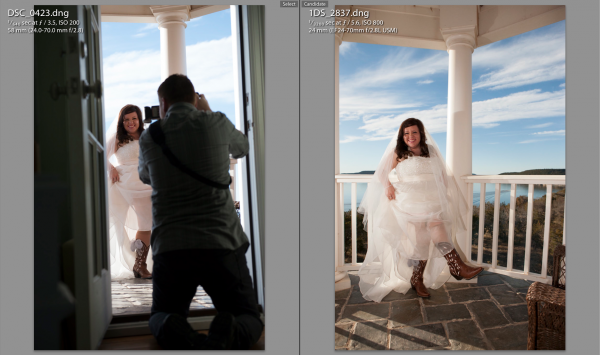
    At some point during the day of a wedding or any shoot, it’s likely that the two shooters took a photo at the same exact time (or dang close to it). This doesn’t have to be an exact, down to the mili-second thing…they just need to be close. For this wedding I found a shot that Cliff took of me taking a picture of the bride showing off her boots. Perfect. All I needed to do was find the picture that I took at that moment.

    Screen Shot 2013-03-29 at 9.05.24 AMThe first thing you need to do is select the first photo you find by clicking on it in Library Mode. Then, scroll down to the other image from the second camera, hold down command on a Mac (control on PC) and click that one as well. This will select both images at the same time. Now hit the ‘C’ key on your keyboard which will bring up the two images in Compare mode side by side. Once in compare mode you can click back and forth between the two images to see all the EXIF information on the right hand side. Again, this all has to be done in Library Mode, not Develop Mode.

    On the right hand side in the EXIF data, you will see the Capture Time. This is how you tell if the images are off at all. Just click back and forth between the two images and watch how the time changes. If they are off by more than a few seconds, it’s time for the next step.

    Syncing The Times

    This part was a little tricky the first time. Go ahead and write down the exact times of each photo on a piece of paper or type it onto your computer somewhere. Note which time correlates with each image.

    Now you need to decide which set of images you want to sync. In all honesty, it doesn’t really matter which one you choose. Nobody cares what time the picture was taken, they just need to be in order of when they were taken. So I just chose to make Cliff’s images match the time of my images. I could have gone the other way around and gotten the same result.

    Screen Shot 2013-03-29 at 12.14.44 PMTo sync the time stamps, select all the images from the camera you want to correct. If you have them in separate folders this will be easy. If they are all mixed in to the same folder, you can sort by File Name in Library Mode and then the images will be separated. If all the images from the one camera are in their own folder, just hit Command A on a Mac (Control A on PC). This will select all the photos. If the images are mixed with another camera in the same folder, separate them by file name, then select the first image from the camera you want to correct by clicking on it, then scroll down to the last image from that camera, hold down Shift and click the last image.

    Now that you have all the images selected that you want to fix, go up to Metadata in the top menu and scroll down to Edit Capture Time. When the window pops up all you need to to is update the time under the ‘New Time’ section. The original time will be on the top so just plug in the time that you wrote down from the correct camera in the ‘Corrected Time’ section.

    Screen Shot 2013-03-29 at 12.16.11 PM

    Once this is done, it’s important to just double check everything and make sure you have everything correct. It says at the bottom of the window that the operation cannot be undone so don’t make any mistakes! Once you are sure you have everything right just click Change and you’ll be done! You should now be able to select the images from both cameras in library mode, sort by time and see all of the images in chronological order.

    Conclusion

    Like I said in the beginning, it’s way easier to do this right the first time by synching the cameras before the shoot. But if you ever forget this like I did, being able to do it in Lightroom is a life saver!


    Post originally from: Digital Photography Tips.

    Check out our more Photography Tips at Photography Tips for Beginners, Portrait Photography Tips and Wedding Photography Tips.

    How To Sync Multiple Camera Time Stamps In Lightroom 4


    Digital Photography School
  • Getting off Auto – Manual, Aperture and Shutter Priority modes explained

    Macro image of a digital camera's controls set on autoYou may have heard that once you get a DSLR you need to learn to shoot in manual and only ever use that mode. That if you are using the Aperture or Shutter Priority you’re cheating and if you want to be more like a pro you have to shoot in Manual only, all the time. To that I say “horse pucky”! (if you’re old enough to remember M.A.S.H. you’ll get that reference).

    What you’ll learn from this article:

    • what each of the A (Av), S (Tv) and M modes are, a definition of each
    • what types of situations I would choose each of them and why
    • some advantages of A (Av) and S (Tv) over manual
    • some advantages of Manual and when it’s the only choice
    • some things to look out for

    The three manual shooting modes what are they?

    1. Manual mode: this mode puts you in full control of the three settings on your camera that control the exposure (commonly known as the exposure triangle).  ISO, aperture and shutter speed. In manual you will be making all of those choices.
    2. Aperture priority:  (A on Nikon, Av on Canon) this mode has you in control of two of the three exposure controls:  ISO and aperture.  The camera will select an appropriate shutter speed to give you a correct exposure.
    3. Shutter priority: (S on Nikon, Tv on Canon) this mode once again puts you in control of two of the three exposure settings, this time it is ISO and shutter speed.  The camera will select the aperture for a correct exposure.

    There are of course other factors involved that will affect the exposure such as what Metering Mode you’re using and Exposure Compensation. More on the latter later.

    Shot in Aperture mode to control Depth of Field

    Shot in Aperture mode to control Depth of Field

    How do you decide which mode to use?

    I actually use the Aperture and Shutter priority modes more often than I use Manual. How I decide which mode to use is based on my subject matter and what is my goal of the image as follows:

    • I choose Aperture Mode when I want to control depth of field (DoF) as my top priority.  Such as to create shallow DoF for a portrait, people photos, or any time I want a blurred background (choose a large aperture like f2.8 or f1.8). That also applies if I want a larger DoF as well such as for a landscape photo, group portraits, or shots where I want maximum detail and sharpness (choose a smaller aperture like f11 or smaller)
    • I choose Shutter Mode when my top priority is controlling motion, either freezing or blurry it. So freezing for subjects like sports or action and I will choose a faster shutter speed such as 1/500th or faster depending on the subject. Subjects like flowing water, waterfalls, or panning a moving subject I will select a slower shutter speed like 1/15th for panning and 2-5 seconds for flowing water. (for more on this topic read my article Using Shutter Speed to Freeze or Blur Motion)
    • I switch to Manual Mode in a few specific instances: doing a portrait where the subject is not moving; night photography; pretty much any time I’m using a tripod; doing HDR bracketed exposures (even though my camera does 7 on AEB I still use Manual when on tripod); when using studio lighting; certain times when using a speedlight (such as working in a dark room and I want to maintain some ambient light levels)

    Here’s some example images taken with each of the modes as explained above.

    Shot in Aperture mode to control Depth of Field

    Shot in Aperture mode to control Depth of Field

    Shot using Shutter Priority to use a panning technique and slow shutter speed

    Shot using Shutter Priority to use a panning technique and slow shutter speed

    Shot in manual mode for night photography challenges

    Shot in manual mode for night photography challenges

    Things to watch out for and keep in mind

    ISO: remember that when you select either A or S mode you are still choosing the ISO
    I usually select my ISO first, based on the lighting conditions I’m shooting in.  If it’s bright sunlight I go to 100 or 200.  If it’s subdued light, shade or overcast I might bump it up to 400. For indoors or dimly lit rooms I may go to 800 or higher up to 3200 if necessary (you need to test to know the upper limits of your ISO and where you’re comfortable shooting with your camera, mine will yield pretty decent results even at 6400 and beyond).How I know I’ve gone high enough with the ISO, is if I have a fast enough shutter speed to eliminate camera shake when hand holding.  If I’m on a tripod, I’m usually shooting a ISO 100 or 200 because I can use any shutter speed safely.

    Check your shutter speed when in A mode
    Just because the camera is picking the shutter speed does not mean it will give you a nice sharp image. Yes it will choose a shutter speed to give you the correct exposure, but if you set up your camera for ISO 100 at f16 in dark room you’ll wind up with a pretty slow shutter speed like 1/2 of a second perhaps, and without a tripod you’ll get blur from camera shake.So keep your eye on the shutter speed the camera is picking and if it is too slow (I suggest you follow the 1/focal length rule for minimum shutter speed – for more on getting sharp images read my article 5 tips for Getting Sharper Images) readjust the ISO, the aperture or both – picking a higher ISO will help, so will choosing a larger aperture like f4 as that will let the camera pick a faster corresponding shutter speed.

    Multiple bracketed exposures using Manual for HDR processing

    Multiple bracketed exposures using Manual for HDR processing taken during my Drumheller Workshop

    Watch for exposure warning notices in A or S modes
    Your camera is pretty smart but it can only work within its own limitations. So it will tell you if you’ve gone outside that boundaries of what it can adjust for you.  This will show up as a flashing warning in your viewfinder. I’ll give you an example for both Aperture and Shutter modes.

    Scenario #1 in Aperture mode if you choose say ISO 800, F1.8 on a bright sunny day the camera will tell you there is simply too much light and give you a flashing shutter speed (your fastest) like 1/4000th of a second.  If you take the photo it will be overexposed which is what the camera is warning you above.  Choose a lower ISO or smaller aperture and try again until the warning is gone.

    Scenario #2 in shutter mode in a darkened room with settings of ISO 400 and 1/1000th of a second you will likely get a flashing aperture shown in your viewfinder (the largest your lens goes to such as f3.5 or f5.6).  To correct this you need to choose a slower shutter speed and likely a larger ISO as well until that warning disappears.Side note: this is why kit lenses with a maximum aperture zoomed in of f5.6 become somewhat limiting. Grab yourself a simple 50mm f1.8 for low light conditions, it’s an inexpensive great lens to have in your bag

    Painting with Light during night photography on my Drumheller workshop

    Painting with Light during night photography on my Drumheller workshop

    Exposure compensation in Manual
    There is often confusion among students about using Exposure Compensation when in Manual mode.  This behaves differently depending in the camera you have, in Canons for example it just doesn’t apply, as it is has no affect. When using a Nikon if you shift the Exposure Compensation to say +2 what it does it adjusts the scale you see in your viewfinder to reflect that so if you then set the exposure to match the “0″ mark it will give you a +2 exposure. I’d personally find that even more confusing, so if you want +2 just set your exposure in Manual so that it shows +2 on the scale.

    Summary

    Steps I use are these:  

    1. choose ISO first
    2. decide whether motion or depth of field are most important and choose my shooting mode
    3. set my shutter speed or aperture for the results I want
    4. check for warnings and slow shutter speeds
    5. review image and correct as necessary

    Tell me what you do and if you find this information helpful.

    Post originally from: Digital Photography Tips.

    Check out our more Photography Tips at Photography Tips for Beginners, Portrait Photography Tips and Wedding Photography Tips.

    Getting off Auto – Manual, Aperture and Shutter Priority modes explained


    Digital Photography School