Category: Photography

  • How to Choose Your Next EOS Camera: Part Two

    01.jpg

    This article is written by Andrew S. Gibson, the author of Understanding EOS, on sale now at Snap N Deals for a limited time.

    Note: This article is about Canon’s semi-professional and professional EOS cameras. You can read about its entry level models in my previous article.

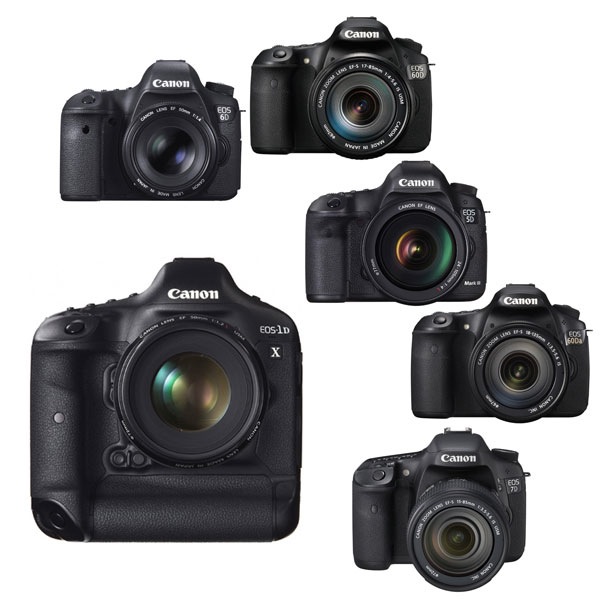
    Semi-professional cameras

    This group of EOS cameras is aimed at semi-professional photographers and serious hobbyists. Don’t let that put you off if your budget stretches to one of these models and you’re looking to buy your first EOS camera. There is nothing intrinsically more complicated about these models. In some ways they are even simpler to use as most of them don’t have the automatic exposure modes (portrait, landscape etc) that come on entry-level models.

    The main differences between these cameras and entry level models are:

    Size and weight. These cameras are bigger and heavier than entry-level models. Most of them have bodies constructed from magnesium alloy frames and are built to last.

    Quick control dial. Entry-level models use a set of four cross keys to dial in exposure compensation and make other adjustments. Semi-professional (and professional) EOS cameras use the Quick Control dial instead. This makes it easy to dial in exposure compensation while looking through the viewfinder and simplifies the photo taking process.

    Autofocus. Two of these models (the EOS 7D and 5D Mark III) have a much more advanced autofocus system than the entry level cameras and are suitable for shooting moving subjects such as sports and wildlife.

    Full-frame. Both the EOS 6D and 5D Mark III have full-frame sensors. Cameras with full-frame sensors cost more but give better image quality and improved high ISO performance over cameras with APS-C sensors.

    Names. These cameras have the same name no matter where they are sold.
    02.jpg

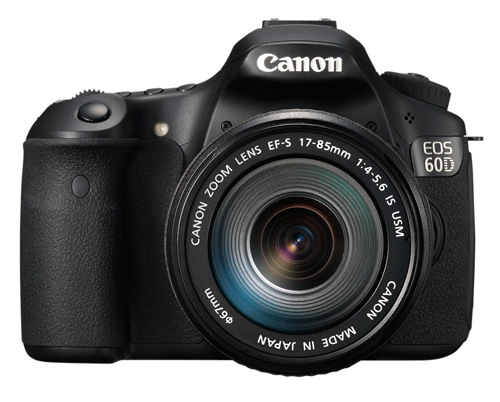
    EOS 60D

    September 2010

    Key specs:

    • 18 megapixel APS-C sensor
    • 9 point AF with 9 cross-type sensors
    • 63 zone evaluative metering
    • Live View and movie mode
    • DIGIC 4 processor
    • Uses SD cards
    • Three inch vari-angle LCD display
    • Built-in flash with wireless flash control

    The EOS 60D is bit of an oddity in that it has a smaller and lighter body than the previous models in the xxD range like the EOS 40D and 50D. In terms of size, weight and features the EOS 60D occupies the middle ground between the EOS 700D and 7D. However, the 700D, being much newer, has a few advanced features that the 60D doesn’t have such as a touchscreen menu system and hybrid AF for improved autofocus performance in Live View and movie mode.

    The EOS 60D is a fine camera to learn photography with but the age of the model does suggest that Canon may replace it with an EOS 70D sometime this year. Whether the 70D will retain the body size of the 60D or return to the larger sizes of its predecessors remains to be seen. However, in the meantime the EOS 60D represents great value for money.

    While lagging slightly behind the EOS 700D in terms of specification, it has a much more professional feel in the hand, and the Quick control dial is a great asset. If you’re trying to decide between the 700D and the 60D, it’s a good idea to try both out in a camera store. That’s the best way to appreciate the difference between the two.
    03.jpg

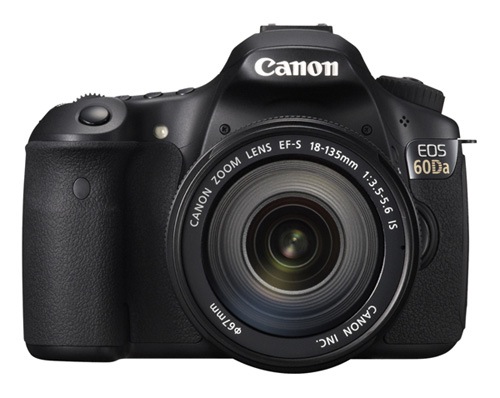
    EOS 60Da

    April 2012

    Key specs:

    • 18 megapixel APS-C sensor
    • 9 point AF with 9 cross-type sensors
    • 63 zone evaluative metering
    • Live View and movie mode
    • DIGIC 4 processor
    • Uses SD cards
    • Three inch vari-angle LCD display
    • Built-in flash with wireless flash control

    The EOS 60Da is a modified version of the EOS 60D designed specifically for astrophotography. It contains a powerful infra-red filter that increases hydrogen-alpha light sensitivity by 300%. This means that it can capture light wavelengths emitted by deep space gases normally blocked by the low-pass filters in regular digital SLRs. This camera is a specialised tool for photographing stars and nebulae in space, and not intended for ‘regular’ photography.
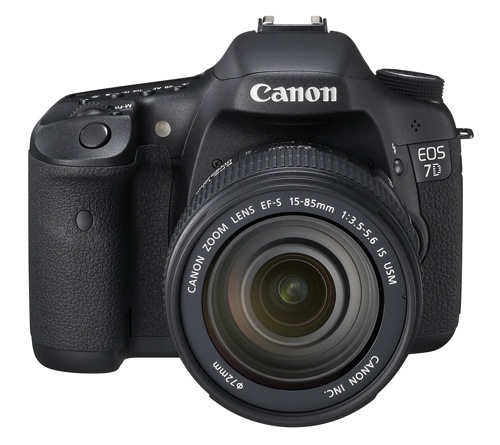
    04.jpg

    EOS 7D

    October 2009

    Key specs:

    • 18 megapixel APS-C sensor
    • 19 point AF with 19 cross-type sensors
    • 63 zone evaluative metering
    • Live View and movie mode
    • Dual DIGIC 4 processors
    • Uses CF cards
    • Three inch fixed LCD display
    • Built-in flash with wireless flash control

    The oldest model in the current EOS lineup, the EOS 7D marked a turning point in EOS camera design when it was released in 2009. It was the first APS-C camera to feature an advanced autofocus system capable of accurately focusing on and tracking moving subjects. It has 19 cross-type autofocus points (entry level models have 9 point AF arrays) plus other innovative features such as the electronic level and built-in Speedlite transmotter that have since been included in other EOS cameras. Despite its ‘age’ it’s still a very capable camera and the least expensive EOS camera to feature advanced autofocus.

    The big question is will Canon release a 7D Mark II in 2013 and if so how much will it cost and how good will the autofocus be? In the meantime, the EOS 7D is another camera that represents excellent value for money. It is ideal for photographers who photograph sports, wildlife or any other moving subject and need an AF system capable of keeping up.
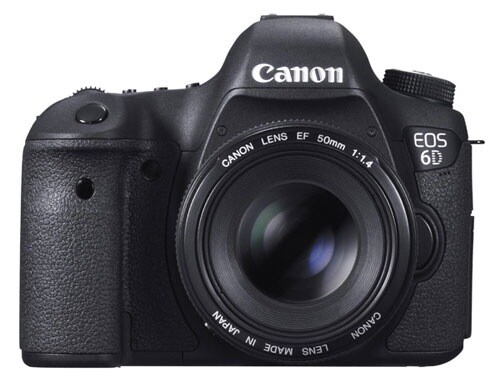
    05.jpg

    EOS 6D

    November 2012

    Key specs:

    • 20.2 megapixel full-frame sensor
    • 11 point AF with 1 cross-type sensor
    • 63 zone evaluative metering
    • Live View and movie mode
    • DIGIC 5+ processor
    • Uses SD cards
    • Three inch fixed LCD display
    • No built-in flash
    • Built in Wi-Fi and GPS connectivity

    The EOS 6D is less expensive, smaller and lighter than Canon’s other two full-frame EOS cameras, the EOS 5D Mark III and 1D-X.

    Unique features include an 11 point autofocus system that Canon claims is the best in low light of any EOS camera and built-in Wi-Fi and GPS transmitters (it is sold in some countries without the latter two features where forbidden to do so by laws regarding radio transmission).

    The Wi-Fi lets you tether the camera wirelessly to a computer and will be appreciated by anybody who works in a studio or has bought a dedicated Wi-Fi transmitter separately (expensive!) and struggled to get it to work. The GPS transmitter, if enabled, records your location in the photo’s metadata and will be a useful feature for some.

    The EOS 6D, like Canon’s other full-frame cameras, doesn’t have a built-in flash or Speedlite transmitter for controlling Speedlite flash units remotely.
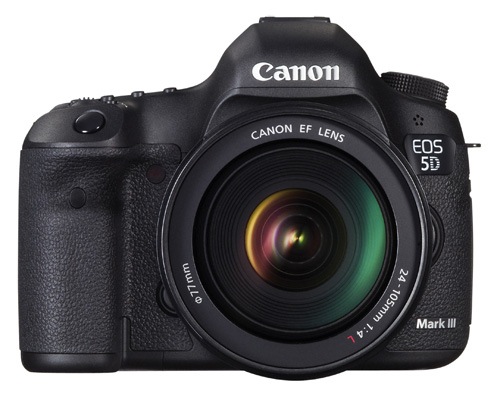
    06.jpg

    EOS 5D Mark III

    March 2012

    Key specs:

    • 22.3 megapixel full-frame sensor
    • 61 point AF with 41 cross-type sensors
    • 63 zone evaluative metering
    • Live View and movie mode
    • DIGIC 5+ processor
    • Uses CF and SD cards (dual card slots)
    • Three inch fixed LCD display
    • No built-in flash

    This is the latest model in the venerable 5D range and is used by many professional photographers. While the most expensive of the models reviewed so far, it also has the best autofocus system (61 point array), high ISO performance, dual CF and SD card slots and a 22.3 megapixel sensor. If you can afford it you won’t be disappointed by any aspect of this camera. It is a tool that will serve you faithfully for many years to come.

    Professional cameras

    Canon’s top of the line EOS 1 series cameras are aimed at professional photographers. They are big, heavy and expensive, built to withstand just about anything the working pro can throw at them. There is just one current model:
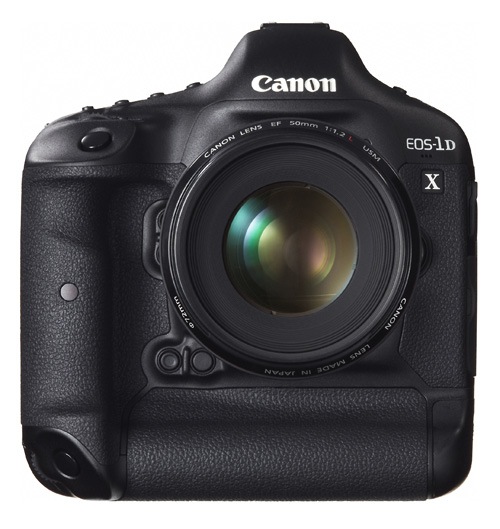
    07.jpg

    EOS 1D-X

    April 2012

    Key specs:

    • 18.1 megapixel full-frame sensor
    • 61 point AF with 41 cross-type sensors
    • 252 zone evaluative metering
    • Live View and movie mode
    • Dual DIGIC 5+ processor plus a DIGIC 4 processor dedicated to AF processing
    • Uses CF and SD cards (dual card slots)
    • Three inch fixed LCD display
    • No built-in flash

    The best camera in the EOS range by far. I’ve used one and the look, feel and quality just blows the other cameras away completely. Which, considering the price, is exactly what you’d expect.

    The EOS 1D-X has an 18.1 megapixel full-frame sensor, 61 point autofocus, 12 frames per second continuous shooting speed, two DIGIC 5+ processors, a weatherproofed body and a maximum ISO of 204,800. It has a built-in portrait grip and a large battery that outlasts every other Canon battery.

    If you’re in the market for this camera bear in mind the extra size and weight may be a disadvantage. Take the EOS 5D Mark III into consideration when making your buying decision. The money saved on the body could be used towards some good quality glass.

    Final thoughts

    Recent advances in digital camera technology mean that there has never been a better time to buy a new camera body, regardless of which brand you use. The recent expansion of Canon’s line-up with the launch of the EOS 100D and 700D means that Canon users have a greater choice of camera bodies than ever before, which can only be a good thing for the consumer.

    Understanding EOS

    It’s wise to remember that whichever camera you have, it’s only a tool. Photographers create photos, cameras just take them. An understanding of the principles of light and composition are just as important as which model you own.

    08.jpg

    This is the principle behind my ebook Understanding EOS, which I wrote to help people learn to use their EOS cameras. It’s available now at Snap N Deals for a special price for a limited period. Whichever EOS camera you own, it’s the essential accessory to help you get the most out of your camera. Grab it today (at 30% off) at SnapNDeals.

    Post originally from: Digital Photography Tips.

    Check out our more Photography Tips at Photography Tips for Beginners, Portrait Photography Tips and Wedding Photography Tips.

    How to Choose Your Next EOS Camera: Part Two


    Digital Photography School

  • Studio Lighting: Unravelling the Complexity of Multiple Lights

    As one gets started in studio lighting I think it is pretty common to get over ensconced in the lighting scenarios. It is funny because everything you read tells you to start with one light until you really start getting a feel for how to shape, angle and manipulate it with purpose. Most of us end up getting lost in multiple light set-ups struggling to find proper lighting solutions. I was not any different.

    Soon after I got started, I found myself using 4-5 lights in every setup and then getting frustrated with the nuclear explosion of light that was going off with each shutter click. It makes me laugh now, because at the time I was solely focused on getting light on the subject, background and in most cases everything else in the room that was touched by the mushroom cloud of illumination. I did not understand the importance of shadow, shape, depth and form.

    Maturing with studio lighting takes time and patience, and always remember that each light should have a specific purpose. Understanding how to build the lighting with intent in mind takes plenty of practice and a fair number of mistakes and experimentation. Just remember to keep an open mind and never stop learning from both your successful and failed attempts. So, let’s get down to business and walk through a more challenging lighting set-up being mindful of the reasons and rational for each lights use.

    Creative Winter-106(sRGB-websize)

    Concept

    In pre-planning for any shoot it is always good to have some structure and direction to the idea or concept. Some focus, no matter how vague, will always be helpful. Understand what sort of mood, feel or emotion you hope to portray and have some insight into what you want presented in your final image. In the shoot presented in this article, the overall theme was a creative portrait based on the beauty of ice, winter and cold.

    This already set most of my color palette to blues, whites, silvers and other cooler tones. I also wanted to give a feeling like the model was being seen through a pane or block of ice and knew I wanted some crystal like texture incorporated. Simply put, I needed a lighting set-up that would maximize the crystalline texture, but that would also provide a flattering light for the model. Sounds simple right?

    Lighting Plan

    Let’s think through this lighting for a moment. In order to light for texture, one needs to light from the side so that the light skims the texture and creates shadows that give some shape, depth and form to the surface. Great! We can side light our crystalline forms. Oh but wait, if we side light the model we are likely going to see every blemish, hair or imperfection on the skin and either are going to resort to a lengthy saddle-sore ridden editing session, or have a very unflattering photo of our model.

    How can I get a nice beautiful light on my model? I know, butterfly or clam shell lighting provides a very flattering look and has a way of smoothing out the complexion. Awesome! But wait, if I front light the texture, I will lose the depth and form of the crystals. Quite a conundrum, huh? Well, at least it provides a framework to help me set-up my lighting. I want some sort of combination of side lighting and butterfly lighting that will accomplish both of my needs. Lets break it down in a diagram.

    LightingSetup

    Set-up

    All make-up and styling was performed by the amazingly creative Dina Bree. The model, Leslie, was shot against a blue seamless background through a piece of plexiglass that had been treated to create a crystalline or frozen texture. White and silver confetti was released over the model during shooting to gain an effect as if snow was falling lightly.

    I had two strip boxes, one on either side of the plexiglass skimming the surface and providing some side lighting to the model. The key light was a diffused beauty dish that was placed directly above the plexiglass and angled down at the model and positioned so that it would not spill light on the textured surface. My fill light was a 7” reflector with blue gel bounced off of the floor beneath the plexiglass up at the model again trying to avoid spill on the plexiglass. I knew I wanted both the textured surface and the model in sharp focus so I chose a very small aperture at f/16 to gain a large depth of field.

    Thus, I had found a pleasant combination of side lighting and butterfly lighting to accomplish my goals within the original framework I had outlined.

    When I conceived the idea for this shoot, I have to admit I was not sure if I could pull it off effectively. I knew the lighting would be tricky and that it could take some subtle changes or modifications as I progressed through the shoot. I also knew that it could be a complete disaster with an ultimate failed result. Either way it was going to be a great learning opportunity. Lighting with intent and purpose is critical as you move into multiple light set-ups. Planning and understanding the need for each light serves to unravel a lot of the complexity encountered in studio lighting scenarios.

    Also, don’t be afraid to experiment within the set-up. This final shot was a fantastic accident as I decided to turn the key light off for some production shots and I got a whole new look and feel to the image. Take your time and think it through and make sure you have an idea of where you are going before you start. There is no need to fly completely blind. Be confident, clever and calculated and you will soon find that you can amaze yourself and satiate that starving creative beast inside you with a nice healthy meal.

    Creative Winter-314-Edit(sRGB-websize)

    Post originally from: Digital Photography Tips.

    Check out our more Photography Tips at Photography Tips for Beginners, Portrait Photography Tips and Wedding Photography Tips.

    Studio Lighting: Unravelling the Complexity of Multiple Lights


    Digital Photography School

  • Kitchens: Weekly Photography Challenge

    Easter BreakfastKitchens – we all have one (or at least should have access to something resembling one) – so lets make our kitchens the focus of this weekends photography challenge.

    The task is simple – take the best possible shot that you can in your kitchen.

    Let your imagination run wild – you might snap a food image of something in your kitchen, you might take a shot out of your kitchen window, you may choose to sit a portrait subject in your kitchen, you could set up a still life shot on your kitchen table, you might try your hand at a self portrait in the kitchen….. anything goes.

    Feel free to take a humorous approach, a serious one, or to be as creative as you’d like.

    I can’t wait to see what you cook up (sorry)!

    Note: We’re looking for ‘new’ shots – this is a challenge rather than a look through your archives for a shot!

    Here are a few shots to get your imagination flowing:

    [365] 096

    158/365 - Oh, Veronica Mars!!!

    Large Order Of Toast

    Day 354 - Tea is drunk to forget the din of the world

    Alice In Domesticland

    My Kitchen

    kitchen from livingroom

    Cupcakes Clone

    co-dependent

    Once you’ve taken your ‘KITCHEN’ image and have upload it to your favourite photo sharing site either share a link to it or – embed it in the comments using the our new tool to do so.

    If you tag your photos on Flickr, Instagram, Twitter or other sites with Tagging tag them as #DPSKITCHENS to help others find them. Linking back to this page might also help others know what you’re doing so that they can share in the fun.

    Also – don’t forget to check out some of the images posted in our last challenge – Seasonal challenge where there were some great images submitted.

    Post originally from: Digital Photography Tips.

    Check out our more Photography Tips at Photography Tips for Beginners, Portrait Photography Tips and Wedding Photography Tips.

    Kitchens: Weekly Photography Challenge


    Digital Photography School

  • 50 Striking Examples Of Professional Photos In Twitter Background Design

    If you are a man of a taste and you like to tweet then you’ll probably appreciate these Twitter backgrounds of photography-related accounts. Go ahead and check them out!

    The post 50 Striking Examples Of Professional Photos In Twitter Background Design appeared first on Photodoto.


    Photodoto

  • Sigma DP3 Merrill Review

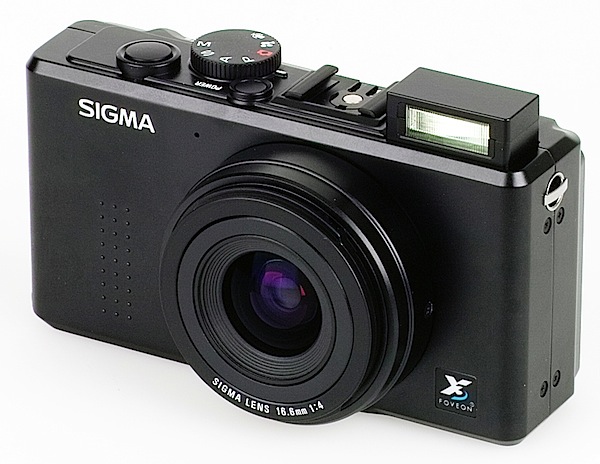
    Sigma DP3 Merrill-flash.jpg

    Some see the arrival of cameras such as these as indicative of camera companies responding to the market by taking on smart phones as a camera to take everywhere.

    While phone cameras are damned useful and most of them take pretty decent images, they fall down in many respects.

    Some, but not all, fall down in low light, with little access to high IOS settings; many disallow precise control of the lens aperture, enabling low light photography and/or control of depth of field; a similar story can be told of shutter speed control, preventing sharp images of fast moving objects; extended zooms are rare in smart phone cameras; battery life may be foreshortened due to excessive phone use.

    But we’re not here to bash smart phones … god love ‘em!

    Back to the review.

    As usual, I started firing off with not a peek in the manual. OK for a few shots, then the screen blacked out!

    Messing about with the buttons I found I had encountered one that accidentally canned the display. Dumb!

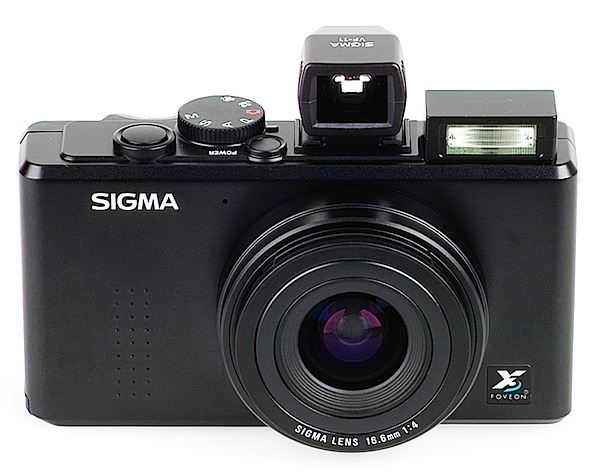
    The DP3 Merrill looks like a bread-and-butter digicam in its all black livery with very few external controls, each id’d by clear white text. And little else.

    Sigma DP3 Merrill with VF.jpg

    Sigma DP3 Merrill-Back.jpg

    Controls

    Top deck: flash hot shoe, button for mode selection and shutter plus a command dial that allows alteration to diaphragm, shutter speed and menu.

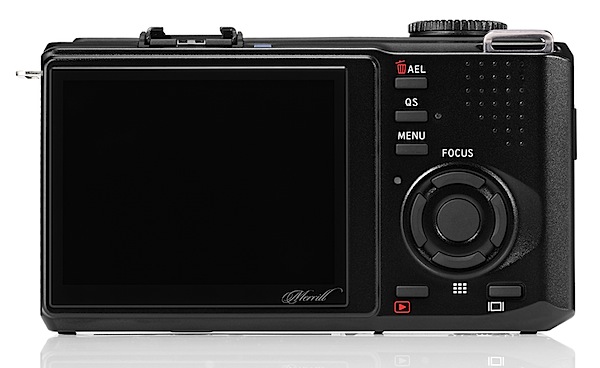
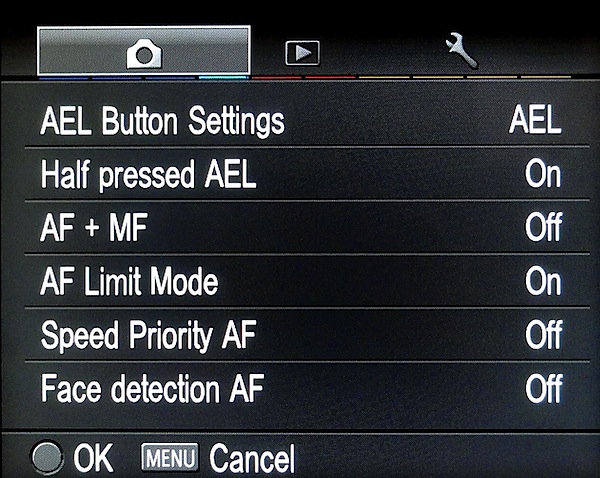
    Rear: a button for AEL (exposure lock), doubling for trash; a QuickSet button that accesses commonly used functions like ISO, flash mode, metering and drive modes; the menu button which takes you into the not over-loaded menu options; the four way controller selects picture settings (contrast, sharpness, saturation) and focus pattern; replay; display on/off and other options.

    If you want to select Program or shutter or aperture priority you tap the mode button. Simple!

    Menu.jpg

    Sigma DP3 Merrill Features

    The big headline with this camera is its Foveon X3 sensor that captures 46 million pixel still images. See below for an explanation.

    The maximum image size is 4704×3136 pixels or 40x27cm as a printed image.

    Video: A tiny 640×480 MPEG movie clip at 30fps. This camera is surely not for making movies.

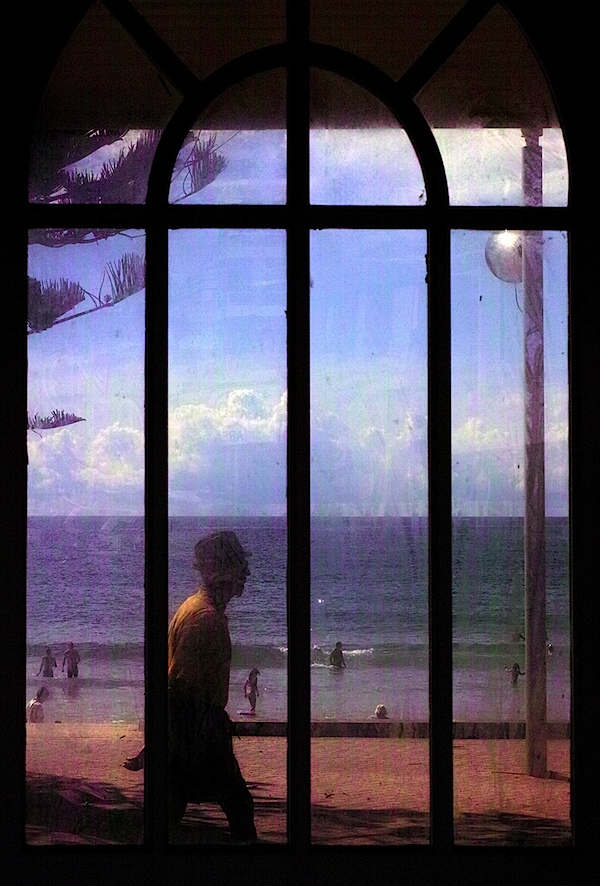
    Beach window 5.JPG

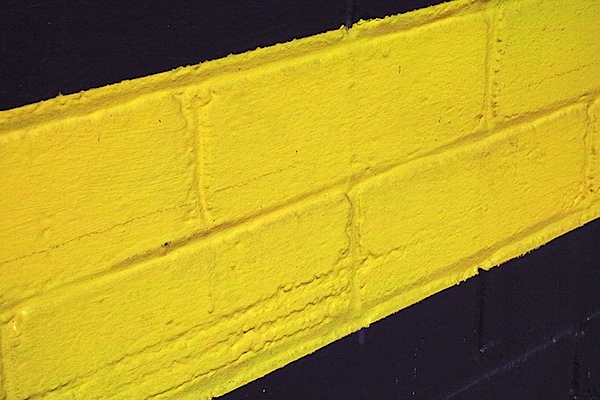
    Brick wall 2.JPG

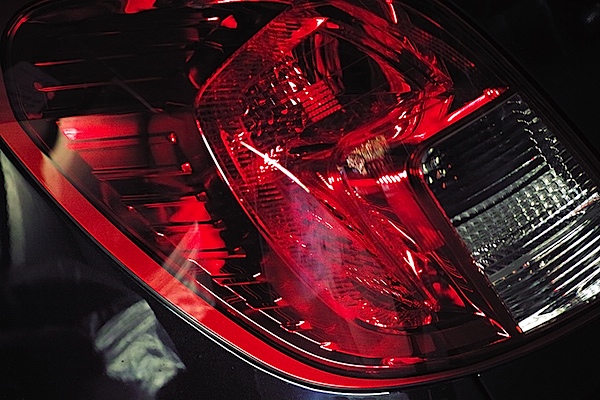
    Car light.JPG

    The fast f2.8/500 lens has a 35 SLR equivalent of 75mm, so it’s an ideal beast for shooting portraits, not general scenery. Macro? Ideal!

    A large buffer memory enables the camera to capture up to seven RAW images per sequence in continuous shooting mode.

    Auto focus has a multi point select mode that selects the desired focusing point from nine different frames and a free move mode that can move the desired point to any spot. Manual focus is also available by using the focus ring for focusing — just like an SLR!

    Startup Time

    It was three seconds after power was applied that I could take the first shot; follow-ons came in at a little over a second apart. Not fast!

    Distortion

    No problems.

    Sigma DP3 Merrill ISO Tests

    Now here is where the walls fall down!

    Sigma DP3 ISO 100.JPG

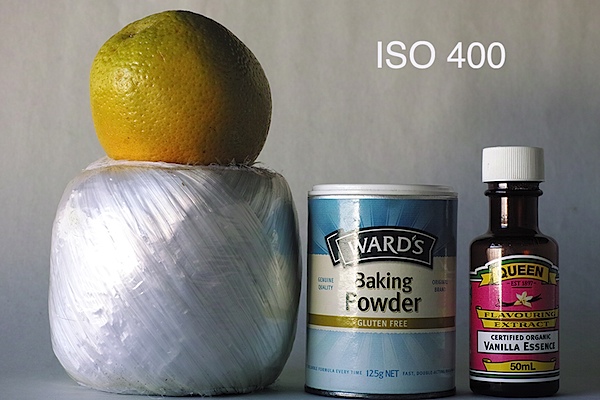
    Sigma DP3 ISO 400.JPG

    Sigma DP3 ISO 800.JPG

    Sigma DP3 ISO 1600.JPG

    Sigma DP3 ISO 3200.JPG

    Sigma DP3 ISO 6400.JPG

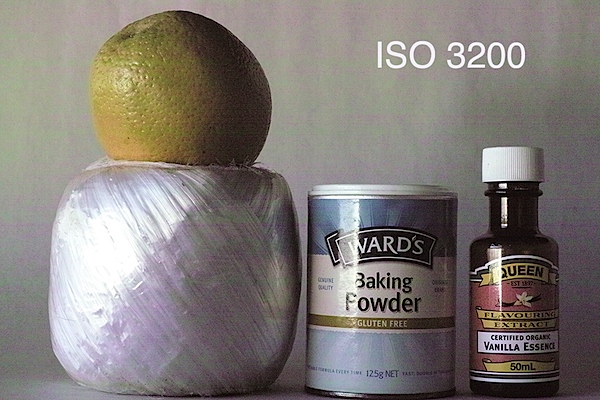
    My tests ran from ISO 100 to ISO 6400. On running the images on screen it was apparent that images in the range ISO 100 to 800 had no problems but when ISO 1600 was reached, a blue cast appeared.

    Worse still, the ISO 3200 shot displayed even more problems, which became more severe at ISO 6400: these were noise, desaturation of the image and the appearance of horizontal ‘tracking lines.’

    The camera’s selling agent was asked about this oddity and replied: ‘I have attached a few photos taken with the DP2 Merrill. You will note a similar pattern appearing on the photos as the ISO increases. This is seemingly a limitation of the Foveon sensor.

    ‘The most effective range of the camera that we have been able to ascertain is between 100 and 800.

    ‘I hope this sheds some light on the situation.’

    ‘The latest version of Sigma’s Photo Pro 5.5.1 software can correct some of the colour noise and further processing can help too.” Download at http://www.sigma-sd.com/download/photopro.html

    ‘When using the Sigma Photo Pro software you will notice that the initial image (in the RAW .X3F format) gets a lot crisper and the colour will correct to some extent when the software has rendered the image.

    ‘Further processing with Lightroom/Photoshop etc can reduce some of the noise.

    ‘But again, the camera’s effective ISO range is generally between 100-800 and this works across the current range [of cameras] and a lot of the older range of Foveon sensors.

    ‘One other thing about this camera is that you will get the best performance when shooting RAW images.’

    I did not take the opportunity of using the software fix; it seemed to me that the high ISO problem is something that should have been attended to in the original camera design.

    I have searched the Internet and found there is some limited comment about the problem.

    Not a good look!

    Sigma DP3 Merrill Review Verdict

    Quality: I found the colour depth to be quite outstanding; sharpness was also excellent.

    Why you’d buy the Sigma DP3 Merrill: compact, good quality lens, big sensor.

    Why you wouldn’t: fixed, longish focal length too restricting; slow and hesitant AF.

    Without doubt, a high level camera but the ISO problem is a serious deterrent for me.

    Sigma DP3 Merrill Specifications

    Image Sensor: 46 million effective pixels.
    Sensor: 23.5×15.7mm Foveon X3 CMOS.
    Lens: f2.8/24.2mm (75mm as 35 SLR equivalent).
    Metering: Evaluative, centre-weighted, spot.
    Exposure Modes: Auto, Program AE, shutter and aperture priority, manual.
    Shutter Speed: 30 to 1/2000 second.
    Memory: SD/SDHC/SDXC/MMC.
    Image Sizes (pixels): Stills: 4704×3136 to 2336×1568.
    Movies: 640×480.
    Viewfinder: 6.35cm LCD screen (920,000).
    File Formats: RAW, JPEG, RAW+JPEG, MPEG4.
    ISO Sensitivity: Auto, 100 to 6400.
    Continuous Shooting: 3 fps (4 JPEGs or 3 RAW).
    Interface: USB 2.0, AV, audio out, DC input.
    Power: Rechargeable lithium ion battery, DC.
    Dimensions: 121.5×66.7×80.6 WHDmm.
    Weight: 400 (body only).
    Price: Get a price on the Sigma D3 Merrill Digital Camera at Amazon.

    INFO

    Foveon X sensor. How it differs:
    To capture the color that other image sensors miss, Foveon X3® direct image sensors use three layers of pixels embedded in silicon. The layers are positioned to take advantage of the fact that silicon absorbs different wavelengths of light to different depths. The bottom layer records red, the middle layer records green, and the top layer records blue. Each stack of pixels directly records all of the light at each point in the image.
    More info at www.foveon.com

    Post originally from: Digital Photography Tips.

    Check out our more Photography Tips at Photography Tips for Beginners, Portrait Photography Tips and Wedding Photography Tips.

    Sigma DP3 Merrill Review


    Digital Photography School

  • 10 Pro Motion Control Time-Lapse Tips

    As I’ve been documenting landscapes and cityscapes with time-lapse photography the past several years I’ve learned some key lessons, many times the hard way. If you’re new to time-lapse here’s a quick definition from my eBook Photographing the 4th Dimension – Time that discusses slow shutter & video techniques:

    Time-lapse videos are produced when hundreds of sequential images are displayed in rapid succession. The line between still photo and video is directly tied to how the human visual system works. Images are retained in our visual memory for roughly one-fifteenth of a second.1 As a result we can differentiate still photos when they’re played to us at a frequency of 10-12 images per second (video lingo being frames per second or fps). Standard video playback frequencies are 24 and 30 frames per second, both of which easily fool our visual system, via the Phi phenomenon, into seeing continuous motion versus still images.

    To save you the hardship of enduring the same mistakes I’ve made over the years here are 10 motion control time-lapse tips to get you shooting like a pro including some gear recommendations.

    _Q2A4768_full_600c

    1. Setup Early
    To avoid a last minute rush or worse yet missing fleeting lighting conditions be sure to setup early.  If you’re rushed you’re bound to make careless errors and even put your gear at risk of falling. It pays to take your time, arrive early, carefully setup, review your setup and take a test sequence if time permits. This is a sure fire way to make sure that your actual shoot goes to plan.

    jmg-giveaway-HEADERalt
    Enter to Win My Ultimate Time-Lapse Photography Setup
    Over $ 5000 in prizes – http://bit.ly/WGy7Jw

    2. Compose Anticipating Subject Movement
    Anticipate the movement of your subject(s). Time-lapse subjects really shine when you take the time to anticipate not only where your camera will move, but where elements in your frame will move during a sequence. Clouds, water, traffic, people, etc. will have a line of movement if you take the time to carefully observe the scene you’re going to photograph you can compose your frame to maximize the impact of this movement. Here again having the necessary time on hand, not rushing, will be advantageous for you to properly evaluate your subject(s).

    3. Know Your Move
    “The move” is the line of movement your camera will take on a motion control system as your time-lapse sequence runs. As you setup a shot be sure you evaluate the scene and your surroundings to find a move that will highlight your subject best. At the same time be sure that during the sequence your setup won’t be put in harms way during the move either by passing pedestrians, vehicles, losing balance & falling, etc.

    _MG_9494-600c4. Variation
    Vary the direction of your moves (left to right, right to left, down to up & up to down) and even consider capturing video at a normal 24 or 30 fps. Having a variety of footage will allow you to edit together different sequences with enough variation that your audience won’t find the editing predictable while providing opportunity for smooth transitions between scenes.

    5. Know & Read The Weather
    As with still photography the most interesting conditions often come about from bad weather (see Make the Best of Bad Weather). Capturing sequences of bad or changing weather can be quite dramatic. To do this the first step is to monitor the weather in the area of your shoot. Time your shot when transitioning weather is most likely to happen. On the flip side since many motion control rigs contain metal, monitoring the weather can also help you say safe by avoiding conditions where lightning might be a possibility.

    6. Be Organized Don’t Forget Anything
    One best practice I like to follow is to carry the little things that can make or break a shoot. Murphy’s Law always has a way of tripping up a photographer so I like to travel very well prepared even if it costs me in having a heavier bag. Items I carry with me include tools (ex small hex wrench set), extra batteries, extra screws, backup equipment such as an extra camera body & lens, lens clothes, levels, rain covers, filters, etc. There are some very versatile bags out there to help carry these “little” things.  See In Pursuit of the Ideal Time-lapse Camera Bag: Gura Gear Bataflae 32L for the bag I’ve chosen.

    7. Choose the Right Equipment & Lenses
    Trial and error with gear can be costly both in time and money if you’re not careful. In most instances I shoot with lenses of a focal length ranging from 15mm to 50mm, but for some shots I’ve been known to use a 70-200 or 300mm lens… it all depends on the subject. (see What lens do you use for your Landscape photographs?) When it comes to hardware and software specific to motion control time-lapse my choices are below:

    • Dynamic Perception Motion Control Dolly [win this]
    • eMotimo robotic tripod head (see full eMotimo review with example videos) [win this]
    • Backup Intervelometer(s): Canon TC-80N3 and TriggerTrap
    • Adobe Lightroom
    • Adobe After Effects [win this]
    • BG Render Pro (AfterEffects plugin)
    • For more gear ideas visit my Ultimate Time-Lapse Photography Setup giveaway page

    eMotimo & Dynamic Perceptions Examples
    http://www.youtube.com/watch?v=1vxQAnfjKrQ
    http://www.youtube.com/watch?v=k5HKaplJa_4

    8. Don’t Forget Narrative
    While it’s great to highlight cool time-lapse sequences always keep in mind how your sequences will piece together to tell a story. Narrative is always important to achieve a deeper connection with your audience. A series of time-lapse sequences without narrative is merely a demo reel.

    9. Faster & Higher Capacity CF/SD Cards
    When it comes to CF/SD cards faster is always better. As your camera snaps off sequential images you’ll want media that will allow for the fastest write speeds possible. If your CF/SD cards are too slow then your camera’s buffer might fill up and you’ll experience lag in your sequences as your camera tries to empty its cache & write files to your card(s) before taking another photo. Note: A 300X card = 45MB/s write speed. 1X = 150KB/sec Higher capacity cards (ex. 32GB, 64GB and 128GB) will also allow you to capture numerous sequences on the same card.  Use of such cards will also allow you to focus on your subject and less on juggling cards. While some worry use of high capacity cards puts you at greater risk for data loss I’ve yet to experience an issue and chalk this up to regular formatting after downloading images off the card(s).

    10. Know Your Time
    Don’t lose track of time or mis-calculate sequence times as it can result in the loss of a sequence or keep you tied up for extremely long periods of time. There are now several time-lapse apps for mobile phones to help even the most fatigued photographer get the right sequence calculations. When all else fails once can always revert to the simple use of a calculator

    Post originally from: Digital Photography Tips.

    Check out our more Photography Tips at Photography Tips for Beginners, Portrait Photography Tips and Wedding Photography Tips.

    10 Pro Motion Control Time-Lapse Tips


    Digital Photography School

  • What Do You Think of Photos on the New Facebook Timeline?

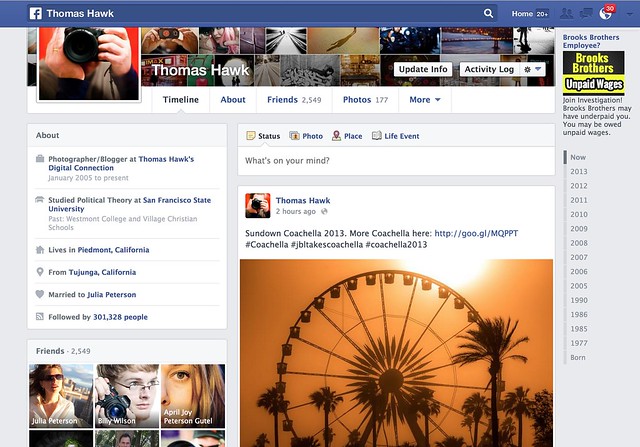
    The New Facebook Timeline

    I had the new Facebook Timeline turned on for me yesterday. My wife got it about a week ago. Does anyone else have it? Do you like it? Anyone ever seen that movie Memento?

    Photos feel larger — I like that — but I don’t really like the way that photos are cropped.

    The old timeline forced everything into a square box by default so landscape/portrait crops were still problematic. You could reposition the photo after the fact (sometimes, when the reposition tool worked, which was probably less than 10% of the time for me) but your photo got stuck in a square crop. You could also “feature” the photo which would give it an extreme horizontal crop manually.

    By the way, I seem to be able to use the reposition tool again now with the switch over to the new timeline.

    Part of me liked the old Facebook timeline format. I love the square photo. It’s my favorite crop of all. When I uploaded a square to Facebook it would then show perfectly on my timeline page. If the other crops suffered, oh well.

    The new timeline page goes back to a traditional landscape crop. So now when you upload your landscape oriented photos to Facebook they fit and look great. Unfortunately though, now both the portrait and the square crop are squashed into a landscape box.

    Why on earth doesn’t Facebook just display BOTH landscape and square crops in their original crop? This is what they do on mobile btw, so it would seem more consistent. This would mean that square photos would be even bigger on the web version of Facebook, but everybody wants bigger photos anyways, so why make our square crop photos suffer in that landscape oriented box? This is what Flickr does by the way. On Flickr the square crop is king. I love that.

    Of course portrait oriented photos get butchered even worse now with the new Facebook timeline — now they are squeezing a portrait photo into a landscape orientation instead of a square. Some of these just look awful.

    It does feel like Facebook is trying to somehow more intelligently decide which portion of square and portrait photos get shown in the landscape box. Maybe their algorithm is looking for the eyes and focusing on that. I’m not sure, but it feels like the auto cropping is a little smarter and more intelligent.

    Google+ takes a different approach. They retain the photographer’s original crop… but then you are stuck with those damn grey bars on the sides of your square and portrait photos on G+. For the life of Kevin, I’m not sure why G+ doesn’t just let the square photo have the entire envelope. It would look much better than those tiny little gray bars on the side and it’s just giving square photos an ensy weensy more real estate.

    Which is what Facebook should do too, by the way. Square crops sort of fit into the landscape envelope, but why make the square suffer that way? Just liberate it. Make the square the king. I thought Facebook was doing this on the newsfeed a couple of weeks ago, but I think they switched back to cramming a square photo in a landscape box with both the new newsfeed and timeline now too.

    Is there an answer to this perplexing problem about how best to display our images on the web? Why can’t we have just one big gigantic mosaic wall on both Facebook and Google+, that’s actually my favorite format of all I think.

    Other changes on the new Facebook timeline, include moving your follower count over to a smaller less prominent place on the left. They also give the actual number now, instead of something that just said 300K before. You can add or remove certain modules out of the smaller left side column if you want.

    Despite the photo crop issues, overall I like the new timeline a lot. I like it better than the old version. It feels more fluid and slick. I do like that overall photos do appear bigger. Landscape oriented photos especially look great there now.

    The new comment system drives me a little batty though. I can never figure out who is talking to who and I feel like I’m trapped in some sort of web version of the movie Memento — but that’s a whole other topic entirely. I can never understand who said what in what order to who. I feel like I’m trapped in some sort of online version of that old movie Memento.

    Unfortunately, as usual, with the new Facebook timeline we’re still stuck with the damn ads. I wish Facebook’s ads weren’t so especially vulgar. Why is Facebook trying to get me to join some lawsuit about unpaid wages at Brooks Brothers? I hate lawsuits — plus I’ve never worked at Brooks Brothers. Shouldn’t Facebook be smarter than that in terms of what ads it shows me? Why does Facebook think I worked at Brooks Brothers? Next thing you know some other ambulance chaser is going to start advertising at me just in case I’ve ever had Mesothelioma. Facebook should let us pay for a Pro account and exempt us from bad advertising.

    By the way, anyone ever seen that movie Memento?


    Thomas Hawk Digital Connection

  • Getting The Image You See In Your Head: Blending vs HDR

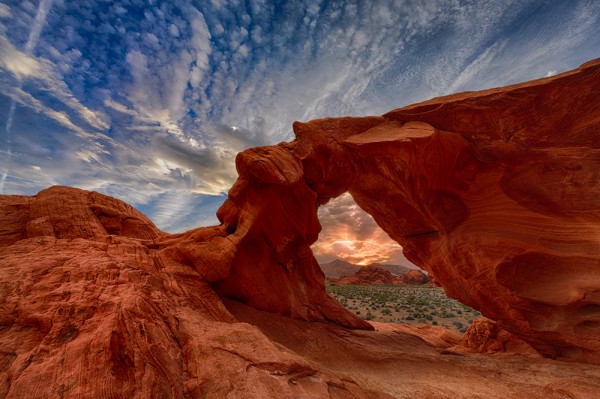
    This shot is an HDR shot blended from 6 bracketed shots.  Each shot is one stop different from the next. The exposures range from -2 through +3. Aperture was set to f/16. The shutter speed ranged from 1/125 at -2, to 1/4 at +3.

    This shot is an HDR shot blended from 6 bracketed shots. Each shot is one stop different from the next. The exposures range from -2 through +3. Aperture was set to f/16. The shutter speed ranged from 1/125 at -2, to 1/4 at +3.

    Often times when I’m photographing landscapes, the image the camera sees versus the image in my head are quite different.  Sometimes that image in my head doesn’t mesh with what the camera capture, because the dynamic range is far too great.  The contrast between the highlights and shadows is just too great.  Such was the case with this shot I took a week ago of Arch Rock in Valley of Fire State Park in Nevada.

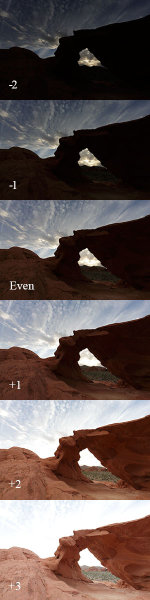
    These are the six shots I used for the HDR blend. I also used the even exposure, and the +2 exposure, for the two image manual blend I did in Photoshop.

    These are the six shots I used for the HDR blend. I also used the even exposure, and the +2 exposure, for the two image manual blend I did in Photoshop.

    With the sun setting directly behind it, exposing for the sky would have rendered the rock a silhouette.  This may have been fine had I intended a silhouette shot- which I did capture and intend to use. But ultimately I wanted some detail in the rock, I wanted detail in the sky, and I wanted to maintain the drama of the spectacular desert sunset that I was witnessing.  Because of the way the landscape was laid out before me, graduated neutral density filters were not going to work for this shot.  If I wanted to bring down my highlights and keep detail in the shadows, I was going to have to either blend two shots, or use an HDR program to get the result I was looking for. HDR stands for High Dynamic Range, meaning an image where the range of tones is higher than what the camera can accurately record.

    I really wasn’t sure which processing technique would give me the best results.  And sitting there in the desert, I didn’t want to place any bets on it.  So I bracketed my shots using the auto exposure bracketing mode on my EOS-1D X.  I shot in Av mode, at f/16, with the EF 14mm f/2.8L II lens. I bracketed for 7 exposures, but ended up only using six. The -3 exposure really didn’t add anything to the HDR, so that was dropped from my processing.   I use Nik HDR Efex Pro 2 for my HDR processing to blend the exposures, and then finish in Photoshop, adjusting color, saturation, etc.  Nik HDR Efex Pro offers a variety of presets, but I always try to keep the HDR processing fairly subtle. I don’t like the over the top look that some get, but I do like the image to pop a bit. I try to minimize any halos, and keep the tones fairly smooth.

    Before I processed the HDR image, I also tried a simple two shot blend in Photoshop. I first processed the even exposure and adjusted for color and saturation.  Then, I took the +2 exposure, and processed in the same way, dropping that image on a new layer in photoshop over the even exposure. I then apply a layer mask to the +2 layer, and paint the entire mask black to hide the layer.

    Then, using white, I painted the arch back in to reveal the arch at +2 against the sky at even exposure. This takes a lot of patience since with the exposure difference, it’s very easy to see halos if the masking isn’t done carefully. One way to ease the transition is to run a gaussian blur filter on the mask to soften the edges. How much will depend on what the mask is like. You may need to run the gaussian blur more than once to get it just right.

    Looking at the two images, the HDR blend seems to have a smoother transition from lights to darks, as well as a richer overall look. I know there is a lot backlash against HDR, and I understand it’s not everyone’s cup of tea. But I believe in using any tool available in order to express what I felt when I looked upon the scene as it happened.  Every scene will be different, and will lend themselves to different processing techniques. Understanding what techniques are available to you can help you overcome the shortcomings of technology and allow you to express your creativity to the fullest.

    This shot was done by blending an even exposure with a shot exposed at +2.  The +2 exposure was masked off in Photoshop so only the areas I needed to show through did.

    This shot was done by blending an even exposure with a shot exposed at +2. The +2 exposure was masked off in Photoshop so only the areas I needed to show through did.


    Post originally from: Digital Photography Tips.

    Check out our more Photography Tips at Photography Tips for Beginners, Portrait Photography Tips and Wedding Photography Tips.

    Getting The Image You See In Your Head: Blending vs HDR


    Digital Photography School

  • The Secret of Creating a Strong Image – 5 Tips for Creating a Story in Your Image

    Article and photos by Oded wagenstein.

    In an era when we are drowning in images and lots of people and talents are competing for the viewers’ eyes or the magazines’ attention, have you ever wondered what makes you have a longer look at an image?

    Is it the person that was photographed? Perhaps a certain color or an angle?

    What is the secret of the photographers that mange to get their work published on magazines and newspapers? What is the secret of taking a strong image that lasts?

    1.jpg

    The secret of all strong images is their ability to provide the viewer a story .

    Since the dawn of time, People gathered around the fire and shared stories with each other.

    It doesn’t matter what subjects you like to shoot. If you want to become a good photographer, you have to be a good storyteller first. An image with a story, one that evokes emotion and curiosity will rise above other images and catch the viewer’s attention.

    So what is the stuff of which “visual stories” are made from?

    In most cases it is an emotion that the image creates. It can be empathy, curiosity or even negative emotions such is anger.

    Even if you are dealing with macro or landscape photography it is better to have an image that tells a story. However, the best way for me to get a story is with people photography, as people are a large “pool” of stories and emotions.

    Here are 5 tips for finding your “visual story” in Travel photography before departure, and on the road:

    1. Preparation needed

    The thing that makes the difference between an amateur and a professional in almost every field is usually preparation.

    A professional photographer will start working even before leaving home, while an amateur photographer will wait for things to happen in front of their eyes in the field. Professionals will gather information that will help them exceed the potential of getting those photogenic stories on the road in minimum time and by doing so, increase the amount of good strong images.

    2.jpg

    What are the things that are worth checking before going to shot on a trip for example? Here are some classic examples:

    Will there be any festival or photogenic event during your stay? Festivals are a great place for finding stories. Is there any taboo related to photography or culture in general in the country you are going to visit, that you must know? For example, the hill tribes that can be found on the mountains of Asia (as the woman from the Karen tribe in photo number 2) mostly believe that taking their photo would also take their soul. And trust me, the custom officers in your home country would not like the “soul” attached to your camera.

    The best thing you can do to get this kind of information is to get the advice of a photographer who has already been there. Online photography forums would love to help you with that.

    Want to take your photography to the next step? – Take a journey deeper into the place and read a little bit about the culture and history, prior to arrival.

    The best tip someone has given me is to learn a few words of the local language. Locals appreciate people who try to speak their language (even if they laugh at them a bit at first)

    Learning “Hello”, “Thank you” and ” may I take your photo?” will do wonders to your story telling images.

    2. Getting closer

    3.jpg

    Taking photos of people from a distance with telephoto lens may be safer and will not ruin the spontaneity of the story, but there’s nothing like the narrative and emotional quality of close-ups in people photography.

    Sometimes I want to photograph people from just a few inches away and still keep the spontaneity and intimacy.

    What do I do? – I look for this moment in which the person returns to routine activity, after creating a bit of a connection with them and letting them understand that my camera and I don’t have any bad intentions.

    I never approach people while the camera is hanging from my neck. It is threatening and may result in negative responses from the locals.

    After greeting the person (in their language) I sit with them for a while, let them get used to my camera and me and only later I begin taking photos

    Never ever forget- people don’t like to feel they are on a show for you. Always treat them with respect. The best way to do so is with the help of a local. So go to the next Section

    3. Best ice breaker

    4.jpg

    Professional photographers use a fixer, which is a local who knows their needs as photographers and helps them to get around.

    You can use a fixer, but you can also find your “fixer” in a much more interesting way and for free, in most cases. You can connect with local at your age in advance to your visit on the basis of “culture exchange”. The local will help you get to the best places and will also recommend which places to avoid. They will speak for you in their local language and will be the best “ice breaker”. All you have to do is be polite but it won’t hurt to bring your host something for your own country, like postcards or a unique product related to your place.

    If you can find a photography student to be your fixer, it can be an exciting experience for both of you.

    Hanging with a local as a friend or with a professional fixer does not give exemption from the previous section of “getting closer”.

    4. The Stories generators

    5.jpg

    Feeling lost? Feeling unpleased with the photos you took? You can always try to visit a “story generator”. It can be anywhere that people Gather: a market, a central square or a festival. Just be alert and keep your eyes open and the stories will simply appear before your eyes.

    The best tip for finding a “story generator” place is just to go to the places that interest you. It could be a church, a busy street, a quiet beach or even an abstract shooting of a building. Go with your passion and you will find your stories.

    5, Last one for the road – get lost

    We talked about the preparations and the work needed for good story finding, but sometimes all you need is to leave the tour guidebook in the hotel room and just go outside to walk the streets and roads looking for the unexpected.

    Some of my best stories and photos came to me with this way of traveling.

    Don’t forget to check with the locals or your fixer about the places that should be avoided and always, but always, check the time of your last ride home.

    Oded Wagenstein is a travel photographer. His photographs were published on numerous magazines and websites world wide.

    He is known for his intimate culture portraits. In his works he put the emphasis on understanding the culture and achieving good relationship with the person being photographed pre-shooting.

    You can join his Travel photography group on Facebook and continue to discuss on travel and people photography:

    Post originally from: Digital Photography Tips.

    Check out our more Photography Tips at Photography Tips for Beginners, Portrait Photography Tips and Wedding Photography Tips.

    The Secret of Creating a Strong Image – 5 Tips for Creating a Story in Your Image


    Digital Photography School

  • Traveling Light

    Having traveled more in the last five years than in all of the previous forty three, I finally feel like I have found a comfort zone as a traveling photographer. Though lugging far less gear, I'm still protected with backups for critical items.

    Looking back just four years, there is now a huge difference in the way I approach my gear pack. A walk-thru and my reasoning, below.

    Read more »


    Strobist