Category: Photography

  • 8 Tips to Become Excellent at Minimalist Photography [+2 bonuses inside]

    Less is more! You’ve definitely heard that old saying before, and it couldn’t apply more to the genre of minimalist photography. People’s exact definitions of minimalist photography may vary from person to person, but in general, this style of photography can be summed up in the following way. It makes sure that all of the attention is focused upon the Continue Reading

    The post 8 Tips to Become Excellent at Minimalist Photography [+2 bonuses inside] appeared first on Photodoto.


    Photodoto

  • 3 Small But Important Lightroom 5 Beta Changes You Might Have Missed

    Adobe announced the availability of Lightroom 5 Beta at Adobe Labs today and by all means, go grab a free copy and play. I’ve been using Lightroom since version 1 and have been impressed with every upgrading to the program, gladly plopping down my money for a new version as I have found the enhancements in subsequent revisions well worth the funds. And Lightroom 5 seems to be on the same track, based on my findings while playing with the beta this last week.

    Adobe has a number of fine new features in this revision and they are sure not to be missed. They include

    • A Smart Preview feature which mobile photographers will love as it creates a smaller, editable version of their monstrously sized RAW image that is easily portable on a laptop and can be synced when the originals, possibly stored on an external drive or NAS back at home, become available.
    • Radial Gradient which allows for selecting oval or circular shaped areas for specific effects.
    • Upright, which attempts to correct crocked images or fine tune vertical lines. (My experience with this tool has been less than stellar on simple horizon shots at sea. More on this in a minute.)
    • Advanced Healing Brush. This one, I like a lot and it is very helpful. Now your “Spot Removal Tool” can be used as a brush to wipe out items that are not in the shape of a circle. This helps a lot and means I spend even less time in Photoshop CS6.

    That’s the obvious stuff that Abode packs into their press kit and you probably have seen those items demonstrated on other sites. What I want to show you are three things I found to be helpful in little, but repetitive ways for how I use Lightroom.

    (Click any image for a larger version)

    Invert Mask

    Shot4Thank you! I’ve been wanting this feature for the longest time to save time. But it’s not quite right.

    Invert Mask is currently only available with the new Radial Gradient feature. See it at the right? It works well and I’d like to see if appear in the Gradient Tool (especially when creating a new gradient…it would be great to great one just the opposite of the one I am using at the moment) and in the Adjustment Brush.

    Here’s a simple rundown of how the tool works.

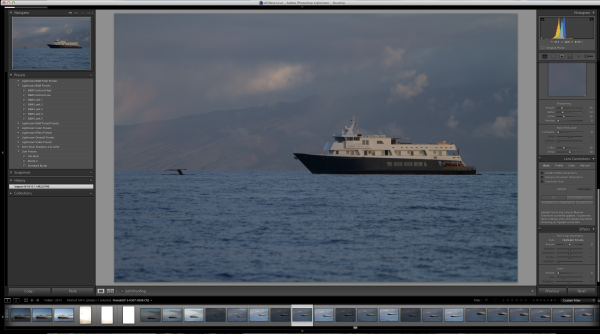
    Starting with this image of one of my client’s boats, the Un-Cruise Adventures Safari Explorer off the shore of Maui, Hawaii, I want to see which direction works best: highlight the boat and darken the surrounding seas or slightly darken the boat and bring up the seas, in order to add contrast to the main subject.

    Shot1

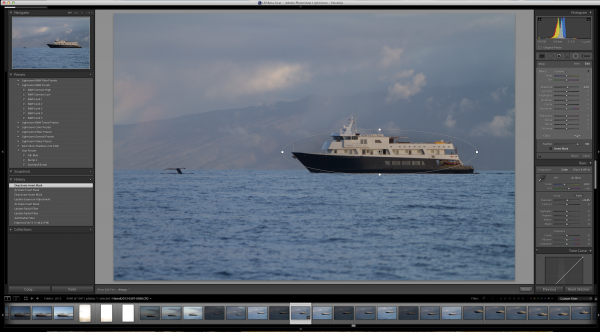
    I select the new Radial Gradient tool and draw an oval over the boat (Dear Adobe, please make this tool work like the Ellipse Tool in Photoshop for consistency. Specifically, please allow me to grab a “corner” of the ellipse and drag it down instead of starting with the middle of the ellipse. Consistency would really help. Thanks.).

    Shot2

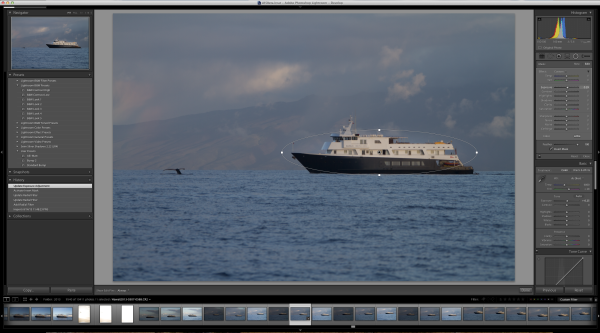
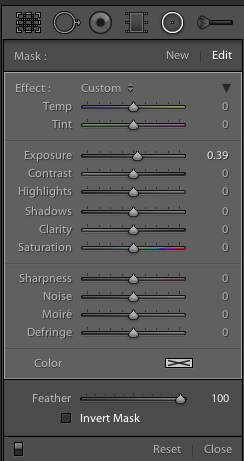
    Because I have chosen only to increase the exposure by .39, Lightroom masked the boat and increased the exposure for the rest of the image. But if I want to swap that and mask the entire picture except for the boat, it’s just a simple click of the “Invert Mask” check box.

    Shot3

    Subtle, but useful to me.

    Now please, Adobe, add that ability to the Gradient Tool and to the Adjustment Brush especially.

    Visualize Spot Healing

    I’d like to think my sensor was perfectly clean before leading a recent tour to Bhutan. As a matter of fact, it was extremely clean before I left. But, as life goes, things don’t stay clean.

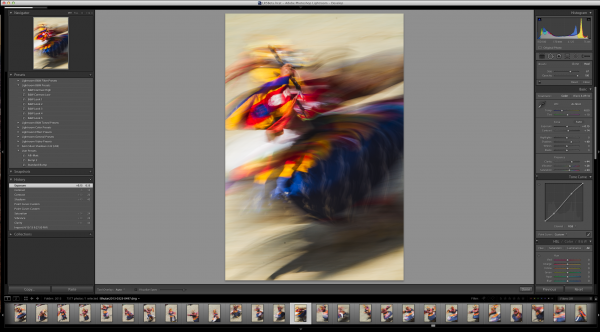
    Take this image of a masked dancer at the Paro Tsechu.

    Viz1

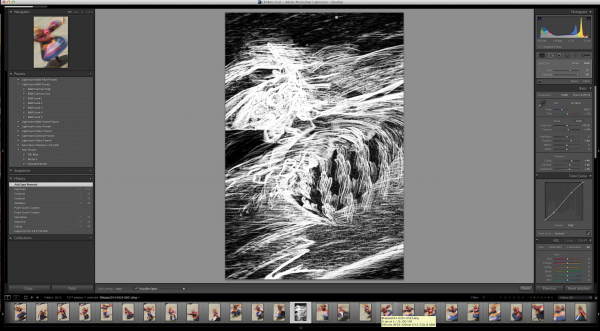
    I wanted some blur (obviously) and used a small aperture to achieve a slow shutter speed. In this case, f/25 and 1/6th of a second. Closing down that aperture makes dust on the sensor more obvious, but this image has a lot going on making it hard to find all the dust.

    Viz1-2


    Viz2


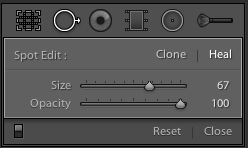
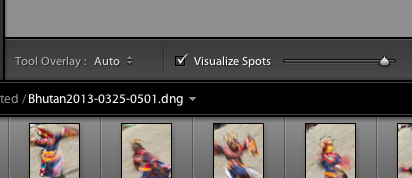
    If I click on the “Visualize Spots” check box after clicking the Spot Removal Tool, the slider to the right of it comes alive and I can now more easily see spots. This is a technique used in Photoshop for a while and it works best where edge contrast can be spotted, so in areas without a lot going on.

    Viz11

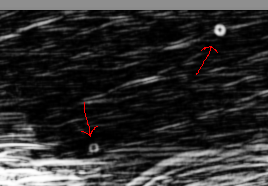
    In this image, I found three additional spots, two of which would have been easy to miss without the tool.

    Viz4

    Remove Chromatic Aberration Check Box

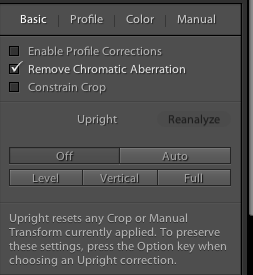
    This one is really small, but helpful. With the addition of the “Upright” feature to the Lens Correction panel, Adobe made it easier to get to the Chromatic Aberration removal check box.

    Rem1

    It’s a small thing, but I often use the check box for “Enable Profile Corrections” for my lens and then want to remove chromatic aberration on only select images, but many. The placement of the box here, as well as on the “Color” tab, helps.

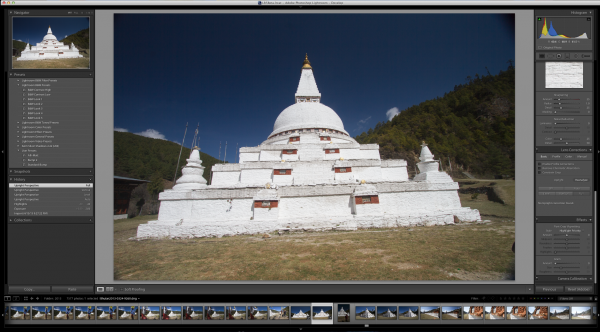
    Upright Is Not That Functional For Me

    Maybe I’m doing something wrong, but I doubt it. This is one of Adobe’s touted JDI (Just Do It) features and it seems to work well on the demos, but not in real life. If it did, it would be cool. I can get the feature to work part of the time, but no where near even 25% of the time reliably.

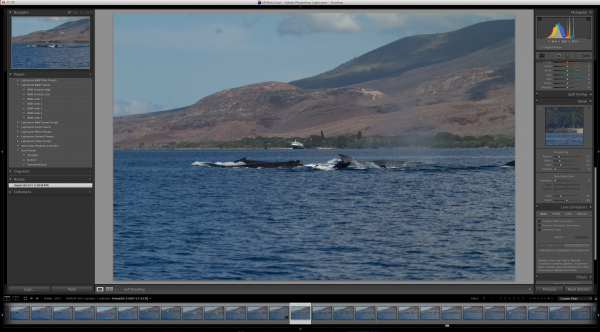
    The feature is supposed to level a scene and make diverging or converging vertical lines straight. It can be helpful when it works. But something as simple as a horizon, an obvious one, in this example is not being leveled.  Here’s the initial image out of the camera.

    Level1

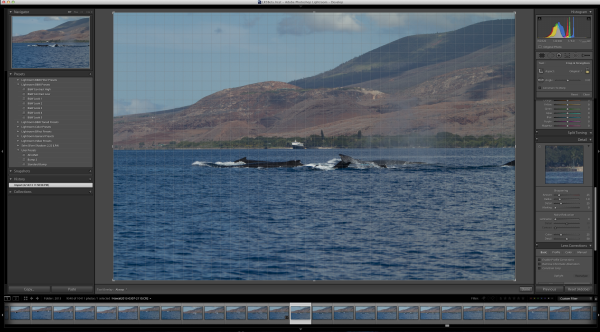
    Now to show that the horizon is not level using the Crop Overlay.

    Level2

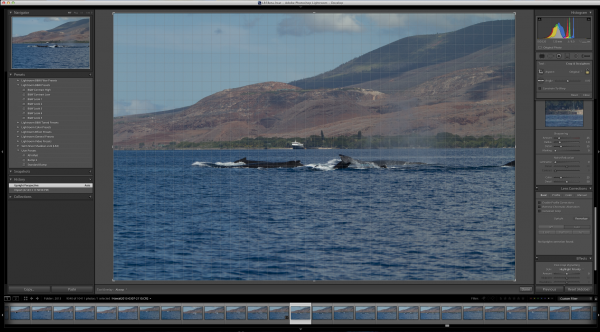
    And now using the tool in Auto mode.

    Level3

    I tried in Level and Full modes to no avail. The program clearly states “No Upright Correction Found”. This is supposed to be a boon for landscape photographers, but even with a clear horizon like this, it failed.

    I tried another obvious shot from Bhutan.

    Level4

    Now how can it say, in all four modes (Auto, Level, Vertical and Full) that no data can be found?

    I’m not saying it doesn’t work, I’m saying it’s wonky and not yet reliable.

    But this is beta software and that is why they put it out, to find the kinks that mean the most for their users.

    Give it a try, Lightroom 5 Beta is quite useful with all the upgrades instituted.


    Post originally from: Digital Photography Tips.

    Check out our more Photography Tips at Photography Tips for Beginners, Portrait Photography Tips and Wedding Photography Tips.

    3 Small But Important Lightroom 5 Beta Changes You Might Have Missed


    Digital Photography School

  • A Photographic Tour of New York

    Lego Girl, SoHo.New York is a diverse city with gorgeous old architecture and sleek new skyscrapers, iconic landmarks of all types, hidden surprises around every corner, and a diversity of residents and visitors that is unrivaled.  The energy, speed, and creativity that occurs on the streets every single day makes it a playground for all types of photographers.

    While Manhattan is probably the most photographed place in the world, we’re not going to talk as much about photographing places like the Empire State Building, the Statue of Liberty, or the Flatiron Building.  No trip to New York is complete without visiting these landmarks, but there is so much more than that.  This article is about delving a little deeper, seeing its most beautiful corners, and capturing the true essence of the city.

    And before we go any further, remember that there are so many camera equipment rental shops, such as Foto Care, Calumet, Adorama, or CSI.  So while you’re here, rent that lens or camera that you’ve always wanted for a week, rent a tripod, or even rent a Leica!

    Best Buildings, Unknown Landmarks, and Best Views.
    The oldest subway tunnel in the world.

    The oldest subway tunnel in the world.

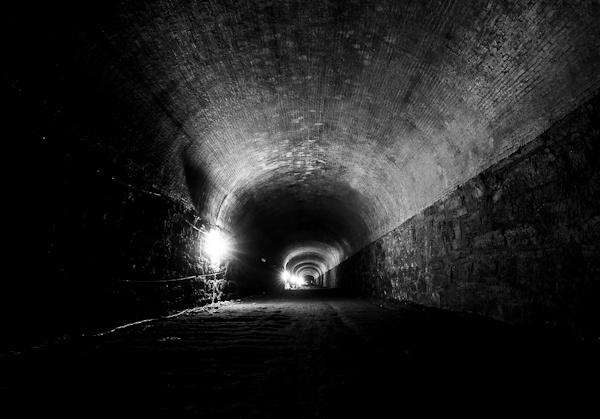
    Running under Atlantic Avenue in Brooklyn is the oldest subway tunnel in the world, dating back to 1844.  The tunnel was sealed up in 1861 and forgotten about it until a 19-year-old engineering student named Bob Diamond found it in 1980 after a year of searching.  Diamond gave tours of the tunnel for 30 years through a manhole cover in the street, but they were unfortunately stopped recently by the Department of Transportation.  However, there is a legal fight to get them re-opened, so hopefully they will resume soon.  The tunnel has 17-foot ceilings and is a half-mile long and an old locomotive is even reported to be hidden behind the far, closed-off wall.  Check here for more information about the tunnel and tours.
    The Unused City Hall Subway Station

    The Unused City Hall Subway Station

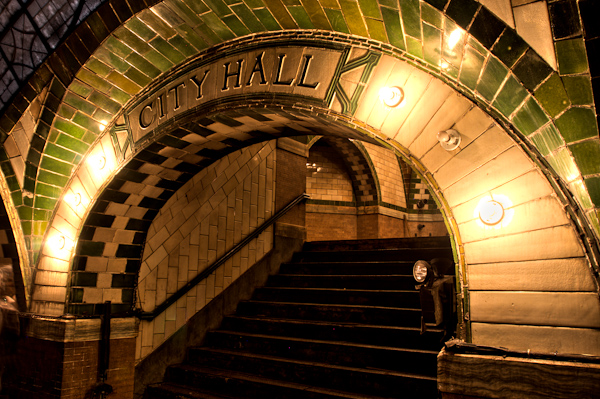
    Another underground tour, run by the New York Transit Museum, visits the old and gorgeous, unused City Hall subway station, once the crown jewel of the MTA.  Tours are infrequent and you must be a member of the Museum, however, there is an easy trick to see it on the 6-train.  At the end of the line, the 6-train still passes this station to change directions and you can see it through the windows of the subway cars.  Stay on the 6-train at its last stop (Brooklyn Bridge-City Hall) and look out the side of the train where the doors close.  Get in one of the middle cars and pay attention because it passes quickly.  You may want to do it twice since many people miss it the first time around.  And don’t worry about staying on the train past its last stop as it was recently made legal by the city to do this.
    American Standard Building, Chrysler Building Lobby, NY Public Library, The Alwyn Court

    American Standard Building, Chrysler Building Lobby, NY Public Library, Alwyn Court

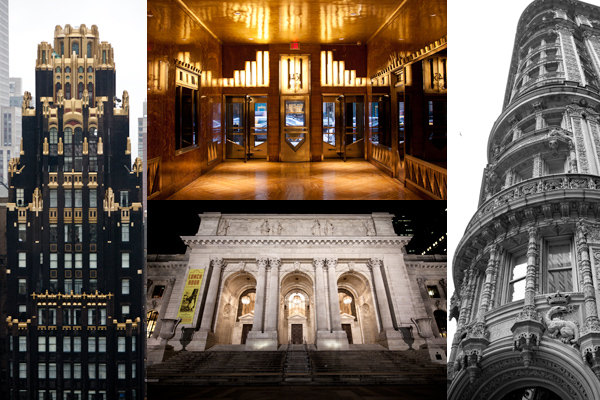
    Here are a few of my favorite buildings that you might not know about.  On 42nd Street, next to Bryant Park you can see both the New York Public Library and the American Standard (Radiator) Building, which is now a hotel but was originally built for the American Radiator and Standard Sanitary Company in 1924.  Nearby, you can do some street photography in Grand Central and a couple blocks away is the entrance to the Chrysler Building, which has the most magnificent art deco lobby in the city.  It is covered in murals and is a must see.  And the most ornate building in the city, a block south of Central Park on 7th avenue, is the Alwyn Court.

    One of the views from the James Hotel rooftop bar.

    One of the views from the James Hotel rooftop bar.

    You also can’t travel to New York without seeing a few cityscapes and there are so many spots.  Of course there’s Top of the Rock and the Empire State Building but there are also a lot of rooftop bars with incredible views.  Two of my favorites are at The James Hotel and Ink48.  There’s nothing better than capturing a cityscape and having a drink at the same time.  In addition, if you visit the Metropolitan Museum of Art, then make sure to visit the rooftop during the warmer months, which has one of the best views of the Central Park.

    The Brooklyn Bridge and Brooklyn Bridge Park have incredible views of lower Manhattan, especially at night.  And the Water Taxis will give you an great view as well if it’s warm enough to stand outside.  Walk the Brooklyn Bridge, explore the park, and then take the water taxi back.

    And finally, a place that I love to walk, but is a little out of the way, is the Manhattan Bridge, which has incredible views of the Brooklyn Bridge.  Walk it and then walk back as there’s not much on the other side.

    Best Areas for Street Photography

    You can’t visit New York without trying some street photography.  The people are the most important, creative, and interesting aspect of the city.  Capture the life and fashion on the streets and you will photograph the true essence of the city.  Here are a few of my favorite spots.

    Lady in Red, 5th Avenue.

    Lady in Red, 5th Avenue.

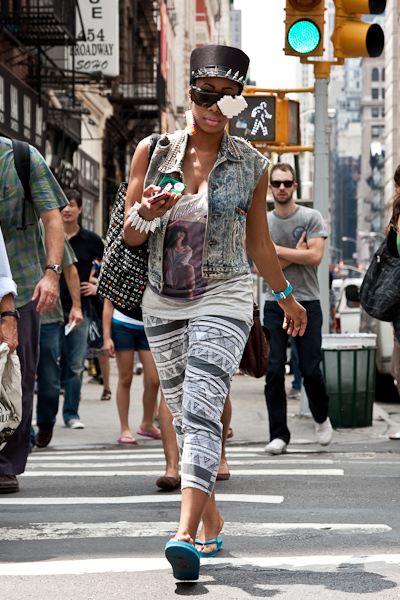
    The corner of 57th and 5th is one of the most iconic corners in Manhattan.  At any given moment you will have a mix of very fashionable New Yorkers, both the wealthy and the everyday people and workers, and the interesting tourists from all over the world.  This wide avenue also has incredible light throughout the day so use it to your advantage.  Walk south on 5th Avenue, stopping at interesting corners and people watching until you get to the 42nd street, Bryant Park area.  This stretch of Manhattan is one that is constantly captured by the famous New York Times fashion street photographer Bill Cunningham, so who knows, you might run into him as well.
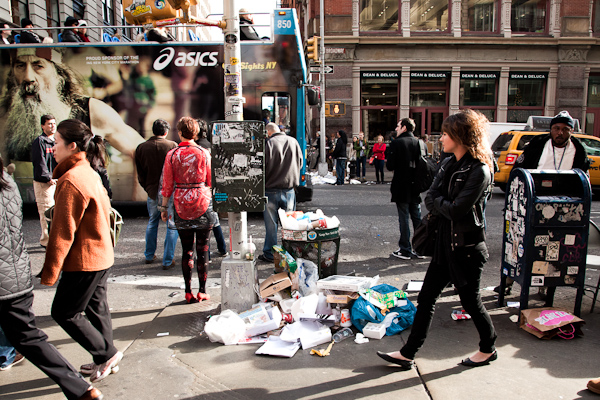
    Corner of Prince and Broadway

    Corner of Prince and Broadway.

    SoHo is probably my favorite area for capturing people.  You can venture anywhere and find interesting people and hidden corners, but the best corner is Prince and Broadway, right by the N R subway stop.  The stretch of Broadway between this corner and Canal Street is my favorite.  Also, for planning sake, remember that the Prince street corner is only 4 short blocks from Lombardi’s pizza.

    The corner of Broadway and Canal (home of the fake purses) brings us to Chinatown, which is always bustling with people no matter the day or time.  Travel southeast and make sure to see Doyers Street, nicknamed the “Bloody Angle” and seen in many movies and tv shows.  Also nearby is Columbus Park, which is always filled with tables of old Chinese men and women gambling and playing music.  It is such a fun place to be and capture.  And while you are there, don’t forget to stop for some soup dumplings and fried dumplings at Joe’s Shanghai.

    Cutting through the middle of Chinatown is the Bowery, one of the most amazing streets in the city and filled with so much diversity.  The Bowery, quickly becoming a fashionable place to be, was once one of the most down and out streets in Manhattan.  It was also the birthplace of Punk Rock and you can see the old CBGBs (now a John Varvatos store).  Visit the photographer Jay Maisel’s stunning bank building and graffiti mecca on Bowery and Spring and walk until you end up on my other favorite street, St. Marks (8th Street), a main thoroughfare of the East Village.

    Finally, we can’t forget the mecca of street photography, which is the New York Subway system.  Set your camera on 1/200th of a second and ISO 3200 and make sure to take the subway everywhere.  Stations such as Times Square and Grand Central are filled with people at almost any time of day.  For some inspiration, check out the work of Bruce Davidson – and keep in mind that the subways are a lot less scary looking than when he did his work.
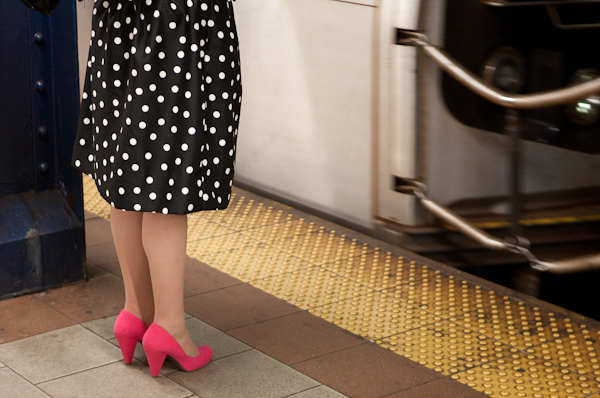
    N-R Train, Polka Dots and Pink Shoes

    N-R Subway Train, Polka Dots and Pink Shoes

    A Photo Tour of Central Park South 

    (To best follow this advice, download the “Central Park” app for your smartphone, which will provide you with a map with points of interest, along with your location.)
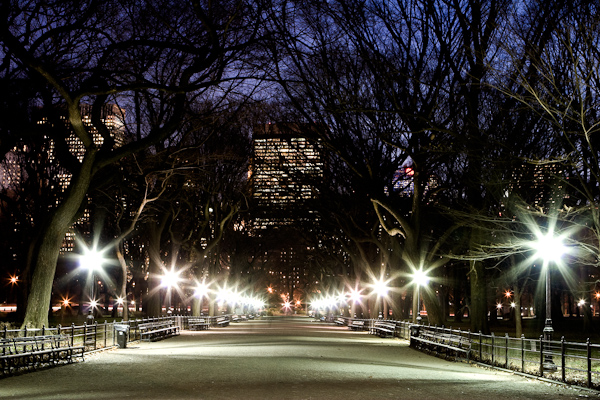
    Poets Walk at Dusk.

    Poets Walk at Dusk.

    Enter the Park by the Plaza Hotel at 59th Street and 5th and walk and explore the area of the Pond and Gapstow Bridge.  The view of Gapstow Bridge with the Plaza behind it is an iconic view of the city.  Walk north until you come upon Literary Walk (Poets’ Walk).  There is nothing like the view here at dusk, so consider coming back when the sun is setting.  Walk north until you arrive at Bethesda Terrace, which has a beautiful view of the Lake.  To your right will be the boat rental area, so rent a rowboat, which is my favorite thing to do in the city.  Travel under Bow Bridge, bring some sandwiches for a picnic on the boat, and spend an hour exploring the lake and it’s many hidden areas.  You will most likely see a few couples getting engaged.
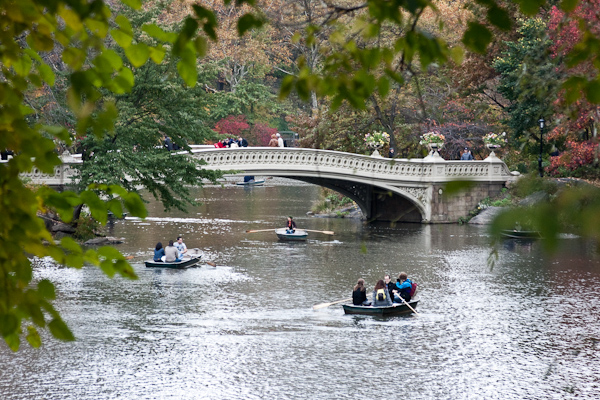
    Rowboats and Bow Bridge.

    Rowboats and Bow Bridge.

    After you return the boat, walk west to Bow Bridge, cross it and head back east around the Lake to the “Central Park Point.”  Then walk all the way to the eastern edge of the park and head south to Dene Shelter, which has a stunning view of Central Park south.  If you have kids, nearby is also the zoo, home to the Penguins of Madagascar.

    Favorite Photography Museums and Galleries

    The Modern Museum of Art (MOMA) on 53rd street has an unrivaled photography section with hundreds and hundreds of diverse and classic works.  It is my favorite place to view photography in the city and it is constantly being updated and changed. 

    Three of my other favorites are the ICP Museum on 43rd and 6th (http://www.icp.org/museum), the Leica Gallery on Broadway and Bond Street (http://us.leica-camera.com/culture/galleries/gallery_new_york/) and the Howard Greenberg Gallery (http://www.howardgreenberg.com/) on East 57th Street.  While the HG gallery has much more than photography, it has an amazing photography collection.

    If you’re a fan of the photography of Jacob Riis, visit the Tenement Museum on the Lower East Side and transport yourself back in time to see what living in an old tenement was like.  After, visit the fantastic Tenement Museum Bookstore and then go for a walk and enjoy the gorgeous tenement exteriors and fire escapes in the neighborhood.  Stop at the nearby Katz’ Delicatessen or Russ & Daughters for lunch. 

    And while this technically doesn’t count as a museum, it might as well be.  The Strand Bookstore on Broadway and 12th street is the best bookstore I’ve ever been to and it has by far the best photography book section that I’ve ever seen.  To say it has everything is an understatement.  I know time is often of the essence when visiting the city, but if you are a fan of photography, the Strand is a must see and has the same weight as any photo exhibit.

    Brooklyn

    This article is focused mostly on Manhattan, yet Brooklyn is a borough that needs to be seen and explored.  It deserves its own article and there are incredible locations for photography.

    Quickly, a few things to see are the waterfront (with amazing views of Manhattan), the area of DUMBO, Get lost in Prospect Park and see the nearby Brooklyn Museum and Botanic Gardens, and visit Coney Island.  And if you are a fan of Brownstones, then Brooklyn is the place to be.  Go brownstone touring through the neighborhoods of Park Slope, Fort Greene, Brooklyn Heights, Prospect Heights, and Cobble Hill.

    Photographing at Night
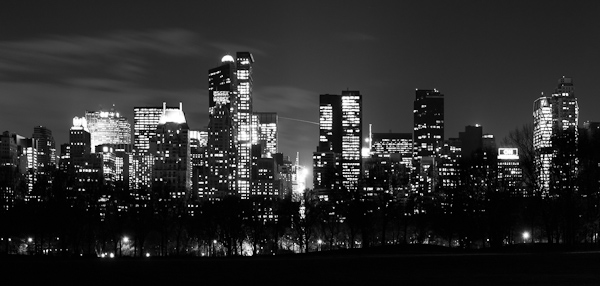
    Central Park South.

    Central Park South.

    A final thought.  If ever there was a fact about photographing New York, it’s this – while the city may look beautiful during the day, there is nothing that comes close to capturing it at night.  When I meet people or give tours for visitors I try to stress this, but I feel like many people don’t take advantage of it.  I suggest that when you plan your trip, schedule one night of the trip to explore at night.  Do something easier on the legs during the day, grab a quick dinner from a hole in the wall pizza place, and go for a very long walk.  Central Park is generally very safe at night as long as you stick to the well travelled areas and stay south of Bow Bridge.  Even if you don’t you’ll be fine, but better to be somewhat careful.  You will be surprised with how crowded the park is at night during the warmer months.  Other areas that are amazing at night are anywhere in Midtown, the Brooklyn Bridge, anywhere along 5th Avenue, SoHo, Chinatown, and the East Village.

    Hope to see you soon!

    Post originally from: Digital Photography Tips.

    Check out our more Photography Tips at Photography Tips for Beginners, Portrait Photography Tips and Wedding Photography Tips.

    A Photographic Tour of New York


    Digital Photography School
  • The Delight of Photography: An Instructional Book Series for the Aspiring Photographer

    At last, here is the photo course that you have always wanted to do but never had the time! The majority of new camera owners just want to know some of the key basics so that they can take good images and enjoy them. I have not yet met a book that caters for this – they all (even the Continue Reading

    The post The Delight of Photography: An Instructional Book Series for the Aspiring Photographer appeared first on Photodoto.


    Photodoto

  • 12th Annual South Platte River All Club Paddle

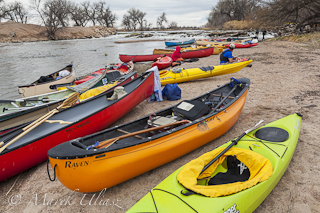
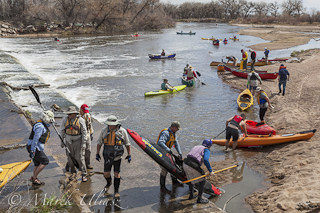
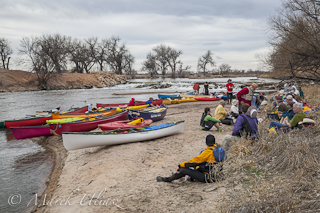
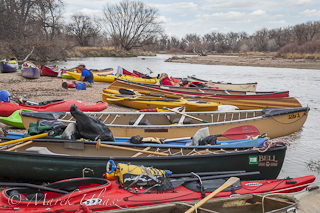
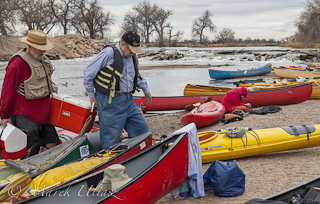
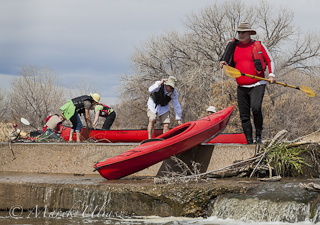
    The annual spring kickoff paddling trip on the South Platte River took place this year with two weeks delay on April 6, 2013, due to a winter weather. Typically, this trip is organized on the third Saturday of March. It starts in Evans Riverside Park and goes 9 miles downriver to Kersey or 14 miles to Kuner wuth a lunch break at the second dam portage. Several Colorado paddling clubs participate (Rocky Mountain Canoe Club, Poudre Paddlers Club, Rocky Mountain Sea Kayak Club, High Country River Rafters, and Colorado White Water Association), but no membership is required to paddle.

    Kayaks and canoes on South Platte River portaging kayaks and canoes over diversion dam on South Platte River
    Kayaks and canoes on South Platte River Kayaks and canoes on South Platte River
    lunch break on South Platte River portaging kayaks and canoes on South Platte River

    We had a good weather this year with some signs of spring, but pretty low water, ~550 cfs at Kersey. I took the pictures above with my Canon 5D Mark II DSLR camera. They can be licensed for editorial use from my stock photography portfolio

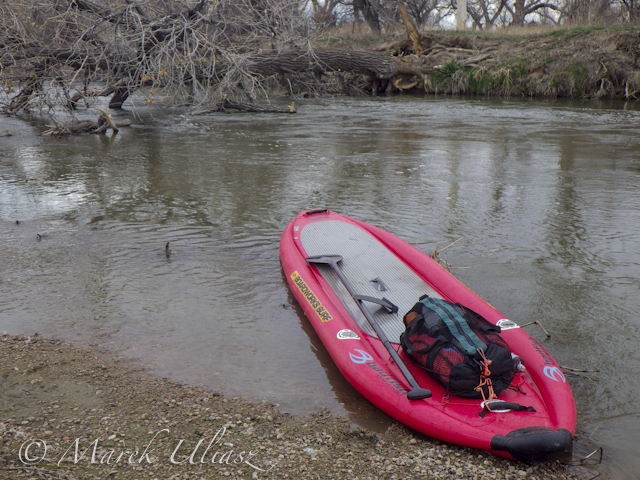
    This year I paddled Badfish inflatable SUP in a longer version of this trip to Kuner. It was not a first time of this paddleboard on the South Platte since I started my SUP season in early February this year with upstream and downstream paddling at Kersey.

    I had a nice paddling with some problems on several shallow spots. I paddled a couple of miles without the center 10″ fin, but tracking of Badfish was pretty bad. I will try a shorter fin in my next paddling.

    Badfish SUP on South Platte River

    Related posts:
    Opening 2013 Paddling Season with Badfish SUP on the South Platte River
    SUP on the South Platte River – Opening Winter Paddling Season
    South Platte River below Denver, Colorado – GPS/photo river guide. Links to flow data.


    paddling with a camera

  • Sunset on Coachella, Coachella 2013 — Indio, CA

    Sunset on Coachella, Coachella 2013 -- Indio, CA

    Check out all my Coachella 2013 Photos here.

    Just finished up a fantastic weekend shooting the first weekend down here at the Coachella music festival. I got to photograph so many new and interesting bands. Mostly I spent the entire time shooting with my good pal Robert Scoble. Check out Scoble’s photos on his Google+ stream. Ron Sheridan has a Pixt wall up on Coachella as well here.

    Thanks so much to Sam Levin and JBL Audio for getting us down here and for getting us media credentialed. Thanks to BorrowLenses for equipping us with some heavy duty gear. Scoble brought down a 600mm and a 400mm that we used to shoot the bands. Mostly I shot with a Canon 70-200 f/2.8, but those big guns came in handy a lot of time too. They were *tough* to lug around all weekend long, but worth it!

    Thanks also to Seagate for the great storage for holding thousands of photo files for us. I’m testing out one of their new wireless hard drives (more on that later!).

    I’ll write more about what shooting the weekend was like soon, but am going to work on getting a lot of photos processed first. I made some great new friends and got to hang out with some pretty cool people. Sam Levin, Chris Voss, Jen Friel, Daniel Brusilovsky, Ron Sheridan, you guys rock! Getting to hear Greg Kihn play Beatles and Stones songs for us in the RV on the way down was a definite highlight — man that guy can sing. Greg’s also got some of the best stories you’ve ever heard about rock and roll. Great getting to know you on the trip down Greg!

    Check out all my Coachella 2013 Photos here.


    Thomas Hawk Digital Connection

  • So You Want to be a Stock Photographer, Part I

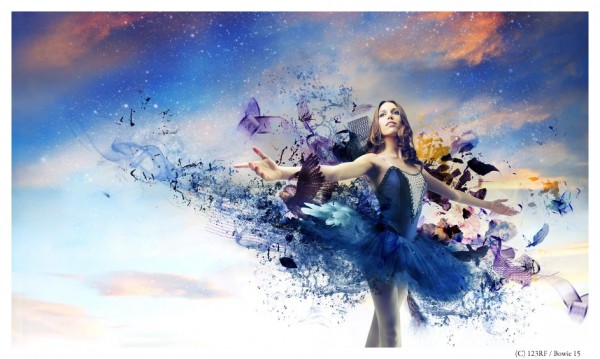
    The photographer has spent a fair amount of time creating this image both in shooting the elements and model, and compositing in post production.  But as a stock image - what does it say?  How will the end user use the image for their messaging?  License cost was 3 credits or about $  2.58; photographer will receive about 52 cents.

    The photographer has spent a fair amount of time creating this image both in shooting the elements and model, and compositing in post production. But as a stock image – what does it say? How will the end user use the image for their messaging? License cost was 3 credits or about $ 2.58; photographer will receive about 52 cents. How much is the photographers time worth?

    A few weeks back there was an opinion piece posted on dPs that raised the ire of many, and garnered supporters from others.  The fact remains that while it was an interesting read from a single individual, there were several inaccuracies in that piece.

    First,  iStock was not the first microstock agency to enter the marketplace; the most widely known perhaps, but it definitely was not the first.  That claim to fame can be laid on another Canadian upstart – Corel.  While I can’t recall the exact dates, in was around 1993-94 time frame when Corel started to purchase images outright for inclusion in CD bundles and incorporation in Corel Draw and Word Perfect. In those days it was pretty much called clip art.  Now it can be argued that Corel wasn’t a microstock agency. I would suggest they were as they purchased images from amateurs and professionals alike. The only difference between them and an iStock, for example, was that Corel purchased the rights and owned the image whereas the microstock agencies today simply work on a royalty basis with the contributor.

    The other inaccuracy in the article was the implication that agencies only provide 20% royalty to the photographer.  In some cases this may be true; however, there are also agencies that provide 50% royalty to the contributor, and any percentage combination below that which you can think of.  Usually, the extreme low percentages are in microstock and traditional agencies marketing RF images.  However, in order to compete traditional rights managed agencies are also making package and bundle deals that can see rights managed license fees dramatically reduced to levels even below royalty free image fees.

    But let’s not get hung up on the 20% royalty. Yes, the contract most likely states that the photographer will receive 20% royalty from “monies received.” Let’s put that in context.  Somewhere else in that contract you are most likely giving the agency the exclusive right to redistribute the image through their other supply networks.  What this means is that you will not get 20% of the purchase price, but 20% of your contracted agencies receipts.

    Put in context it translates to this:  Photographer A makes an image available to his contracted agency – let’s call them Agency X.  Agency X then places that image in the redistribution circuit with Agency Y.  (Photographer A usually does not know who Agency Y is or what the financial arrangement between Agency X and Agency Y might be.)  Agency Y licenses the Royalty Free image to a client for $ 10.00 USD.  Agency Y then remits $ 5.00 to Agency X (assuming their split if 50%), and agency X then redistributes its 20% obligation amounting to $ 1.00USD to Photographer A.

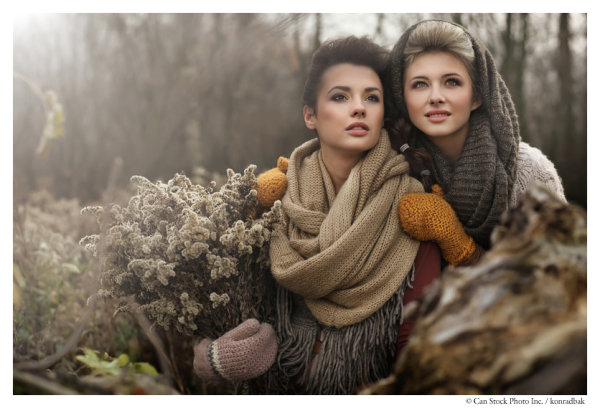
    This is a really nicely executed stock image. Are the two ladies friends, or lovers? Is this image about fashion, seasons, or simply looking toward the future? The image provides options for the copy writer, and the more options provided typically the better sales. However, this image has only been licensed twice in more than one year. The license for appearance here cost one credit or about 60 cents; the photographer will receive, unfortunately,  about 12 cents.

    This is a really nicely executed stock image. Are the two ladies friends, or lovers? Is this image about fashion, seasons, or simply looking toward the future? The image provides options for the copy writer, and the more options provided typically the better sales. However, this image has only been licensed twice in more than one year. The license for appearance here cost one credit or about 60 cents; the photographer will receive, unfortunately, about 12 cents… it is most definately worth more just in production value alone.

    So as you can see, if you are signed with a small agency who more than likely is clamouring to get their material with the large image machines that have far reaching marketing clout, you are more than likely only going to receive 10%, or less, of the initial license price.

    Let’s put this financial translation into further context.  I am going to assume you are a Canon user, and you need a new popular lens; let’s say the 70-200mm F4L which retails for about $ 700.  You offer that you can warrant purchasing the lens because of your stock sales and over time you will recover the purchase price.  But wait, when you receive the $ 1.00 from that sale, that is not a deposit in your bank account.  How much time did you take to edit and prep the image by sizing and ensuring the right colour space? How much time did you spend ensuring the correct metadata and keywords were applied. How much is your time worth?  Now that you have received your royalty I suspect you have the usual income tax deductions that can range anywhere from 15-40% depending upon where you live. And on it goes – the list of expenses is endless. However, a general rule of thumb is to endeavour that you would like to retain 30% of your gross income as profit … although many stock photographers today are suggesting they are in a negative profit position and are getting out of the business.

    Therefore, and assuming we are going to keep good business practises and retain 30% of the gross sale, we would have 30 cents from each sale from which to purchase that lens. (I don’t want to get into the minutiae of whether or not your capital reserve is included in your business plan.)  Quick translation realizes that we would have to make 2,333 sales in order to purchase that lens!  I can tell you that in more than 20 years as a full time stock photographer I have not had one image be licensed for even half that many times.

    So the point of this primer on the financial benefit of the microstock industry and part-time photographer is this: There probably isn’t any financial benefit and in all likelihood it will cost you money.

    So yes, if you want to continue shooting for pizza and beer go for it; but at the same time you should calculate all your costs, including time, to see if you would be further ahead by spending that time and money with family.

    In the next installment we’ll take a look at cost per image versus return per image.

    Post originally from: Digital Photography Tips.

    Check out our more Photography Tips at Photography Tips for Beginners, Portrait Photography Tips and Wedding Photography Tips.

    So You Want to be a Stock Photographer, Part I


    Digital Photography School

  • 5 Terrifying Photography Fears and How to Overcome Them Today

    You’re walking down the street, sleek camera in hand. As luck would have it, a photogenic girl crosses your path, stopping at the curb long enough to pull her hair back. She is silhouetted against the glowing city light; this is the perfect photographic moment. You reach for your camera, frame the shot, and…she’s gone. You didn’t hear the click Continue Reading

    The post 5 Terrifying Photography Fears and How to Overcome Them Today appeared first on Photodoto.


    Photodoto

  • Batch Crop and Resize in Lightroom

    Lightroom batch crop and resize opener

    If you’re working on a large shoot and need to output a lot of images at a fixed size then Lightroom can do the work for you. It isn’t obvious how you can crop all your images to a fixed size and output them at a certain set of pixel dimensions but it is easy to do when you know how. Here’s how to do it:

    Step 1

    Lightroom batch crop and resize 1

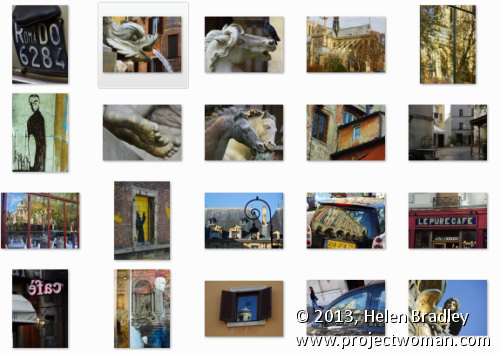
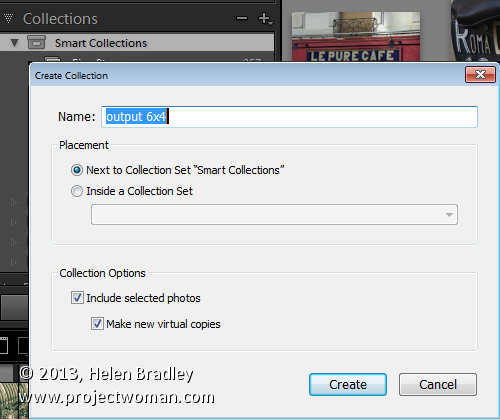
    First locate the folder with your images in it. I prefer to make virtual copies of my images and put them in a new collection but you can do whatever makes sense to you.

    Step 2

    Lightroom batch crop and resize 2

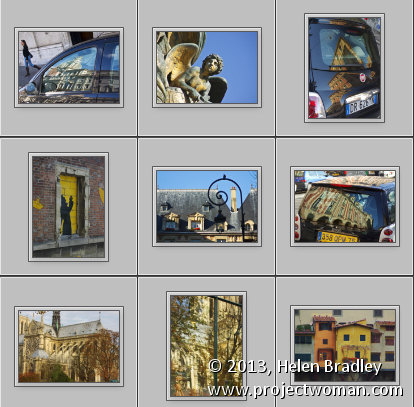
    Select all the images in Grid view in the Library module in Lightroom.

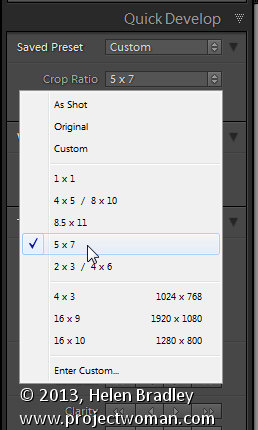
    Open the Quick Develop panel on the right and, from the Crop Ratio dropdown list, select the crop ratio that you want to crop to. For example you can crop to fixed ratios such as 1 by 1 or printing sizes such as 5×7, 4×6 and so on.

    Here I’ve selected 5×7 and when I do so all the selected images are automatically cropped to this 5 x 7 ratio.

    Lightroom is smart enough to understand that some images are portrait orientation and others are landscape. Portrait images are cropped to 5 x 7 and landscape orientation images to 7 x 5.

    Lightroom batch crop and resize 2a

    Step 3 (optional)

    Lightroom batch crop and resize 3

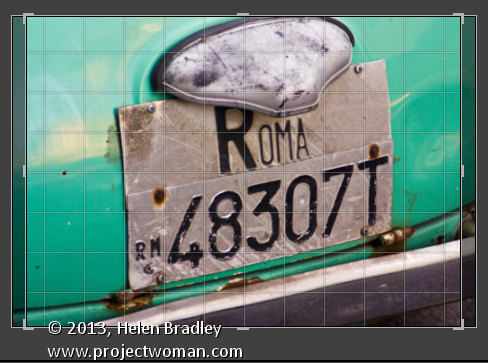
    If desired, you can now move to the Develop module and check the crop for all the images. By default, Lightroom will center the crop rectangle on the image and this may not be exactly what you want for some images. However, it is easy to go to the Develop module, click the first image and click on the Crop Overlay Tool so you see the crop marquee in position on the on the image.

    Now from the filmstrip you can click on each image in succession to preview it in the crop window and you can easily identify if any of them need an adjustment to the crop rectangle. If they do simply drag on the crop rectangle to reposition it. When you’re done return to the Library view.

    Step 4

    Lightroom batch crop and resize 4

    As the images are now all cropped to size, press Ctrl + A to select them and then click Export. Choose a folder to export the images into or click New Folder to create a new folder.

    You can now set your desired preferences in the Export dialog.

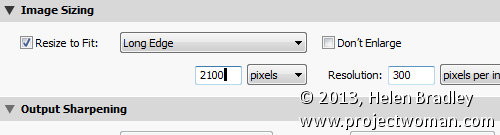
    To control the output size – in pixels wide and tall – of the images easily because you already know the crop ratio. To do this, select the Resize to fit checkbox and choose Long Edge from the dropdown list. Then type a pixel dimension for the long edge. So, for example, to prepare 5 by 7 ratio images for printing at 300 dpi the longest edge will need to be 2,100 pixels (7 x 300) so type 2100 and set the resolution to 300.

    Step 5

    Lightroom batch crop and resize 5

    Click Export to export your images and they will be exported to a folder at the chosen size and resolution.

    This process allows you to quickly and effectively prepare a batch of images for printing. It manages portrait and landscape images so that you don’t have to separately handle each type. It’s a simple workflow and a fast way to prepare images from a large shoot.

    Post originally from: Digital Photography Tips.

    Check out our more Photography Tips at Photography Tips for Beginners, Portrait Photography Tips and Wedding Photography Tips.

    Batch Crop and Resize in Lightroom


    Digital Photography School

  • How to Choose Your Next EOS Camera: Part One

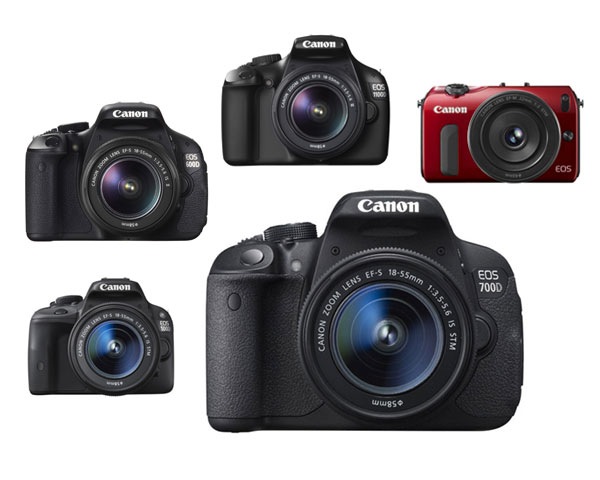
    01.jpg

    This article is written by Andrew S. Gibson, the author of Understanding EOS, on sale now at Snap N Deals for a limited time.

    In these articles I’m going to take a look at the current range of Canon EOS cameras, giving an overview of each model and the reasons that you may consider buying one.

    You may be wondering why I’m writing about Canon EOS cameras – after all there are other brands such as Nikon, Sony, Pentax and Olympus to choose from. The answer is that I’m a Canon EOS user, and I write about EOS cameras for a living. If you want to know anything about other brands, I’m definitely the wrong person to ask.

    Maybe other DPS authors will jump in and write similar guides about the brands they’re familiar with (hint, hint). I think it would make a fantastic series.

    A note about prices: DPS has an international readership, so I haven’t included prices as they vary so much. The cameras are listed roughly in order of ascending price to give you an idea of where each model fits in the EOS range.

    Entry level EOS cameras

    Let’s start with ‘entry level’ EOS cameras. Canon calls these enthusiast cameras. They are designed for hobbyists rather than professional photographers. If you are buying a digital SLR for the very first time, or you’re on a tight budget, you will probably buy one of these models.

    An idiosyncrasy of entry level EOS cameras is that Canon gives the same model different names depending on which territory they are sold in. Hence the same camera is a 700D in Europe, a Kiss X7i in Japan (where it is marketed to the female demographic) and a Digital Rebel T5i in North America.

    Canon currently has five enthusiast models:

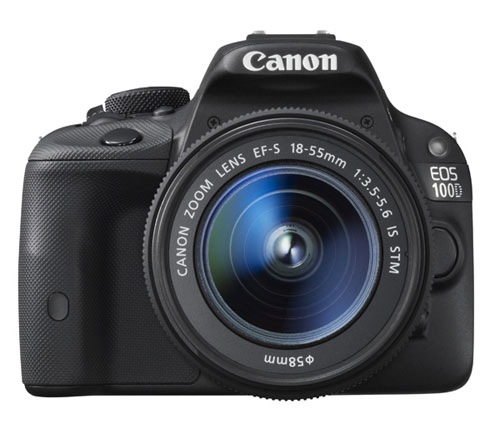
    02.jpg

    EOS 100D/Rebel SL1/Kiss X7

    March 2013

    Key specs:

    • 18 megapixel APS-C sensor
    • 9 point AF with 1 cross-type sensor
    • 63 zone evaluative metering
    • Live View and movie mode
    • DIGIC 5 processor
    • Uses SD cards
    • 3 inch fixed touch screen LCD display
    • Built-in flash with no wireless flash control

    According to Canon the EOS 100D is the world’s smallest and lightest digital SLR. It’s aimed at photographers who are moving up from compact cameras or smart phones and don’t want to buy a larger camera.

    It is ideal for photographers who want a light body to carry around all day, or who need to keep the weight down when travelling overseas. It may also appeal if you like the idea of being able to carry it around in your bag or handbag.

    The small body of the EOS 100D will be more inconspicuous when you are travelling than other EOS cameras. This may suit some people, including street photographers.

    The spec is similar to the EOS 700D, although it doesn’t have as many features. The main selling point of this model is the size. If size doesn’t matter, then consider a more advanced model – you’ll get more bang for your buck.

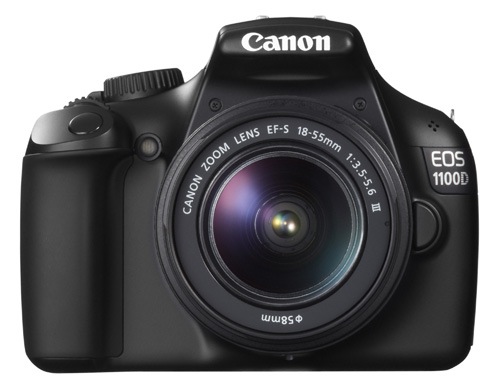
    03.jpg

    EOS 1100D/Rebel T3/Kiss X50

    March 2011

    Key specs:

    • 12.3 megapixel APS-C sensor
    • 9 point AF with 1 cross-type sensor
    • 63 zone evaluative metering
    • Live View and movie mode
    • DIGIC 4 processor
    • Uses SD cards
    • 2.7 inch fixed LCD display
    • Built-in flash with no wireless flash control

    This is Canon’s least expensive SLR, ideal for anybody on a tight budget. However, it also has the lowest spec and lacks some of the features found on the other models in this list, such as the three inch vari-angle LCD screen and built-in master unit for controlling external Speedlites.

    It also has the lowest megapixel count. To be honest, if you buy it you’re probably going to outgrow it fairly soon. It’s also possible that Canon may update this model soon as it’s two years old.

    Don’t let that put you off though if you’re on a tight budget – this is a very capable camera for learning on and is by far the cheapest model in this list. Might also make a good gift for a relative or friend who has expressed an interest in photography. Budget allowing, you’ll be better off with a more advanced model.

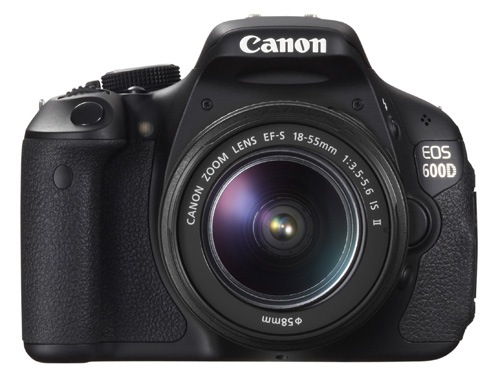
    04.jpg

    EOS 600D/Rebel T3i/Kiss X5

    March 2011

    Key specs:

    • 18 megapixel APS-C sensor
    • 9 point AF with 1 cross-type sensor
    • 63 zone evaluative metering
    • Live View and movie mode
    • DIGIC 4 processor
    • Uses SD cards
    • 3 inch vari-angle LCD display
    • Built-in flash with wireless flash control

    The EOS 600D is a step up from the EOS 100D and 1100D models. It has a larger body and a high resolution vari-angle LCD screen that you can use with movie mode or for taking photos at awkward angles (ie with the camera at ground level).

    Another benefit of the vari-angle screen is that you can turn it around so the screen faces the back of the camera, protecting the LCD surface during travel.

    The built-in flash doubles as a wireless master for external Speedlite flash units, so if you want to use (or learn to use) external flash then this is a good camera to buy instead of the EOS 100D or 1100D.

    You may be interested in this camera if you are upgrading from an 1100D, or an older model such as the EOS 400D camera. It’s not as advanced as the EOS 700D, but much less expensive.

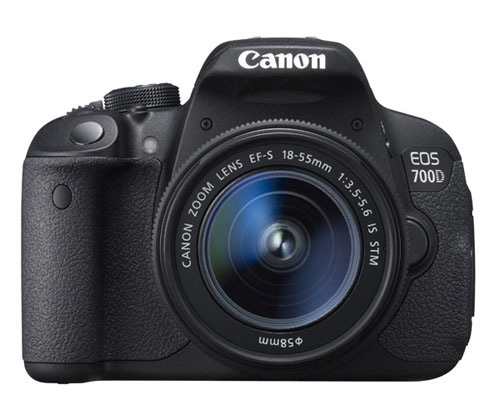
    05.jpg

    EOS 700D/Rebel T5i/Kiss X7i

    March 2013

    Key specs:

    • 18 megapixel APS-C sensor
    • 9 point AF with 9 cross-type sensors
    • 63 zone evaluative metering
    • Live View and movie mode
    • DIGIC 5 processor
    • Uses SD cards
    • 3 inch vari-angle touch screen LCD display
    • Built-in flash with wireless flash control

    The EOS 700D was announced in March and replaces the EOS 650D (which you may still be able to buy until stock runs out). The EOS 600D remains available as a lower cost alternative to the 700D.

    The key differences between this camera and the 600D is that the 700D has a more advanced processing chip, a greater ISO range and hybrid AF that gives better autofocus performance in Live View and movie mode.

    You may be interested in this camera if you are upgrading from an 1100D, or an older model such as the EOS 400D camera. It’s an ideal model if you want an advanced EOS camera but don’t like the extra size and weight or need the more advanced features of models like the EOS 6D, 7D or 5D Mark III. It is also cheaper than those cameras.

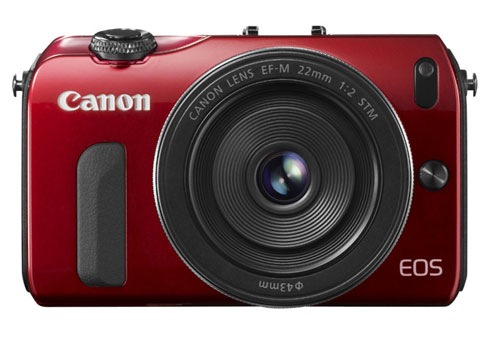
    06.jpg

    EOS M

    July 2012

    Key specs:

    • 18 megapixel APS-C sensor
    • 31 point hybrid AF
    • 63 zone evaluative metering
    • Live View and movie mode
    • DIGIC 5 processor
    • Uses SD cards
    • Three inch fixed LCD display
    • Comes supplied with 90EX Speedlite flash unit in most countries when purchased in kit form

    The EOS M is Canon’s first compact system camera and marks the company’s entry into the mirrorless camera market. It’s essentially a scaled down EOS 650D without a pentaprism or viewfinder.

    Another important difference is that the EOS M has its own lens mount (the EF-M mount). At the moment there is a choice of two EF-M lenses, plus an adapter that lets you mount the EF-S and EF lenses that other EOS cameras use.

    The appeal of this camera is the small size and beauty of the design. Coupled with the EF-M 22mm pancake lens it makes a very portable setup that will create high quality images, something that could be ideal for travel or street photography.

    However, reviews about the camera’s autofocus performance aren’t encouraging. The lack of a viewfinder means you have to take photos by composing them on the LCD screen, something regular digital SLR users could find hard to get used to.

    If size isn’t important, then go for an SLR camera instead. The optical viewfinder and phase detection autofocus make them a much more versatile tool.

    Conclusion

    That concludes the round up of entry level EOS cameras. I will take a look at the current range of semi-professional and pro cameras in the next article.

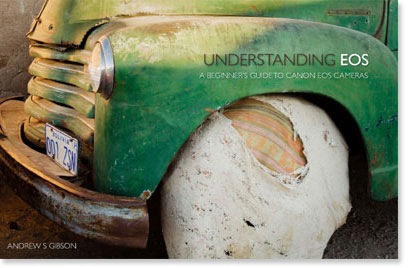
    Understanding EOS

    It’s wise to remember that whichever camera you have, it’s only a tool. Photographers create photos, cameras just take them. An understanding of the principles of light and composition are just as important as which model you own.

    07.jpg

    This is the principle behind my ebook Understanding EOS, which I wrote to help people learn to use their EOS cameras. It’s available now at Snap N Deals for a special price for a limited period. Whichever EOS camera you own, it’s the essential accessory to help you get the most out of your camera.

    Post originally from: Digital Photography Tips.

    Check out our more Photography Tips at Photography Tips for Beginners, Portrait Photography Tips and Wedding Photography Tips.

    How to Choose Your Next EOS Camera: Part One


    Digital Photography School