Category: Photography

  • Portrait Photography: How to Photograph People in the Harsh Midday Sun

    By: Oded Wagenstein

    Great tips and tricks on overcoming the harsh mid-day sun to create beautiful portraits on either side of the “golden hours”

    The Golden Time

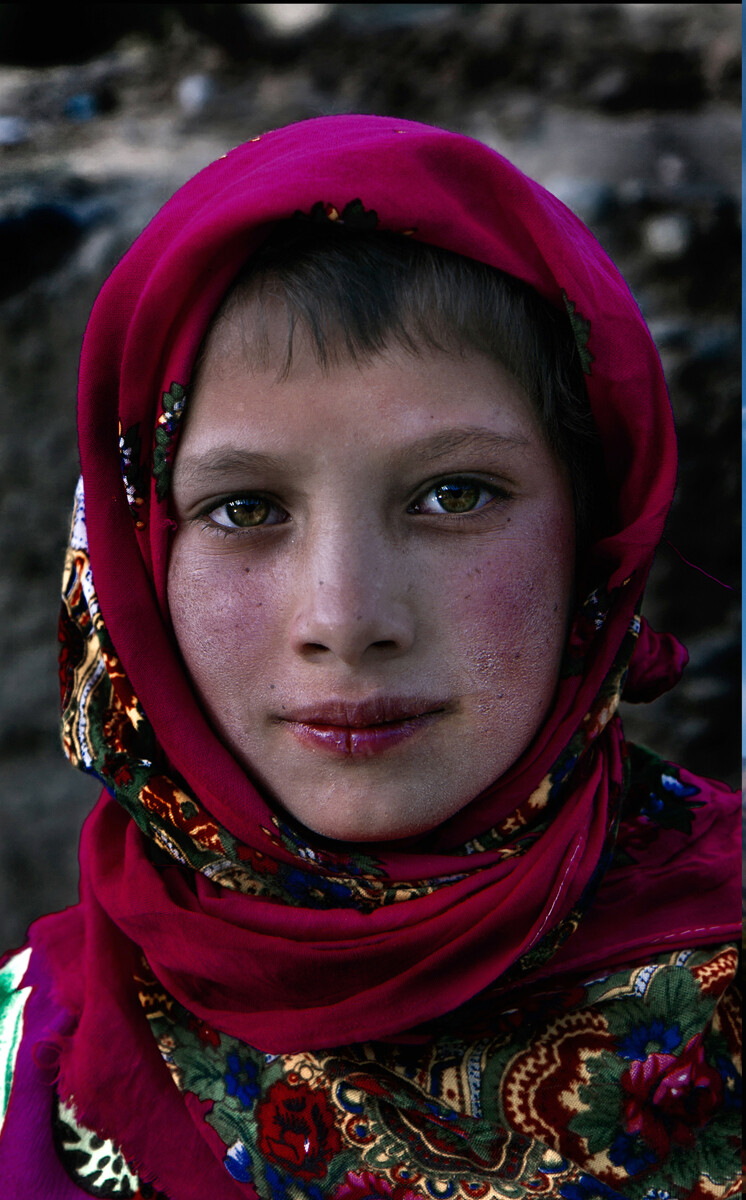
    The best time to take almost any kind of  picture, is in the “golden hours”: around one hour before sun down and one hour after sunrise, because that’s when the light is at its softest, lacking hard shadows, rich in colors, bathing your subject in even light, which entering from the side and that gives your subjects face definition.
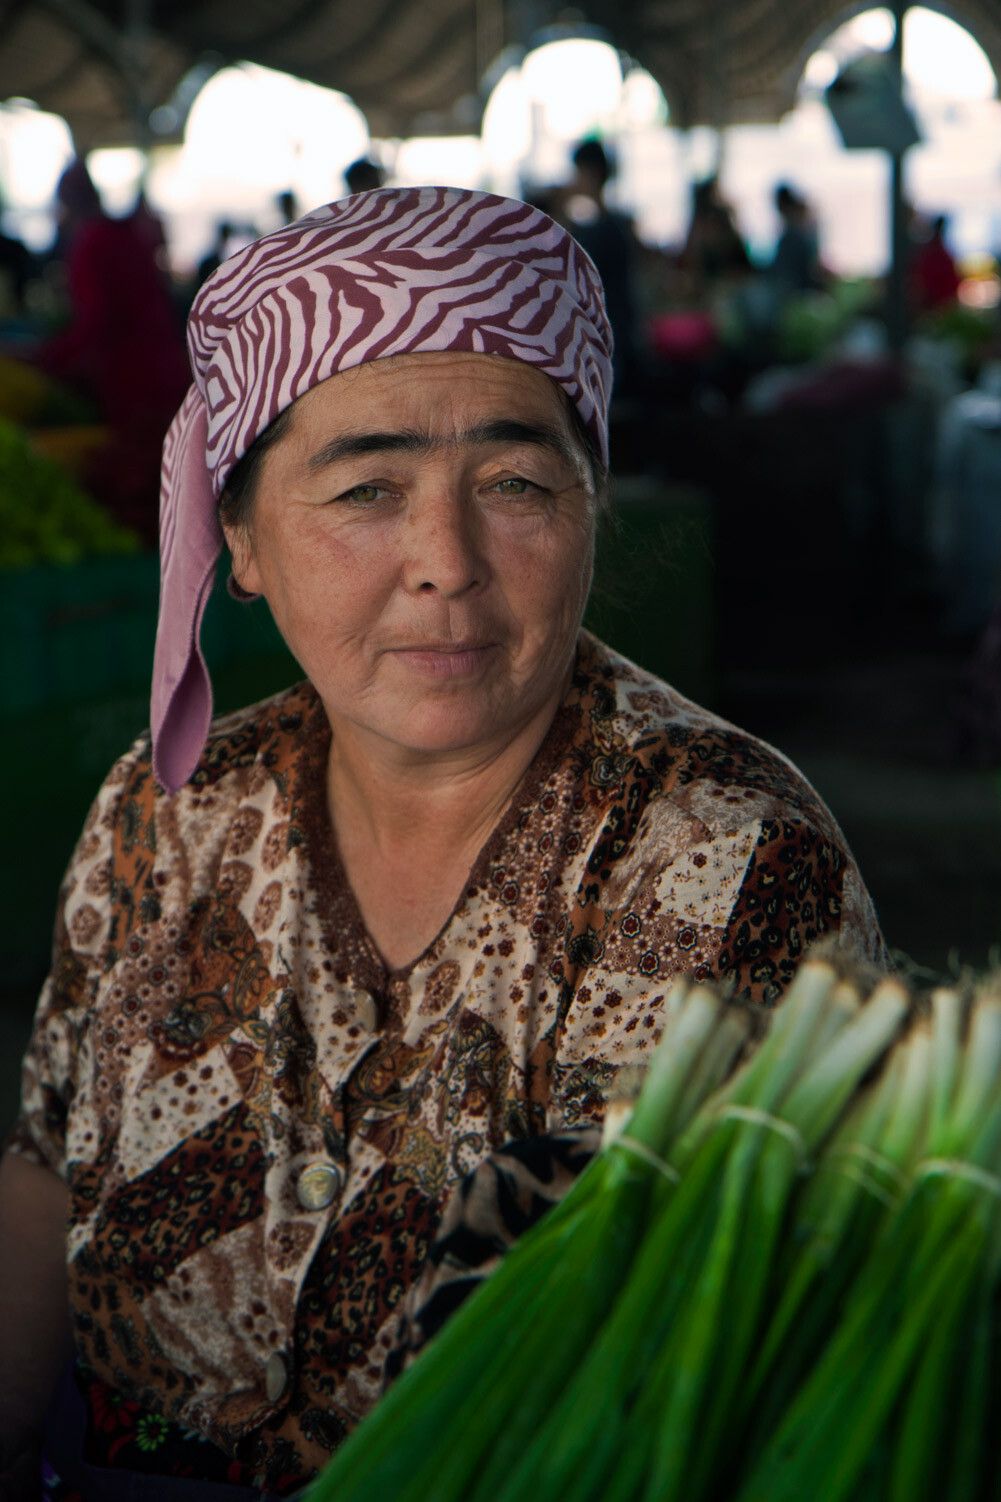
    -Uzbekistan-  Canon EFS 17-55mm f/2.8  Fstop of 3.5, shutter speed@10 ISO 160
    -Uzbekistan-
    Canon EFS 17-55mm f/2.8
    Fstop of 3.5, shutter speed@10 ISO 160

    -Tajikistan- Canon EFS 17-55mm f/2.8 Fstop of 5.6, shutter speed@15, ISO 200.

    -Tajikistan-
    Canon EFS 17-55mm f/2.8
    Fstop of 5.6, shutter speed@15, ISO 200.

    -China - Canon EFS 17-55mm f/2.8 Fstop of 2.8, shutter speed@10 and ISO 400 Natural light (sunrise) entering the frame from the right
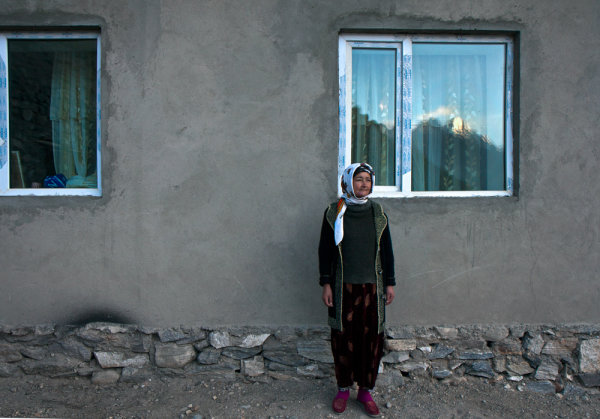
    -China –
    Canon EFS 17-55mm f/2.8
    Fstop of 2.8, shutter speed@10 and ISO 400
    Natural light (sunrise) entering the frame from the right

    -Tajikistan- Canon EFS 17-55mm f/2.8 Fstop of 5.6, shutter speed@10 and ISO 100 Natural light (sunrise) reflecting from the mountains, which are about 45 degrees to the woman (you can see it in the window).

    -Tajikistan-
    Canon EFS 17-55mm f/2.8
    Fstop of 5.6, shutter speed@10 and ISO 100
    Natural light (sunrise) reflecting from the mountains, which are about 45 degrees to the woman (you can see it in the window).

    Once this time (golden time) has passed, we are left with harsh, unflattering light that is low in saturation and makes the images look dull and flat as you can see in this photo:
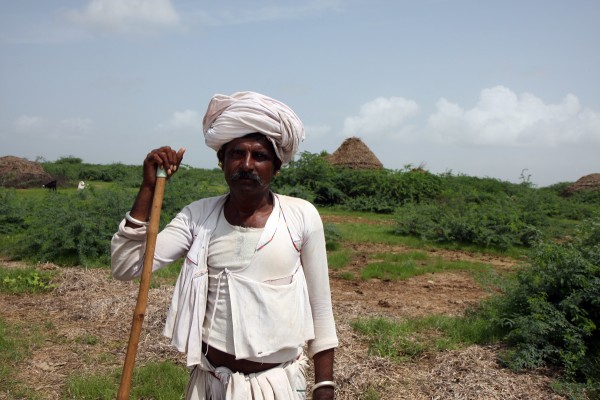
    -India- Canon EFS 17-55mm f/2.8 Fstop of 8, shutter speed@10 and ISO 100 The harsh mid-day sun is just above him.

    -India-
    Canon EFS 17-55mm f/2.8
    Fstop of 8, shutter speed@10 and ISO 100
    The harsh mid-day sun is just above him.

    The Problem

    In order to provide solutions, first let’s understand the “problem”: Your camera doesn’t see as well as your eyes.  The “problem” is the camera’s dynamic range.  In plain English, the dynamic range is the distance between the brightest and darkest points in the frame.  Let’s say you take a shot of a man wearing a hat in the middle of the day, when the sun is at its highest and harshest. Your eyes will be able to make out his eyes even under the shadow of his hat, as well as his chin in the strong daylight. That’s because your eyes have the ability to see a large dynamic range.

    Your camera however has a far more limited ability to see the dynamic range .If you we go back to our man in the hat, your camera will see his eyes, which are in shadow under his hat as black, while his chin which is in strong sunlight will be blown out and very white.

    You might try to “fix it” by changing your aperture/shutter or ISO parameters but, this would only make your image lighter or darker as these actions have no bearing on the dynamic range. Even if we try to use an ND filter, again, this would only make your image darker and would not solve the problem or alter the range.

    The Solutions

    Move to the shade
    Try moving the subject to the shade, or perhaps indoors. When I asked Steve McCurry, the creator of the “Afghan Girl” image, how he works in the mid day sun, he told me that he prefers to work indoors with the harsh light coming in through a window so that it turns to soft even light, and that’s really change my way of “seeing” the harsh light as an opportunity of creating great images by moving to the shade or indoors.
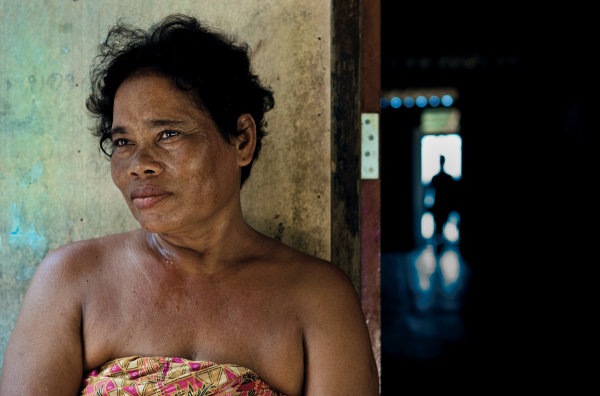
    -Thailand- Canon EF 24-70 mm f/2.8L Fstop of 3.5, shutter speed@10 and ISO 160 This woman is sitting in the shade with strong light coming from the street (to her left). A small piece of paper was held above her head to block the light (flag).

    -Thailand-
    Canon EF 24-70 mm f/2.8L
    Fstop of 3.5, shutter speed@10 and ISO 160
    This woman is sitting in the shade with strong light coming from the street (to her left). A small piece of paper was held above her head to block the light (flag).

    Try turning your subject 45 degrees to the light source (exp: window) by doing so you will be able to create a nice 3D effect.
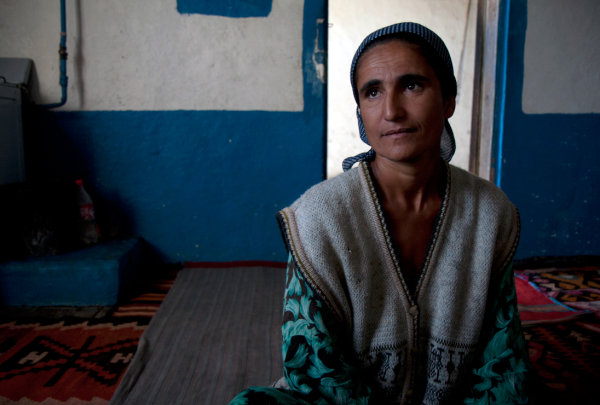
    -Uzbekistan- Canon EFS 17-55mm f/2.8 Fstop of 2.8, shutter speed@10 and ISO 500 Natural light (only) coming from the window on the left side of the frame (about 45 degrees)
    -Uzbekistan-
    Canon EFS 17-55mm f/2.8
    Fstop of 2.8, shutter speed@10 and ISO 500
    Natural light (only) coming from the window on the left side of the frame (about 45 degrees)

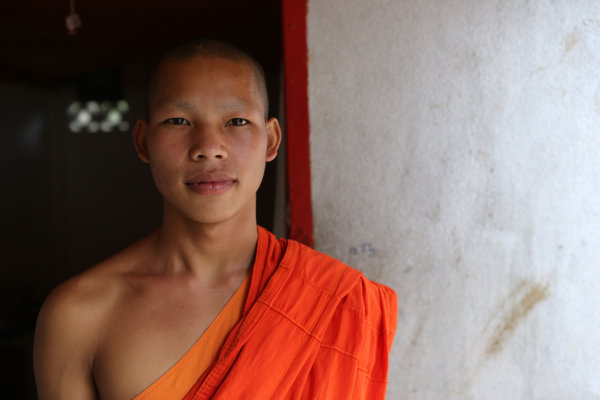
    -Laos- Canon EF 24-70 mm f/2.8L Fstop of 3.5, shutter speed@100 and ISO 1000 I used the soft light coming through a red robe which was on the right side of the frame, in order to "sculpture" the light on his face. It also gave the whole image some sort of orange glow.

    -Laos-
    Canon EF 24-70 mm f/2.8L
    Fstop of 3.5, shutter speed@100 and ISO 1000
    I used the soft light coming through a red robe which was on the right side of the frame, in order to “sculpture” the light on his face. It also gave the whole image some sort of orange glow.

    Create a Silhouette

    Expose your image from the background, so your subject becomes a silhouette in some cases it makes for a wonderful image.

    You can do so by using the manual exposure (M mode) or by changing the metering mode to spot and measure from the background.

    -Thailand- Canon EF 24-70 mm f/2.8L Fstop of 5, shutter speed@10 and ISO 100 (on spot metering) Natural light only

    -Thailand-
    Canon EF 24-70 mm f/2.8L
    Fstop of 5, shutter speed@10 and ISO 100 (on spot metering)
    Natural light only

    Burn it Down

    Burning the background is not always a bad thing. On the contrary it creates a unique portrait that’s different and interesting
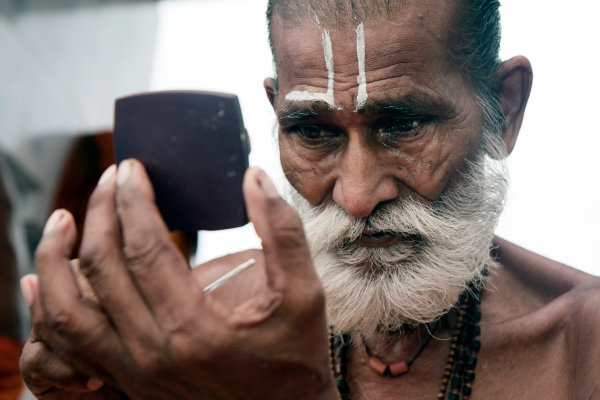
    -India- Assistant: Hardik Pandya Canon EFS 17-55mm f/2.8 Fstop of 4.5, shutter speed@10 and ISO 200 Natural light only

    -India-
    Assistant: Hardik Pandya
    Canon EFS 17-55mm f/2.8
    Fstop of 4.5, shutter speed@10 and ISO 200
    Natural light only

    Reflector

    By using a reflector, you can minimize the light range by bouncing light back onto your subject, which will add light to the dark areas. Like this image below.  I used a small folding reflector, which I held in my hand while taking the photo.
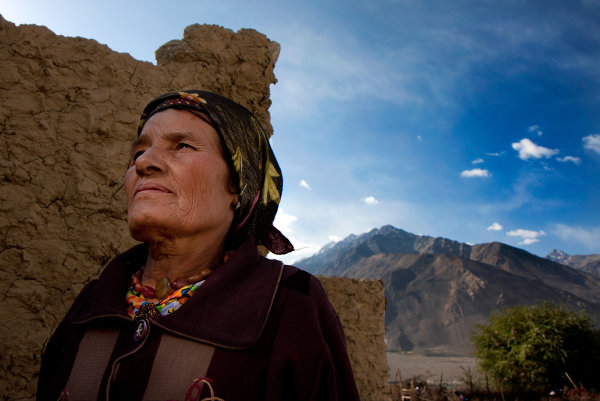
    -Tajikistan- Canon EFS 17-55mm f/2.8 Fstop of 8, shutter speed@10and ISO 100 Natural light+ Reflector (gold color) I held in my hand on the lower left side of the frame + warm natural light bouncing off the mud wall
    -Tajikistan-
    Canon EFS 17-55mm f/2.8
    Fstop of 8, shutter speed@10and ISO 100
    Natural light+ Reflector (gold color) I held in my hand on the lower left side of the frame + warm natural light bouncing off the mud wall

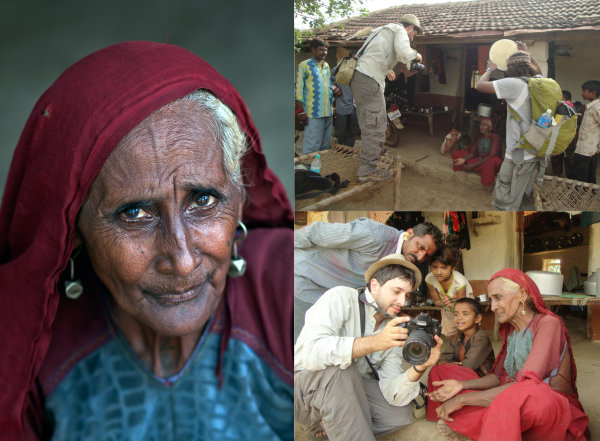
    -India- Assistant: Hardik Pandya Canon EFS 17-55mm f/2.8 Fstop of 2.8, shutter speed@10 and ISO 100 This nice lady was sitting in the shade of her house + silver color reflector, coming from the right upper side of the frame.

    -India-
    Assistant: Hardik Pandya
    Canon EFS 17-55mm f/2.8
    Fstop of 2.8, shutter speed@10 and ISO 100
    This nice lady was sitting in the shade of her house + silver color reflector, coming from the right upper side of the frame.

    External Flash

    Like the reflector, the flash will add more light to the dark areas in turn creating a smaller dynamic range.
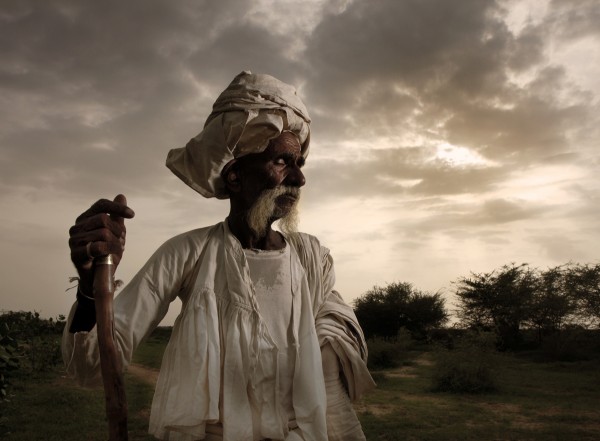
    -India- Canon EFS 17-55mm f/2.8 Assistant: Hardik Pandya Fstop of 9, shutter speed@10 and ISO 100 Natural light of the background sky + fill light flash (off camera and inside a small soft box) coming from the right side of the frame, about 1 meter in front of the man's face.

    -India-
    Canon EFS 17-55mm f/2.8
    Assistant: Hardik Pandya
    Fstop of 9, shutter speed@10 and ISO 100
    Natural light of the background sky + fill light flash (off camera and inside a small soft box) coming from the right side of the frame, about 1 meter in front of the man’s face.

    HDR

    Taking 3 (or more) exposures of your subject and using this technique in post processing could come in very handy.
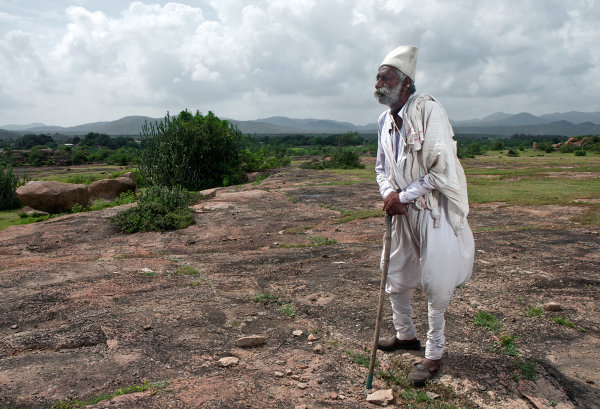
    -India- Canon EFS 17-55mm f/2.8 Assistant: Hardik Pandya Fstop of 11, shutter speed@10 and ISO 100 Natural light of the background sky + fill light flash (off camera and inside a small soft box, coming from the left side of the frame) + HDR effect in Photoshop.

    -India-
    Canon EFS 17-55mm f/2.8
    Assistant: Hardik Pandya
    Fstop of 11, shutter speed@10 and ISO 100
    Natural light of the background sky + fill light flash (off camera and inside a small soft box, coming from the left side of the frame) + HDR effect in Photoshop.

    I would like to thank Hardik Pandya and Linda Burnette for their help on making this article.

    Do you have any interesting techniques or methods to overcome the harsh light? Please share in the comments.

    Oded Wagenstein is a Travel photographer and writer. He is a regular contributor to the National Geographic Traveler magazine (Israeli Edition) and he is known for his intimate culture portraits. You can join his Portrait & Travel Photography blog and continue to discuss on travel and people photography and get more amazing tips!

    Post originally from: Digital Photography Tips.

    Check out our more Photography Tips at Photography Tips for Beginners, Portrait Photography Tips and Wedding Photography Tips.

    Portrait Photography: How to Photograph People in the Harsh Midday Sun

    Digital Photography School

  • So You’re Going to Shoot A Wedding: Part 2 of 3 [Day Of]

    If you want to know how to photograph a wedding, there are ton of books on the subject but the truth is nothing is going to be a greater lesson than just doing it.  This series is not about what shots to take or how to shoot.  It’s about being a lone ranger vendor with no roadmap. Read Part 1 on the topic of Preparation here.

    It’s Game Day folks.  Your pockets are jammed packed with spare batteries, CF cards, and gum.  You’re rested and ready.  You’re a vision of both professionalism and cool comfort.  You’re terrified out of your mind that you’re going to mess up, but no one else can even sense that.

    Now what?

    IMG_1868b

    The Art of Bossy Invisibility

    This is the finest line you will walk all day: staying out of the way, but being right in the middle of everything.  One of the first things I do when I get started at the ceremony site is to chat with the officiant.  At that point, I have (hopefully) already met with the bride and groom and have a feel for if they are the type that want great pictures even if it means me shoving my way in, or if they would prefer that it’s a fun night for all of their people and no one even noticed that they had a photographer there.  

    The officiant may have some very specific thoughts on this too.  Either they don’t care a bit and feel the couple are in charge, or they may ask you to stay out of the center isle, refrain from obviously standing during seated moments, and similar during the ceremony.  It’s the hardest part of the whole day—you are there to do a job, but you also don’t want to be known as the pushy portfolio-building photographer who couldn’t take a hint.  

    At least 50 times a wedding I have to silently ask myself if the potential shot is amazing enough to risk being intrusive.  Sometimes the answer is yes and sometimes it’s no.  And sometimes I make a bad choice and I find myself obnoxiously close or I miss a great shot.  The sun  still always rises the next day though.

    IMG_0101b

    Shoot THEIR wedding, not Yours

    I’m a huge flirt.  And I don’t discriminate with this at all—men, women, kids, babies, dogs, whatever.  And while it maybe hasn’t made my dating life simple, it’s been great for my career and getting people  to feel comfortable and look happy quickly and easily.  

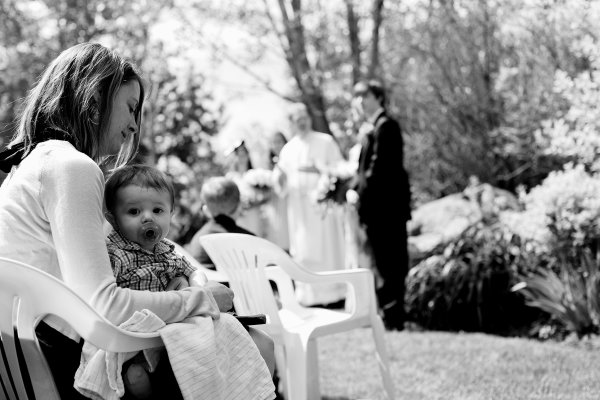
    When this baby started making eyes at me with drool dripping, I forgot where I was for a second and thought, how fun is this shot—this baby oblivious to the union of souls happening mere yards away and instead diggin’ on me.  The problem with this shot is that, cute as it may be, there is nothing the couple—my clients—are likely to do with it.  They may not even know for sure who that baby is for all I know.  They hired me for pictures of them, important moments, and candid situations.  Not evidence of me flirting with a baby.  

    Stay true to your style—it’s what you were hired for.  But always in the back of your mind remember that the end result will be what the couple didn’t get to see, what they didn’t remember, and what they will treasure for a lifetime.

    IMG_0779b_color

    Don’t Miss the Moments

    This is the greatest fear of every wedding photographer; that something will happen and they will miss the kiss.  Or the moment when the groom sees his bride for the first time.  Or the entire first dance because they somehow got locked in the bathroom and no one could hear them banging on the door, screaming to be let out.  (That last one is maybe just my own fear.)  

    Worrying won’t get you anywhere.  Odds are, you’re not going to miss the big moments.  What is more possible though is that by being on high alert every second for hours on end, you’ll miss some sweet little situations that could be an image no one expected, yet a perfect capture.  Try to be there as an observer that isn’t stressed about seeing every little thing happen.  You’re going to miss some stuff.  But you’re going to see a lot more than anyone else there.  It’s the most interesting backstage pass—enjoy the VIP status and use it wisely.

     weddingarticle

    Shoot The Whole Story

    Often couples in an attempt to cut costs, will push back the arrival time of the photographer or ask for ceremony and portrait shots and nothing else.  This is understandable: wedding photography is expensive.  I personally feel it’s the worst corner to cut with the exception maybe of tossing a giant cubic zirconium in platinum, but this is tough to explain to cost-conscience couples.  

    If this is a wedding you are shooting that in any way will become a part of your wedding portfolio, go above and beyond and shoot even what’s not asked of you.  To only shoot the ceremony or portraits, leaves you with little to show for your effort and nothing that’s enough to impress the next couple you may try to book.  This may cost you time you didn’t account for or aren’t getting paid for, but it will come back to you in the long run when you have a wedding in it’s entirety as part of your portfolio.  It’s also just plain ol’ good experience.

     IMG_2935b

    Make the Retail Shots Meaningful

    I am convinced that those bouquet shots that photographers go to so much trouble to shoot at every possible different angle go completely to waste and I’m staying convinced of that until the day I walk into someone’s home and see a 16×24 gallery wrap canvas featuring a rose bouquet, laying casually on the alter as if by magic.  Flowers are expensive—I get that.  And every bride has likely been putting the occasionally thought into what color daisies her bridal bouquet is going to include since she was in the 4th grade.  But there’s better stuff to document, I promise.  Sure, take a pretty flower picture—why not.  

    Digital is cheap and you likely will have a little down time while people are shoving chicken picatta into their faces (because, promise me, you will never, ever shoot people eating.  Don’t be that photographer.) But look for the details that are meaningful.  Instead of putting the rings somewhere weird and artsy, zoom in close and shoot that shiny new ring on their hand when they aren’t looking.  When it’s casually on their grooms face and they are enjoy a small moment.  Photograph the details that will be important years later.

    And if you do get locked in the bathroom, don’t panic.  I have to hold on to the belief that a missing wedding photographer isn’t something that goes unnoticed for long.

    Post originally from: Digital Photography Tips.

    Check out our more Photography Tips at Photography Tips for Beginners, Portrait Photography Tips and Wedding Photography Tips.

    So You’re Going to Shoot A Wedding: Part 2 of 3 [Day Of]


    Digital Photography School

  • How Capturing Expressive Eyes Can Be The Key To Good Portraiture

    Paul Kostabi

    If you look at some of the most famous photographs in history, such as Dorothea Lange’s Migrant Mother, Steve McCurry’s Afghan Girl, or much of Irving Penn’s work, you might notice there’s one thing that they have in common, a powerful emotion in the main subject’s eyes.

    While this is far from a steadfast rule, if you’re doing portraiture, street photography, or photojournalism, catching a powerful expression in the eyes can be the difference between a mediocre photograph and the best photo you’ve ever taken.

    If you watch a person’s eyes and wait, you can see when they are experiencing something, recalling a moment, or feeling an emotion.  That sometimes split second is when you need to take the shot.  You can create an amazing composition with gorgeous lighting, but if there is no expression coming through from the subject then the photograph will be lacking.  And that expression often begins with the eyes.

    It could be a fleeting glance away from the camera as the subject recalls a story or a powerful gaze into the camera.   A momentary glance from the eyes can portray strength, fear, romance, nostalgia, confidence, glamour, and so many other emotions.

    A good trick to elicit these emotions is to get the subject talking about a meaningful moment in their lives.  The more time you are able to spend with them, the more they will open up and the more opportunities you will have to capture these emotions.  Or with some, you can even simply state the emotion and they will be able to portray it (“Give me confidence!”)

    So the next time you create a portrait, make sure to pay special attention to the eyes.

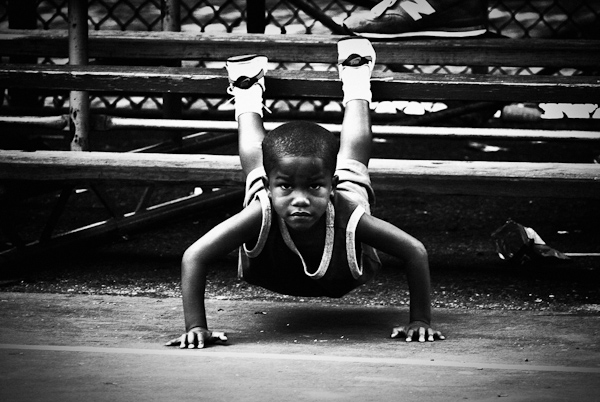
    Pushups, Rucker Park

    Post originally from: Digital Photography Tips.

    Check out our more Photography Tips at Photography Tips for Beginners, Portrait Photography Tips and Wedding Photography Tips.

    How Capturing Expressive Eyes Can Be The Key To Good Portraiture


    Digital Photography School

  • Check Out the RoundFlash Ring Flash Adapter

    See this little bag? It's about six inches across, yet it contains a ~17", collapsible ring flash adapter.

    Curious? I was too. So I ordered one and had it shipped over from Poland. Full test drive, inside.

    Read more »
    Strobist

  • 7 Secrets to Capturing Awesome Beach Photographs

    To be on the beach in summer is relaxing, fun and beautiful. It is also a great idea to capture those happy moments in the photographs but if you are not sure where to begin from, you can actually fall victim to the stress. Therefore, you need to prepare well in advance about what you are going to do while Continue Reading

    The post 7 Secrets to Capturing Awesome Beach Photographs appeared first on Photodoto.


    Photodoto

  • Canadian Travelogue – Nova Scotia – Brier Island

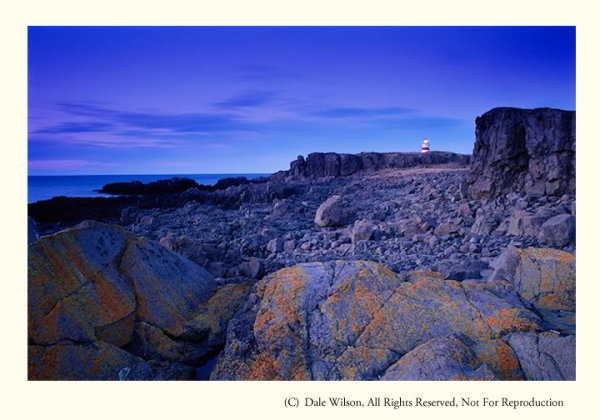
    Long Island and Brier Island, along with several much smaller uninhabited islands, form the archipelago that lies right at the tip of Digby Neck, a peninsula that juts into the Bay of Fundy. With a population hovering around 300 residents, Westport, Brier Island’s only village, cannot help but be relaxing. Consequently I recommend the village of Westport as one of the most relaxing three-day summer holiday destinations in Nova Scotia. There is only one access route to Brier Island: drive west on Highway 217 from Digby for about an hour, and two small ferry crossings.

    Brier Island, the outer-most island along Digby Neck, is essentially a comprised of lava-flow-formed basalt rock. While making a beauthiful coastline to photography, it is also brutal on scrapped knees.

    Brier Island, the outer-most island along Digby Neck, is essentially comprised of lava-flow-formed basalt rock. While making a beauthiful coastline to photograph and enjoy, it is also brutal on scrapped knees.

    There are countless photo opportunities, including rare flora, numerous shore and seabird species (Brier Island is located on the Atlantic Flyway, and autumn is the best season for bird-watching) and spectacular seascape opportunities wherever you choose to “drop” your tripod.  Brier Island juts into the lower Bay of Fundy, and the waters surrounding it are the summer home of the nearly extinct Atlantic Right Whale. Endangered humpback whales are also regularly seen in these waters, as are finback and Minke whales and the Atlantic white-sided dolphin.

    One of my favourite locations on Brier Island is a stretch of basalt columnar formations along the east and south-east shorelines. Simply park your car at the lot at the end of the road and walk south toward the small monument that profiles the seafaring heroics of Joshua Slocum, the first sailor to circumnavigate the world solo. Really good hiking books are essential here as you will be scampering along a fairly rugged shoreline. Be careful of the slippery seaweed and the tide: you will have great difficulty out-running the rising water if you’re caught where you shouldn’t be.

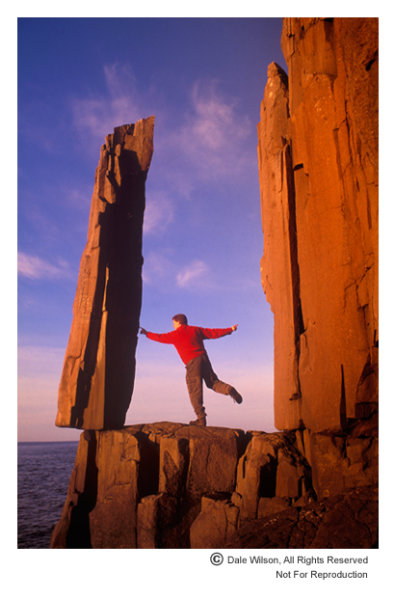
    One of the quirkiest sights in all of Nova Scotia is the “Balancing Rock.”  Near the village of Tiverton on Long Island, this precariously perched piece of basalt stands nearly seven metres high and looks as a good wind would blow it off its precarious perch.  Not so. It’s easy to find, just look for the roadside sign several kilometres west of the Tiverton or ask any local resident.

    I first discovered the Balancing Rock in 1991 when working on an editorial assignment and immediately saw its photographic potential. Getting close to it then was quite a chore, but I am pleased to report that a boardwalk now makes crossing the bogs and fens much easier and a really convenient stairway with an observation deck has replaced the knotted hawser once tangling over the cliff edge.  It is about a 30-minute trek from Highway 217 and is most definitely a sunrise location.

    Precariously perched on a ledge above St. Mary's Bay, local folklore indicates three lobster boats once tried to pull over this rock in unison - unsuccessfully, apparently.  The Balancing Rock can now only be photographed from a viewing platform, so it is highly unlikely you will find any fairies testing their strength.

    Precariously perched on a ledge above St. Mary’s Bay, local folklore indicates three lobster boats once tried to pull over this rock in unison – unsuccessfully, apparently. The Balancing Rock can now only be photographed from a viewing platform, so it is highly unlikely you will find any fairies testing their strength.

    Welcome to this great little archipelago jutting like a finger into the Bay of Fundy and be prepared for many great days of therapeutic relaxing while gulls screech in this working harbour and the smell of salt wafts through the air.  Your watch won’t be wound quite so tight when you leave – I guarantee it.

    Post originally from: Digital Photography Tips.

    Check out our more Photography Tips at Photography Tips for Beginners, Portrait Photography Tips and Wedding Photography Tips.

    Canadian Travelogue – Nova Scotia – Brier Island


    Digital Photography School

  • 7 Ways To Create Authentic & Powerful Portraits

    Create authentic powerful portraits 1

    by Steven McConnell

    Do you remember the time you were learning to drive a car?

    If you’re like most people, it began as a purely technical, logical activity. You had to think about your every move. You were reacting to your environment, rather than anticipating it.

    Over time, that settled into a form of unconscious competence. You began to drive by feeling the car, rather than thinking about it.

    Learning to shoot portraiture is similar. Beyond the mechanical, logical world of preoccupation with gear, ISO, f-stops and focal lengths is a realm of feeling your way around your environment, connecting with your subjects, witnessing their stories and sharing them with the world through your photographs.

    It’s easy to say, I hear you say. But how do I start moving in that direction?

    For me personally this has been a focus of my attention for the past few years and I feel like I’m just starting to scratch the surface. Every time I discover something new I see how much more there is left to uncover.

    It’s my aim here to share some of my main discoveries with you. I hope that lessons I’ve learned on my journey to becoming a portrait photographer help you along in yours.

    Create authentic powerful portraits 2

    1. Forget The LCD

    I see so many photographers take a few photos and then bend over to check what they got on the back of their camera.

    Meanwhile, their subject is just standing there. Their mood is collapsing. All kinds of weird thoughts are starting to run through their head.

    Checking the histograms every now and then is important, but your main job as a portraits photographer is to be aware of, and manage, your subject’s headspace.

    You can’t do it effectively if you’re spending more time with your camera than you are with your subject. You need to be completely present with the person you’re photographing.

    It means you need to photograph a lot and often, until know with a reasonable degree of confidence when you’ve nailed the shot – without having to check it on the LCD.

    Create authentic powerful portraits 3

    2. Explore Av & Tv [Aperture and Shutter Priority Modes]

    There’s a sentiment in the photographer community that you must always shoot in your camera’s manual mode because “that’s what serious photographers do”.

    Manual gives you great creative options in certain situations – for example, when you’re combining ambient light with strobes.

    But be aware that you don’t always need it – and sometimes it will shoot you in the foot.

    If you’re using only natural light, for example, and it’s likely to be changing while your subject is moving, the last thing you want is to miss moments while you’re chasing exposure.

    Try shooting in aperture-priority mode (Av), using aperture to control depth of field as a creative element while dialling the exposure compensation in or out to fine-tune exposure.

    3. Lose The Fat Lens

    I shoot with prime lens because I like to have as few physical barriers between me and my subjects as I can.

    If I can’t look them directly in the eye as I’m photographing them, then I want to look at them through as little metal, plastic and glass as possible.

    Also, I think there’s a lot to be said about removing everything you can which will intimidate your subjects.

    As photographers we tend to view gear as something to get excited about. But in doing so we forget that something like a 70-200 f/2.8 (even a 24-70 f/2.8!) on front of a DSLR can be unnerving to most people.

    Create authentic powerful portraits 6

    4. Research Your Subjects

    When I started photography, I did enough research about cameras to be able to quote the pros and cons of just about any DSLR body out there.

    But if you asked me what the person I was photographing wanted to be when they grow up, I’d have no idea.

    How can a photographer tell a story about a subject through the photos if they don’t know anything about them?

    What are your subject’s dreams? Obsessions? Fears? Ice-cream preferences? Why do they get out of bed in the morning? What kind of personality they have – quirky, calm, strong, bubbly or intellectual?

    Answers to those questions are a great departure point for your creative choices as a photographer.

    Create authentic powerful portraits 4

    5. Put The Camera Down

    I picked this idea up when I was watching this video of Annie Leibovitz photographing Keith Richards:

    Notice how at 1:55 she puts the camera down to give him direction. It’s not accidental – by doing so, she injects a healthy dose of warmth and intimacy into their interaction. She reminds Keith that there’s a real human taking his photo.

    6. Control Your Purpose

    How you come across to your subjects is heavily influenced by your purpose in any moment. And that will determine how they act around you.

    My default purpose is “Here I am, the photographer, about to photograph you – the subject”. Needless to say, it’s not very conducive to creating a connection of facilitating a particularly warm dynamic.

    Before a shoot I literally have to shift the context through which I view the session to one which helps me set a warmer tone.

    If I’m photographing kids, I’m likely to change to a space of “Let’s play – and I’m bringing my camera along”. If I’m with adults, I’ll probably take things in the direction of “Hey, let’s get to know each other – and I’ll take some shots along the way”.

    Connection takes first place, photography second.

    Create authentic powerful portraits 5

    7. Meditate

    This looks odd as a piece of advice on a photography blog. But here’s why I think it’s useful.

    As photographers, we tend to be quite analytical – we go through the world thinking about it, rather than feeling our way around it. We spend a lot of time preoccupied with our thoughts, which can give our emotional tone a somewhat distant edge.

    Meditating 10-15 minutes a day will helps you settle down and feel more centred. You will come across as a warmer, more approachable and confident photographer. You will also be more present with your subjects’ needs and be able to respond to them (rather than react to them).

    It’s important because your subjects will largely mirror your emotional tone. The easiest way to help them settle down and connect with you is for you to be calm yourself.

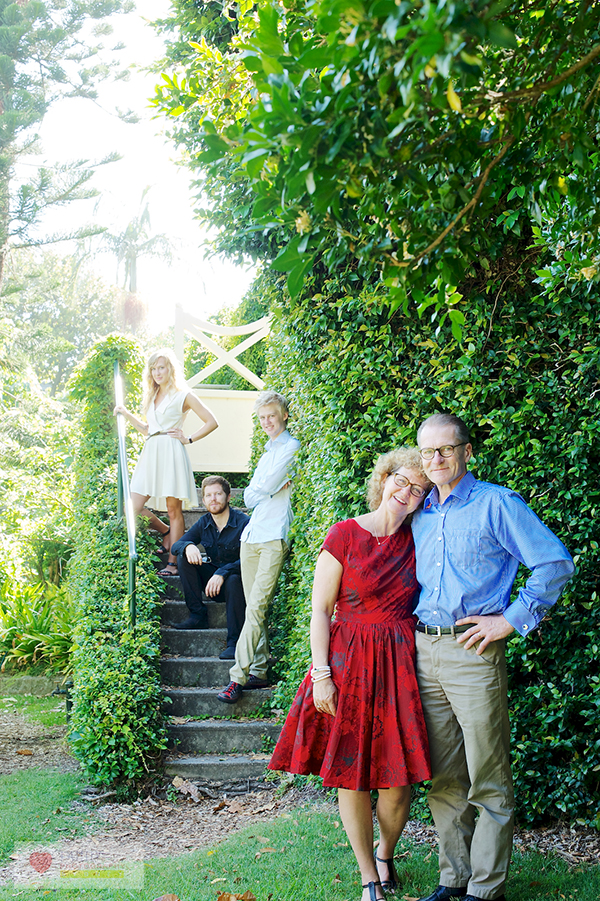
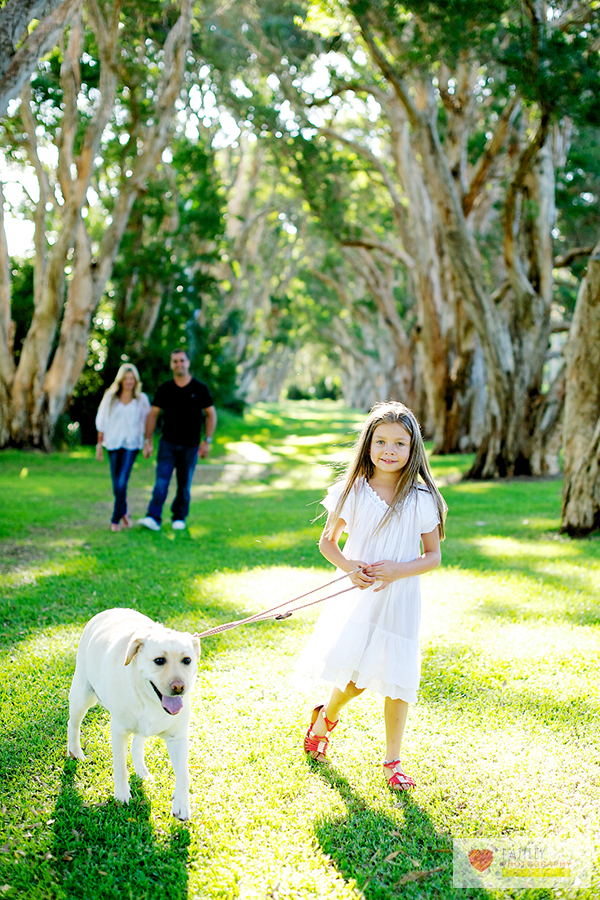
    Steven McConnell is a family photographer at Family Photography Sydney. You can connect with him on Google+. and Twitter.

    Post originally from: Digital Photography Tips.

    Check out our more Photography Tips at Photography Tips for Beginners, Portrait Photography Tips and Wedding Photography Tips.

    7 Ways To Create Authentic & Powerful Portraits


    Digital Photography School

  • Cloud Storage: Why an External Hard Drive is Not Enough

    A contribution from Lori Peterson

    IMAGE 01A few years ago I shot a beautiful, heartfelt wedding. The bride’s grandmother had just gotten out of the hospital after a terrible fall. Her grandfather was not doing well, but he was managing the care of her grandmother in addition to taking care of himself. They made it a huge family occasion and created a beautiful, family oriented evening.

    Celebrations continued to the later hours in the evening and then the bride and groom left to spend their first few days as man and wife. It was a beautiful, perfect day. The images I shot in camera looked just amazing and seemed to really capture the essence of the day.

    I went home and loaded all the images onto my computer and then backed them up to my external. I edited a few images so that the bride and groom could have some sneak peeks of their wedding photographs to share with their friends and family.

    A few days later my husband noticed that my computer was not displaying the photograph slideshow that I have my computer set to play. We sat down and looked at my computer together. While we were sitting there all of the images started disappearing off my computer. I thought “Well, at least they are on my external!” I apparently got too hopeful way too fast. My external and my hard drive crashed at the same time. While we sat there trying to figure out what was going on my computer’s hard drive and the external hard drive were dying….and wiping away all of the images they had.

    We have a friend who works for a computer repair store. We called him. We immediately took over the external and left it waiting and hoping for a phone call and for him to say that they recovered the images. I couldn’t even think straight, it was the only thing on my mind.

    Our phone finally rang, but he was not able to give us good news. Our external hard drive had crashed and wiped out all of the data on it. Nothing was able to be recovered. Not one image. I was frantic. I now had to call the bride and tell her that all of the images from that day were gone. All of them, except for their sneak peeks. Those little fragments were all that remained of their day.

    That was one of the hardest phone calls I have ever had to make. I wanted to tell them in person, but I honestly felt that setting up a meeting to tell them this would make it worse for them. I picked up the phone and dialed the number. I explained what happened. I apologized profusely. She was disappointed and heartbroken, that much you could tell. She was also understanding and forgiving as well. As it turns out, just a few weeks before their wedding, their own computer had abruptly died. They wanted to get it repaired, but according to their computer technician, there was absolutely nothing they could do to save the computer, the photos, and the documents on the computer. When the computer died, it took all of its information with it, just like mine had done.

    At this point refunding her money and offering her the world was on my agenda because I felt awful about the entire situation. I was surprised by how well they took the news. They knew that the situation was not one I created or that they created. It was just a by-product of our relying on our technology to keep everything safe. Sometimes it fails and lets us down.

    On that day I vowed that would never, ever happen again. That was not a situation I was going to put myself into ever again. This is when I started researching cloud storage. I wanted something that immediately backed up my computer. I wanted a safety net. The external was just not a big enough safety net for me anymore.

    You can get overwhelmed when you are looking for cloud storage by the number of providers available. You should factor in what you are looking to backup. Is it just your computer? What about an external? Photos or documents? Or all of it.

    One of the easiest and cheapest options for backing up everything is BackBlaze. For $ 5 a month it will back up one computer and any external plugged into that computer. It will back up everything except your Operating Systems and applications. All your files, photos, and documents will be securely backed up and you can retrieve them in the event of any emergency.

    IMAGE 02

    Carbonite is another option. For one computer to be backed up their pricing begins at $ 59.99 per year. If you have an external hard drive that you also want backed up they have plans that begin at $ 99.99 per year.

    Dropbox, Copy, and Google Drive all have free plans for anywhere from 15-18 GB of storage. Depending on your needs they have other plans that begin at $ 4.99 per month for 100GB and they go up from there. Dropbox does have an add on for $ 3.99 a month that lets you have unlimited undo history for those moments when you accidentally delete something and realize that you really should have kept it.

    Whatever your situation, having a backup plan is always a good idea. If you are a photographer, it’s even more important to have that peace of mind not only for you but for your client as well. There are pricing structures and plans to fit every budget and every need, because sometimes technology fails. Don’t have to make that phone call like I did. Back your photos and documents up and then back them up to cloud storage. It’s inexpensive and well worth it to invest in some sort of extra storage.

    Lori Peterson is an award winning photographer based out of the St. Louis Metro Area. Her dynamic work ranges from creative portraits to very unique fine art photography. Lori’s work can be seen at www.loripetersonphotography.com and also on her blog at www.loripetersonphotographyblog.com. You can follow her on Facebook at https://www.facebook.com/LoriPetersonPhotography.

    Post originally from: Digital Photography Tips.

    Check out our more Photography Tips at Photography Tips for Beginners, Portrait Photography Tips and Wedding Photography Tips.

    Cloud Storage: Why an External Hard Drive is Not Enough


    Digital Photography School

  • What to Teach Your Kids about Photography

    A Guest Post by Jeff Guyer.

    001

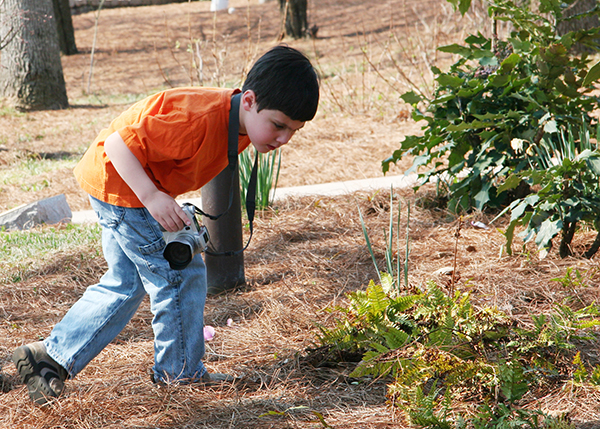
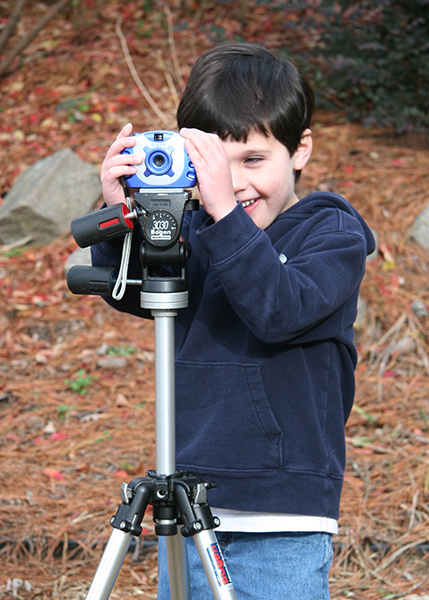
    We love photography. We love our kids. So, it would stand to reason that if we can find a way to combine photography and spending time with our kids it’s a big win, right? Of course it is. If your kids are anything like mine, however, they’ve either already reached a point where they vanish into thin air the moment they even sense a camera coming out of a bag, or will reach that point soon enough. So, how do we enjoy our cherished hobby without abandoning our kids for hours or days at a time? If they’ve grown weary of their time in front of your camera, maybe it’s time to help transition them from test subjects and guinea pigs to budding photographers themselves.

    STEP 1 — WHERE TO START…COMPOSITION & AUTO MODE

    002

    I know– the mere mention of Auto Mode makes you cringe. Ordinarily I’d agree, but it’s time to get over it (at least for a little while). I’ve been teaching a kids photography class for three years, and I can state with absolute certainty that if I tried teaching my own son the way I teach my students, he would most likely never pick up a camera again. In the classroom, I start each semester with a demonstration. We talk about the exposure triangle (aperture, shutter speed, ISO).

    To illustrate, I pull out an old, 1972 Pentax Spotmatic and do something that would be impossible with any of today’s DSLR’s– I open it up. I take off the lens. I open up the back. I show them how the shutter stays open longer at slower shutter speeds. I demonstrate how the aperture ring works on older lenses. Let them see what’s going on from front to back. I show them how these concepts work on a practical, visual level. From exposure, we work our way to composition, to lighting, etc. It’s a logical progression and it works. An effective classroom approach, however, won’t often be the same recipe for success when we try it on our own kids. Why?

    Because our kids just want to spend time with us and take nice pictures. They spend enough time in school learning nuts and bolts. If you are going to get (and keep) them interested in photography, you’re going to have to teach them without teaching them.

    006

    Huh?

    You’ve taught your kids all kinds of things without sitting them down and making a formal lesson out of it. This is no different. But whereas in the classroom I start with the technical, with my son I start with composition and let the technical fall into place later.

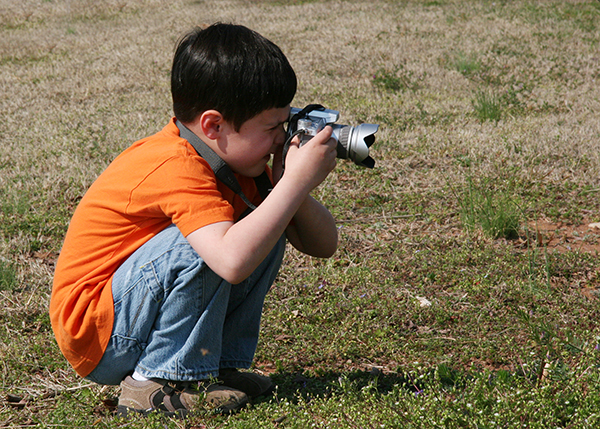
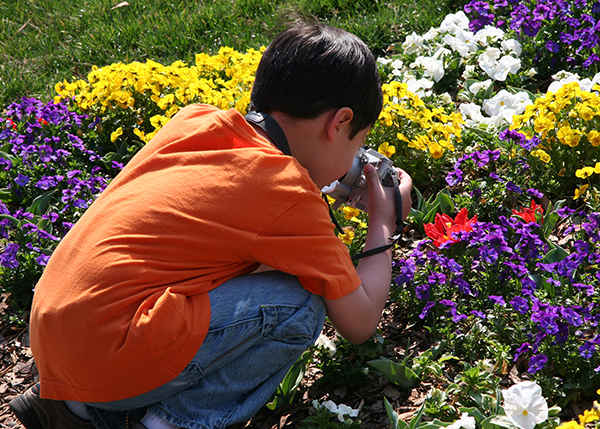
    We all know that composition consists of the placement of our subject and other elements within the boundaries of the frame. What you have to remember, though, is that your child views the world from a much lower vantage point than you do. So, start by getting down on their level and see things as they do. It may also help at first to leave the big guns at home and use a point & shoot or even an iPhone. The iPhone is an amazing compositional tool. A live view that you can share with your kids will be a huge help in guiding them towards alternate angles and helping them get what they see with their eyes within the confines of the frame.

    This is where they will start expressing themselves creatively. It also gives you a chance to get inside their heads and maybe even let them teach you a thing or two about creativity. In some ways, pressing the shutter button is almost secondary at this point.

    STEP 2 – SUBJECTS & LOCATIONS

    003

    Start by thinking about what frustrates you most about basic photography and make sure to remove as many of these stumbling blocks as possible. The more you do to create a successful environment for them, the better your chances for successfully instilling a love for photography. Stationary subjects like landscapes are a great place to start, as are pets, toys, or even cracks in the sidewalk for that matter.

    As long as you are helping them select relatively stress-free subjects on their visual level, you increase their chances of success. Remember also, that creativity does not usually fall too far from the tree. Free from our adult notions of creativity, your kids might very well have some pretty awesome creative visions of their own. Be open to those visions and be sure to give them a chance to guide the journey as well.

    Once they get more comfortable with capturing their vision in a box, you can start introducing games, challenges, and scavenger hunts. You’ve got their interest and attention. Now hold onto it by making it fun and exciting. Shooting themes (e.g., “Lines,” “Red,” “Doors,” “Reflections,” etc.) is a great way to both engage their imaginations and expand how they see the world around them.

    STEP 3 — CAN WE FINALLY TALK ABOUT EXPOSURE NOW?

    004

    As children become more and more comfortable with the ideas of composition and choosing their subjects, they will be in a better position to not only start asking questions about why their photos are too light or too dark, but to understand the answers as well. By now you are hopefully comfortable with your own grasp of exposure, as well as the interplay and symbiotic relationship between the three elements. Once again, it’s all well and good, but your 8-year-old is going to get a glassed-over look in her eyes and expel the biggest yawn you’ve ever seen the moment she starts hearing things like “depth of field,” “stopping down,” and shooting “wide open.” So what do we do? We teach it visually by example.

    Imagine a room with a large single window covered with a curtain. Congratulations– you’ve just stepped inside a camera. The window and curtain combine to act as your shutter and aperture. If your kids can get their heads around the concept simply by way of discussion, great. If not, pick a room of your house and demonstrate. If I open the curtain just a little, I have a smaller aperture. If I open it wider, I have a larger aperture. If I open and close the curtain very quickly, I have a faster shutter speed, and if I open and close it more slowly I have a longer, slower shutter speed. Demonstrate this with various combinations, showing them how their choices affect how much light enters the room and for how long.

    Once they have a handle on aperture and shutter speed, you can add ISO to your demonstration with the use of sunglasses. Technically, ISO is a measure not of the light entering your camera, but of your camera’s sensitivity to that light. For purposes of this discussion, starting with sunglasses on and taking them off will be comparable to raising the ISO. The light entering the room has not changed, but it obviously becomes brighter with the removal of the sunglasses.

    STEP 4 — ARE WE HAVING FUN YET?

    005

    I suppose my most important piece of advice is to make sure you keep all of this in perspective. We love our kids first and photography second. “You’re doing it wrong,” or any variation of it is strictly off-limits. Allow for mistakes and imperfections. Celebrate and embrace them. Just remember, though, that your kid can read you like a book. The second they realize you’re getting pushy or not having fun, it’s over. You didn’t just wake up one morning an accomplished photographer. You worked at it. If you guide them right your kids will work at it, too.

    And one day they might even take a killer, life-altering photo and thank you for it.

    Jeff Guyer is a photographer based in Atlanta, GA. In addition to shooting portraits, architecture, sports, weddings, and just about anything else that pauses in front of his lens, he also teaches a Digital Photo Challenges class for kids. Follow him on Facebook at http://www.facebook.com/guyerphotography or on Twitter @guyerphoto

    Post originally from: Digital Photography Tips.

    Check out our more Photography Tips at Photography Tips for Beginners, Portrait Photography Tips and Wedding Photography Tips.

    What to Teach Your Kids about Photography


    Digital Photography School

  • Black and White Landscapes: Weekly Photography Challenge

    Over the last couple of weeks we’ve been running ‘Landscapes’ challenges to celebrate the launch of our new Landscape Photography eBook – this week we’re going to continue that by nominating ‘Black and White Landscapes’ as the theme for your challenge.

    Black & White

    Once again – there’s a section on black and white landscapes in the eBook (see the screen shot of the first page of the section below) but whether you’ve read it or not – we think it’s a fun challenge because many photographers don’t think to take landscapes with out colour – to their own detriment.

    Screen Shot 2013 08 02 at 8 47 20 PM

    Don’t believe us – check out these 27 great Black and White Landscapes for some inspiration.

    So grab your camera and head out and shoot some landscapes in black and white. If you’re not able to get out – how about finding an older landscape to convert?

    Once you’ve taken your ‘Black and White Landscape’ photos upload your best ones to your favourite photo sharing site either share a link to them even better – embed them in the comments using the our new tool to do so.

    If you tag your photos on Flickr, Instagram, Twitter or other sites with Tagging tag them as #DPSBWLANDSCAPES to help others find them. Linking back to this page might also help others know what you’re doing so that they can share in the fun.

    Also – don’t forget to check out some of the great shots posted in last weeks Leading Lines challenge – there were some great shots submitted.

    Post originally from: Digital Photography Tips.

    Check out our more Photography Tips at Photography Tips for Beginners, Portrait Photography Tips and Wedding Photography Tips.

    Black and White Landscapes: Weekly Photography Challenge


    Digital Photography School