Category: Photography

  • The Intrepid Landscape Photographer’s Guide to Bag Packing

    Landscape photography is a lot like fishing: There are good days and there are bad days…sometimes the weather isn’t on your side…. Other times it is…. You can wait around for hours and come away with nothing, or sometimes you end up with too much to carry! One thing is definitely certain: The better prepared your kit is prior to Continue Reading

    The post The Intrepid Landscape Photographer’s Guide to Bag Packing appeared first on Photodoto.


    Photodoto

  • 3 Ways to Improve Your Images With Composition

    Along with lighting, subject, perspective, composition is one of the fundamental tools to creating better images. It’s one of the easier ones to begin applying to your own photography as well. Here are a few tips on improving your composition, with examples from a recent fitness photo shoot.

    Rule of Thirds

    You’ve probably heard this one beat to death, but the rule of thirds is one of the fundamental keys in creating stronger compositions. It involves dividing an image into nine equal grids at the thirds. By placing your subject on the line of a third, or at the intersection of two thirds you’re following your eyes’ natural focus. We find photographs with the subject on one of these thirds simply more pleasing.

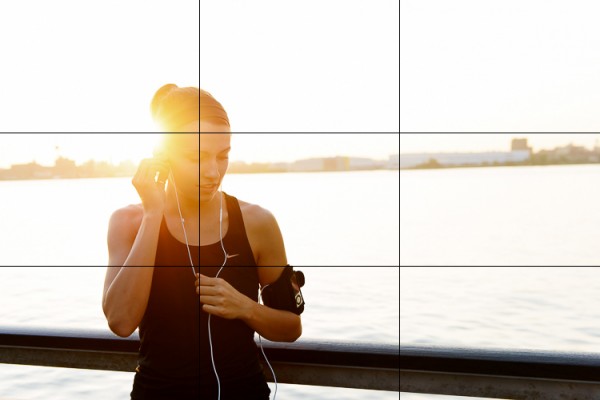
    Take the below image for example, where this woman is placed on the left third line with the focus of her head near the top left third as well. It creates a more pleasing composition and gives the eye plenty of space to wander in the frame.

    RuleofThirds

    The rule of thirds isn’t a hard and fast rule and it’s often broken to great success, but that’s a topic you can find in many other posts. It’s a great starting point though to create stronger compositions.

    1. Second Point of Interest

    Applying the rule of thirds, you can now try adding a second point of interest into your images. Adding a secondary point, whether it’s out of focus in the background or in focus with a deep aperture landscape, gives your image a natural viewing progression. Your eye starts at the first focal subject and then moves along to the second.  Not only does this create more interest in your image, it can help reinforce a theme or perspective.

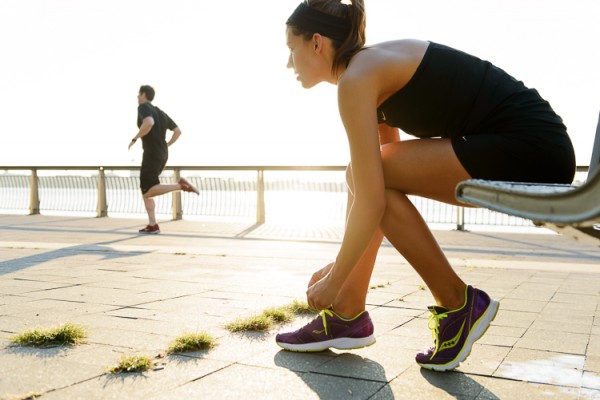
    In this fitness image, the woman tying her shoe and preparing for a run is the clear focus of the image. Introducing a second runner in the background now creates another place for the eye to follow through the image. At the same time the “running” theme has been reinforced. Additional factors in leading the eye are; her gaze into the open space of the image, and the leading lines of the banister and concrete blocks.

    MDP_5148-Edit

    2. Room for Copy Space

    If you ever have aspirations to shoot for advertising agencies and many editorials, learning to leave room for copy space is a must. Copy space is the negative area in an image where a brand will place their tag line, logo or product/information. Generally you want this negative space to not be too busy, so that the copy pops out. The effect can be achieved often by using a shallow focus in your images, or by simple ensuring there is a space without too much “busy-ness” in it. A nice open sky often works great in this regard.

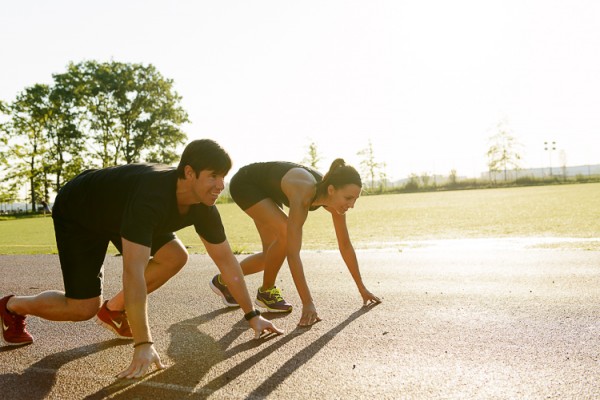
    In this shot there’s some clear head space in front of the two runners that works great for copy. An important thing to keep in mind though if you do end up applying these principles for a client, is how the images will be placed in publication. Will they be on a poster or against a store wall? Or across the pages of a magazine? This particular image might not work well across a double page spread, as it places the subjects’ heads right where the crease would be. Against a store wall it would work just fine. These are important placement ideas to keep in mind with copy space.

    MDP_5190-Edit

    3. Bringing It All Together

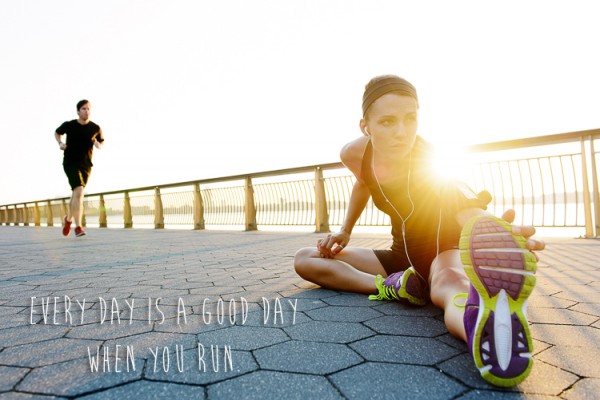
    When you bring all three of these compositional elements into mind you can create a great image that not only holds interest, but appeals to the creative people who hire photographers (always a big plus). The image below is an example when all three work together. The subject is at one of the third grid lines, there’s a secondary point of interest in the background and room has been left below for copy space. When you keep all three elements in mind you’ll be on your way to creating stronger compositions.

    EveryDayRun2

    Post originally from: Digital Photography Tips.

    Check out our more Photography Tips at Photography Tips for Beginners, Portrait Photography Tips and Wedding Photography Tips.

    3 Ways to Improve Your Images With Composition


    Digital Photography School

  • Is that a Workshop, Tour or Seminar [Part III]

    In part I and part II of this series we learned the photo workshop is typically one where the instructor concentrates on delivering an intense teaching/learning experience at a location conducive to enhancing that goal.  In comparison is the photo tour where the delivery is all about exotic or exciting locations with a photo tour leader putting you in the right place at the right time, and might provide minimal formal instruction.

    Located somewhere between the tour and workshop is the photo seminar. More often than not the seminar combines the best attributes of the workshop and tour by providing numerous lecturers and presentations, from internationally recognized keynote speakers who augment acclaimed local and national professionals in various photography disciplines.

    In 1994, I attended a 60-minute presentation where a digital artist explained that a new software called Adobe Photoshop would revolutionize the photography industry. My notes from that lecture said “alpha mask – change sky.”  I later learned how to do alpha masks and discovered that I need not sit and look out a window while it was raining. Nineteen years later there is little argument that Photoshop has changed our industry, and “masks” are one of the foundation tools every digital photographer must eventually learn.

    In 1994, I attended a 60-minute presentation where a digital artist explained that a new software called Adobe Photoshop would revolutionize the photography industry. My notes from that lecture said “alpha mask – change sky.” I later learned how to do alpha masks and discovered that I need not sit and look out a window while it was raining. Nineteen years later there is little argument that Photoshop has changed our industry, and “masks” are one of the foundation tools every digital photographer must eventually learn.

    The seminar is also sometimes referred to as a conference, but the crux of the event remains very much constant: numerous presenters under one roof presenting a variety of topics by experts in their field over several days at one venue.

    Seminars are offered by both private enterprise as well as professional and amateur photography associations who also may open their doors to non-members.  In Canada the two most recognized national association conventions are hosted in different cities each year by the members of Professional Photographers of Canada (PPOC) and Canadian Association for Photographic Art (CAPA).  You can do a web search in your country of residence for professional associations such as Professional Photographers of America (PPA) or your national amateur chapter of Fedération Internationale de l’Art Photographique (FIAP).

    Seminars are typically chock-a-block full of presenters offering a variety of topics and many also offer a slate of add-on field trips. It is not uncommon with the larger conventions to have 25, or more, presenters on a four day program which is augmented with a keynote presentation each evening.  Intensity is the key word with seminars.

    A close cousin to the seminar is the non-degree granting photo school. The concept is very similar, the delivery is quite different.  Whereas in the seminar scenario participants are introduced to a variety of instructors, concepts and theories, the school typically places a classroom of students with one instructor for the entire time period.  Additionally, the school tends to be more about a mixture of theory and practical application, whereas the seminar tends to deliver concepts and ideas for individual exploration at a later time.

    Each approach has their advantages and disadvantages. If you are seeking exposure to a variety of concepts and motivation the seminar might be the best approach. By comparison, if you are seeking to spend a lot of one-on-one time learning a particular technique or skill set the school might be the better choice.  Be aware, however, if you “hook-up” with a presenter in the seminar situation who has poor instructional technique you can find some solace that the next lecturer, an hour or so later, might be better.  In the school environment, however, if you have a poor instructor you will be less than satisfied over the duration of several days, a week, or even longer.  Be diligent and do your homework well; there are many great photographers who simply are not good at sharing their knowledge, skills or information for a variety of reasons.  As suggested in the opening of this series, there are instructors and then there are teachers – not all are truly teachers.

    In summation we can generally draw to following conclusions:

    Workshop:  Typically intense training with one instructor that includes field and formal classroom instruction with measureable outcomes. The location is secondary but supportive of the curriculum.

    Photo Tour:  Location(s) is the key ingredient and instruction is minimal if at all. The tour leader is typically a well known photographer who should also be familiar with the locations and scope of the tour, be it cultural, wildlife, etc.

    Seminar:  Typically a broad array of concepts, discussion and disciplines with a variety of presenters. It is about being introduced to new theories, approaches and motivation. They are typically shorter in duration with minimal practical application.

    Post originally from: Digital Photography Tips.

    Check out our more Photography Tips at Photography Tips for Beginners, Portrait Photography Tips and Wedding Photography Tips.

    Is that a Workshop, Tour or Seminar [Part III]


    Digital Photography School

  • On Assignment: Radiance

    "What should I wear?" asked Funlayo Alabi when we were touching base the day before I was to photograph her for the Howard County EDA.

    "A white shirt if you have one," I said, wanting to distill the photo and feature her skin given she that she runs a boutique beauty products company.

    Twenty years ago I might have said, "anything but white." But the more you work with lighting, the easier it is for you to control not only the contrast range but also the specific tone of a person's skin.

    Even darker skin against a white shirt.

    Read more »
    Strobist

  • The Kickstarter Travel Photography Campaign You Just Have to See to Believe

    Throughout my photography career, one of the most challenging aspects has been learning how to get the travel shots I really want. Faced with a limited window of time, unfamiliar areas, and unpredictable weather, getting the shot you envisioned can be difficult. However, by planning ahead, being flexible and making any conditions work to your advantage, the end result of Continue Reading

    The post The Kickstarter Travel Photography Campaign You Just Have to See to Believe appeared first on Photodoto.


    Photodoto

  • Five Self Assignments That Teach You To See

    In my 20 years in photography, I’ve seen a lot of different assignments teachers have given their students.  Most I have heard, or been given myself from time to time, have centered around learning to use the camera.  Things like “Use Only One Exposure Mode”, “Use Only One Lens”, or “Use One Aperture Setting”.  The most interesting to me, from a photographic standpoint, involved learning to see.  The reason I say this is that simple camera use can be easily learned. It’s basic math when you boil it down.  But learning to see creatively, learning to compose a shot, takes much more than learning buttons, dials, and controls.  These self assignments force you to look around you, to really see what you’re shooting and try to make interesting images.

    1. Pick A Color

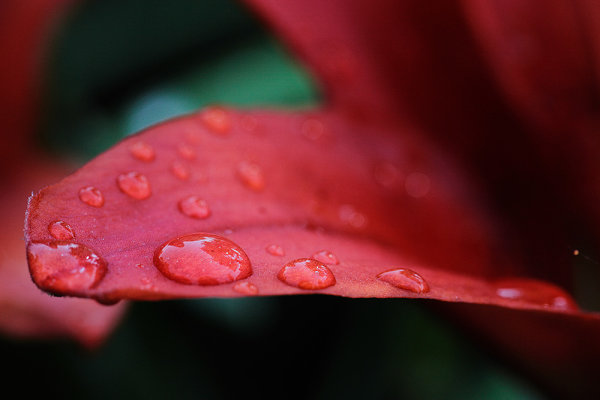
    Pick up your camera and choose a color for the day. Go out and make images with that color as a dominant element in the image. Find as many different ways as possible to do this.

    This image I went in search of things red. 1/320, f/7.1, ISO 1000. EOS 5D Mark II, EF 100mm f/2.8L IS Macro.

    This image I went in search of things red. 1/320, f/7.1, ISO 1000. EOS 5D Mark II, EF 100mm f/2.8L IS Macro.


    2. Pick A Shape

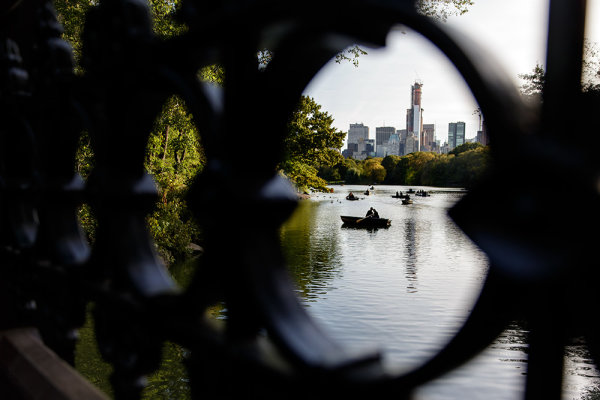
    Choose a shape and create images which use that shape in an interesting way. It could be features in architecture, artwork, or juxtaposition of multiple structures. Squares are relatively easy. Start there, and then search out triangles, circles, or combinations of shape.  Again, look for the most interesting composition you can to highlight that shape in your image.

    I ventured into Central Park in New York City without a real game plan in mind. I found a sundial and started shooting that, and then went in search of more circles. Found this ironwork and used it to frame a pair of lovers in a rowboat. 1/160. f/2.8, ISO 100. EOS 5D Mark III, EF 24-70 f/2.8L II at 24mm.

    I ventured into Central Park in New York City without a real game plan in mind. I found a sundial and started shooting that, and then went in search of more circles. Found this ironwork and used it to frame a pair of lovers in a rowboat. 1/160. f/2.8, ISO 100. EOS 5D Mark III, EF 24-70 f/2.8L II at 24mm.

    3. Shoot Something Different

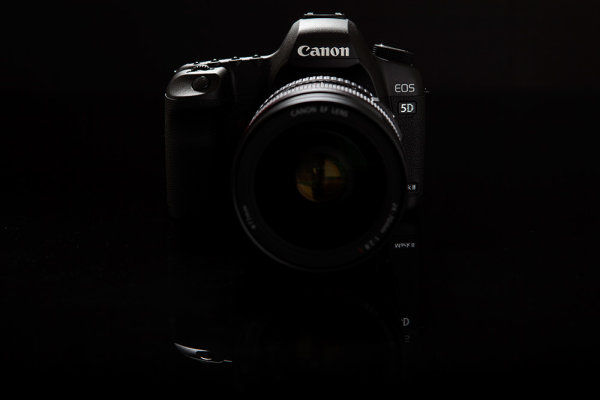
    If you’re like me, you probably have one type of subject you gravitate to more than any other.  But it’s easy to get too comfortable, and miss opportunities to make great images, when you’re only looking for one thing.  Once in a while it’s a good idea to change things up and shoot something different.  If you’re a sports shooter, try shooting a still life.  If you’re a landscape artist, try shooting macro.  These types of exercises forces you out of your comfort zone and helps you learn to see in a new way.

    Normally I'm a landscape guy first. But I decided I wanted to try a still life of one of the tools of my trade.  I used some black plexi as the table, and black matte board for the background. I used a single speedlite in a softbox above and behind the subject. EOS 5D Mark II with EF 24-70 f/2.8L II. 1/200, f/8, ISO 100.

    Normally I’m a landscape guy first. But I decided I wanted to try a still life of one of the tools of my trade. I used some black plexi as the table, and black matte board for the background. I used a single speedlite in a softbox above and behind the subject. EOS 5D Mark II with EF 24-70 f/2.8L II. 1/200, f/8, ISO 100.

    4. Shoot Reflections

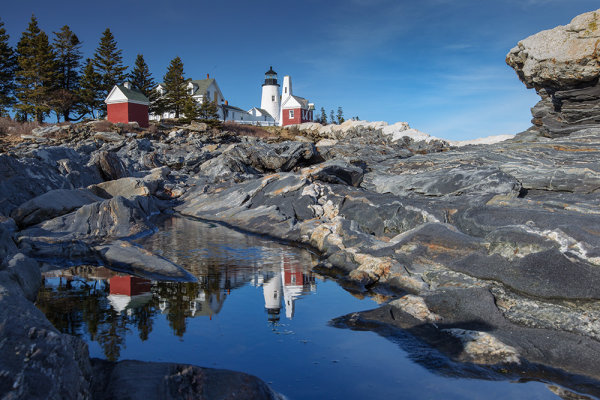
    Reflections are a powerful element in photography, but I’m almost embarrassed to admit how long it took me to actually start SEEING them.  I had a “lightbulb moment” one day when shooting with a friend of mine, and since then, I am constantly looking for reflections as an element in my work, whether it be portraits, landscapes, or still lifes.

    This is probably the most photographed puddle in New England, but it's great for producing a reflection of Pemaquid Point Lighthouse. Reflections add interest to images so always be on the lookout. EOS-1D Mark IV, EF 16-35mm f/2.8L II. ISO 100, 1/20, f/16.

    This is probably the most photographed puddle in New England, but it’s great for producing a reflection of Pemaquid Point Lighthouse. Reflections add interest to images so always be on the lookout. EOS-1D Mark IV, EF 16-35mm f/2.8L II. ISO 100, 1/20, f/16.

    5. The 15 Foot Circle

    Stand in the center of a room, or wherever you happen to be.  Make photographs only of subjects that happen to be within 15 feet (or 10, or 5) of where you’re standing.  Give yourself a time limit. Exhaust all possibilities. Get as many images as you can using only that area before moving on.  This kind of exercise forces you to really look at things and work to compose interesting images.

    I was standing in a dining room at the holidays last year and decided to try the 15 foot circle. This was a line of candles on a fireplace mantle. EOS-1D X with EF 70-200 f/2.8L IS II. ISO 400, 1/250, f/2.8.

    I was standing in a dining room at the holidays last year and decided to try the 15 foot circle. This was a line of candles on a fireplace mantle. EOS-1D X with EF 70-200 f/2.8L IS II. ISO 400, 1/250, f/2.8.

    For beginners, these assignments are great for learning to see. For more experienced photographers, these are great ways to stay fresh, to restart the creative eye when you’re feeling blocked, or to just do something different.  What other self assignments have you tried to refresh your photographic vision?

    Post originally from: Digital Photography Tips.

    Check out our more Photography Tips at Photography Tips for Beginners, Portrait Photography Tips and Wedding Photography Tips.

    Five Self Assignments That Teach You To See


    Digital Photography School

  • Photographing Tweens and Teens

    By Lori Peterson

    Booking teens and tweens for photo shoots is always fun. They have so much energy and enthusiasm and it really shows once they step in front of the camera. For that time when they are in front of your camera they feel like they are celebrities. That can be good for fragile egos and low self-esteem, especially when their hair and makeup is done and they look absolutely gorgeous.

    Teens and tweens of today have seen enough modelling shows that they know the drill for posing. Some of them even have that runway walk down too! It’s very easy as a photographer to get swept up in our posing and our images and we can forget how old (or young) our client really is.

    Keeping yourself engaged with your client and talking about school, their friends, music they like (which you may have never even heard of!) can be easy ways to make them feel at ease and remind you of who is in front of your camera. Keep their posing simple, not too suggestive.

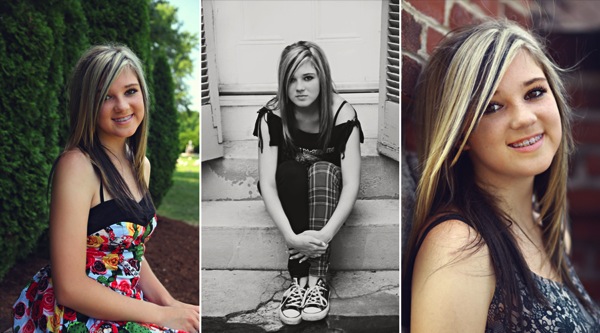
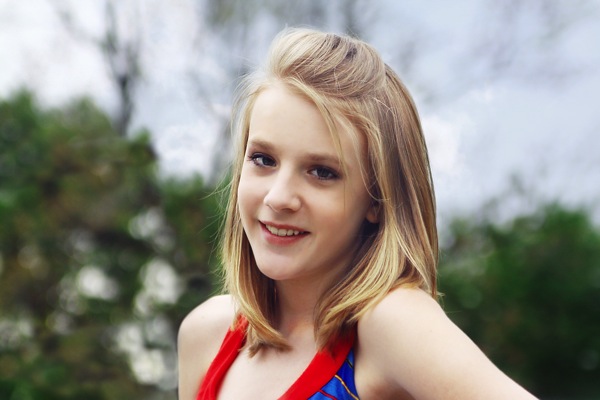
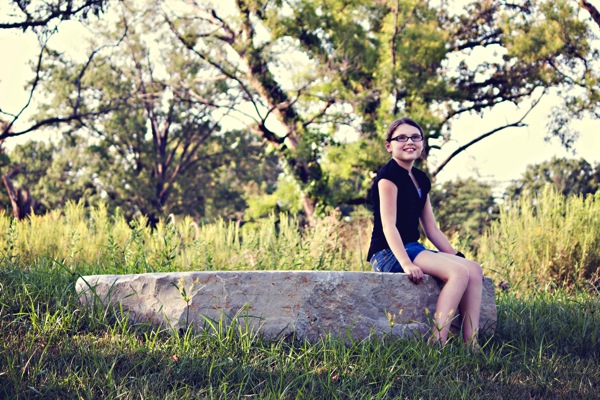
    Tweens and Teens Photography 01

    Wardrobe seems to be a fairly contentious subject when it comes to teens and tweens, but I have the rule that if the parents have seen the wardrobe and have no problem then it’s not for me to judge. You want them to look like themselves and you don’t want it to look too out of their norm or they won’t want to show the photos off to their friends.

    Tweens and Teens Photography 02

    You aren’t there to parent them or to lecture on them their choice of clothing; you are there to take portraits. This is why consults before the shoot are so important. Going over wardrobe is one component that you should incorporate into your shoots so that you can decide where best to pose them and what works best for each location. Going over wardrobe also includes shoes, jewellery, and even hair and makeup. Talking to the parents about their expectations for the shoot is also very important.

    Go over your contract with both the client you are shooting and their parent and let them know what your own expectations are during the shoot. Let them know about whether you allow parents to take photos during the shoot with their cell phone or with another camera too. Let them know what your policies are regarding afterwards when the photos are posted to social media. A lot of photographers have issues with people re-editing their images or cropping out their watermark. If you outline your specific rules for your images verbally and in your contract then you have a smaller chance for clients violating those policies.

    Tweens and Teens Photography 03

    Working with teens and tweens can be a lot of fun for photographers. They might be a little uncomfortable in the beginning, but once you get them started with the shoot and talking, it will almost be second nature for them to be their natural selves and let their personalities shine through. A lot of parents prefer these types of photo shoots for their teens and tweens to the traditional school portraits because you can see their personalities and their uniqueness in the images.

    Lori Peterson is an award winning photographer based out of the St. Louis Metro Area. Her dynamic work ranges from creative portraits to very unique fine art photography. Lori’s work can be seen at www.loripetersonphotography.com and also on her blog at www.loripetersonphotographyblog.com. You can follow her on Facebook at https://www.facebook.com/LoriPetersonPhotography.

    Post originally from: Digital Photography Tips.

    Check out our more Photography Tips at Photography Tips for Beginners, Portrait Photography Tips and Wedding Photography Tips.

    Photographing Tweens and Teens


    Digital Photography School

  • Photography Pricing: How much is your Art worth?

    We all love the art of photography, and perhaps even the technical challenges of capturing the essence of a scene or an occasion. Behind passion and creativity, however, is the reality that every photographer – whether you are into advertising photography, or offer wedding photography services, or any specialization for that matter – must place proper value on his or Continue Reading

    The post Photography Pricing: How much is your Art worth? appeared first on Photodoto.


    Photodoto

  • Prints vs. CDs: When Business Strategies Collide

    By Lori Peterson

    There seems to be a constant war waged between photographers who sell prints and the “shoot and burn” photographers that give their clients a disc with edited images. Photographers who sell prints think that photographers who sell (or ***gasp***) give away their images on a CD are devaluing photographers and photography as a whole. Photographers who provide discs (whether given or purchased) to their clients think they are just keeping up with technology and client demand.

    So, who is right in this war pitting photographer against photographer? Sadly, no one. Not all business models are created the same and neither are photographers. Client demand is a huge factor when creating packages and figuring out what products to sell.

    As a photographer, I think it is natural to want to see your prints displayed. However, if you are only selling 4×6 sizes of images, you are not really creating displays for your clients, you are creating pieces for their scrapbooks and photo albums. Seeing your work displayed gives a feeling of accomplishment and a sense of purpose. It also allows clients to see the work every day and remind themselves of how beautiful your work is and how they need to keep updating those wonderful pieces.

    In this digital age now, people want to share everything online and save the images to their computer. They don’t necessarily want the hard copies of the images, but the ability to create them if they want. They upload them to their computers, their external hard drives, or even cloud storage. This doesn’t only apply to younger people, because even older people are learning to use the Internet to connect with their families. Grandma and Grandpa may even be on Facebook just to keep up with photos of their grandchildren and see what is happening on a day-to-day basis with their families. Grandparents love seeing all those new images and most of the time, they don’t even care about seeing the watermark from the photographer on them. They just want to see new photos.

    Just because you are a part-time photographer or new photographer does not mean that you can only give images on a CD. New photographers think that is the only way for them to give their images to their clients and it’s just not so. There are so many options for photographers who solely provide discs because they don’t know how else to give their clients their images.

    Most professional photographers use professional labs, such as White House Custom Color, Black River Imagining, Miller’s Lab, Bay Photo Labs or Mpix Pro. How do you know which lab is best for you? Most labs will offer to do test prints for you so that you can see how your particular images will look when transferred from your computer and screen to their paper. Setting up accounts with most labs is pretty easy as long as you have a Tax ID number.

    Educating your client on the differences between a professional lab and a discount store lab is very important. The test prints you get from your lab can help your keep your monitor calibrated which helps to ensure that what is seen on the computer screen matches what is printed. This is not a guarantee, sometimes not even close enough to be passable, from a discount lab. There can be huge color shifts, variations in overall tones, and the photographer has lost all control of the quality of the output of their final images.

    If you are giving your images on CD, you need to think about presentation and packaging. Just handing a burned CD with their name written in Sharpie doesn’t make for a professional presentation. You can create white CD labels with your logo or a photo simply and cheaply. You can even order blank CD/DVDs from labs that have your logo on them and then just burn the images onto the discs as you sell them. There are so many options out there that can help make your presentation of CDs beautiful and unique. For instance, you can use these simple brown kraft envelopes and place them inside the banana leaf sinamay envelopes. It’s relatively inexpensive and looks so much nicer than just handing over a CD.

    Image 01

    You can customize boxes or folders to present your CDs in when you give them to your client. You want it to represent your photography, your business, and your brand model as a whole. It doesn’t have to cost an arm and a leg, but it should come across as a representation of your business and what you provide.
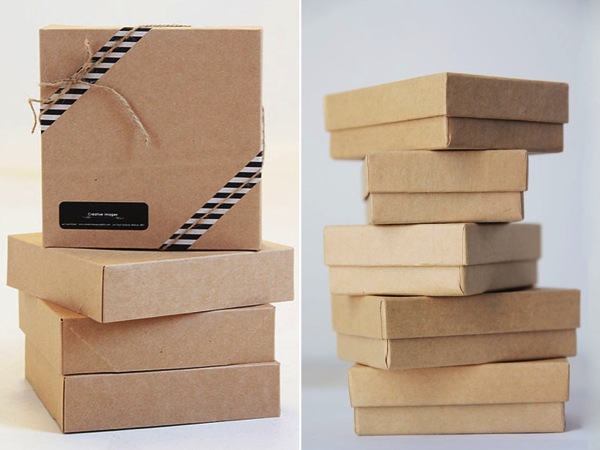
    Image 02

    The final images can be placed inside the box on some beautiful fabric or you can purchase bags to separate them inside the presentation boxes. Again, this is very inexpensive to do, but makes the presentation so much more beautiful and shows the attention to detail you provide in every aspect of your business.
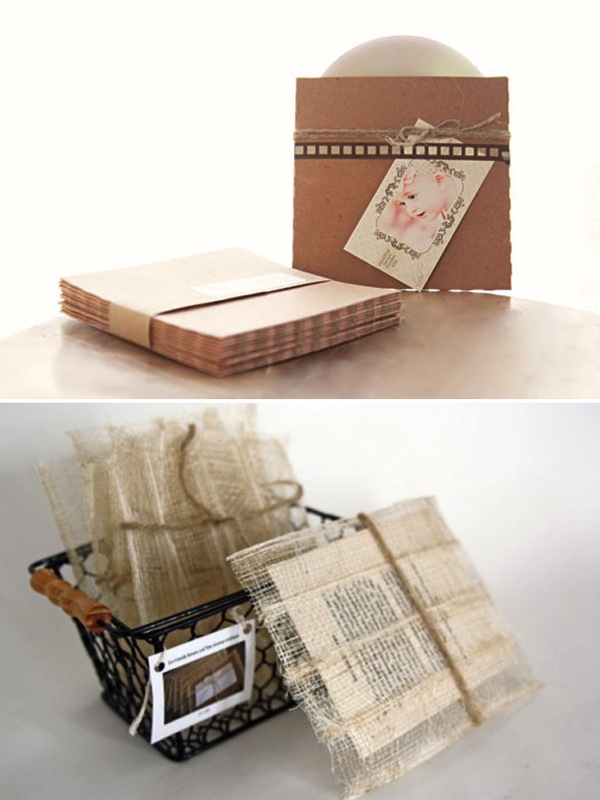
    Image 03

    They key component is not which is technically “right”, but which fits your business model. If you are pricing your sessions correctly and including the price for the CDs then you are doing what best fits your business. Giving the CDs away actually does very little to help clients value your business and the time and energy that was spent into creating, editing, and presenting your images. The same goes for providing prints so cheap that you are trying to compete with discount store pricing.

    You need to value your business. You need to know your worth. Does the cost of whatever product you are providing help maintain your business or are you just throwing money away trying to get clients to walk in the door? If your business is not making money or at least breaking even, then you really need to figure out where you are losing your money. Is it from not selling prints or from including a CD with every order?

    There are resources you can go to if you need help figuring out what to do and what your business can afford. The bottom line is that you have to do what makes your business successful, profitable, and provide a professional looking end product to your client. Photographers spend much of their time trying to figure out how to get clients and in the end your presentation of their products can be the difference in showing them if you are truly a professional or you are just a hobbyist making money on the side.

    The presentation resources in this article are available from Le Box Boutique. Digital Photography School readers can use the code PHOTOGRAPHER10 for 10% of any purchase from Le Box Boutique.

    Lori Peterson is an award winning photographer based out of the St. Louis Metro Area. Her dynamic work ranges from creative portraits to very unique fine art photography. Lori’s work can be seen at www.loripetersonphotography.com and also on her blog at www.loripetersonphotographyblog.com. You can follow her on Facebook at https://www.facebook.com/LoriPetersonPhotography.

    Post originally from: Digital Photography Tips.

    Check out our more Photography Tips at Photography Tips for Beginners, Portrait Photography Tips and Wedding Photography Tips.

    Prints vs. CDs: When Business Strategies Collide


    Digital Photography School
  • 10 Pictures from 2013 Missouri River 340 Race


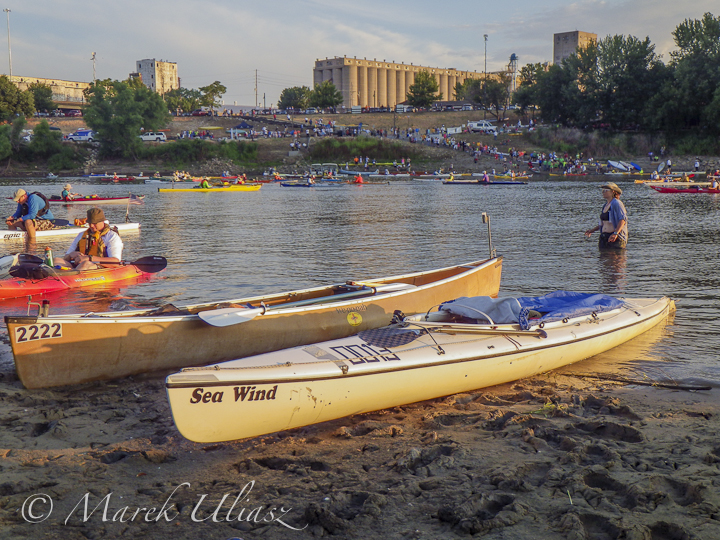
    Sea Wind canoe on Kaw River
    My Sea Wind canoe on the shore of Kaw River 20 minutes before the race start.

    Missouri American Water MR340 is a paddling race across the entire state of Missouri – 340 miles nonstop in less than 88 hours from Kansas City to St Charles. The 8th edition of the race took place July 23-26, 2013.

    It was my 7th MR340 race, and the third one paddled self supported in Sea Wind canoe designed by Verlen Kruger. This year it took me 62:21 hours to finish – 38th place overall and 19th place in men’s solo division (142 boats), see race results. I had a pretty good race. Sea Wind allowed me to to run long river sections up to 12 hours of paddling without any stops.

    Here is a selection of 10 pictures from the race, all shot with Pentax Optio WG2 camera. I will be writing more technical reports and commentary in my Fitness Paddling blog where you can find a lot of information on previous MR340 races starting from the very first one in 2006.


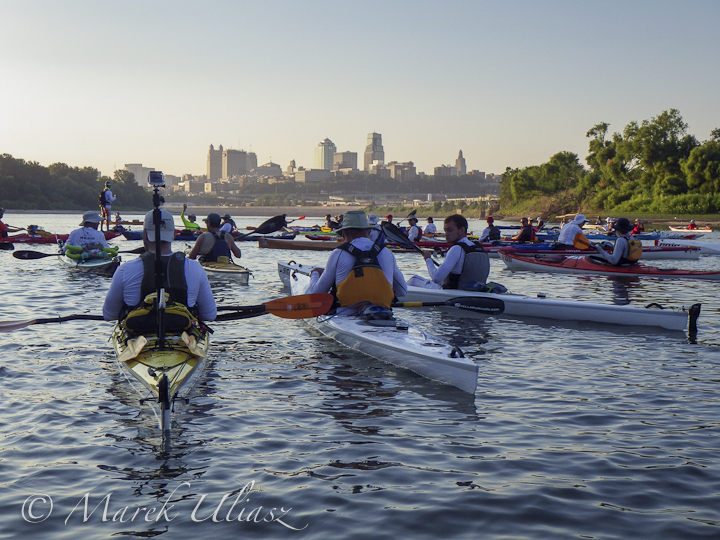
    solo boats start of 2013 Missouri River 340 Race
    A few minutes before the start of solo boats at 7am on the Kaw River with a cityscape of Kansas City.

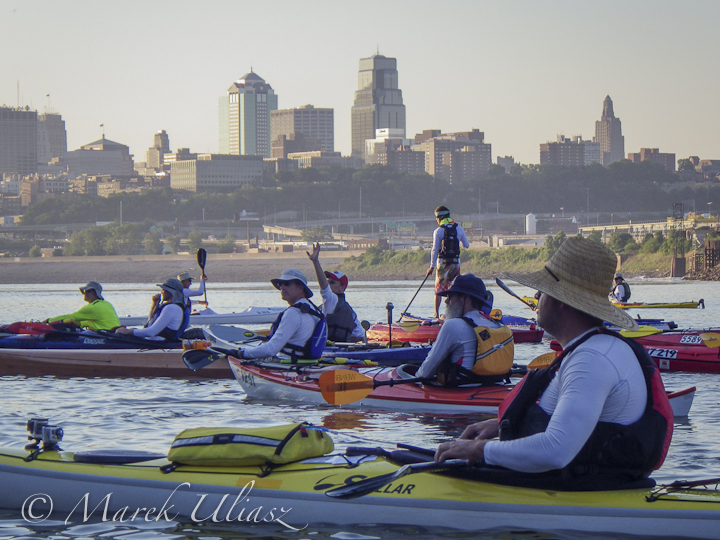
    solo boats start of 2013 Missouri River 340 Race
    Tandems and all other boats are starting at 8am.

    solo boats start of 2013 Missouri River 340 Race
    One of 3 SUP paddlers is standing up above kayaks and canoes.

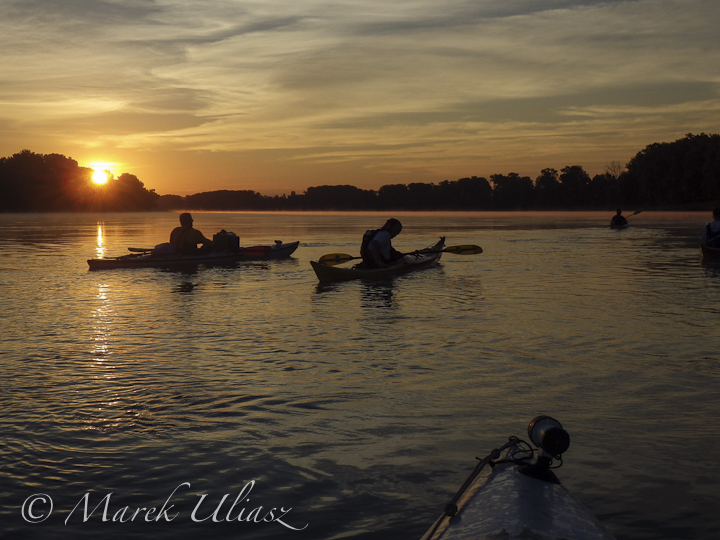
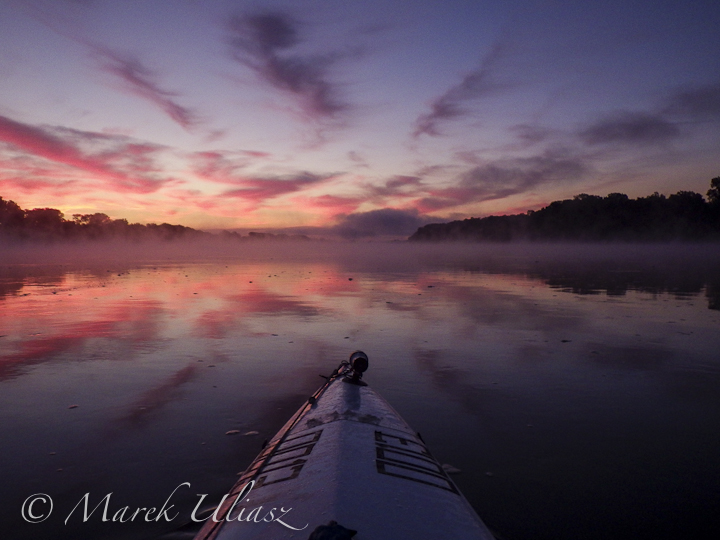
    sunrise on Missouri River
    First sunrise on the river (Wednesday morning) a few miles above Glasgow.+

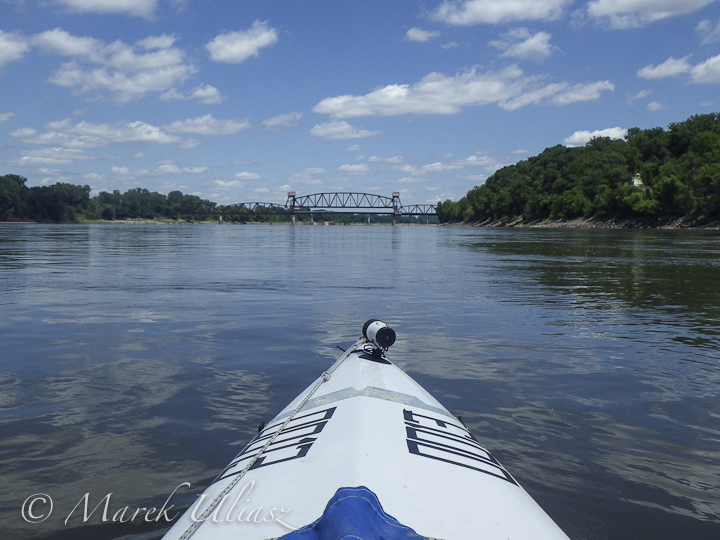
    Old Katy railroad bridge at Boonsville1
    Old Katy railroad bridge at Boonsville. 170 miles. Already half of the race or only half …

    Old Katy railroad bridge at Boonsville
    Approaching Boonsville bridge. Traditionally, I am shooting some pictures here.

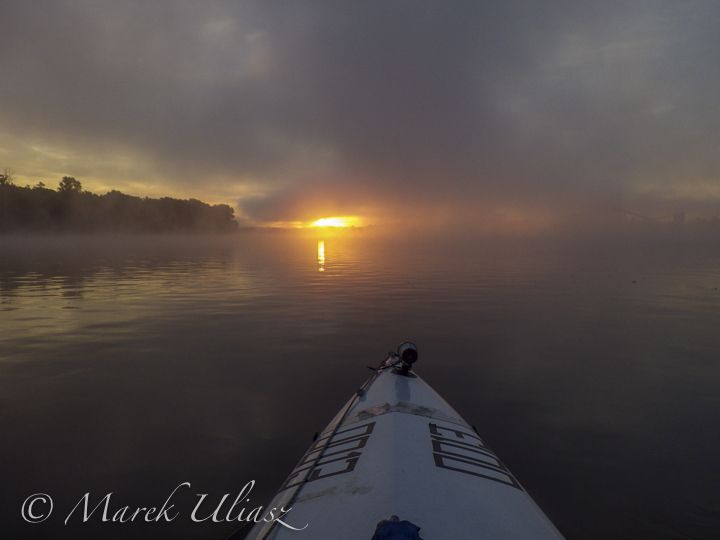
    foggy sunrise on Missouri River

    foggy sunrise on Missouri River

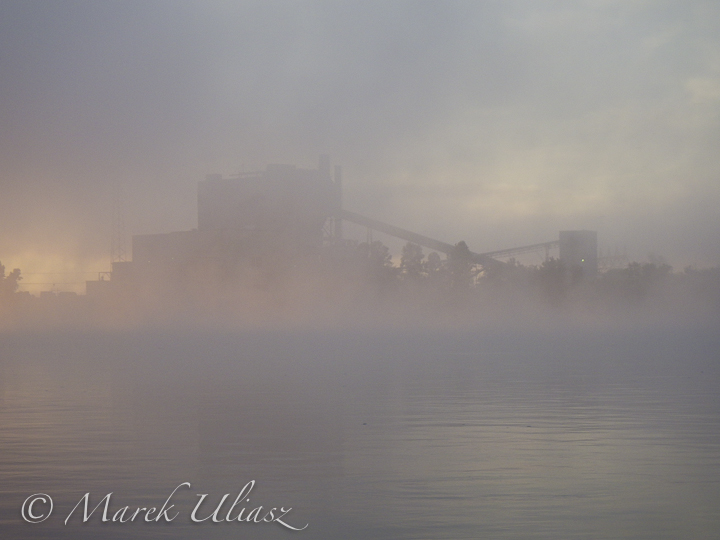
    foggy


    paddling with a camera