Category: Photography

  • 10 Stupid Photography Fads You Have Not Tried Yet

    You have probably noticed that the majority of entertaining media spreading thoughout internet can hardly be called intelligent. The more silly something looks the more refined rapture it arouses in the biomass of internet users. Visual art, the most strong way of conveying life situations and emotions, which some time ago looked like this: now looks more like this: No Continue Reading

    The post 10 Stupid Photography Fads You Have Not Tried Yet appeared first on Photodoto.


    Photodoto

  • Dear China, Please Make This.

    Whoops, my bad. Lemme rephrase that:

    ?????????????????????????????????????????????????

    Now, here's why:

    Read more »
    Strobist

  • ioSafe N2 – Your own Private Muscly Cloud

    I wrote recently about the Synology NAS, I will write more about it soon as I’ve added to it! But there are, as they say, two sides to every story and here’s the other side to that story!

    Introducing the ioSAFE N2 NAS

    ioSafe-n2-review-simon-pollock

    Having (had!) an IT background and experiencing first hand a number of times people losing their data – sometimes LOTS of data – and being completely overwhelmed at the thought of not knowing what they had saved somewhere else and what was “gone forever*” I wanted to make sure that wasn’t the case for me.

    At the same time, I wanted to be able to get to “stuff” from wherever I was. I do use multiple “online” storage things, Dropbox is my main online storage space, I’ve also just started using COPY who give much more free space.. Why multiples? Who puts all of their eggs in one basket? But we’re talking 20gb here and 30gb there… If I wanted to have an entire copy of my computer online just incase something really shoddy happened like theft, flood, fire, or something else… The ability to get to my digital life (as I like to call it) is crucial. I work from home, I have client data (As a photographer, I have photographs obviously, but they’re covered with my other NAS, the DS1512+) and I need to be able to access that data at all time.

    There’s also the whole “would I walk up to someone in the street and hand them all the photos of my kid, all of my important business data” that Robb touches on in the video below… I’m sure you’ve heard of businesses folding – well, it has happened to online storage companies too [READ THIS this is from 2009, but there’s nothing to say it can’t happen today] and with this firmly in mind, I smile about my N2 sitting securely in a cupboard in my house, out of line of sight, quietly backing up all of my precious digital stuffs…

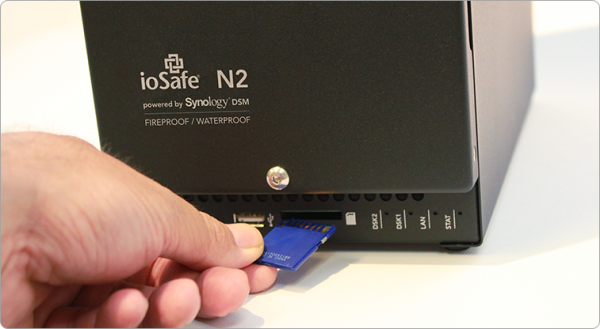
    That said, having this NAS packed in a cupboard out of harms way, I don’t get to use the SDXC slot on the front of the unit, but it is there if you want to use it – simply take photographs on an SD card, pop the card into the front of your NAS and it mounts up like a little external drive and you can copy all of the images across. Very handy.

    3

    Lets hop around a little.. I run my own business, but it isn’t large and I don’t have co-located servers with my data replicating across multiple sites – if I wanted to make sure I was 100% safe, I’d do that, but it is cost restrictive for me right now, so I needed to be able to trust what I could afford** The ioSAFE N2 is sort of like a baby army tank that stores data.. It can withstand fire, water, three year olds etc… 1500 degrees f. for half hour – you’d want to hope the fire brigade had put your house out in that time!, Under ten feet of water for 72 hours… This is no ordinary NAS (Network attached storage) device. There’s also the included one time data recovery service – ioSAFE will recover your data up to $ 5K worth of DRS included with every ioSAFE product… that is pretty rad if you ask me! (read more on that here)

    ioSafe-n2-internal-photo-simon-pollock-review-dps

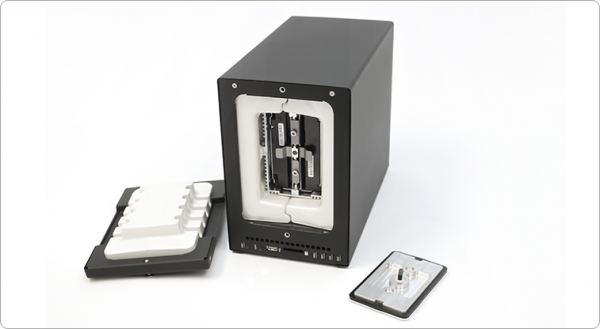
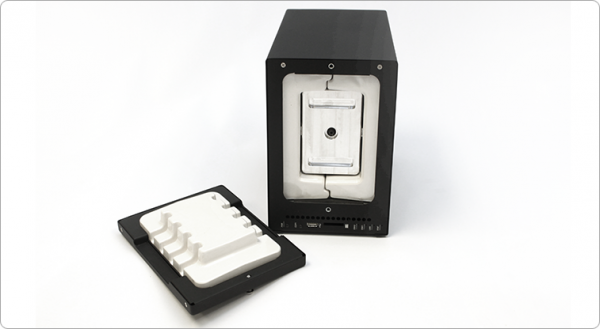
    You can see above (and below) where your data is stored, on those two disks in the middle… Then there’s a solid metal plate that goes on the front of the disk bay, then a plug that is the front of the unit… There is airflow around the sealed unit that has heat dispersion wings on it, so your disks maintain a normal working temp, too.

    ioSafe-fire-water-proof-nas-simon-pollock

    Lets jump back to where I was talking about accessing my data remotely shall we… The ioSafe runs Synology DSM (I’m currently running the 4.3 Beta on my ioSafe with great success) DSM pretty much turns the N2 into a fully fledged cloud (cloud simply means server that can be accessed remotely in this case.. sort of) and there are some very handy iPhone and Android and (even haha) Windows phone apps that you can use to get to your data.. You can log into your server via FTP too.. (It also works as a web server, print server, ftp server, media server… this thing can’t make a decent espresso, but then I can, so we’re good!)

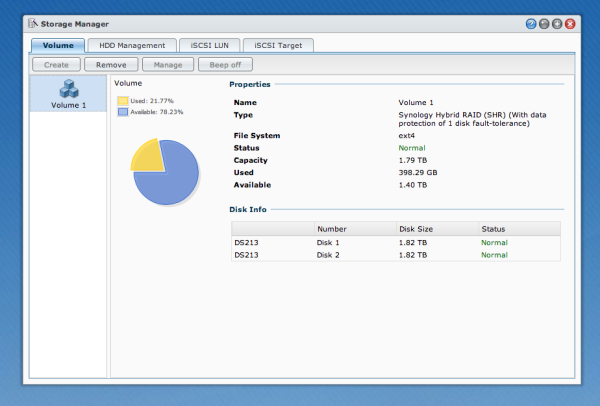
    My ioSafe N2 is setup using the Synology Hybrid Raid, I use two 2TB disks in (basically) raid one so I have a one disk fault tolerance.. My stuff is essentially safe unless Godzilla comes along and eats my N2..

    DSM-Synology-disk-manager-simon-pollock-review-iosafe-n2

    I use my N2 in conjunction with my other ioSAFE drives.. I have a Solo G3 and a Rugged Portable (That my brother has borrowed to take around the world!!)

    Who is the N2 for? 

    Anyone that is serious about keeping their data safe but maybe not quite ready to buy a serve in a datacentre. (You can also bolt the N2 to your floor / hide it in a cupboard and access it wirelessly!)

    Pros

    • Life proof.
    • Connectivity.
    • Massive feature set via DSM.
    • Small footprint by comparison.

    Cons

    • Errr? For the market this beast is aimed at, there are none.

    I want to leave you with a video from Robb Moore, he’s the guy that started ioSafe when nothing else would suit his needs… I’m very glad he did because right now, for me, nothing else does what this N2 does.


    I was provided with the N2 for review, I was already an ioSafe user… I use product I love, I don’t have time for rubbish that doesn’t work – who does. I give this N2 a total of 10 out of 11 gold stars, I only deduct one because I know I’m going to need more space soon and there’s not a 4 disk model – yet.

    Please feel free to ask any questions in the comments below.

    –Sime


    Post originally from: Digital Photography Tips.

    Check out our more Photography Tips at Photography Tips for Beginners, Portrait Photography Tips and Wedding Photography Tips.

    ioSafe N2 – Your own Private Muscly Cloud


    Digital Photography School

  • Color Portraiture with Retouch and Enhancement in Lightroom 4 and 5

    The Following is an excerpt from the SLR Lounge Lightroom Preset System v5, a preset system designed to take you from Ordinary to Extraordinary photos in just a few seconds and clicks.

    In this article, we have a beautiful bride who designed an amazing red dress with a lot of great details and jewelry. We want to edit this photo so that she has a nice soft portrait look and the details in her dress remain sharp and crisp. To do this, we’re going to be utilizing similar techniques in production as we covered in the previous Soft Flattering Color Portrait tutorial. But, we are going to go through the added step this time of utilizing our brush presets to make the image details pop. The written article is below, and if you like, you can also watch the original video tutorial towards the end of the article.

    Here’s a quick sneak peak of our image before and after we’re done with our edit.

    beforeafter copy

    Read the Written Tutorial

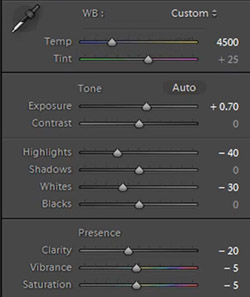
    Since this is a portrait, we have a preset that gets us to a nice soft portrait look quickly which we discussed in detail in the previous Soft Flattering Color Portraits tutorial. This preset adjusts the develop settings so that portrait skin tones looks nice and soft, and it also desaturates skin tones via a slight modification to Vibrance and Saturation to help even out skin tone colors. We also increased our exposure to +0.70 because an overall brighter image will look more flattering on our bride. Personally, I want to go with a more neutral/white look for the image, so that the red in the dress truly pops. So we’re going to adjust our Temperature to 4500. Here’s what our develop settings look after our preset and manual adjustments are applied.

    developesettings

    In the HSL our Red and Orange have been decreased slightly because once again, we want to subtly even out skin tone colors.

    HSL

    • Red: -20
    • Orange: -10

    In the Details our preset gave us the perfect amount of Sharpening and Noise Reduction. The Sharpening settings are doing a great job of showing the intricate details in the dress, while using a little bit of Noise Reduction to smooth out pores and fine detail in our subjects skin.

    Sharpening

    • Amount: 70
    • Radius: 1.5
    • Detail: 10
    • Masking: 30

    Noise Reduction

    • Luminance: 15
    • Detail: 70
    • Contrast: 0
    • Color: 25
    • Detail: 50

    Our preset also adjusted our Lens Vignetting to +30, because we want a nice even edge to edge toning.

    Lens Vignetting

    • Amount: +30
    • Midpoint: 30

    Now we’re going to do some more post processing with our Brush. The first thing we want to focus on is the beautiful red dress. We’re going to set our Brush settings for Clothing and Texture and apply it everywhere but her skin. If you press “O” you can bring up the brush mask overlay and see where the brush is being applied. (See video tutorial below for reference)

    When you apply a brush onto your image, a “pin” will appear on your image (Press “H” on your keyboard to hide/reveal pins). If you click on the pin you can decrease or increase the strength of the brush settings by left-clicking and dragging to the left (weaken) or right (strengthen). We want our adjustments to be a little more subtle so we slightly decreased the strength of the brush.

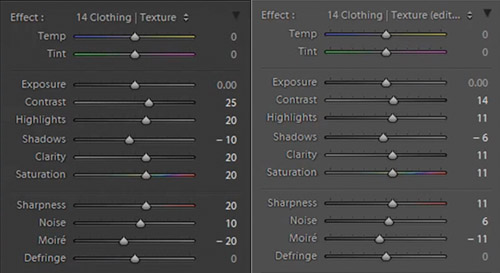
    bothclothingbrushsettings

    Original Brush Settings on Left, Lowered Brush Strength Settings on Right

    We like the window in the background because it helps compose our frame, but there’s a distracting bar in the middle. For this particular image, we could keep the frame since it does a great job framing our subject. But, just to illustrate how capable Lightroom is, we’re going to remove the window entirely, making this a high key image with a nice bright background. To do this we’re going to use our Brush with strong dodge settings and apply it to the window.

    Screen Shot 2013-08-21 at 1.12.48 PM

    If you have additional questions, watch the video tutorial below to see exactly how this affect was applied.

    Dodge Brush Settings

    • Exposure: 4.00
    • Contrast: 1.00
    • Highlights: 1.00

    We want to apply the brush to the inside of her hands, but it’s a tough spot to reach because the area is very small. This is a great place to use Lightroom’s Auto Mask function.

    automask

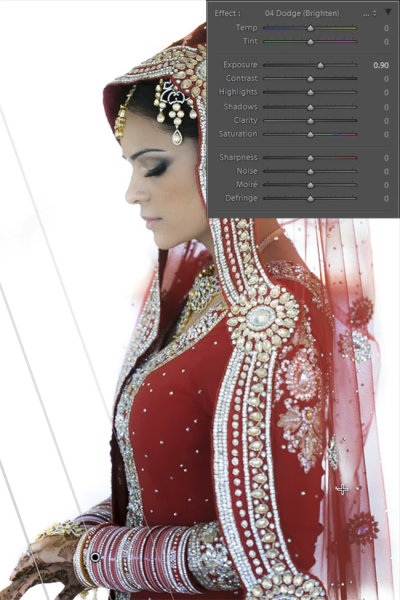
    Her hands are slightly underexposed so we’re going to add a graduated filter and set the exposure to +0.90. We are then going to drag the filter from the bottom left of the image to her bracelets.

    firstgraduatedfilter

    We also want another subtle graduated filter for the back of her veil, so we’re going to set the exposure on this filter to +0.30. We want to drag this up from the bottom right of the image to her bicep area just as we did for the previous graduated filter shown above.

    Now that we’re done with the dress, we’re going to go back and touch up some details on our bride. The first thing we’re going to do is select our “Hair and Lashes” preset. This will give some nice contrast and sharpness in her eyes and eyebrows.

    Hair and Lashes Brush Settings

    • Contrast: 10
    • Highlights: 20
    • Shadows: -10
    • Clarity: 15
    • Saturation: 10
    • Sharpness: 25

    After the eyes, we’re going to move onto the lips. We’re going to select our Brush preset for lips which will give us some nice color and contrast on the lips.

    Lip Brush Settings

    • Contrast: 15
    • Clarity: 15
    • Saturation: 20
    • Sharpness: -10
    • Noise: 10

    And now we are left with our final image. Here’s a before and after of our portrait.

    Before

    lightroom-5-tutorial-high-key-retouch-0001

    After

    lightroom-5-tutorial-high-key-retouch-0002

    Watch the Video Tutorial

    If you would like to see exactly how all of the settings and adjustments were applied, please watch the video below from the SLR Lounge YouTube Channel.

    Conclusion and Learn More

    We hope you all enjoyed this tutorial. If you are interested in learning more or purchasing the SLR Lounge Lightroom Preset System v5

    Post originally from: Digital Photography Tips.

    Check out our more Photography Tips at Photography Tips for Beginners, Portrait Photography Tips and Wedding Photography Tips.

    Color Portraiture with Retouch and Enhancement in Lightroom 4 and 5


    Digital Photography School

  • How to Shoot High School Football

    It’s the middle of August here in Atlanta, and that means that the kids are back in school.  It’s a bit earlier than most places, but regardless of where you live the rites of fall will soon be in full swing.  Here in the South, one of those rites plays itself out every week– not in cathedrals of brick and stained glass windows, but in those made from steel beams, cement bleachers, and 6,400 square yards of well-tended grass.  Yes, it’s high school football season.  And in the South that means an almost religious zealotry.  If you think I’m kidding, give me a call and come for a visit.  Make sure to bring your camera, though, because you’re not going to want to miss this.
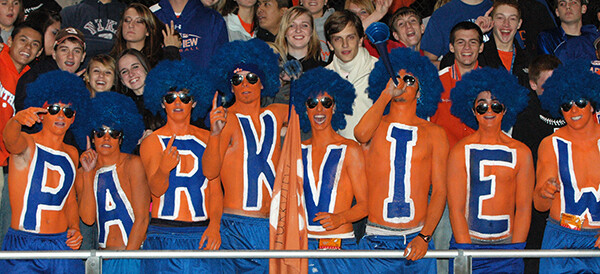
    FB-348

    The Right Gear

    I’m not going to spend a lot of time here discussing camera bodies.  Some of the photos in this article were taken six or seven years ago on a used Nikon D70, while later images were shot with a Nikon D300 or D700.  As long as you are photographing with a reliable DSLR, your bigger concern is going to be the glass. As much as you may covet that 400mm lens you see NFL sideline photographers shooting with on TV, it is possible to get really great shots at this level with a few basic pieces of equipment.  As with any sporting event, you are going to want a good mix of wide-angle and zoom images.  When I first started shooting sports I was using one body and one lens– the 70-200mm f/2.8.  I was able to shoot and edit creatively enough to get that variety of necessary focal lengths.  As things progressed, I was able to add a second lens– the 24-70mm– to the arsenal.  With these two lenses I was able to get everything cropped properly in the camera, without having to rely on destructive post production.  If you can only afford one fast lens right now, definitely opt for the longer zoom.

    Fast lenses are also going to be important once the sun goes down because most high school sports have a prohibition against using flash.  I’ll confess to occasionally firing my flash, but be careful with your angle.  You don’t want to blast a player with flash full in the face and possibly change the outcome of the game.

    Since flash is not going to be an option, you will most likely need a monopod for keeping your camera steady– particularly at slower shutter speeds after the sun goes down.

    As with any type of shoot, make sure you have all of the necessary backups– batteries, memory cards, etc.  Make sure you also have a plan for when it starts raining.  This isn’t an “IF” it starts raining.  Into every sports shooter’s life some rain WILL fall.  Be prepared for it.  The Think Tank Hydrophobia or the OP/TECH USA Rainsleeve should do the trick
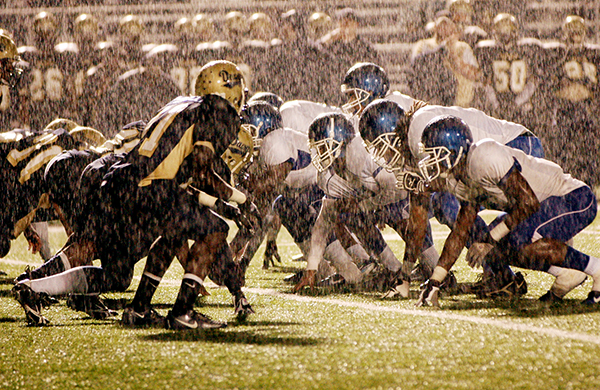
    Trust me.  At some point it's going to rain.

    Trust me. At some point it’s going to rain.

    Getting In

    Unless you are a credentialed photographer from a media outlet or the school’s contracted photography company, chances are you’re going to have to pay to get in.  The good news is that it’s usually less than $ 10.  You might be able to talk your way in, but the money goes to a good cause, so don’t be a tightwad.

    Get There Early

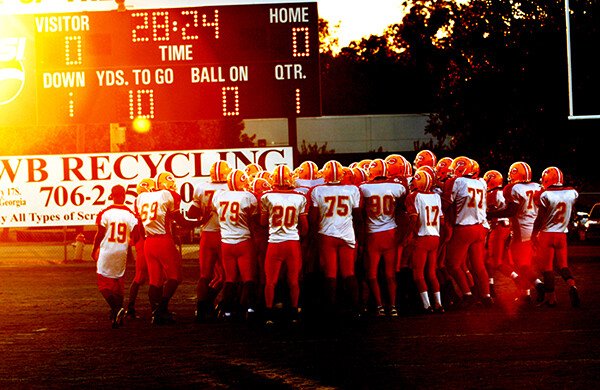
    You are also going to want to get there early.  The teams take the field to warm up anywhere from one to one and a half hours before game time.  Warm-ups are going to give you one of your best opportunities for quality shots.  For starters, the light is better.  The sun hasn’t set and you’re going to have a really great quality of natural light– particularly if you shoot with the sun at your back.  Players also tend to move a little more slowly in warm-ups than in the actual game.  You’ll have an easier time capturing motion, and more of an opportunity to isolate individual players.  In some cases, you may even be able to actually walk out onto the field to shoot and not be restricted to the sidelines.  If you do walk out onto the field, PLEASE BE CAREFUL!  There are probably 150 kids and coaches out there warming up.  They are big, fast, and not paying attention to you.  Their job is to play football– not give you a good photo op.
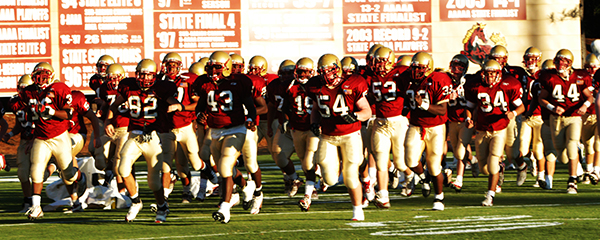
    Get there early and take advantage of the sun while you can.

    Get there early and take advantage of the sun while you can.

    Know the Sport

    The biggest key to getting quality photos of any sport is to have a solid understanding of the game and how it is played.  These games have an ebb and flow all their own.  You are going to want photos of both the offense and the defense.  Is it a running play or a passing play?  What are the odds they’re going to fake the punt on 4th down?  Do you need to be on the sideline or the end-zone?  The home side of the field or the visitors’?  Remember that there is a big difference between shooting as a media photographer and shooting as a parent.  As a reporter or school photographer, you are there for “the big picture.”  As a parent, you are mostly concerned with getting photos of your son, and he’ll be easy to track with that big number on his back.  In either case, the more you understand the subtleties of the game the better prepared you will be.
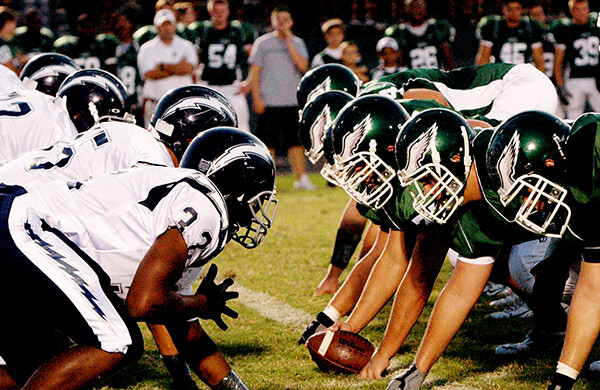
    FB-207

    Focus

    When I say “focus” I’m not just talking about your photography.  As noted above, these kids are big and fast and strong, and are trained to run through anything in their way.  I once saw a photographer stand his ground on the sidelines, despite the fact that a player was being pushed out of bounds right at him.  I watched as his camera, lens, and monopod all went flying in three different directions and he flew in a fourth.  He was wheeled off the field with cuts to his face and a leg that had been broken in two places.  No photograph is worth that.  Focus on where you are and what is going on around you.
    FB-281

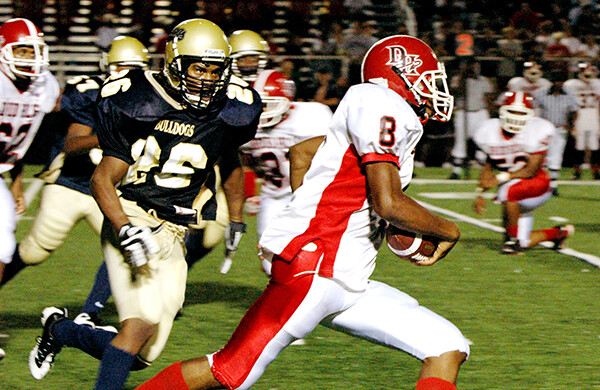
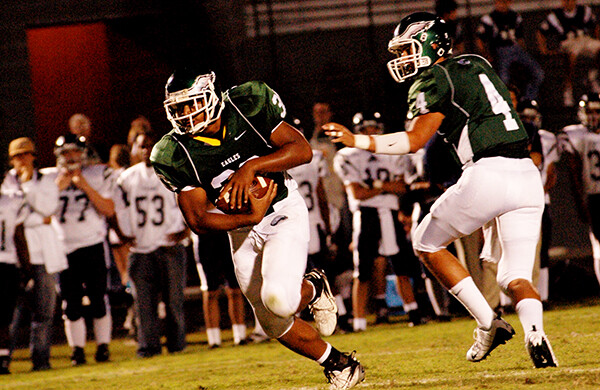
    Now let’s talk about the other kind of focus.  It’s an action sport and you want action photos.  Whereas you would ordinarily focus on the eyes for a portrait, these kids are all wearing helmets and you’re not going to have that option very often once the game starts.  Your camera’s auto-focus works by looking for contrast.  Football uniforms are usually going to have a lot of contrast between the color of the jersey and the color of the numbers.  If you can get the eyes, great.  If not, your best bet is to try locking on either those numbers or the ball once players start moving.
    FB-213

    Camera Settings

    As with any photo shoot, there is not necessarily a “right” or “wrong” exposure.  But this is a sport, after all, and if you come home with 250 blurry photos you aren’t going to be happy.  Keep in mind that since shutter speed controls ambient exposure, the faster your shutter speed is the better your chances of freezing the action.  I generally like to start with a shutter speed of 1/500 and adjust my aperture and ISO accordingly until I get the look I want.  Since this is an outdoor sport, your lighting is going to be changing over the course of the game.  What started out with great natural light before the sun went down is going to finish in the dark under less-than-ideal stadium lights.  That may mean slowing down your shutter speed to let in more light, as well as opening up your aperture or raising your ISO.  This is going to take some practice.  Be prepared for some trial and error.
    FB-777

    Vantage Point

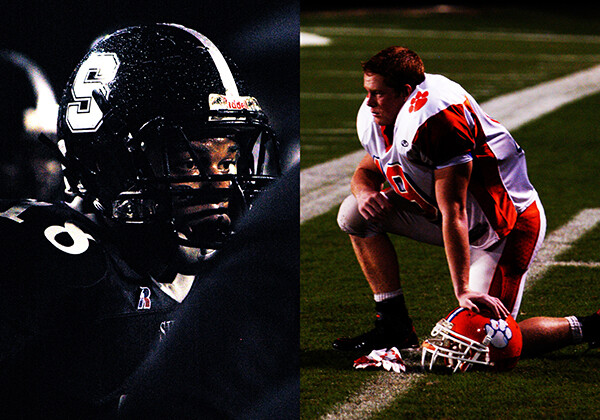
    First and foremost, let the light guide you.  I know…sounds all dramatic and stuff, but really.  Take advantage of the sun while you can
    FB-071

    Obviously, the closer you are to the action the better your photos will be.  As noted earlier, having a solid understanding of the game will definitely help you decide where to be.  This is one reason why you hardly ever see a veteran sports photographer standing still for very long.  Be aware that some places are going to have restrictions on where you can and can’t stand, regardless of your press credentials.  “The Box,” for example, is the area on the sideline between the 20-yard lines.  This area, for a variety of reasons, is supposed to be off-limits for anyone other than players, coaches, trainers, etc.  A game official who is a stickler for the rules could penalize the team for your presence in the box.  If that happens, start running and don’t look back.

    There is a natural tendency to shoot a football game primarily from “your team’s” side of the field.  If you’re a parent, this is where you know people and feel comfortable.  Try going around to the other side of the field once in a while.  From this vantage point, you will not only capture the action, but your own team’s colors and sideline will add a great element to your background.

    Be Creative.  Keep Your Eyes Open

    It’s football, but that doesn’t mean you can’t be creative with your angles and composition.  If you’re the parent of a player, find a way to focus on your athlete and make them stand out.  If you are selling game photos on your website, getting creative will only help your sales.  I tend to think in terms of portraits.  Changing angles resulted in getting this quarterback against a perfect background.
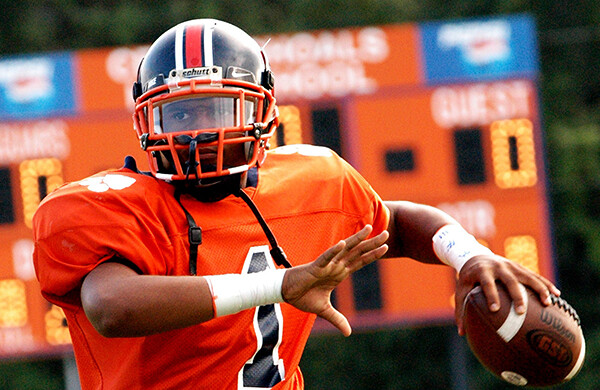
    FB-295

    Don’t fall into the trap, though, of assuming that everything worth photographing is right there on the field in front of you.   Spend some time in the stands.  Shoot the crowd reactions.  Photograph the band and the cheerleaders.  Capture the traditions.  There is so much more going on in that stadium than just a football game.  Turn your back on the action once in a while and take a look around you.  There are stories everywhere.   Learn to keep your head on a swivel.
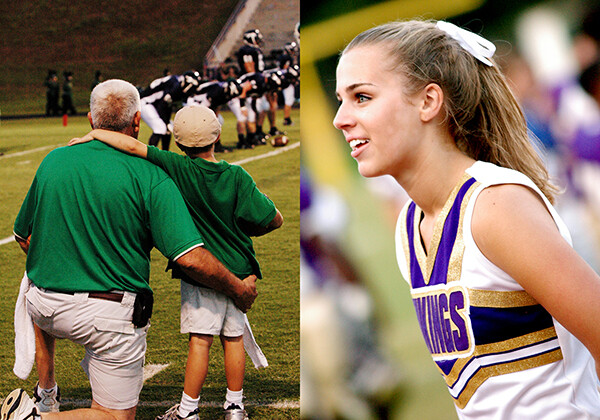
    FB-999

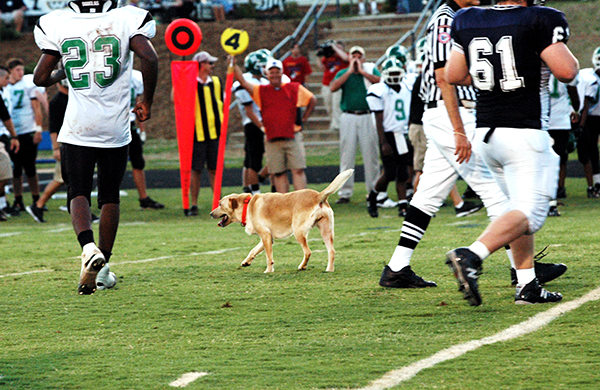
    Pay attention.  You never know who might drop in.

    Pay attention. You never know who might drop in.

    Spray and Pray…to Motor Drive or Not to Motor Drive?

    As with so much of what we do, five photographers will give you five different answers.  When I first started shooting high school sports I was doing so with a slow camera that didn’t have the buffer speed for just leaning on the motor drive and hoping for the best.  That was probably a good thing.  I learned to both compose my shots and choose my moments a little more carefully.  I developed a pretty fast shutter finger, and, I think, a better eye for sports action. Even now, though, with better equipment, I tend to leave my camera set for single clicks.

    FB-888

    Etiquette

    If you are covering a particular team over the course of a season, introduce yourself to the coaches.  Your job will be easier if they know who you are and why you are there.  These kids may be big and strong, but they are still kids and these coaches are looking out for them.  Play your cards right with the coaches and there’s no telling what kind of access you might get.
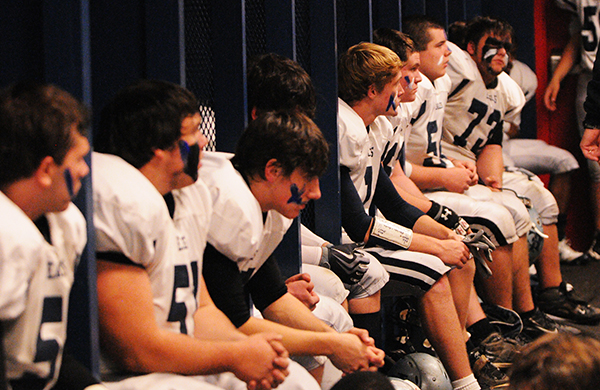
    FB-178

    Being nice to coaches gets you all kinds of access.

    If a coach or official tells you something, listen to them.  If they ask you to move, you move.  You’re in their house and you have to play by their rules.

    No flash.  It may sound silly to you, but you have no idea what the consequences might be.  There may be college scouts in the stands, and you blinding the receiver with your flash might have an impact on whether that kid gets a scholarship or if he’s even recruited at all.

    If play stops for an injury on the field, show some respect and PUT YOUR CAMERA DOWN.  While it might make for compelling photography, it is entirely possible that you just witnessed the end of a child’s life-long dream or his chance of going to college.  You don’t want him or his parents seeing that on your website.  This is high school, not the NFL.  Be sensitive and keep it in perspective.

    Any seasoned photographer will tell you that photographing sports is not easy, and football may be one of the hardest.  With with a little practice and preparation, though, you’ll see your images start to improve quickly and steadily.

    Post originally from: Digital Photography Tips.

    Check out our more Photography Tips at Photography Tips for Beginners, Portrait Photography Tips and Wedding Photography Tips.

    How to Shoot High School Football


    Digital Photography School

  • My 30 Day Adventure With The Fuji x100s

    Please note that this is not a technical review of the Fuji x100s. There are many great reviews already written by photographers who are technically more savvy than I am. This is simply an account of my experience as I make my first steps away from a DSLR system.

    I finally did it! I left the DSLR and lenses behind and boarded a plane to France, via Iceland, with one camera and a fixed focal length lens. I can hear some of you think out loud: “Iceland without all your gear? Are you crazy?” Well… Maybe I am, but I was ready for the challenge and I never looked back! If you’re not familiar with the Fuji x100s, it’s a retro looking mirrorless 16MP camera, fitted with a 23mm lens (35mm equivalent) and an APS-C X-Trans CMOS II sensor. Google it, everyone is talking about it!

    I wrote quite a bit about the power of limitations in photography before. This is not a new thing for me. Even with my Canon 5DMarkII, you were more likely to see me with a 40mm lens recently than a zoom lens. Limitations help you grow as a photographer. Traveling with the Fuji x100s for a month, from Iceland to my home country in France, was very liberating. Not only the comfortable size and weight of the camera was a great advantage, the fact that the camera became a simple tool and did not get in the way between me and my vision was the best part. It was almost like shooting with a camera phone without ever sacrificing control or quality.

    I’m not a landscape photographer, I’m an urban shooter. That doesn’t mean that I don’t appreciate a beautiful landscape when I’m in front of one. Iceland is like no other place on earth. The thought of my Canon gear, thousands of miles away, did cross my mind a couple of times while taking in the amazing Icelandic minimalist landscape. But, as they say: “The best camera is the one you have with you.” And I had a heck of a great piece of equipment with me on this journey.

    Although my true love is street photography, I shoot whatever moves me wherever I happen to be. I can honestly say that I discovered a renewed joy for the craft. I felt like a child at play again. I loved the fact that no one took me seriously by the look of my camera. Being so inconspicuous when you shoot street photography has several advantages. You’ll dare some shots that you may not feel so comfortable capturing with a larger camera. Also, if you enjoy doing street portraiture as well as candids, you will find that people are much more receptive to having a portrait taken in the street with something that looks like a point-and-shoot than a professional looking camera. With a smaller camera, you become a lot less intimidating.

    Many photographers have asked me if I would replace the x100s for a model with interchangeable lenses. NO, I wanted something different!  I already own a system with the best glass in the world (although I would love to try a mirroless system with interchangeable lenses eventually…) Truth is, the fact that you cannot change lenses IS the reason why I chose the Fuji x100s. If you don’t believe that a fixed lens will help you grow as a photographer, try it for a week. Put any fixed focal length lens on your camera body, get out there and shoot the world around you. It will slow you down, you will take more care in your composition, you will be more creative. With a fixed lens, your feet become your zoom. You will pay closer attention to what you include in your frame, and more importantly, what you decide to leave out in order to make a stronger image. Try it! My workshop students get a little nervous at first when I suggest they shoot with a 50mm all day in Paris and leave the rest of the gear at the hotel. They soon realize that it is on those days that they yield their best work.

    What’s going to happen to my Canon bodies and L glass? They are definitely not going to accrue much frequent flyers miles anymore but I’m still using them for commercial shoots when I’m not traveling or teaching workshops. For the time being there is still a place for DSLRs, especially in some specific genres of photography such as wildlife, fast action sports, etc. For most other types of photography, you won’t compromise on quality with a smaller system. The perception from the client’s point of view may be a barrier for a little while longer, but that too will change. As far as I am concerned, I think I already own my last DSLR…

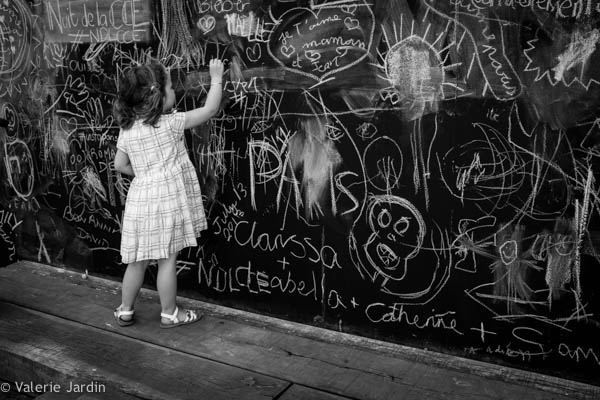
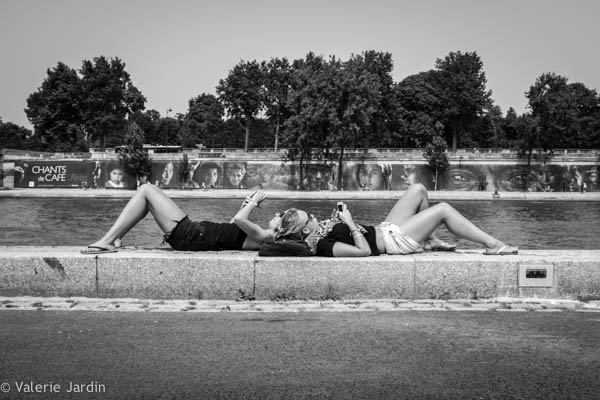
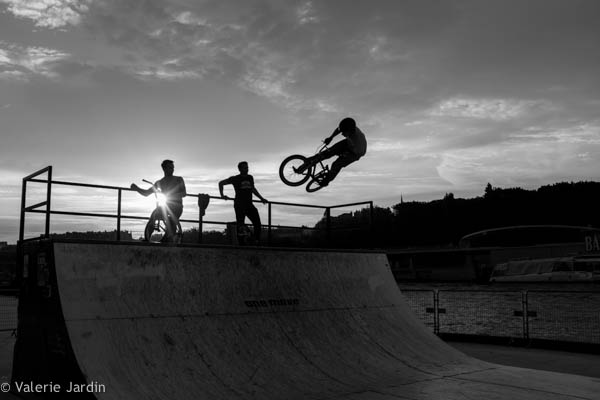
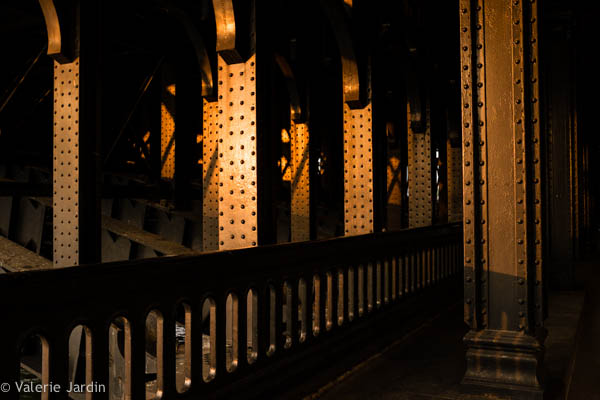
    I made a selection of images that I shot with the Fuji x100s over the past few weeks, they include a variety of genres to demonstrate that you can pretty much do anything with one fixed lens. It’s all about taking letting your creative juices flow.

    I would love to read about your experience traveling with minimal gear or your fear to give it a try.

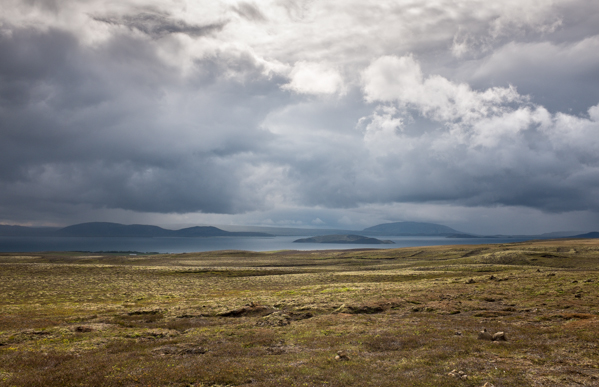
    I am not a landscape photographer by any stretch of the imagination. That doesn't mean that I am insensitive to such a view. It was time to apply the saying: "The best camera is the one you have with you."

    I am not a landscape photographer, I’m more an urban shooter, but that doesn’t mean that I was insensitive to the minimalist landscapes of Iceland. It was time to apply the saying: “The best camera is the one you have with you.”

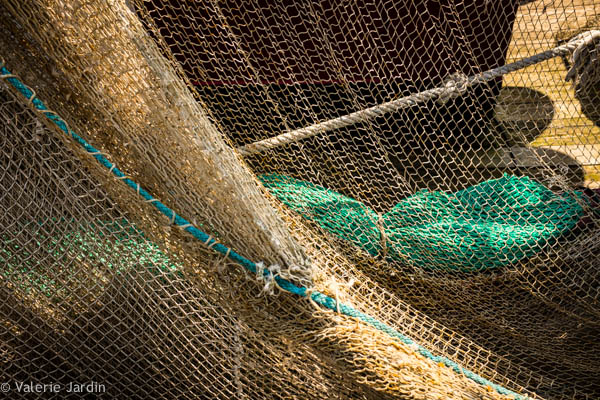
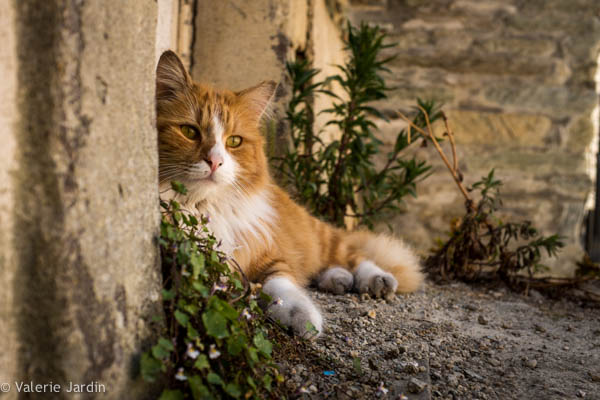
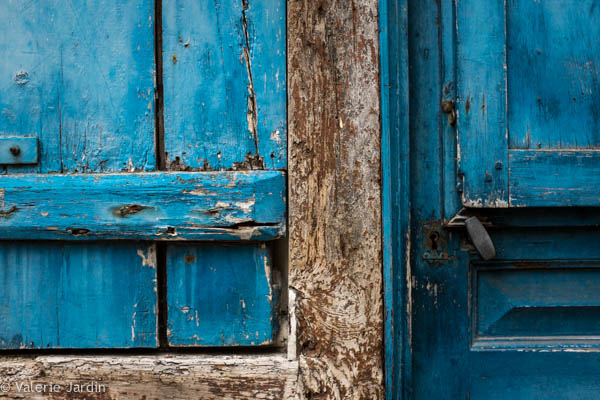
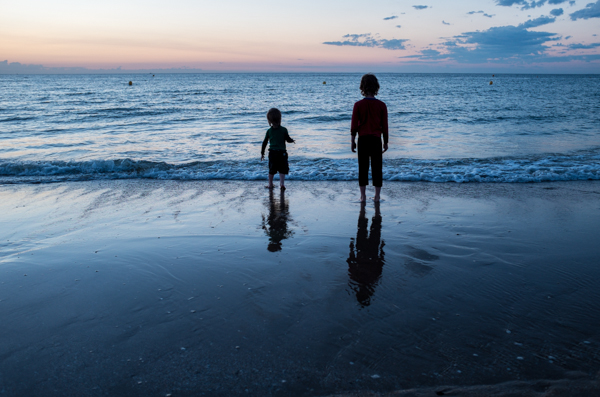
    Valerie Jardin Photography - Paris-1

    Valerie Jardin Photography - Paris-2

    Valerie Jardin Photography - Paris-4

    Valerie Jardin Photography - Paris-3

    Valerie Jardin Photography - France-1

    Valerie Jardin Photography - France-3

    Valerie Jardin Photography - France-4

    valerie jardin photography - market-1

    Valerie Jardin Photography - France-5

    valerie jardin photography - Blue hour-1


    Post originally from: Digital Photography Tips.

    Check out our more Photography Tips at Photography Tips for Beginners, Portrait Photography Tips and Wedding Photography Tips.

    My 30 Day Adventure With The Fuji x100s


    Digital Photography School
  • Do You have Photography Compulsion Syndrome?

    photo-compulsion-dps-06

    Missed the sunset but sat in the cold until I got this bird flying over. 4 shots layered in PS.

    “Photography Compulsion Syndrome” – tell me if you can relate to any of the following scenarios:

    • when traveling you’ve raced around at dusk, narrowly escaping a speeding ticket, trying to find the best spot to shoot the sunset
    • you’ve skipped dinner, or left your friends having dessert, while you go outside in the rain cause there was a great shot you just had to get
    • you’ve been on regular travel tours and were constantly frustrated because they never gave you enough time at the great locations or stopped at the side of the road for the old broken down buildings or because the “light was amazing”
    • you’ve lost images due to a card failure, a lost memory card, or a hard drive problem and have cried for days
    • you’ve yelled “Stop the car I’m going to have a coronary if I don’t get this shot!” to your friend or significant other
    • you comment on the lighting in a movie and notice when they use a graduated filter on the sky to make daytime into night and your partner rolls his/her eyes at you
    • you have at least 8 photography apps on your smartphone

    If you nodded your head in agreement and related to any of the above, you too may have . . .

    Photography Compulsion Syndrome!

    But don’t despair, there is help available!

    So keep reading, and please share your photography compulsion stories in the comments below. Only by forming our own support group and sharing can we find the help we need to conquer this crippling problem.

    The other way to look at this is by using the following phrase: “You know you’re a photographer when . . .”. I know you may not consider yourself a “photographer” but you do not need to be a professional to have this distinction.

    It’s in the blood. You can’t help but live, breathe and sleep photography.

    It’s about passion. It’s about what makes your heart beat a little bit faster.

    It’s about being excited when you get that shot you’ve always wanted.

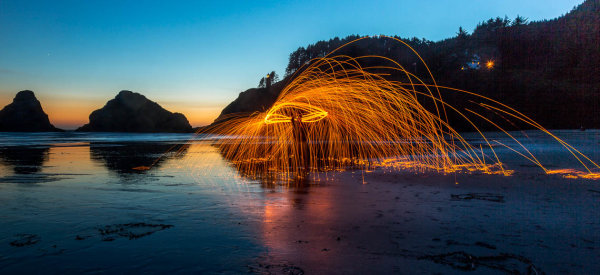
    Steel wool or fire spinning, something I've always wanted to do and finally got to try it.

    Steel wool or fire spinning, something I’ve always wanted to do and finally got to try it.

    So if you feel all those things about photography, you ARE a photographer. Don’t listen to what anyone else says, or labels set out my society or other people. They’re just that, labels. Being a photographer is in the blood, and the more you do it, the more passionate you feel about it. I often feel privileged because I “see” the world differently than others. Honour that in yourself and just embrace it.

    The Stories behind the Syndrome

    Okay so truth be told all of those scenarios are real and actually happened to me. This is how they went down and any resulting images.

    #1 Chasing the elusive sunset

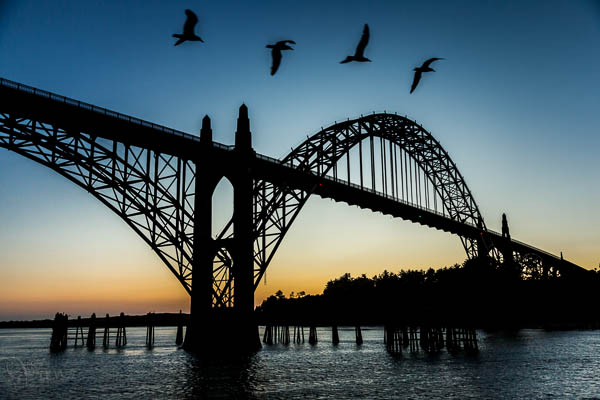
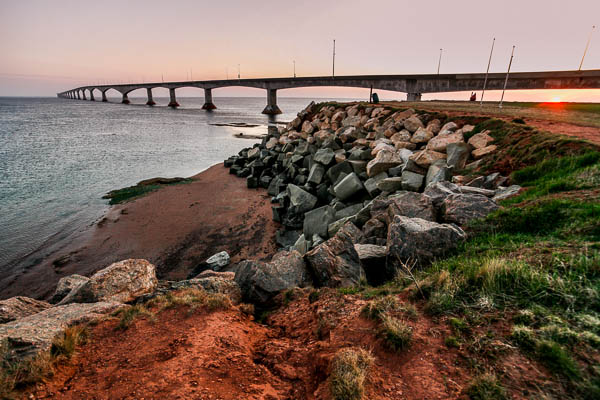
    While traveling with a friend (who is also a photographer) on Prince Edward Island in Canada, we spent the day getting great images and had planned on arriving at Confederation Bridge to photograph it at sunset. The original plan had us arriving much earlier, having dinner and then scouting a location to get the best spot for the sunset. Well, that SO didn’t happen because we had stopped practically every 3 minutes all day, and we ended up literally racing just to get there. We really did get pulled over by the police for speeding (which I do NOT advocate by the way!), pleaded our sad story, and funny enough he believed us and actually escorted us right to the bridge.  We got off with a warning and we promised not to do it again. The image I ultimately got is below. Notice the location of the sun on the horizon. If we had arrived 10 minutes later we’d have missed it completely.

    photo-compulsion-dps-01

    The red earth of PEI is what I wanted to capture along with the 12.9km (8 mile) bridge at sunset.

    #2 Missed meals and lost sleep

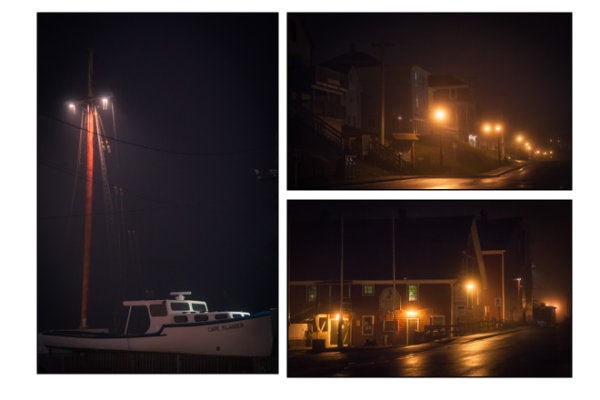
    On the same trip as above a bunch of us had gone to Peggy’s Cove to see the famous lighthouse, then on to Lunenburg, NS.  It has started to rain so we went in for dinner right by the water. I quickly ate my dinner and skipped dessert and coffee to go out and shoot the streets in the rain and mist. The images I got aren’t among my favourites ever, but I think they are a bit haunting, and ghostly feeling. I would rather miss an hour of sleep, or a meal once in a while, rather than ever having to say “I wonder if”. Take the images, go the extra mile, leave no regrets behind.

    photo-compulsion-dps-02

    #3 The frustration of regular travel tours

    In 2011 I took a 2 week tour of Turkey. The price was so good I couldn’t pass it up. I knew going in that it wasn’t a photography tour and I anticipated being frustrated some of the time, but I had no idea how much. Practically every day by 8am we were on a bus for our next destination, only stopping at gas stations along the way. We visited most of the locations at midday, amongst the biggest crowds and worst lighting of the day, and were back at hotel for the night by 6pm.

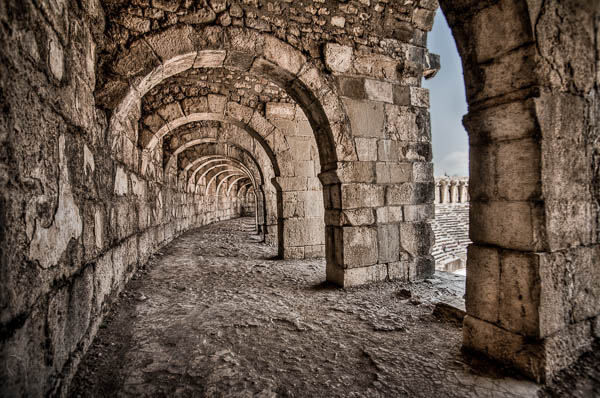
    But to top it all off, we usually had very little time at the locations to wander around on our own. One such location was at the Roman theatre in Aspendos, one of the most well preserved in the world. After talking for 10 minutes outside the gate, we were taken inside where our guide talked for another 15 minutes. Finally we were set loose for a grand total of 15 minutes to explore this gigantic structure, I pleaded for more time! Of course I raced to the top to get an overall view, and literally ran around like a mad woman. I came back to the bus sweating, out of breath, and wishing I had another hour there later in the day. This is my favourite image of the theatre. I will go back one day I vowed!

    photo-compulsion-dps-03

    The solution of course to this problem is to join photography oriented travel tours where priority is put on being on location for the best light of the day. Where you’re given plenty of time on your own to explore and photograph and the schedule is flexible if the group votes for more time. I lead several such photography travel tours and are working on more (Nicaragua, Mexico and Africa to name a couple possibilities), as do many other DPS writers. Check out your options. See more of my Turkey images here.

    #4 Image loss to do hardware failure or stupidity (mine)

    After my Turkey tour my husband flew over to meet me in Spain for a week with friends in Barcelona. We also drove to France for a few days, and through a unique little country called Andorra and a teeny tiny town called Os de Civis in Catalonia. My friend had photographed it before and her photos made me want to go there, so she took us. It was spectacular, unfortunately I have NO images to show for it.

    Upon returning home I had problems downloading and kept inserting the card back into the reader, even after getting the same error message 4 times. Eventually the card failed and all the images were gone and the card unreadable. Even data recovery couldn’t get them back. I literally still want to cry when I think about the 1000+ images I lost from that trip, it was heart breaking but preventable.

    LESSON – don’t do what I did! If you get an error message, listen to it! 

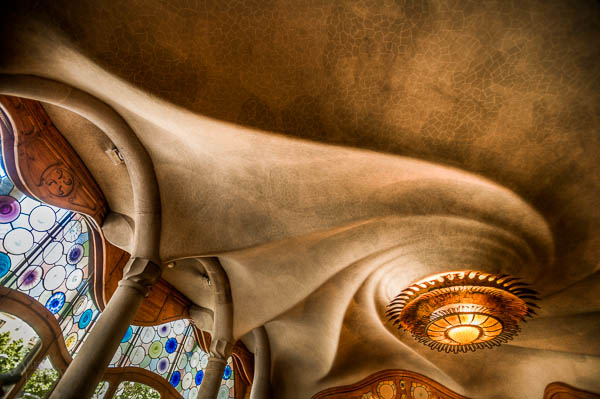
    So I can’t show you any fabulous photos of Os de Civis, but here’s one from Barcelona that I took on an earlier card. I lost about 1/2 my images from Spain and France on a 16gb card. One advantage of smaller cards is that if you lose them, or they crash, you lose fewer images!

    Guadi house in Barcelona

    Guadi house, Casa Batlló in Barcelona

    #5 “Stop the car I’m going to have a coronary”

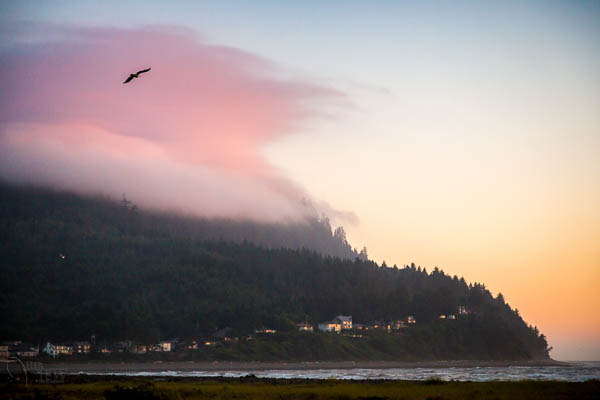
    I’m obsessed with light and when I see good light I want to leap from moving vehicles to capture it. On our recent trip to the Oregon coast I wanted to photograph sunset on Cannon Beach and once again we were chasing the light. There was a magical cloud hovering over a hill by the beach, tinted in pink and golden light from the setting sun. I knew it was a fleeting moment and we were blocks from the beach and anywhere to park. I literally yelled to my husband “stop the car I’m getting out now”.

    I didn’t get the shot I really wanted and was disappointed that I missed the sunset on the beach. But the beach was full of people and chairs, it looked like a wedding, and I didn’t have the right location. So I got out and took a few shots and got back in the car dejected. This is the pink cloud, but it was more more vibrant 2 minutes earlier. I am my own worst critic, I’m sure you can relate. How good a time I have on a trip is directly related to the images I come home with – you?

    photo-compulsion-dps-05

    So what do we do about this Photography Compulsion Syndrome?

    Nothing! As far as I can tell it’s incurable. But it IS treatable by doing the following:

    • carrying your camera with you as often as possible so you never miss a shot, at the very least have your phone in your pocket always
    • photograph daily, the only treatment is frequent indulgence
    • look at other people’s photography, get inspired
    • share your compulsion with a friend, join a photowalk, camera club or take a workshop
    • get away from your every day scenery as often as possible, even if it just means taking a drive in the country, or visiting a neighbourhood in your own city you’ve never been to
    • share your images and stories with others with PCS, it will help relieve the anxiety

    All in a little fun

    I hope you realize this is all completely made up. There is no such syndrome, although it feels quite real sometimes. Are you as compulsive and compelled to take photographs as I am? Or am I completely off my rocker?

    I’m just having a little fun at my own expense, and hopefully you can join in with me and share your stories. Tell me about the one(s) that got away. What image did you miss that broke your heart? Or better yet, show me the ones you’re proud of that DID work out and you went out of the way to get.

    Keep on shooting!   Cheers

    Darlene-1-250x130

    Post originally from: Digital Photography Tips.

    Check out our more Photography Tips at Photography Tips for Beginners, Portrait Photography Tips and Wedding Photography Tips.

    Do You have Photography Compulsion Syndrome?


    Digital Photography School
  • Negative Space: Weekly Photography Challenge

    This week we explored the idea of Negative Space in composing images so now it is time to put that into practice with our weekly photographic challenge.

    NewImage

    Your challenge is to take and share an image that uses Negative Space well.

    NewImage

    You can do this by taking a photo of any genre, portraits, macro, street or landscape… anything you like.

    NewImage

    If you’d like another tutorial on Negative Space check this one out too.

    NewImage

    Once you’ve taken your ’2nd Point of Interest’ photos upload your best ones to your favourite photo sharing site either share a link to them even better – embed them in the comments using the our new tool to do so.

    If you tag your photos on Flickr, Instagram, Twitter or other sites with Tagging tag them as #DPSNEGATIVE to help others find them. Linking back to this page might also help others know what you’re doing so that they can share in the fun.

    NewImage

    Also – don’t forget to check out some of the great shots posted in last weeks Secondary Point of Interest challenge – there were some great shots submitted.

    NewImage

    Post originally from: Digital Photography Tips.

    Check out our more Photography Tips at Photography Tips for Beginners, Portrait Photography Tips and Wedding Photography Tips.

    Negative Space: Weekly Photography Challenge


    Digital Photography School

  • Win An Amazing “Canon PowerShot SX50 HS” & Other Photo Goodies

    Take part in the rocking giveaway by our friends at MacPhun. You have a chance to win Canon PowerShot SX50 HS. There are also some sweet prizes for runner-ups, like Casetagrams and Bluelounge postal bags. The nicest thing about it is that there are no restrictions, except for the one – love Photography like we do. The Giveaway finishes in Continue Reading

    The post Win An Amazing “Canon PowerShot SX50 HS” & Other Photo Goodies appeared first on Photodoto.


    Photodoto

  • London and Baltimore: Going Out With a Bang

    The good news: I just landed what will almost certainly turn out to be the coolest gig of my career. It's a dream project, and I could not be happier nor more excited about it.

    The bad news: It will be very time-intensive, so it will have an impact on my life going forward. Which my upcoming seminars in London and Baltimore/Washington are probably gonna be my last. If not ever, then certainly for a long time.

    So let's sweeten the pot a little bit for the last go-round…

    Read more »
    Strobist