Category: Photography

  • When to Stop Being a Photographer and Start Being a Photo Editor

    At some point, every photo shoot comes to an end.  Every portrait session, cookbook shoot, family vacation, ad campaign, college graduation, wedding, and photo essay eventually gets to the point when it’s time to put the camera down and see what you’ve got.  Congratulations–  You’ve just become a photo editor.  To be clear, I’m not talking about correction or manipulation in Lightroom, Photoshop or any of the other image editing software packages available.  I’m talking about the task of sitting down with the 367 images that you’ve just downloaded and being able to look at your own work with an objective, critical eye, and whittle them down to your best work.  Truthfully, this is one of those benchmark qualities that defines the term “professional photographer.”  Some people define the term based on the gear, while others base it on whether you are paid for your photography (and if so, how much).  For me, I define it in large part based on the photographer’s ability to at least temporarily sever their emotional tie to the work and realize that they shouldn’t be uploading ten images of the same sunset to their Flickr or 500px accounts simply because the angle is ever so slightly different in each.

    I first learned this lesson several years ago when I started out as a second shooter for a high-end wedding photographer.  I showed up at the studio one Monday morning after a big weekend wedding, all excited to help with The Culling.  The preliminary critique the night of the wedding had been very positive, so I was feeling good.  Until we started going through the images.  “You’re deleting THAT one?  Seriously?  Wait a minute– what was wrong with THAT one!?!”  By the time we were done I was seriously questioning my new career choice.  My boss tried explaining that when the bride started going through the proofs she was going to get overwhelmed (and not in the good way) by having so many similar photos, that picking her favorites and placing an order would be an insurmountable task.  There wasn’t enough that was different about them.

    As much as I didn’t want to admit it, he was right.  I hate it when that happens.

    The bottom line was that the bride really didn’t need five 3/4 portraits with varying degrees of tilt when two– MAYBE three– would more than suffice.  The point of the lesson was learning to edit yourself by thinking like a client.  It’s a lesson I’ve tried carrying with me on every assignment since.  Think about it like this– have you ever had to sit through a three-hour marathon session of being forced to look at each and every photo your best friend took on their summer vacation?  Of course you have.  We’ve all been there.  How much better would it have been if they had edited themselves down to their twenty best?  See where I’m going with this?

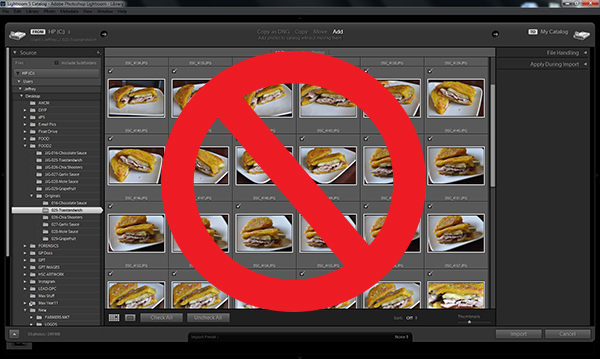
    This was a Lightroom import from last week while I was shooting the last four dishes of the thirty I’d been commissioned to shoot for an upcoming cookbook.  I seriously overshot this one.  The screen capture only shows 24 of the 39 frames I shot of a sandwich.  Thirty-nine frames of a sandwich!  Not only do I not want the client to have to go through that many images to select the one that will go in the book, I don’t want them knowing that it took me 39 frames to take a picture of a sandwich!  Knowing how to edit yourself is crucial.  Unfortunately, not enough photographers learn how to do it well.
    Editing-001-copy

    The rule of thumb here is not to only show your best.  It’s to show the best of your best.  If I’ve taken 100 photos, chances are that maybe 50 go in the “selects” folder.  Of those 50, maybe 30 are really good.  Keep cutting your numbers in half as you move from “really good” to “THAT’S what I’m talking about!”  If I’m your client, I’ve already spent considerable time and money in hiring you.  I know you’re good.  Show me just how good you are by not wasting my time and showing me your best.  As soon as you can take your own emotions out of the equation you’ll be thinking like a photo editor and will be much better prepared to present only your best work, whether the client is a bride, a band, or a book publisher.  (As a side note, the same advice applies to entering photography competitions.  Think like the judge, not the photographer).

    I see some you nodding your heads, but some of you are still skeptical.  “I got up at 3:00 in the morning to get to the location and set up just in time to see the sun come up over the crest of the mountain…”  Stop right there.  Rule #1 of critique with my photography students is “No talking once your photo is up on the screen.  The old cliche that every picture tells a story is true, but you need to let the picture tell it.  I don’t care about how difficult it was to get the shot or that you were happy/depressed/angry/indifferent when you took it.  While the result always matters,  you can’t necessarily say the same for the back story.  Save the stories for when you write your book some day.  For now, the work needs to speak for itself.

    Learning to edit yourself pays dividends across the board.  If you are a professional photographer, your clients will appreciate both your quality and professionalism.  Professionals, hobbyists, and enthusiasts can not only get better at selecting the cream of the crop, but can also eventually start mentally editing themselves before they even push a shutter button.  Digital has made it easier than ever to walk away from a shoot with several hundred images.  That’s great, I suppose, but why create so much extra work for yourself?  Learn to think like a photo editor and all that extra work goes away.


    Post originally from: Digital Photography Tips.

    Check out our more Photography Tips at Photography Tips for Beginners, Portrait Photography Tips and Wedding Photography Tips.

    When to Stop Being a Photographer and Start Being a Photo Editor

    Digital Photography School

  • Rebellious Portrait Photography That Goes Against the Grain Like You Wouldn’t Believe

    The world’s major fashion magazines are plump with advertising images of the size-zero models, with their flawless complexions and perfect bone structures. Much to the everyday girl’s dread, these images can also be found pretty much everywhere, especially in portrait photography. However, imagine for a moment if these models weren’t perfect? Would the images have a greater impact? Would people Continue Reading

    The post Rebellious Portrait Photography That Goes Against the Grain Like You Wouldn’t Believe appeared first on Photodoto.


    Photodoto

  • 100 Clever Digital Photography Ideas [Book Review]

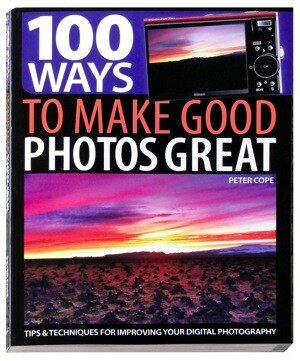
    100 Ways to Make Good Photos GreatSometimes you need more than a guide to specifics in using a digital camera for ambitious image making. It is possible to overload your brain with info on lenses, lighting, camera controls and the rest of the tech jungle.
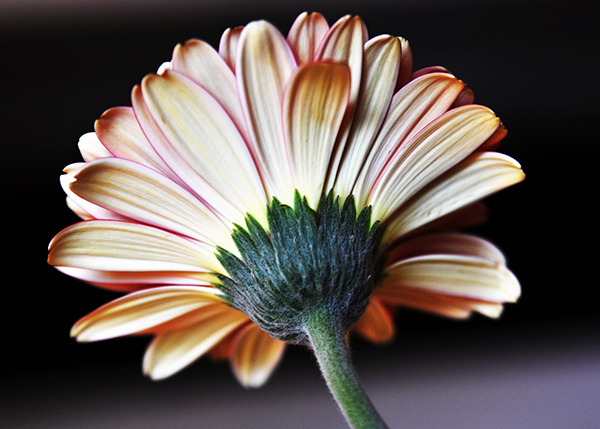
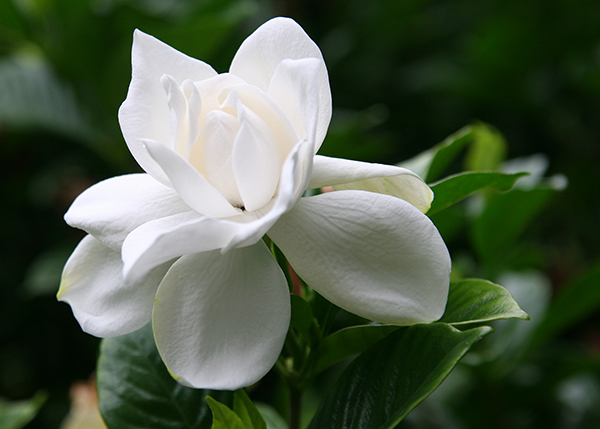
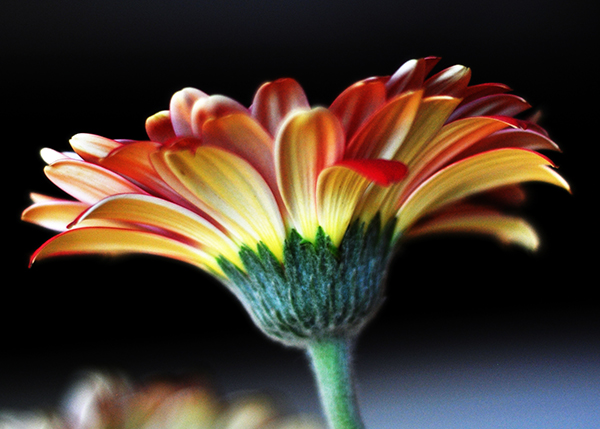
    Sometimes it’s better to just look behind the curtain and pick up some tips on how to make good photos great. As the book says!

    Author Peter Cope makes the point early in the book that during the 2012 London Olympics ‘exciting, emotional and iconic images flashed around the world …’

    He observes that ‘What made these images unique and different from those that press photographers’ captured was that most came from amateur or casual photographers … grabbed shots ‘taken on a purely opportunist basis.’

    Little thought went in to these ‘point and shoot’ pictures, much as they may have been enjoyed. But sometimes we need more: photos rather than snaps. Cope’s book sets out to help you not only shoot technically excellent photos but to create images that have something to say. The layout of the book is ideal for the purpose: for one thing, the size is enough to accommodate large pictures along with concise blocks of text that explain the issues.

    For example, the page on red eye from flash suggests ways to avoid the dreaded issue: increase the ISO; use an external flash unit; and — last resort! — remove it in post.

    Similarly, with the chapter on how to conceive great landscape photos which, after people, are possibly the most photographed subjects there are!

    Cope’s tips go this way: great landscape photos should be in sharp focus from the nearest point to the most distant; follow the rules of composition closely, including the rule of thirds; use lead in lines to draw peoples’ attention to the landscape’s main subject; shoot at different times of day; watch the effect of weather on the scene; use polarising or graduated filters.

    You won’t find much specific techy stuff in the book, except for a few pages on such matters as lens choice, exploiting your camera’s aperture controls, mastering ISO settings, astro photography, macro photography and then there’s a longish section on software manipulation. Most of the book is encouraging, handholding help.

    The techy section also includes includes optimum ways in successfully sharpening an image, using ‘auto fixes’ such as auto enhance, auto tone and auto levels. Some will shy away from such easy fixes but, in Cope’s view, if the ‘adjustment works and delivers a great image’ — use it.

    Within its pages are chapters on a whole variety of people photography, along with subtle suggestions on how to deal with human subjects. Like: shoot plenty of shots of children … they move fast! And, when shooting people at work, shoot fast! In straight portrait photography, establishing eye contact can establish a strong connection or sometimes be unsettling.

    There are also whole pages devoted to ideas like ‘transplanting’ a whole sky, creating scenes that might otherwise not exist … if it were not for the magic of our old friend Photoshop!

    An excellent publication that’s highly readable just as a book or as a complete reference guide.
    Oh and it would make an excellent ebook that you could take with you on a shoot!

    Author: P Cope.
    Publisher: David & Charles.
    Distributor: Capricorn Link.
    Length: 144 pages.
    Size: 25x19x11mm.
    ISBN 1 4463 0300 9.
    Price: Get a price on 100 Ways to Make Good Photos Great

    Post originally from: Digital Photography Tips.

    Check out our more Photography Tips at Photography Tips for Beginners, Portrait Photography Tips and Wedding Photography Tips.

    100 Clever Digital Photography Ideas [Book Review]


    Digital Photography School

  • How to Photograph Flowers

    I know what you’re thinking.  “Flowers?  Really?  Didn’t he just write about shooting football?”  As a matter of fact, I did.  I shoot lots of different things– a statement which frustrates the hell out of business mentors and advisers who like to talk about branding, creating your niche, and attracting the right kind of client.  And they’re right.  After all, clients want to know that you do precisely what they need you to do seven days a week and twice on Sunday.  Makes sense.  But I was a lawyer for fourteen years.  Photography was my hobby for a long time before I ever even thought of trading in my briefcase for a camera bag ten years ago.  So, yes.  We’re going to talk about photographing flowers– in many ways the ideal subject.  Flowers are pretty, but they don’t require a hair and makeup team on set.  They are neither moody nor volatile, and never cop an attitude.  They don’t require a specific brand of expensive water secretly bottled straight from a hidden stream in Madagascar, and they are never late for a shoot.  Never.

    But seriously.  I love shooting flowers.  My wife is actually convinced that I buy them for myself and not her anymore.  She’s (mostly) wrong, but I do take advantage of them while I can.  As with so much of what we do in photography, there are at least two ways of going about this–  ridiculously expensive or affordable.   Guess which way we’re going.

    dPS Flowers-001

    IT’S NOT AS EASY AT IT LOOKS

    “How can it not be as easy as it looks?” you’re asking.  They just stand there perfectly still.  Get them near the light, push the button, we’re done, right?  Not so fast.  I was at a seminar one time where  Joe McNally said,  “If you want to take more interesting pictures, you need to stand in front of more interesting stuff.”  While I would never (EVER) presume to improve upon his wisdom, my own personal addendum to this guideline is, “But if you’re not going to stand in front of more interesting stuff, at least pick a more interesting angle.”  Six of us can stand around in a circle over the same flower, shoot straight down at it, and end up with six almost identical photos.  Boring, right?  Of course it is.  If you are going to stand an average distance from something, shooting it at an average angle with average camera settings, you are going to get average photos.  Personally, I’d rather not settle for average.  So get down low.  Shoot across it.  Shoot under it.  I actually really like photographing flowers from behind.  It’s not a mortal sin if you take that straight-down-the-middle shot.  No long arm of a photography god is going to descend from the heavens and snatch your camera away.  But promise me that once you take that straight-down-the-middle shot and get it out of your system, you’ll get down on your knees, or into a chair, or on your back, or anywhere else you need to be in order to achieve that interesting angle.

    dPS Flowers-005

    THE GEAR

    You’ll see some macro photographers really go all out on these images.   While a really good macro lens or a tripod with an inverted center column can help create some truly stunning images, they aren’t always necessary.  Regular zooms can serve you just as well.  Every photo in this article was taken hand-held with one of three lenses: Nikon 24-70mm f/2.8, Nikon 18-70mm f/3.5-4.5 (GASP! A kit lens!), or my iPhone.  Never underestimate the value of a tripod for this kind of work.  I don’t often use one because I tend to have pretty steady hands, but having a tripod on hand is never a bad thing.  Nature tends to provide some pretty great backgrounds, but isolating a single flower on a black or white background can often make for some very compelling images.  A yard or two of black velvet from a fabric store or a poster-size piece of white foam core from an office supply store are simple, effective, and very budget-friendly options for getting that high-contrast look, indoors or out.  You could waste a lot of time creating these backgrounds in Photoshop, by why would you when the in-camera solution is so much easier?  The last piece of gear you’ll find useful is very high-tech.  A spray bottle with water will let you fake that just-rained-on look.  Just make sure it’s set to a fine mist, rather than a full spray.

    dPS Flowers-002

    START SHOOTING

    As with any photo, finding the right angle only gets you halfway there.  Don’t forget everything you know about composition.  The usual considerations– Rule of Thirds, negative space, balance, etc.– all still come into play.  One of the advantages of a regular zoom lens over a macro is that by filling the frame with your flower subject, it becomes that much easier to blur out your background.  Start by focusing on one particular flower or a small cluster of flowers in the arrangement.  As you lock focus you will see the depth-of-field effect in your viewfinder.  Make sure that you don’t overdo it on the DOF.  Depending on your composition and camera settings, you could easily blur out your foreground.  Start with your widest aperture. but make sure you try several different combinations of aperture and shutter speed.  Your model is not going to get bored and give you a hard time.  Take advantage of this chance to achieve the look you want.  Remember that sometimes the whole is not always as interesting as its individual parts.  Focus in on details and textures.  Make it interesting.

    dPS Flowers-003

    HOW AND WHEN TO LIGHT IT — INDOORS AND OUT

    Ultimately, diffused natural light is always at the top of my wish list.  Direct sunlight is going to blow out the subtleties and textures you’re trying so hard to capture.  As with all indoor lighting, time is less of an obstacle than when you shoot outside.  Outdoor light doesn’t care if you are photographing flowers, portraits, or a football game.  Light is light and its properties don’t change.  Just like we get the best portrait and landscape light right after the sun comes up and just before it goes down, the same goes for flowers.  We really want that soft, beautiful light to enhance these images, not overpower them.  For that, nothing beats an overcast or cloudy day– Mother Nature’s very own soft box.  For inside, use the biggest window you can find.  The side-lighting it provides will add more dimension than flat lighting from above the flower.  Whatever you do, experiment with your light.  Pay attention to where it falls and the shadows it creates.  You can also be sure that patience and time spent here will dramatically benefit your portrait work as well.

    DCF 1.0

    TAMING THE WIND

    As much as I try to never take my camera out of Manual mode, an argument can be made that exposure modes are there for a reason.  This would be one of those.  When shooting outside, even the slightest breeze can give you fits.  Try switching you camera into shutter priority mode and dial in a shutter speed of 1/250 or faster.  The fast shutter speed should negate the effects of the breeze.  I’m not a huge fan of exposure modes and relinquishing control of my settings (one reason why we’re not talking about your camera’s macro setting in this article), but this is a simple and effective way to remove one of the obstacles in your path.

    dPS Flowers-007

    POST PROCESSING

    My philosophy on editing these images is the same as my approach to portraits.  If you read my post on Basic Skin Smoothing in Photoshop, you know that when people look at my photos I want them to say, “That’s a beautiful ______,” not “Wow, nice editing.”  A slight levels adjustment and contrast bump should really be all they need.  Anything much stronger than that is going to come dangerously close to wiping out the texture and any of the natural feel to the overall image.

    dPS Flowers-004

    Now go buy some flowers and let me know how it goes.

    Post originally from: Digital Photography Tips.

    Check out our more Photography Tips at Photography Tips for Beginners, Portrait Photography Tips and Wedding Photography Tips.

    How to Photograph Flowers


    Digital Photography School

  • The Magic of Natural Light: Twilight

    The Magic of Natural Light: Twilight photo

    One of my favourite times for taking photos is at twilight. Especially during the spring and summer, the seasons when the light is at its most magical at this time of evening.

    I’ve always liked the idea that great photography happens on the edges. Twilight, the transition between night and day, is an edge. While the low light levels can be technically challenging, the reward in terms of quality of light are well worth it. I think of it as the ‘magic hour’. You may also see it referred to as the blue hour, a reference to the colour of the ambient light as night falls.

    What is twilight?

    Twilight is the time that marks the transition between day and night. It starts after the sun has set and continues until night completely falls. The quality of light during twilight can be truly beautiful, especially after a bright sunny day. The duration depends on your distance from the equator. In the tropics night falls very fast and twilight is short. Go far enough north (or south) in the summer and it can last for over an hour.

    Landscape photography during twilight

    One of the more obvious subjects that benefits from the quality of light at twilight is the landscape. Now, I’m sure most photographers are aware that one of the best times to photograph the landscape is during the golden hour – the hour or so before the sun sets. The sun is low in the sky and the warm, raking light it casts can bring the best out of a beautiful location.

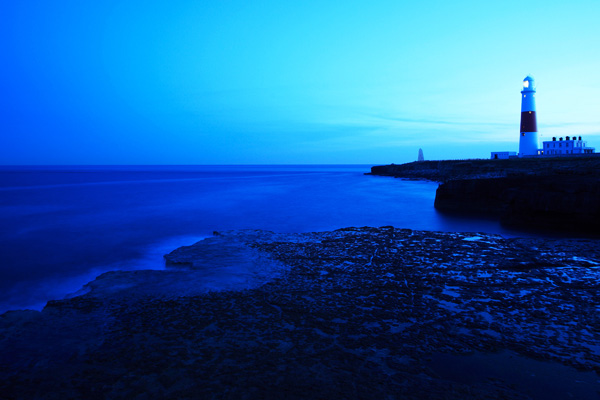
    Whenever I’m on location and see other photographers, I’m always a little surprised how early most of them leave. For the few that wait until the sun has set the reward is often an intensely beautiful, soft golden glow that gradually fades as night falls. This type of light is especially beautiful if you are by the sea or a lake as the water reflects the light. The opening photo is a good example of that.

    The Magic of Natural Light: Twilight photo

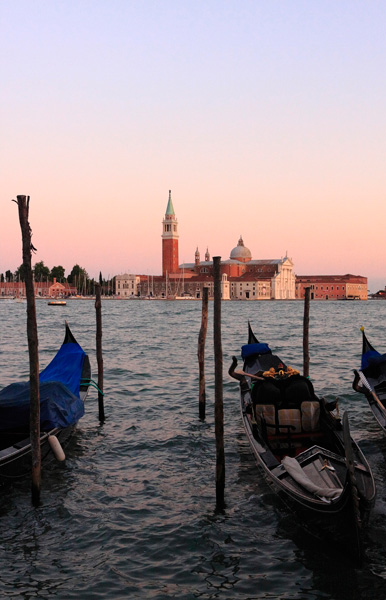
    There are two approaches to taking landscape photos in low light. One is to use a high ISO setting and shoot with the camera hand-held. I took the photo above at 1600 ISO shortly after sunset.

    The Magic of Natural Light: Twilight photo

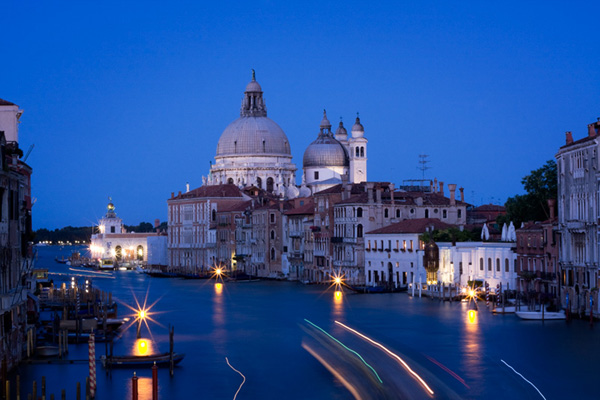
    To take full advantage of the beautiful light during twilight though you will need to use low ISOs (better image quality) and consequently slow shutter speeds. You’ll need a tripod to support the camera and a cable release or remote control to fire the camera without touching it (the self-timer will do in a pinch). The advantage of this approach is that you can use the slow shutter speeds to create blur. This works particularly well when there is water in the scene, as in the photo above.

    Portrait photography

    The Magic of Natural Light: Twilight photo

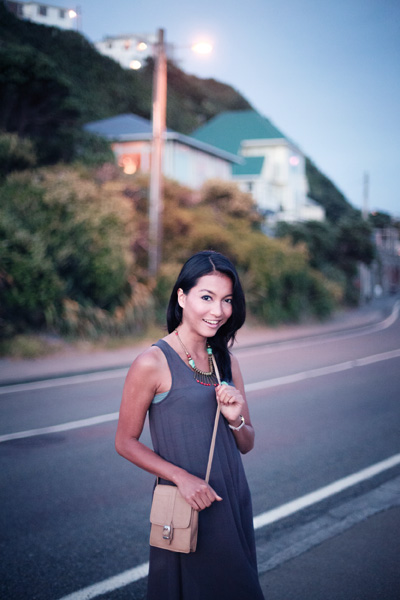
    I also like twilight for portrait photography. It’s not without challenges, but if you can overcome those you’ll be rewarded with some beautiful portraits taken in unusual conditions where many photographers wouldn’t bother taking photos.

    The best way to take advantage of the twilight for portraits is to arrive with your model before sunset to take advantage of the late afternoon light. Explain to your model that the light is best at this time of day, and they will be rewarded with some beautiful images. Then, just as in landscape photography, you can keep shooting after the sun has set until the light fades or the magic disappears. Unlike landscape photography though it’s not practical to use a tripod, so you will need to set a high ISO and use the wide aperture settings of your lenses.

    When it comes to lenses, primes are best because the wide maximum apertures let you shoot for longer. For example, if you have a kit lens, the maximum aperture at the telephoto end (focal length usually around 55mm) is f5.6. If you have a 50mm prime lens, the maximum aperture will be at least f1.8. That’s a three stop difference.

    You will also need to set a high ISO. It’s a good idea to test out your camera beforehand using different high ISO settings to see how high you’re willing to go before the deterioration in image quality is more than you’re happy with. On my EOS 5D Mark II, for example, I’m quite happy to shoot at 3200 and sometimes even 6400, especially if I can expose to the right to maximise image quality. If you have a newer camera, especially full-frame, you might even be able to go higher. If your camera is older your limit will probably be lower. It’s a personal decision that only you can make.

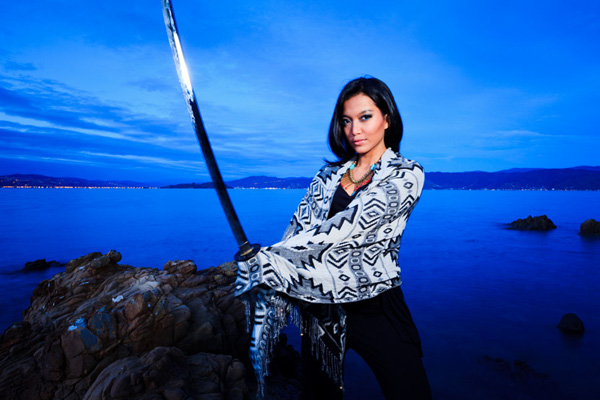
    The photo above was taken using ISO 6400 and an aperture of f1.4. It was nearly dark, much darker than it looks in the image. The lights behind the model are a good indication of this.

    The Magic of Natural Light: Twilight photo

    Another approach is to use a tripod to support the camera and a portable flash to illuminate your model. If your model keeps still during the long exposure, there will be very little blur. This portrait was taken with a shutter speed of two seconds. This technique allows you to keep shooting during twilight when there is very little light.

    Mastering Photography

    The Magic of Natural Light: Twilight photo

    My latest ebook, Mastering Photography: A Beginner’s Guide to Using Digital Cameras introduces you to digital photography and helps you make the most out of your digital cameras. It covers concepts such as lighting and composition as well as the camera settings you need to master to take photos like the ones in this article.

    Post originally from: Digital Photography Tips.

    Check out our more Photography Tips at Photography Tips for Beginners, Portrait Photography Tips and Wedding Photography Tips.

    The Magic of Natural Light: Twilight


    Digital Photography School

  • A Travel Tripod that can Also Act as a Light Stand

    by Sarah Hipwell.

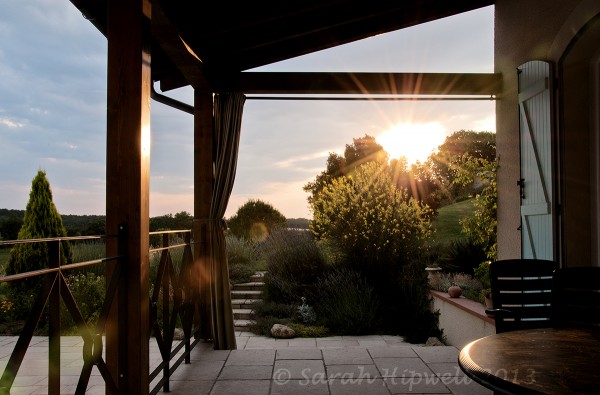
    The above shot at 1/20sec at f22

    The above shot at 1/20sec at f22

    I brought two cameras on a recent vacation to France. My trusty DSLR and my new fab Sony RX100.

    I don’t normally bring a tripod on holidays but this time I wanted to get some decent video footage. I also wanted to experiment with a variety of (still) exposures for HDR work and to get a nice sunset (low light shot).

    With such an array of tripods on offer, how do you decide which one to buy?

    I narrowed my search to 5 key features:

    1. Low cost
    2. Size – folded & extended
    3. Portability
    4. Lightweight
    5. Sturdy enough to hold a DSLR with a 18-200mm lens

    The cost of a tripod varies enormously and with so many brands, it can take a bit of time to find which model suits your requirements. Cost was a main issue for me for two reasons:

    1. I had to pack my tripod in one of the luggage bags that was going into the plane’s hold! See NOTE & TIP 1 below.
    2. As I wasn’t taking the tripod in my carry-on bag, I didn’t need to buy an expensive one and run the risk of it getting lost or damaged in transit.

    This ruled out purchasing a carbon fibre model as they are quite costly and it wasn’t justifiable for my means (I don’t travel extensively). So I decided on an aluminium tripod.

    The more compact the tripod the better when travelling. But I need the height when it is extended (I’m 5’ 9”).

    Portability is a prerequisite for any travel tripod.

    Last but not least, the tripod had to be able to hold my D300 plus a 18-200mm lens, which both have a combined weight of 1.463kg or 3.23lbs. See TIP 2 below.

    After a considerable research online between brands and so forth, I was beginning to think my criteria was a tall order. Then I hit jackpot. I found a Manfrotto Compact MKC3-H01 on offer for 49 euros! This particular tripod isn’t their current model but it seemed to tick all my boxes. Plus, I have a Manfrotto 055XB so I’m already familiar with the brand.

    Tripod when closed measures 18”(46cm) and when it is extended, can reach 64”(163cm) with centre column fully extended

    Tripod when closed measures 18”(46cm) and when it is extended, can reach 64”(163cm) with centre column fully extended

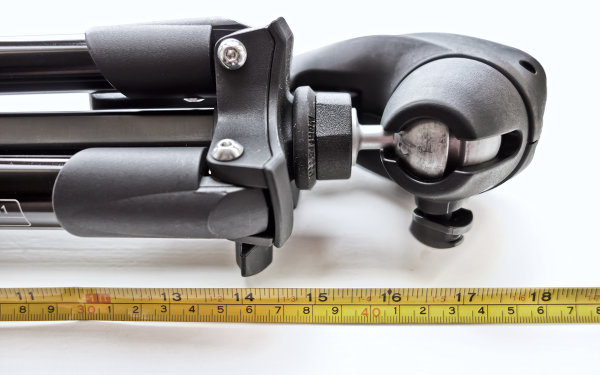
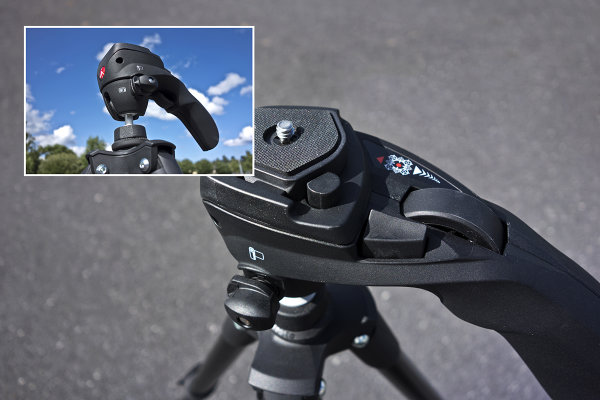
    This tripod comes with a pistol type grip head which has two settings for photo(still) and video on the side. I found it is easy to use and a pleasant change from my usual ball-head socket type. My only gripe is that when I had it in the video position and tried to pan, it was quite jerky. I just loosened the locking wheel to make it more fluid, this wasn’t perfect but it worked.

    Pistol type movie/photo head showing the locking wheel

    Pistol type movie/photo head showing the locking wheel

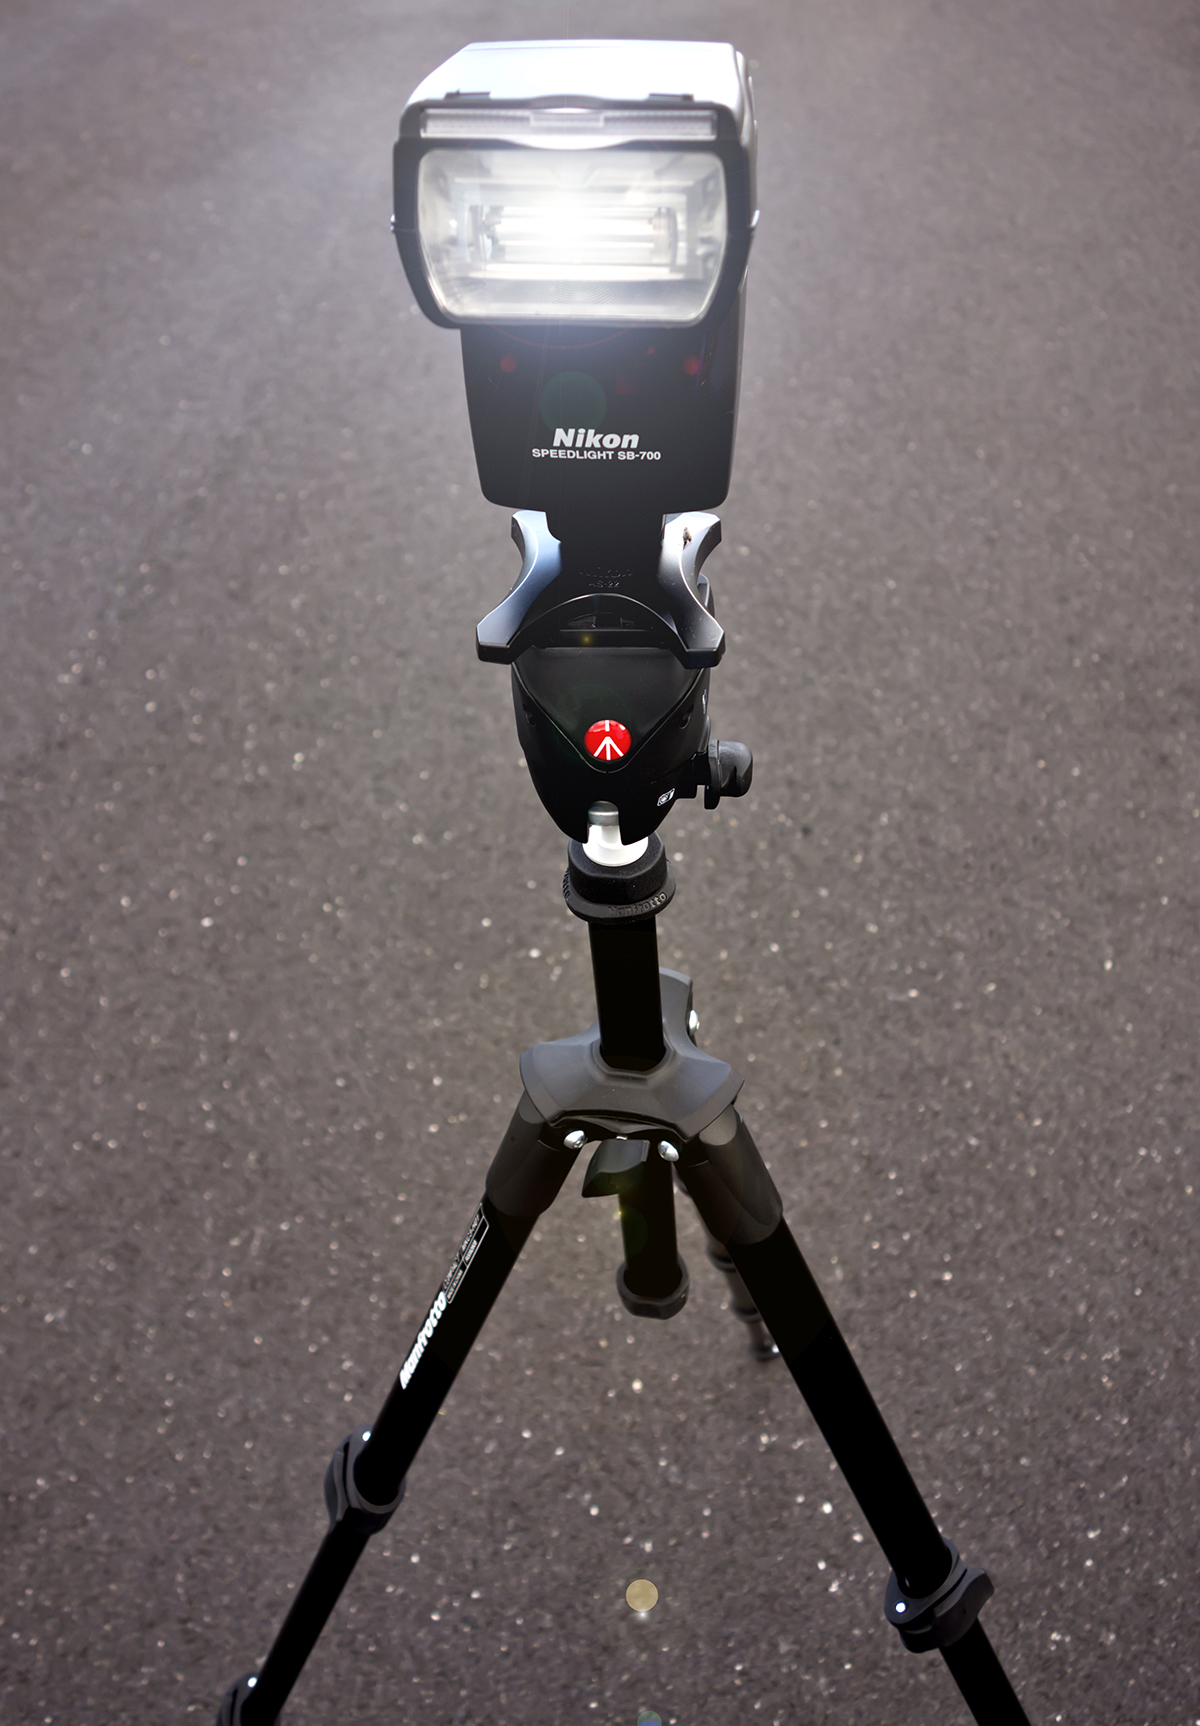
    To sum up, the cost of this tripod was only 49 euros. Therefore, it wasn’t a big deal putting it into the plane hold. When folded, it measures a mere 18” and can extend to 60”. It is very lightweight, compact and easy to set up. The actual weight of this tripod is 1.15kg. An added bonus for me is this travel tripod can be used as a light stand! I can pop on my SB700 speedlight and shoot remotely. I had a wonderful two weeks with my family, I swam, read books (oh such a treat) and took over 32gb worth of images with the support of my new neat travel tripod.

    NOTE

    Check with each airline company in each country that you are flying to and from. Last year, I flew to Bordeaux from Dublin. I had a Manfrotto 5001B Nano Black Light Stand in my carry-on bag. However, en route home from Bordeaux the custom officials would not allow me to take on board the light stand as they deemed it a lethal weapon! I was quite fortunate, that a lovely desk clerk retrieved my already checked-in bag, so that I could put in my light stand without incurring any extra charges. She’s was a star!

    TIP 1

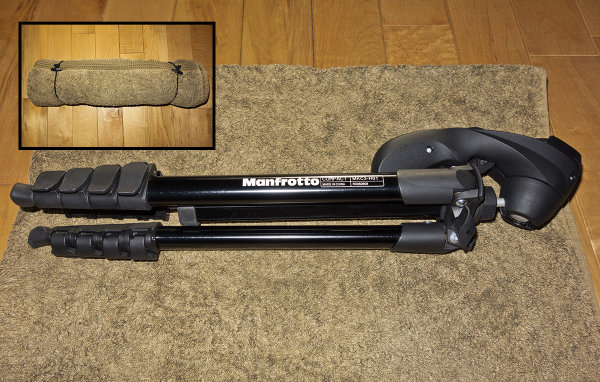
    When I was packing my travel tripod into one of the luggage bags, I thought of wrapping it in bubble wrap to protect it. I used a beach towel instead which I needed to bring with me. The towel provided adequate protection.

    Using a large or beach towel to wrap around the tripod for added protection in luggage bag

    Using a large or beach towel to wrap around the tripod for added protection in luggage bag

    TIP 2

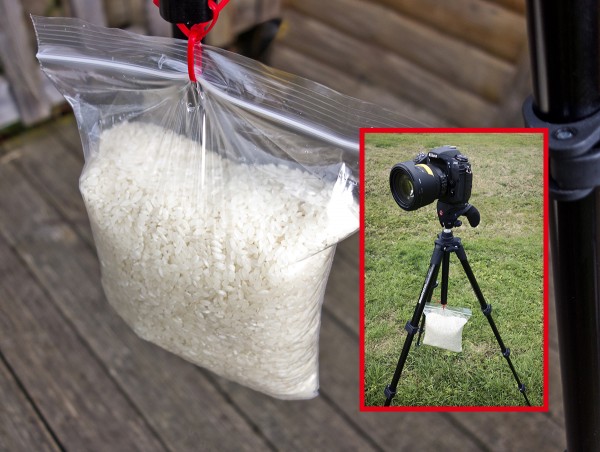
    The maximum weight that this tripod holds is 1.5kg (3.3lbs). I was thrilled when I weighed my DSLR camera plus the lens which has a combined weight of 1.463kg (3.23lbs). However, this is pushing it to the max. Fortunately, I didn’t experience any inclement weather while on holidays, i.e. wind/gusts. Otherwise, I would have been nervous using my DSLR body and lens on the tripod for fear of toppling over. For added stability in this case, I recommend adding a sandbag(s). Sandbags are not practical to bring away with you on vacation. Here’s my tip, there is a rubber end at the bottom of the centre column. Ease this off and you will see two holes. Place a cable tie through the holes to create a plastic ring. With another cable tie, secure this to a Ziploc bag filled with dried beans, rice or soup mix (Cable ties & Ziploc bags should be in your camera bag). Dried beans/rice can be purchased at the local supermarket very cheaply. See below.

    A Ziploc bag filled with 1kg of rice suspended from tripod using cable ties

    A Ziploc bag filled with 1kg of rice suspended from tripod using cable ties

    My SB700 speedlight on the Manfrotto Compact MKC3-H01

    My SB700 speedlight on the Manfrotto Compact MKC3-H01

    Check out more of Sarah’s work at her website – SarahHipwell.com.

    Post originally from: Digital Photography Tips.

    Check out our more Photography Tips at Photography Tips for Beginners, Portrait Photography Tips and Wedding Photography Tips.

    A Travel Tripod that can Also Act as a Light Stand


    Digital Photography School

  • Soft Light: Weekly Photography Challenge

    NewImageYour challenge this week is to take and share a photo on the theme of ‘Soft Light’.
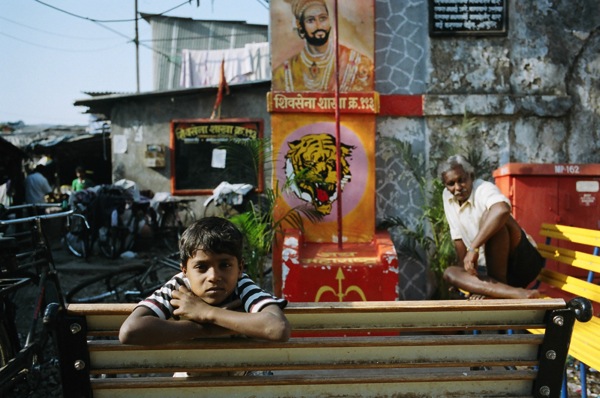
    Earlier in the week Andrew Gibson wrote a post on the topic of using Soft Light in a variety of types of photos to create a magic feel in your images.

    Using soft light is a technique that can be used in many types of photography including portraiture, landscapes, macro and much more so you can submit any type of photo – as long as it was taking in soft light.

    Note: also check out our article this week on taking natural light portraits in the shade which will also produce ‘softer’ lit portraits even on a bright day.

    Once you’ve taken your ‘Soft Light’ photos, upload your best ones to your favourite photo sharing site either share a link to them even better – embed them in the comments using the our new tool to do so.

    If you tag your photos on Flickr, Instagram, Twitter or other sites with Tagging tag them as #DPSSOFTLIGHT to help others find them. Linking back to this page might also help others know what you’re doing so that they can share in the fun.

    Also – don’t forget to check out some of the great shots posted in last weeks Negative Space challenge – there were some great shots submitted.

    Post originally from: Digital Photography Tips.

    Check out our more Photography Tips at Photography Tips for Beginners, Portrait Photography Tips and Wedding Photography Tips.

    Soft Light: Weekly Photography Challenge


    Digital Photography School

  • 103 Things I’ve Learned About Street Photography

    By Street Photographer Eric Kim

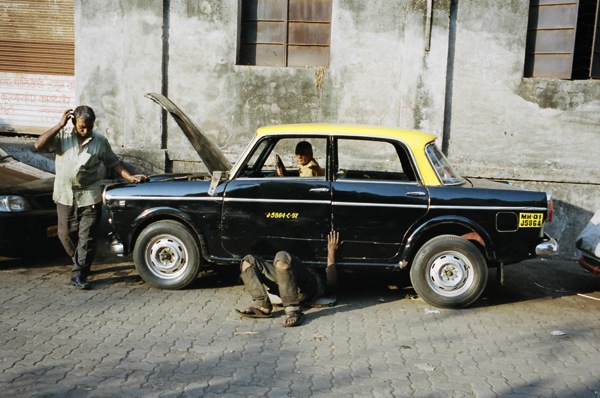
    Calcutta 2013 2

    1. A good photo asks more questions than provides answers
    2. 35mm as a focal length is generally ideal for most street photographers. 28mm is too wide (most people don’t get close enough) and 50mm is too tight.
    3. My keeper ratio : one decent shot a month, one shot I am proud of in a year.
    4. “When in doubt, click.” – Charlie Kirk
    5. When in doubt, take a step closer.
    6. You will become a better photographer by asking people what they don’t like about your shots (rather than what they like).
    7. A harsh and constructive critique is better than a pat on the back.
    8. A good photo critique needs (at least) 4 sentences online. Preferably 8 sentences or more.
    9. It isn’t the quantity of social media followers you have that matters, rather then quality of followed you have that matters.

    Calcutta 2013 1

    1. Be consistent : stick with one camera, lens, film, or post processing approach to develop your style.
    2. Great photography projects generally take at least 5-10 years.
    3. Buy books, not gear.
    4. The only way money will make you happier in photography if you invest it into experiences (travel, workshops, teachers) rather than material things (cameras, lenses, gear).
    5. The best camera bag in street photography is no camera bag.
    6. “The decisive moment” is a myth. Even Henri Cartier-Bresson took at least 5 photos of scenes he found interesting and worked the scene to get the one memorable shot.
    7. Most famous photographers are only known for their 1-3 most popular images after they die. If you accomplish the same, you have done your job as a photographer.
    8. When shooting film, it is better to over expose than underexpose (film has more details in the highlights).
    9. When shooting digital, it is better to unexpose than overexpose (digital has more details in the shadows).
    10. Street photos of people just walking by billboards is boring.
    11. To become a great street photographer you must first understand what a great street photograph is. Study the masters.

    Eric Kim Color 1

    1. When shooting street photography with a DSLR, micro 4/3rds, or a compact and you don’t want to worry about technical considerations, just use “P” mode at ISO 1600.
    2. Projects are more meaningful than single images.
    3. Creating a photo book is the ultimate expression of a photographer.
    4. Shoot as if each day were your last.
    5. One camera, one lens is bliss.
    6. Grain is beautiful, noise is ugly.
    7. My favorite films are Kodak Tri-X (for black and white) and Kodak Portra 400 (for color).
    8. Bokeh in street photography is overrated. Shoot at f8-16
    9. With film, your first 10,000 photos are your worst. With digital, it is more like your first 1,000,000 are your worst.
    10. The secret of a memorable street photograph : capturing emotion.
    11. A street photograph without emotion is dead.
    12. No amount of post processing will make a crappy photograph into a good photograph.
    13. Wait at least 6 months to a year before uploading your images to the Internet, to truly understand if is a good photograph or not.
    14. When it comes to editing, remember to “kill your babies.”
    15. Cheesy titles in street photographs don’t make them any better.

    Calcutta 2013 11

    1. Watermarks in street photographs ruin the viewing experience for your audience.
    2. Buying a more expensive camera won’t make you a better street photographer.
    3. Shooting film will teach you more discipline in street photography (and may lead you to become a better photographer).
    4. Street photography is the most challenging genre of photography out there.
    5. A great street photograph needs strong content (what’s inside the frame) and form (composition).
    6. Shoot for yourself, not others.
    7. Spend less time on gear review sites and more time on Magnumphotos.com
    8. You can never spend too much money on photo books.
    9. You are your worst critic. Always get critique from others, they will help spot the holes in your photography.
    10. Sticking with one focal length for a long time will help you better pre visualize your shot and master framing.
    11. You are only as good as your worst (public) street photograph.
    12. Secret to good multi subject shots : don’t overlap your subjects and look for emotional gestures.
    13. How to improve your framing : don’t crop for a year.
    14. How to become a better editor : don’t upload photos to social media for a year.
    15. Try to shoot at eye level (or extremely above or below) your subjects. So crouch when taking photos of people sitting down, shorter than you, or kids. Or shoot from a very high vantage point.

    Eric Kim Color 6

    1. 99% of street photographs are ruined by messy backgrounds.
    2. To get cleaner street photographs, first find a clean background and then wait for your subjects to enter the scene.
    3. If your mom likes your street photographs, your photos are probably generic and boring.
    4. Always carry a camera with you.
    5. Street photographs don’t have to have people in them (but generally are more interesting with them in it).
    6. You don’t need a Leica to shoot street photography. Be grateful for what you have and use what you got.
    7. Spend 99% of your time editing your photos (choosing your best images) and only 1% of your time post processing them.
    8. Style in street photography is a combination of having consistent equipment (camera and focal length) as well as “look” (film or post processing style) and content (the subjects you generally photograph).
    9. It is better to over shoot a scene then under shoot a scene.
    10. “Shoot from the gut, edit with the brain” – Anders Petersen
    11. It is always nice to have a shooting partner when out on the streets.
    12. “Shoot who you are.” – Bruce Gilden
    13. Taking a photo of an interesting character isn’t enough. Try to capture them in an interesting context or with a good gesture.
    14. Don’t take photos of homeless people and street performers. They rarely make good photos.
    15. Don’t worry if your photos qualify as “street photography” or not. Just aim to make meaningful and memorable images.

    Eric Kim Color 2

    1. Telling the truth isn’t the job of a street photographer (it is for the photo journalist).
    2. Don’t be afraid to interact with your subjects when shooting on the streets. Not all of your photos have to be candid.
    3. You can make interesting posed street photographs. But don’t pretend to your audience that they are candid.
    4. There is no one “right” definition of street photography. Define it personally for yourself and just shoot.
    5. You often can’t control the scene when you are shooting in the streets, but you can control whether you share the image or not. Case in point : don’t make excuses for the small failures in your photos, just edit out those shots.
    6. Don’t respect the critique of other photographers unless you have seen their portfolio.
    7. Zoom lenses will prevent you from becoming a great street photographer (you will never master one focal length). Stick to primes (preferably a 35mm full frame equivalent). 28mm and 50mm are okay too (if you can use it well).
    8. A single photo can’t tell a story (it doesn’t have a beginning, middle, or an end). Only photo series or projects can do that.
    9. The photos you take are more of a reflection of yourself (than of the people you photograph).
    10. The importance of looking at great photos : you are what you eat. Fine french cuisine = great photos in books, galleries, or exhibitions. Junk food = most photos on Instagram, Flickr, Facebook (not always, but mostly).
    11. 99% of people on the Internet don’t know what a great street photograph is. Don’t always trust the comments, likes, and favorites you get from the Internet on social media sites. Rather, stick around in street photography critique groups (or private ones).
    12. You will find the best street photography opportunities in the least expected places.

    Eric Kim Color 4

    1. When you see an interesting person or a scene, don’t just take one photo and move on. Aim to take at least 5 photos (or more if possible).
    2. Beware using telephoto lenses in street photography. Remember, “Creepiness is proportional to focal length.”
    3. Incorporate your own reflections and shadows in street photography. They often make interesting images (look up Lee Friedlander).
    4. Photos shot head on have more energy and drama than photos shot from the side.
    5. A brief list of great street photographers : Garry Winogrand, Lee Friedlander, Henri Cartier-Bresson, William Klein, Daido Moriyama, Diane Arbus, Weegee, Bruce Gilden, Alex Webb, Joel Meyerowitz, Martin Parr, Josef Koudelka,
    6. After taking a photo of a stranger, make it a rule to look at them, smile, and say thank you.
    7. I never regret taking photos. I always regret not taking photos.
    8. It is better to beg for forgiveness than ask for permission.
    9. Be confident while you are shooting and rarely will you have any issues. Be nervous while shooting and you will ruin into many problems.
    10. The only person you should try to impress with your photos is yourself.
    11. The benefit of getting eye contact in your photos : eyes are the windows to the soul.

    Eric Kim Color 5

    1. Don’t make photos. Make connections.
    2. The best place to shoot street photography isn’t New York, Tokyo, or Paris. The best place to shoot is your backyard.
    3. See your scenes with your eyes and shoot with your heart.
    4. If you are working on a project and photographers discourage you by saying “it has been done before” ignore them. Nobody has done it like you before.
    5. Street photography is applied sociology with a camera.
    6. If you aim to get recognition for your photography you will never get it.
    7. If someone gets upset when you take their photograph, offer to email them a copy. Carrying around business cards always come in handy.
    8. Don’t just look at photos, read into them.
    9. To double your success rate in street photography, double your failure rate.
    10. The photos you decide not to show are more important than the photos you decide to show.
    11. Rather than creating photos to please your audience, find an audience that will be pleased by your photos.

    Eric Kim Color 12

    1. Street photography isn’t a contest about how many followers, viewers, followers, exhibitions, books, cameras, lenses, and fame you have. There are no winners and losers. Collaborate with one another instead of competing with one another.
    2. Giving away my prints and cameras has brought me more joy than selling it for money.
    3. The friendships I have made through street photography is mode valuable than any of the photos I have ever taken.
    4. Luck is when preparation meets opportunity – Seneca. Make your own luck.

    Check out more from Eric Kim at his Blog, Facebook, and Twitter.

    Post originally from: Digital Photography Tips.

    Check out our more Photography Tips at Photography Tips for Beginners, Portrait Photography Tips and Wedding Photography Tips.

    103 Things I’ve Learned About Street Photography


    Digital Photography School

  • The All-Knowing Guide to Purposefully Placing Highlights

    To a photographer, the mood of the sun means everything. Natural light is temperamental — fluxing, fading, and shifting to an invisible rhythm. Working at the mercy of the elements means photographers often find themselves stuck in unsuitable situations, especially when it comes to lighting. Seasoned photographers Lindsay Adler and Erik Valind have developed a bag of tricks to get Continue Reading

    The post The All-Knowing Guide to Purposefully Placing Highlights appeared first on Photodoto.


    Photodoto

  • Anatomy of a Subject

    So much of what we do is defined by the elements that embody the concept.  The three elements of the exposure triangle help us understand “proper” exposure.  Every light source has three distinct qualities (color, quality, direction).  Even the physical tools at our disposal can be broken down to a simple trifecta– light, lens, and camera.  Being able to break something down into its components helps the beginner by giving them a road map– a series of steps that simplifies the process and makes it easier to understand.  With enough repetition, that same road map becomes a mental checklist for the more advanced photographer.  Over time, that checklist hopefully just becomes second nature.  That photographer might not actually be thinking “foreground, subject, background” each time they compose an image in the viewfinder, but the elements are present, both in the planning and execution of the shot.  Taking this concept of breaking down composition a step further, we can even break down the subjects in our images into distinct visual components.

    SHAPE or OUTLINE

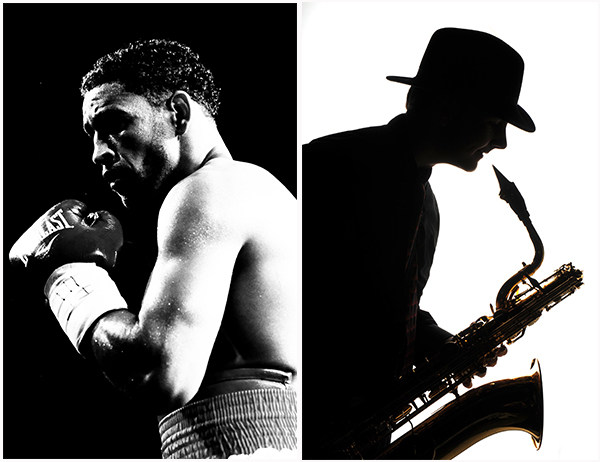
    Perhaps one of the most fundamental of these components is shape.  Regardless of whether we are photographing people, buildings, landscapes, or any of the other endless possibilities, every subject has shape.  Definition.  It can be subtle or dramatic, but everything we photograph is defined to a certain extent by its outline.  The most graphic representation of shape comes from a back-lit silhouette or underexposure, either of which draws less attention to individual features and more to the overall shape of the subject.  While this photo of a boxer is very brightly lit from the side, the high contrast lighting and black background combine to engage the viewer with a strong emphasis on the shape and outline of the subject.  In a more classic silhouette, the sax player was lit completely from behind.  The soft, wraparound quality of the light does bring out a bit of detail in the instrument, but the visual emphasis rests primarily on the shape and outline of the musician, creating an entirely different overall feel to the image.

    001-Shape

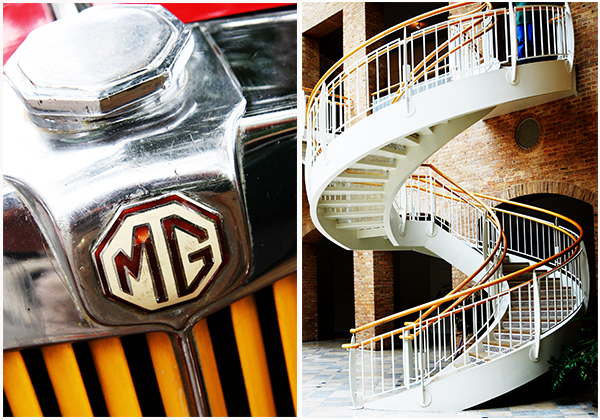
    Obviously, high contrast and silhouette are not the only ways to illustrate the shape of a subject.  As noted, everything that comes in front of our camera has shape.  How and to what extent you choose to highlight it relies on how you choose to place it in your frame.  The photograph of the staircase was taken for an ABC project entirely because of its shape, while the radiator grill of the 1938 MG has multiple shapes and lines which draw the viewer’s eye into the photo from top to bottom.

    002-Shape

    COLOR & TONE

    While color often grabs our attention first, sometimes we take the extra steps to actually plan for it.  Bright and bold.  Soft and muted.  Contrasting or Complementing.  In the portrait of the boy with the football helmet, the bright red obviously grabs your attention and draws you in.  In the low-key portrait on the right, however, it was the darker tones and color palette that caught my interest.

    003-Color and Tone

    FORM & TEXTURE

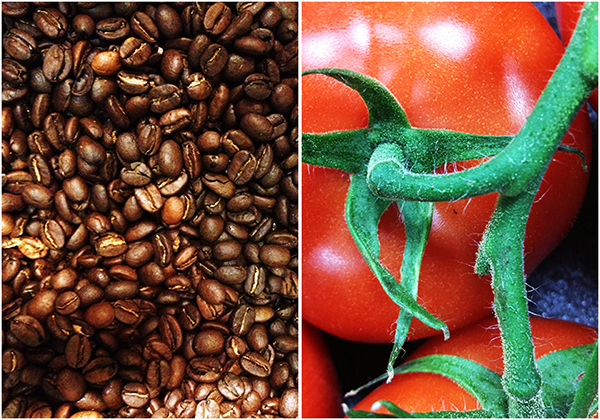
    When we start introducing light and shading across a subject we produce various qualities of shape, shifting lines, and intensity of color.  While our silhouette primarily emphasizes a subject’s two-dimensional  shape, it is “form” that best describes the three-dimensional qualities of a subject.  Form gives substance, depth, and definition to the silhouette– bringing it out of the shadows and into the foreground.  Here is where the combination of light, color, and shadow combine to create texture in our images.  In each of the images below, the form and textures are created and accentuated not only by the composition, but also by the way the light falls across the subject.

    004-Form and Texture

    As is the case with things like the exposure triangle  or characteristics of light, the extent to which each of these is emphasized in any given photo is going to rely heavily on the photographer and how they express their personal vision and individual style, as well as the mood they are trying to convey and the story they are trying to tell.  In virtually every situation, however, one of these components plays a huge role in making a photographer stop in their tracks and say, “I need to photograph that.”

    Post originally from: Digital Photography Tips.

    Check out our more Photography Tips at Photography Tips for Beginners, Portrait Photography Tips and Wedding Photography Tips.

    Anatomy of a Subject


    Digital Photography School