Category: Photography

  • How to Photograph a Portrait of a Stranger with the WOW Factor

    By Oded Wagenstein

    Have you ever met a person, while travelling abroad or at home, who has such an interesting face that you would really like to photograph?  But, just before you press the shutter, you suddenly think, “How am I going to shoot this”?

    Because there are so many questions to answer: How do I approach a strange person? Should I photograph from a distance, with a Tele-photo lens, or should I get closer? What if the person will get offended or angry?

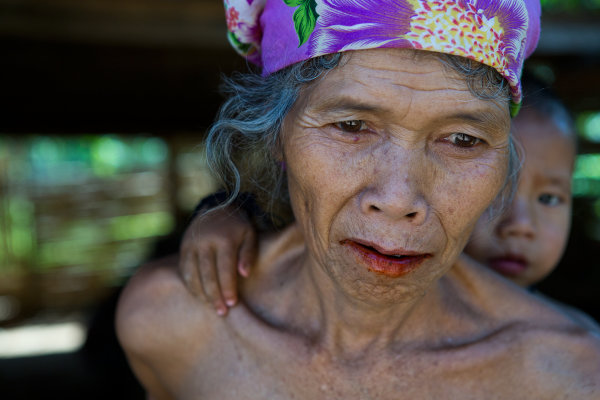
    It depends on the situation but, in 99% of my portraits, I use what I like to call the “being involved” technique.  This technique requires the photographer to get closer to the subject, by using a wide focal length lens and there is no doubt, that the subject will be aware of the photographer and the camera.
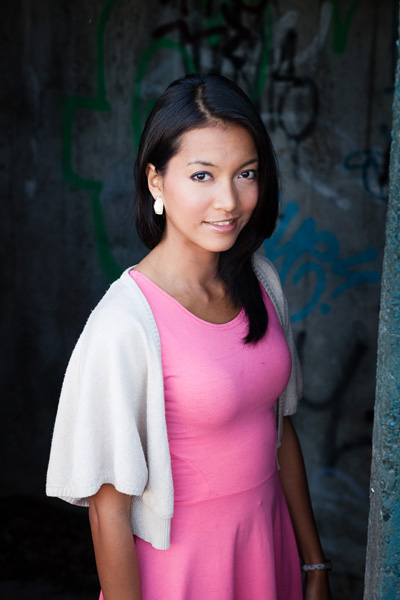
    Fstop of 4.5, shutter speed@10 and ISO 320

    Fstop of 4.5, shutter speed@10 and ISO 320

    There are so many advantages to using this method, for instance the ability to control the composition, the angle, the background, not to mention asking your subject for “one more take” and of course, the possibility of  making a new friend. Creating a close-up portrait, with the technique of “being involved” creates intimacy and gives warmness to the image that you wouldn’t get with a Tele-photo lens in most cases. But, with this method as my students are well aware, there is one big disadvantage, when a person becomes aware of the camera, his behavior and the authenticity and spontaneity of the moment disappears.

    Once, on a very cold night, while shooting in Japan, I asked my good friend and great photographer Dave Doisneau – “What kind of super power he would like to have?” (Cold nights in Japan will make you ask stupid and philosophical questions) Dave answered “I would like to be invisible. To be able to photograph a person, inches away from their face without them being aware that I was even there”. This for me sums up my whole philosophy on portrait photography. Losing the spontaneity, or the fear of losing authenticity, are just weak excuses. As a photographer, your job is to bring all these qualities back to your image. How can you do that? (Here’s a little hint for you) Photoshop or expensive equipment won’t help you.
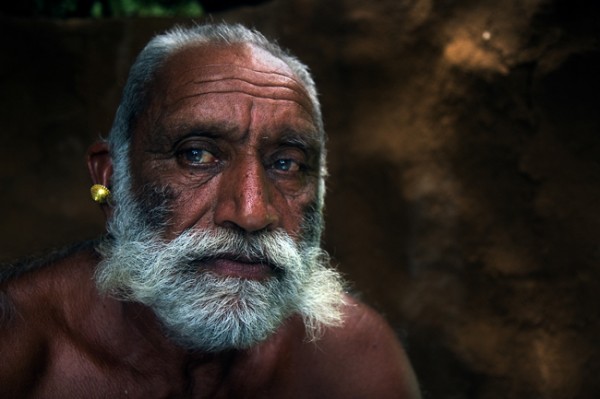
    Fstop of 2.8, shutter speed@10 and ISO 100?

    Fstop of 2.8, shutter speed@10 and ISO 100

    As one of the great photographers, Ansel Adams once said: “You don’t take a photograph, you make it”. The difference between an amateur and a professional is in the preparation.Knowledge is power and the more you know about a person and their culture, the easier it will be for you to become invisible. While I was in the Wakhan valley, between the Afghan and Tajikistan border, I learned, in advance that the people who live there have many cultural dos and don’ts. From the way they greet a stranger (Right hand on the chest and a slight bow) to the proper way to react when invited to a local house (just say yes and prepare yourself for tea, and lots of it!).
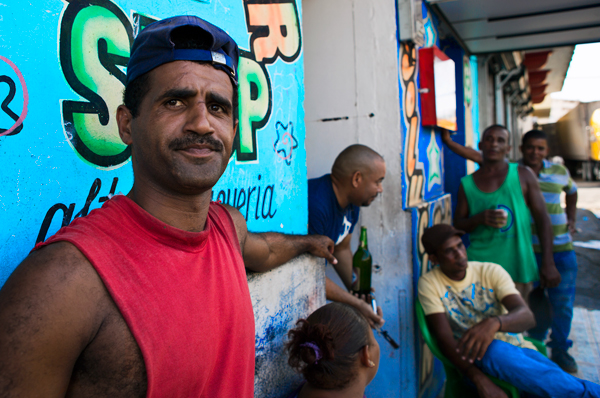
    Fstop of 4.5, shutter speed@1 and ISO 125

    Fstop of 4.5, shutter speed@1 and ISO 125

    So before I travel anywhere, I familiarize myself, in advance, with any photography related taboos.  From how will people respond to the camera, to things that you should not shoot. For example, did you know that the people of the Akha tribe in south East Asia, believe that photographing one of their tribe member will actually steal his soul?

    You can learn all these things and more by consulting with a photographer who has already visited the place.  The internet is a great place to find him or her. You can consult travel forums, books, or even call the embassy of the country of your destination.
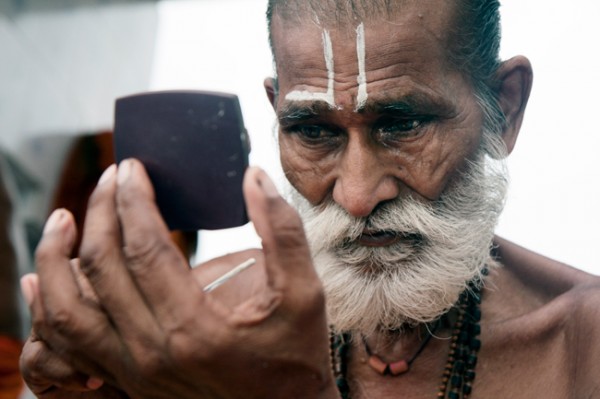
    Fstop of 4.5, shutter speed@10 and ISO 200

    Fstop of 4.5, shutter speed@10 and ISO 200

    Many photographers will advise you to take your camera with you all the times. For me, the camera is just a tool, and as a tool it must not interfere. Have you ever felt uncomfortable because someone is aiming a camera at you? Have you ever thought how YOU look when you stand behind the camera? (A bit like holding a weapon right?).

    Nobody likes it when you aim something at them without any explanation or permission. That’s why, when I encounter a new and interesting person, I would like to photograph, I first introduce myself as Oded the person before as Oded the photographer. by the time I take out my camera, the person has lost interest in me, and gone back on his work, I then become invisible and Voilà I can take my shot and I’ve make a new friend into the bargain.

    In the past year, I have photographed hostile tribes in South East Asia, gypsy communities in Central Asia and even in the former Soviet Union. If there is one thing that I’ve learned from visiting those places, is that most people would actually like their picture taken, if we do it right. So please give yourself a confidence boast and try it. Anywhere you are on the globe, if you act with respect, be polite, and even have a little bit of sense of humor, most of the time people will act the same way towards you.

    Yes, we’ve all got a horror story, of the one person who shouted at us while we took his photo. Think about it for a second; did it happen when you tried to shoot the person without his permission? If you approach a person with dignity, make a connection, and then you take out the camera, what the worst thing that can happen? They will say no, but at least you would have tried right?
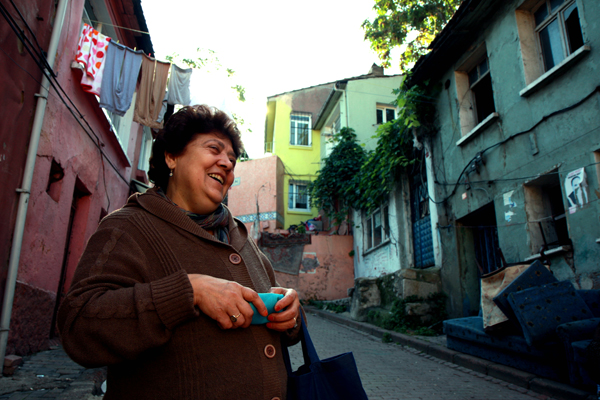
    Fstop of 5.6, shutter speed@15 and ISO 100

    Fstop of 5.6, shutter speed@15 and ISO 100

    When you found a person with a unique face, invest the time to break the ice with them, then when you finally have his approval for the shoot, if he’s very polite, you will probably have around 30 seconds to take the shoot before they moves on, that’s some pressure.

    This may be the most important section of this article, that many photographers forget, just relax. Being stressed never helps especially when dealing with people or while creating art. It’s true you may not have much time to decide on the focal length, the background, the shooting angle, the shutter or the aperture.

    Also, try not to let your technical level stand in your way. How? Before starting to shoot people, try your craft on still life. Flowers would be perfect to start with. Also it would be really wise to invest in some photography course (much more important than buying new equipment). Last but by no means least, don’t forget to RTFM- read the camera’s fu*** manual!

    That’s right, creating interesting and strong portraits is not easy. Take your time to work on your craft. Shoot flowers, then your friends and family members. Learn, learn and learn everything you can about your camera and about your subject. Come with respect and most important – relax.
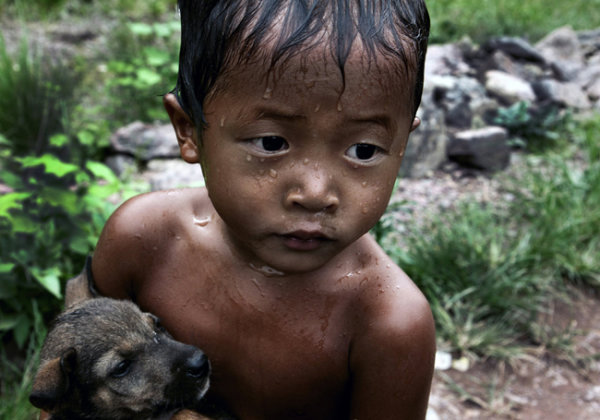
    Fstop of 3.2, shutter speed@10 and ISO 200

    Fstop of 3.2, shutter speed@10 and ISO 200

    Oded Wagenstein is a Travel photographer and writer. He is a regular contributor to the National Geographic Traveler magazine (Israeli Edition) and he is known for his intimate portraits from around the world. You can join his Portrait & Travel Photography Facebook page  and continue to discuss on travel and people photography and get more amazing tips!

    Post originally from: Digital Photography Tips.

    Check out our more Photography Tips at Photography Tips for Beginners, Portrait Photography Tips and Wedding Photography Tips.

    How to Photograph a Portrait of a Stranger with the WOW Factor


    Digital Photography School

  • My Week With Heisler, Pt. 1

    Let's say for a moment that you found yourself embedded as an assistant with arguably the world's best living photographic portraitist. And let's also say that, beyond your primary duties as an assistant your secondary goal was to be observant as possible and report back on what you learned.

    That's exactly what happened to Italian photographer (and occasional Strobist contributor) Sara Lando, who as you can see above was not at all excited about her assignment at Gulf Photo Plus earlier this year. She looks almost bored, dontcha think?

    This post marks the first of a three-part series on what she learned from her experience. Today, the intangibles: the stuff you'd never consider because you are too busy worrying about a gridded beauty dish or something…

    Read more »
    Strobist

  • Physical Filters Versus Digital Filters! Which One Wins the Battle?

    The age old battle between physical and digital filter stirs once more. It’s difficult to pick a   winner because both are integral to the entire photographic process, and, individually, each has its advantages for different effects that you’re trying to achieve. Some view the physical filter as an unnecessary piece of baggage, needlessly weighing down your kit, as you Continue Reading

    The post Physical Filters Versus Digital Filters! Which One Wins the Battle? appeared first on Photodoto.


    Photodoto

  • 3 Reasons To Keep Your Old Photoshop Version

    By Helen Bradley

    3 reasons not to delete old versions of photoshop opener

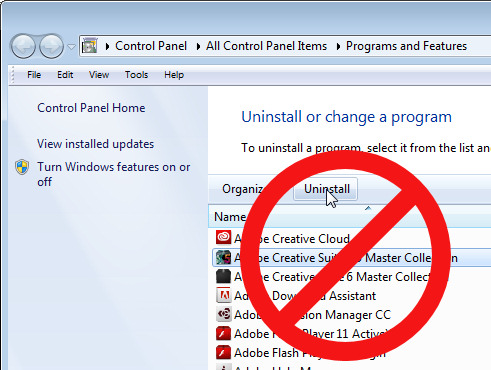
    If you’re moving from Photoshop CS5 or CS6 to Photoshop CC you may be tempted to clean up your computer and remove the older Photoshop version from it. After all there’s no point leaving it there if you’re not using it is there? Well I, for one, won’t be removing Photoshop CS5 anytime soon and I suggest you think twice about removing your older version too. Here are my reasons:

    1. Adobe Axed Picture Package

    Adobe axed Picture Package quite a long time ago but it could be easily made to work with Photoshop CS5. For a time there I also had it running with Photoshop CS6 until an update to CS6 permanently knocked it out. So, because I like to use Picture Package for assembling images and because it works just fine with Photoshop CS5, I’ll be keeping that version. Anytime I need to assemble multiple images into a layout I only need choose File > Automate > Picture Package and I’m off and running.

    If you want to know how to add Picture Package back into Photoshop CS4 there’s a DPS blog post that I wrote explaining all about it here in Multiple Image Printing in Photoshop CS4.

    For Photoshop CS4 and CS5 I also created some training for Mediabistro.com which you will find here.

    And for Photoshop CS6, I wrote a post on my blog about how to add it to Photoshop CS6. While many readers are finding it still works, sadly while I can tell you how to do it the actual solution no longer works for me.

    3 reasons not to delete old versions of photoshop 1

    2. Adobe Axed Pixel Bender

    Yep, in Photoshop CS6 Adobe took the Oil Paint Filter from Pixel Bender, built it into Photoshop and promptly dumped everything else. I found that disappointing – I kind of like Pixel Bender – in particular some of the fractal effects that you can create with it. I also have a Droste filter for it that is awesome and that I use from time to time.

    Since I plan to keep Photoshop CS5 I’ll still have access to Pixel Bender – thank you very much Adobe!

    Just in case you’re interested – the Pixel Bender extension won’t work with versions of Photoshop later than Photoshop CS5. Again, I wrote a DPS blog post on Pixel Bender, how to install it and what you’ll find when you get it here.

    And a post on Tom Beddard’s awesome Droste Filter here.

    And I have a YouTube video that shows you how to use the Droste Effect filter here:

    3 reasons not to delete old versions of photoshop 2

    3. I Don’t Trust the Licensing Model

    If you’re reliant on Photoshop for your day to day work – if you’re a Photoshop teacher, for example, then problems with the new licensing model might cause you unexpected grief. In this scenario you will start your computer one day and Photoshop will lock you out citing some issue with your license. Of course you have a paid up license, but the software won’t recognize this and it will go into lock down mode.

    Until you can call Adobe Support and get them to fix the issue you won’t be able to get into your software – one more reason why I suggest you keep an earlier version of Photoshop on your computer just in case.

    Now I haven’t had problems with Photoshop CC but I have had issues with a subscription license for Adobe Captive – on two separate occasions both within the last 12 months and both without warning. If I had been teaching a class, it would have meant that I simply couldn’t do what I was being paid to do. The problem with the subscription licensing is that it’s not full proof and if it fails you may be locked out of your software until you can get support to fix the issue and that’s going to take time.

    In Summary

    While I wholeheartedly encourage you to enjoy the new features of Photoshop CC I do recommend that you keep an earlier version of Photoshop on your computer. Then, you’ll have access to Picture Package and the Pixel Bender feature (once you install them) and a fallback position if you get locked out of your software unexpectedly.

    So now it’s over to you – if you’ve installed Photoshop CC do you still have an older version of Photoshop installed? If so, what is your reason for not removing the earlier version?

    Post originally from: Digital Photography Tips.

    Check out our more Photography Tips at Photography Tips for Beginners, Portrait Photography Tips and Wedding Photography Tips.

    3 Reasons To Keep Your Old Photoshop Version


    Digital Photography School

  • How To Take Ridiculously Unique Photos

    Take ridiculously unique photos 1

    by Steven McConnell

    How do you make your photography more meaningful, moving and unique?

    Lately, I’ve been fascinated with the idea that our motivations significantly influence the quality of photography we create.

    This sentiment is expressed particularly well in The Foutainhead by Ayn Rand. The character is an architect, rather than a photographer, though his lessons apply to any artist who wants to create great work:

    “Nothing can be reasonable or beautiful unless it’s made by one central idea, and the idea sets every detail. A building is alive, like a man. Its integrity is to follow its own truth, its one single theme, and to serve its own single purpose.”

    Pleasing Everyone Doesn’t Work

    In the novel, the hero makes a strong point that, when artists attempt to fulfil on competing needs they tend to create uninspiring, soul-less compromises.

    In the context of architecture it might look like this:

    • A building gets an impressive facade, because the owners want to impress the neighbours.
    • It adheres to rules of traditional architecture, because that’s what the architect’s boss wants.
    • It features a striking look, because the architect knows its a good way to attract some publicity to himself.
    • Its materials are dictated by the budget, rather than their suitability for the task.

    And so on.

    The hero’s point is that the most beautiful building is one which follows a single, unyielding purpose: to create most liveable space for the people who will inhabit it.

    Take ridiculously unique photos 2

    Why Do We Take Photos?

    I think as photographers, we often fell into the same trap. We are either unconscious to our motives, or we consciously lose focus because we try to satisfy too many ends.

    In doing so, we cease creating art and start creating generic commodities.

    What Drives Us?

    I’ve been paying a lot of attention lately to what drives me and how it affects the photography I create.

    For me personally, I notice that photography serves as a means to these ends:

    • A way to escape from something.
    • A way to get approval.
    • A way to challenge myself.
    • A way to make a difference.

    Neither one of them are right or wrong, better or worse. But some are more conducive to a more powerful focus. Which, in turn, brings about stronger results.

    Photography Assignment

    Let’s say I have a day off and I decide to spend it taking photos. Where do I go? What do I photograph? Who do I show the photos to?

    If I approach the day from a space of needing approval, for example, then my focus will be extremely broad. Anyone or anything which gives me recognition will satisfy that need.

    I am free go take snaps of everything from the Opera House to my neighbour’s cat, and show off what I did to my friends, family, other photographers on online forums and so on.

    Take ridiculously unique photos 3

    Narrowing Focus

    However, if I consciously decide to make this day about making a difference to someone, then my focus narrows significantly.

    I can still go take a photo of the Opera House, for example. But a pretty picture, which has also been taken by millions of people, won’t do now.

    If I’m going to hold myself to account and really make this day about making a difference to someone through my photography, I’ll need to dig much deeper.

    Creating Art

    I’ll probably look at the issues surrounding it today (art vs politics, need for funding and redevelopment, modern society vs art, budget cuts, people who make it all work) and attempt to take photos which tell those stories in a powerful way.

    My audience would also be much more narrow – I’ll have to connect with people who have a need for such photos and offer it to them as a gift.

    In the end, 99.999% people in the world would never see, or appreciate those photos. But those who do, because they really have an interest in the story I’ve told, will be touched forever.

    Default Isn’t Good Enough

    If left to our own devices, our brain will pick a purpose for us, depending on the wiring from our past.

    Because we’re human, most of the time we default to the “escape” and “get approval” kind of space. Unfortunately, that headspace gives rise to generic kind of results.

    Escape is a powerful motivator, but it’s vague. You can escape anywhere, doing just about anything you’re trying to escape from.

    Desire for approval is even more powerful, but it comes hand in hand with a fear of disapproval, which makes it difficult to say something original.

    I find that I produce best photography when I consciously come from “challenge myself” or “make a difference” type of mindsets.

    Take ridiculously unique photos 4

    Purpose Is Changeable

    We are in control of our motives – not the other way around. Which means we’re entirely in control of the level of photography we produce.

    The first step is awareness. Moment by moment, we can ask ourselves – what’s driving me now? What end am I serving?

    The second step is change. If we discover that we’re serving too many masters, we can change our purpose to one which gives us a more powerful focus.

    So, what’s your photography assignment for today? And, more importantly, why?

    Steven McConnell is a family photographer at Family Photography Sydney. You can connect with him on Google+. and Twitter.

    Post originally from: Digital Photography Tips.

    Check out our more Photography Tips at Photography Tips for Beginners, Portrait Photography Tips and Wedding Photography Tips.

    How To Take Ridiculously Unique Photos


    Digital Photography School

  • The Magic of Digital Nature Photography [BOOK REVIEW]

    The Magic of Digital Nature PhotographyI like these books for more than the obvious reason that they contain a wealth of help in their pages.
    For one thing they’re an easy read so, after a hard day behind the camera, you can relax at home and read it for pleasure, not only soaking up all the useful info but enjoying the largish pictures within its pages.

    Author Rob Sheppard intentionally laid out all the practical info and creative suggestions you would need to take your images to a higher level: which lenses and accessories are best for the purpose; the pluses and minuses of RAW vs JPEG; how do you stalk an animal? How about landscape composition?

    Satisfying it may be, but many amateurs are unaware their work is just that: amateur. Sure, it takes effort, but it is worth while to lift your game, tune up your senses and place your image making on a higher plane.

    Sheppard confesses that he has enjoyed photography since he was a kid and remembers entering a B&W print of a local scenic spot in the local newspaper’s photo contest and recalling his pride in the photo — but it didn’t win!

    He still enjoys being out and about with a camera, having shot images from Peru to Newfoundland, Florida to Washington and admits he wants to ‘get you excited about getting out and taking photographs of your own special subjects.’

    First the spiritual: Sheppard believes that ‘nature photography definitely deepens, widens and expands our sense of life. He believes you can shoot pictures of your favourite subjects; most times you can shoot many shots of your favourite subjects and yet capture totally different images than another person may take.

    A touchy feely sort of book? You betcha!

    In a chapter titled ‘Connections’ Sheppard asserts that whilst we may have many connections to the natural world, these are not always recognised. He suggest you connect with the subject in the picture, then connect again with the subject when you look at the final image. The final pleasure comes in sharing the image with others, helping them also to connect with the subject.

    Then down to practicalities: choice of camera is important but what may work well for one person may not be OK with another. Educate yourself about differing camera types, decide on which type of nature photography you wish to pursue and make sure you can tote your camera into the field, making sure you don’t spoil your adventures with a pile of gear that weighs you down.

    In a section titled ‘Megapixels and Quality’ he comes down heavily on the hype over pixel count: after all, megapixel counts are less about image quality and more about size.

    Useful chapters follow on lenses, suitable focal lengths for scenic work, suitable camera mounts. Then follow discussions on exposure; lens aperture vs shutter speed; working in auto vs Program AE vs aperture or shutter priority vs manual exposure; reading a screen histogram; ISO settings; how to determine white balance.

    Without light you can’t capture too much in the way of a digital scenic! That much is obvious. But what quality of light? Hard or soft? Front lit or backlit? And its colour?

    There follows some handy help on how to model and shape the light on your scenic using reflectors or diffusers, by warming it with a change to the white balance, a change to the exposure, adding another light source, adding a grad filter etc.
    The general tone of the book is more in the nature of help rather than a pile of techy details, which makes it an easy and encouraging read.

    If you’re into scenics, this is for you!

    But, as I said, don’t expect ‘a pile of techy details!’

    Author: R Sheppard.
    Publisher: Pixiq.
    Distributor: Capricorn Link.
    Length: 192 pages.
    Size: 28x22x12mm.
    ISBN: 978 1 4547 0813 1.
    Price: Get a Price on The Magic of Digital Nature Photography at Amazon (currently 39% off)

    Post originally from: Digital Photography Tips.

    Check out our more Photography Tips at Photography Tips for Beginners, Portrait Photography Tips and Wedding Photography Tips.

    The Magic of Digital Nature Photography [BOOK REVIEW]


    Digital Photography School

  • Coping with Extreme Brightness (Without HDR)

    Extreme brightness

    Good photographers learn to work within the limitations of their equipment and learn to cope with scenes where the brightness range is too great for the camera’s sensor to handle. Here are some ideas for you to explore – and none of them involve HDR techniques.

    1. Look at the light

    I suspect the reason that most photographers are attracted to HDR photography is because they like the look of the high contrast, super saturated images you often see created with this technique. It’s not really about capturing every detail of a high contrast subject.

    Look at the light instead. If you are shooting a landscape or architectural study, and the brightness range of the scene is too much for your camera to handle, you are most likely shooting in the wrong light for the subject. Wait until the sun is lower in the sky and the light is softer. The quality of the light will be better, the brightness range will be less, and the photo will be better.

    2. Let shadows go dark

    Extreme brightness

    You don’t have to see into the shadows. Let them go dark. If the brightness is too bright, expose for the highlights (i.e make sure the camera captures all highlight detail) and let the shadows go where they will. It won’t work all the time – sometimes you just need better light (see tip one). But exposing for the highlights and letting the shadows go dark is a good exercise in observation and creating images. Work with the light to create graphic images, not against it.

    You can take this even further in post-processing. Photographers Eduardo Izquierdo and Tom Hoops both deliberately make dark backgrounds in their portraits darker or even black so that the viewer’s attention goes straight to the model, without distractions. Maybe it’s time for a low dynamic range setting on our cameras?

    3. Exposure blending

    Extreme brightness

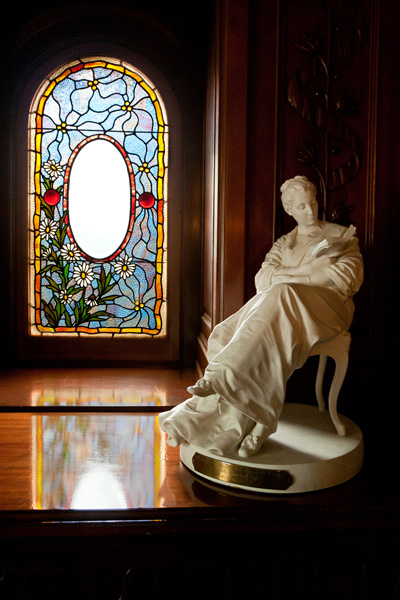
    Sometimes you will come across a scene like the one above where the brightness range is too much for your camera but the quality of the light is good. The issue here is the difference in brightness between the light coming through the window and the light illuminating the interior of the building. If you expose for the interior, the window will burn out. If you expose for the window, you won’t get much detail in the interior.

    So what do you do if you want good detail in both? The answer is to take two separate exposures, as in the examples above, and blend them in Photoshop. Ideally the camera should be on a tripod so that the images match exactly, but I was able to do that with the above photos even though they were hand-held and slightly out of register:

    Extreme brightness

    4. Exposure blending in the landscape

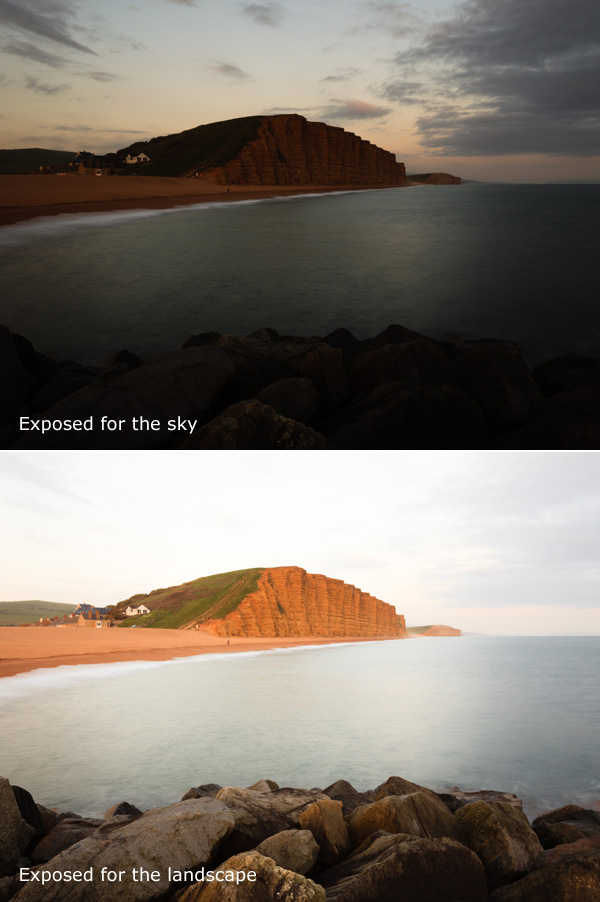
    Landscapes are another area where you may have good quality of light, but the brightness range is still too great for your camera. That’s because the sky is often much brighter than the landscape itself. You may also want to make the sky darker for dramatic effect (as well as to capture more detail).

    One solution is to use a neutral density graduated filter; a square or rectangular filter that is clear at the bottom and dark at the top that clips into a holder screwed onto the front of your lens. You move it up or down so that the dark half blocks some of the light from the sky and effectively reduces the brightness range of the scene.

    Grads are great, but they’re not perfect. They work well when the horizon is a straight line across the photo, but badly if it has an irregular shape. Good quality grads are expensive, and cheap ones may give your sky a magenta colour cast.

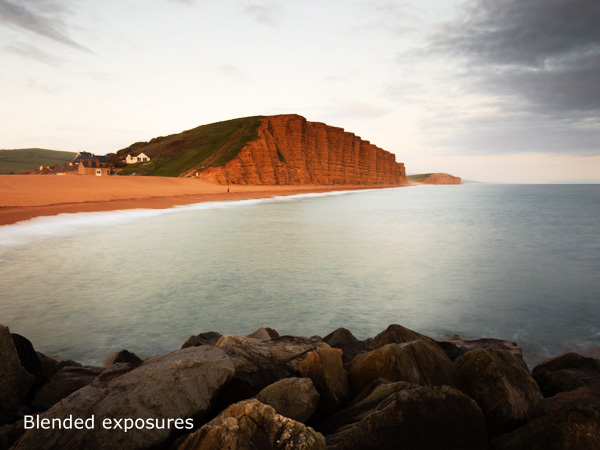
    Exposure blending resolves those issues. Just like the previous example, you need to take two photos – one exposed for the sky, and the other for the landscape itself:

    Extreme brightness

    Then you can blend the two together in Photoshop. The idea is to create a blend that looks natural to the eye, so that means making sure the sky isn’t too dark, or that the landscape isn’t too light, otherwise it won’t look right. You end up with something like this:

    Extreme brightness

    The Photoshop techniques used for this can get quite involved. Christopher O’Donnell has written a good article about it here.

    Mastering Photography

    Extreme brightness

    My latest ebook, Mastering Photography: A Beginner’s Guide to Using Digital Cameras introduces you to digital photography and helps you make the most out of your digital cameras. It covers concepts such as lighting and composition as well as the camera settings you need to master to take photos like the ones in this article.

    Post originally from: Digital Photography Tips.

    Check out our more Photography Tips at Photography Tips for Beginners, Portrait Photography Tips and Wedding Photography Tips.

    Coping with Extreme Brightness (Without HDR)


    Digital Photography School

  • Available Light Portraits: Weekly Photography Challenge

    This week we are celebrating the launch of our brand new Portrait Lighting eBook so I thought it might be fun to have a portraiture themed weekly challenge.

    Bus People

    Your challenge is to take and share a portrait image that only uses the available light in the setting where you’re shooting.

    Giada

    So if you’re outside during the day – shoot only using natural light. If you’re inside, only use the light in the room (window light, the normal artificial lights in the room etc).

    golden light

    So – you can use artificial light but no your speed light or any studio lights – just what is there in the setting you’re shooting in. I hope that makes sense!

    Once you’ve taken your ‘Available Light’ photos, upload your best ones to your favourite photo sharing site either share a link to them even better – embed them in the comments using the our comments tool to do so.

    who am i?

    If you tag your photos on Flickr, Instagram, Twitter or other sites with Tagging tag them as #DPSAVAILABLELIGHT to help others find them. Linking back to this page might also help others know what you’re doing so that they can share in the fun.

    Also – don’t forget to check out some of the great shots posted in last weeks Soft challenge – there were some great shots submitted.

    Post originally from: Digital Photography Tips.

    Check out our more Photography Tips at Photography Tips for Beginners, Portrait Photography Tips and Wedding Photography Tips.

    Available Light Portraits: Weekly Photography Challenge


    Digital Photography School

  • Natural Light: Making the Most of Hard Light

    Hard light

    In a previous article I explored ways of taking photos in soft light. Today, I’d like to look at the opposite of that, and discuss the idea of taking photos in hard light.

    In the earlier piece I wrote about matching the light to the subject. That’s an important concept to understand – especially when it comes to hard light, a type of lighting considered by many photographers to be unsuitable for most types of photography.

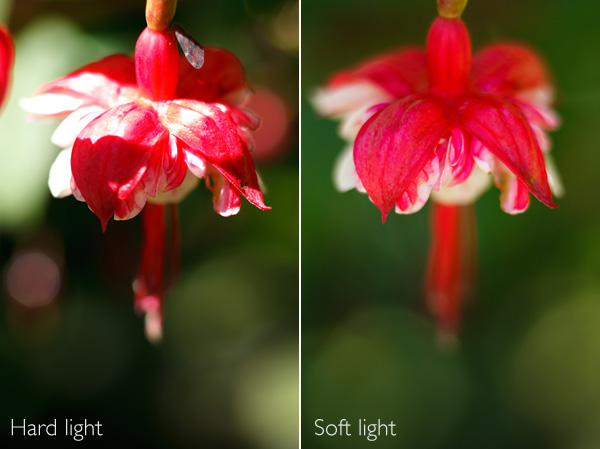
    I’m not saying those photographers are incorrect. Hard light doesn’t suit every type of subject, and if you’re trying to take a photo in hard light that you really shouldn’t be taking, then nothing you can do is going to work. Here’s an example from the earlier article:

    Hard light

    The flower had to be lit by soft light for the image to work. In hard light, there was too much contrast. The light didn’t suit the subject.

    What is hard light?

    Hard light comes from a light source that is relatively small compared to the subject. It creates strong, clearly defined shadows.

    For example, hard light is cast by the sun when it is high in the sky on a cloudless day. The light gets softer as the sun dips towards the horizon at the end of the day. If clouds appear, or the air is hazy or polluted, that may also soften the light.

    If you use portable flash you will also know that the light from an unmodified flash unit is very hard. That’s because the light comes from a relatively small light source – the flash head isn’t very big. That’s why photographers use lighting modifiers with flash units, to effectively make the source of the light larger, which makes the light softer. You can read more about using portable flash here and here.

    Now, let’s look at how you can make hard light work for you, with some practical examples:

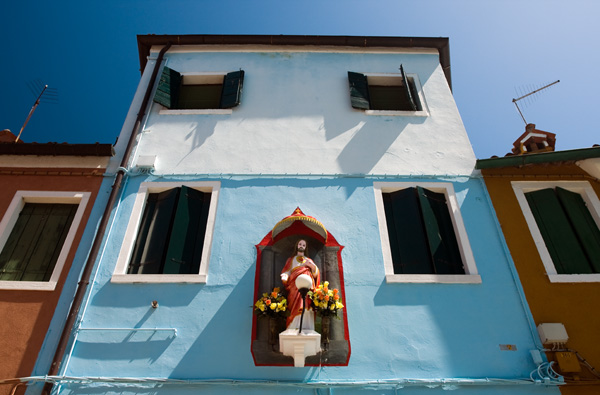
    Hard light

    I took this photo in Burano, an island near Venice, at around 2.30pm in summer. The light was very hard. But look at the long shadows on the wall of the building. The sun was nearly overhead, and a little to the right. From that position, the light rakes over the surface of the building, picking out the texture (I also used a polarising filter to deepen the colours). Noticing scenes like this, and recognising the photo opportunity, is just a matter of training your eye to see where the light is falling.

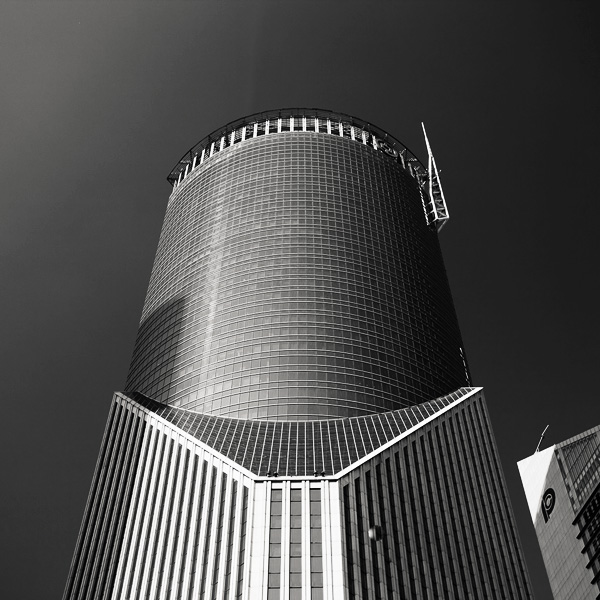
    Architecture is an ideal subject when the light is hard. If you are in a city or urban area during the middle of a sunny day, you can often take good photos of the buildings.

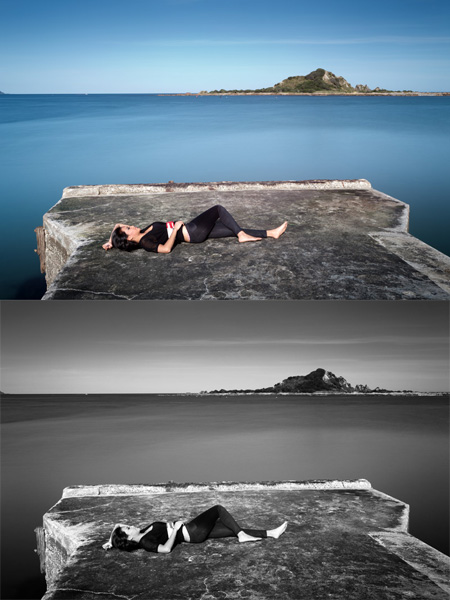
    Convert to black and white

    Photos taken in hard light are often more interesting in black and white than colour. Colour photos may look bland when illuminated by hard light from the overhead sun.

    Here’s an example of long exposure photography that I took around 2pm in the afternoon. I used a nine stop neutral density filter to obtain a shutter speed of 30 seconds. It looked a little boring, so I converted it to black and white.

    Hard light

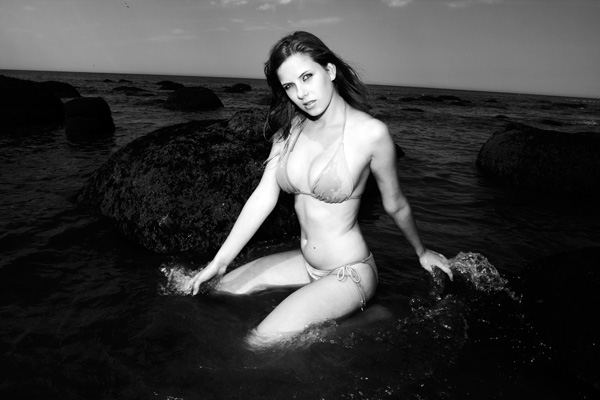
    Finally, here’s a photo taken at around 2.30pm in the middle of summer:

    Hard light

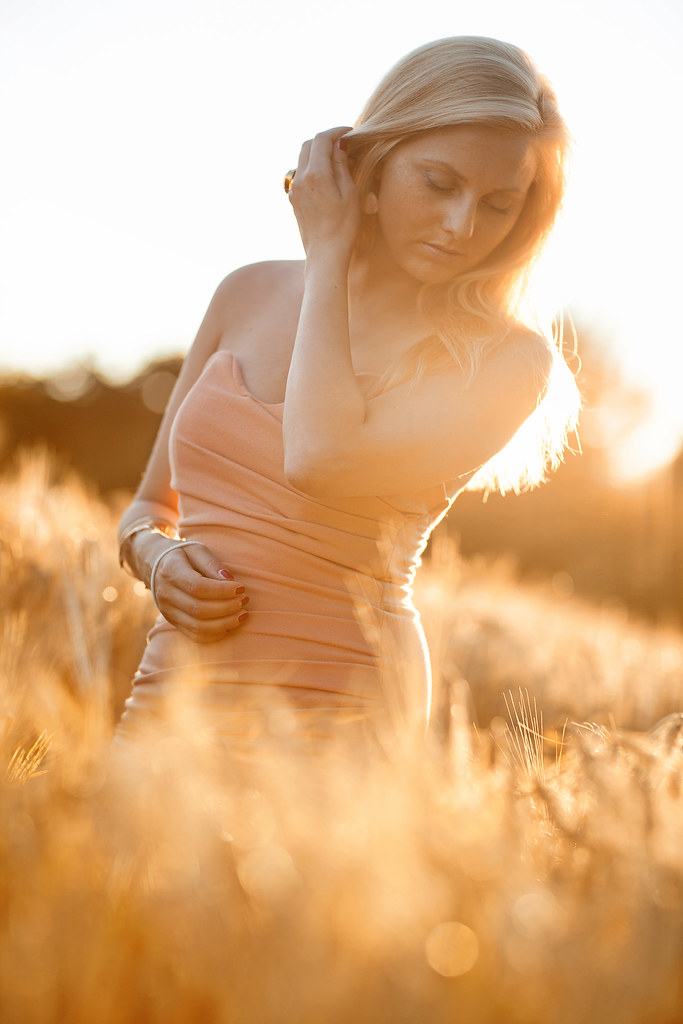
    We were on the beach and the light was very hard. There was no way that I could take a portrait using natural light alone. I used an on-camera portable flash unit (itself a hard light source) and used that to overpower the light from the sun. It acted like a powerful fill light, filling in the shadows cast by the sun. Compare that to this portrait (from my article about soft light):

    Hard light

    Two different types of light, two completely different effects. Bear in mind that hard light plus flash won’t be flattering to everybody, and will generally work better with men than women. Again, it comes back to the idea of matching the light to the subject.

    Mastering Photography

    Hard light

    My latest ebook, Mastering Photography: A Beginner’s Guide to Using Digital Cameras introduces you to digital photography and helps you make the most out of your digital cameras. It covers concepts such as lighting and composition as well as the camera settings you need to master to take photos like the ones in this article.

    Post originally from: Digital Photography Tips.

    Check out our more Photography Tips at Photography Tips for Beginners, Portrait Photography Tips and Wedding Photography Tips.

    Natural Light: Making the Most of Hard Light


    Digital Photography School

  • 2,500 Kick Ass Photographers on Google+

    2,500 Kick Ass Photographers on Google+

    Over the past 2 years I have been super active on Google+. Google+ has emerged as the best community on the web for photographers. Photos look great there, but photos look great a lot of places on the web today. More significantly, Google+ is a positive, visually oriented community where photographers can meet, talk, get to know each other and develop and maintain friendships.

    I’ve met more photography friends on Google+, than any other social network.

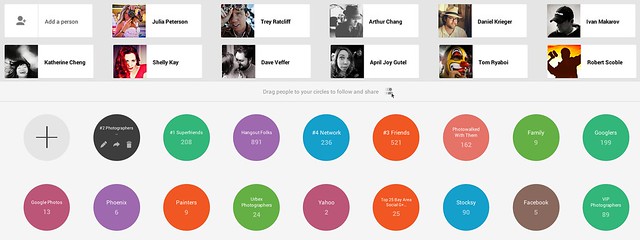
    As Iv’e gotten involved with Google+ I’ve shared my circles of photographers. When Google+ first started out and I built my photographers circle up to 500, I shared it, then 1,000, then 1,500, then 2,000. Last week my photographers circle on Google+ hit 2,500 and I shared it again.

    If you want to see some of the best photography being published on the web today, check out some of these photographers.

    Part 1-5 (A-Da)
    Part 2-5 (Da-Ho)
    Part 3-5 (Ho-Mi)
    Part 4-5 (Mi-Sh)
    Part 5-5 (Sh-Z)


    Thomas Hawk Digital Connection