Category: Photography

  • Actions: Efficient Editing or Cheating?

    Learning to use Photoshop can be overwhelming to some people. There are so many functions and so many tools that it can seem like you will never really understand how to use it. You search online for videos and tutorials, but even then, depending on your version of Photoshop you still may feel lost.

    When photographers discover actions for Photoshop it’s sometimes like hitting the photography jackpot. They speed up your workflow. You can get more done. You can achieve different effects with them, but sometimes other photographers will tell you that it’s basically cheating in Photoshop.

    Are you cheating yourself or your client when you use actions?

    Most actions require a bit of tweaking when you use them to get the effect that you want. It’s very rare that once actions are played that they are perfect. This way a photographer can adjust them to get the look they desire for their images. When photographers use actions that require the tweaking of their images, they are learning more than just using the slider, they are learning how parts of Photoshop works. They are learning about blending modes, adjustments, curves, etc.

    Photography is about finding your art and doing it your own way. Using an action does not compromise the vision of your art. You still make the decisions about how the end product looks. There are some people who will disagree and say that actions are cheating because you don’t have to learn to manually adjust everything by hand. You can get clean dishes by using a dishwasher or washing them by hand, is one way cheating? You still achieve clean dishes. Isn’t that the goal?

    Some photographers use different actions combined with hand editing. They have learned Photoshop over time and figured out what works for their editing needs. You can even make your own actions by combining the actions you use the most and your own hand editing. It takes a little practice to get the technique down, but once you do you will speed up your own workflow go even faster. I have incorporated actions and hand editing and now when I do a photo shoot I typically know what type of look I am going to want for the final images. Whether I achieve those looks by hand editing or by actions or a combination doesn’t matter to my client. They just want beautiful images. You can even use actions multiple times or use different actions in a combination to achieve your desired look.
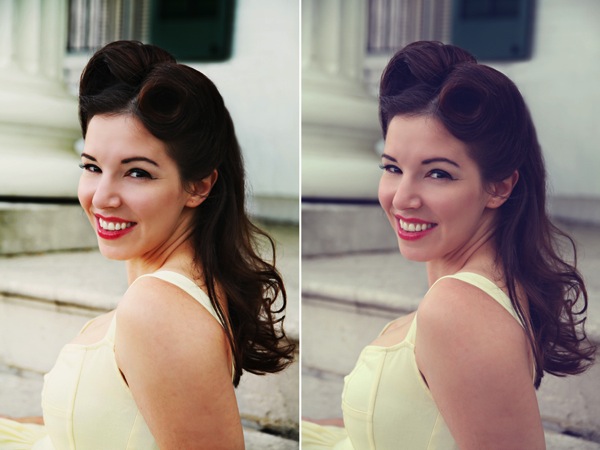
    For this vintage type look I used Blue Ginger from Florabella Classic Workflow twice.  The second time I only used it at 10%.

    For this vintage type look I used Blue Ginger from Florabella Classic Workflow twice. The second time I only used it at 10%.

    So, you decide that you want to look into actions, but then you Google them and are overwhelmed by the options that are out there. What’s next? How to choose? Well, this depends on the look you want for your images. Look at the images that are posted using the actions and see if they reflect your style and your images. There are some free actions out there, but most you have to purchase. Some are relatively inexpensive and there are some that are very expensive. For some people it’s very hard to commit to buying expensive actions without testing some first. There are some action developers that post some free sample actions for you to use so that you get an idea of how their actions work.

    For this complete vintage look I used Pioneer Woman's free set. I used Vintage and changed the edge burn to 74%, vintage blur to 84%, midtone bump to 85%, and turned grain off. Then I used the Old West action and just decreased the overall action to 37%

    For this complete vintage look I used Pioneer Woman’s free set. I used Vintage and changed the edge burn to 74%, vintage blur to 84%, midtone bump to 85%, and turned grain off. Then I used the Old West action and just decreased the overall action to 37%

    Whether your purchase your actions or use free actions the only thing you need to be sure of is that they are working with your overall images and that they are reflecting your style. As you learn Photoshop you may start creating your own actions that help your workflow and truly reflects your style and your artistic vision, or you may stick with what is working. Only you can decide what works best for your business, your images, and your clients.

    A few recommended places to download free actions:

    • Colorvale Actions
    • Pioneer Woman
    • My Four Hens (Look for the freebie tab on their Facebook)

    You can also purchased actions from:

    • Colorvale
    • My Four Hens
    • Wish Photography
    • Florabella

    Post originally from: Digital Photography Tips.

    Check out our more Photography Tips at Photography Tips for Beginners, Portrait Photography Tips and Wedding Photography Tips.

    Actions: Efficient Editing or Cheating?

    The post Actions: Efficient Editing or Cheating? by Guest Contributor appeared first on Digital Photography School.
    Digital Photography School

  • Falling for Waterfalls

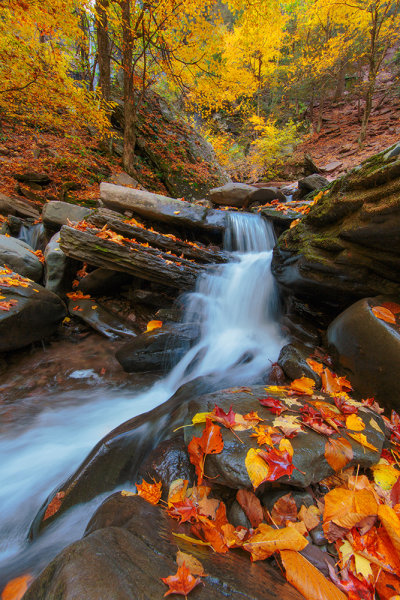
    A small cascade at Kaaterskill falls in upstate New York. It's important to balance the long shutter to blur the water, with the need for keeping the foliage sharp.  While blending two exposures will accomplish this, I preferred to try and capture the scene in one exposure.  Exposure was 1/3 second, f/22, ISO 100. EF 14mm f/2.8L II with EOS 5D Mark III.

    A small cascade at Kaaterskill falls in upstate New York. It’s important to balance the long shutter to blur the water, with the need for keeping the foliage sharp. While blending two exposures will accomplish this, I preferred to try and capture the scene in one exposure. Exposure was 1/3 second, f/22, ISO 100. EF 14mm f/2.8L II with EOS 5D Mark III.

    While the northeastern Unites States isn’t a wealth of dramatic vistas ripe for the landscape photographer’s choosing, one thing  we do have plenty of here are waterfalls.  The list is endless- from Niagara Falls in northwestern New York, to the plethora of waterfalls that can be found in the Catskills and Adirondacks, to Great Falls in Paterson, New Jersey. These provide ample opportunity to photograph them, as many run year-round.

    I always carry a few things when photographing waterfalls. I like to get that milky look to the water, and for that of course you need a long exposure and for that you need a tripod to hold the camera steady. Next, I carry a polarizing filter.  This allows me to control reflections, whether they be from shiny rocks glistening with water on them, or to control reflections on the water in the landing pool. I also keep a chamois in my bag to keep the lens dry. Depending on how hard the falls are flowing, and how big the cascade, mist can be a problem.  Finally, I keep a set of neutral density filters handy.  As I mentioned, I like a nice, milky look to the water, and if there’s too much light, I won’t be able to slow the shutter down enough to get that look unless I use the filters. I generally keep 3, 4 and 5 stop ND filters with me.

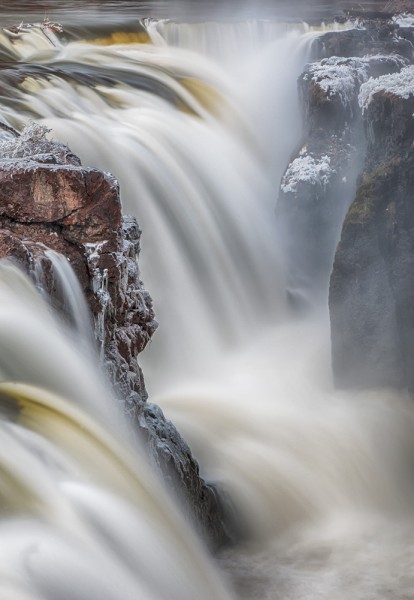
    Great Falls in Paterson, NJ. Photographing these falls in late winter, I was able to capture frost forming on the rocks from the spray.  Exposure was 2 seconds, ISO 100, at f/22. EF 24-105 f/4L IS, with EOS-1D Mark III.

    Great Falls in Paterson, NJ. Photographing these falls in late winter, I was able to capture frost forming on the rocks from the spray. Exposure was 2 seconds, ISO 100, at f/22. EF 24-105 f/4L IS, with EOS-1D Mark III.

    When photographing waterfalls, the first thing to consider, as with all subjects, is the light. I find photographing waterfalls in flat, even light, such as on an overcast day, to be ideal.  Ultimately, you don’t want the waterfall in direct sunlight.  Direct sunlight on a waterfall has a tendency to create such a high contrast scene that either your highlights are blown out, or your shadows are blocked up. Flat, even lighting allows you capture the full range of detail in the scene without losing detail in the highlights or shadows.

    Next, you need to consider the look of the water you want. While I prefer that milky, fantasy-like look, you may prefer more detail.  Try a variety of shutter speeds to see what works best for you. I find 1 second to 30 seconds works well, but much will also depend on how much water is flowing over the falls. More water rushing faster will not require as slow a shutter speed as less water flowing at a slower pace will.

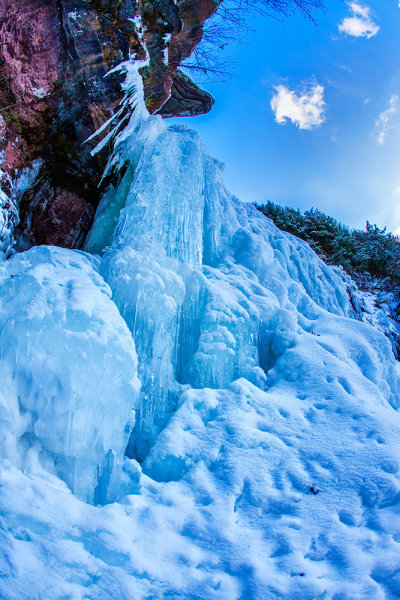
    I hiked up these falls in mid-winter- a treacherous, icy hike that almost resulted in injury! This was the base of the tallest cascade, frozen almost solid. It pays to visit these locations year round to get different perspectives. Exposure was 1/20, f/16, ISO 100. EF 15mm f/2.8 Fisheye with EOS-1Ds Mark III.

    I hiked up these falls in mid-winter- a treacherous, icy hike that almost resulted in injury! This was the base of the tallest cascade, frozen almost solid. It pays to visit these locations year round to get different perspectives. Exposure was 1/20, f/16, ISO 100. EF 15mm f/2.8 Fisheye with EOS-1Ds Mark III.

    Waterfalls change with the seasons.  In the spring, when snow is melting, waterfalls will be fuller and faster flowing. Some waterfalls only flow at this time. Others run year round, but the amount of flow changes.  And in the winter, depending on the climate, some falls can freeze into columns of ice that create an entirely different spectacle.  It pays to revisit these falls at different times of year, to take advantage of all of the opportunities a particular waterfall presents.

    One last thought: While many of the waterfalls I’ve photographed are easily accessible, many others require some arduous hiking. Try to get as much information as possible on a new location before going there, and be prepared for anything.

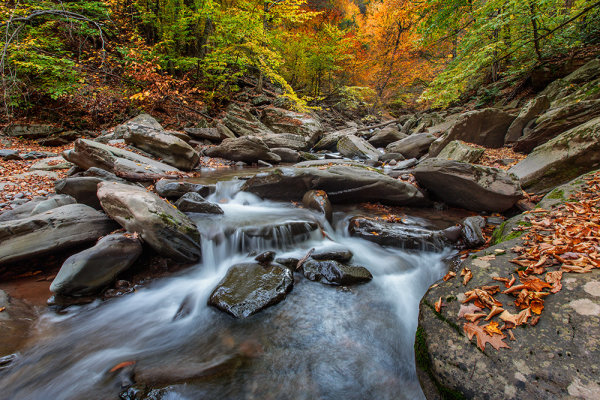
    This was another small cascade that I found on the way up to the upper falls.  These smaller cascades present great opportunities to really create dynamic compositions, layering the foreground, middle ground, and background, and using the leading lines of the water. Exposure was 1 second at f/16, ISO 100.  EF 16-35mm at 16mm with EOS 5D Mark III.

    This was another small cascade that I found on the way up to the upper falls. These smaller cascades present great opportunities to really create dynamic compositions, layering the foreground, middle ground, and background, and using the leading lines of the water. Exposure was 1 second at f/16, ISO 100. EF 16-35mm at 16mm with EOS 5D Mark III.


    Post originally from: Digital Photography Tips.

    Check out our more Photography Tips at Photography Tips for Beginners, Portrait Photography Tips and Wedding Photography Tips.

    Falling for Waterfalls

    The post Falling for Waterfalls by Rick Berk appeared first on Digital Photography School.

    Digital Photography School

  • Stellar Photo Projects Showcase: Alexandre Bordereau’s “Oh, My Head!”

    All photographers, with no exceptions, have their own photo projects that show the personal layer of their being, bring some new ideas to life and provide attitude to particular things. However, a huge number of such projects went unnoticed by an audience. Thus, here on Photodoto, we decided to launch a series of articles that is aimed to showcase little-known, Continue Reading

    The post Stellar Photo Projects Showcase: Alexandre Bordereau’s “Oh, My Head!” appeared first on Photodoto.


    Photodoto

  • DISCUSS: What Would It Take to Get You To Swap to a New Camera System/Brand?

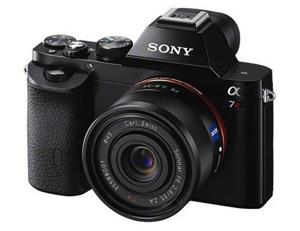
    switch camera system brandThis last week Sony released a couple of cameras that caused a big stir around the online photography community – the Sony A7 and A7R cameras (pictured right). These full frame, interchangeable cameras come in a compact body with lots of features and the initial hands on reviews being published from around the web say that they are going to be really popular.

    I’ve seen a lot of DSLR owners say that they’re pre-ordering these cameras already and it has made me wonder – what would it take for me to switch from one camera system to another?

    The thing that stops most DSLR owners from switching brands is their investment in lenses and accessories that tie them into a brand. But increasingly we’re seeing adapters released that allow using lenses with one lens mount on other brands. For example these new Sony cameras can be fitted with an adapter that allows for my Canon lenses to be used.

    The barriers to switching are slowly being removed.

    I’m not yet ready to make a switch but I’m seeing more and more people do so. For some reason I’m particularly seeing disillusioned Canon DSLR users make the switch – maybe its just that there are more of them but quite a few feel frustrated by the lack of development by Canon of late.

    So here’s my Question

    What would it take for you to switch from one camera system to another?

    Are you tempted to do so by some of the new cameras announced in the last year?

    Or have you already made the switch and do you have any regrets?

    Post originally from: Digital Photography Tips.

    Check out our more Photography Tips at Photography Tips for Beginners, Portrait Photography Tips and Wedding Photography Tips.

    DISCUSS: What Would It Take to Get You To Swap to a New Camera System/Brand?

    The post DISCUSS: What Would It Take to Get You To Swap to a New Camera System/Brand? by Darren Rowse appeared first on Digital Photography School.

    Digital Photography School

  • How to Harness the Power of Lightroom Print Collections

    LR print collection opener

    In a post last year I explained a process for exporting images from Lightroom (http://digital-photography-school.com/output-from-lightroom-to-your-blog) sized and all ready for posting to a blog. Since then I discovered a more robust solution to the problem of outputting images using a custom print layout from Lightroom. This can be used when printing images or saving them as jpeg files.

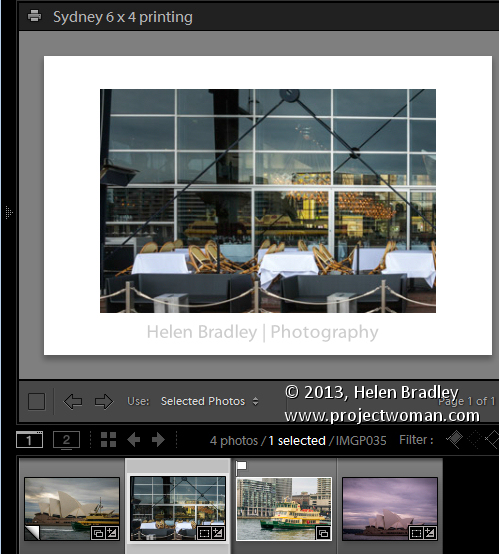
    The process of preparing and outputting images can be simplified by taking advantage of the Single Image/Contact Sheet Layout in Photoshop and combining this with a print collection. The result is that printing to a specific layout is as easy as dropping the image into a collection and switching to the Print module and clicking to print – it’s a simple process once it is all setup.

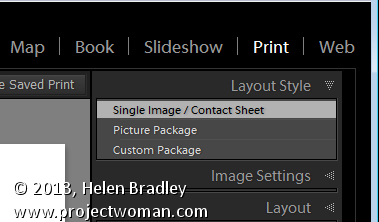
    To do so, start out by selecting an image to use to configure your print layout and click to launch the Print module. In the top right panel select Layout Style: Single Image/Contact Sheet. The image which appears on the page is the one selected in the filmstrip.

    LR print collection 1

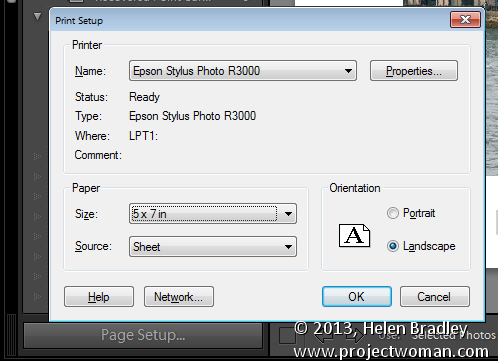
    Set up this image so that it looks the way you want to print all images of this type. If you plan to print the image to paper, click Page Setup and select your printer and the page size and orientation.

    LR print collection 2

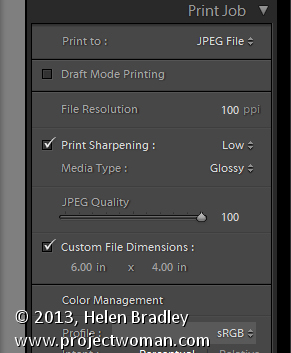
    To print to a file, open the Print Job panel and from the Print to dropdown list select JPEG file. Deselect the Draft Mode Printing checkbox, select Custom File Dimension and set the output dimensions and file resolution.

    LR print collection 3

    Adjust the image size and placement on the page using the Image Settings and Layout panel options. You can also add an Identity Plate and/or Watermark as desired.

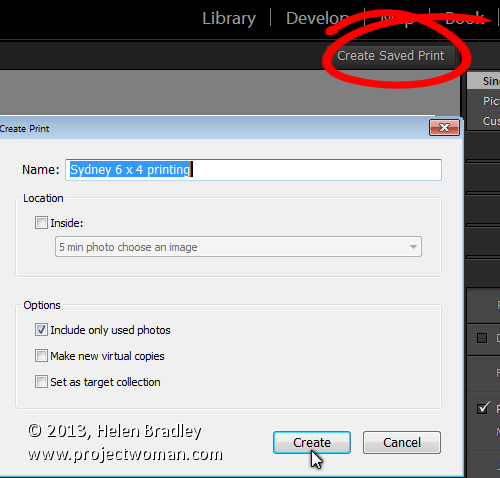
    Once you are done, click the Create Saved Print button at the top right of the screen above the print layout and type a name for your new collection. This saves the image and the layout as a special Print collection in the Collections panel.

    LR print collection 4

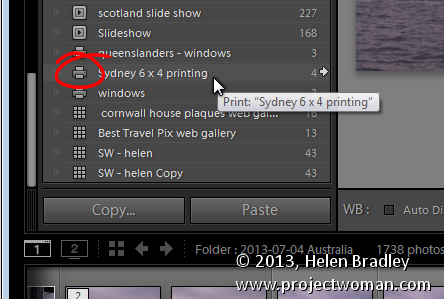
    In future to set up images ready to print them, add them to this collection in the Library module, double click the collection in the Collections panel and it will automatically launch the Print module.

    Click on any image in the filmstrip and the image will be assembled ready to print or save to a jpeg file.

    LR print collection 5

    A number of readers have asked me for solutions to outputting images with watermarks in different positions and using different text colors from Lightroom. If you’re outputting to jpeg files or printing images you can do this using this process. Set up a print collection for each of the watermark options. You can then drop the images into the appropriate collection and they’ll be automatically laid out ready for printing. The layouts are saved in the collection so simply selecting the collection automatically recreates your layout.

    Post originally from: Digital Photography Tips.

    Check out our more Photography Tips at Photography Tips for Beginners, Portrait Photography Tips and Wedding Photography Tips.

    How to Harness the Power of Lightroom Print Collections

    The post How to Harness the Power of Lightroom Print Collections by Helen Bradley appeared first on Digital Photography School.


    Digital Photography School

  • How I Shot My ‘Mini World’ Image

    Over on our Facebook page this week we shared our recent ‘Small World‘ post featuring some of our readers shots of miniature figurines shot in larger scenes. On Facebook one of our readers – Dave Flynn – commented that he used to take these types of photos but now does something different. He shared a link to his Mini Worlds Gallery where he showed his different take on it. It includes this photo!

    Mini World: Final Edit

    I immediately shot Dave a message asking if he’d write up how he took it. Here’s what he sent in.

    My name is Dave Flynn, I’m 45 years old and got into photography 3 years ago when I was made redundant from my career in retail. I’m completely self taught through reading magazines and watching online videos. I don’t have a particular field of interest and have a varied portfolio which can be seen at www.dflynnphotography.com and www.facebook.com/daveflynnphotography

    In my bag

    • Nikon D90
    • Nikon 50mm 1.8D prime lens
    • Nikon 18-70mm DX 3.5 wide angle lens
    • Tamron 90mm Macro 2.8
    • Tamron 70-300mm Zoom f/4
    • I also have 2 speedlights and triggers.

    For most of my creations I use the 50mm, 90mm and 18-70mm.

    I will always try to use natural light where possible and have a roof terrace which is perfect for getting shots of the posed models and backgrounds.

    On wet days, I use my bedside table which is next to a large window. I don’t have expensive equipment or studio lights, my editing is all done on my laptop so I am proof that you don’t need every photography related gadget or the latest kit to create amazing images. They key to all photography is the light. It’s the first thing you should think about when creating any image.

    Inspiration just comes to me, I might see an item/person/scene and imagine a final image in my head then set out to create it. Photography for me is a great way to share what goes on in my brain and I hope you can get some inspiration from my thoughts.

    ONE LUMP OR TWO: How I Shot It

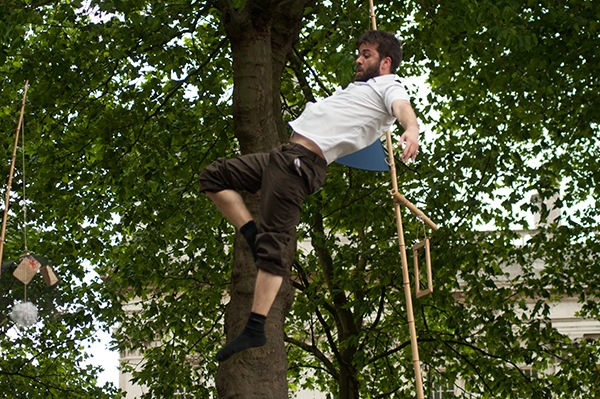
    I’d been to a festival in London and got some shots of the various performances. The bearded man in the shot below is jumping on a trampoline for his act. Shot using my 70-300mm at f/5.6 @200mm, ISO 400 with a fast shutter. When I reviewed the images; this one stood out so I tried to think how to use him in a mini world. It was a few days later when I was making coffee and I got the idea. This is how I created it.

    GW_-79.jpg

    In photoshop I use layer masks to remove the model from the background. There are other methods like using the pen tool or quick selection tool but masks are my preferred method.

    There are very good tutorials on youtube about using layer masks in photoshop.

    SL.jpg

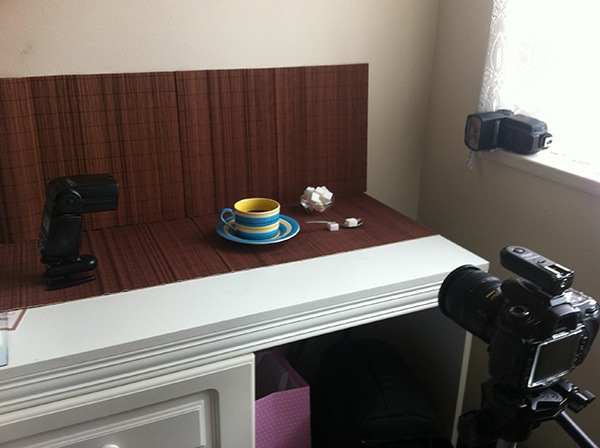
    The scene is set for the background. I used 2 speedlights to balance the light. I think they were both set to 1/128 sec because I had natural light coming in the window too. I used my wide angle lens at 18mm with a shutter speed of 1/160 and an aperture of f/8.

    SL-5.jpg

    Next it was time to drop a sugar lump into the scene, remember the speedlights are set to freeze any motion in the image. It took a few attempts for me to get this shot to catch sugar cube where I wanted. Exactly the same settings were used.

    SL-6.jpg

    The same technique was used to catch the splash at just the right moment. This again took a few attempts ( and a lot of cleaning) to get the splash how I wanted.
    photo.jpg

    The ‘studio’ in my bedroom and the scene setup.

    The final edit with some curve and level adjustments in photoshop.

    one lump or 2 2nd Edit Final.jpg

    Thanks to Dave for sharing this behind the scenes look at his shot. Check out more of his Mini Worlds here.

    Post originally from: Digital Photography Tips.

    Check out our more Photography Tips at Photography Tips for Beginners, Portrait Photography Tips and Wedding Photography Tips.

    How I Shot My ‘Mini World’ Image

    The post How I Shot My ‘Mini World’ Image by Darren Rowse appeared first on Digital Photography School.


    Digital Photography School

  • Panasonic Lumix DMC-GX7 Review

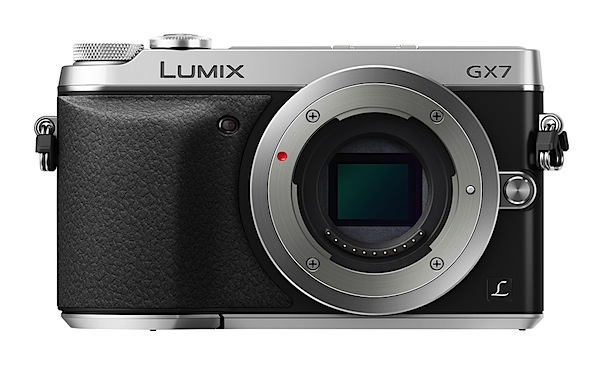
    Panasonic Lumix DMC-GX7 Review.jpg

    The MILC models keep rolling out Panasonic’s door. Mirrorless Interchangeable Lens Cameras still appear to have flavour of the month gloss, so Panasonic as well as Olympus are keen to milk every drop from the technology.

    This one is especially attractive, although it does appear you will have to pay for the ‘smarts’ in the camera as it leads the G Series in imaging capability.
    The review camera was fitted with the G Vario f3.5/14-42mm kit lens. The body is made from magnesium alloy and the camera is available in silver+black or black.
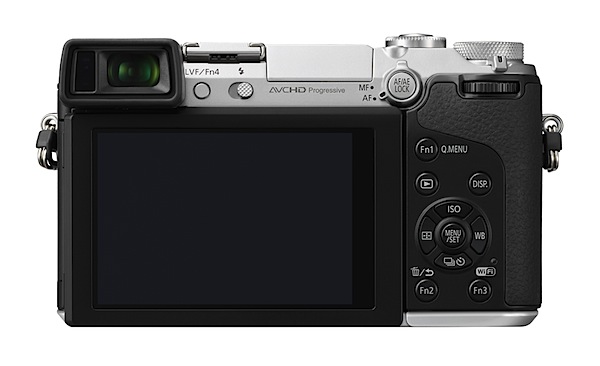
    Panasonic Lumix DMC-GX7 Review back.jpg

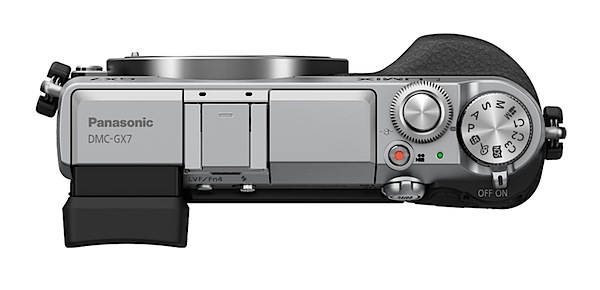
    Panasonic Lumix DMC-GX7 Review top.jpg

    Panasonic Lumix DMC-GX7 Features

    There’s a whole heap of attractive features on the Panasonic Lumix GX7.

    • A 16.00-megapixel Live MOS sensor.
    • Shutter speeds run to 1/8000 second.
    • The rear 7.6cm LCD screen tilts and swivels in a vertical plane, tilting up by 80 degrees and down by 45 degrees.

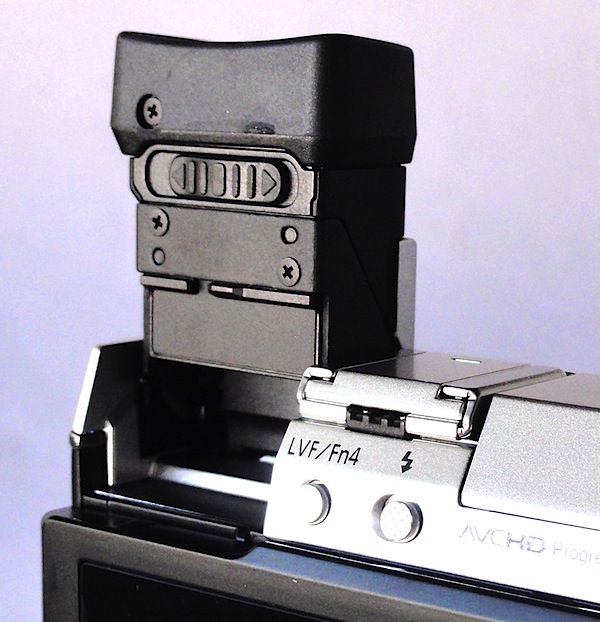
    Panasonic Lumix DMC-GX7 Viewfinder.jpg

    • For the first time in a digicam the top Live View viewfinder rotates through 90 degrees, so you can view downwards.
    • The AF system has functions including Low Light AF, Pinpoint AF and One-shot AF.
    • Focus peaking can be monitored in Live View. This shows the focus peak of focus in MF and AF+MF mode.
    • The camera has Wi-Fi connectivity (IEEE 802.11 b/g/n) with NFC (Near Field Communication), supported by the Panasonic Image App for iOS/Android smart devices.
    • Touch screen AF to focus and lock on the subject and release the shutter.
      The GX7′s maximum image size is 4592×3448 pixels, sufficient to make a 39x29cm print.

    Video? It can shoot in AVCHD or MPEG4 format, recording Full HD 1920×1080 pixels. I was able to record video and shoot stills mid recording.
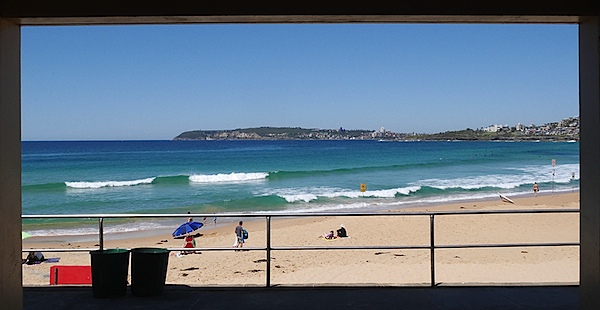
    Panasonic Lumix DMC-GX7 Review - Curl Curl beach arch.JPG

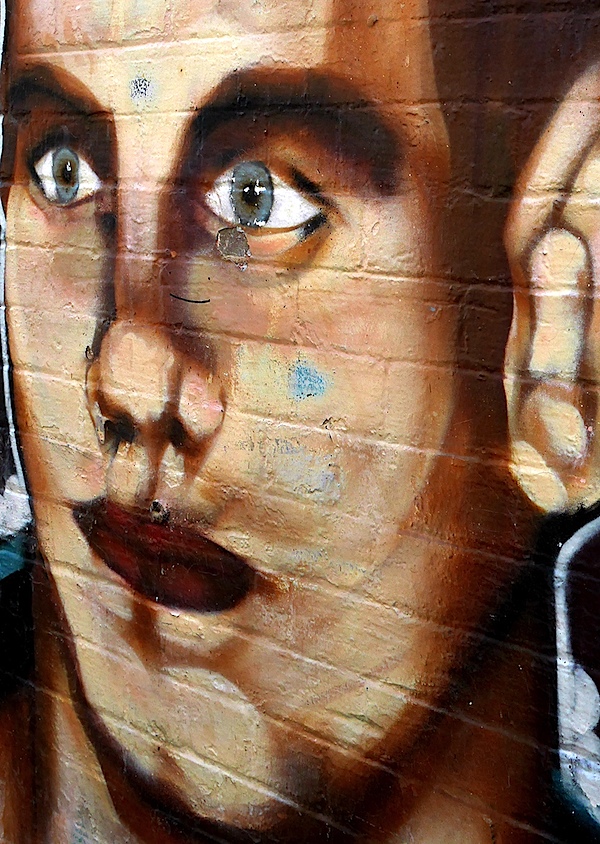
    Panasonic Lumix DMC-GX7 Mural

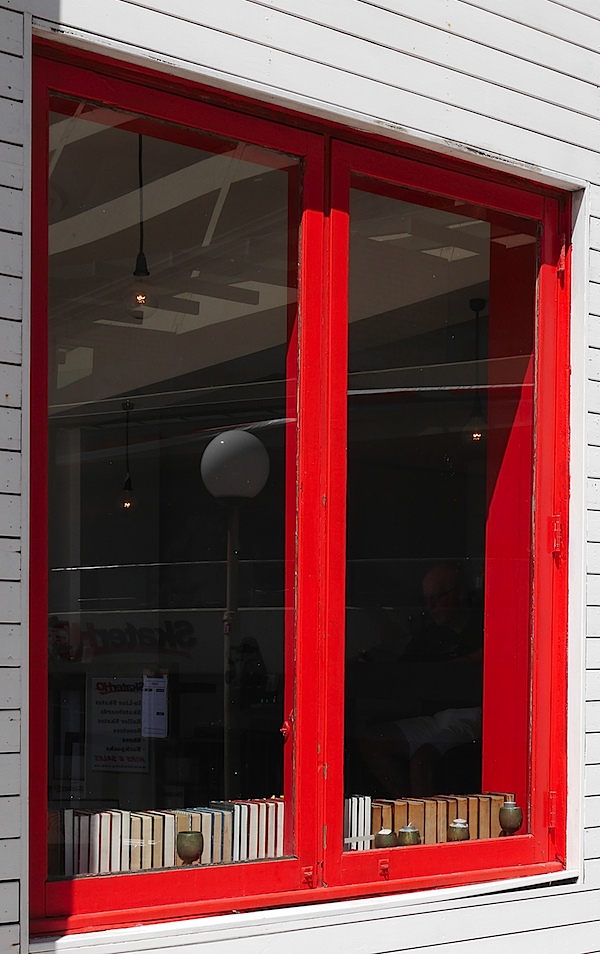
    Panasonic Lumix DMC-GX7 Window

    Stabiliser

    But the big news for those who may have been tossing up between Olympus and Panasonic in the quest for a MILC camera is that the GX7 now has an internal stabiliser. Up to now only Olympus offered an internal stabiliser, while Panasonic’s G series had to rely on specific lenses to keep the camera image steady.

    In Panasonic’s own words: ‘The DMC-GX7 is Panasonic’s first G Series camera to offer an in-body optical image stabilisation system. Now blur-free photography can be enjoyed with classic non-digital lenses and digital interchangeable lenses without image stabilisation.’

    Mind you, there always was a degree of noise from some Olympus owners that ‘Image stabilisers in Olympus cameras are mostly useless, claiming only the OM-D E-M5 as being acceptable.’

    Wasn’t me that said it!

    Handling

    The camera is comfortable in the hand, thanks to a well-defined speed grip, nobbly surface texture and good balance. The lensless camera body is pocketable.

    Controls

    No surprises as we find the top deck relatively uncluttered. Rightwards we find the on/off lever; nearby is the red video record button.
    Scene guide.jpg

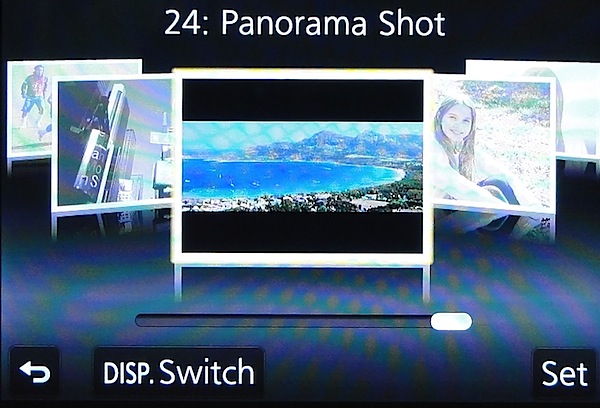
    The mode dial has positions for auto, PASM, creative video (you can manually set aperture and shutter speed), three custom modes, scene guide mode (24 settings from clear portrait to sunset glow to panorama) and creative control mode (eight settings, from expressive to retro, high and low key etc).

    The shutter button is encircled by the front command dial. A second command dial is placed just behind the on/off switch. Nearby is the AF/MF lever.

    Rear panel: three function buttons, replay and trash, display options plus the four way jog dial offering access to ISO, white balance, continuous shooting, self timer and AF mode options.

    Overall, the control geography is well designed, with no devious buttons or mysterious options.

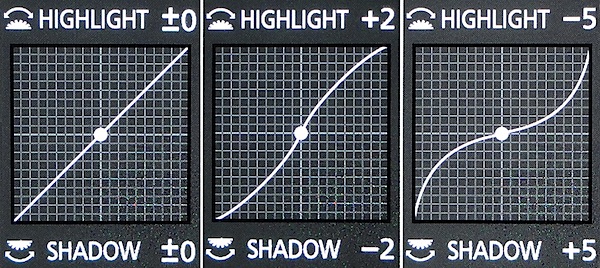
    And then I fell upon a neat scheme where you can adjust the highlight and shadow curves of an image pre-shoot. Simply tap the function 2 button and you sight a series of preset curves. Alternatively, you can adjust the highlight and/or shadow section of the curves by rolling the forward or rear command dial.

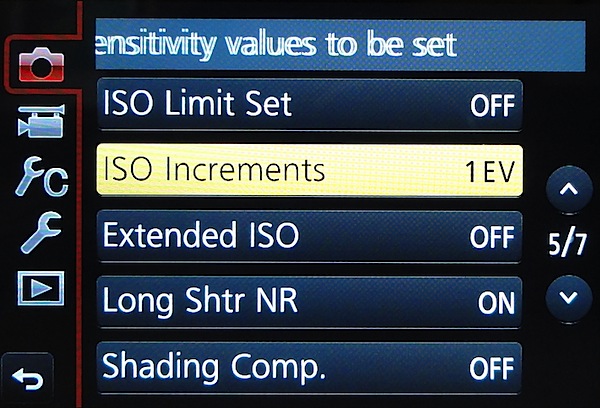
    Menu.jpg

    The menu setup is well-designed and not overpowering.

    Curves.jpg

    One feature that should tug the heart strings of video shooters is the option to completely suppress camera sounds, you know those bumps and clicks from operating the camera, rolling the lens’ zoom etc. The camera also switches the shutter from mechanical to electronic, turning off any operating sounds, and suppresses the AF assist lamp and flash. Good news.

    The sad news is that there is no input for an external mic for video work.

    Panasonic Lumix DMC-GX7 ISO Tests

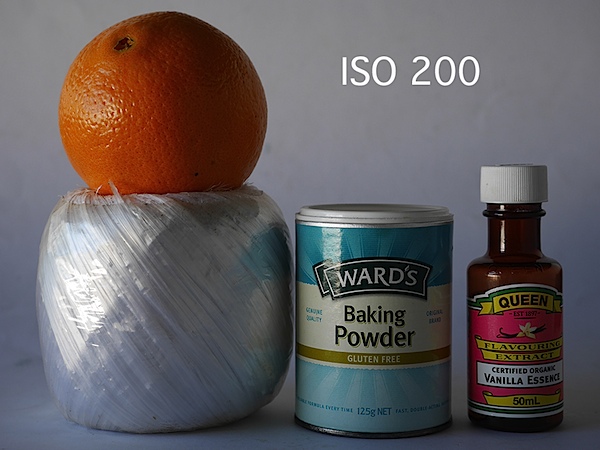
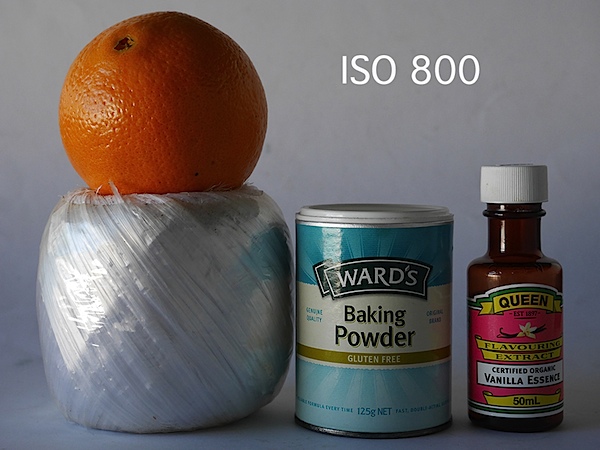
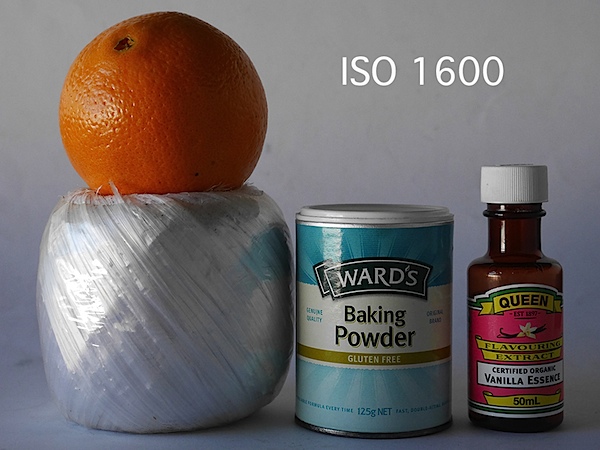
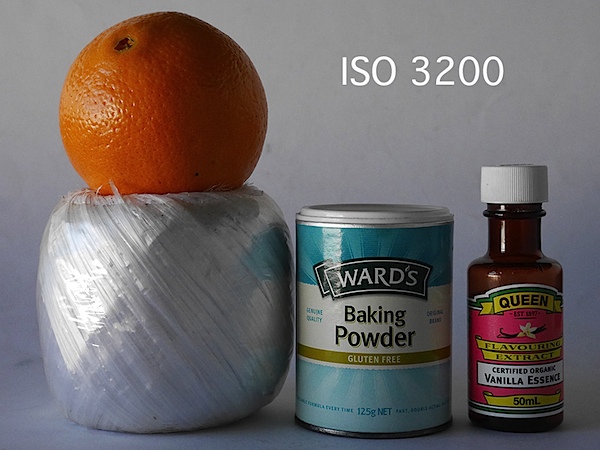
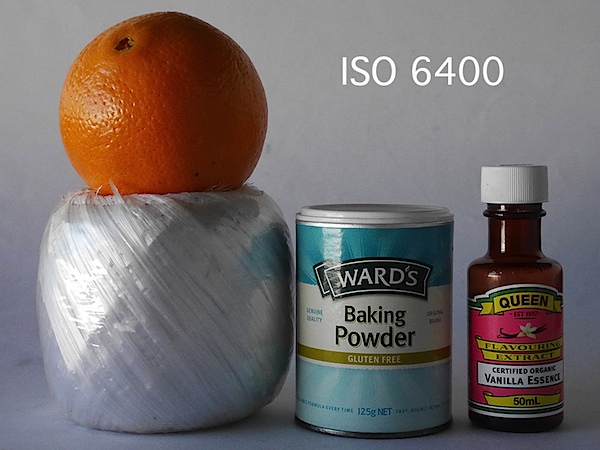
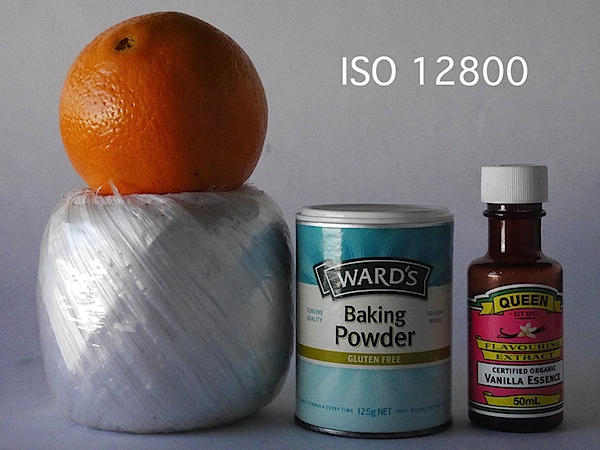
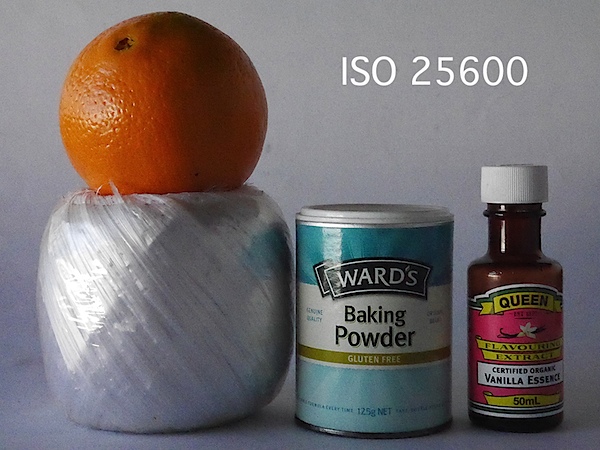
    Good quality all the way up to ISO 6400. Only at ISO 12800 is a slight appearance of noise visible. At ISO 25600 noise is up further but images are useable.

    Panasonic Lumix DMC-GX7 Review Verdict

    Panasonic Lumix DMC-GX7 ISO 200.JPG

    Panasonic Lumix DMC-GX7 ISO 800.JPG

    Panasonic Lumix DMC-GX7 ISO 1600.JPG

    Panasonic Lumix DMC-GX7 ISO 3200.JPG

    Panasonic Lumix DMC-GX7 ISO 6400.JPG

    Panasonic Lumix DMC-GX7 ISO 12800.JPG

    Panasonic Lumix DMC-GX7 ISO 25600.JPG
    Quality: above average.
    Why buy the Panasonic Lumix DMC-GX7: enthusiast features; compact size.
    Why not buy the Panasonic Lumix DMC-GX7: no reason.

    An ideal camera for the enthusiast who wants the benefits of an internal stabiliser and ability to use a wide range of lenses.

    Panasonic Lumix DMC-GX7 Review Rating: 4 Stars out of 5.

    Panasonic Lumix DMC-GX7 Specifications

    Image Sensor: 16 million effective pixels.
    Metering: Multiple, centre-weighted and spot.
    Effective Sensor Size: Four Thirds 17.3×13.0mm CMOS.
    Lens Factor: 2x.
    Compatible lenses: Micro Four Thirds.
    Exposure Modes: Auto, Program AE, shutter and aperture priority, manual.
    Shutter Speed: Bulb, 60 to 1/8000 second; flash sync 1/320 sec.
    Burst Speed: 5 fps.
    Memory: SD/SDHC/SDXC cards.
    Image Sizes (pixels): 4592×3448 to 1712×1712. Movies: 1920×1080, 1280x720p, 640×480.
    Viewfinders: Turret finder: 2,764,800 pixels. 7.6cm LCD screen: 1,040,000 pixels.
    File Formats: JPEG, RAW, JPEG+RAW, AVCHD/MPEG4, MPO (3D).
    ISO Sensitivity: Auto, 125 to 25600 (25,600 with boost).
    Interface: USB 2.0, AV, HDMI mini, WiFi, DC input.
    Power: Rechargeable lithium ion battery, AC adaptor.
    Dimensions: 123x71x55 WHDmm.
    Weight: Approx. 402 (inc card and battery).
    Panasonic Lumix DMC-GX7 Price: Get a price on the Panasonic LUMIX GX7 Body Only or Panasonic LUMIX GX7 with LUMIX G VARIO 14-42mm II Lens or Panasonic LUMIX GX7 with LUMIX G 20mm F1.7 II ASPH Lens.

    Post originally from: Digital Photography Tips.

    Check out our more Photography Tips at Photography Tips for Beginners, Portrait Photography Tips and Wedding Photography Tips.

    Panasonic Lumix DMC-GX7 Review

    The post Panasonic Lumix DMC-GX7 Review by Barrie Smith appeared first on Digital Photography School.


    Digital Photography School

  • A Taste of Oakland Uptown Block Party

    A Taste of Oakland
    $ 2 micro Brew beers tonight at Kitchener in Oakland for A Taste of Oakland.

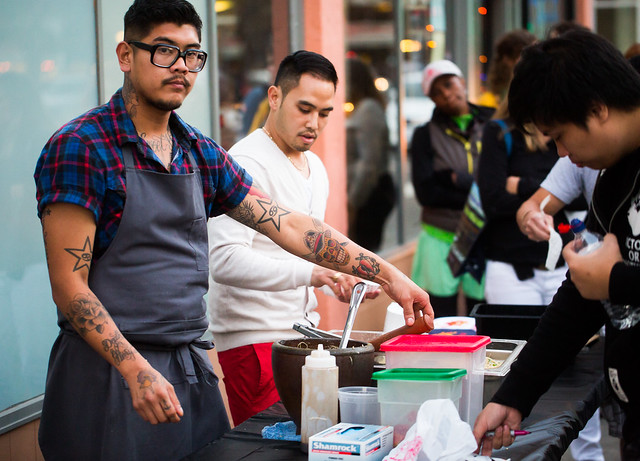
    Earlier tonight mrsth and I enjoyed a night out on the town in Oakland at A Taste of Oakland’s Uptown Block Party. The food/cocktail event included 24 participating Uptown Oakland restaurants and bars.

    A Taste of Oakland was founded by two Oakland natives, Helen Wyman (of Oakland Events) and Lamont Dawson. Their mission is to promote local businesses, highlight Oakland’s assets, change perceptions of Oakland, build a sense of community between the residents and the business community and showcase the culinary revolution that has become prominent in the food industry, establishing Oakland as a culinary destination.

    I’d say based on tonight’s successful event, they did just that.

    Participating restaurants/bars included: Kitchener, Sweet Bar Bakery, Hawker Fare, Pican, Ozumo, Luka’s Taproom & Lounge, Plum Bar, Donut Savant, Era Art Bar & Lounge, Torpedo Sushi, Farley’s East, Anfilo Coffee, Vo’s Restaurant, Telegraph, The Legionnaire Saloon, Kingston 11 Cuisine (although they weren’t open yet), Hutch Bar & Kitchen, Rudy’s Can’t Fail Cafe, Make Westing, Somar Bar, Camber, Bench & Bar, Dogwood and Mockingbird.

    The evening gave Oakland food and restaurant aficionados a great opportunity to sample a ton of different restaurants and bars over the course of the three hour event in stylish Uptown. It was a great opportunity to check out new places and plan for further dinners and reservations down the road.

    My favorite restaurant of the event was the newcomer Mockingbird. They served a duck pate that was delicious! I’ve been wanting to try Mockingbird and that will probably be the next dinner I have out.

    I also really enjoyed the North Carolina pull pork that Rudy’s Can’t Fail Cafe served, the pull pork sandwich served by Telegraph, the Thai food at Camber and the Four Roses Bourbon cocktail served by Hutch. The pork meatball at Ozumo was pretty tasty too. The restaurants were all within walking distance and it was priced at a very affordable $ 20 per ticket.

    With 24 venues, the event had a lot of local community support, it felt like most of the restaurants in Uptown participated — although the woman at Catered to You was outside offering samples of her decadent buffalo french fries complaining that this was the second time she’d asked to be included and wasn’t. Hopefully she gets in on the next one. :)

    Thanks for a great night out A Taste of Oakland. Looking forward to more of your great events in the future! #taseteuptown #tasteofoakland

    To see more photos from tonight’s event, check out this set on Flickr here.

    A Taste of Oakland
    maitre d’ at Pican.

    A Taste of Oakland
    Serving at the Pop Up Outside Hawker Fare.

    A Taste of Oakland
    $ 5 specialty cocktails at a Taste of Oakland restaurants and bars. This one at Pican.

    A Taste of Oakland
    Hutch served an excellent Four Roses Bourbon cocktail along with popcorn popped in bacon fat.

    A Taste of Oakland
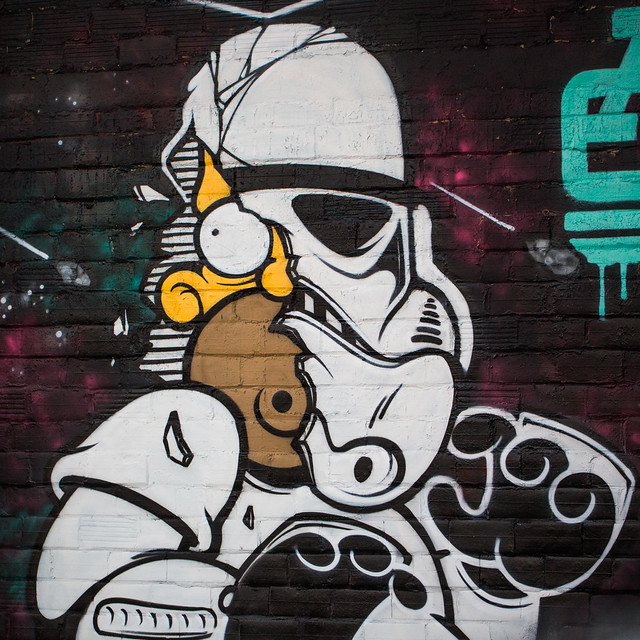
    A little Oakland street art between restaurants — a Homer Simpson / Stormtrooper mashup outside Hawker Fare.

    A Taste of Oakland
    Serving Thai food at Camber.

    A Taste of Oakland
    Torpedo Sushi was serving up their California roll on a potato chip.

    A Taste of Oakland
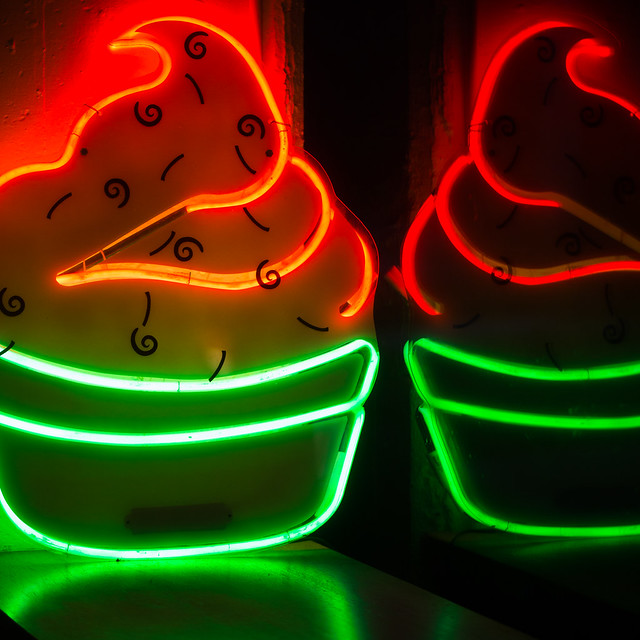
    The dreamland of neon cupcakes at Sweet Bar Bakery who were serving a taste of chocolate or ginger cookies.

    A Taste of Oakland
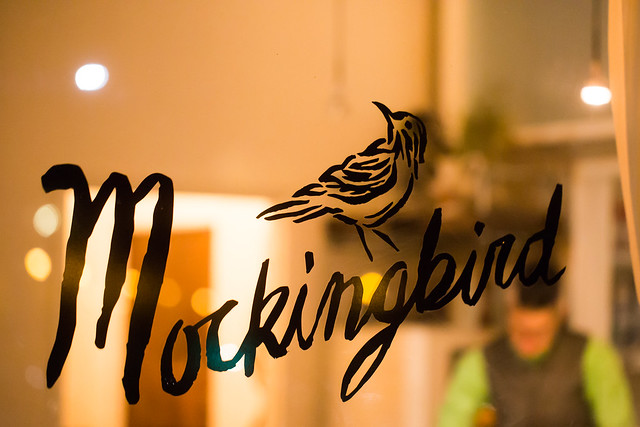
    Newcomer Mockingbird, my favorite restaurant of the evening.

    A Taste of Oakland
    Enjoying a cocktail at the bar at Ozumo.

    A Taste of Oakland
    Making Jameson and tea cocktails at Plum Bar.

    A Taste of Oakland
    That pork meatball at Ozumo was pretty damn good.

    A Taste of Oakland
    Serving pull pork sandwiches at Telegraph.


    Thomas Hawk Digital Connection

  • 25 Shadow Images to Inspire You

    Image by padawan *(xava du)

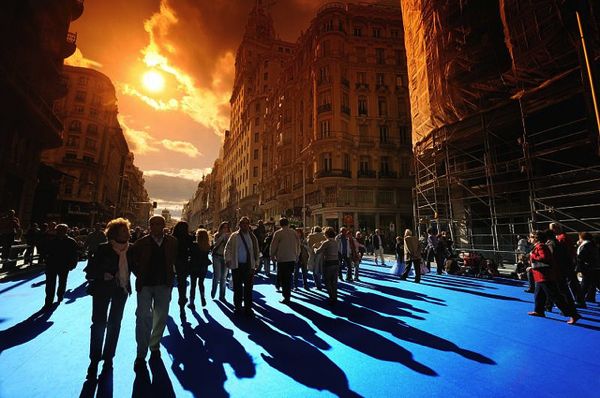
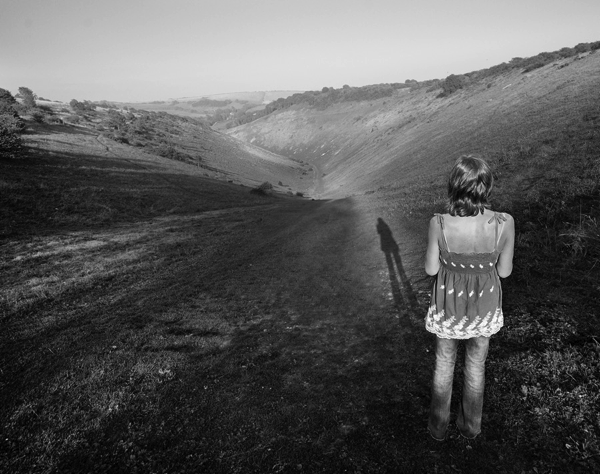
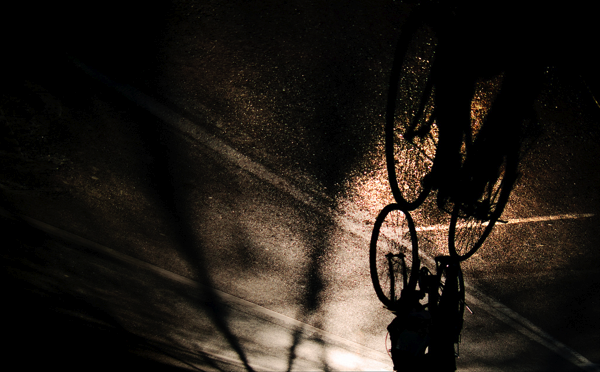
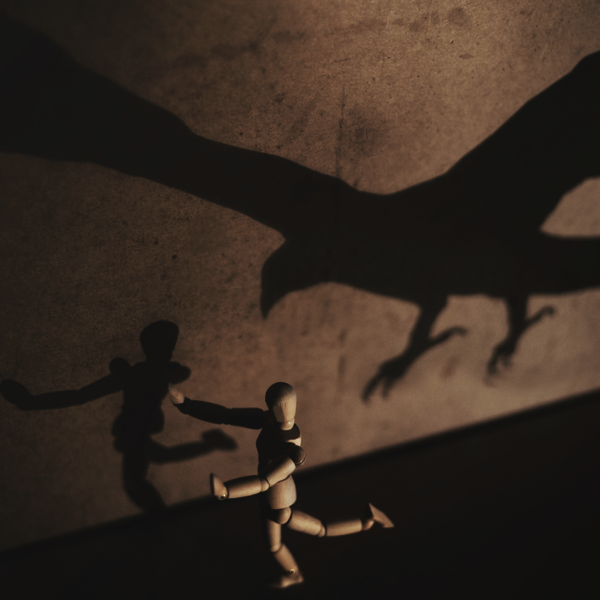
    Today as I was pulling together some images for this weekend’s photo challenge (on the them of ‘Shadows’ – I’ll officially launch it later today) I found so many cool images that touched on the theme that I thought I’d pull them together into an image collection. I hope they give a little inspiration and a few ideas on how to tackle the challenge this weekend.

    Image by seanmcgrath

    Image by Raúl A.

    NewImage

    Image by Jose Maria Cuellar

    NewImage

    Image by Rob

    NewImage

    Image by Jonathan Kos-Read

    NewImage

    Image by Zev

    Image by ElMarto

    Image by thejbird

    Image by d?nito

    Image by icedsoul photography .:teymur madjderey

    Image by Rufus Gefangenen

    Image by NuageDeNuit

    Image by Martino’s doodles

    Image by Alexbip

    Image by mugley

    Image by Whatknot

    Image by fabbriciuse

    Image by Ric e Ette

    Image by Greekadman

    Image by ms4jah

    Image by Rickydavid

    Image by kevindooley

    Image by Paulo Brandão

    NewImage

    Image by Davide Cassanello

    Post originally from: Digital Photography Tips.

    Check out our more Photography Tips at Photography Tips for Beginners, Portrait Photography Tips and Wedding Photography Tips.

    25 Shadow Images to Inspire You

    The post 25 Shadow Images to Inspire You by Darren Rowse appeared first on Digital Photography School.


    Digital Photography School

  • 7 Tips for Kayak Paddling Photography

    I would like to remind you this old post, How Did you Shoot It? with some updates and revisions. It was written two years ago as part of ProBlogger’s group writing project – “How to …” I hope that these tips are still useful. They represent quite well my own approach to paddling photography.


    After posting the above picture, “Paddling in Clouds”, I’ve got several questions: How did you do it? And, I had troubles to provide a reasonable answer since the shot was technically really trivial.

    Finally, I figured out that it is more about seeing pictures than about shooting and wrote these more general comments.

    1. Look and See

    Learn to see pictures. You do not need a camera to practice it. I am often “shooting” without camera, especially, when driving: that would be a good picture, this old barn would look great at sunrise, that dust devil at a horizon can be seen only through polarized glasses.

    I believe that looking at photographs in magazines, books and calendars also help to develop your seeing capability. I am checking all new photography books arriving to my university library and browsing most of photography magazines in a local bookstore.

    There are several good books on the art of seeing. Freeman Patterson comes to my mind first. Recently, I spent a lot of time with Photographer Eye by Michael Freeman.

    2. Have a Camera

    A photographer is shooting pictures, not a camera, but you should have your camera ready. “Ready” means not only accessible. You should be familiar with your camera settings and operations. Learn what camera settings are working for your paddling photography. It may be difficult to figure out camera features when sitting in a tippy kayak and waves are splashing.

    Compact waterproof digital cameras like Pentax Optio “W” or Olympus Stylus “SW” revolutionized my kayak photography. I can shoot pictures I was not able to execute before, e.g., with a partially submerged camera. I am ready to sacrifice some camera features or to some extend a picture quality for convenience and accessibility of these tiny camera for paddling environment.

    3. Be Aware of Light

    The best light for outdoor photography is when the sun is low, i.e., around sunrise and sunset. I know that I can expect interesting light at the end of my afternoon paddling workout. If the sunset is not very exciting I can shoot water reflections or a tree silhouette.

    Ironically, on paddling trips, we are often passing the best scenery in the middle of day, when the light is harsh and unpleasant. I am still shooting some snapshots for documentary purposes. My primary motivation to start paddling fast kayaks was to get in time to my shooting spots. All that racing craziness came later …

    4. Point (compose) and Shoot

    Do not be afraid to shoot without viewfinder. Well, you don’t have one in Pentax Optio. And, the LCD display is often difficult to read in a bright sun. It shouldn’t stop you from shooting. Use some creative angles as far as you can extend your arm. Remember, you can put this camera under water next to you kayak. The lack of a viewfinder is perhaps the main reason preventing some photographers from buying this camera, but I think that this a reasonable compromise in the camera of this size.

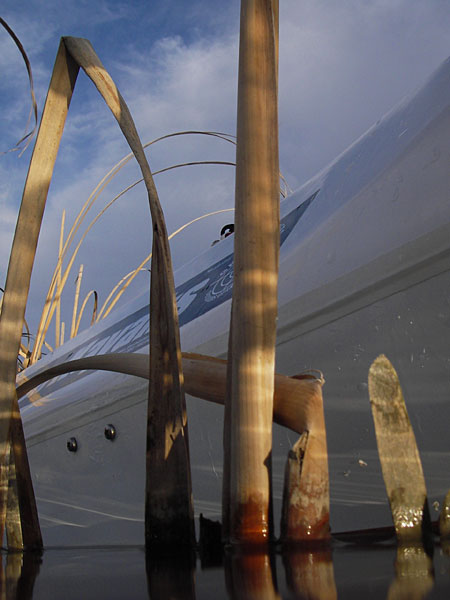
    I didn’t have a clear view of the camera display when shooting my “Paddling in Clouds” picture. I was just trying to keep a paddle diagonally in my frame.

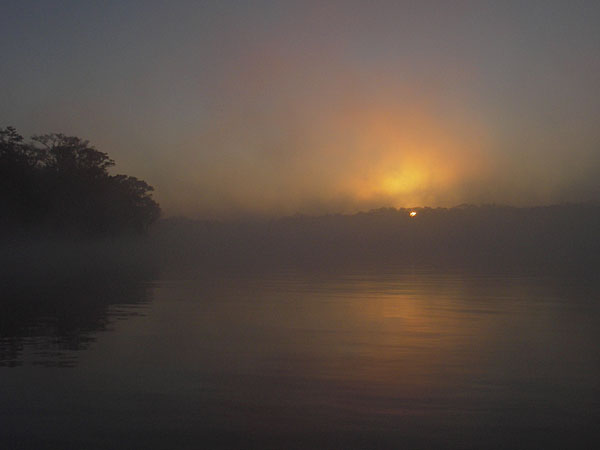
    foggy sunrise over Suwannee River, Florida

    5. Shoot Multiple Frames

    Shooting pictures with a digital camera is cheap. You do not need to worry about film cost. You can always erase the picture and shoot again unless you are after some action shots. So, do not be afraid to experiment and shoot even if you do not see the image in your LCD monitor. Shoot some extra frames. It is helpful to have an adequate memory card.

    I shot about 30 frames trying to catch a sky reflection in water and in my paddle. However, I would show not more than 3 or 4 from those 30 frames.

    6. Practice

    The more you shoot the better you should get. I have shot similar pictures before including reflections and a paddle.

    Review your pictures on the camera LCD if possible. Check the histogram. Analyze your shots after paddling on a computer screen. You have all information about camera setting included in each digital image file. Try to figure out what worked and what not. Learn from mistakes.

    7. Have Fun

    I don’t consider myself a professional photographer. When paddling I am shooting what I like just for fun. Documenting my paddling trips and races is still fun. I feel free to experiment.

    The great Alfred Stieglitz was an amateur photographer too. Anyway, the photography is not a profession…

    Sometimes I sell a picture to a magazine or donate to a book cover. A year ago, I started to sell my pictures through microstock agencies. I am just taking more often my DSLR camera and a tripod for paddling.

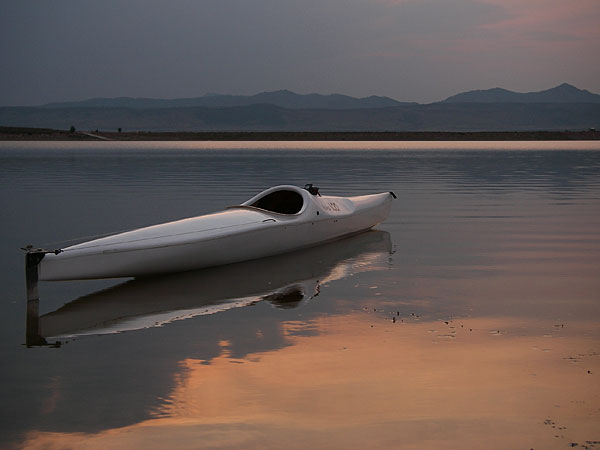
    Related posts:kayaking Colorado - Douglas Lake

    • Use Your Paddle to Stabilize Camera
    • No Viewfinder? 10 Tips on Shooting Pictures without Viewfinder
    • Pentax Optio WP/WPi – 10 Tips on Paddling and Shooting
    • Can Pentax Optio waterproof cameras be used in the water?
    • Pentax Optio W10 as a Helmet Cam – Inline Skating along the Poudre
    • Shooting movies with Pentax Optio WP and W10 and Sisson Nucleus 100 kayak


    paddling with a camera