Category: Photography

  • The 7 Latest and Greatest Camera Bags of 2013

    One of the most neglected and ignored of all photography accessories is the camera bag! It seems like most photographers—even some of the professional ones—just don’t care about keeping their cameras in great condition and preserving them for years to come. Most people just grab and carry their cameras in their hands, slung around their shoulders, you name it, but Continue Reading

    The post The 7 Latest and Greatest Camera Bags of 2013 appeared first on Photodoto.


    Photodoto

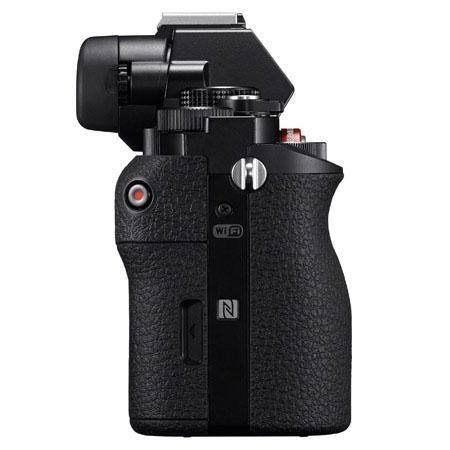
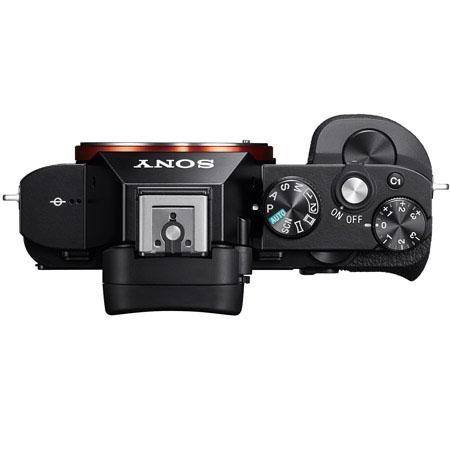
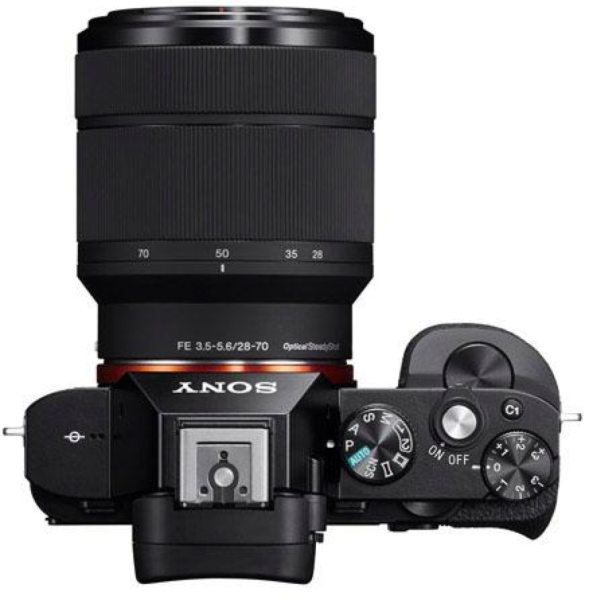
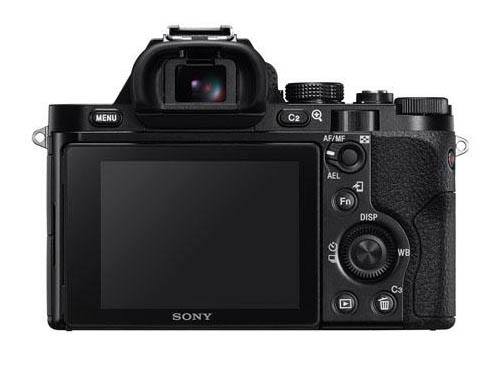
  • Sony release Lightest FULL FRAME camera with interchangeable lens, ever! The A7r

    Sony are launching their new range (two models) of small, lightweight FULL FRAME cameras – right now! You can watch via this link. Updates as they happen.

    I don’t say this lightly, but we see the words “game changer” used a lot in photographic circles… I’ve spent some time with the NEX range, I’ve used an RX1 to photograph a wedding and if I’m honest – the only person that could tell the difference from the other camera I was shooting with was me when I looked at the exif. The client was supremely happy and I was excited to be shooting with this solid little chunk of awesome. I said to myself “You know what… if this thing had an interchangeable lens, there wouldn’t be many reasons for me to be using all this “big stuff” ..and I’m certainly not saying rush out and pawn your dSLR gear… but well, these new cameras from Sony, they really could be “Game changers”

    Time will tell!

    UPDATE: The last update is a “hands on video over on SonyAlphaRumours”

    UPDATE: Pricing a7 body only $ 1,699 USD, a7 w/ 28-70mm lens $ 1,999 USD and a7r body is $ 2,299

    UPDATE: Grip takes two W series batteries, all control features available via grip.

    UPDATE: 35mm f2.8 lens, 55mm f/1.8 (FE denotes full frame coverage) all E Mount Sony lenses will work.

    UPDATE:  Sony Australia release an image gallery of the new cameras / lenses.

    UPDATE: Shipping in Aus from November (mid to late) pre-orders from Friday 18th October

    UPDATE: 3 models, two bodies and one ‘kit’

    UPDATE: A comparison size picture, lovely….

    a&-sony-sensor-comparison

    Sony-NEX-Full-Frame-A7R

    Pictures via Sony Full Frame Cameras Facebook Page


    What we know so far…

    There are two models, here are the basic spec of these two cameras..

    A7r: – Lightest FF camera with interchangeable lens ever

    36.4 MP – gapless lens design on sensor (no AA filter).

    Each on-chip lens is optimally positioned depending on its location to accommodate the sharper angle of light entering the periphery, which is caused by larger sensor dimensions being teamed with the E-mount’s short flange-back distance.

    New BIONZ X image processing engine.

    14-bit RAW image.

    ISO 100-25600 (with 50 ISO extension).

    Advanced 1200-zone evaluative metering.

    4fps (Max. 1.5fps, Speed Priority Continuous shooting).

    1/8000 to 30sec shutter.

    TRILUMINOS™ Color technology (color space).

    1080 HD uncompressed, 60p/24p and 60i frame-rates. AVCHD and MP4 codec.

    2.4M dot OLED EVF.

    25 points contrast AF – +/- 5EV compensation.

    Tiltable 3.0” (1,229k dots) Xtra Fine™ LCD.

    Multi-interface Shoe for flash.

    PC control with remote video capture control.

    Wi-Fi®/NFC control.

    Playmemories App.

    Weight 465g (with battery and card)

    Battery 1080 mAh for 340 shots (with LCD monitor always on!)

    Weather sealed body.

    And the lower spec model;

    A7 (I do only list what’s different from the A7r): – 24 MP (has AA filter)

    117 points (phase-detection AF), 25 points (contrast-detection AF)

    5fps (Max. 2.5fps, Speed Priority Continuous shooting)


    Sony-NEX-Full-Frame-A7R

    Pictures via Sony Full Frame Cameras Facebook Page

    Sony-NEX-Full-Frame-A7R-Side

    Pictures via Sony Full Frame Cameras Facebook Page

    Sony-NEX-Full-Frame-A7R-E-Mount

    Pictures via Sony Full Frame Cameras Facebook Page

    Sony-NEX-Full-Frame-A7R-28-70-f3-5-5-6

    Pictures via Sony Full Frame Cameras Facebook Page


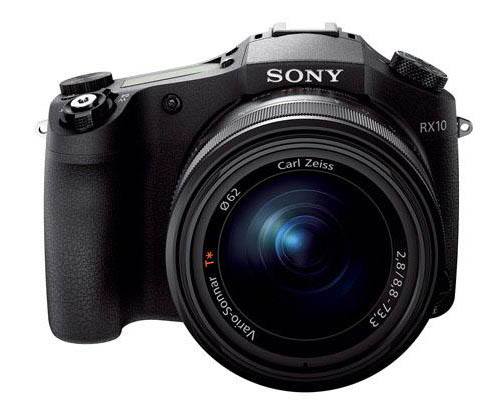
    As a bit of a side-note, but still very cool, Sony are also launching their new RX10 – a SuperZoom.

    sony-superzoom-rx10

    Pictures via Sony Full Frame Cameras Facebook Page

    The new RX10! 24-200mm F2.8 in a magnesium body.


    Post originally from: Digital Photography Tips.

    Check out our more Photography Tips at Photography Tips for Beginners, Portrait Photography Tips and Wedding Photography Tips.

    Sony release Lightest FULL FRAME camera with interchangeable lens, ever! The A7r

    The post Sony release Lightest FULL FRAME camera with interchangeable lens, ever! The A7r by Sime appeared first on Digital Photography School.


    Digital Photography School

  • Use Lightroom Collections to Improve your Workflow

    Using Lightroom Collections

    The main benefit of Lightroom’s Library module is that it gives you the tools you need to get organised and speed up your workflow. The end result is that you can spend more time in the Develop module – the place where you creatively process your photos.

    The best way to get organised is by using Collections and Collection Sets. There seem to be as many ways of using Collections as there are photographers. I’m going to look at two in this article. The first uses Collections, and the second Smart Collections. Together they will give you an insight into how you can use Collections to improve your workflow.

    Why use Collections?

    You may be wondering why you should use Collections in Lightroom instead of the Folders panel. Here’s why:

    1. The Folders panel is only available in the Library module.

    The Collections panel is accessible from every module. Adobe wants you to use the Collections panel as it is the most practical way to organise your images.

    2. Collections and Collection Sets give you far more freedom than the Folders panel.

    The contents of the Folders panel mirrors the file structure of your hard drive. Let’s say you take a photo of a friend called Amy in Hong Kong. In the Folders panel, that photo can only exist in one place – the physical folder where it has been saved on your hard drive.

    However, the same file can be stored in as many Collections as you like. It could be part of a Collection called ‘Amy’, another called ‘Hong Kong’, perhaps another called ‘Favourite photos’. There is no limit to the number of Collections you can add it to.

    It’s a little like using Playlists in iTunes. You can add a song to as many Playlists as you like. It’s the same in Lightroom with photos and Collections.

    Organise your images

    Hopefully you’re now beginning to see just how flexible and convenient Collections are. Now let’s take a look at how you can use them to organise your images.

    Other photographers’ methods

    When it comes to learning how to use Lightroom, don’t feel that you have to figure everything out yourself. There are plenty of outstanding websites dedicated to using Lightroom, and lots of photographers who share the way they work for others to use. There’s no need to re-invent the wheel – just find a way that works for you and tweak it to suit your needs.

    In that spirit, I’m going to look at two methods for using Collections I learnt from other photographers.

    Technique 1: Using multiple Collections

    Using Lightroom Collections

    This technique is based on a method I read about on Scott Kelby’s blog. I like it because it’s simple, and the easiest way that I’ve found to narrow down the images you take in a shoot to the ones that you want to process. The quicker you can do that, the sooner you can move on to the Develop module. Here’s a brief description of how it works:

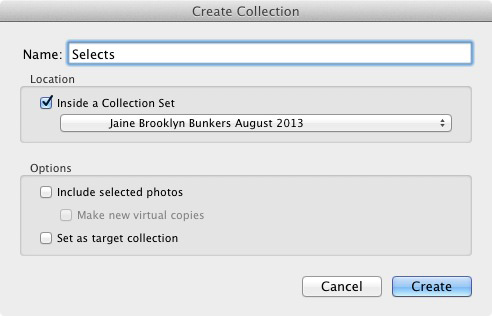
    • Create a Collection Set and give it a name relevant to the shoot (i.e. the name of the place where the photos were taken, or the person in the photos etc.)
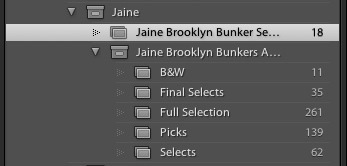
    • Create three Collections inside that Collection Set. Name them Full Shoot, Picks and Selects.
    • Send all the photos from the shoot to the Full Shoot Collection.
    • Flag your favourite photos from the Full Shoot Collection and send them to the Picks Collection. You don’t have to be really selective at this stage. You’re eliminating the worst images rather than picking the best.
    • Use flags to mark your best photos from the Picks Collection and send them to the Selects Collection. This is where you get really picky – the aim is to select only the very best photos from the shoot, the ones you intend to process.

    Of course, you can adapt this to you own needs. If you don’t take many photos during a shoot, you may only need two Collections to narrow them down. On the other hand, if you want to convert some of your photos to black and white, you could create an additional Collection to hold those images.

    Using Lightroom Collections

    As you can see, I ended up creating five Collections for the above shoot.

    The process is outlined in full here.

    Technique 2: Using Smart Collections

    Using Lightroom Collections

    The previous technique relies on you adding photos to each Collection manually. But it’s also possible to use Smart Collections that Lightroom populates automatically. Photographer Rob Knight has the following system:

    • Create a Collection Set – give it a relevant name (in Rob’s example he uses ‘Landscape’).
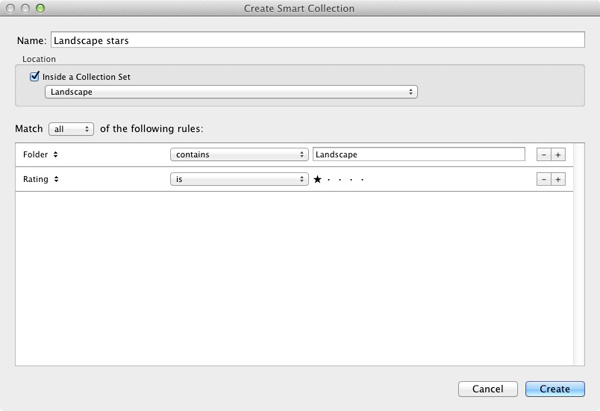
    • Create two Smart Collections inside the Collection Set. Rob names his ‘Landscape picks’ and ‘Landscape stars’. All he has done here is add the words ‘picks’ and ‘stars’ to the name of his Collection Set. The article (link below) explains what rules to set.
    • Go to the Folder containing the images, and flag the best as picks. They are sent automatically to the ‘Landscape picks’ Smart Collection.
    • Go to the ‘Landscape Picks’ Smart Collection and give the best images a one star rating. Lightroom adds them to the ‘Landscape stars’ Smart Collection. This Smart Collection contains the best images from the shoot.

    You can read about it  here.

    Over to you

    If you have an interesting way to use Collections yourself, then why not leave a comment? I would love it if readers could share some of their ideas – I’m also curious to see how other people use Collections.

    Mastering Lightroom Book One: The Library Module

    Using Lightroom Collections

    My latest ebook Mastering Lightroom Book One: The Library Module is a complete guide to using Lightroom’s Library module to import, organise and search your photo files. You’ll learn how to tame your growing photo collection using Collections and Collection Sets, and how to save time so you can spend more time in the Develop module processing your photos.

    Post originally from: Digital Photography Tips.

    Check out our more Photography Tips at Photography Tips for Beginners, Portrait Photography Tips and Wedding Photography Tips.

    Use Lightroom Collections to Improve your Workflow

    The post Use Lightroom Collections to Improve your Workflow by Andrew Gibson appeared first on Digital Photography School.


    Digital Photography School

  • IM Creator: The Free Website Builder That Any Photographer Would Kill to Have!

    At Photodoto, we understand professional photographers perfectly. We know that one of the most important tools that professional photographers can have is a sharp, modern and attractive website. Without one, your professional life becomes so much harder and, naturally, less visible. So, by all means, get one! What better way to get one, though, than your very own free website Continue Reading

    The post IM Creator: The Free Website Builder That Any Photographer Would Kill to Have! appeared first on Photodoto.


    Photodoto

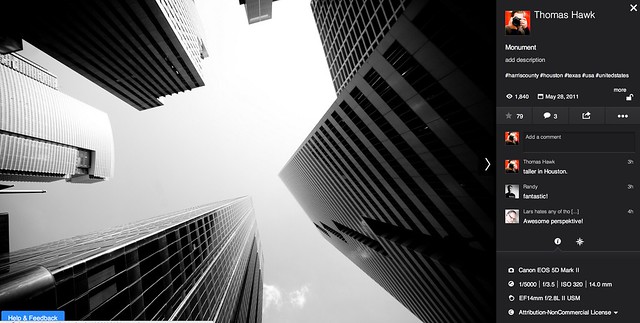
  • Flickr Rolls Out New Photo Preview Page to All Users

    Flickr Opens Up New Photo Preview Page to Users

    Yesterday Flickr opened up their new photo page preview to the world. I opted in to the new photo page this morning and here are my initial thoughts on it. Overall I like it.

    1. Photos are bigger. The bigger the photo the better. Flickr eliminated top menu items on the page. They also eliminated the hint area to encourage people to scroll below the fold. By moving the top and bottom non-photo information to the side of the photo, this allows bigger photos.

    2. You no longer have to scroll to see a lot of the important information around a photo. Having a lot of the information that people care about to the side of the photo, makes it easier to get to this information. You know, sort of like how Google+ does it. ;)

    3. I’ve got mixed feelings on the new hashtags. I do like the fact that Flickr has added #tags to all Flickr tags… I think. This is the new methodology for tags in social media (i.e. Twitter, Instagram, Facebook, Google+ and everybody else in the world), so it would make sense that people would be more familiar with this concept, especially new users.

    On the other hand, hashtags don’t really work very well for multi word tags and descriptions (the space between words gets stripped out). So “Saved by the Deleteme Uncensored Group” on the old Flickr photo page now becomes #savedbythedeletemeuncensoredgroup, which looks like a big mess. A lot of Flickr users would tag phrases and thoughts in the tag section of their photos and these are now pretty much unreadable.

    Also Flickr now hides a lot of tags underneath a “more” button. This to me would seem to discourage users from using lots of descriptive tags, which I think are important for organizational and search reasons on Flickr. I don’t think any tags should be hidden under a “more” button. All tags should be shown on the photo page.

    Groups and others who relied on multi word tags for photo games, may not like the new tagging structure.

    4. A lot of the full functionality of the new photo page is being developed. This new photo page is by no means the final product. I think it’s good that Flickr lets people opt in and opt back out, to try it out. It’s a little bit of perpetual beta in a way and I like that Flickr is willing to put itself out there without having everything at 100%. Move fast and break things (as they say over at Facebook).

    5. The new Flickr photo page is an under-developed preview, this means that there are quite a few things that still need to be done (some of which are planned and in the works by Flickr).

    We need to be able to generate html code to blog images off site still (it’s coming). We need to be able to see all sizes of our photos and download our photos (it’s coming). We need to be able to click on favorites and see who has favorited an image. We need to be able to click on a date an image was taken and have it take us to the calendar archive view for that day of our photos. You can’t edit a comment on a photo after you make it (you can only delete your comment and start over). HTML formated links seem to be borked in photo descriptions.

    Lots of little things still need to be added in to the photo page. It’s missing a lot of functionality still. The design looks good though and I hope they implement all these little things quickly.

    6. My favorite thing about the new photo page is that it really highlights your sets. Sets are one of my favorite things on Flickr. I’ve made over 1,800 sets on Flickr. With the new photo page, Flickr now shows other thumbnails of photos from the same set and not just a link to the set. I think this will drive more views to people’s sets on Flickr, which is a great thing. [Note: this seemed to be working earlier today, but now it seems like this feature is not showing on my photos]

    7. According to Neil Howard, the new Flickr photo page doesn’t support secure SSL browsing. SSL is the “https://” that makes a connection encrypted which is used by a lot of people.

    8. I do like the new feedback forum that Flickr is also pushing with this preview. It has a way to vote answers up or down. This seems like an interesting way for staff to pay attention to the things that need to be fixed the most. The forum is already full of the “who moved my cheese” cheeshead bellyaching that comes with every Flickr change, but there is some useful criticism and feedback there that seems to bubble up to the top at the same time.

    One other thing worth noting with these new bigger photos. A lot of photographers have told me over the years that they only load small, low res images on social media sites like Flickr. They think that these smaller photos are “good enough” and fret about having their larger images “stolen.”

    I’ve always uploaded my full high res originals to the Flickr. As display sizes keep getting bigger and bigger, some of the people who have uploaded low res, small photos are going to see their photos begin to look bad in the larger size formats. On the other hand, those of us who always upload high res photos, our photos will still look good at these larger sizes. Especially as more and more photos are being consumed on things like the Flickr app on AppleTV, people ARE actually looking at your photos in much larger format than what you may have initially considered. Everything with photos on today’s web is going BIGGER — just something to think about.

    It is pretty cool that Flickr gives everyone a full terabyte of high res original sized images for free — which means virtually unlimited free storage for your high res photos on Flickr. Google and Facebook should do that too.

    These are my initial thoughts. Now I’m actually going to revert back to the old photo page (so that I can get the html code to blog the image in this post) and then revert back to the new page and keep testing it out.

    What do you think of the new Flickr Photo Page? Do you like it? Love it? Hate it? And why?

    More from The Verge here.


    Thomas Hawk Digital Connection

  • Olympus OM-D E-M1 Review

    Olympus OM-D E-M1 Review front.jpg

    I got the feeling the opposition was spooked by the news that this one was coming. Suddenly, major makers all over town announced press chats to bellow their wares from the heights.

    Olympus has a disturbing habit of delivering tasty morsels resembling full-on meals (!) in a manner far beyond its size. In the past companies such as Nikon and Canon have been justifiably wary of the O company and its moves on the market. This looks like another one.

    The retro-styled, magnesium alloy bodied E-M1 is Olympus’ flagship compact system camera and, in some very obvious ways, announces that Micro Four Thirds has well and truly arrived. Farewell Four Thirds!

    The review camera was supplied with the f2.8/12-40mm lens which has the same type of sealing as the camera body. The E-M1 was loaned to me for only a few days, so this review will have to be a tad cursory … but, please forgive me if I lean on the hyperbole a bit!

    First up, as far as handling goes, we see the benefits of the Micro Four Thirds system: the camera and lens are not a bulky package.

    Olympus OM-D E-M1 Review back.jpg

    Olympus OM-D E-M1 Review top.jpg

    Olympus OM-D E-M1 Features

    The first (and still current) model in the OM-D series was the E-M5 … don’t you just love the numbering system!

    • The 16.3 megapixel LiveMOS sensor has on-chip Phase Detection AF, True Pic VII image processor and a new electronic view finder. No anti-aliasing filter.
    • Dual Fast AF Technology supports both Contrast AF and On-chip Phase Detection AF, which allows users of both the Four Thirds and Micro Four Thirds systems to use their lenses.
    • There’s an enhanced 5-axis image stabiliser for improved stabilisation at lower shutter speeds.
    • ISO range: 200 – 25600.
    • Manual focus with focus peaking.
    • Focus points: 81-area multiple contrast detection AF with 37-area multiple AF phase detection AF.
    • In-camera HDR.
    • Flash: no built-in flash. Flash sync (for external unit): 1/320 sec.
    • Built-in WiFi.
    • Weather sealing: dust, splash, freeze resistance (-10?C).
    • The LCD screen tilts up and down in a vertical plane but does not tilt up and forward for self portraits.
    • Customizable buttons: two on the front.
    • Built-in microphone socket.
    • Interface: AP2 accessory port, AV/USB, HDMI connector.
    • The maximum image size is 4608×3456 pixels, which leads to a 39×29 cm print. Video is in Full HD 1920x1080pixel resolution. If you shoot a still mid video recording the video is interrupted.
    • Continuous shoot at up to 10fps.
    • The intervalometer can shoot up to 999 shots with a movie compilation at the end.
    • The Color Creator mode allows you to adjust the camera’s colour response, accessed from the Function 2 button and allows a live preview of its effects with a navigable colour wheel that changes the hue and saturation of the image.

    Daisies 2.JPG

    Kayak.JPG

    People and model yacht.JPG

    People near lake.JPG

    Yachts 2.JPG

    Olympus OM-D E-M1 Controls

    At first, the camera appears to have a crowded control layout: but this is only because the whole kit is so modest in size!

    Flanking the lens mount are a pair of buttons that offer instant, one touch white balance (targetting a white card) and a preview button that gives you an idea of the scene when stopped down. These buttons are devilishly hard to activate too!

    The first — and only — shock is that the power lever is located at the left of the camera’s top deck, tucked in between two buttons which access AF options and HDR/sequential shooting. It takes some adjusting to feel relaxed with this location!

    Off to the right is the mode dial. This has something I have never seen before: a two way lock to set or release the dial.
    Art Filter.JPG

    Scene Filter.JPG

    This dial gives access to auto, PASM, Art Filters (13), Photo story (in this mode you can shoot multiple shots, then combine them into one image and then add handwritten text), Scene Filters (24), video.

    Nearby are the shutter button, a front and rear control dial, Function 2 button and the familiar video record button. Tucked awkwardly into the far right corner is the Function 1 button.

    On the brow of the top deck and rear panel are the top/LCD viewfinder button and a two position lever that swings from AE to AF options.

    Rear: buttons for Info (screen display options) and menu plus replay and trash.
    The four way jog dial has a central OK button that quickly gives access to ISO, AF/MF, flash choices, image sizes,single/continuous shooting, white balance, etc.

    As you can see, there is a whole forest of choices with often more than one way to get where you’re going.

    It’s worth mentioning there are three options for the touch screen: off, tap and shoot, tap to display a resizeable AF target — then tap to shoot!

    Olympus OM-D E-M1 ISO Tests

    Olympus  OM-D E-M1 ISO 100.JPG

    Olympus  OM-D E-M1 ISO 400.JPG

    Olympus  OM-D E-M1 ISO 800.JPG

    Olympus  OM-D E-M1 ISO 1600.JPG

    Olympus  OM-D E-M1 ISO 3200.JPG

    Olympus  OM-D E-M1 ISO 6400.JPG

    Olympus  OM-D E-M1 ISO 12800.JPG

    Olympus  OM-D E-M1 ISO 25600.JPG

    Only at ISO 6400 is noise slightly noticeable. At ISO 12800 noise is up a little more but still useable. Surprisingly, ISO 25600 would be useable for certain subjects, ie those with no large areas of continuous tone.

    Some Notes

    The viewing setup is to to die for: while the rear screen is excellent, the top finder is superb, sharp and bright, while seeming so close to an actual optical finder. Remember this is a mirrorless camera!

    And note: there’s an underwater case for the Olympus OM-D E-M1, allowing shooting down to 45 metres. It’s equipped with a wireless flash control function and a waterproof lens port can be attached.

    Olympus OM-D E-M1 Review Verdict

    Quality: truly superb quality with tons of access to image management.

    Why you’d buy the Olympus OM-D E-M1: excellent stabiliser for video shooting; arguably the best Micro Four Thirds camera on the market.

    Why you wouldn’t: you don’t have the expertise to drive it!

    And now a confession: in my rush to get shooting I found myself with a lens that was determinedly manual in operation. No way could I get it onto AF. Then I found a tiny leaflet in the lens box that imparted the secret: slip the focus ring forward and you enter auto focus; reverse it and you’re in manual.

    So I ran the E-M1 for a while in manual focus and can’t rave enough about the focus peaking approach which gives a superb confirmation in the viewfinder that you’re on the right spot.

    A truly remarkable camera. Want one!

    Olympus OM-D E-M1 Specifications

    Image Sensor: 16.28 million effective pixels.
    Metering: Multi pattern, centre-weighted averaging, spot.
    Exposure Modes: Auto, Program AE, shutter and aperture priority, manual.
    Effective Sensor Size: 17.3×13.0mm (22.5mm diagonal) Live MOS.
    Lens Mount: Micro Four Thirds.
    35 SLR Lens Factor: 2x.
    Shutter Speed: 60 sec to 1/8000 second, Time, Bulb. Internal/external flash sync: 1/320/250 sec.
    Continuous Shooting: up to 10 fps.
    Memory: SD/SDHC/SDXC cards and Eye-Fi.
    Image Sizes (pixels): 4608×3456 to 640×480. Movies: 1920×1080, 1280×720, 640×480.
    LCD Screen: Viewfinder (2,360,000 pixels), 7.6cm LCD (1,040,000 pixels).
    File Formats: JPEG, RAW, JPEG+RAW, MPEG4.
    Colour Space: sRGB, Adobe RGB.
    ISO Sensitivity: Auto, 200 to 25600.
    Interface: USB 2.0, HDMI mini, AV, flash, mic, WiFi.
    Power: Rechargeable lithium ion battery, DC input.
    Dimensions: 130.4×93.5×63.1 WHDmm.
    Weight: 497 g (inc battery and card).
    Prices: Get a price on the Olympus OM-D E-M1 (Body Only) or the Olympus Om-d E-m1 with 12-40mm F2.8 Lens.

    Post originally from: Digital Photography Tips.

    Check out our more Photography Tips at Photography Tips for Beginners, Portrait Photography Tips and Wedding Photography Tips.

    Olympus OM-D E-M1 Review

    The post Olympus OM-D E-M1 Review by Barrie Smith appeared first on Digital Photography School.


    Digital Photography School
  • A Guide to Birth Photography

    This Guide to Birth Photography was written by Lori Peterson

    Few things in this world are as joyous as welcoming a new baby. Seeing such a tiny and perfect little human being stirs emotions in everyone. It’s no wonder that there has been a significant rise in the number of photographers offering their services not only for pregnancy and newborn images, but for photographing the birth itself as a way to complete the story of that particular moment in time.

    Birth Photography

    A Guide to Birth Photography

    1. You are on Call

    If you are interested in birth photography you will want to make sure that you have the time to set aside for it. Births can be short or they can be very long. There is no set time for them (not even with a cesarean because a doctor’s schedule can change if there is an emergency!). Make sure you have arranged for child care for your own children and that you can clear anything off your schedule if the need arises.

    2. You Cannot Set the Scene

    Nurses, doctors, techs, interns are all walking in and out of the room. You cannot ask them to stay out so you can set up the perfect shot. You have to just go with it and work within the space you have and around the people in the room.

    3. No Flash Photography

    Mom-to-be is working hard. Flash is a distraction. Enough said.

    4. It’s not the time to Learn about Medicine or ask a lot of Questions

    Asking questions about procedures, medications, or input of your opinions on childbirth or what they are doing is not necessary or needed. You are there to document, not to quiz medical professionals.

    5. If at all possible, arrange to meet the Doctor before the actual Birth

    Meeting the doctor ahead of time can give you an opportunity to talk to them and find out if they have any particular rules for photographing or recording labor and birth.

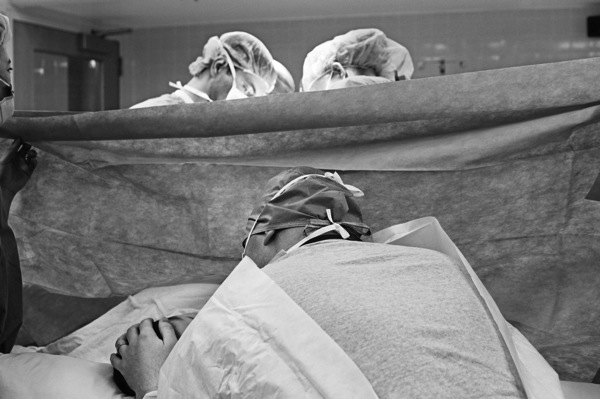
    It also gives you a chance to talk to them about what happens if your client has a cesarean. Some doctors will arrange it with the anesthesiologist to get the photographer back into the OR in non-emergency cases. (In an emergency, you will not be allowed back there.). In most cases the anesthesiologist has the final say because you would be in their area to shoot. Don’t take it personally if they say no to a photographer in the OR. They are looking out for your client.

    6. Have a back up plan in the event of a cesarean and you can’t go into the OR.

    This means making sure you know where the nursery is and where your client will be brought to after delivery. The doctor will fill you in during your meeting about their standard protocol, but make sure you know where everything is once you are there.

    Birth Photography OR

    7. Be Prepared for the Unexpected with Birth Photography

    Babies pay no attention to your time frame, the doctor’s time frame, or anyone else’s. They come when they want to. Be ready for a short labor and be even more prepared for a long one. Make sure you have battery supply for your camera and your phone and extra memory cards. Make sure you have money for vending machines.

    It’s better to have all of that and not need it as it is to not be prepared and find yourself on hour 13 and needing something to snack on and your camera battery has only 10% charge left!

    8. Make sure that your Images are telling the Story of that Day

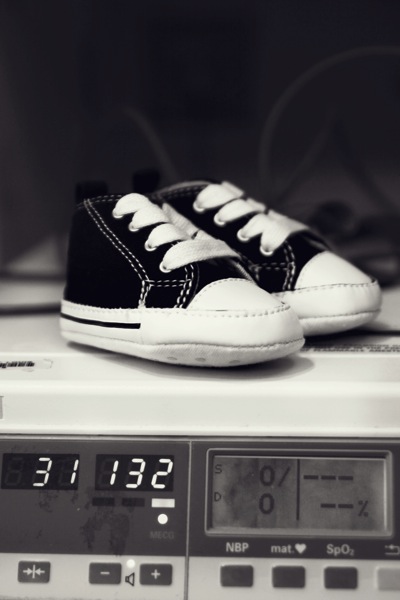
    Flowers, balloons, visitors….they all help tell the story. Capture the moments that you think that they will want to remember. Even take a photo of the dry erase board where their nurse writes her name and their room number. They will want to remember their nurse’s name. If there is a shift change, take a new photo of it.

    Record it until the baby is born. They may have a favorite nurse and you will help them remember her name. Some parents send thank you cards to the staff and it’s nice when they can include the names of the people who took care of them.

    Birth Photography Chucks

    9. Remember that this Day is NOT about You

    Don’t try to chat with everyone and make the focus of the day you. It’s easy to get consumed in the activity and not even realize that you have taken focus from the real star of the day….the mom-to-be. Let her know that you are there documenting everything she wants you to. That makes her job a little easier and allows her to focus.

    10. Convert the images to black and white, but give them the color versions as well.

    Give them color versions, but also black and white. The reason is very simple.
    Some people do not like medical stuff. Some people can’t stand the sight or even the idea of blood, or even the vernix (that cheesy type substance that covers newborns).

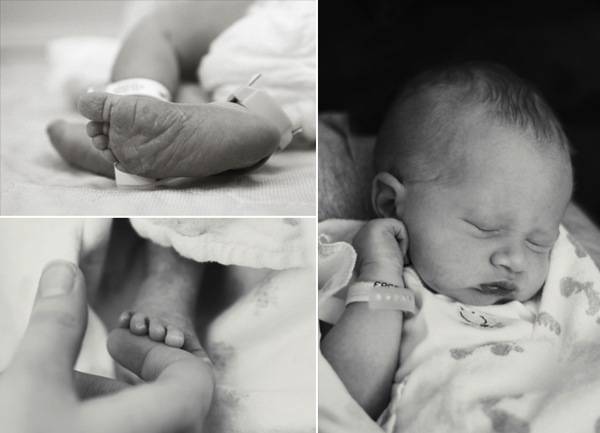
    When they put together their scrapbook for the birth, they might want black and white. Don’t let them be the ones to convert the images. Take control of the edits and make sure they have the images in black and white. They might use all the color ones, but give them the option. Make sure you capture the little details of the baby like toes and ears when you take the photographs as well.

    Those are always loved and appreciated by the parents.

    Birth Photography Story 2

    Birth photography is unlike portrait photography. You may not get everything perfect. People may walk into the shot. Someone may turn on a light or turn off a light. Things happen. The scene can move quickly.

    Make sure you are prepared with camera in hand and make sure to expect the random things that may happen. Document the moments and learn from your experience. The next birth will be easier and you will gradually learn to adapt and easily navigate your way through the whole birthing process and tell better stories each time. Your clients will love you for it and you will grow as a photographer, an artist, and as a person with each moment you help bring to life.

    Lori Peterson is an award winning photographer based out of the St. Louis Metro Area. Her dynamic work ranges from creative portraits to very unique fine art photography. Lori’s work can be seen at www.loripetersonphotography.com and also on her blog at www.loripetersonphotographyblog.com. You can follow her on Facebook at https://www.facebook.com/LoriPetersonPhotography.

    Post originally from: Digital Photography Tips.

    Check out our more Photography Tips at Photography Tips for Beginners, Portrait Photography Tips and Wedding Photography Tips.

    A Guide to Birth Photography

    The post A Guide to Birth Photography by Guest Contributor appeared first on Digital Photography School.


    Digital Photography School
  • Understanding Aspect Ratio

    apect-ratio

    It seems that clients are becoming more and more knowledgeable every day regarding the various facets of what we do as professional photographers. Maybe it’s because we live and work in the most highly tech-savvy society ever, or maybe it’s because anyone with a smart phone and a few good photo apps can turn out amazing results (for which I applaud them, by the way). High-quality DSLRs, mirrorless cameras, and fast lenses are available and well within the reach of  the average photographic consumer. Even those not necessarily interested in taking their own photos still know all the buzzwords. “Excuse me– Is that a full-frame camera?”  Or there is always that old refrain, “We don’t want albums or prints. We just want the RAW files.”  Our clients are learning our language, even if they don’t always completely understand it.

    One concept they still don’t seem to grasp, however, is aspect ratio. And with good reason– we’re not doing a very good job of educating them on the subject. Even photographers will often get that glassed-over look in their eyes when their clients ask why what looks great as a 5×7 makes an awful 8×10. This is not a blanket statement about all photographers. When pressed, though, many are only able to offer a partial explanation. They know that it has something to do with proportions– that a 5×7 doesn’t look the same as an 8×10, for instance– but they don’t know why.

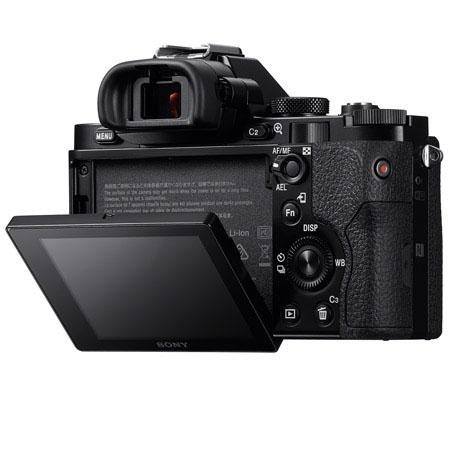
    Aspect ratio is nothing more than a size relationship between the long and short sides of a photo. The most common aspect ratio in DSLRs today is 2:3, which is based on that of 35mm film. A 35mm negative is actually 24mm x 36mm. Simplified, this becomes 2×3, or 2:3 when expressed as a ratio. Several print sizes can be made from the 2:3 aspect ratio without any cropping of the image (e.g., 4×6, 8×12, 10×15, 12×18, 16×24, 20×30, etc.).  Many of the most popular print sizes, however, cannot be simplified the same way. That is why 5×7, 8×10, and 11×14 all require a crop of the original 2:3 photograph. This results in a loss of part of the image, from either the long or short side, depending on the image and the crop.

    In the examples above/below I retained the top edge of the photo in all four aspect ratios in order to illustrate the dramatic effect that each crop can have, relative to the original 2:3. Remember that everything you see in the full frame image will appear in a 4×6, 8×12, etc. But when we start cropping with ratios that can’t be simplified or reconciled with the 2:3, we see an obvious loss along the bottom edge of the frame. There is not at much of a difference between the 8×10 and the 11×14 relative to each other, but it is clear that you can lose a significant portion of your image when it’s time to order prints if you aren’t careful with your composition.

    apect-ratio

    By using either the Joker’s hat or Harley Quinn’s knee as reference points, you can see for yourself just how important it is to not only compose your photos based on your own personal aesthetic, but also with an eye towards how you or the client might intend to print and eventually display the image.  The simplest solution is to compose your shot and then either zoom back out (or take a step or two back if using primes) before you actually press the button. Shooting a little bit loose will give you more options when it’s time to order prints.

    Aspect ratio is a basic concept which can have some pretty significant ramifications if you don’t properly plan your shot. Make sure to give yourself enough room in the frame that you don’t have to worry later about whether the client wants an 8×12 or an 11×14. After all, it will be much easier to give them the sizes they want, rather than explain to them why you can’t.

    Post originally from: Digital Photography Tips.

    Check out our more Photography Tips at Photography Tips for Beginners, Portrait Photography Tips and Wedding Photography Tips.

    Understanding Aspect Ratio

    The post Understanding Aspect Ratio by Jeff Guyer appeared first on Digital Photography School.


    Digital Photography School
  • BTS/360: Julius Koivistoinen’s Terrarium

    So you have learned a little bit about lighting. So what. What do you do with it? What's the goal?

    What if you were only 22 years old, but you had an idea for a project. And what if you wanted to parlay it into a solo exhibition. What would you do?

    If you are creative and resourceful, you could do what Finland photographer Julius Koivistoinen did…

    Read more »
    Strobist

  • The World’s Greatest Tip for Photographers: The Photographic Project

    “Give a man a fish and you feed him for a day. Teach a man to fish and you feed him for a lifetime.” Being a photographer is a lot like being a writer; you have good days, and you have bad days. Some of those not-so-great days can bring a whole multitude of different annoyances: the weather, dead batteries, Continue Reading

    The post The World’s Greatest Tip for Photographers: The Photographic Project appeared first on Photodoto.


    Photodoto