Category: Photography

  • Stand Up Paddling with Pixel, the Water Corgi

    Pixel, the Corgi, grew up with Dax, the Newfoundland, and he believes that he is a water dog. He was my paddling companion in many trips taken in Sea Wind canoe. We paddled together all local lakes and several rivers including South and North Platte, Dismal, and Niobrara.

    A year ago I started stand up paddling and Pixel is paddling with me on calmer lakes. He likes to ride on a stern or on a bow. Badfish SUP, a stable, whitewater board is not a challenge for him. However, a narrower and slippery Bark Expedition SUP may be more tricky and Pixel took some swims.

    I’ve got a life jacket for him and we will certainly try it since water is getting cold.


    Stand up paddling with Pixel

    Stand up paddling with Pixel

    Stand up paddling with Pixel

    Stand up paddling with Pixel

    Stand up paddling with Pixel

    Stand up paddling with Pixel

    Related posts:
    To SUP or to Not SUP?
    Paddling with Pixel, the Water Corgi
    Bennett Peak to Pick Bridge on the North Platte River, Wyoming


    paddling with a camera

  • 7 Tips for Helping Women Love having their Photo Taken by You

    When I look at a picture of myself, I can point out a million things I hate: my hair is always flat, I hate the ptosis in my left eye, I hate the shape of my brow bone, I have a bad complexion. And I’m a photographer! How can I expect women in front of my camera to feel any different than I do when I have to endure having my photo taken? I know that some men hate having their photo taken, too, and many of them probably aren’t as easy to admit that they hate their complexion or the shape of their brow bone, but I’m sure they think these things.

    As in any situation, we photographers just need to start by asking ourselves…what would we want? How would we want a photographer to treat us? It’s a pretty simple, solution, really…to behave in line with the golden rule.

    Women usually aren’t afraid to offer criticism about themselves. In fact, we’re downright professionals at criticizing ourselves. So if a woman truly hates having her photo taken, she usually says so upon making the booking with you. At that point, I would first congratulate her on coming to the point of actually making the booking in the first place. That’s a big step!

    I wouldn’t have a questionnaire for her to fill out about the things she hates about herself. And I wouldn’t make promises and I definitely wouldn’t mention the word ‘Photoshop’. The instant you say ‘Photoshop’, I guarantee that 90% of women instantly begin thinking of Madonna, Kim Kardashian…any and every celebrity who looks NOTHING in real person like they do in magazines. And they may expect/require you to edit every last hair on their head, freckle on their body, roll of fat on their hips. And before you know it, you’ve aged 10 years infront of your computer editing one session.

    Instead, this is how I would proceed:

    • Upon the first conversation and placing the booking, just assure her that having photographs taken by a professional is different and if she’s never done it before, she will probably love it in the end.
    • Simply ask: “what do you hate about it?” This will probably lead on to things she hates about herself. But don’t let her dwell on it too long. Ask what she loves about herself. Make notes about all this and keep them to yourself.
    • When you start shooting,  she might behave or seem awkward and uncomfortable. If so, talk to her as you’re shooting. Ask if she feels a certain side is her ‘good side’. Get her laughing. Tell her she looks great. But don’t patronize her. I mean…I know my left eye is droopy from Ptosis. If someone said it wasn’t, that would make me more uncomfortable.
    • When I edit, I will subtly smooth and ‘suck in’ bumps and bulges. I won’t eradicate them all together because that wouldn’t be natural. But I just do a little work that she won’t even notice and I’ve never had a woman as to get her muffin top put back the way it was! Of course, I understand that this is a controversial topic and doesn’t work for everyone.

    Some tips on photographing women:

    • For goodness sake. Please PLEASE be responsible with low shots. I very rarely see a photo of a woman taken from down low (looking up) that doesn’t make her look totally unattractive. This isn’t a good angle no matter the size or shape of who you’re photographing. Friends don’t let friends get photographed this way so beware that a loving friend may tackle you at any point should you choose to proceed with a low shot.
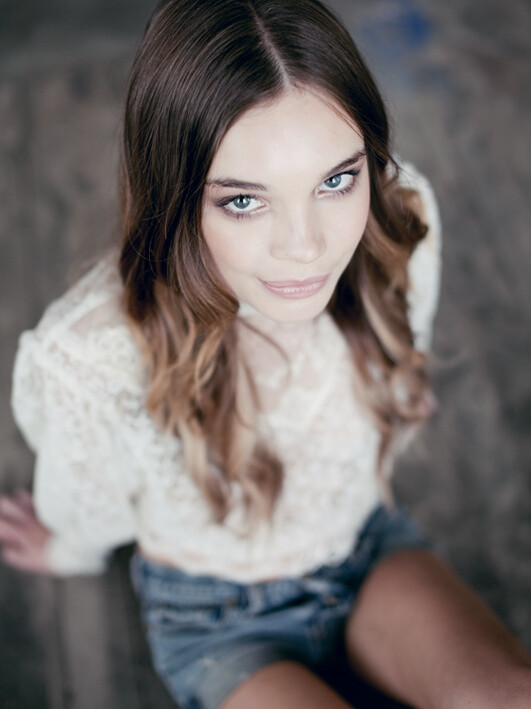
    • On the opposite side of the spectrum. shooting from above (or even a slightly down-angeled POV) can be very flattering for a lady, particularly a fuller figured one. But also beware that this is the calling card of a large lady – this trick has become so well known. Don’t overdo it or you’ll be kind of highlighting the fact that she’s larger rather than minimizing it.
    • Learn from the red carpet – those poses aren’t accidental. Celebrities have training for how to handle the red carpet photographers. Learn their tricks so you can guide your subjects through poses that will highlight their lovely long legs or help minimize their post-partum baby bulge. And you don’t have to tell them what you’re doing because naturally, that will make them feel self conscious.

    One hour with a sensitive professional can change a woman’s view of herself forever.

    Post originally from: Digital Photography Tips.

    Check out our more Photography Tips at Photography Tips for Beginners, Portrait Photography Tips and Wedding Photography Tips.

    7 Tips for Helping Women Love having their Photo Taken by You

    The post 7 Tips for Helping Women Love having their Photo Taken by You by Elizabeth Halford appeared first on Digital Photography School.


    Digital Photography School

  • Small World Pictures

    One of my favourite threads in the dPS forums from the last few months is one titled ‘It’s a Small World‘ that features some of our members creative photos of… small worlds. Here’s some by Jeff Smith who started the thread. He shares how he took them over on the forum post.

    Image by Jeff Smith

    Image by Jeff Smith

    Image by Jeff Smith

    Image by Jeff Smith

    Image by Jeff Smith

    Image by Jeff Smith

    Image by Jeff Smith

    Image by Jeff Smith

    Image by Jeff Smith

    Image by Jeff Smith

    Image by Madvypa

    Image by Madvypa

    Have you ever taken any small world photos? If so – we’d love to see them in comments below!

    Post originally from: Digital Photography Tips.

    Check out our more Photography Tips at Photography Tips for Beginners, Portrait Photography Tips and Wedding Photography Tips.

    Small World Pictures

    The post Small World Pictures by Darren Rowse appeared first on Digital Photography School.


    Digital Photography School

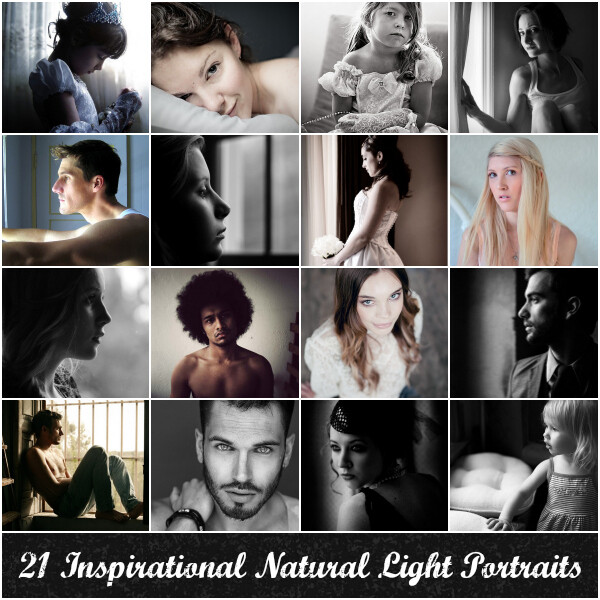
  • 21 Inspirational Natural Light Portraits

    21 Inspirational Natural Light Portraits

    One of the most effective pieces of lighting gear ever invented is available to almost every photographer in the world… unless you’re living in a cave (and even then you might have one).

    It’s the window.

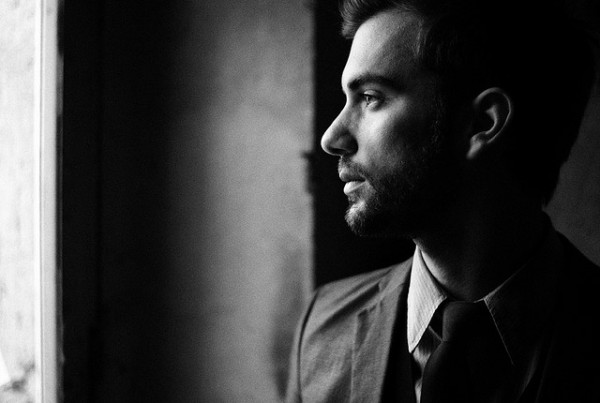
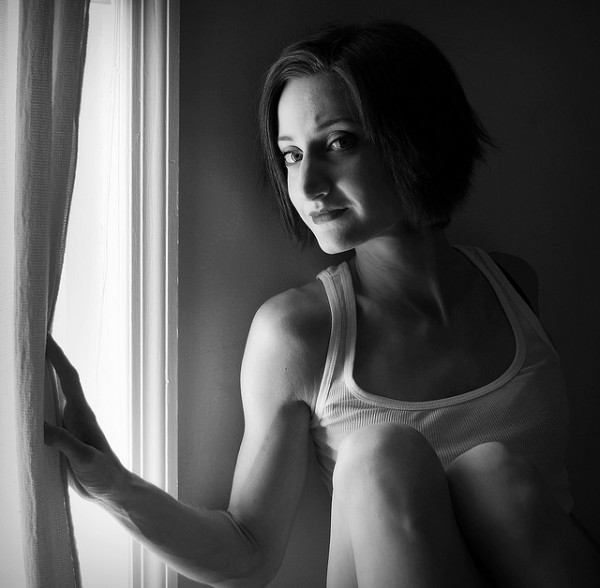
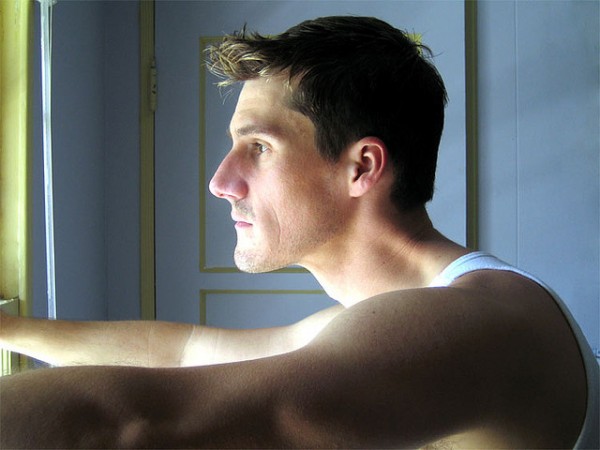
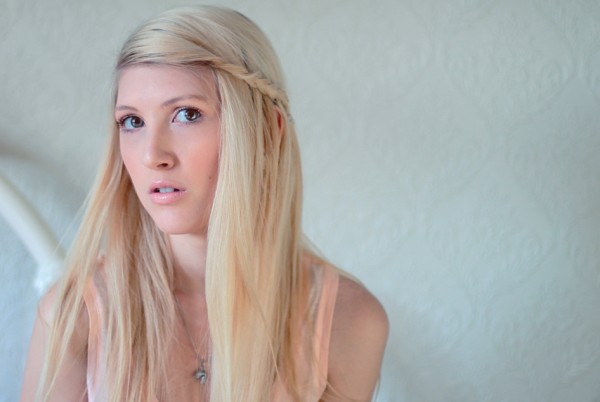
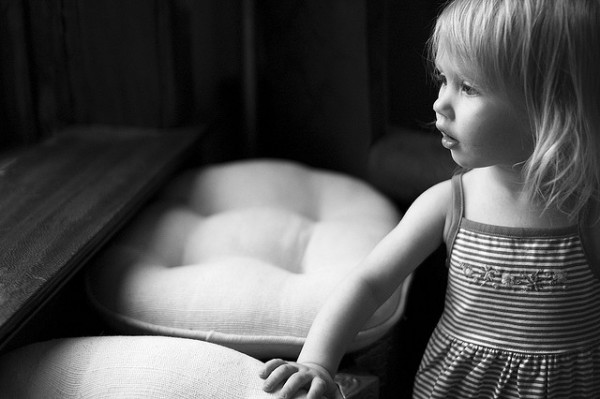
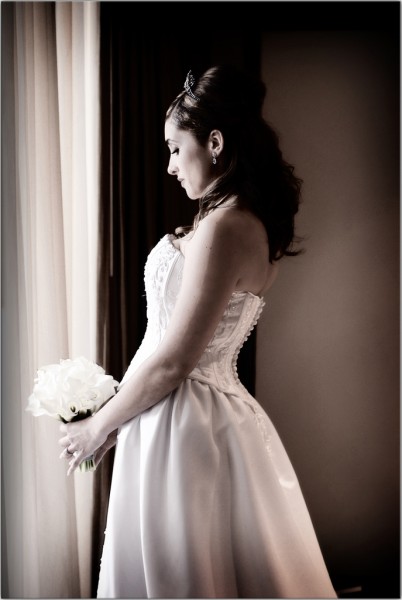
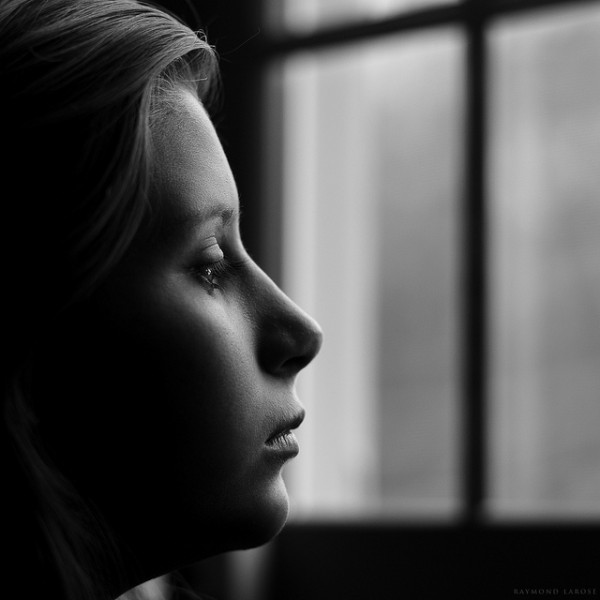
    Here is a collection of natural light portraits. They were all taken predominantly with natural light – in most cases at or near a window. Enjoy.

    portrait

    Image by Daniel Zedda

    Image by Anna Gay

    natural light portraits

    Image by Eric Meuller

    I hear many photographers asking about what lighting gear to purchase to light their portraits – but I’m a firm believer that the natural light provided by a window can often do the job as well – if not better – than any expensive gear that you might buy.

    natural light portraits

    Image by Meredith Farmer

    natural light portraits

    Image by Shandi-Lee

    natural light portraits

    Image by Paul Goyette

    Image by John Meuller

    natural light portraits window light

    Image by Mr Story

    natural light portraits window light

    Image by Beni Ishaque Luthor

    natural light portraits window light

    Image by Gabriela Camerotti

    natural light portraits window light

    Image by The Q

    natural light portraits window light

    Image by Sebastiano Pitruzzello

    natural light portraits window light

    Image by Gabriela Camerotti

    natural light portraits window light

    Image by Jay Ryness

    natural light portrait

    Image by Raymond Larose

    natural light portrait

    Image by gabriele fanelli

    natural light portrait

    Image by Sebastiano Pitruzzello

    Image by Jay Ryness

    Image by Drew Herron

    Image by brice hardelin

    Image by Lauren Nelson

    Further Natural Light Portraits Reading

    We hope you enjoyed these Portraits. If you have some shots to share please do so in comments below. If you’re looking for a little inspiration – check out these links.

    Understanding Natural Light Portrait Photography (tutorial)
    Natural Light: Mastering a Photographers Most Powerful Tool (eBook)

    Post originally from: Digital Photography Tips.

    Check out our more Photography Tips at Photography Tips for Beginners, Portrait Photography Tips and Wedding Photography Tips.

    21 Inspirational Natural Light Portraits

    The post 21 Inspirational Natural Light Portraits by Darren Rowse appeared first on Digital Photography School.


    Digital Photography School

  • Photography Rules and Finding Balance to Discover Your Own Style

    By Lori Peterson

    Digital photography has put the camera in more hands than ever before and everyone seems to either want to follow the standard mold of photography or they want to completely break away from it.

    For instance, Ian Ruhter took a delivery van and transformed it into a giant wet plate camera. There are so many photographers out there that are wanting to copy someone else’s style instead of finding their own. Learn the rules and then use them or twist them as you need to do to make your own art and to tell your story. One part of your image may follow the standard photography rules and another part will completely be out of the norm. Not everyone sees the image or the story the same and that is fine. Don’t get so caught up in trying to make everything absolutely perfect that you lose the shot.

    One of the rules that you hear a lot is to simplify your image. Sometimes, especially in street photography, you can’t simplify the scene. Sometimes the scene has to speak for itself. Whether it’s chaos or clutter, sometimes you need to just go with what you have and work with it. There are stories that can be told just by being the silent observer and recording the image at that place and time.

    Photography Rules and Finding Balance

    Some photographers will talk to you endlessly about the Rule of Thirds and not centering your subject. Composition of the image is really subjective, but people get too comfortable just centering the image and when they start thinking outside of that box they begin to see everything in a new way. Moving your subject slightly off to the side can actually bring the focus onto them. Just make sure that no matter where your subject is in the image that they are the focus.

    Photography Rules and Finding Balance

    Using patterns and lines can draw your viewer in more. It helps for them to picture the scene and even put themselves into that moment in time. S-curves work really well to draw your eyes to a particular spot in an image. You can also try a new perspective and get down really low to the ground and use whatever lines are there to your advantage. Experimenting with your shooting techniques can help you learn what works for your style and what doesn’t.

    Photography Rules and Finding Balance

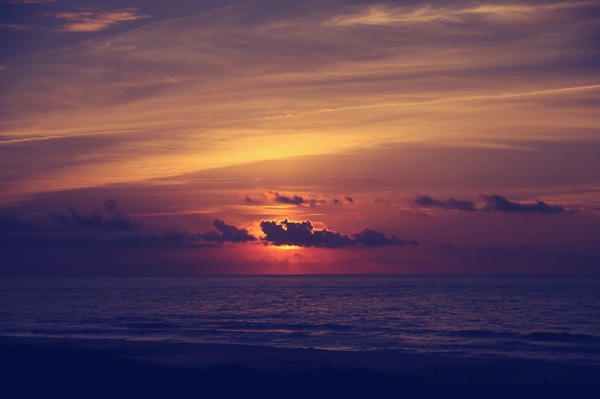
    Use of color and tone in an image can set the scene for the viewer. Colors can bring a harmony and unity to an image or it can be used to emphasize a certain part of the image. Color can add contrast, it can help parts of the image blend in, or it can really make a bold statement. Using color in your image can convey emotion and without a written word it can tell you what time of day it is, such as sunrise or sunset.

    Photography Rules and Finding Balance

    You could do a Google search on photography rules and it would make your head spin from trying to follow all of them, but the important thing about photography rules is knowing when to follow them, when to break them, and when to vary them up just enough to fit your image. Learning to find that balance takes time and practice. Sometimes you just have to learn from the mistakes you make and take those lessons with you to your next shoot. Don’t forget that art is very subjective and what works for one image may not work for another. Experimenting with techniques and composition helps you to learn about photography and find your own creative balance.

    Lori Peterson is an award winning photographer based out of the St. Louis Metro Area. Her dynamic work ranges from creative portraits to very unique fine art photography. Lori’s work can be seen at www.loripetersonphotography.com and also on her blog at www.loripetersonphotographyblog.com. You can follow her on Facebook at https://www.facebook.com/LoriPetersonPhotography.

    Post originally from: Digital Photography Tips.

    Check out our more Photography Tips at Photography Tips for Beginners, Portrait Photography Tips and Wedding Photography Tips.

    Photography Rules and Finding Balance to Discover Your Own Style

    The post Photography Rules and Finding Balance to Discover Your Own Style by Guest Contributor appeared first on Digital Photography School.


    Digital Photography School

  • Fujifilm X-M1 Review

    Fujifilm X-M1 Review.jpg

    It’s been nearly two years since Fujifilm launched its pioneer X-system mirrorless camera to a surprised market.

    That model, the awkwardly named X-Pro1, has been succeeded by a run of other models. So now we have the X-M1, missing a few niceties from the launch model, but undeniably an X-system camera. And, in some ways, it’s very much a ‘camera’ sort of camera. By that, I mean it looks slightly retro with satin chrome trim and a black leather-like surface and has a control interface which you should easily fall into step with.

    And in one respect, more models in an interchangeable lens camera range suggests the likelihood of more lens choices. A good thing!

    Many will notice the absence of an optical viewfinder, however it does have a vertically articulated rear LCD screen, so photographers working in bright sunlight will have a sporting chance of viewing their shot pre-shoot!

    Fujifilm X-M1 Review Lineup.jpg

    Fujifilm X-M1 Features

    The 16.3 megapixel CMOS can capture a maximum image size of 4896×3264 pixels: 41x28cm as a print.

    Fujifilm X-M1 Review - Lamp.JPG

    Fujifilm X-M1 Review -Pattern 1.JPG

    Fujifilm X-M1 Review -Pattern 2.JPG

    Fujifilm X-M1 Review -Dwarfs 2.JPG

    Fujifilm is long a believer in a different colour filter array than the norm to minimise moiré and chromatic aberration without the need for an optical low pass filter. This is claimed to boost resolving power.

    Video: capture in Full HD 1920×1080 pixel video. And no, you can’t shoot stills mid video recording.

    The ISO speed runs from 200 to 6400 and further to 12800 and ISO25600 with expansion.

    The wireless image transfer function uses a free Fujifilm camera app (free download) for transfer of shots to a smart device or computer.

    The review camera was supplied with the Fujinon XC f3.5/16-50mm OIS kit lens, giving a 35 SLR equivalent of 24mm–76mm.

    Fujifilm X-M1 Handling

    You might be able to pack the X-M1 with lens attached into a jacket pocket, but it will be a tight fit!

    The camera is well-balanced and the textured leatherette assures a firm grip.

    Fujifilm X-M1 Controls

    Top deck: the flash pop up trigger kicks the cell up and forward, siting the light source a healthy, red eye defeating 7cm from the lens.

    The mode dial has positions for auto, PASM, a custom setting, three scene positions (sport, landscape, portrait), the SR setting which automatically optimises settings to suit the scene plus a notch (Advanced) which gives access to even more (high and low key, partial colour — red, orange, yellow, green, blue, purple filter effects etc).
    Fujifilm X-M1 Review -Advanced night.jpg

    Then there’s an advanced setting which can handle situations such as beach/snow, moving objects, night shots etc.

    If you think there’s an avalanche of shooter aids you’d be right! This gives you an inkling of the likely market: the keen, but skill-deprived enthusiast.

    At the edge we find the on/off lever and shutter button; the nearby prominent main command dial can set exposure compensation, shutter speed or trawl through images in replay. And a word of warning about the latter: it would be very easy to bump this dial and accidentally set an unwanted plus or minus exposure setting!

    Just ahead is a function button that takes you directly into image size and quality, metering and AF options etc.

    Rear: a second command dial is at the top, then to the right of the screen is the replay button, info display options, trash. And the video record button, usefully placed at the camera’s extreme right edge.

    The jog dial has positions for single and continuous shooting, AF options, macro and white balance plus a centrally located main menu button.
    Fujifilm X-M1 Review -Q menu.jpg

    Bottom and to the right is found the Q button which gives immediate access to the main menu options such as ISO, image size, focus and flash modes etc. A useful short cut.

    The menu display is easily accessed.

    ISO Tests

    Fujifilm X-M1 ISO 100.JPG

    Fujifilm X-M1 ISO 400.JPG

    Fujifilm X-M1 ISO 800.JPG

    Fujifilm X-M1 ISO 1600.JPG

    Fujifilm X-M1 ISO 3200.JPG

    Fujifilm X-M1 ISO 6400.JPG

    Fujifilm X-M1 ISO 12800 equiv.JPG

    Fujifilm X-M1 ISO 25600 equiv.JPG

    Definition starts to fall off at ISO 3200. No noise at ISO 6400 but sharpness falls further. Noise up at ISO 12800 equivalent but still useable. ISO 25600 equivalent? Not useable IMHO.

    Fujifilm X-M1 Review Verdict

    Quality: above average.
    Why you’d buy the Fujifilm X-M1: good quality, small form factor.
    Why you wouldn’t buy the Fujifilm X-M1: no panorama mode.

    An excellent camera for the ambitious beginner. Available in black, silver and brown.

    Fujifilm X-M1 Specifications

    Image Sensor: 16.3 million effective pixels.
    Sensor: 23.6×15.6mm CMOS.
    Metering: Multi segment, averaging, spot.
    Lens Mount: Fujifilm X.
    Lens Factor: 1.5x.
    Exposure Modes: Auto, Program AE, shutter and aperture priority, manual.
    Shutter Speed: 60 mins (Bulb); 30 sec to 1/4000 second. Flash X-sync at 1/180 sec.
    Memory: SD/SDHC/SDXC.
    Continuous Shooting: 5.6 fps.
    Image Sizes (pixels): Stills: 4896×3264 to 1664×1664.
    Movies: 1920×1080, 1280×720.
    Viewfinder: 7.6cm LCD screen (920,000).
    File Formats: JPEG, RAW, JPEG+RAW, MPEG4.
    Colour Space: sRGB, Adobe RGB.
    ISO Sensitivity: Auto, 100 to 25600.
    Interface: USB 2.0, HDMI mini.
    Power: Rechargeable lithium ion battery.
    Dimensions: 117x67x39 WHDmm.
    Weight: 330 g (inc battery, card).
    Price: Get a price on the Fujifilm X-M1 with 16-50mm Lens or ;Fujifilm X-M1 Body Only.

    Post originally from: Digital Photography Tips.

    Check out our more Photography Tips at Photography Tips for Beginners, Portrait Photography Tips and Wedding Photography Tips.

    Fujifilm X-M1 Review

    The post Fujifilm X-M1 Review by Barrie Smith appeared first on Digital Photography School.


    Digital Photography School

  • I’d Plus One That! Why I Think Google’s Shared Endorsements Are a Good Thing for Social Media, Influencers and Consumers

    Are You On Google+ Yet?  If You're Not You Should Be

    There’s been a lot of talk today online about the upcoming change in Google’s TOS that will allow them to begin selling ads with your endorsement of various products and services on the web. I’ve seen different reactions from some people who dislike this idea and others who are largely apathetic about it.

    Because Google gives everyone an opportunity to opt out of shared endorsements, it’s easy to dismiss a lot of the criticism by simply pointing folks to how easy opting out is. Some people are very anti-advertising though and certainly this new advertising channel will naturally be met by some with healthy skepticism. It’s also worth noting that these ads are not going to appear on Google+. Google+ will remain ad free. The new ads simply will use Google+ data to advertise in places where Google is already advertising, like search.

    Personally speaking, for myself, I embrace change. In general I’d rather see more change, than less. I think change represents innovation (usually) and I probably tend to look for the positive in change rather than the negative. I’m a glass half full sort of guy when it comes to change.

    I think most of us see how today’s announced change in the TOS is good for businesses who advertise. Personal endorsements by our friends are incredibly powerful motivators. Ads which feature personal endorsements by people we know, trust and respect, will be far more effective than other ads that an advertiser might come up with.

    I think we can also see where this new product would be good for Google. Google gets paid by the click. If they can run ads that produce way more clicks and are more effective, it would seem to stand that they can make more money selling ads. The more clickable an ad the more revenue per page view it represents.

    The last part of this equation though is the user, and I think a lot of people are trying to figure out if this is a good, bad, or indifferent thing for the user.

    My opinion is that this is a good thing for the user and here’s why.

    1. I believe that this change will push brands, products, services, businesses, etc. to allocate more of their marketing budgets towards social media and social media influencers than in the past. It’s ridiculous to me how much money companies like Canon and Nikon and other old brands, that just don’t get it, spend on things like tired old photography magazines and traditional print media vs. social media.

    Social media is the future. By increasing the value of our possible endorsements through advertising buys, companies will spend more time, effort and money to court social influencers.

    My favorite lens is the Canon 135 f/2. I love that lens so much. By allowing Canon the opportunity to buy that love in the form of a Google ad and promote it, that gives Canon a more powerful incentive to work with me to be more public about my love for this lens. I love lots of other things too. I’m not shy about telling folks when I like something. I had dinner last night at A 16 in Oakland, and it rocked. I like to spread the good word.

    I predict that individuals with large followings on G+ will increasingly be seen as potential partners for brands whose products they use. If you consider yourself a social media type, this will be one more important reason why you’ll want to devote time to building out your presence on G+.

    There will be a risk of course that some influencers will be bought off by brands for positive endorsements, but I think most of the time this stuff is pretty easy to sniff out. It’s the true, authentic, natural posts (available for purchase after the fact as ads) that will be most valuable. I bet brands spend more time showing us their cool new tech and products as the value of these ads become apparent and more of their budgets are spent on promoting products to G+ users.

    2. When a company buys an ad with your endorsement, this is one more place that your social media footprint is shared on the web. I’m not sure if the endorsements will actually link back to your profile or the actual product review itself, but as I’ve seen it, it will at least include your name and your avatar.

    One of the reasons why I never change my avatar is that I believe having a strong avatar that is consistent over the years with your brand helps you build recognition. When I see Robert Scoble’s avatar, I immediately know that it is him — I’m biased of course because I took the photo Robert uses for his avatar. :)

    Even faster than I can read Robert’s name, I know it’s him.

    When Facebook first started showing brands that your friends liked, Robert jumped right on that bandwagon. For about 2 months every time I logged into Facebook, I was seeing another brand that Robert liked. Were the brands paying Facebook for that? Probably. But it also constantly reminded me of a good friend and also linked back to him in the like. I have to admit that I ended up liking a lot of the same brands Robert did, when it was something I really liked.

    3. Knowing that one of my friend’s has endorsed a product helps *me* make buying decisions. Let’s say I’m in the market to buy a new filter for my camera. Wouldn’t it be a positive for me to know that another photographer I respect (like Joe Azure) seems to like his Lee Big Stop Filter? Isn’t that a lot better than just a generic ad? Especially if I see a lot of my friends endorsing one product, this may be a good signal to me that this product is worth checking out more than others.

    I saw a report earlier today that said that by 2014 10-15% of online reviews will be fakes. With all the fake reviews and astroturfing out there, I’m more inclined to trust the word of a friend on a product or service, than a stranger.

    This is why I don’t really use yelp anymore. Every time I go to yelp I wonder if the review I’m reading is legit or whether or not someone from India or China has been paid to write it up and give it a five star rating. When I was recently in New York City, rather than rely on a service like Yelp to figure out where to eat, I instead relied on my good friend Daniel Krieger, whose opinion I respect and know I can trust. Would a five star dinner recommendation for a new restaurant in the form of a Daniel Krieger advert get my attention? You bet it would. As a consumer, this is a win for me.

    Certainly there may be things that go wrong with the implementation of all of this. What if I’m not really endorsing something but my endorsement is slapped on it? Some of this will likely have to be worked though. As far as the general idea of shared endorsement goes though, I think I like it.

    Oh, and by the way, if you were wondering whether or not those sea salt and vinegar chips in the dark blue bag by Kettle Chips were the BEST CHIPS IN THE ENTIRE WORLD? Yep, they pretty much are — and if Kettle Chips wants to send a few bags of those over to our place, my daughters and I would totally be down with that. ;)


    Thomas Hawk Digital Connection

  • 7 Lifestyle Photography Tips

    By Annie Tao.

    Lifestyle Photography has been around for as long as there were cameras, but it was called Photojournalism and was mostly seen only in the newspapers. During those times, most Portrait Photographers captured their subjects posed and “perfect”.

    Once DSLRs infiltrated the market at lower price points, everyone and their grandmas (okay, maybe not all grandmas) had one. Digital photography allowed the birth of this new form of portraiture – Lifestyle Photography – by allowing people to shoot freely without the worry of film and film development costs. Now with smart phones and other electronics that piggyback a convenient camera, snapping photos about your life has become mainstream.

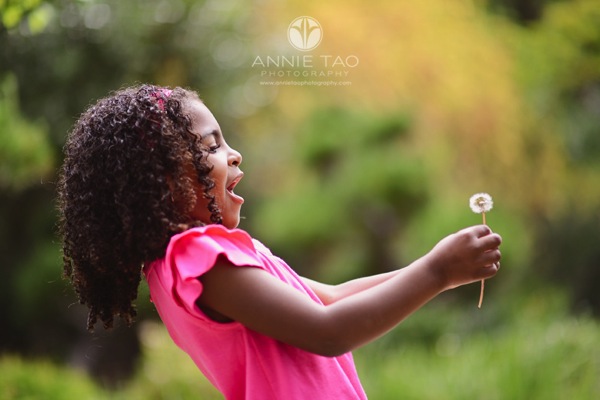
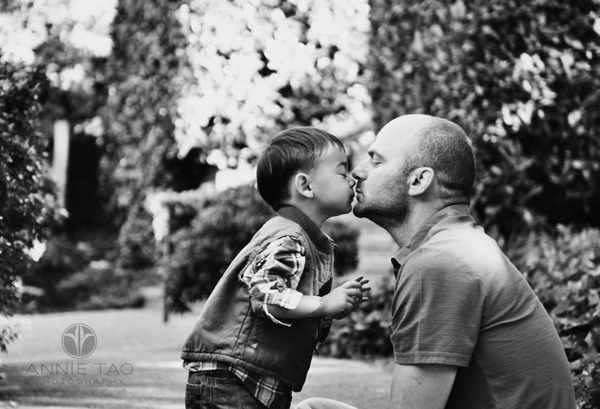
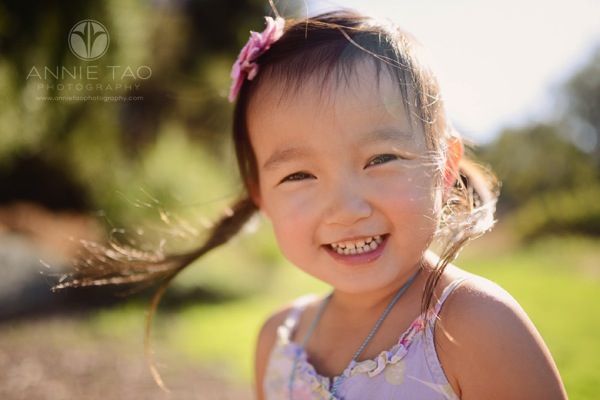
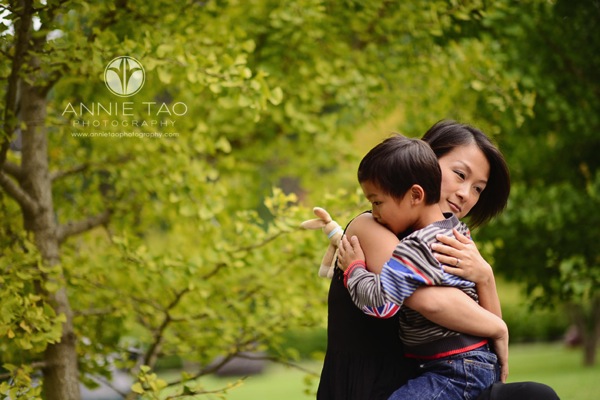
    True Lifestyle Photography, however, is more than taking candid shots. It is about capturing images that reveal a story. A personality. A relationship. A feeling.

    7 Lifestyle Photography Tips:

    1. Anticipate what’s going to happen

    Don’t wait to take the shot until you see something happening because some things last only one second and you can miss it.  Be ready.

    Annie Tao Photography Tips on on Lifestyle Photography Anticipate whats going to happen

    2. Capture the second before and second after an anticipated moment

    Annie Tao Photography Tips on on Lifestyle Photography Capture the moment before or after

    3. Know your light at all times

    When capturing Lifestyle, it’s often best to not disturb what is unfolding naturally. So if your subject is not in the best light, then it is up to you to make it work. It may be changing your shooting position, your camera angle or quickly grabbing a reflector.
    Annie Tao Photography Tips on on Lifestyle Photography Know your light at all times

    4. Help create the mood

    Just because the photo shoot started doesn’t mean your couple will instantly jump into a romantic moment or a family will burst into a fit of laughter.  Help create an environment for those scenes to happen.  Talk to them, play music, be silly, etc.

    Annie Tao Photography Tips on on Lifestyle Photography Help create the Mood

    5. Don’t forget the details

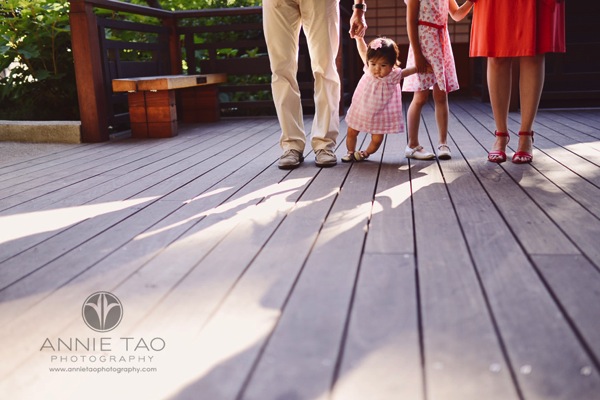
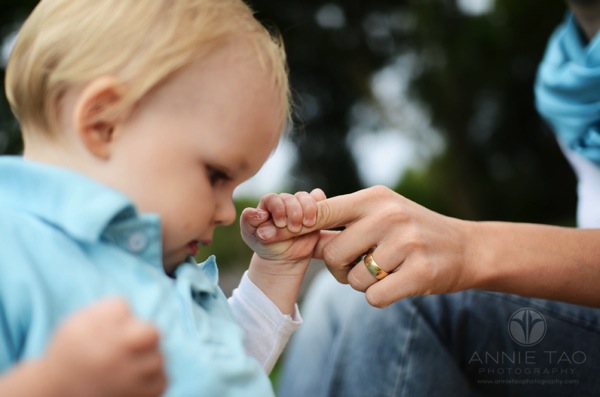
    Get a close-up of the lace on a dress, the way someone stands or the way a baby grips a parent’s finger with his entire hand.  These shots are pieces of information that help tell a cherished story.

    Annie Tao Photography Tips on on Lifestyle Photography Dont forget the details

    San Francisco Bay Area East Bay lifestyle baby photography family of four portrait of their lower half baby is slipping

    6. Pay attention to the environment

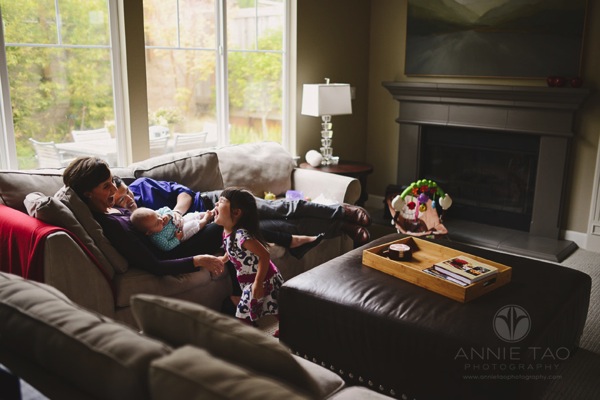
    I carry a wide angle lens with me to all my Lifestyle shoots because I like getting a shot that includes the environment. Often we think of close-up shots when we photograph people, but step back and look at the environment too. Those are just as important.

    Annie Tao Photography Tips on on Lifestyle Photography Pay attention to the environment

    7. Give your subjects something to do

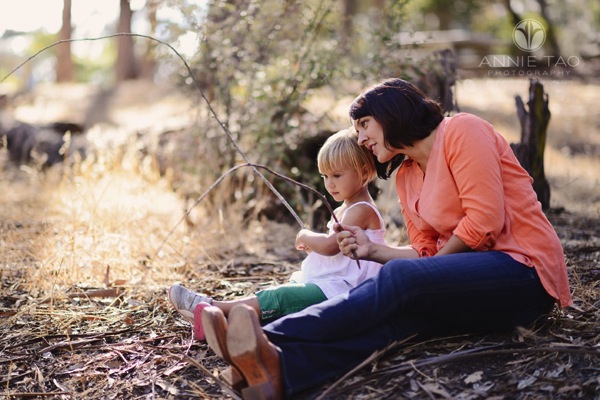
    Lifestyle Photography is the opposite of look-at-me-and-say-cheese type of portraiture. If your subjects have something to do, then you are setting the stage for their personalities to show and they will have natural expressions.

    Annie Tao Photography Tips on on Lifestyle Photography Give subjects something to do

    If you have an example of a Lifestyle image, feel free to share it in the comments below. I’d love to see it!

    Annie Tao is a Professional Lifestyle Photographer in the San Francisco Bay Area who is best known for capturing genuine smiles, emotions and stories of her subjects.  You can visit annietaophotography.com for more tips or inspiration and stay connected with her on Facebook.

    Post originally from: Digital Photography Tips.

    Check out our more Photography Tips at Photography Tips for Beginners, Portrait Photography Tips and Wedding Photography Tips.

    7 Lifestyle Photography Tips

    The post 7 Lifestyle Photography Tips by Guest Contributor appeared first on Digital Photography School.


    Digital Photography School

  • Pink: Weekly Photography Challenge

    This week your photographic challenge is to take and share a photo that fits into the theme of ‘Pink’.

    Pink

    It has been a while since we’ve done a colour theme so we thought this week we’d get you to keep your eye open for pink objects and settings – it might sound a slightly obscure colour choice but when you start looking for shots I’m sure you’ll find them!

    Once you’ve taken your ‘Pink’ shots we’d love to see them in comments below. Simply upload your shot into the comments (look for the little camera icon in the Disqus comments section as pictured below) and they’ll get embedded for us all to see or if you’d prefer upload them to your favourite photo sharing site and leave the link to them.

    If you tag your photos on Flickr, Instagram, Twitter or other sites with Tagging tag them as #DPSPINK to help others find them. Linking back to this page might also help others know what you’re doing so that they can share in the fun.

    Also – don’t forget to check out some of the great shots posted in last weeks Kids challenge – there were some great shots submitted.

    Post originally from: Digital Photography Tips.

    Check out our more Photography Tips at Photography Tips for Beginners, Portrait Photography Tips and Wedding Photography Tips.

    Pink: Weekly Photography Challenge

    The post Pink: Weekly Photography Challenge by Darren Rowse appeared first on Digital Photography School.


    Digital Photography School

  • The 3 Biggest Kid Photography Mistakes

    The 3 Biggest Kids Photography Mistakes

    A Guest Post by Brent Mail – creator of How to Photograph Kids Naturally Online (currently 50% off at SnapnDeals).

    After watching many families at the beach over the school holidays, I noticed that most of the parents, as well as some professional photographers, were making the same 3 HUGE mistakes when they were photographing kids. I could see the parents getting frustrated and it looked like no one was having fun.
    I guess I can summarise the 3 mistakes in one sentence. “Hey kids, please sit down over there, look this way and smile!”

    Mistake 1: Asking Kids to Sit Still: “Hey kids, please sit…”

    The kids are all dressed up for the photo shoot and excited, but don’t quite know what will happen, so they do what comes naturally – they run off and play.

    The photographer and parents then try to round up the kids, find a place to photograph them and then ask the kids to sit down and be still and look at the photographer. Ever tried this? It goes against all the natural instincts of the kids – they are super excited and told to sit still. Very difficult to achieve!

    Kid photography mistakes 1

    Solution – Let the kids run & play

    All kids love to run and play. It’s a natural part of being a kid, so why not let them do what comes naturally? Some of the best images I capture are when kids are allowed to run on the beach or at a park. I take this one step further and create games for the kids to play, like racing each other, or getting the parents to chase the kids.

    There are 2 things that happen when kids are allowed to run & play:

    • Kids have all this built up energy that needs to be released, and now they get to use it up. It’s fun for them and they become happy, playful kids. This is what you want.
    • Parents and kids get to relax and we capture natural facial expressions, un-posed with no fake smiles.

    Kid photography mistakes 2

    Tip: Shoot in sports mode – use a fast shutter speed 1/500th sec or 1/1000th sec with AI Servo auto focus (tracking autofocus). When kids are racing towards you, a very fast shutter speed and tracking autofocus will mean that you capture all the action and your subjects are in focus.

    Mistake 2: Asking for a Smile – “…look this way and smile!”

    Wow, this is a big one. I don’t think I have ever seen a parent not say “smile” to their children when they are being photographed. “Common kids, smile. Give us a big smile!”

    Yes, sometimes we get a smile, but it’s normally a fake smile. Who wants images of their children with fake smiles? Not me.

    Kid photography mistakes 3

    Solution – Be the Clown

    Have you ever taken your kids to the circus to see a clown? A really entertaining clown, who gets the kids laughing. Go behind the clown and photograph the kids – those are real smiles!

    So you (the photographer) need to become the clown.

    How do you do that? When you meet the kids for the first time get down to their level and introduce yourself in a very enthusiastic and loud voice. Set the scene from the start, then, when you are photographing the kids, be loud, be funny, do funny things like roll your eyes, stumble around, dance, or get the kids to scare you! Bring along props to entertain the kids, like a clown nose.

    Kid photography mistakes 4

    An alternate to being the clown is the have the parents or siblings become the clown. When I’m shooting the close-ups (after the kids have run around and released all that energy) I get the parents to stand behind me and I get them to dance around. This always gets the kids smiling and laughing – seeing dad do “gangnam style” dance is hugely entertaining for the kids. It’s also a lot of fun for the parents.

    Mistake 3: Standing Tall

    Have you ever had someone stand over you and talk down to you? How do you feel? Inferior, small & insignificant? This is what kids feel like when someone photographs them from high-up. They feel intimidated and it’s not fun for the kids.

    Also there is nothing special about the images captured from high-up, they are more like snapshots.

    Kid photography mistakes 5

    Solution – Get Down Low

    When I first get to meet the kids I’m about to photograph, I get down low, and introduce myself. “Hey kids, my name is Brent and we are going to have so much fun today! What is your name?” I connect with the kids in a very enthusiastic voice. From then onwards the kids know that I’m on their side.
    When I photograph them, I kneel down to their level, sometime I lay down flat on the ground to get a very different angle of view. Parents love these images, because they have never seen their children from this low angle, and the kids do not feel intimidated so they relax and play along with me.

    Kid photography mistakes 6

    Summary:

    So, next time you go out and photograph kids keep these 3 tips in your mind. The photo shoot will flow and everyone will have much more fun – including you!

    1. Let the kids run and play.
    2. Be the clown and get the kids to laugh naturally.
    3. Get down low to their level.

    Hope you enjoyed these kids’ photography tips. If you want to find out more then checkout my “How to Photography Kids – Naturally” course which is currently 50% off at SnapnDeals.

    Who is Brent? Brent is an award-winning professional photographer who runs a successful portrait photography studio near the beach in Australia. Brent also teaches photography and has a free mini-course here, as well as
    other photography training courses here.

    Post originally from: Digital Photography Tips.

    Check out our more Photography Tips at Photography Tips for Beginners, Portrait Photography Tips and Wedding Photography Tips.

    The 3 Biggest Kid Photography Mistakes

    The post The 3 Biggest Kid Photography Mistakes by Guest Contributor appeared first on Digital Photography School.


    Digital Photography School