Category: Photography

  • A Review of the ThinkTank Airport Commuter Camera Bag

    If you’ve ever had to work your way through a busy airport with your gear, you know that an ordinary camera bag just isn’t going to cut it. Making sure everything is safely packed, moving through security, getting on and off your plane, working your way through yet another airport– it’s a challenge. Think Tank Photo addressed the challenge head-on not too long ago, when they introduced a new line of Airport Backpacks. The line includes (from biggest to smallest) the Airport Accelerator, Airport Commuter, and Airport Essentials, all of which meet U.S. and international carry-on standards. I’ve been putting the Commuter through its paces for the better part of a year, and– as someone who’s never owned a gear bag designed specifically around air travel– I’m really impressed.

    As with all things Think Tank, the construction is impeccable. Heavy-duty zippers and stitching, comfortably padded straps and handles, as well as all of the pockets and compartments I’ve come to expect from Think Tank. While lots of pockets isn’t exactly innovative, Think Tank’s newer bags have also been designed with dedicated pockets for tablets or laptops. The Airport Backpack series is designed to hold both. The exterior-access pockets are also right where they do the most good, providing quick access to travel essentials like i.d., credentials, passports, boarding passes, and other travel necessities. A large side pocket is perfect for a bottle of water or paperback book.

    All of that great exterior access doesn’t do you much good, though, if the interior doesn’t do its job well. Fortunately, the gear section of this bag is pretty remarkable. The two things I noticed while packing it were (1) how much it holds, and (2) how deep it is.  Without doing any reconfiguring of the pre-installed dividers (OK…I removed one little one in the middle), I packed three bodies, five lenses, two speelights, a set of Pocket Wizards, and all of the cards, cords, batteries, gels, film, pens, business cards, m&m’s, and all of accessories I needed.  And there was room for more.

    Other “bonus features” include a locking security cable, removable waist belt, and tripod attachment straps.  To be honest, I was a little disappointed by the tripod attachment.  That great side pocket I mentioned earlier?  That’s where the feet of the tripod go, but I never felt the tripod was truly secure.  I’ll admit my tripod might be somewhat to blame– if it was more of a travel size or if it was carbon fiber I might feel differently.

    The only other down side for me personally is that this is a lot of weight for my back.  It is all very well-padded and evenly distributed, but my back’s not what it used to be.  I’m hoping that an Airport 4-Sight rolling bag is somewhere in my future.

    Post originally from: Digital Photography Tips.

    Check out our more Photography Tips at Photography Tips for Beginners, Portrait Photography Tips and Wedding Photography Tips.

    A Review of the ThinkTank Airport Commuter Camera Bag

    The post A Review of the ThinkTank Airport Commuter Camera Bag by Jeff Guyer appeared first on Digital Photography School.


    Digital Photography School

  • Terrified of Street Photography? So Am I! Here’s How I Do It

    by Mridula Dwivedi.

    I am truly terrified of street photography. It is such a daunting task to point my camera at a stranger’s face and click. I know in India (and many other places) not too many people mind, but I just completely freeze somehow. Yet I was fascinated by street photography. I would keep reading tips after tips thinking something would unlock the secret for me. In the end I had to discover my own way. I am still far from comfortable but I look forward to street photography as well on my trips. These are the things that got me started, even if tentatively.

    My Street Photography Tips

    Shooting Things

    Street Photography

    Since I was petrified of shooting people I started with shooting things. Most of the times, the street vendors are fine when you walk up close, exchange a glance towards their stuff and raise an eyebrow. They generally wave a hand to go ahead. I know this is not real street photography but I had to start somewhere. That is where I started and remained, for a very long time.

    Use a Zoom Lens

    Street Photography

    I know, every self street respecting street photographer would advise you against it. But remember we are not dealing with a self respecting street photographer but terrified street photographer. I actually gathered courage only after I used a 75-300 to shoot people walking by at Phewa Lake in Pokhara, Nepal. I was sitting on a bench under shade as it was too hot. I saw boats coming and going as well as people walking by the lake. I decided to use the zoom. No one took any notice as I was a little away from the scene. It helped that I stationary as well. Using a zoom lens certainly got me started.

    Framing Wider

    Street Photography
    So, when I found myself in the colorful border market at Aranyaprathet (Thai-Cambodia border) recently I wanted to do street photography. I was using a 50 mm prime lens which would not let me zoom anything. I wanted to click the man under the umbrella but my nerves failed me as usual. I then decided to frame the scene wider. What to do, you have to think of ways to click things when you are scared of offending people.

    Clicking Busy People

    Street Photography
    While walking through the Rong Kluea Market at the Thai-Cambodian border I realized that the vendors were so busy doing their business they hardly had any time for nosy photographer. Now that is a good thing for scared novices like me.

    Positioning Myself in a Corner

    Street Photography
    But what has worked best for me is positioning myself in a corner of a busy street. That way I could watch the world go by and occasionally get a picture too. I must have clicked at least 30 pictures standing at this particular corner of Rong Kluea Border Market. Not one person stopped and asked me what I thought I was doing! A very happy scenario if you ask me.

    Mridula Dwivedi is a full time academician from India. She blogs at Travel Tales from India. Her blog has taken her places as she was invited by the tourism boards of South Africa, Malaysia and recently Thailand.

    Post originally from: Digital Photography Tips.

    Check out our more Photography Tips at Photography Tips for Beginners, Portrait Photography Tips and Wedding Photography Tips.

    Terrified of Street Photography? So Am I! Here’s How I Do It

    The post Terrified of Street Photography? So Am I! Here’s How I Do It by Guest Contributor appeared first on Digital Photography School.


    Digital Photography School

  • Texture as a Design Element in Photography

    While it’s true that photography is a visual medium, I am always fascinated by images that can suggestively invoke my other senses. Have you ever looked at a photo in a cookbook or magazine and commented that the food looked so good you could practically taste it? What really pulls me into the essence of a photograph, though, is texture. Whether I’m feeling colorful autumn leaves crunching under my feet, the delicate edges of flower petals on my fingertips, or the jagged shards of a broken window– when a photo makes me want to touch it you have me hooked. That’s probably why I’m such a sucker for texture and why I strive to include it as a design element in so much of my photography. I want (or is it need?) these images to speak not only to your eyes, but to as many of your other senses as I possibly can. I want them to speak to your heart.

    texture-002-leaves

    1/80, f/5, ISO 250

    One of the first things to consider when photographing texture is that the beauty is in the details. While the deserted hallway of an abandoned building can evoke a strong sensory response, it’s filling the frame with a broken window or rusted pipe from the deserted hallway that’s going to really bring your textures to the forefront. That’s not to say that the deserted hallway doesn’t have its own story to tell, but this is not the time for cramming as many elements as you can into the frame. Keep it simple.

    1/250, f/8, ISO 400

    1/250, f/8, ISO 400

    As with just about everything we do as photographers, lighting is crucial in accurately and effectively creating a both visual and textural  experience for the viewer. The three characteristics of light– color, quality, and direction– are just as defining when highlighting textural elements as they are when photographing people, landscapes, or any other subject. While it is difficult to separate the three, I find that quality and direction of light tend to have the most impact on photographing textures– accentuating them, rather than overpowering them. Generally speaking, soft, cool lighting will enhance softer, smoother textures like ice or water, while hard side-lighting will not only bring out the detail on that rusty pipe or stone statue, but elevate it as a tactile experience. Ambient light almost always works best, providing a more organic, natural feel.

    1/100, f/4.8, ISO 100.

    Remember that when you are shooting for texture, your model isn’t going to get bored or tired. Your child is not going to get all fidgety, wondering about the ice cream you promised if they sat still for a nice picture. The only timing issues you have to deal with when shooting texture are your shutter speed and how long your ambient light is going to cooperate.  As result, you usually have the luxury of taking your time. Experiment with your composition. Play with your angles. Adjust your camera settings, then adjust them again.  Your available light may be your primary tool in these scenarios, but you still have to able to make sure that your camera sees the scene the same way you do. Your digital camera is nothing more than a computer with a window on it. It has no opinions or artistic intent. You have to tell it what you are seeing, so play with your shutter speed and aperture. See where they take you.

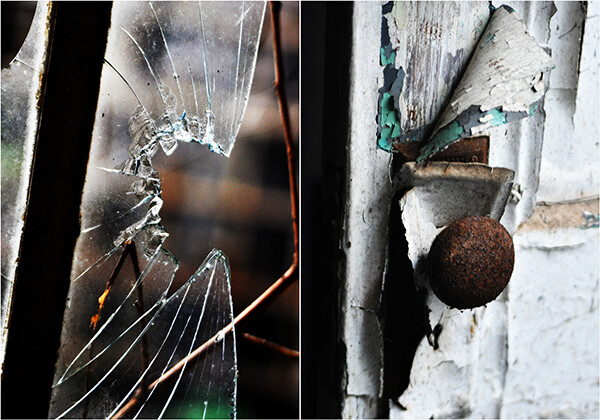
    texture-008-broken-glass

    Taken at an abandoned prison, the broken glass and decades worth of peeling paint not only tell a story, but evoke an almost physical reaction. Both shot at 1/250, f/5.6, ISO 640.

    Obviously, a certain amount of personal taste and preference come into play, but I tend to use smaller apertures when shooting textures. Shooting wide open and its resulting depth-of-field, can throw parts of your image out of focus– something I want to avoid when photographing texture, simply because textures will no longer look as they should when out of focus. I will, however, use wider apertures if I am including any background elements. Just as with a portrait, an out-of-focus background will place added emphasis on my subject and foreground– emphasis which will significantly enhance the textures in the frame. Try bracketing your exposures until you get the desired results.

    In the examples below, I did go with wider apertures because of the background elements. For the cookbook shot, we needed a clearly defined background in order to really emphasize the texture of the ingredients. Blurring out the background behind the butterfly in the next example gave more definition to the textures of the wings and flowers.

    texture-007-food-photog

    1/80, f/5.6, ISO 400

    texture-009-butterfly

    1/250, f/5, ISO 200

    For the sunflower, however, notice that there are multiple textures on the same visual plane. Since I was working with a mostly solid, dark background, I wanted to make sure that every element– as well as all three textures– was in focus, which meant going with a smaller aperture.

    texture-006-sunflower

    1/250, f/5.6, ISO 100

    Texture is such an  interesting and effective design element because it provides visual cues that allow the viewer to put your images into their own context. It gives them something they can relate to. If your photo truly speaks to them, this is one of the reasons why. You’ve given them something that helps make it their own. By capturing the texture, you’ve captured at least part of the essence– and it doesn’t get much cooler than that.

    Post originally from: Digital Photography Tips.

    Check out our more Photography Tips at Photography Tips for Beginners, Portrait Photography Tips and Wedding Photography Tips.

    Texture as a Design Element in Photography

    The post Texture as a Design Element in Photography by Jeff Guyer appeared first on Digital Photography School.


    Digital Photography School

  • My Week With Heisler, Pt. 3

    Editor's Note: Contributor Sara Lando continues her three-part series chronicling her 10-day stint as an assistant/mole with Gregory Heisler in Dubai. This is part three. Part one is here.

    Whenever I spend enough time shadowing a photographer, I end up lusting for gear. Don't judge me: you probably wouldn't be reading Strobist if you didn't have the same problem.

    A week spent with Heisler had me definitely interested in playing around with gels, made me want to trade my octabank for a strip light, definitely added a tilt-shift lens to my wish list, but what impressed me the most is what he calls "the unsung hero of light modifiers": the narrow beam reflector.

    Read more »
    Strobist

  • 5 Most Memorable Photography TED Talks That You Have to Witness!

    Ever heard of TED Talks? If you like photography, you should! For those of you who are unfamiliar with TED (Technology, Entertainment, Design), know that it is a global series of conferences that’s owned by the Sapling Foundation, which is a private non-profit organization. TED’s whole concept is to spread ideas about science and culture, which are delivered by their Continue Reading

    The post 5 Most Memorable Photography TED Talks That You Have to Witness! appeared first on Photodoto.


    Photodoto

  • Defining Your Photographic Specialty

    By Lori Peterson

    Recently I came across a photography page and the photographer’s About Me said “I specialize in everything photography.” I couldn’t help but wonder how many other people had stumbled across that particular page and dismissed it because they wanted someone who had a more defined photographic specialty. When you are looking for a photographer to capture images of your newborn, family, or senior, aren’t you looking for someone who really knows how to take images that really grab your attention?

    Photographers spend so much time trying to figure out what their style is and during those times they shoot whatever sessions are available to them. If you are shooting weddings, babies, seniors, products, and anything else you can, are you really defining your specialty?

    The first thing you should figure out is what your favorite photo shoots have been. If you shot weddings and hated it, then you should reconsider booking them. If you think newborns and small children require too much time to be set aside and too much patience, then you should rethink advertising for newborns and children. It might take some time, effort, and networking, but finding your niche can be well worth the wait once you get your foot into that door.

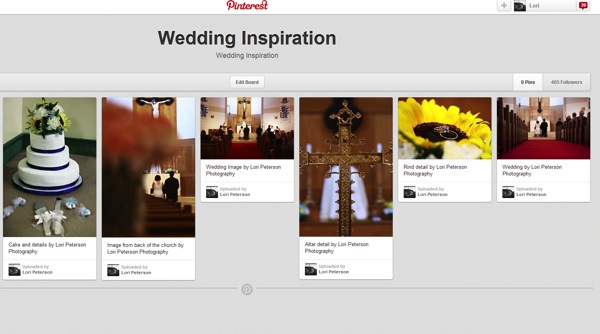
    If you are new to the photography business and are considering shooting weddings you should find an experienced wedding photographer who would let you be their second shooter. (Yes, you should be paid for your time. Don’t spend hours and hours shooting for free!). Do your homework on wedding photography. Looking at wedding blogs and even Pinterest for ideas of shots that people frequently request can help you figure out if shooting weddings might be a good fit for you. Keep in mind that weddings are often long, long days and some photographers don’t really get breaks (or even meals). Meetings ahead of time with the bride and groom and a firm contract are always key items for weddings, even as a second shooter you will want to know ahead of time what the expectations they have of you are. Personally, I have shot weddings and realized that is not where I wanted to focus my time and energy and so I stopped booking weddings. You will know if it’s something you want to forge ahead with or not after a few under your belt.

    Photographic Specialty

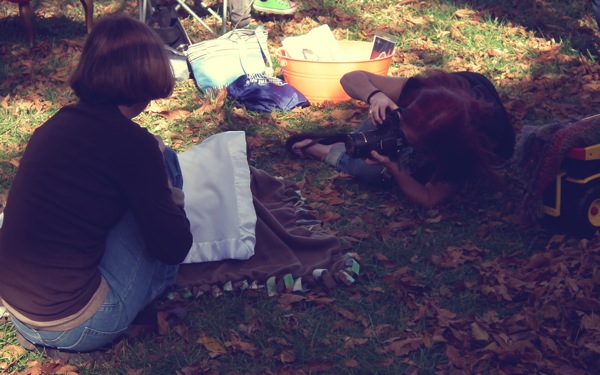
    Newborns and small children require lots of patience and even though those shoots dates are not as extensive as shooting a wedding, you will still be working without a real break. Kids have those rare little ‘windows’ of time that are perfect for shoots and if you miss that it’s very hard to get it back. Talking ahead of time to the parents about naps and feeding schedules can help you get into that small window of time and help you to nail the shoot. Shooting newborns requires a lot of props (blankets, pillows, etc.). You will also be shooting in all sorts of odd angles that can be hard on your back and limbs.
    Photographic Specialty

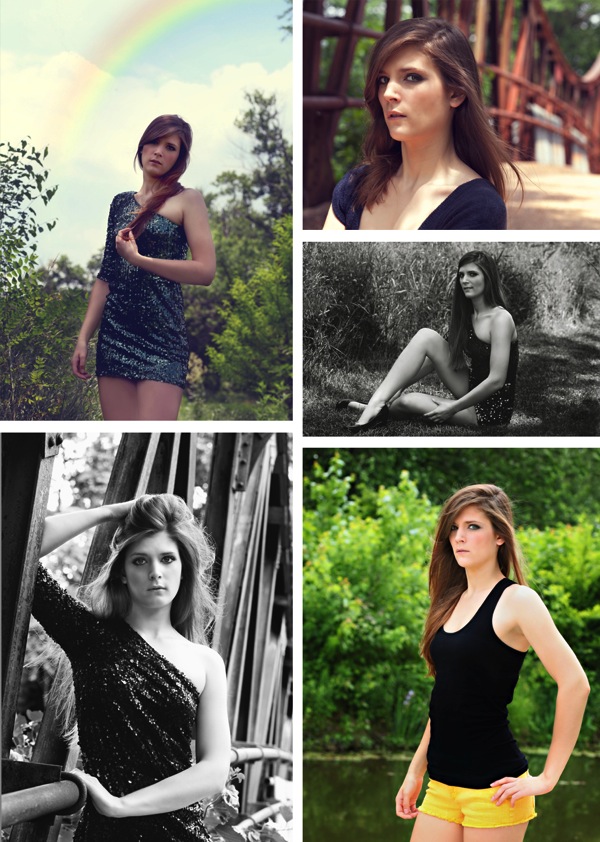
    Adults (models, couples and seniors) are easier to work with because you don’t need to fine tune that window of opportunity for a good shoot. Their shoots don’t take as long as weddings and generally they can be scheduled any time that works around a school or work schedule. They can take direction easily and most of the time they are welcoming at getting their images taken.

     Photographic Specialty 1

    Getting your contracts in order, meeting with your clients ahead of time to let them know how your shooting and editing works, and knowing what your client expects of you can all be huge factors in helping you figure out where your business heads. After shooting a few sessions you will get a general idea if those shoots are where you want to take the direction of your business. Don’t be afraid to stop shooting the things you don’t enjoy. A lot of photographers get nervous about turning away shoots when the reality is that when you really put your time into shooting what you love that you enjoy what you do more and that can only increase your business.

    The areas that you specialize in should reflect your best work and it should make you want to get out your camera and shoot more. If you are finding it hard to get motivated or excited about shoots, then those shoots may not be where you need to be concentrating your energy and creativity. Ask yourself “If I could only take on one more photo shoot and then have to retire my camera, what would it be?” You might surprise yourself with your answer or you might really understand where you need focus more. It’s hard to specialize in everything, so find the things you love to shoot, the ones that feed your creative soul and run with it. You can do great things once you really start pointing yourself in the right direction.

    Lori Peterson is an award winning photographer based out of the St. Louis Metro Area. Her dynamic work ranges from creative portraits to very unique fine art photography. Lori’s work can be seen at www.loripetersonphotography.com and also on her blog at www.loripetersonphotographyblog.com. You can follow her on Facebook at https://www.facebook.com/LoriPetersonPhotography.

    Post originally from: Digital Photography Tips.

    Check out our more Photography Tips at Photography Tips for Beginners, Portrait Photography Tips and Wedding Photography Tips.

    Defining Your Photographic Specialty

    The post Defining Your Photographic Specialty by Guest Contributor appeared first on Digital Photography School.

    Digital Photography School

  • The Secrets of Great Portrait Photography – Great Video from Brian Smith

    Late last year I was giving a copy of celebrity portrait photographer Brian Smith’s book – Secrets of Great Portrait Photography: Photographs of the Famous and Infamous. It was a great read and one that gave me load of ideas for my own portraiture.

    Today I was surfing on YouTube and came across a great lecture that Brian Smith gave at B&H Photo that really is a great walk through of the book and many of the tips in it. While long – the video is really useful on many levels.

    The video goes for almost an hour and a half so grab yourself a beverage and snack and make yourself comfortable – it really is a great watch!

    Get Brian Smith’s Book – The Secrets of Great Portrait Photography

    Grab Brian’s book here and check out more of Brian Smith’s work on his website.

    Post originally from: Digital Photography Tips.

    Check out our more Photography Tips at Photography Tips for Beginners, Portrait Photography Tips and Wedding Photography Tips.

    The Secrets of Great Portrait Photography – Great Video from Brian Smith

    The post The Secrets of Great Portrait Photography – Great Video from Brian Smith by Darren Rowse appeared first on Digital Photography School.


    Digital Photography School

  • Canon Powershot N Review

    PowerShot N_3.jpg

    You never know in this reviewing game: one day it’s a DSLR, then a MILC, rapidly followed by a compact camera. Each with its own attractions, each with its own foibles … but few that really break convention very much.

    Then, suddenly, the door bangs open and in comes a crazy, ground-breaking innovation. Is it a pack of cards, ciggies or business card holder?

    NOTA: none of the above!

    It’s Canon’s entry into the fashion world of desirable gadgets.

    PowerShot N_5.jpg

    PowerShot N_10.jpg

    Canon Powershot N Features

    Gone is the usual myriad of external controls. Absent are cascading viewfinder menu options. Gone is a top-mounted viewfinder. Missing is a comprehensive instruction manual … in its place is a pamphlet ‘Getting Started’ with the instructions covering only one side of the A3 paper. Oh and there’s a CD with a more elaborate instruction manual in linked files.

    Before heading out on a shooting spree I suggest you thoroughly immerse yourself in either or both! Don’t want to be caught with your shutter down in the wild outdoors! For one thing, the camera is ‘driven’ by touch screen operation and well implemented it is too. But manual controls? De nada!
    camera in hand 1.jpg

    camera in hand 2.jpg

    In construction, the camera is a fold out job to form an L shape; with screen swung 90 degrees outwards, the l8x zoom lens faces forwards, protruding some 18mm. So you hold the camera facing forward to take pictures with the screen facing upwards …or you can fold the screen back onto the body and hold it like a normal camera. In either configuration, outdoors the screen washes out.

    Want to zoom? Simply rotate a metallic ring at the front of the camera body and just aft of the lens itself.

    At this stage I have to warn you that holding the camera is a little nerve-wracking. For one, it’s tiny. It’s light. And there are no handholds that you usually find on DSLRs or many compacts, so you’re on your own. There are two lugs, one one either side of the camera so I suggest you string some sort of neck-bearing strap to prevent you dropping the little beast!

    One note: the camera accepts micro cards: microSD, microSDHC and microSDXC. So that will be your first buy before you head out shooting.

    My usual habit with a new camera to review is to fire up and start shooting straightaway. But the N floored me right at the starting gate. Having a touch screen I saw a large red button at left, tapped it and the N began video recording. Gave up on the stills front.

    I scanned the external controls. At left is the power button.
    Creative.jpg

    On the right edge, a tiny toggle that swings between normal shooting and creative mode. The latter shoots a bracket of five shots bearing different treatments: washed out; underexposed; diffused top and bottom of shot (1200×1200 pixels); centre enlarged; edges whited out. A lot of fun!

    Lower down is a mobile device connect button. The N offers integrated Wi-Fi and one-touch connectivity to smartphones or tablets.

    Then, beneath that is the replay button and the card slot.

    Forward of the lens ring is another ring which gives you manual control of the camera: focus confirmation and shutter firing.

    Front of camera: at the top right corner is a tiny clear button. Waffor? It’s the flash. Believe me!
    Menu 1.jpg

    Menu 2.jpg

    The menu options are minimal, allowing control of the touch shutter, AF, the stabiliser etc. You can also choose shooting modes that include Miniature Effect, Soft Focus, Toy Camera Effect and Monochrome.

    There’s a novel option that commands the camera to shoot a four second movie before every still shot resolution. Sort of a ‘behind the scenes’ video of your still shooting efforts!
    Stairway.JPG

    Flowers 2.JPG

    And that’s about it.

    The 12.1 megapixel CMOS captures a maximum image size of 4000×3000 pixels, enough to make a 34x25cm print.

    Full HD video at 1920x1080m pixel resolution can be shot. No, you can’t shoot stills mid video recording.

    Startup Times

    About a second from startup to first shot; under a second per shot from then on.

    Distortion

    No problems.

    Canon Powershot N ISO Tests

    Canon PowerShot N ISO 80.JPG

    Canon PowerShot N ISO 400.JPG

    Canon PowerShot N ISO 800.JPG

    Canon PowerShot N ISO 1600.JPG

    Canon PowerShot N ISO 3200.JPG

    Canon PowerShot N ISO 6400.JPG

    I made four attempts to shoot my favourite orange/bicarb and vanilla. AF was the problem… it just wouldn’t lock in.

    Eventually, I managed to shoot the run from ISO 80 to 6400. The sharpness and lack of noise was OK up to ISO 1600. At ISO 3200 sharpness fell off noticeably; noised still quite low. At ISO 6400 sharpness had dropped noticeably but noise was still low.

    Thinking that my efforts were suffering from operator error or newbie complex, I shot a test shot at ISO 6400 outdoors. Perfect. Sharpness 100 per cent. I can only put it down to the camera’s general unhappiness with AF at close quarters.

    Canon Powershot N Review Verdict

    Quality: about average.
    Why you’d buy it: glam cam!
    Why you wouldn’t: fiddly for experienced photographers.

    The N is available in white or black.

    I found some aspects of the N quite irritating: for one, the lens and shutter rings are easily perplexing … I often found I had to do a visual check to find either.

    Pick up the camera and I often did not know which way was up.

    Despite this, the N is the perfect companion for the smart phone set and has obvious ambitions to surpass the latter’s picture taking prowess. Doubt it will tho’!

    Canon Powershot N Specifications

    Image Sensor: 12.1 million effective pixels.
    Metering: Multi pattern, centre-weighted, spot.
    Exposure Modes: Auto, Program AE.
    Sensor: 11mm CMOS.
    Lens: f3.0-5.9/5-40mm. 35 SLR equivalent: 28-224mm.
    Shutter Speed: 15 to 1/2000 second.
    Memory: microSD/microSDHC/microSDXC.
    Image Sizes (pixels): 4000×3000 to 640×480. Movies: 1920×1080, 1280×720, 640×480, 320×240.
    LCD Screen: 7.1cm LCD (461,000 pixels).
    File Formats: JPEG, MPEG4.
    Continuous Shooting: 2.3 fps.
    ISO Sensitivity: Auto, 80 to 6400.
    Interface: USB 2.0, Wi-Fi.
    Power: Rechargeable lithium ion battery, DC input.
    Dimensions: 79x60x29mm WHDmm.
    Weight: 195 g (inc battery and card).
    Prices: Get a price on the Canon PowerShot N at Amazon.

    Post originally from: Digital Photography Tips.

    Check out our more Photography Tips at Photography Tips for Beginners, Portrait Photography Tips and Wedding Photography Tips.

    Canon Powershot N Review

    The post Canon Powershot N Review appeared first on Digital Photography School.


    Digital Photography School

  • Views Across the Landscape [Book Review]

    NewImageAgain, another large format book, sized precisely to best show off the subject matter.

    As befits this subject, the pictures get priority and so they should … text takes the back seat but not to a demeaning degree.

    Author Peter Watson is a self-taught photographer and has authored five other books, all to do with landscape photography. In his view ‘recent developments in digital technology have simplified landscape photography.’ Perhaps this could have been better said as the arrival of digital photography has simplified landscape photography.

    How so? Well, for one thing the burden of establishing, equipping and operating a darkroom has gone, along with the bane of keeping chemicals fresh, enlargers clean and dust free and the pain of long hours of operation, mostly at night. In nearly all forms of photography today, software is king!

    Photographers now have total control over the process, right from concept through to the tap on the shutter and on to the final print. Never before has the photographer had complete control.

    While we can now enjoy enormous control post exposure there are still limits to what can be achieved and many a trap may lay in waiting for the unwary. What may emerge after software processing can only be as good as the original material: RIRO or Rubbish In Rubbish Out!

    Landscapes are a demanding subject. You have no control over the subject, none over the lighting of it, its placement or orientation. Watson’s attitude is that it is sanguine to adopt techniques that require minimal post exposure adjustment; as he says ‘post processing should be considered the icing on the cake, not the main recipe.’

    The book begins by suggesting research methods for prospective subjects, location hunting, the ‘right equipment’ and accessories such as tripods and pan heads, filters … even down to the right clothing for the location.

    The chapter headings show the way:

    • Equipment
    • Technique
    • Light in the Landscape
    • Composition and Design
    • Taking a Closer Look
    • Landscape Locations

    In terms of equipment the book is realistic: beware of buying and using a digital camera with a ‘kit lens’ included in the purchase price; they are all built with a smaller maximum aperture and mostly offer lower resolution than fixed focal length primes lenses.

    There is some basic info on lens apertures and shutter speeds, understanding histograms, the use of filters, etc.

    Then, to my mind, some of the most important elements in successful and satisfying landscape photography are outlined: finding the best viewpoints and using light.

    With the former, location recces using Google Earth lets you ‘fly’ to anywhere in the world, check out sample photos of the area in question and even scout a shooting position. The message is search for a shooting spot by discovering one with a useful foreground.

    With the latter, light can impart mood, atmosphere, tranquility, harmony etc. Visit the location at different times of the day and year. Notice its angle, colour, strength and distribution.

    In scanning the book I was struck at how the author/photographer used light to lift the quality of his landscape images. If the same images had been shot at different times of the day or at times when the light was a less powerful element those pictures would not have ‘worked’.

    There are four pages of pictures and text on how to use mist in photographing the landscape: a fine balance is essential; too much landscape will diminish it; too little will leave you wondering what you’re looking at. Balance is crucial.

    IMHO the book’s purchase is worth it for the value of the pictures alone!

    Author: P Watson.
    Publisher: Ammonite Press.
    Length: 192 pages.
    Size: 25x25x12mm.
    ISBN 978 1 90770 884 8. Price: Get a price on Views Across the Landscape

    Post originally from: Digital Photography Tips.

    Check out our more Photography Tips at Photography Tips for Beginners, Portrait Photography Tips and Wedding Photography Tips.

    Views Across the Landscape [Book Review]

    The post Views Across the Landscape [Book Review] appeared first on Digital Photography School.

    Digital Photography School

  • 5 Creative Ways to Find New Locations to Photograph

    There’s truly nothing like visiting a location for the first time – I absolutely love it and I strive to always photograph at least one new location a month.

    When I started on my photography journey this wasn’t a hard challenge to meet as even my own backyard was new to me and my camera, but as time went on things got a bit more difficult. New locations became ‘go-to’ spots and there came a point where I was only photographing at places that I had previously visited.

    While I’d love to travel the world on a whim I just don’t have the means or time to do so which severely limits the range of my ‘new locations’ to places within driving distance from my house. As a result I’ve developed this list of useful techniques for getting the most out of my local area and I hope that it will help you do the same!

    Creative Ways to Find New Photography Locations

    #1 – Stuck on Earth

    While Google Maps, Google Earth and Google’s Street View tools are great for getting location data, one of the best tools that I’ve used to find locations to photograph is the amazing app created by the people at Stuck in Customs called Stuck on Earth.

    It works by fusing Flickr location data with a beautiful map to give you an amazing resource of not only useful locations, but the photographs other photographers have taken at those locations.

    On top of searching random locations for photographs that have been tagged in various locations around the world, they have top location lists that have been curated by actual photographers to showcase the best photographs in cities around the world. There’s a bunch of other cool features as well and I highly recommend it as a resource (after all it is free).

    You can find out more about it here.

    #2 – Join a Photo Club

    I’d have to say that one of the best ways to get out and find new locations is by meeting new people local to your area. Even if you’ve lived there your entire life odds are someone else has found interesting locations you haven’t – or better yet – has been able to find a new perspective on a location you thought you’ve picked clean.

    Photography clubs often will also hold photo walks which will help you get out to different locations many of which might become your new ‘go-to’ spot when you’re in a pinch to get on location before sunset. It’s a great experience and I highly recommend trying it if you haven’t done so yet.

    Have you ever gone on a photowalk? Tell us about the experience in the comments!

    #3 – Make an Old Place New By Going At Night

    One trick that I’ve done is not necessarily to find a new location, but instead to photograph the same location in the middle of the night.

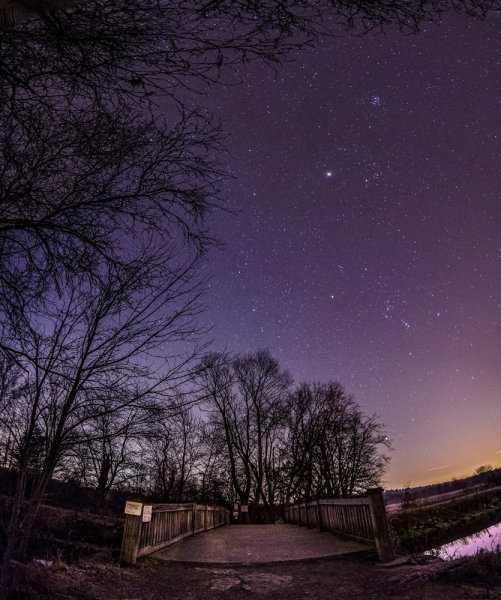
    A-lot-of-Stars

    Night changes the way we perceive the world and will more than likely change the way you see a familiar location. It opens up a whole new set of challenges and pushes your camera to its limits of low light image capture, but in my opinion it’s one of the most fun types of photography there is.

    Read more about photographing at night here.

    #4 – Buy a Guide Book to Your Local State

    Guide books might seem dated these days with instant access to so many great tools online, but there’s something to be said about a good guide book that has a friendly voice guiding you to the spots, telling you what to expect, where to park and when the best time to visit is.

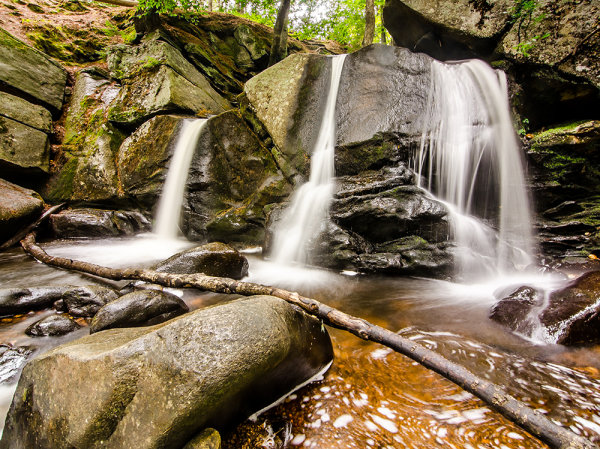
    Trap Falls 2013

    I never would have found out about Trap Falls (pictured above) if I hadn’t gotten a guide book detailing the hundreds of waterfalls and cascades that New England has to offer. It’s amazing the detail that the book goes into about not only where the waterfalls are, but how difficult the hikes are, and how picturesque the fall is.

    There are tons of great guide books on Amazon and other bookstores and many of them can be downloaded as eBooks right to your phone or eReader so you can take it with you on your trip!

    #5 – Fill up your tank and just drive

    Finally, if all else fails, just fill up you tank and drive. One of my favorite things to do is pick a highway and a direction and tell myself, “I’m driving for 50 miles and taking the first exit I see after that”. What I end up doing is putting myself into an unknown town with all sorts of new things to see. I like to bring a friend along for the ride to keep me company as well as a second pair of eyes so that I can be sure to see potential photography opportunities.

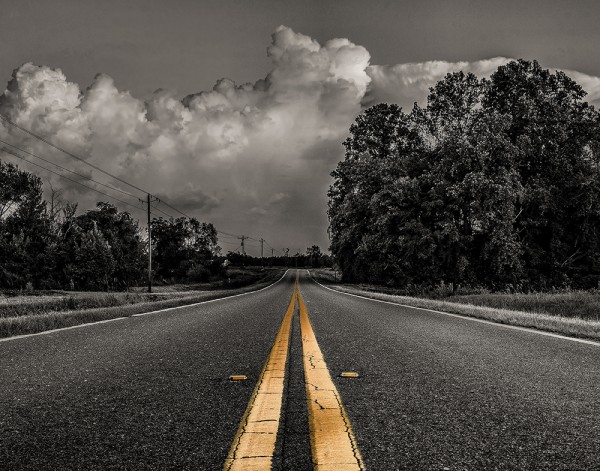
    Double Yellow

    Of course it’s not a fool proof plan and driving around aimlessly can be a bit tricky. While it’s certainly possible that you’ll find a location you might otherwise have overlooked – it’s nearly just as likely that you’ll spend your day driving around with nothing to show for the effort, time and gas you burned.

    How Do You Find New Locations to Photograph?

    Okay now it’s your turn to help build upon this list – I’d love to hear what techniques you use to continue to discover new locations – leave a comment below and let us know!

    Post originally from: Digital Photography Tips.

    Check out our more Photography Tips at Photography Tips for Beginners, Portrait Photography Tips and Wedding Photography Tips.

    5 Creative Ways to Find New Locations to Photograph

    The post 5 Creative Ways to Find New Locations to Photograph appeared first on Digital Photography School.


    Digital Photography School