Category: Photography

  • Moon Photography: 6 Tips for Better Moon Photos

    The moon is something so familiar to us, and yet so strange that it’s mesmerizing. It’s at once commonplace and extraordinary. As photographers, we are drawn to it in an attempt to convey the intrigue we feel when we look at it.

    But moon photography can be tricky.
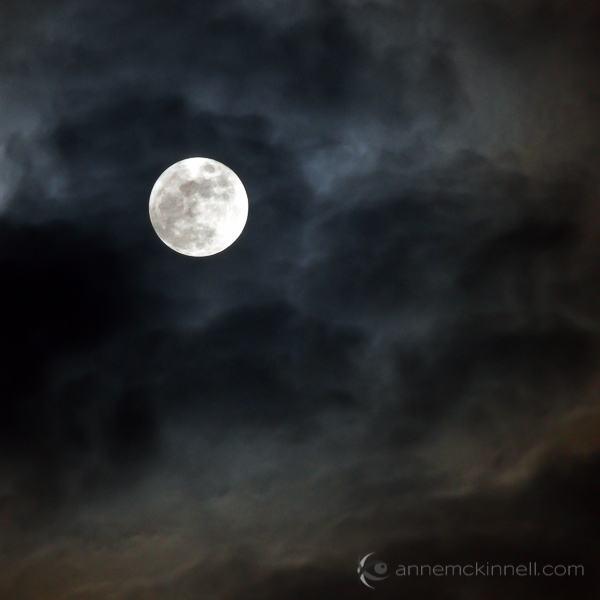
    Moon Photography: Just the Moon, by Anne McKinnell

    A bright full moon creates one of the most high contrast situations there is, posing a difficult challenge for photographers. Often photos of the moon appear like a spotlight in the sky that looks more like the sun than the moon.

    Moon Photography Tips

    To get the best possible pictures of our one-and-only moon, it’s important to know a few things about it first.

    1. Learn the Phases of the Moon

    The moon itself emits no light, it’s simply a huge rock being lit up by the sun. As it orbits the earth, and as the earth orbits the sun, how much we see of that reflection changes from a bright, full moon to no apparent moon at all.

    Moon Photography: By Tomruen [Public domain], via Wikimedia Commons

    By Tomruen [Public domain], via Wikimedia Commons

    Because of our counter-clockwise trajectory around the sun, the shadow it casts on the moon is always moving to the left; after a new moon (no moon), the illuminated side starts to creep in from the right edge, expanding towards the left side each night. As the moon’s apparent size gets bigger, we call it “waxing”.

    Once the moon is full, the shadow starts to reappear – again on the right side – and grow leftwards, shrinking the visible moon until it is dark again. This is called “waning”. Therefore, any time you want to know what the moon will look like tomorrow, look at it tonight; if it is lit on its right side, it is waxing towards fullness. But if it’s lit on the left, it is waning, and will soon be gone.

    The twilight sky also holds clues to the lunar phases. If the moon is visible before sundown, it is waxing, but if you can see it before sunup, it’s waning. Alternatively, you can always look up a calendar online, or download a moon phase app that will do the calculations for you.

    2. Use the Right Equipment

    To maximize the success of your moon photography, there are a few bits of a gear that will come in handy.
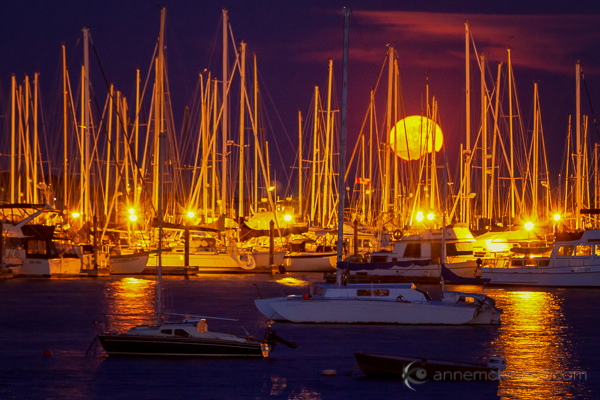
    Moon Photography: Moonrise over the Oak Bay Marina, in Victoria, British Columbia, by Anne McKinnell

    • A zoom lens.
      If you’ve ever taken a shot of the moon and been disappointed by the tiny white blob that results, you’re probably using too short of a focal length. A standard wide-angle lens makes everything appear smaller, particularly things that are far in the distance. To get a close-up shot, use a focal length of at least 200mm or more. Longer lenses will result in greater magnification and detail.
    • A tripod.
      To support the weight of this large lens, and to allow the slow shutter speeds that may be necessary to get a good exposure, mount your camera securely on a sturdy tripod.
    • A shutter release.
      These come in both wireless and wired options and will allow you to fire the shutter without having to depress the shutter button and risk camera shake. If you don’t have one, use your camera’s self-timer to achieve the same benefit.

    3. Get a Good Exposure

    The moon is very intricate and detailed, with craters, channels, and mountains dotting its surface. If the moon in your photo turns out bright white, it is overexposed. This happens frequently because the blackness of the surrounding sky throws the light meter off.

    To fix this, turn down your exposure compensation (+/-), or use your camera’s spot metering mode to expose for the moon alone. Check your camera’s manual for information about how to do this on your specific model.
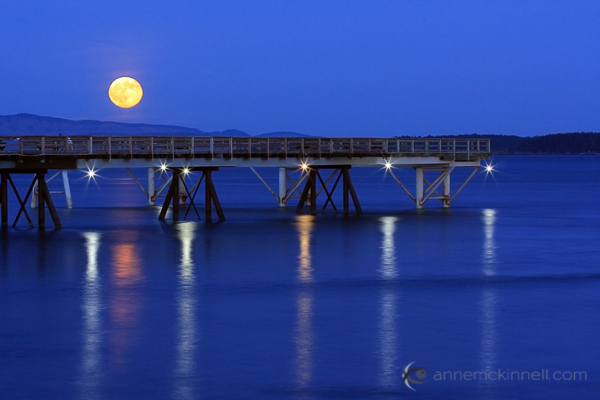
    Moon Photography: Long Nights Moon by Anne McKinnell

    For best moon photography results, bracket your shots. Some cameras will have an automatic bracketing feature, but if yours doesn’t, you can simply do it manually. First, take one shot at the automatically-determined settings. Then, using exposure compensation, take the same shot at -0.5EV, and one at +0.5EV. Do the same at -1EV and +1EV, and continue to +/-1.5EV and beyond if necessary. Later, you can choose the best exposure when you view them on your computer.

    4. Find the Best Times and Places to Shoot

    Unless the city is a part of your scene, you probably don’t want a lot of urban light pollution spilling into the sky when you’re trying to photograph a pristine moonlit night. You’ll get the cleanest shots outside of dense civilization. Explore backcountry roads, or take a hike into the nearby mountains to find truly dark night skies.

    That said, a common problem photographers run into with moon photography is the harsh difference between a brilliantly lit moon and a pitch-dark sky. To avoid this, consider shooting during the “blue hours”, when the sky glows faintly after the sun goes down, or before it comes up. There is less contrast at this time, though the moon is still bright.

    A moon phase app can help you determine when there will be a full moon during twilight.

    5. Create an Interesting Composition
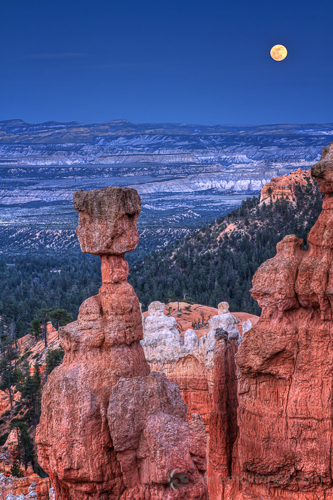
    Supermoon at Bryce Canyon National Park, Utah, by Anne McKinnellAs compelling as a beautifully sharp, detailed image of a lonesome moon is, once you’ve seen one, you’ve seen them all. Getting that perfect close-up is excellent practice, but try to get creative by placing the moon within a more complex composition.

    For instance, you could try framing it behind trees and buildings, or reflecting it off the surface of a still lake. Placing other objects in the foreground gives the moon context and scale that it lacks on its own. Think of the moon as a single element which should be incorporated along with other compositional elements and techniques to make a great final photograph.

    6. Combine Multiple Exposures

    Incorporating other objects can complicate things though, and you may find that the perfect exposure for the moon doesn’t match that of the rest of the scene. Sometimes natural light doesn’t cooperate, and the camera doesn’t see things the way our eyes do. This is where digital photography comes in really handy, allowing you to play with your images to create the scene the way you saw it, even if the camera saw it a little differently.

    To do this, take several shots at different exposures by bracketing, as mentioned above. When you open the files on your computer, choose two: the one with the best exposure on the moon (‘Image 1′), and the one with the best exposure on the rest of the scene (‘Image 2′). Using an image editing program, select the moon from Image 1 and copy it, then paste it into Image 2, covering the moon in that picture. Use the eraser tool with a heavily feathered edge to remove any imperfections and blend the edges together. This method may take some trial and error to get it just right, so try it several times with several different shots to get the hang of it.
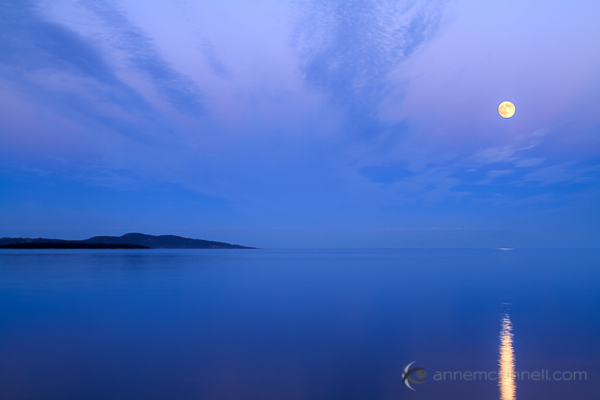
    Moonrise over the ocen in Sidney, British Columbia, by Anne McKinnell

    When performing this technique, try not to stretch or enlarge the size of the moon. The goal of image editing is to faithfully recreate a scene that the camera simply can’t capture all at once, so beware of any visual exaggerations that make the composition look unnatural or inauthentic.

    Share Your Moon Photography Tips and Moon Photos

    Got any more moon photography tips to add? We’d love to see them in comments below. Also feel free to share any photos you’ve taken of the moon.

    Post originally from: Digital Photography Tips.

    Check out our more Photography Tips at Photography Tips for Beginners, Portrait Photography Tips and Wedding Photography Tips.

    Moon Photography: 6 Tips for Better Moon Photos

    The post Moon Photography: 6 Tips for Better Moon Photos by Anne McKinnell appeared first on Digital Photography School.

    Digital Photography School

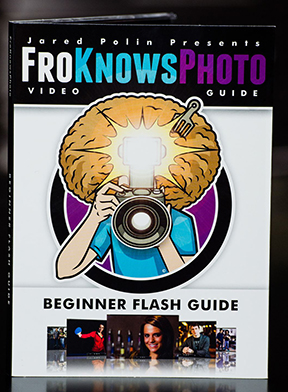
  • Fro Knows Photo Beginner Flash Guide – Review

    It’s a little past 4:00 a.m. and I just finished watching all three hours of the just-released Fro Knows Photo Beginner Flash Guide.  A lot of photography-related books and videos come across my desk, and my favorites are always those that have something to offer not only the beginner, but the advanced photographer as well. This is absolutely one of them. In this follow-up video to his Fro Knows Photo Beginner Guide, Jared Polin (the aforementioned Fro) leads you on an off-camera flash adventure, taking you from hopelessly intimidated to supremely confident in a style all his own. Not bad for a three-hour tour.  With expert assistance from friend and professional photographer Adam Lerner, viewers have a front-row seat to everything from breaking down the contents of an affordable-but-effective light kit, to a behind-the-scenes look at six professional-grade photo shoots, all lit with a single speedlight and a convertible umbrella.

    fro-knows-photo-flash-guide

    The Beginner Flash Guide starts literally from the ground up, planting a light stand firmly on the floor and explaining not only the contents of the light kit, but how those five or six pieces all work together to achieve professional-quality lighting without breaking the bank. Jared launched FroKnowsPhoto.com in 2010– a brand and a website that quickly became synonymous with making advanced photography techniques accessible not only to professional photographers, but also to beginners, hobbyists, and enthusiasts. The Beginner Flash Guide maintains and elevates that educational philosophy, taking what can be the confusing language and landscape of photographic lighting, and essentially handing the viewer a dictionary and a road map.

    Among the nuts and bolts laid out are: The Lighting Kit Explained, Four Ways to Trigger Your Flash, Flash-to-Subject Distance, How Shutter Speed Affects Ambient Light, Understanding Flash Zoom, and Quality of Light. Plus, thirteen “Quick Tips” interspersed throughout the lessons cover some minor and some not-so-minor details on topics ranging from which rechargeable batteries you should use (lithium) to how best to interact with your subject. Word to the wise– make sure you take notes– they’ll make retaining and applying the information to your own photography much easier. An additional, non-video element is the included Flash Photography Field Guide– a six-page PDF designed to be printed and tucked away in your camera bag for quick, easy reference. The field guide does a great job of summarizing the basics covered in the videos, as well as offering suggestions for overcoming some real-world lighting challenges.

    Not everyone is lucky enough to have a mentor or someone to show them the ropes when they are first trying to learn this stuff. The BFG can and will fill that void. But even if you already have a firm grasp of off-camera flash principles– or just need a refresher– the lessons in this video guide can enhance and build upon what you already know. There will always be trial and error when it comes to learning and experimenting with photographic lighting. The Beginner Flash Guide, though, can help you minimize the error.

    Get your copy of the Fro Knows Photo Beginner Flash Guide here.

    Post originally from: Digital Photography Tips.

    Check out our more Photography Tips at Photography Tips for Beginners, Portrait Photography Tips and Wedding Photography Tips.

    Fro Knows Photo Beginner Flash Guide – Review

    The post Fro Knows Photo Beginner Flash Guide – Review by Jeff Guyer appeared first on Digital Photography School.

    Digital Photography School

  • Hurry Up! Premium Stock Photos For Ultra-low Prices At MightyDeals.com

    Stock photos are professional images of ordinary locations, events, nature, landmarks and people. They’re purchased as well as sold on a royalty-free agreement, and what makes them so useful is, of course, the fact that they can be constantly used for commercial-design applications. The photographer who snapped the stock photos owns them, but the person who purchased them gets to Continue Reading

    The post Hurry Up! Premium Stock Photos For Ultra-low Prices At MightyDeals.com appeared first on Photodoto.


    Photodoto

  • Off-Brand LED Studio Monoblocs: Wouldya? (I Did.)

    So you're used to using flashes without modeling lights. How about modeling lights without flashes? Yes? No? Maybe?

    My project for 2014 is video-based (no spoilers, please) so I found myself shopping for video lights in the form of LED monoblocs. If you've ever considered taking the plunge, read on…

    Read more »
    Strobist

  • Got Sensor Dust? Here’s How to Check.

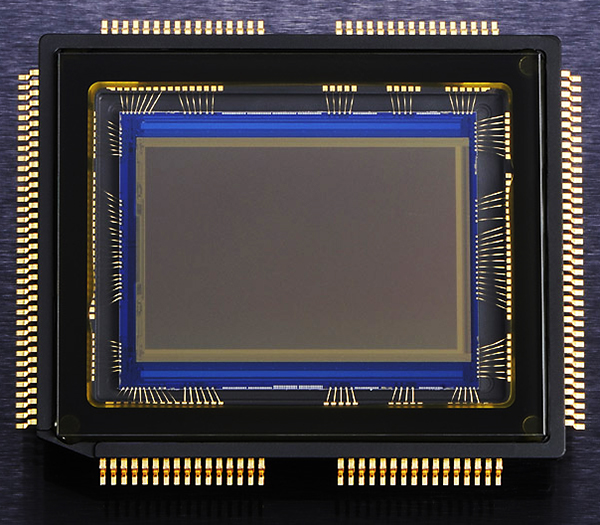
    We all know that dust on a DSLR sensor can range anywhere from the mildly annoying to downright problematic. You can try avoiding it, but the simple, unfortunate truth about sensor dust is that regardless of how careful you are, onto every sensor some dust will fall at some time. The closest you might come to avoiding it would be if you were to put a prime lens on your camera when it’s brand new and never change it or take it off. Ever. We all know that’s not about to happen, so dealing with dust becomes a critical part of regular camera maintenance. Part of eradicating any enemy, however, first requires some knowledge of where he’s hiding and how he got there.

    guyer-photo-sensor-dust

    The fact is that our cameras spend a great deal of time in dusty environments. Regardless of how clean your studio is or how lint-free your camera bags are, those microscopic makers of mayhem are going to settle on your camera at some point. And that’s before we even think about taking our cameras outside or changing lenses. When using lower-end or budget zoom lenses, the simple act of repeatedly zooming the lens in and out can “inhale” dust particles into the lens, which can then over time work their way into your camera. Once inside, they can settle on the mirror or sensor. Once you start changing lenses, the likelihood of dust finding its way to your sensor skyrockets. There are steps you can take to minimize the dust (holding the camera with lens mount facing down while changing, not changing lenses outside, etc.), but sooner or later it’s going to find you.

    Mirror or Sensor?

    The first important difference between the dust that settles on your sensor and that which settles on the mirror is that only one of them will appear in your photos. While the mirror is essential to viewing the scene and taking the photo, mirror dust will have absolutely no impact at all on your images. It also differs from sensor dust in that you can often actually see mirror dust with the naked eye when you look through the viewfinder. It can be annoying, but it is also usually a pretty easy fix with an air blower. Sensor dust, on the other hand, won’t show itself until it’s left dark spots of varying sizes on your photos. If you see it in the viewfinder, it’s not on the sensor.

    Spotting the Spots

    For starters, you’ll be able to recognize a dust spot on your photos if it appears in the same place in multiple images, particularly in images taken at small apertures like f/8 or smaller. If you are generally a “wide open” photographer, you need to know that most dust particles will not show up at very wide apertures like f/1.8 against bright backgrounds. Dust may also be less noticeable in images with a lot of detail, but that doesn’t mean it’s gone. If a dust spot is visible with just a quick glance at the image, chances are that you’re looking at a pretty bad spot on your sensor– one that’s not going to leave just because you squeeze a little bit of air at it. You may need a thorough sensor cleaning to get rid of your worst offenders. But regardless of whether you pay to have your sensor professionally cleaned or you are comfortable enough doing it yourself, it is possible to overdo it. Sensors have a delicate coating that can be damaged by over-cleaning, not to mention the fact that you increase the odds of damaging your sensor the more often you clean it. So, how do you do a quick and easy evaluation to see if your sensor really does need a cleaning?

    Test Shot

    You can run this test against a clear sky, a white sheet of paper, or even your computer screen. Start by switching your camera into Aperture Priority mode, as well as matrix/evaluative metering, and the lowest possible ISO. Then turn off auto-focus and dial in the smallest aperture possible (remember– higher number = smaller aperture). Fill the frame with your blank target area, manually dial the lens completely out of focus, and click off a frame. When you open the image on your computer, look for dark spots– those are your culprits.

    Making Sure

    No system is perfect, and this one is no different. There is, however, a neat little trick you can run in Photoshop as an added layer of detection. By holding down Command + I (CTRL in Windows), you will invert the image, basically creating a negative.  The dark spots (if any) will now appear white against a dark background, making them easier to see. In the example below, certain spots were plainly visible in the original photo. It wasn’t until I inverted the image, however, that I was able to see several additional trouble spots on my sensor.

    In the original image, some dust spots are obvious on the right side of the sky.

    In the original image, some dust spots are obvious on the right side of the sky.

    By inverting the photo and creating a negative, several additional problem areas are revealed.

    By inverting the photo and creating a negative, several additional problem areas are revealed.

    Saving Time in Post

    Obviously, this is one of those things that can be fixed in Lightroom or Photoshop without too much of a hassle, but why spend extra time in front of the computer when you don’t have to? If you are a photographer who strives to get things right in the camera (and you should be), this is absolutely one of those things to keep on a semi-regular checklist. There are a lot of do-it-yourself sensor-cleaning options available. If you are comfortable doing this task on your own, great. If not– and I don’t blame you– local camera shops provide sensor-cleaning services for a nominal fee. Either way, by knowing how to quickly identify the problem, you’re in a much better position to do something about it and get back to taking clean, crisp, dust-free photos.

    Post originally from: Digital Photography Tips.

    Check out our more Photography Tips at Photography Tips for Beginners, Portrait Photography Tips and Wedding Photography Tips.

    Got Sensor Dust? Here’s How to Check.

    The post Got Sensor Dust? Here’s How to Check. by Jeff Guyer appeared first on Digital Photography School.

    Digital Photography School

  • Choosing the Right Color Reflector for Your Photography

    Of all the portrait lighting tools at our disposal, none are quite as versatile as the the five-in-one reflector. The concept itself is extremely basic. In the hands of a photographer comfortable with common lighting principles, the reflector helps us bounce light into or onto those areas that aren’t getting enough light, regardless of whether we are using natural, ambient, or studio/strobe lighting.  A reflector placed directly opposite a main light can act as a hair light, creating separation between the subject and background. Placed in front of a back-lit subject, we can negate the silhouette effect, using available, natural light to balance the exposure between our subject and background. Held at a ninety-degree angle to a subject’s chest, we can toss some light up on the subject’s face and neck, eliminating troublesome shadows caused by foreheads and chins when using overhead or mid-day lighting.

    The possibilities really are nearly endless, and– just as importantly– affordable. While there are many options available, at about $ 40.00, The Westcott 40″ 5-in-1 Reflector meets (and often exceeds) my needs, in terms of price, size, durability, and versatility. But dropping $ 40 on a reflector and adding it to your bag of tricks is only half the battle. Like the name says, you’ve got five-in-one. While technically not all five are actually reflectors, knowing which of the five to use and under what circumstances is essential to successful photographs.

    gold-reflector-guyer-photography

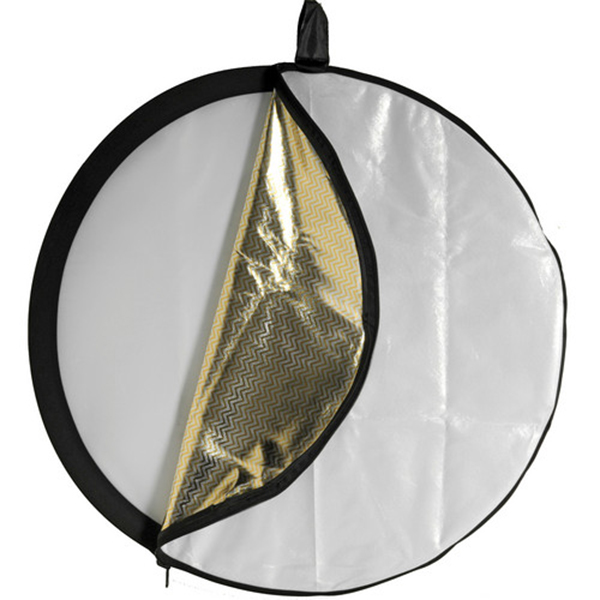
    5-in-1 Reflector surfaces are attached to or removed from the outer ring with zippers.

    Silver

    The silver panel is one of the most useful, and is best for beginners first getting their bearings with reflectors. Since the silver reflects the most amount of light of the five, it is a great choice for low-light situations or those scenarios where you need a strong fill light. Since it  doesn’t change the color of white-balanced flash or studio lights, it is perfect for both indoor and outdoor portraits. Another reason it works so well for beginners is that most first-timers make the mistake of not placing the reflector close enough to their subject. The silver reflector’s ability to shine more light than the gold, for instance, allows it to be placed further away from the subject than we typically want, without sacrificing results. One word of caution, though– the fact that the silver is the strongest of the five is an advantage, but it can also be too strong in already bright light unless it’s feathered. Take some time to experiment with proper and effective placement.

    Gold

    The gold reflector is great for outdoor portraits because it matches the warm color tones of sunlight. The gold reflector is actually at its best when it is reflecting sunlight, casting a warm glow on the subject. It’s easy to turn normal skin tones overly yellow, however, if you aren’t careful. This is also why the gold reflector is also not recommended for studio or flash work. It not only changes the color of the white light that hits it, but can cast uneven color tones on the subject.

    White

    Under most circumstances, this one is my favorite. The white panel may not reflect quite as much light as the silver or gold, but when used properly it can still bounce just enough light onto the subject to overcome shadows and add subtle dimension opposite larger light sources. Since it is soft, clean light, it works well both in the studio and outside when there is ample light. While effective, the white reflector won’t do you much good at all in low-light situations.  It is also important to remember, though, that for the white reflector to do its job, you’re doing to have to get it very close to your subject. Wedding photographers love the white reflector because it doesn’t change the color of the light– or the dress.

    reflector-examples-guyer-photography

    In the outdoor portrait on the left, a white reflector adds just enough light to open up the shadows, while a silver reflector casts some dramatic light across the boxer on the right.

    Black

    This one is pretty much the “anti-reflector.” Black, as we know, absorbs light, which helps to cut down on the reflections from shiny, reflective surfaces– one of the reasons it is used so often in jewelry photography. When placed properly, the black panel also creates shadows when light falls too evenly across the subject. The benefit of this “negative fill” is that it allows you to create shadows rather than overcome them.

    split-light-guyer-photography

    Using the black “reflector” in a small space helped me achieve split lighting, which I usually create with a silver reflector in a larger area.

    Translucent

    When all of the other reflection panels have been removed, the translucent is left. While technically not a reflector, this panel works great as a shoot-through diffuser for flash or location lighting, or as a diffusion panel between the sun and your subject. Since larger light sources provide softer light, using the translucent panel as a large diffuser gives you a very large, easily portable light source. While a large enough translucent reflector can also be used as an impromptu background for a head shot, the translucent panel will almost always be between your subject and the light source.

    translucent-guyer-photography

    Using the translucent panel above the subject’s head, we spread the light and softened it.

    Conclusion

    The 5-in-1 Reflector can one of the most versatile lighting tools in your entire workflow. Taking full advantage of its capabilities, though, won’t be possible until you know what color reflector to use for which lighting scenario. Remember, though, that photography rules were made to be broken once you’ve learned them, so be sure to experiment with color and placement.

    Post originally from: Digital Photography Tips.

    Check out our more Photography Tips at Photography Tips for Beginners, Portrait Photography Tips and Wedding Photography Tips.

    Choosing the Right Color Reflector for Your Photography

    The post Choosing the Right Color Reflector for Your Photography by Jeff Guyer appeared first on Digital Photography School.


    Digital Photography School

  • How to Create Great Environmental Portraits

    Interested in learning how to take better Environmental Portraits? If so, do yourself a favour and watch this video of a training session by photographer David Handschuh and what he has learned about the topic from the last 20 years of his doing environmental portraits.

    Thanks to the team at BHPhoto for putting this video out there.

    Further Reading on Environmental Portraits:

    • How to Create Portraits that Captivate and Intrigue
    • An Introduction to Environmental Portraits

    Post originally from: Digital Photography Tips.

    Check out our more Photography Tips at Photography Tips for Beginners, Portrait Photography Tips and Wedding Photography Tips.

    How to Create Great Environmental Portraits

    The post How to Create Great Environmental Portraits by Darren Rowse appeared first on Digital Photography School.

    Digital Photography School

  • Learn How To Connect With Your Subject

    I was reading through the comments left on a recent post that I wrote here on DPS and one of them really spoke to me and ultimately inspired me to write this post for you today. For reference I’ve quoted the comment below by Justin Donie.

    p165722407-4

    All the tips given here are relevant and true. And I won’t minimize the value of any of these tips. They will all help you have a better experience and create something closer to what you want than if you don’t follow them. I thank the author of this post for sharing these practical tips … they are all good and useful. But let’s also remember that we need to spend time … and not just a little time … on our inner preparations as well.

    All the technology, technique and work-flow management in the world can’t make up for what will be missing from our images if we never learn how or take the time to infuse the power of our personal inner experience of life into uniquely expressed, emotionally moving visions. I believe, as photographers, we must begin focusing more of our time and energy and even money on these aspects of our art.

    Preparing for a successful shoot … a REALLY successful shoot … must include a powerful immersion in our personal relationship with the subject, a passionate exploration of different ways of visualizing and of sharing our individual inner experience, and a careful nurturing of the emotional connection we’re creating with our intended viewers.

    Over the last 40 years of my creative experience it has gradually become clear to me that we photographers face a challenge in our art that most other artists do not. We can far too easily let “the gear” and “the work flow” and our fascination with them get in the way of the core and essence of all art … “the experiences of life we’re exploring … what we have to express … and how we choose to expressing it.”

    All art utilizes some form of media, directly or indirectly. But in other arts, the act of creating may actually put the artist more closely in touch with the thoughts or feelings they are trying to explore and express. In photography, the very tools of creativity are so numerous and so complex that they can distance us from the raw experience of self-exploration and self-expression, ESPECIALLY because vast majority of photographic instruction tends to focus on technology and technique and not self awareness, other-awareness, emotional honesty and ever-more creative modes of revealing our inner selves to the outer world. I believe it’s time for that to change.

    Justin Donie

    What really stuck out to me was the way Justin closed his comment – “…photographic instruction tends to focus on technology and technique…” he’s got a point. Just look around DPS or any other blog related to photography training and you’ll find post after post teaching you how to use your camera, how to compose your scenes better, how to use Lightroom or Photoshop or some other software to enhance the images you have captured – the list goes on. However, when you look for information on how to actually dig deep into the emotional side of capturing a piece of art and translating that emotion to a still image – it gets a bit more difficult to find.

    This is not a bad thing so don’t get me wrong it’s just something we have to be aware of. As Justin mentioned at the start of his comment these techniques and skills are important and will help you make better photographs in the end, but like Justin, I think the point here is that to truly capture powerful images we have to learn how to translate our emotions from the scene we’re photographing through the camera and into a still image.
    p471780900-4-1
    I’ve thought about how I was going to write this article for quite some time. I knew it wasn’t going to be an easy piece to write, but I wanted to bring attention to the concept that Justin brought up and try my best to get us, at least started down the road to, an answer for it.

    My hope is that through the community here at DPS we can come up with a massive list of ideas for connecting with our subjects – Whether you photograph the stars that fill our skies, shoot macros of the smallest insects or anything in between – How do you connect with your subject?

    Here are a few ideas that I’ve come up with – I hope you’ll continue to add to the list in the comments below.

    A Four Step Process On How To Connect With Your Subject and Better Your Photography

    1.) Put Down the Camera

    The first step in this process is to put down the camera and step back from the scene. The camera in some instances is very much like a security blanket it’s a buffer between us and our subject, by putting it down, you remove that buffer and you start to see the scene differently. The idea here is simply to free yourself from the camera for a minute and remove yourself from the need to adjust your settings.

    2.) Define Your Subject

    Next on the list is to truly define the subject of your photograph. If you can’t tell me what the photograph your taking is about then you probably shouldn’t be taking a photograph of the scene after all.  If you’re photographing a model it can be quite easy to do this, but when you’re in a vast and open landscape, sometimes the subject is so big it’s hard to find a way of defining it within the limits of the camera’s frame.

    Spend some trying to describe what it is you’re trying to capture to yourself or to a friend. The more you do this the better you’ll be at being able to pick out the little things that really will start to help you tell a story with an image.

    3.) Meditation

    This is something I haven’t done yet, but I’m actually going to attempt to give it a try on my next shoot. My idea here is going to be to show up extra early to the location I want to photograph. Set up my camera and determine my subject. After that I’m going to sit down, close my eyes, and drift away for a few minutes to clear my head. Once this meditation is over I’m going to once again return to step two and see if anything has changed or if I’ve noticed any finer details of the scene.

    I do this before  I write long articles or when I find myself struggling for ideas to write about. So the thinking here is that if it can help clear my head for writing, maybe, just maybe, it can help clear my head on a shoot.

    4.) Talk it Through

    This tip tends to shadow the idea of number two, but here rather than specifically talking about the subject you’re capturing, talk about everything on a whole. What kind of photograph are you looking to make? Is it black and white? Is it an HDR? What do you want your viewer to feel – what are you currently feeling?

    Whether you’re with another photographer, a model or alone in the wilderness it’s amazing to simply put words to the emotions that you’re feeling. Describing the scene out loud might seem strange at first, but it will help you see it better in your mind.
    Connect with your subject
    It’s so important to never forget that gear, software and knowledge of what we should do in the scene can only take us so far. To truly capture the world around us we have to connect with the scene that we are capturing and transfer the emotions that we feel into the still image. Without this connection – we might end up with technically sound photographs that lack power or purpose and ultimately that is what gets people to stop and look at the photographs that you’ve created.

    Now – I’d love for you to take a moment, or a day, and come up with a few of your own techniques for connecting with subjects and leave the answers you find in the comment below so others might be able to learn how to connect with their subject and ultimately take better photographs.

    Post originally from: Digital Photography Tips.

    Check out our more Photography Tips at Photography Tips for Beginners, Portrait Photography Tips and Wedding Photography Tips.

    Learn How To Connect With Your Subject

    The post Learn How To Connect With Your Subject by John Davenport appeared first on Digital Photography School.


    Digital Photography School

  • Pets: Weekly Photography Challenge

    NewImageThis week we launched the brand new Pet Photography eBook (at the special price of just $ 7) at our sister site SnapnGuides so we thought we’d do a weekly challenge on the theme of pets!

    While I know not all of our readers have a pet to photograph – feel free to get a little creative and interpret the theme in a more abstract way… maybe you have something else in your life that you treat like a special pet perhaps?

    So grab your camera… convince your pet to pose (or capture him or her in action) and get practicing your pet photography!

    Once you’ve taken your ‘Pets’ shots we’d love to see them in comments below. Simply upload your shot into the comment field (look for the little camera icon in the Disqus comments section as pictured below) and they’ll get embedded for us all to see or if you’d prefer upload them to your favourite photo sharing site and leave the link to them.

    If you tag your photos on Flickr, Instagram, Twitter or other sites with Tagging tag them as #DPSPETS to help others find them. Linking back to this page might also help others know what you’re doing so that they can share in the fun.

    Also – don’t forget to check out some of the great shots posted in last weeks Shadows challenge – there were some great shots submitted.

    Post originally from: Digital Photography Tips.

    Check out our more Photography Tips at Photography Tips for Beginners, Portrait Photography Tips and Wedding Photography Tips.

    Pets: Weekly Photography Challenge

    The post Pets: Weekly Photography Challenge by Darren Rowse appeared first on Digital Photography School.

    Digital Photography School

  • Photography Courses: Which Ones Rock and Which Ones Don’t

    As a photographer, you work hard for your money, so you don’t want to shell out cash for photography courses that are sub-par or a rip-off. We totally understand where you’re coming from because photographers frequently work as freelancers, which means that every penny you spend counts. So we’ve assembled some of the better photography courses for you…just in case Continue Reading

    The post Photography Courses: Which Ones Rock and Which Ones Don’t appeared first on Photodoto.


    Photodoto