Category: Photography

  • The Science of Selecting Photos

    By Annie Tao

    The business of photography is a complicated matter. I spend hours after each photo shoot culling, processing and sorting the photos to tell the story of the day.

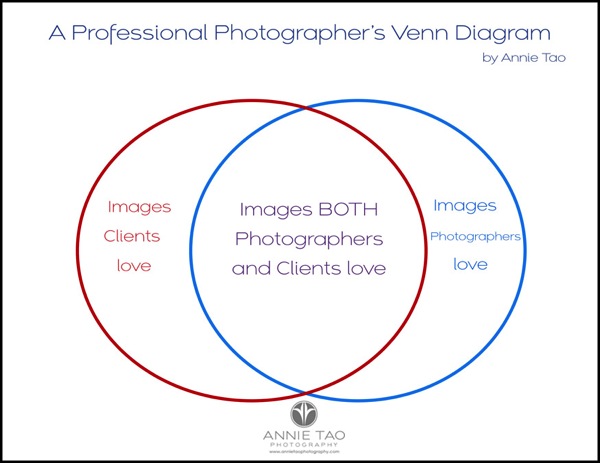
    From a recent session of one of my own children, I realized that choosing the final photos can be described as a Venn Diagram! One circle represents images photographers love and the other circle represents images clients love. Some images overlap and some don’t.

    To be successful, you want the largest area to be the one that overlaps: images both photographers and clients love. It is important, however, to be aware of what images may fall into the other areas.

    Here is an example.

    Professional Photographers Venn Diagram by Annie Ta bg

    I had a photo shoot of my son just last week. He recently turned 6 years old, so this mini shoot was to capture how he loves reading, loves playing with Legos, and still has hints of having a baby face.

    After the shoot, I went through the images as though this was a regular client gallery, but found myself saving a few images that I know would NOT have made it into a client gallery!

    That got me thinking.

    Are there photos that I’ve left out of a client gallery that should have been in it?

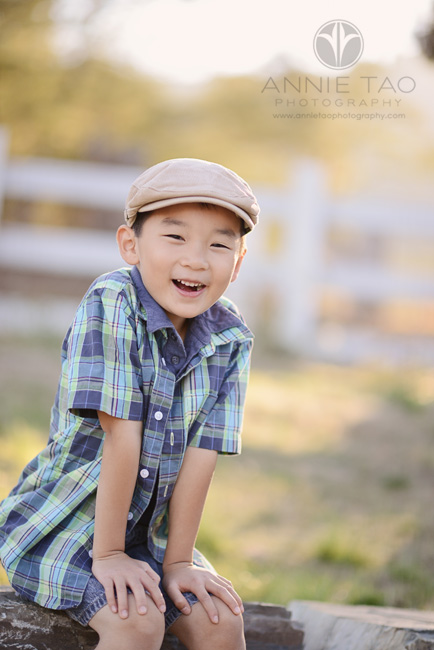
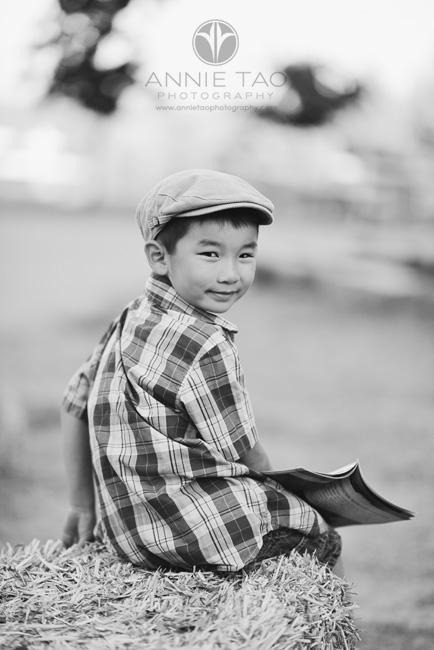
    Below are examples of photos from this recent shoot that would make it into a client gallery…

    Annie Tao Photography The Science of Selecting Photos article image that would make it into client gallery 2

    Annie Tao Photography The Science of Selecting Photos article image that would make it into client gallery 1

    Annie Tao Photography The Science of Selecting Photos article image that would make it into client gallery 3

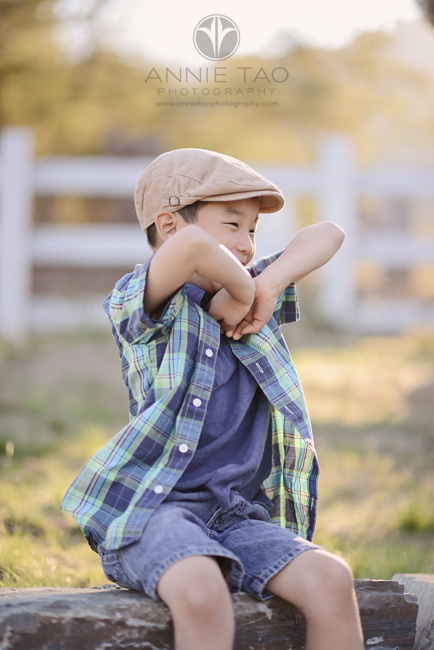
    Below are examples of photos that would NOT have made it into a client gallery, but I love…

    Annie Tao Photography The Science of Selecting Photos article image that would NOT make it into client gallery 2

    Above: he is playing with his hands and arms, which he does when he’s nervous.

    Annie Tao Photography The Science of Selecting Photos article image that would NOT make it into client gallery 1

    Above: he is chewing gum (I can even see it in his mouth – Oy!), which is his favorite treat.

    What does this mean?

    Note: I am writing this for Children and Family Photography, but this can apply to any portrait session.

    1. During the session, pay attention to the children’s behavior. What are the little things they do when they’re happy, nervous or excited?
    2. Have an open dialogue with the parents. If they feel comfortable with you, they will share details about what they love or the little quirks that represent their child. It could be something you wouldn’t have guessed.
    3. Remember your client when selecting your final images. Think about what images your clients may like that perhaps didn’t make it into your selection. There may be something you’d want to include in the final images that may bring a tear to their eyes or make them laugh, but isn’t “perfect” in your eyes.

    In terms of photo selection, your job as a Photographer is to choose photos that represent your artistic style. You are also a Service Provider whose ultimate goal is to make your clients happy.

    Annie Tao is a Professional Lifestyle Photographer in the San Francisco Bay Area who is best known for capturing genuine smiles, emotions and stories of her subjects. You can visit annietaophotography.com for more tips or inspiration and stay connected with her at facebook.com/annietaophotography.

    Post originally from: Digital Photography Tips.

    Check out our more Photography Tips at Photography Tips for Beginners, Portrait Photography Tips and Wedding Photography Tips.

    The Science of Selecting Photos

    The post The Science of Selecting Photos by Guest Contributor appeared first on Digital Photography School.


    Digital Photography School

  • 3 Lightroom History Tips

    Lightroom history tips opener

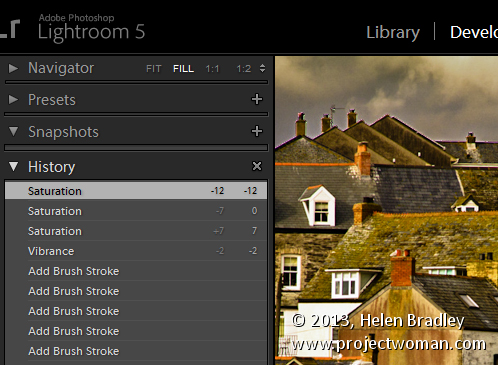
    Like Photoshop, Lightroom has a History feature that shows a list of the fixes you’ve applied to an image. It can be used to wind back changes that you have made to an image. Unlike the Photoshop history, the Lightroom history entries don’t disappear when you close Lightroom – they remain accessible from one instance of Lightroom to the next.

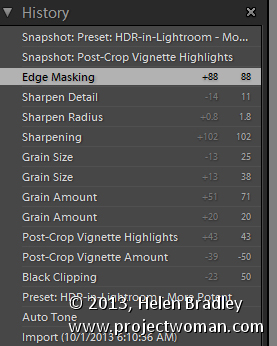
    The History panel is on the left in the Develop module. Click to open it and you’ll see a list of the edits made to the image. These read from bottom to top so the topmost history setting is the one you applied last to the image. These History settings show not only the sliders you adjusted when editing the image but also the final value of that slider and the amount of change you made at that step.

    Lightroom history tips 1

    You can wind back the history of changes that you’ve made to the image by clicking any of the entries in the History panel. Until you make further changes to the image you won’t lose the later history states if you click on an earlier one. So you can click from one history state to the next to view the image at that point in the editing process.

    If you click to view an image at an earlier stage of its editing and then start making changes to the image you will lose all the later history states – they’ll be replaced by your new edits.

    3 Lightroom History Tips

    Here are three handy tips for working with Lightroom History:

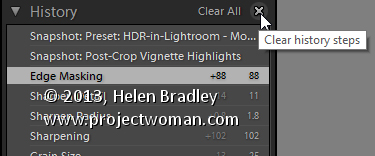
    1. Delete History

    You can delete the Lightroom history for any selected image. To do so, click the X (Clear All) button in the top right of the History panel. This removes the history steps from the History panel – it doesn’t actually remove the edits from the image – it just clears the History panel.

    Lightroom history tips 2

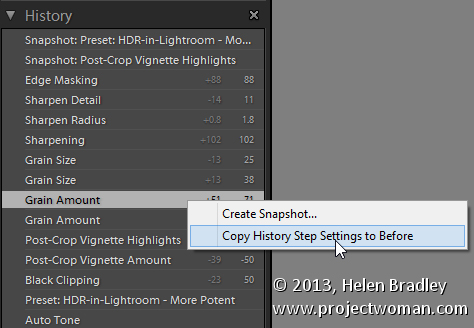
    If you are like me you will use the backslash key (\) in the Develop module to compare the image Before and After your edits. However, sometimes you will want to compare the After version with the image as it was part way during the editing process – not as it was when you imported it.

    You can set the Before version of an image to be the image as it was at any earlier History step. To do this, right click the History step that shows the image at the point you want to make the Before image and choose Copy History Step Settings to Before. If the most recent history step isn’t selected, select it to return to the current state of the image. Now, when you press the Backslash key you will compare the current state of the image with the selected history state.

    You can also drag and drop History steps to do the same thing. So, if you are viewing the Before image you can drag and drop any History step onto the Before version and that will become the new Before version. Again – you don’t lose any history steps when you do this, you’re just creating a different Before version of the image.

    Lightroom history tips 3

    3. Create a Virtual Copy

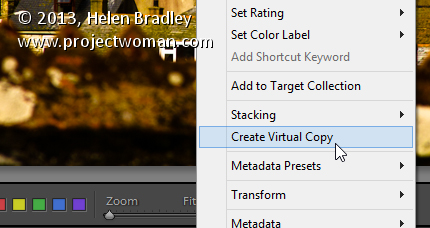
    When you are part way through editing an image you might want to go back and try a different editing process but also keep the version of the image you are working on. You can use the History panel to facilitate this. Start by selecting the History step where you want to begin an alternative method of editing the image. Right click the image and choose Create Virtual Copy. This creates a new Virtual Copy – its starting point is the current History step – it has no other History steps associated with it. Also note that this new Virtual Copy is the currently selected image.

    Lightroom history tips 4

    Before beginning to work on this image, click the original image in the filmstrip to reselect it and click the last History step in the list to return this version of the image to your current editing point.

    You’ll now have two versions of the image – a virtual copy extracted from the image at the point at which you want to begin an alternative editing approach and the original version with all your current edits in place.

    Post originally from: Digital Photography Tips.

    Check out our more Photography Tips at Photography Tips for Beginners, Portrait Photography Tips and Wedding Photography Tips.

    3 Lightroom History Tips

    The post 3 Lightroom History Tips by Helen Bradley appeared first on Digital Photography School.


    Digital Photography School

  • We All Screw Up. Don’t Worry About It.

    Look, no one is born a lighting genius. We all make mistakes. And we are all gonna make mistakes in the future.

    And just to make you feel a little better about it, today I am gonna tell you about my stupidest moment as a lighting photographer.

    So far.

    Read more »
    Strobist

  • How to Photograph Strangers: The 100 Strangers Project

    A Guest submission by Matt John Robinson
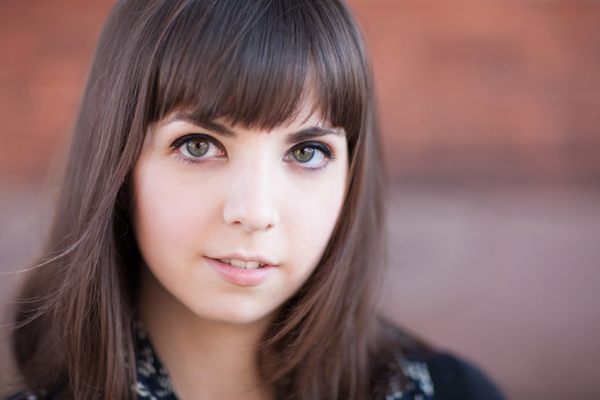
    Liz

    The First Stranger

    Taking the portrait of a person whom you’ve just met moments before is one of the most exciting—and in the beginning, unnerving—experiences you can have as a photographer. It’s also one of the most rewarding.

    The 100 Strangers Project sounded simple enough: gather 100 portraits of complete strangers after getting their consent. For my mostly introverted self, this meant more precisely: interact with 100 human beings I would otherwise never interact with…AND take their photograph.
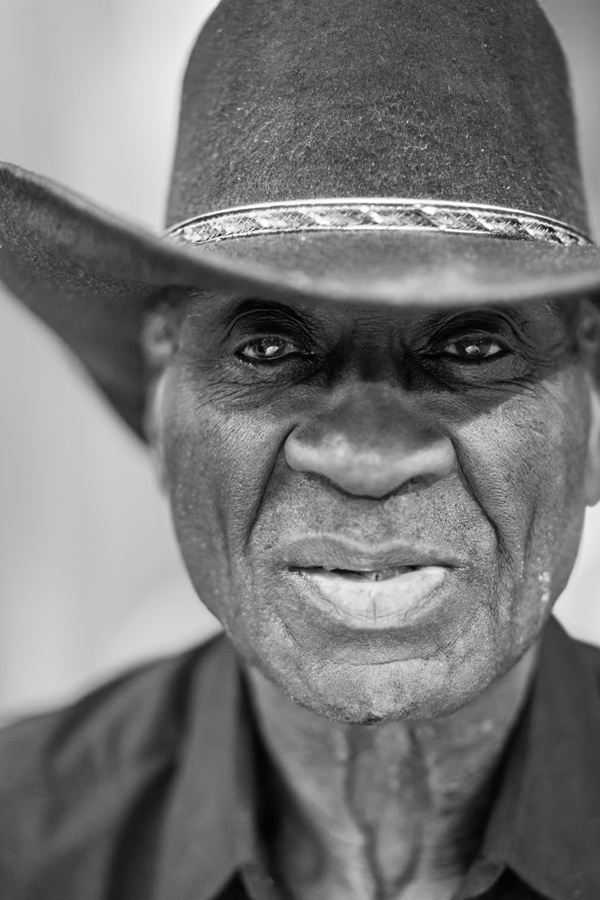
    Jimmy

    The prospect seemed filled with anxiety. Yet the intrigue and amazing possibilities that gathered vaguely in my mind were becoming too palpable to resist. I had seen and greatly admired many 100 Strangers photos by Chris Camino, an online photography contact who was working on the project (known on dPS and Flickr as Paco X).

    When I realized that a few of his portraits had been taken only an hour away from me, I had to know more. “How does he do it? How does he interrupt people during their daily routine and so boldly ask for their picture? How do they react, and why would they ever say yes?” Chris was happy to share his process and agreed to have me tag along during his next stop in Philadelphia.

    He was honest. He was direct. Chris would see something in a stranger and would stop them, letting them know exactly what he admired and why he wanted to take their picture. The stranger, more often than not, would agree! They might even ask how he’d like them to pose; they might even walk to a more appealing background; they might even glow with the flattery of somebody wishing to take their picture. These strangers, for however brief the encounter, would connect with this photographer. They would trust him.
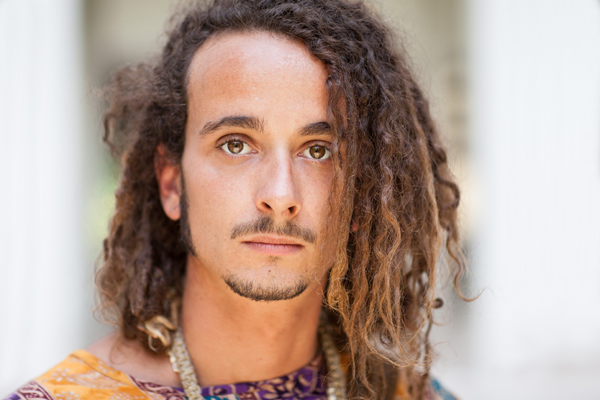
    Allen

    It was a rush just watching it unfold before me. I knew I wanted to feel the excitement of photographing a stranger myself. I saw a few interesting strangers and would point them out to Chris, secretly hoping that he would goad me into taking their picture myself. And he would. But I wouldn’t. My courage would build up—almost to the point—and a wave of nerves would wash it all away. What if they refused? What if they thought I was just a creep?

    Chris spotted another stranger walking across the street with a friend, and I ambled after him. His stranger agreed very kindly after he introduced himself and me. The woman and her friend were both lovely and seemed like very warm and open people. It occurred to me that this was the perfect opportunity: I had already half-met this “stranger,” the woman’s friend, and judging from her personality she was likely to agree.

    While Chris was busy shooting, I walked over to his stranger’s friend with as much an air of confidence as I could muster. I told her that I very much wanted to start the same photography project and wondered if she was willing to be my very first stranger. Not only did she agree to have her portrait taken, but she was flattered to be the start of the project. After the shoot, as she started to walk away, she turned and called back with her bright smile, “Thank you for your kindness.” Thank you for my kindness!
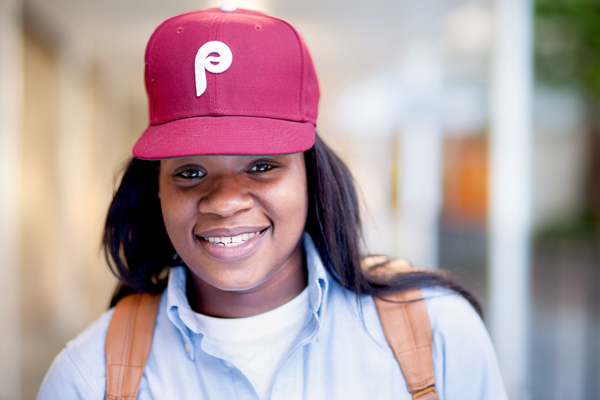
    Unknown Stranger 1

    I was blown away. So blown away and filled with excitement over my first ever street portrait that I forgot the young woman’s name. But I am oh-so-grateful to have met my unnamed Stranger #1 in her Philly’s ball cap. She opened my eyes to how easy and instantaneous it can be to connect with people you’ve never met, and how truly kind a complete stranger can be.

    And the greatest revelation: I, as a photographer, have the power to capture the beautiful qualities of anybody I pass by. Or I can at least make the attempt. And anybody with a camera has that power. It might seem silly to photographers who’ve been doing this for ages, but I really think it’s something a lot of photographers haven’t thought about. I certainly hadn’t.

    Emily

    It was addicting. A piercing set of eyes, an awesome sense of style, or just a charismatic air—it’s all gloriously walking on the street and waiting to be captured by a camera. I returned to Philadelphia several times and also shot at a few places more locally.

    I’m a little over halfway through my project now. No matter where I go, though, it’s all the same. I wait until I find somebody with some quality that I want to capture and then simply walk up to them and introduce myself and the project. Often I will let them know what caught my eye. And the majority of the time these strangers agree… and then it’s time to think about the photo.
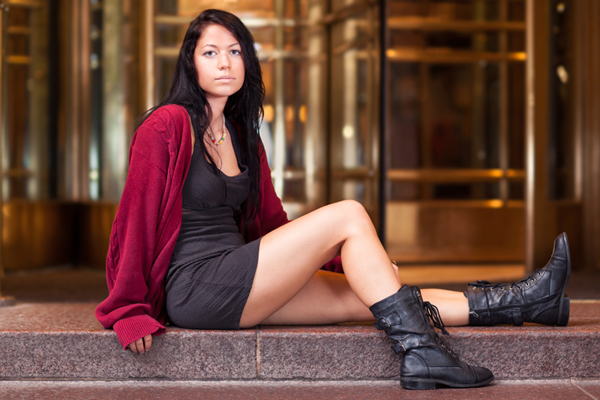
    Marcy

    How to: the Posed Street Portrait

    The technical considerations I make for posed street portraits are identical to any that you might make when taking any sort of outdoor portrait. You just have to figure it out a little more quickly.

    I almost always make an attempt at carefully pairing my strangers with their backgrounds.

    Sometimes I will find a background first, and I’ll wait for a serendipitous stranger to happen upon me. Other times I’ll come upon a stranger without having the time to consider a background before addressing them. In that case, I will always ask if they mind if we continue to walk in the direction they were headed until a suitable background catches my eye (it’s amazing how accommodating the strangers usually are).

    It’s just my own personal style to really “create” the portrait. Other street portrait photographers take the opposite approach and prefer to photograph their subject exactly where they found them. The hugely popular Humans of New York photographer Brandon Stanton asks, “Can I take your picture, just like that, right where you are?”
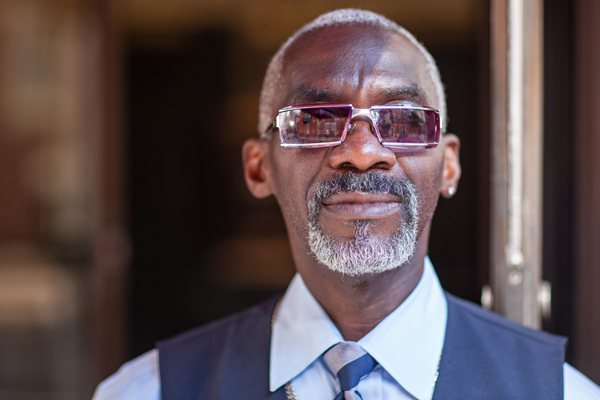
    William

    100% of my backgrounds are in the shade. I like soft, even lighting, as most portrait photographers do. Working with shade also gives you the ability to shoot any time of day, and midday is actually quite nice. While cloudy skies are appealing because of the ability to shoot out in the open, bright sunny skies make for beautiful shade.

    However, not all shade is equal. Sometimes the shadows can still be too heavy depending on how far you are from the open sunlight. For instance, if you’re in the shade of a building, yet there is open sky above you and all around, the lighting may very well be ideal on its own. However, if you’re under the shade of a tree, or on a street surrounded by shade with tall buildings on each side and only a thin strip of open sky, a reflector is usually going to help a lot.

    Aside from what’s above you, what the stranger is facing is also important when considering the lighting. If you’re in the shade of a building, and your subject is facing other buildings in the shade, there is hardly any light being reflected sideways and up, so the eyes are going to appear very dark. On the other hand, if the subject is facing buildings/sidewalks/streets that are brightly lit by the sun, their eyes will be nicely illuminated by the reflected light, and you’ll capture a nice catch-light.

    For those times when there’s not much open sky or bright surroundings outside the shade, carrying around a collapsible reflector is extremely helpful. You can expand it and have the subject hold it themselves around waist or chest height, depending on the framing, angling it slightly toward their face. This works well when the light is still generally coming from above.

    Sometimes, depending on the structures around you and the time of day, the light mostly comes from the side. In this case it is helpful to have somebody hold the reflector on the opposite side the light is coming from (the subject is unable to do this without getting the reflector in the frame), bouncing back the light onto the shadowed side of the face. The strangers I stop often have friends along with them, and they’ve always been happy to assist with the reflector. As soon as the reflector is busted out, the stranger is likely going to ask how you want them to look/stand/pose.

    Christian

    Posing the stranger can be the second hardest part for a lot of people just getting started, right after the approach. The simplest way, and the way I still use sometimes, is to not even bother with a specific “pose.”

    I’ll just ask them, “Ok, let’s get a few straight-faced shots—no smile.” And then after a few frames, warm them up with a joke or two and try to get them smiling (or just ask them to smile).

    The way they are standing and holding their arms isn’t important if you’re just shooting head shots. The pose matters when moving out from the head shot, and for that, I’ve done all sorts of things.

    You can just start backing up and capture their natural pose while they’re not fully aware that you’re actually capturing the entire body (this is all assuming you’re shooting with a prime—zooming out from the head shot and continuing to fire away would work great as well).

    One of my personal favorites is to have the stranger sit down in a specific location that I think will work well with them. I’ll sit down myself exactly where I want them to sit and show them generally how I would like them pose. The stranger will follow suit with their interpretation and usually ask for more direction. I’ll follow with something like, “However your body feels comfortable,” and then start taking photos. At that point I’m looking through the viewfinder and beginning to frame my subject.
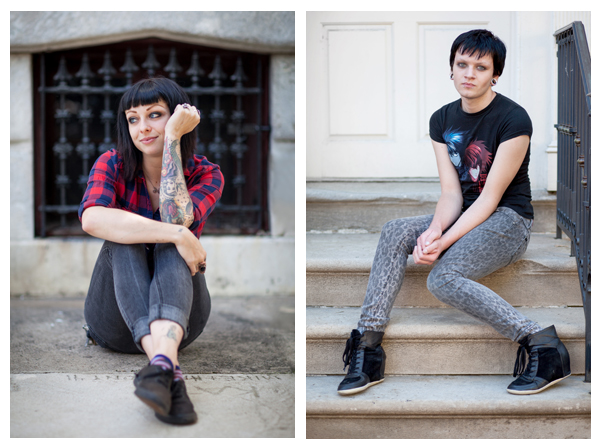
    Ben Sarah

    When it comes to composition, I am a heavy “rule of thirds” guy, especially with the eyes. The rule of thirds isn’t as much a “rule” as it is a way that our visual system scans the frame. For whatever reason, placing key points of the photograph on the thirds lines, or at their intersection, really focuses our attention during visual processing. This is dramatically true for portraits especially.

    Placing the subject’s eyes on (or above) the upper third line gives them a much larger impact (try it yourself: on the same image with two different crops, place the eyes on the middle horizontal line and then place it side by side with the eyes on the upper third line).

    I also avoid the “floating head.” That is, I almost never frame the subject from just their neck up, leaving their face to be the only thing in the frame. Including a good part of the shoulders in a headshot is key in grounding the subject within the frame and giving them their proper space. It’s a similar element to not cropping the subject at the knees or elbows.

    There are of course exceptions to both of these compositional guidelines (you can see them in my own portraits), but they are a great place to start and it’s hard to go wrong when following them.
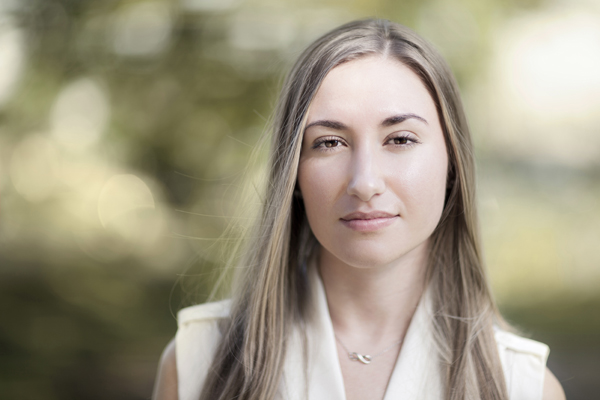
    Katelyn

    And finally, the lens and camera settings. Choosing the lens greatly depends on how much of your subject you’re really aiming to capture.

    I focus primarily on head shots because of the intimacy it provides through a strong connection with the eyes. Because my primary goal is to come away with a good head shot, I always shoot street portraits with my 85mm f/1.2 lens.

    I love the 85mm focal length for several reasons. For one, there is no distortion. Shooting a headshot with a 50mm or wider is going to make the center of the face appear subtly bulbous (and super bulbous if you’re down in wide angle territory). This can be mostly corrected in post, but why not get it right in camera?

    More importantly, the 85mm gives you perfect working distance, which is especially important when working with strangers. Standing two feet in front of a stranger with a 50mm lens to get a head shot can feel pretty “in your face” for them. With the 85mm, you’re a bit further back, yet you’re close enough to easily continue communication—to continue chatting and helping them to feel comfortable.

    Conversely, if you’re shooting a 200mm, you’re going to be pretty far away, and may have to raise your voice a good bit. You begin to lose your subject’s connection to the camera. And in a street setting, you really might not have enough room to back up, especially if you’d like the option to capture a full length.

    I almost always shoot with a very large aperture for head shots in order to isolate the subject through a shallow depth of field as much as possible. For my personal tastes, I don’t mind having the ears and tip of the nose blurred. In my opinion it just places even more emphasis on the eyes, and well, I am in love with a good pair of eyes. It also naturally softens the skin of the forehead and cheeks, which is an added bonus.

    I shoot in manual, choosing my aperture and then adjusting my shutter speed to properly expose. I won’t shoot an SS below 1/100 and will boost my ISO if needed from there.
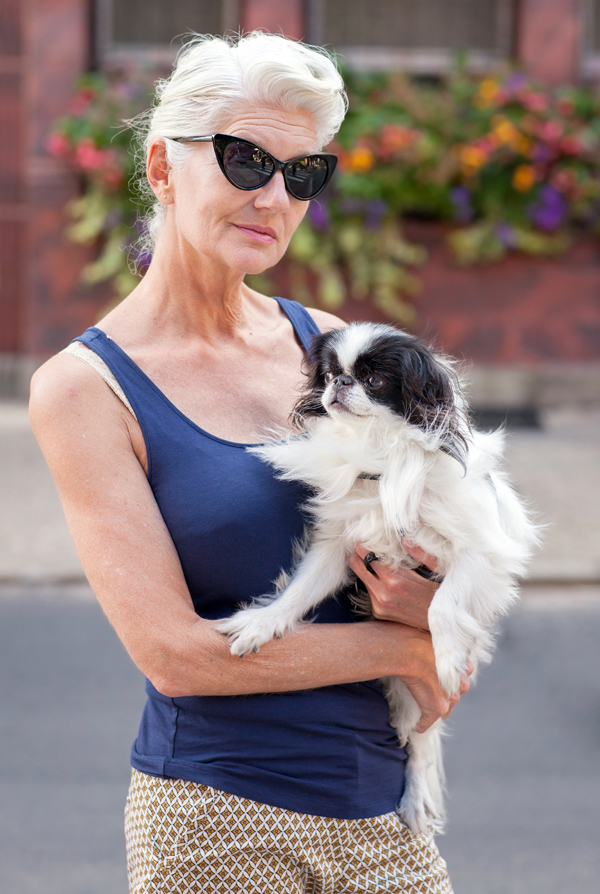
    Christina

    I hope this post was helpful for anybody interested in outdoor portraiture, and especially those who might be interested in starting this amazing street photography project. It’s a no-brainer that my people skills have improved and I’m a lot more comfortable interacting with complete strangers. And of course, my portrait photography has improved a great deal. All the while, it has been so much fun. If you’re interested in the project, check out our Flickr group for the 100 Strangers Project.

    Matt John Robinson is a portrait photographer from Allentown, Pennsylvania. See more of his work at www.mattjohnrobinson.com and connect with him on Facebook and Flickr.

    Post originally from: Digital Photography Tips.

    Check out our more Photography Tips at Photography Tips for Beginners, Portrait Photography Tips and Wedding Photography Tips.

    How to Photograph Strangers: The 100 Strangers Project

    The post How to Photograph Strangers: The 100 Strangers Project by Guest Contributor appeared first on Digital Photography School.


    Digital Photography School
  • 50 More Incredible Tumblr Blogs for Photographers

    Tumblr is a magic land of GIFs, memes and photography. If you step into this world, you should know in advance that there is no looking back. Browsing through the images can take you hours, so you may even forget to feed your pet! But no worries: Tumblr will help you go through it – there are tons of cute Continue Reading

    The post 50 More Incredible Tumblr Blogs for Photographers appeared first on Photodoto.


    Photodoto

  • 5 Adorable Pet Photos [and How to Make your Shots even Cuter]

    A guest post by by Erin McNulty – Pet Photographer and author of Snapn Paws – currently 33% off at SnapnGuides.

    Want to get photos of your pet that will make everyone say “aaawwww”? Here are five of my top tips for capturing cuteness.

    1. Get down on their level

    Adorable pet photos 1

    One of the easiest and most often overlooked techniques is to be on the same level as your pet! By being at eye level with them, you will create a connection which translates into a more intimate, engaging photo.

    2. Use Props

    Adorable pet photos  2

    Does your pet have a favourite basket, bed, or toy? If so, incorporate these into your photos. Make sure whatever prop you are using is one that your pet is happy and comfortable around, and don’t force any behaviour that makes them stressed or wary – this will show through in the photos

    3. Engage in Play

    Adorable pet photos  3

    A lot of pets have a sixth sense for when a camera is being pulled out, and will immediately turn their back or engage in a vigorous grooming session to avoid it. By engaging them with a fun toy, you will distract them from the camera as well as capturing some great natural expressions.

    4. Get up Close and Personal

    Adorable pet photos  4

    Want to create a more interesting shot of your pet? Focus in on the little things that make them so cute – whether it be their big puppy dog eyes, their magnificent whiskers, or their tiny little paws.

    5. Let them be Themselves – and be Patient!

    Adorable pet photos  5

    Your best shots will always come when you observe and capture their behaviour, rather than forcing them into unnatural poses. It may take ten minutes or an hour to get that perfect shot, so be patient and calm – pets pick up on your mood!

    Want to learn more about Photographing Pets? Check out Erin’s brand new eBook – Snapn Paws over at our sister site SnapnGuides (currently 33% off).

    Post originally from: Digital Photography Tips.

    Check out our more Photography Tips at Photography Tips for Beginners, Portrait Photography Tips and Wedding Photography Tips.

    5 Adorable Pet Photos [and How to Make your Shots even Cuter]

    The post 5 Adorable Pet Photos [and How to Make your Shots even Cuter] by Guest Contributor appeared first on Digital Photography School.


    Digital Photography School
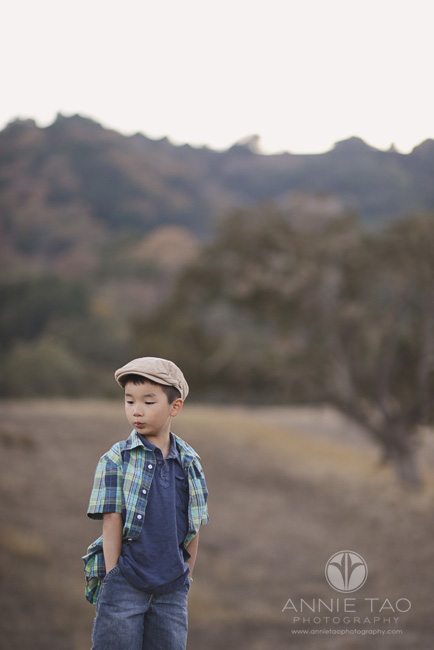
  • The Power of Black & White

    The power of black & white photography

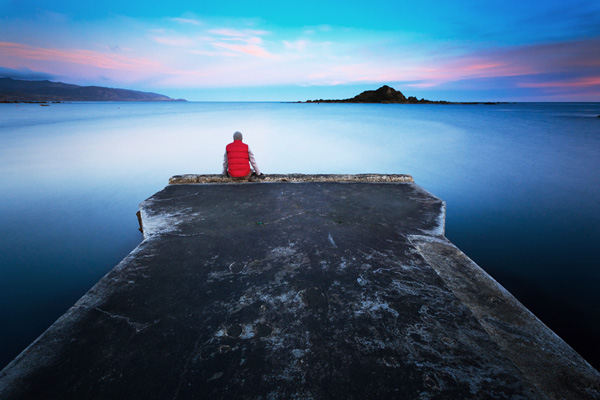
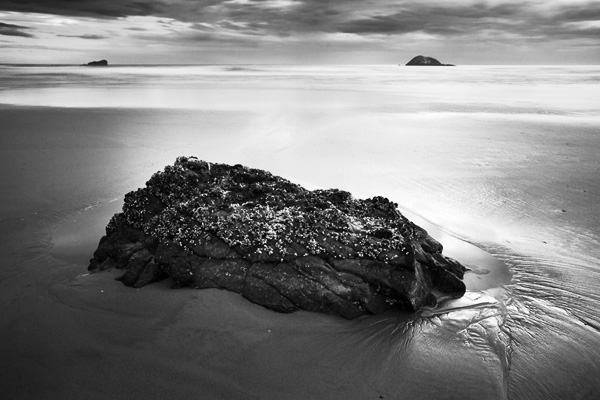
    If you read my articles about long exposure photography and intentional camera movement in the landscape you may have noticed a common theme amongst the photos illustrating the articles – most of them were in black and white.

    I’ve been thinking about the reasons that black and white photography appeals to me. Regular readers of my articles will know that I’m a big fan of tonal contrast in both colour and monochrome work. I use it as the basis of many of my compositions and it helps me create atmosphere and mood.

    But things became clearer today when I read an interview with Joel Tjintjelaar, a well-known fine art photographer who works exclusively in black and white. He is one of the leaders in the discipline of long exposure photography (I interviewed him myself as a case study in my book Slow).

    The power of black & white photography

    In the interview Joel talks about photos representing the vision, or the essence, of the artist rather than reality. Black and white, in addition to being a beautiful medium in its own right (he uses words like mysterious, nostalgic and dramatic to explain its appeal) is a step removed from reality. Add in changes in tonal values achieved in post-processing, the surreality of long exposure photography techniques and the manipulation of light (also in post-processing) and you finish with a photo (or a work of art, depending on your world view) that is an expression of the artist, rather than the original subject.

    Make sense? There are many ways of expressing yourself creatively in photography, and black and white is just one of them, but it certainly is a powerful medium. Trends come and go. Whether it’s the fast film, high grain techniques popularised by Robert Farber and Sarah Moon in the seventies, or the Photoshop based techniques of modern times such as using texture layers or HDR, most of these are ephemeral. They won’t be remembered as anything more than dated trends in decades to come. But black and white will endure.

    The power of black & white photography

    Learn more about black & white photography

    Now that I’ve piqued your interest you’ll no doubt want to learn more about black and white photography. I’ll write about that in the future, but first I think it’s a good idea to go have a look at the work of some of the best black and white photographers out there. I’ve picked out five of my favourite photographers from 500px – looking at their work will help you appreciate the true power of the monochrome image.

    Have a think about the following points while you look through their portfolios:

    • Why do you think these photographers have chosen to work in black and white? How would their images look if they were in colour?
    • How important is tonal contrast in the composition of their images?
    • How important are other elements of composition, such as line, texture, form and shape? How does black and white emphasise these elements?
    • How important is light in these images?
    • How far removed from reality are the photos in these portfolios? How do they express the photographer’s vision?

    Here are the links:

    Hengki Koentjoro

    Hengki is an Indonesian photographer who creates beautiful black and white landscapes (read my interview with him here).

    Sabrina de Vries

    Sabrina is a young Dutch photographer who creates black and white portraits. Some of her work is in colour, so it’s a good chance to compare the way she works in both mediums.

    Andy Lee

    Andy is a professional film maker and photographer who works in black and white. Tonal contrast is a strong element of his work.

    Joel Tjintjelaar

    You should definitely take a look at Joel’s work. One of the interesting things about the way that Joel works is his painstaking attention to detail – he may spend 40 hours working on a single image before he is happy with it. This approach is very unusual.

    Michael Diblicek

    Michael shoots both the landscape and architecture. He is another photographer who uses tonal contrast really well (read my interview with him here).

    Mastering Photography

    Mastering photography ebook

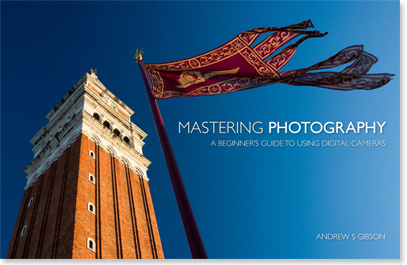
    My ebook Mastering Photography: A Beginner’s Guide to Using Digital Cameras introduces you to photography and helps you make the most out of your digital cameras. It covers concepts such as lighting and composition as well as the camera settings you need to master black and white photography and take photos like the ones in this article.

    Post originally from: Digital Photography Tips.

    Check out our more Photography Tips at Photography Tips for Beginners, Portrait Photography Tips and Wedding Photography Tips.

    The Power of Black & White

    The post The Power of Black & White by Andrew Gibson appeared first on Digital Photography School.


    Digital Photography School

  • Breaking Down the Creative Process

    I’ve been thinking quite a bit lately about the creative process. When we talk about “creativity,” people generally end up putting themselves into one of two categories– creative or not creative. I’m always amused– and a bit leery– when people who consider themselves creative say that they have no creative process. That ideas “just come” to them. I’m not buying it. I can’t help but ask if ideas really do just come to them, or have they refined and streamlined their process to the point that they don’t even recognize it as a process? And if there really is a process, can someone who thinks they aren’t creative follow a series of steps that can help them become creative? The truth is, everyone has creative potential.

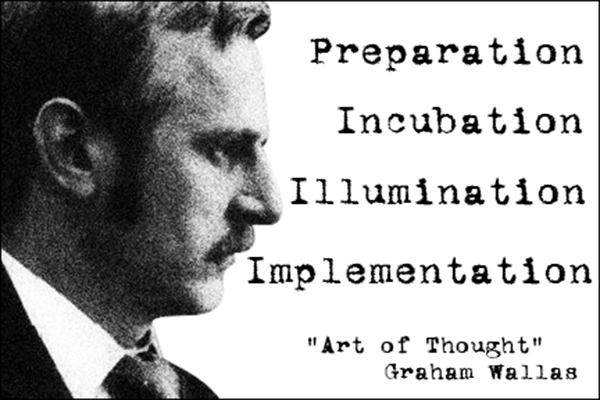
    Graham Wallas (1858-1932) was an English social psychologist and co-founder of the London School of Economics. In Art of Thought – The Model of Creativity, written in 1926, Wallas broke down what we now refer to as the “creative process” into four distinct stages– Preparation, Incubation, Illumination, and Implementation. I’ve seen his approach described in several sources recently and over the years, but few ever seem to give any proper credit to the source material, espousing these thoughts and concepts as if they were original ideas. And so, Graham Wallas– this one’s for you, with my thanks.

    guyer-photography-graham-wallas

    Preparation

    It sounds simple, and maybe a bit obvious, but this first step really does lay the foundation for the entire process. Writers write, read, research, and revise. Musicians practice and rehearse. They listen to music– sometimes their own, sometimes that of their influences. Painters experiment with color and visit museums. They sketch. As a photographer, what are you doing to prepare? Do you have influences and inspiration? Do you look to other art forms? How will you nurture an idea once it’s formed? We all draw from different emotional resources, but one thing that every creative has in common at this stage in the process is that the steps can actually be pretty boring. We may enjoy walking through museums or scouting locations, and they may get the creative juices flowing,  but they are not the exciting part of the process. Preparation is, quite simply, evaluating your creative options and beginning to come up with a plan.

    Incubation

    For me, this is where the fun begins– partially because half the time I don’t even realize it’s happening.  This is the stage where those first hints of a hopefully great idea are bouncing around in my head.  This is when I’m sitting in the car at a red light and happen to notice how the sun is hitting an object.  This is the stage when I’m flipping through a magazine  and an off-handed remark in an article brings the whole project into focus (no pun intended).  During the incubation step your conscious AND subconscious minds are working on the idea.  Wallas talked about the incubation stage being one where no real direct thought was given to the project or idea. Have you ever tried forcing an idea? It doesn’t usually work, right? Just like you sometimes have to take a break and clear your head, diverting your thoughts to other problems or projects– or to nothing at all– during the incubation stage may be just what you need for you to find yourself at…

    Illumination

    This is the “A-hah!” moment.  When this moment hits, your creative urge is so strong that you just have to get the idea out of your head and into its medium (camera, canvas, paper, etc.)– usually to the point that you have no problem ignoring or losing track of everything else going on around you.  The biggest problem with my illumination moments is that they usually happen at the most inconvenient times (in the shower, driving, middle of the night, etc.). It’s going to happen when it happens. You’ve had all these preparatory elements bouncing around– incubating– inside your head that when they do finally snap into a coherent form, it’s almost like the wheels on a Vegas slot machine coming to rest in perfect alignment.

    Implementation

    This is where your idea sees the light of day.  You’re taking conscious, positive steps towards executing your idea. Remember, though, that implementation in and of itself does not mean that your idea is going to be a success. This is also the point where a good creative begins to evaluate the idea and determine whether it was a good or bad idea.  Until you have something tangible to show for your idea, it’s almost impossible to decide whether this theoretical notion you’ve been nurturing through the process can be a success.  How many times has the idea or image in your head not matched the photo in your camera?  For every great idea, there are several I wish I’d never had.

    Bringing it All Together

    Obviously, we’re not talking about flow charts or checklists. Each of these “steps” is really more like part of a gradient– soft edges overlapping as you move from dark to light. As you know from your own experience, sometimes this process runs start-to-finish in the blink of an eye, but it can also take weeks. You just never know. While they may not always be clearly defined as you process each idea or project, it can be extremely helpful knowing what they are and how to identify them. Being able to recognize where you are on a creative journey can often be the confidence boost you need to see something through from preparation to implementation.

    Post originally from: Digital Photography Tips.

    Check out our more Photography Tips at Photography Tips for Beginners, Portrait Photography Tips and Wedding Photography Tips.

    Breaking Down the Creative Process

    The post Breaking Down the Creative Process by Jeff Guyer appeared first on Digital Photography School.


    Digital Photography School
  • Sony Cyber-Shot RX100 Mark II Review

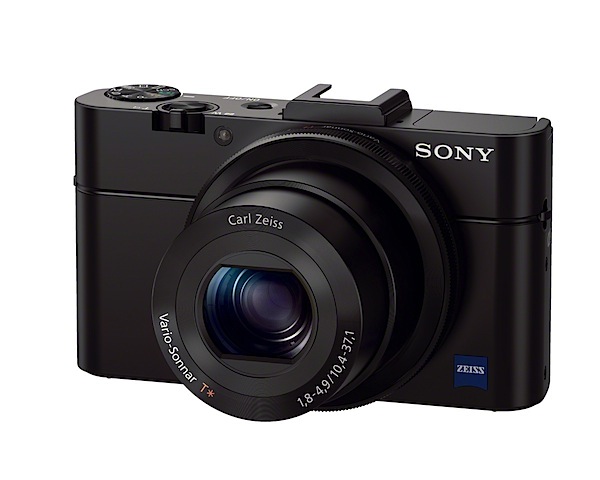
    Sony Cyber-Shot RX100 Mark II Review.jpg

    Welcome to Mark II of the Sony Cyber-Shot RX100, a neat, surprising camera that could sit happily alongside an upper level snapper (like a DSLR) in the camera bag. Unsurprisingly, it is priced at the upper level of compact digicams.

    It has a reasonably fast Carl Zeiss f1.8, 3.6x optical zoom, imaging to a 20.2 million pixel CMOS, enabling the capture of a maximum image size of 5472×3080, leading to a 46x26cm print.

    Video can be captured in AVHCD or MPEG4, up to a Full HD 1920×1080 pixel resolution.

    Yes, you can shoot still shots in the middle of a video recording but with a click or two on the audio.

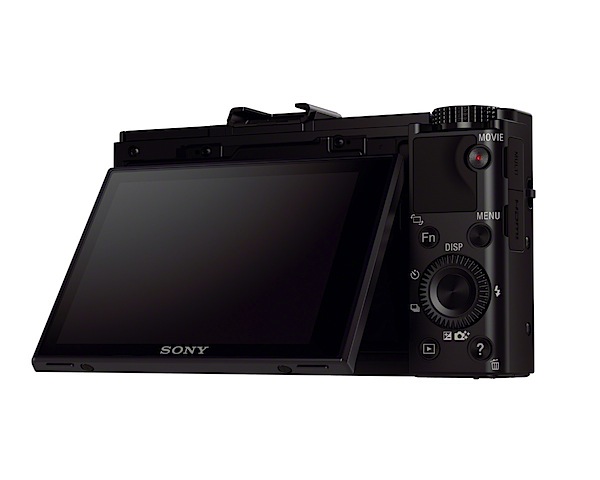
    Sony Cyber-Shot RX100 Mark II review back.jpg

    The body is made from aluminium and has a tiltable (up/down) LCD screen that responds to touch commands as well as tilting up by 84 degrees and down by 45 degrees. There is a (pricey) turret viewfinder to allow clear viewing in bright light that fits into the camera’s hot shoe; this shoe also accepts a clip on LCD screen, external flash or a microphone adaptor.

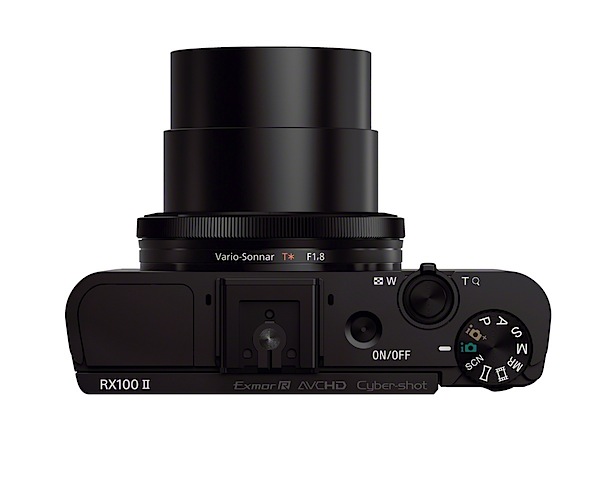
    Sony Cyber-Shot RX100 Mark II Review top.jpg

    Sony Cyber-Shot RX100 Mark II Features

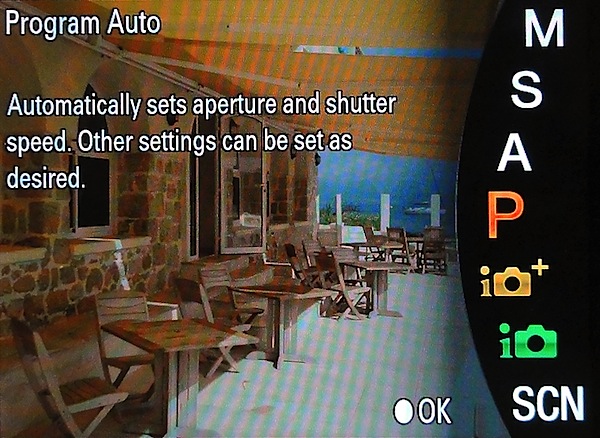
    The camera control layout follows the usual Sony pattern: at extreme left is the flash cell; centre of the top surface is the multi interface shoe (or ‘hot shoe’); to the right is the power button, zoom lever and shutter button; nearby is the mode dial with positions for intelligent and superior auto exposure (!), PASM, movie, memory recall, sweep panorama and scene selection (presets for portrait, sports, macro, fireworks etc).

    Function button.jpg

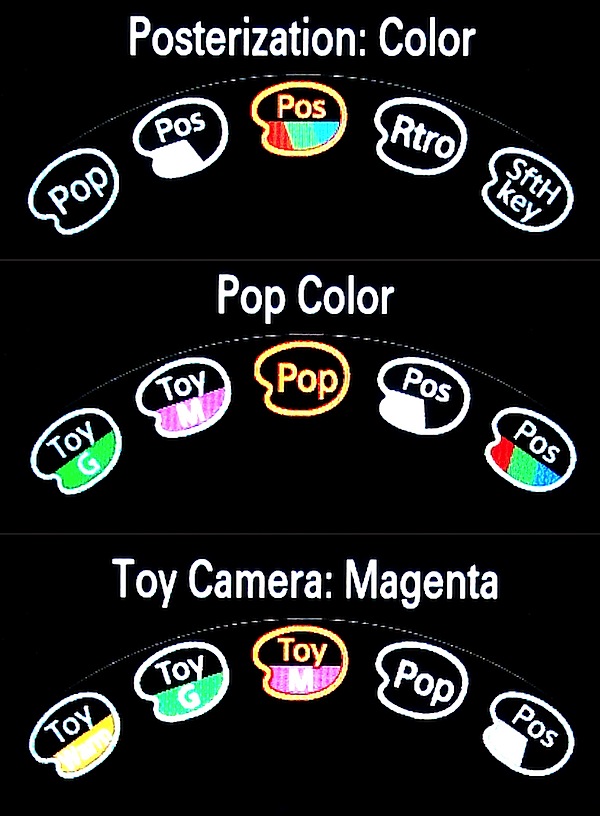
    Rear: the familiar movie record button is on the top right corner; beneath it is a really useful Function button that offers exposure correction, ISO setting, AWB, the D-RANGE Optimiser and access to a wide range of effects … such as posterisation, pop colour, partial colour, retro, toy camera effect (in colorisations such as cool, warm, green, magenta). You could spend days with this item!

    The D-Range Optimiser shoots a bracket of three shots with different exposures; the camera then overlays the bright area s of the under exposed image and the dark areas of the over exposed image to create an image with improved gradation. A single image with the ideal range is saved.

    Menu 1.jpg

    Menu 2.jpg

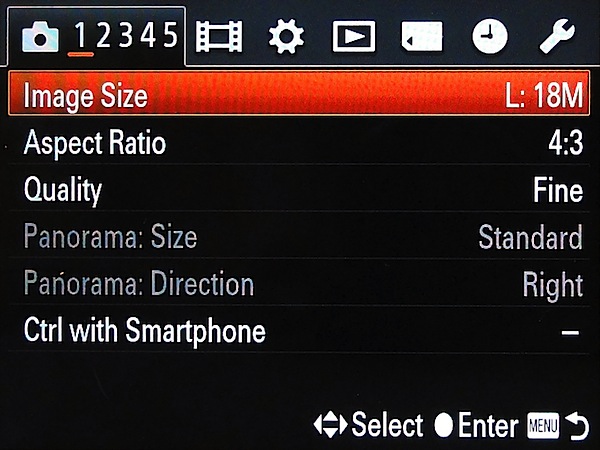
    Nearby is the menu button which displays a super wide range of options. Newbies should pay deep attention to this menu … it all happens here! If you find a specific function is not working properly, it’s most likely because a ‘box’ in the menu has not been ticked!

    Lower is the control wheel. Here you can select options for flash, self timer, burst shooting and exposure compensation. If your camera happens to be set to auto or intelligent auto you can access a range of picture effects, change image brightness, colour etc.

    The central button of the control wheel locks in tracking focus to the subject nearest centre frame.

    Lower still is the replay button and one which doubles as the image trash action and gives access to a useful information bank. I guess the latter gives the game away with the RX100: it is really a high priced beginners’ camera! Oh well!

    Sweep panorama.jpg

    Sony Cyber-Shot RX100 Mark II Pano 1.JPG

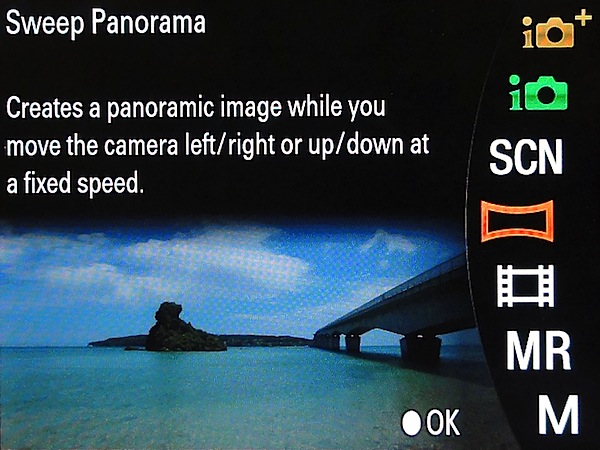
    Sony, IMHO, has by far the best sweep panorama feature of all compact digicams: you can pan right, left, up or down and capture panos in enormous sizes. Like: 12,416×1856 pixels!

    NFC

    This is also Sony’s first NFC camera. Wassat?

    Near Field Communication is designed to enable users to instantly share images with other NFC capable devices, such as Android smartphones, tablets, laptops or even TV.

    The company’s strategy behind NFC is to simplify the connection of its RX100 II to smart devices. Once connected, users can remotely control the camera’s shutter release from the mobile device, quickly receive the captured image via WiFi and upload the transferred images straightaway to a social networking site.

    But is NFC just Bluetooth or Wifi? Maybe.

    Take a look at http://en.wikipedia.org/wiki/Near_field_communication for more info.

    Snoopy 2.JPG

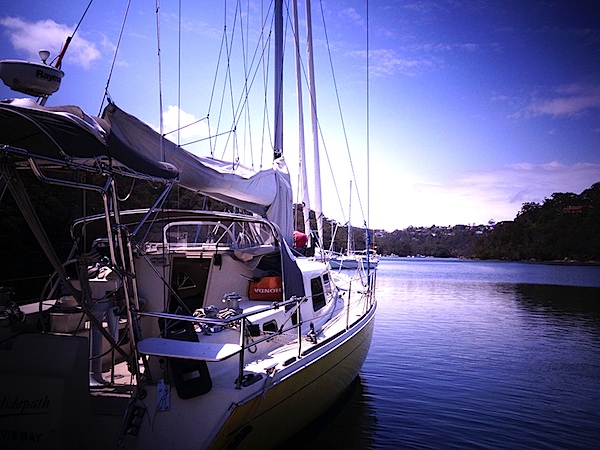
    Sony Cyber-Shot RX100 Mark II Review Yacht.jpg

    Distortion

    No problems at either end of the zoom. A well corrected lens.

    Startup

    In just a little over two seconds the camera came to life after the power was tapped. Then I was able to fire off a run of shots as fast as I could tap the button.

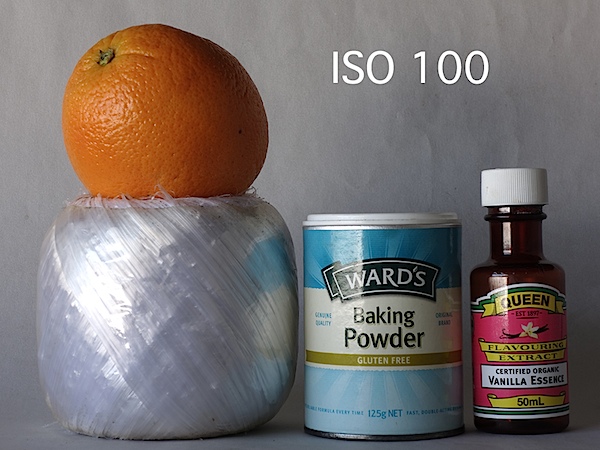
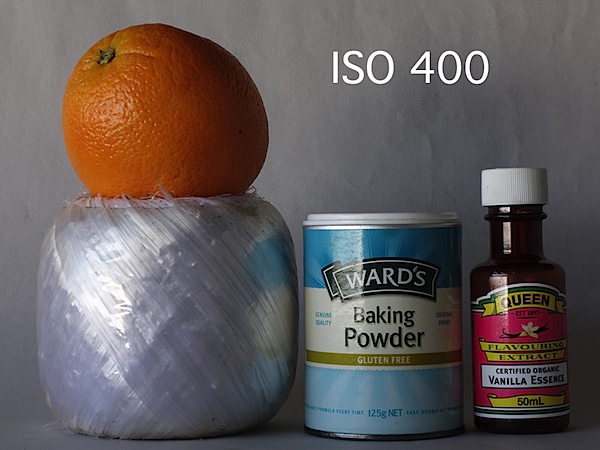
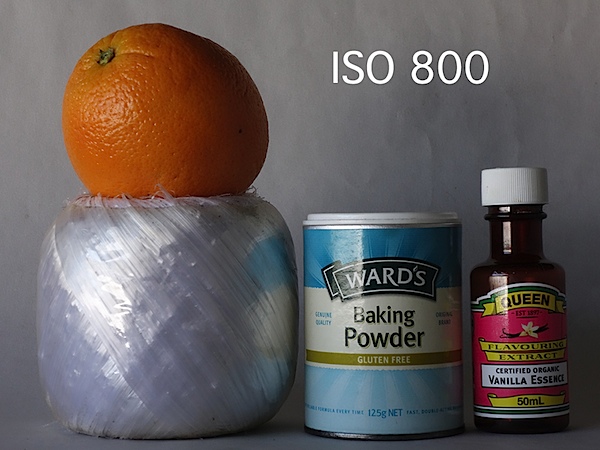
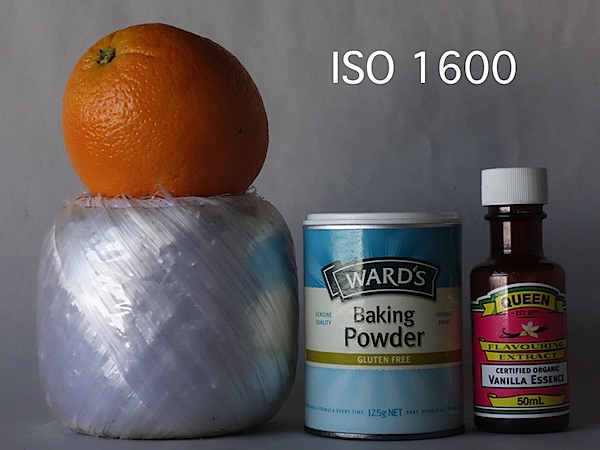
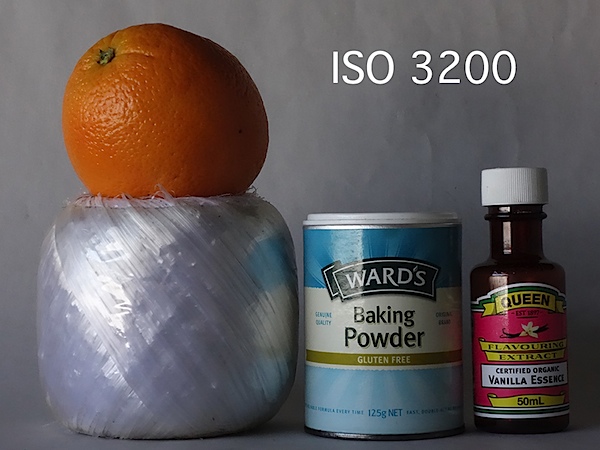
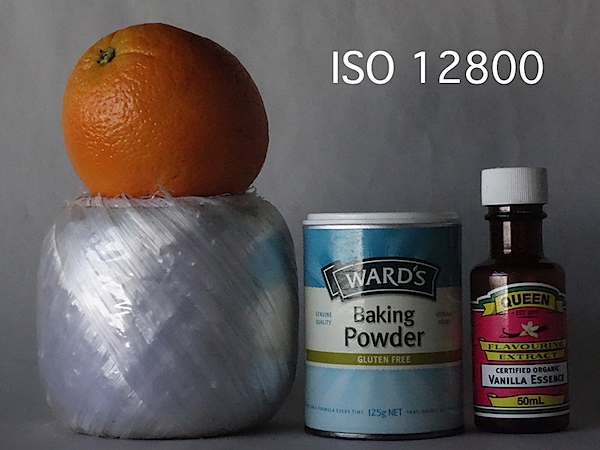
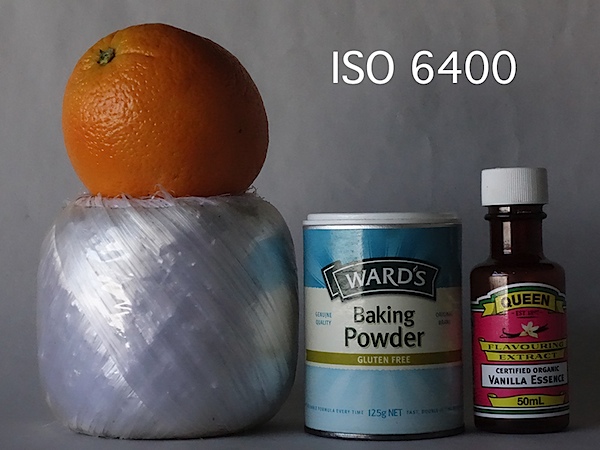
    Sony Cyber-Shot RX100 Mark II Review ISO Tests

    Sony Cybershot RX100 Mark II ISO 100.JPG

    Sony Cybershot RX100 Mark II ISO 400.JPG

    Sony Cybershot RX100 Mark II ISO 800.JPG

    Sony Cybershot RX100 Mark II ISO 1600.JPG

    Sony Cybershot RX100 Mark II ISO 3200.JPG

    Sony Cybershot RX100 Mark II ISO 6400.JPG

    Sony Cybershot RX100 Mark II ISO 12800.JPG

    At ISO 1600 sharpness dropped off slightly but noise was low. By ISO 6400 these factors were a little worse. By ISO 12800 sharpness was down further and noise up — but not by a large factor.

    Sony Cyber-Shot RX100 Mark II Review Verdict

    Quality: just above average.
    Why you would buy the Sony Cyber-Shot RX100 Mark II: compact; fast Zeiss lens.
    Why you wouldn’t buy the Sony Cyber-Shot RX100 Mark II: limited zoom range for your needs; LCD screen tilts are limited.

    A surprising package in such a tiny body.

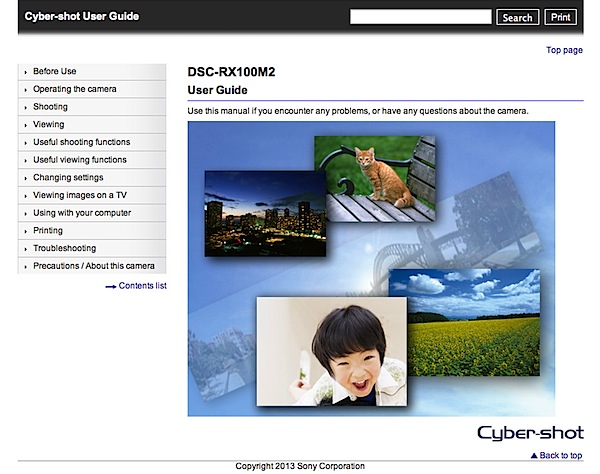
    User guide.jpg

    I felt the manuals to be inadequate: aside from a 37 page PDF basic guide in English and a Web-based user guide with no search facility, that was all. For a camera at this price level you could at least expect at least a decent searchable PDF manual.

    Otherwise, a very good performance.

    Sony Cyber-Shot RX100 Mark II Specifications

    Image Sensor: 20.2 million effective pixels.
    Metering: Multi pattern, centre-weighted, spot.
    Exposure Modes: Auto, Program AE, shutter and aperture priority, manual.
    Sensor Size: 13.2×8.8mm Exmor R CMOS.
    Lens: Carl Zeiss Vario Sonnar T* f1.8-4.9/10.4-37.1mm (28-100mm as 35 SLR equivalent).
    Shutter Speed: 30 to 1/2000 second.
    Continuous Shooting: 2.5, 10 fps.
    Memory: Memory Stick Duo, PRO Duo/PRO-HG Duo/SD/SDHC/SDXC and Micro SD/SDHC cards.
    Image Sizes (pixels): 5472×3080 to 2592×1944.
    Movies (pixels): 1920×1080, 1440×1080, 640×480.
    LCD Screen: 7.6cm LCD (1,229,000 pixels).
    Colour Space: sRGB, Adobe RGB.
    File Formats: JPEG, RAW, JPEG+RAW, AVCHD, MPEG4.
    ISO Sensitivity: Auto, 160 to 25600.
    Interface: USB 2.0, micro HDMI, WiFi, DC, remote.
    Power: Rechargeable lithium ion battery, DC input.
    Dimensions: 102x58x38 WHDmm.
    Weight: 281 g (with battery and card).
    Price: get your hands on a Sony DSC-RX100M II Cyber-shot at Amazon here.

    Post originally from: Digital Photography Tips.

    Check out our more Photography Tips at Photography Tips for Beginners, Portrait Photography Tips and Wedding Photography Tips.

    Sony Cyber-Shot RX100 Mark II Review

    The post Sony Cyber-Shot RX100 Mark II Review by Barrie Smith appeared first on Digital Photography School.


    Digital Photography School
  • Wide-angle Lenses and the Landscape

    Wide-angle lenses and the landscape

    If there was ever a subject and a lens made for each other, then it is the wide-angle lens and the landscape.

    Wide-angle lenses are ideal for landscape photography:
    • They have more depth of field at any given aperture setting and camera to subject distance than telephotos. It is simple to stop down and obtain front to back sharpness.
    • The perspective of the wide-angle lens draws the viewer into the image and adds a sense of depth by making the horizon seem further away than it really is. You can see the effect in this landscape taken with a zoom lens set to a focal length of 26mm:

    Wide-angle lenses and the landscape

    Telephoto lenses, by contrast, increase the sense of distance between the viewer and the photo. They are lenses of isolation that you use to pick out an element of the landscape, as in this photo taken with an 85mm lens:

    Wide-angle lenses and the landscape

    Wide-angles are lenses of inclusion that you use to capture a larger slice of the scene.

    Bruce Percy’s article A Gift takes an interesting perspective on this topic.

    What is a wide-angle lens?

    There is no precise definition of a wide-angle lens, but it includes focal lengths of up to around 40mm on a full-frame camera, 25mm on an APS-C camera and 20mm on a micro-four thirds camera. The definition is hazy because some zoom lenses cover a focal length range from wide-angle at one end to telephoto at the other. It is difficult to pinpoint where one ends and the other begins.

    Prime or zoom?

    There are pros and cons of both, so let’s look at each in turn.

    Canon EF 24mm f1.4 wide-angle lens

    The biggest advantages of prime lenses are that you get excellent value for money in terms of image quality. They are great for photographers on a budget. An inexpensive prime gives you great image quality, and you would have to spend much more on a zoom lens to get one that gives the same image quality throughout the focal length range.

    Another benefit of prime lenses is that they have wider maximum apertures than zooms. While this may not be much of a benefit in landscape photography, when you often need to stop down to f11 or f16, it may come in useful if you are shooting images hand-held in dim light.

    Prime lenses are often lighter than zoom lenses. This is a generalisation only; for example, a wide-angle prime lens with a maximum aperture of f1.4 may be larger and heavier than a zoom that covers the equivalent focal length.

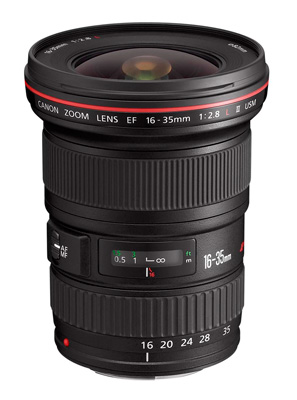
    Canon EF 16-35mm f2.8L wide-angle lens

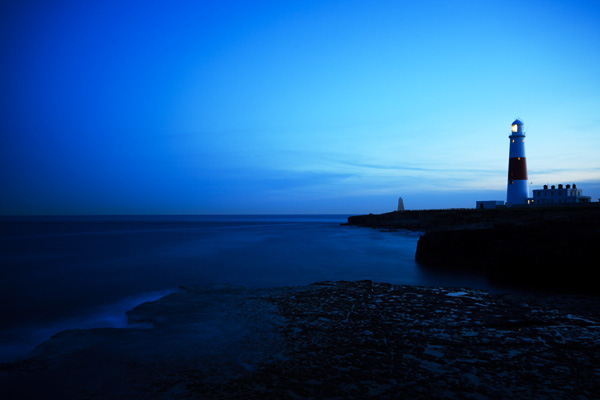
    The biggest benefit of zoom lenses is the rather obvious one of having several focal lengths available. This comes in useful in landscape photography because there are times when you are unable to move closer to (or even further away) from your subject. If you are standing on the edge of a cliff, for example, then it is not physically possible to move forwards. The advantage of a zoom lens in this situation is that it enables you to frame the landscape precisely. That’s what happened in this photo. I used a 17-40mm lens set to 28mm to frame this image:

    Wide-angle lenses and the landscape

    Getting the most out of a wide-angle lens

    Here are some tips for getting the most out of your wide-angle lens:

    Wide-angle lenses and the landscape

    1. Include some foreground interest.

    Look for something interesting to place in the first third of your photo. This gives the viewer something to look at.

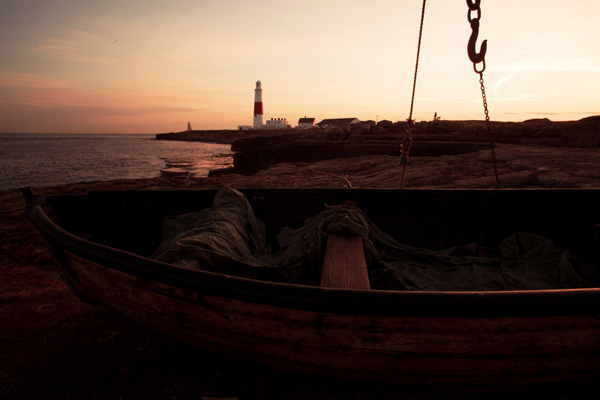
    Wide-angle lenses and the landscape

    2. Move in close to the subject.

    It depends on exactly what you are photographing, but see what happens when you move closer to your subject with a wide-angle lens. Remember that wide-angle lenses make distant objects appear smaller, and if you are not careful you may end up with everything in the frame too distant to be of interest.

    Perhaps what I’m really saying is that you should decide what is your main subject in the photo. In a landscape that may be something like a tree, a rock or even a person in the landscape. Once you have decided on the subject, see if moving closer makes the image stronger.

    But: don’t move too close, don’t be afraid of including negative space to improve the image. It’s a subjective thing, and your eye for how close to the subject to get will improve with practice.

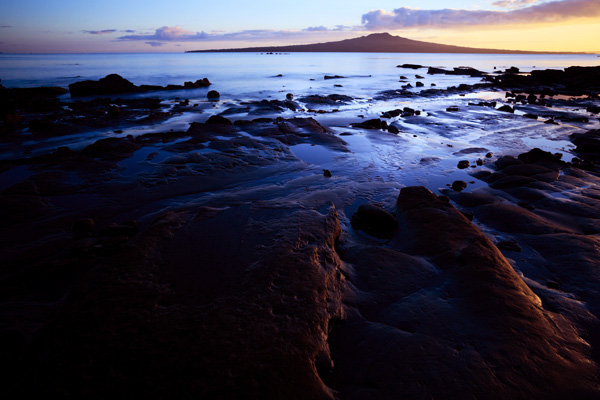
    Wide-angle lenses and the landscape

    3. Use leading lines and patterns to create a sense of movement. The viewer’s eyes will follow the lines through the image. This creates a sense of movement and depth. Do you see how the rocks in the foreground in the above image create lines that point towards the distant volcano?

    Understanding Lenses: Part I – A guide to Canon wide-angle and kit lenses

    Understanding Lenses ebook

    If you liked this article then take a look at my ebook, Understanding Lenses: Part I – A guide to Canon wide-angle and kit lenses. It is a complete guide to wide-angle and kit lenses for the Canon EOS camera system, showing you how to use them and how to decide which lens to buy.

    Post originally from: Digital Photography Tips.

    Check out our more Photography Tips at Photography Tips for Beginners, Portrait Photography Tips and Wedding Photography Tips.

    Wide-angle Lenses and the Landscape

    The post Wide-angle Lenses and the Landscape by Andrew Gibson appeared first on Digital Photography School.


    Digital Photography School