Category: Photography

  • The Path to Better Photography

    Ed Verosky is a professional photographer and author based in New York. In this article, Ed presents his recommended path to learning photography. This, along with his eBooks on the subject, have greatly improved the skills of thousands of photographers. To learn more about improving your photography, visit his site and check out his extensive eBook collection (currently 62% off at SnapnDeals).

    If you’ve ever wanted a little guidance when it comes to learning photography from top to bottom, this DPS post is for you! There’s a lot of information out there, and tons of books, tutorials, workshops, etc. to learn from. But it’s not always easy to know where to start, or where you should focus your efforts when it comes to really improving your knowledge of the art and craft of photography. With that in mind, here’s a "learning road map" I’ve put together for you that has helped many of my readers. I hope it helps you with your quest to become a better photographer.
    NewImage

    Getting Started

    First of all, I want to thank you for taking the time to read this. You’re probably looking at this right now, excited about the possibility that you might actually learn something new, something that will elevate you as a photographer in some way. Whether you are a beginning photographer, or someone who’s been at this for a few years, you probably have the desire to improve on this thing that you love.

    Photography means something special to you; it’s a kind of magic that allows you to express yourself. It’s your way of communicating and sharing with the world. Whether you’re doing what you love to earn extra income, or simply for the pure excitement and enjoyment of it, that’s reason enough to want to keep improving and learning and growing. It’s not only the technical skills, but the psychology and artistic sensibility of what we do as photographers that keeps us constantly in the need to learn and adapt to everything from new gear, to new people/clients, to our own ways of expressing ourselves.

    How to Use this Post as a Guide

    Print this post out. It’s your guide and starting point. It can serve as a road map to learning the basics of photography, helping you to build a solid foundation from which to grow and become really good at what you do. I encourage you to use this road map and seek out multiple resources, like DPS, to further your understanding of each topic that follows. My blog, newsletter, video tutorials, and ebooks will also definitely help you learn about these things quickly and in great detail. But I routinely direct people to outside resources as well, because I think it’s important to learn from more than one teacher in order to really drive home the knowledge and principles of photography.

    I’m very excited about this journey you’re on, and it’s my goal to do everything in my power to help you get everything you want out of your photography. I’m obsessed with teaching and demonstrating what I’ve learned and all the new things I continue to learn. I’m sincerely happy that I have another person I can share this excitement with right now. That’s you!

    Now, we’ll begin our discussion of the four topics that I feel are most important in your development as a good photographer: the camera, the lighting, the subject, and post-processing.

    The Camera

    The first part of becoming a complete photographer is knowing how your camera works, inside and out. Your camera is the main mode of communication between you and the outside world as a photographer. Like your voice, your photographic vocabulary is extremely limited without some good understanding of how best to tell a story. Put the effort into learning everything about your camera and and it will pay off, big time. Plus, you’ll be able to speak intelligently about your craft, and be able to ask the right questions when it comes to the topic of lighting. The camera and the lighting; knowledge of one topic supports an understanding of the other, so you need both. Start with your camera.
    NewImage

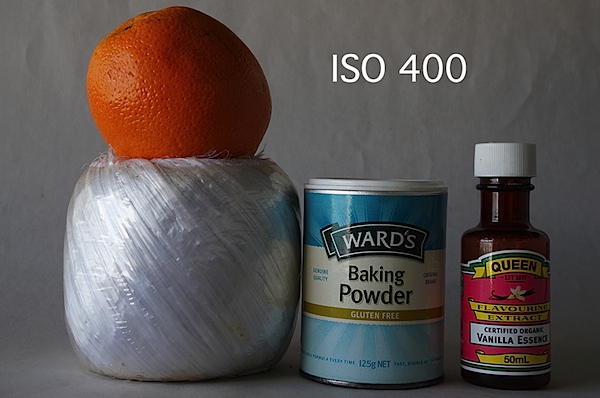
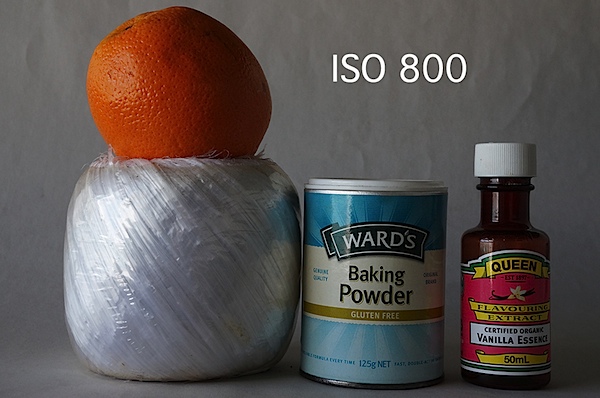
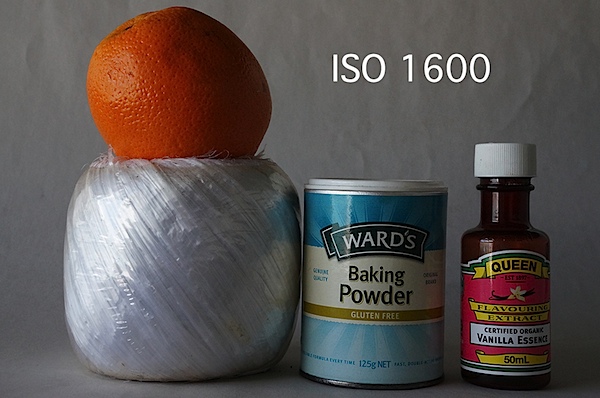
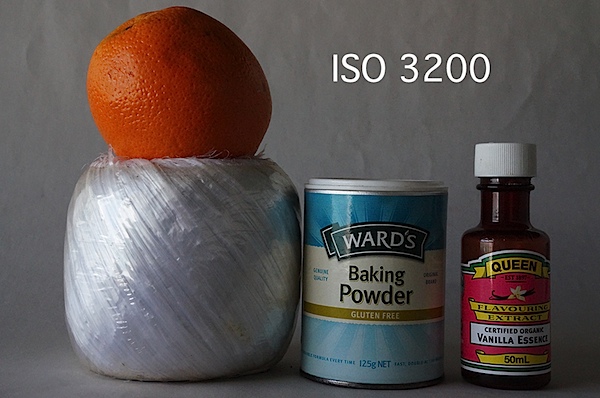
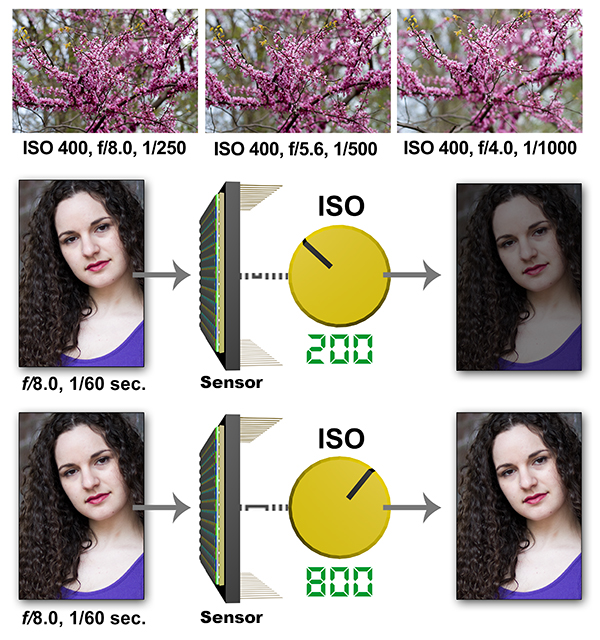
    Good resources will provide numerous visual examples to help you understand how exposure works. The sequences above are just a few that I use in my eBooks to illustrate the interdependent nature of exposure controls on the camera.

    ———————–

    Here are some of the most important things you should learn about:

    • Raw and JPEG. The differences between Raw and JPEG file formats. Learn what the differences are and why one is not always better than the other. For example, I strongly recommend that people shoot in the largest Raw format their cameras produce. But that’s not always the practical choice, nor is it always necessary. In general, however, Raw will provide you with the highest quality file from which to work with. From there, you can export out to fine-tuned JPEGs that are sure to produce prints and web display images of excellent quality. But this isn’t the whole story, and you should probably investigate what these file formats are capable of, and how they work with your post-processing software, so you can make the most informed decisions according to the demands and limitations of your schedule, software, and client needs.
    • ISO, Aperture, and Shutter Speed. These are the fundamental components of exposure and a huge topic for photographers. Our cameras are able to keep these three components in check for us in automatic shooting modes, but the auto-metering and exposure mechanisms don’t always get it right. Understanding exactly how ISO, aperture, and shutter speed interrelate will give you complete control over exactly how your exposures turn out. You need to understand this topic in order to make educated decisions about how to adjust exposure even when using automatic shooting modes. There are shortcuts to learn, too. But I cannot stress how important it is to get a real, rock-solid, understanding of exposure.
    • How to do the math of photography. It’s easy once you get the hang of it, and it’s an essential part of working with all aspects of exposure and lighting. What is this "math" all about? Well, it comes down to how light is measured in photography; we talk about light in terms of "stops" which are traditionally full increments of camera and lighting adjustments. Each stop either doubles or halves the amount of light you’re working with. For example, when working with apertures (often talked about in terms of f-stops), moving from one full f-stop of say, f/5.6 to f/8.0 cuts the light entering the camera by half. Likewise, changing your shutter speed from 1/500 sec. to 1/250 sec. allows twice as much light to expose the camera sensor. ISO works the same way; ISO 200 makes your sensor twice as sensitive to the light hitting it as ISO 100. Lighting has a similar math with a few good rules you can follow. Knowing all of this and putting it to use will put you in complete control of your lighting and exposure.
    • White Balance. Light comes in many different colors, even when it looks white to your eyes, a light source can reproduce as blue, green, or orange. Learn how to control and fix it both in-camera and during post-processing. When you’re using different types of light sources together like flash and household incandescent lamps, you’ll have to make some decisions about how to handle the difference in light color, if at all.
    • Shooting modes. Which camera mode do you typically shoot in? There are several to choose from including full automatic, program, aperture priority and shutter priority. There’s also manual mode which is very important to know how to use. In fact, for studio-type lighting, manual mode is usually the best choice. Learn what each camera shooting mode does. Each one has a real purpose and knowing how to choose the right one is crucial.
    • Manual mode. Understand how to use it and gain total control over every aspect of exposure. No, you don’t have to shoot in manual mode all the time to be considered a "real" photographer, but for many situations, knowing how to use your camera in manual mode will save you from disaster. Manual mode is also important in studio work and anytime shooting conditions require you to do the thinking when your camera’s auto modes aren’t cutting it.
    • Understand all the metering, focusing, and drive modes on your camera. It’s easy to find one thing that works and simply stick to it. But sometimes you need to switch things up to get better results as conditions change. Learning what your camera’s capabilities are is going to come in handy.
    • Evaluate and fix your shots. Know how to most effectively use all the tools available on your camera to properly evaluate and adjust your exposures as you’re shooting.

    Ok, remember the broad list of things you need to learn: camera, lighting, subject, and post-processing? Well the list above is just the CAMERA part! Trust me, I know that part alone can seem overwhelming, and that’s why most people never bother to learn it all. That’s a real shame, because it’s the first part of becoming a complete photographer; you need to know everything about how your camera works.

    Fortunately, you don’t need to know everything from the start. If you’re using your camera in a way that’s working for you right now, keep doing that. There’s no reason to give that up. But in the meantime, start building on your current understanding and usage of the camera and learn a little bit more as the weeks go on. Soon, everything’s going to start coming together and you’ll find that you have a total command of the camera. That’s the goal. Read the best resources on using your DSLR, and just commit to wanting it. It’s going to happen, I promise!

    Lighting

    Although setting your camera to one of the auto exposure modes is a great way to solve the immediate problem of getting a properly exposed image, it won’t solve your lighting concerns, and it’s your lighting that really makes the difference. Many photographers soon realize that what separates their images from better work is the application of good lighting techniques and different types of lighting sources. I would say that the ability to skillfully use lighting is the number one technical skill a photographer should seek to acquire in order to produce good work. Unfortunately, this is also the number one place photographers tend to drop the ball.
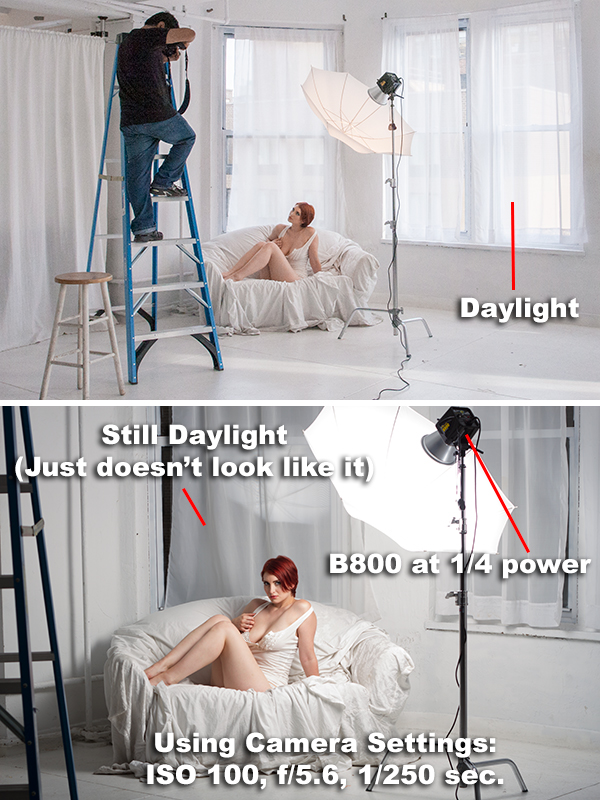
    NewImage

    Learning how to control your light will allow you to easily create effects like overpowering daylight (above). Here, the right combination of camera settings and flash power create a nighttime effect, even though there is actually bright window light coming into the studio.

    ———————–

    Sure, lighting isn’t easy at first, and maybe that’s why so many photographers just give up on learning how to do it properly. It takes time, experimentation, and a good teacher to help you get to where you need to go with photographic lighting. Good books and tutorials can help you with that. When I teach, my goal is to show readers how to use natural, constant, and flash lighting in a way that really gives them a handle on it quickly.

    In order to really master lighting for photography, you should learn the following things:

    • How light actually behaves. By learning the properties of light, you can easily control the way it can be directed, redirected, and modified to suit your needs.
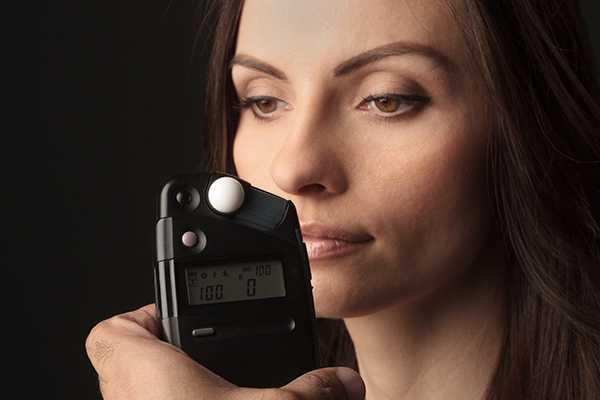
    • How light is measured in photography. There’s a very easy and powerful math to photographic lighting (which I touched on earlier). It’s been around for a long time and has served photographers well. Learning how to measure light is crucial to good lighting and good exposures.
    • How to use strobe/flash lighting. This is one of the most powerful and convenient types of lighting you can learn to use. Knowing how to use both on-camera and off-camera flash is what separates many photographers. While it’s ok to feel comfortable being a "natural light only" photographer, it’s also limiting.
    • Lighting for portraiture. Using your knowledge of lighting will transform your portraiture work to a new level. There are five important lighting patterns you should absolutely know. Starting with a single light source, you can apply these patterns and build upon them to eventually create portraits that take advantage of multiple lights.
    • Mixing and matching light sources. Make sure to understand how different light sources (although many appear to look white to your eyes) will cause major color shifts in your exposures. You can handle these problems in-camera with good white balance techniques and also during post-processing.

    The Subject

    I believe in teaching portraiture in a semi-traditional way; instructing on the fundamentals and quickly moving to a more freestyle approach. An appreciation for traditional lighting patterns and contemporary portraiture will give you a good foundation for all of your portraiture work. But in today’s marketplace, the old traditional portraiture isn’t the only game in town. Working photographers should look beyond typical portraiture to find ways to differentiate themselves from others. One of the main things I like to stress is that you should start thinking about unconventional posing, directing, lighting, etc. eventually developing your own style.
    NewImage

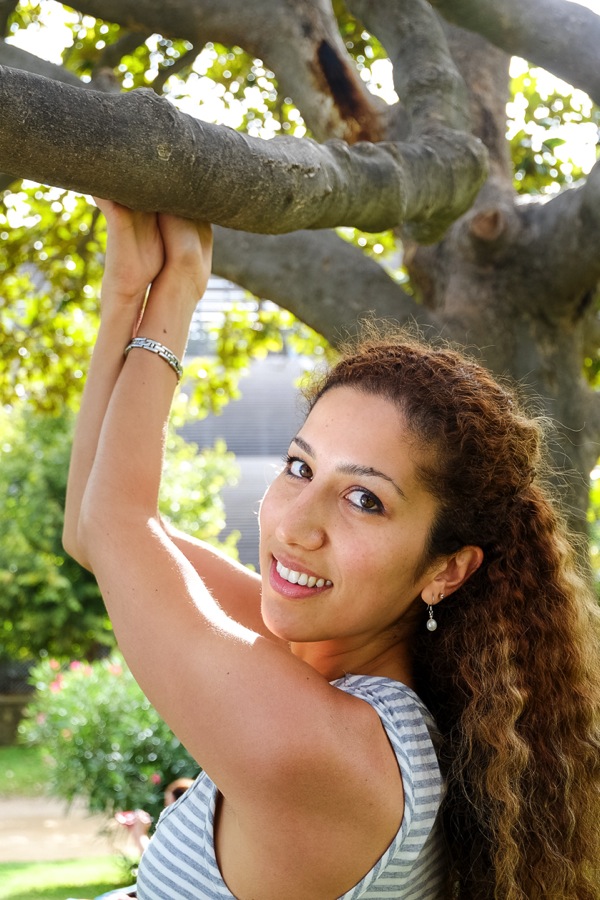
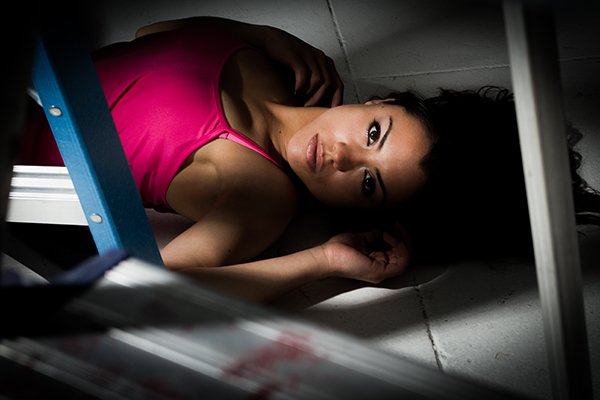
    Great subjects can inspire you to get creative with your posing and lighting techniques. This type of experimentation will help you develop your own unique style.

    ———————–

    Again, this all begins with really knowing the fundamentals of lighting, and getting very comfortable with your gear so it becomes an extension of your vision and not something that gets in the way of the creative flow. But simply knowing how to use the tools and basic techniques of your craft isn’t enough. You need to let go of the things that hold you back from creating your best work and explore new ways to look at and create portraiture. Yes, the soft skills like working with subjects and clients are important which is why it’s one of my favorite things to teach.

    Here are some of the most important themes and topics I tend to discuss on a regular basis:

    • Classic Lighting. The basic traditional lighting patterns are classics and always look great. Even if you’re the type of photographer who doesn’t like to do things the traditional way, get to know the classics because they come in handy and the principles they’re based upon apply to ALL types and styles of lighting.
    • Creative Lighting. I strongly encourage you to go nontraditional, too. Working with your subjects in a way that encourages creativity includes bending and breaking the rules of traditional lighting.
    • Developing Your Own Style. It’s imperative for working photographers to do this in order not to drown in a sea of competition where so many are producing work absent of any unique style or vision. Amateurs have even more reason to explore the artistic areas of portraiture since it is a part of the amateur heritage to do so, and also because they don’t have the burden of producing work according to the tastes and needs of paying clients. When I talk about developing your own style, I don’t necessarily mean that you can, or should attempt, to do it deliberately. I don’t think you can create a true style as much as you can identify it by looking back at your work as time goes on. But in the meantime, take this as a cue to work in a way that is your own.
    • Portraiture Projects. One of the best ways to expand your body of work, as well as come up with new imagery that you otherwise might not have thought of, is to start a photo art project. Starting with just a simple idea or theme, you might find yourself discovering many different ways to express it. Even a very general concept has a tendency to build on itself as it becomes, at the same time, more defined and diverse. This process of creation and discovery can only enhance your artistic vision and technique.
    • How to Find Great Subjects. Good models are everywhere, you just have to know how to find them. This is another thing I talk about in my books, but the main message here is that family, friends, and strangers can all make great subjects. You don’t always have to look to "model" directory websites to find great people to photograph. I’ve gotten some of my best results through other means.
    • How to Direct Your Subjects. Whether your portrait subject is a client or a collaborator in your next artistic vision, it’s very important to get them excited and on-board with your ideas for the shoot. They are the actor in your drama, the star of your movie, even if your "theater" is only an ad-hoc studio setup, your subject’s confidence and enthusiasm are key ingredients for a successful shoot.
    • Make Your Work Personal. This is very important. No matter what, or who, you photograph, if you invest something personally in your efforts, it will show. Your work will be less generic and more substantive. It’s often said that all portraits are really self-portraits. While it’s not always that evident, the truth is that the best portraits happen when you recognize something special as you click the shutter. And what you recognize most often comes from a very personal place.

    Post-Processing

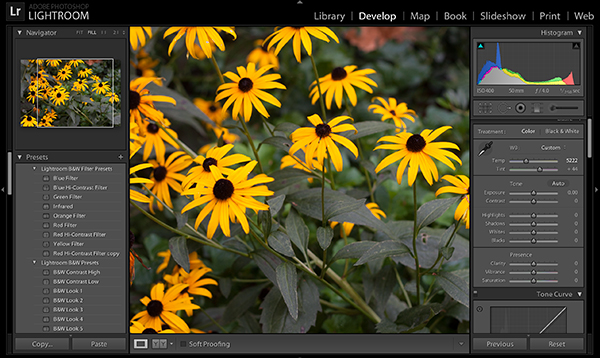
    It can be argued that post-processing happens the moment a digital camera processes the data off the sensor, and certainly when a file is converted, via some programmer’s algorithm, for view in a RAW conversion engine common in most digital workflows. Why not make the absolute most of the tools available to you, just as photographers have always done? It used to be darkroom tools, like various ways of developing film and selectively exposing photographic paper during the printing process, which allowed the photographer to enhance or correct problems with an original negative. Now it’s digital. Of course you can ruin any photograph with overdone effects or cheesy gimmicks. But used thoughtfully, post-processing techniques can help make a good picture an outstanding one.
    NewImage

    • Raw Conversion Software. I recommend that you learn how to use Raw conversion software which powers and comes built-in to Adobe’s Photoshop and Lightroom products. Working with Raw files has gotten to be a rather seamless part of the normal workflow.
    • Image Editing. Software like Lightroom and Aperture make organizing and basic editing a breeze. Adobe Photoshop is the standard professional editing (retouching) tool of choice, however, the less expensive Photoshop Elements might have just enough features to allow you to do the type of post-processing you’re interested in.

    Try out these products for free by clicking on the following links. You should see a "Trial" link on each product’s information page:

    • Adobe Lightroom
    • Adobe Photoshop
    • Adobe Photoshop Elements

    Of course there are also other fun and effective ways to post-process your images, including using some popular mobile device apps. This is one of my favorite topics to cover as I’m a big fan of iPhone photography and mixing DSLR photography with phone photography editing and sharing technologies.

    Some of the things you might be interested in learning include:

    • Retouching. Using Photoshop tools like the clone tool, liquify, and healing tools to remove blemishes, tighten up body parts, and otherwise improve the overall look of your portrait subjects. "Photoshopping," "airbrushing," or retouching is so prevalent these days, it’s almost expected that you offer this to paying clients as part of the service. You can learn to do at least the basics by watching a few tutorial videos on YouTube, but I suggest you also invest in some basic detailed instruction from books like the popular ones by Martin Evening. Once you get that under your belt, you’ll be ready to tackle more advanced topics.
    • Effects. There are several effects that are popular with photographers these days, including texturing, compositing, and alternative color processing and black and white conversions. Some effects can be purchased as presets and actions making them simple to apply. However, I recommend you also learn how to create and manipulate images directly so you’ll know exactly how to get the looks you want and make them unique.
    • Image Preparation. You’ll also want to know the best ways to prepare your images for use in various applications like prints of specific sizes, on-line web galleries, distribution and presentation on the web, etc. Knowing the ins-and-outs of image resolution and quality settings will help you make the most of your photography. After all, what good is all the work you’ve done up to this point if you don’t know how to best present your images in the end?

    This Is Just The Start

    I realize there’s a lot of information in this post. At the same time, it’s not complete, just one general outline based on my experience and teaching methods. But I strongly encourage you to find your place on this map and start navigating your way through it. It will take some time, but that’s one of the best things about photography, the discovery.

    ——————

    To get started, you can download my popular eBook bundle at a special discounted price (62% off) on SnapnDeals. Everything I’ve talked about above (and more) can be accessed now so you can get started today.

    Post originally from: Digital Photography Tips.

    Check out our more Photography Tips at Photography Tips for Beginners, Portrait Photography Tips and Wedding Photography Tips.

    The Path to Better Photography

    The post The Path to Better Photography by Guest Contributor appeared first on Digital Photography School.

    Digital Photography School

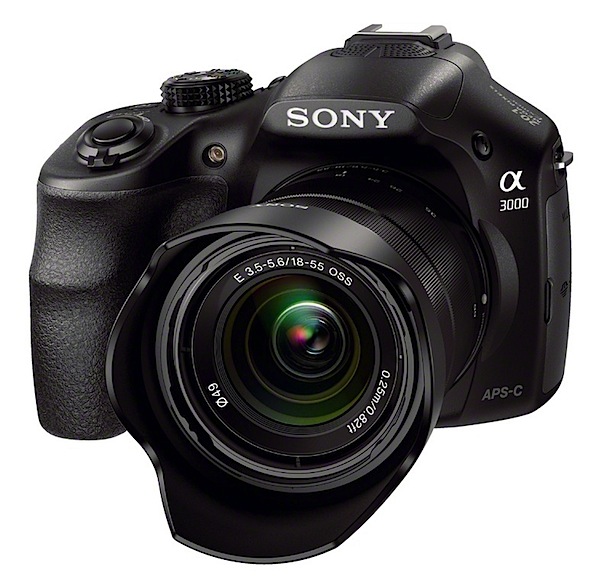
  • Sony A3000 Review

    Sony A3000 Review.jpg

    If you hanker for a DSLR and don’t have the budget for a high end full frame camera nor even enough $ $ $ for an APS-C sized sensor job, look this way… the news suddenly has suddenly got brighter.

    Most of the early action in mirrorless interchangeable lens cameras was in the area of models that offered viewing only via a rear screen, sometimes with an add on turret finder.

    But they just didn’t look like a DSLR!

    ILCE3000_Phantom01.jpg

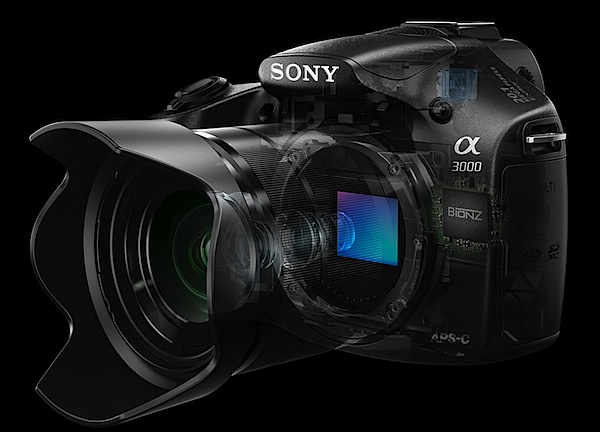
    Now Sony has come up with an appealing answer to a mirrorless interchangeable lens camera that has the appeal of a DSLR … with maybe a few less bells and whistles.

    The A3000 indeed has a traditional DSLR look and feel with a simple user interface.

    For one thing, you know you’re holding a DSLR with a traditional DSLR body shape and speed grip.

    To whet your appetite further, you can choose from 16 interchangeable E-mount lenses from Sony and Zeiss for a range of shooting options.

    The camera can shoot a maximum image size of 5456×3632 pixels, sufficient to make a 46x31cm print.

    Video can be shot in MPEG4 or AVCHD, with the latter offering Full HD 1920×1080 pixels.

    I was unable to shoot stills while recording video.

    Handling

    The camera is surprisingly small, easy to hold and well-balanced, at least it felt well-balanced with the f3.5-5.6/18-55mm OSS kit lens that was supplied with the review camera. Bear in mind that this is the package that is usually offered: body and 18-55mm lens.

    One Sony exec made the statement that ‘newcomers are often daunted by the complex settings found in traditional DSLR products … The 3000 user interface has been inspired by our easy to use NEX range of cameras.’

    There are many key DSLR features in the camera, including a hot shoe and an eye level viewfinder. I ventured out in bright sun and at first found the viewfinder to be a dim alternative to the LCD screen, but then managed to successfully lift the brightness of both via a menu helper.

    To minimise total size and weight the A3000 accepts existing E-Mount lenses from the NEX family of products.

    Cables 2.jpg

    Church ext 2.JPG

    Church int 2.jpg

    Sony A3000 Controls

    At this point I have to disagree with the Sony spokesman. Firing up the camera with nary a glance at the instruction manual (thankfully available online) I found my early hours a mess of confusion.

    You can find the PDF of the full manual here.

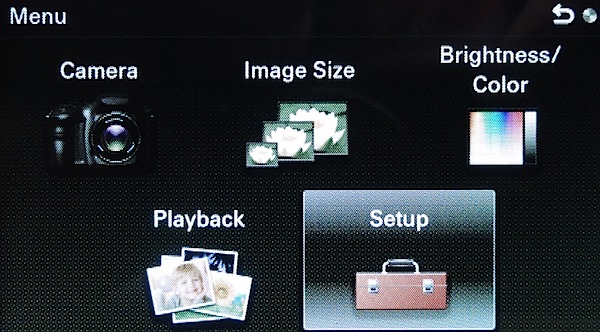
    Confusion? For one thing there was no menu button, at least there was no button labelled ‘menu’.

    But let’s look it over.

    Scene selection.jpg

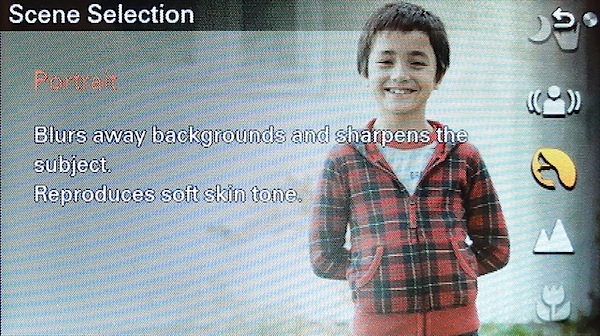
    Top deck: familiar territory, with the mode dial housing positions for intelligent and superior auto exposure, PASM, movie, sweep panorama and scene selection (presets for portrait, sports, macro, fireworks etc).

    Forward are the power and shutter buttons. At one corner is the replay button.

    Rear: just over the edge is the movie record button, which I feel could have been better placed at the camera’s far right corner.

    Then there are three unlabelled ‘soft keys’ — A, B and C — which take care of menu choices. Here’s how Sony describes the functions of these keys:

    ‘The soft keys have different roles, depending on the context. The assigned role (function) of each soft key is shown on the screen. To use the function shown at the upper right corner of the screen, press soft key A. To use the function shown at the lower right corner of the screen, press soft key B. To use the function shown at the center, press the center of the control wheel (soft key C). You can assign the functions to the soft key B.’

    By careful inspection of the manual you can eventually suss out the functions of these three buttons but I found them to be a bit bewildering at first.

    Anyway … the control wheel has positions for burst shooting and the self timer, ISO setting, display options plus exposure correction and AF options.

    Menu.jpg

    Menu 2.jpg

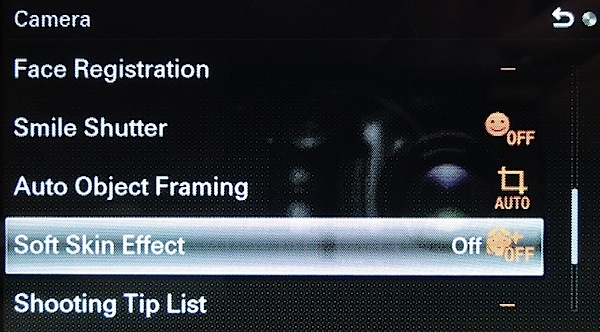
    Fifteen picture effects are accessible from the menu (soft key A). These include ‘artistic treatments’, like retro photo, miniature and partial colour.

    Pano 2.JPG

    Sony’s sweep panorama feature is included that can shoot panos up to 12,416 x 1856 pixels in size.

    One note: unlike most interchangeable lens digicams, you need to manually blow away any dust on the sensor. Like this: ‘After turning off the camera, remove the lens and blow off dust on and around the image sensor surface using a blower.’ Careful!

    ISO Tests

    Sony Cyber-shot A3000 ISO 100.JPG

    Sony Cyber-shot A3000 ISO 400.JPG

    Sony Cyber-shot A3000 ISO 800.JPG

    Sony Cyber-shot A3000 ISO 1600.JPG

    Sony Cyber-shot A3000 ISO 3200.JPG

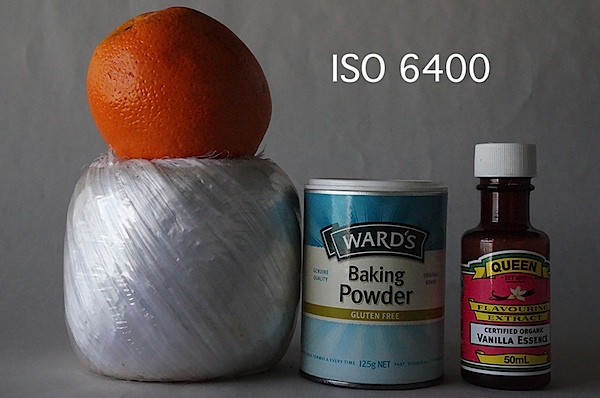
    Sony Cyber-shot A3000 ISO 6400.JPG

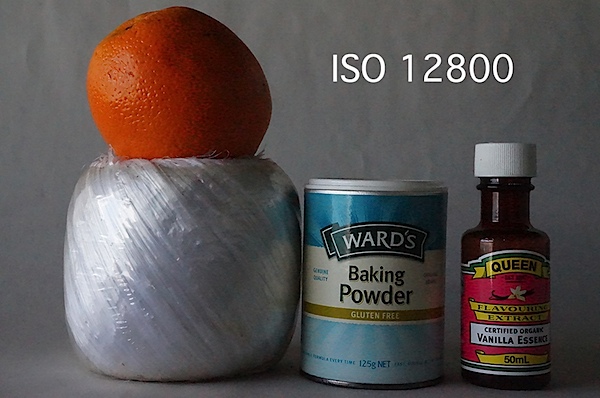
    Sony Cyber-shot A3000 ISO 12800.JPG

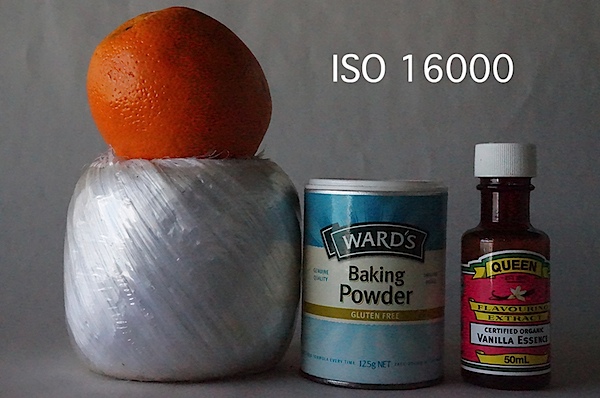
    Sony Cyber-shot A3000 ISO 16000.JPG

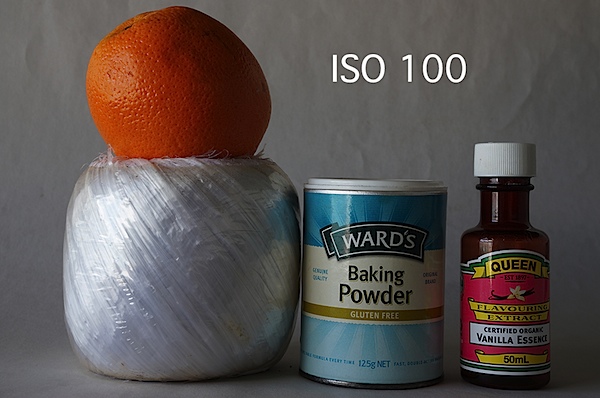
    Only at ISO 3200 was noise beginning to rise. At ISO 6400 noise up slightly but sharpness acceptable. At ISO 12800 noise up further, sharpness noticeably down and ugly artefacts evident.

    At ISO 16000 the show was over: noise up, sharpness down and ugly artefacts worse.

    Sony A3000 Review Verdict

    Quality: above average. Accurate colour.

    Why you’d buy the Sony A3000: small DSLR-like camera; access to lots of lenses.

    Why you wouldn’t buy the Sony A3000: menu access confusing.
    An attractive camera for the newcomer. Lots to like. Especially the price.

    Sony A3000 Review Rating: 4 stars

    Sony A3000 Specifications

    Image Sensor: 20 million effective pixels.Metering: Multi segment, centre-weighted, spot.
    Lens Mount: Sony E-mount.
    Exposure Modes: iAuto, Superior Auto, Program AE, shutter and aperture priority, manual.
    Effective Sensor Size: 23.5×15.6mm APS-C CMOS.
    35 SLR Lens Factor: 1.5x.
    Shutter Speed (stills): 30 to 1/84000 second and Bulb.
    Continuous Shooting: 3.5 fps.
    Memory: SD/SDHC/SDXC, Memory Stick Pro Duo/Pro-HG Duo cards.
    Image Sizes (pixels): Stills: 5456×3632 to 2736×1824.
    Movies: 1920×1080, 1440×1080, 640×480.
    Viewfinder: Turret electronic plus 7.5cm LCD screen (230,400 pixels).
    File Formats: JPEG, RAW (Sony ARW), JPEG+RAW, MPEG4, AVCHD.
    Colour Space: sRGB, Adobe RGB.
    ISO Sensitivity: Auto, 100 to 16,000.
    Interface: USB 2.0, HDMI mini, remote.
    Power: Rechargeable lithium ion battery, DC input.
    Dimensions: 128x91x85 WHDmm.
    Weight: 411 g (inc battery).
    Price: Get a price on the Sony A3000 with 18-55mm Lens or the Sony Alpha A3000 with 18-55mm Lens and 55-210mm Lens + 32GB Card + Battery + Case + Flash + 3 Filters + Tripod + Tele/Wide Lenses Kit.

    Post originally from: Digital Photography Tips.

    Check out our more Photography Tips at Photography Tips for Beginners, Portrait Photography Tips and Wedding Photography Tips.

    Sony A3000 Review

    The post Sony A3000 Review by Barrie Smith appeared first on Digital Photography School.


    Digital Photography School

  • 5 HOT Posts From Our Archives You Would Have Seen if You Were Following us on Facebook

    At dPS we have a little problem.

    As of this morning dPS has now published 4109 tutorials since we were founded back in 2006!

    That’s a lot of photographic learning hidden away in our archives and we’re increasingly aware that many of our readers have not seen some of our most helpful tips and tutorials.

    As a result – our team has been coming up with some strategies for highlighting some of the gold in our archives and have begun to experiment with some new ways of sharing it.

    How to See the Best Stuff in Our Archives

    The most successful experiments so far have been centred around our Facebook page. Over the last few weeks we’e started sharing some of our best content from the past there to those who follow us – and the response has been amazing!

    Dps facebook

    In the past week alone we’ve had hundreds of thousands of people view, like, share and comment upon these links to old posts and have received a lot of positive feedback about sharing them.

    So if you want to explore our archives please Like Our Facebook page.

    If you do you’ll see us update around 4 times per day – the updates will be a combination of our new posts and old ones – as well as some fun challenges and discussions.

    To get a taste for what you’re missing – here’s the top 5 Facebook posts we’ve done this week:

    • 10 DIY Lighting Hacks for Photographers
    • 15 Tips for Low Light Landscape Photography
    • Get out of Your Photography Rut by Creating Sketches
    • 50 Must Have Wedding Photography Shots
    • 21 Poses for Photographing Kids

    Also hot this week was a Facebook only challenge that we ran asking followers to submit a photo on the theme of CUTE.

    Following us on Facebook but Not Seeing Our Updates?

    Over the last few months Facebook have made changes that mean you don’t always see every post that people and pages you follow make.

    If you would like to see all our updates here’s what to do (this should take you 15 seconds at most):

    1. Head to our Facebook Page

    2. Make sure you’ve clicked our ‘like button’ (it should say ‘liked’ and have a tick next to it).

    3. Once you’ve liked us – hover your cursor over the ‘liked’ button until a drop down menu appears (like the one pictured below).

    Facebook dps

    4. Click the ‘settings’ option and you’ll see an option to choose ‘all updates’ (as you see below). If you select it you’re telling Facebook you want to see all of our updates.

    Facebook dps

    5. You’re done – you should start seeing all our updates (that is if you check Facebook regularly).

    PS: we’ve also started featuring some of our new and old posts on our Google Plus page and plan to keep getting more active there too.

    Post originally from: Digital Photography Tips.

    Check out our more Photography Tips at Photography Tips for Beginners, Portrait Photography Tips and Wedding Photography Tips.

    5 HOT Posts From Our Archives You Would Have Seen if You Were Following us on Facebook

    The post 5 HOT Posts From Our Archives You Would Have Seen if You Were Following us on Facebook by Darren Rowse appeared first on Digital Photography School.


    Digital Photography School

  • Sending Panorama Sequences from Lightroom to Photoshop

    Sending Panorama Sequences from Lightroom to Photoshop

    In addition to being able to send single images from Lightroom to Photoshop for editing you can also send a series of images to Photoshop to assemble into a panorama. This is a useful because the Photoshop panorama merge feature is pretty good (certainly since the improvements in Photoshop CS3 & CS4) and other Photoshop tools such as Content Aware Fill and the Lens Correction Filter are handy for finishing your panoramas. When you are done, click Save and the completed panorama will be sent back to Lightroom for further processing.

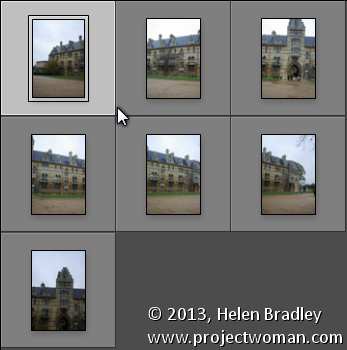
    To see how this is done, begin inside Lightroom and select the images to assemble into a panorama. I like to put these into a collection so they are handy if I want to try multiple panorama options to select the best of them. I don’t typically process the images before sending them to Photoshop and, instead, I process the completed panorama when it returns to Lightroom. One exception to this is fixing the white balance if it were incorrectly set on the camera at capture time, for example.

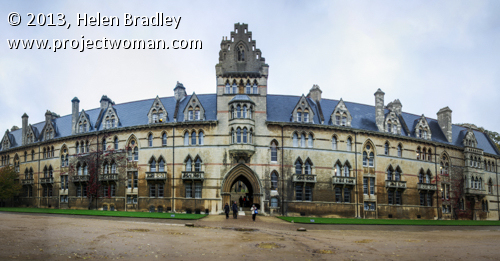
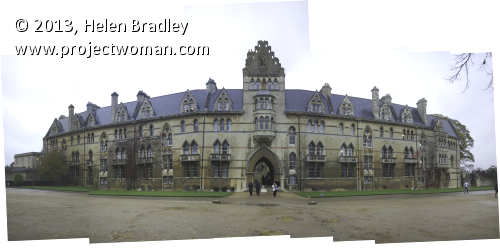
    Photoshop can assemble panoramas both vertically and horizontally and it can also take a mix of images such as I used here. This sequence is six shots horizontally across the front of a building and one extra shot to handle the building’s tower which wasn’t captured in the original sequence. If I’d been thinking, I would have captured some extra sky to use but we can solve that in Photoshop.

    Sending Panorama Sequences from Lightroom to Photoshop 1

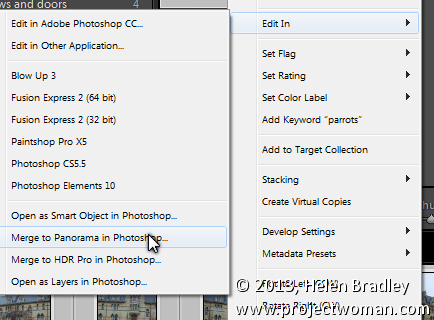
    Select the images, right click and choose Edit In > Merge to Panorama in Photoshop.

    Sending Panorama Sequences from Lightroom to Photoshop 2

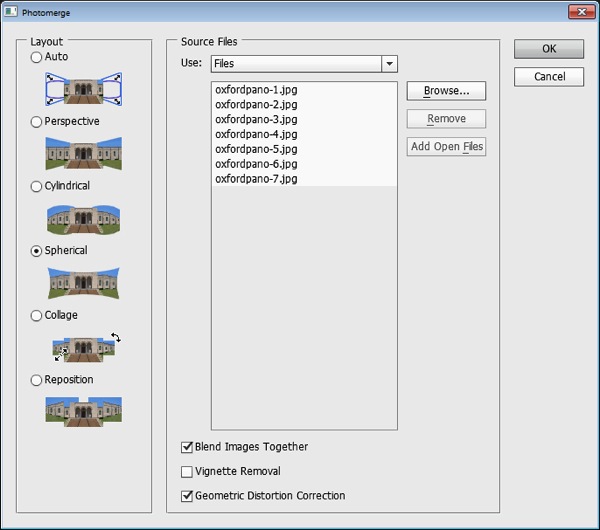
    Photoshop will open with the images you sent to Photoshop listed in the Photomerge dialog. Now you need to determine the Layout to use. In most cases the Auto setting will be a good choice – when you select this, Photoshop will analyze the images and determine the best of the other layout alternatives: Perspective, Cylindrical and Spherical to use.

    Sending Panorama Sequences from Lightroom to Photoshop  3

    Check the Blend Images Together checkbox so that the images will be seamlessly blended together – then you won’t have to do it yourself. You can also click Geometric Distortion Correction to remove the effect of any barrel, pincushion or fisheye distortion in the original images. If the edges of your images have some edge vignetting click Vignette Removal. If you’re unsure what to choose, check all three checkboxes. Click Ok and wait as the images are aligned and blended.

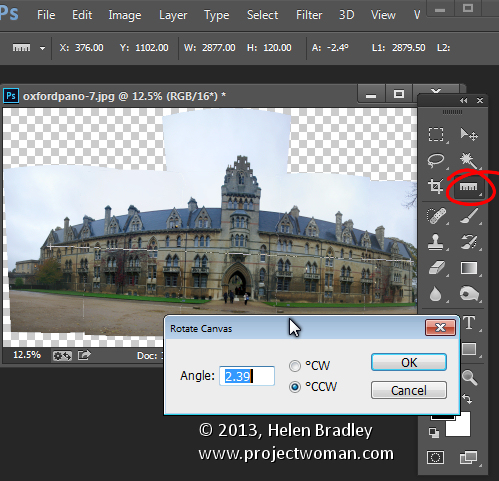
    Once the panorama is assembled you can straighten the image if desired. To do this select all the layers and target the Ruler tool. Now drag along a line in the image which should be perfectly horizontal – you won’t be able to click the Straighten Layer button to rotate the image because you will have multiple layers selected. Instead, choose Image > Image Rotation > Arbitrary and click Ok to straighten the entire image to the angle of the Ruler line.

    Sending Panorama Sequences from Lightroom to Photoshop  4

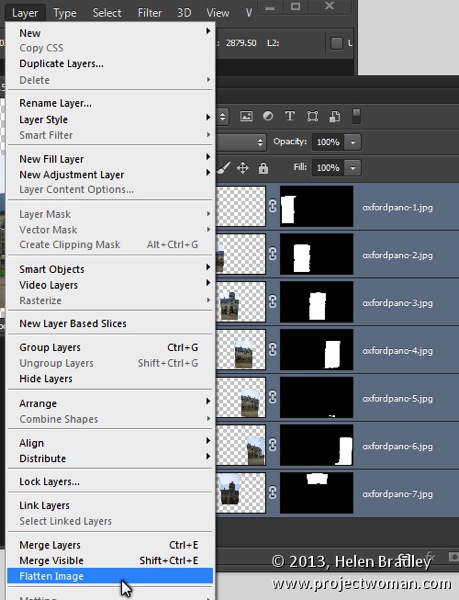
    Most panoramas will then need to be cropped to a rectangle to eliminate uneven areas around the edge of the image. However, before you do this you may want to fill in some of the empty areas of the image using the Content Aware Fill tool so you can crop larger than you would otherwise be able to do. To do this you’ll either need to flatten the image to a single layer or you will need to create a new layer with the entire image on it to use. To flatten the image choose Layer > Flatten Image. To make a new layer with the image on it (but still retain the individual layers below) click the topmost layer and press Control + Alt + Shift + E (Command + Option + Shift + E on the Mac).

    Sending Panorama Sequences from Lightroom to Photoshop  5

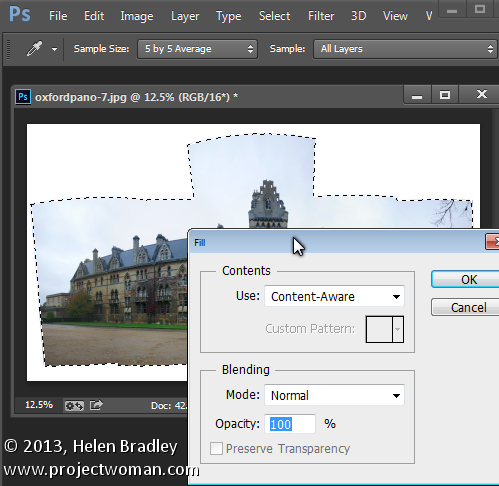
    Select the area that you want to fill and then choose Edit > Fill, from the Use list choose Content Aware and click Ok. Photoshop will attempt to fill the missing area with details from the image around it. If the image contains sufficient detail you should be able to build up missing areas of sky and foreground, for example.

    If you encounter problems with the Content Aware Fill feature this post will show you how to mask a layer to get better results when using it: http://digital-photography-school.com/smarter-content-aware-fill-in-photoshop. Crop the image when you have filled the edge area.

    Sending Panorama Sequences from Lightroom to Photoshop 6

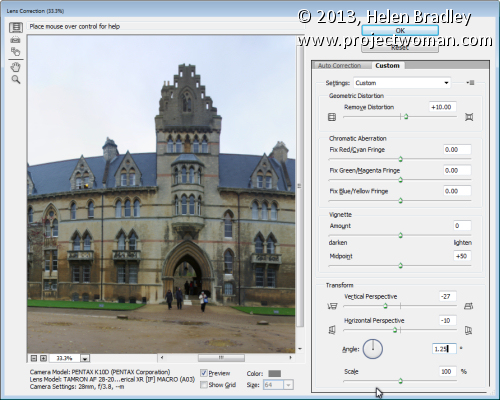
    To fix unwanted distortion in an image you can use the Lens Correction tool. This tool works on a single layer and you run it by choosing Filter > Lens Correction > Manual. Adjust the Horizontal Perspective slider to fix problems with an image which has not been captured face onto the point of interest. Use the Vertical Perspective slider to adjust for keystoning – generally you will drag this slider to the left. Use the Geometric Distortion slider to remove barrel and pincushion distortion.

    Sending Panorama Sequences from Lightroom to Photoshop 7

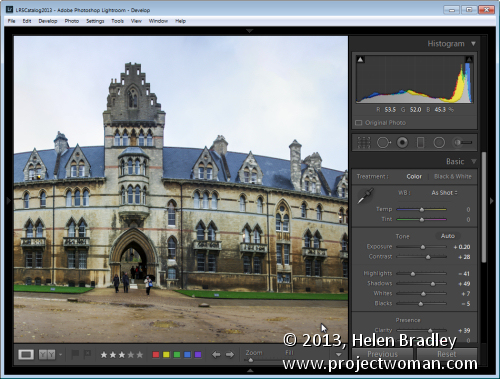
    Once you have finished assembling the panorama choose File > Save to save the image and return to Lightroom where your panorama will be ready for further editing.

    LR PS panoramaMerge 8

    If you are not using Lightroom you can assemble a panorama from Bridge or from inside Photoshop. In Bridge select the panorama sequence and choose Tools > Photoshop > Photomerge in Bridge. In Photoshop, first open the images to use then choose File > Automate > Photomerge and click the Add Open Files button. In either case you will probably want to fix the image in Photoshop once the panorama is complete. If you are using Lightroom you may prefer to finish processing the panorama in Lightroom.

    Layout Options

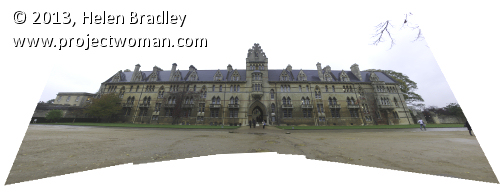
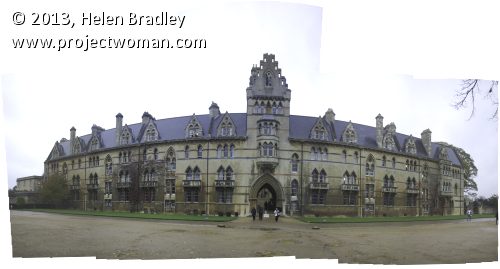
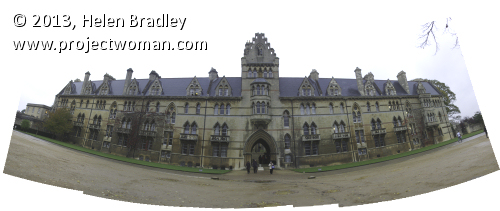
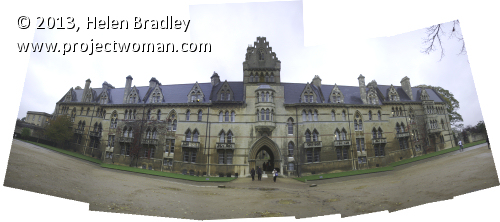
    Each of the panorama Layout options in Photoshop results in a different looking panorama. Choosing Auto tells Photoshop to select the best of the options Perspective, Spherical and Cylindrical for your particular sequence of images.

    Here is the result of each of the other Layout options used with our image sequence, these results haven’t been edited except to straighten the image and brighten it a little. You may want to experiment with any given sequence of images to see which of these options gives you the most pleasing result:

    Perspective Layout

    The panorama is assembled in relation to the middle image of your sequence of images. The middle image is placed in position and the other images arranged either side of it and skewed and repositioned as needed. This often results in edges which are taller than the middle giving rise to the term ‘bow-tie” distortion.

    LR PS panoramaMerge perspective

    Cylindrical Layout

    This layout avoids the bow-tie distortion by showing the images as they might look if placed on an unwrapped cylinder.

    LR PS panoramaMerge cylindrical

    Spherical Layout

    This layout arranges the images as if to cover the inside of a sphere. It is a good choice for 360 degree panoramas and can also give good results with other shorter panorama sequences.

    LR PS panoramaMerge spherical

    Collage Layout

    This layout aligns the images matching overlapping content. If necessary, image layers are transformed and rotated.

    LR PS panoramaMerge collage

    Reposition Layout

    This layout aligns the images matching overlapping content but without transforming or rotated the images.

    LR PS panoramaMerge reposition

    Post originally from: Digital Photography Tips.

    Check out our more Photography Tips at Photography Tips for Beginners, Portrait Photography Tips and Wedding Photography Tips.

    Sending Panorama Sequences from Lightroom to Photoshop

    The post Sending Panorama Sequences from Lightroom to Photoshop by Helen Bradley appeared first on Digital Photography School.

    Digital Photography School

  • The Sensitive Side of Newborn Photography

    By Annie Tao

    Sensitive Side of Newborn Photography

    There are many ways you can photograph newborns, but one thing is for certain: it takes a certain amount of finesse to photograph these tiny little creatures that is beyond an ability to operate a camera and knowledge of photography.
    ?If you’ve had a baby, then you probably know what I am talking about. Newborns are especially fragile with soft bones and unfused plates in their skull, so moving them around should be done carefully. In fact, I will ask the parents to handle the baby during my Newborn shoots, if I want the baby to be in a different place or position.

    Newborns are also only recently outside the protection of their mother’s womb, so they are more susceptible to disease, cold and stress than other people you will probably photograph.

    Here are 6 tips to the sensitive side of Newborn Photography.

    1. Avoid wearing fragrances

    Sensitive Side of Newborn Photography 4

    That includes perfumed soaps, lotions, perfumes/colognes, after shave, and hair styling products. Babies have sensitive noses. The last thing you’d want is to have your precious subject sneezing. If she (or he) is uncomfortable, then she will be restless and fussy.

    2. Wash hands before you begin

    Sensitive Side of Newborn Photography 2

    The first thing you should do when you enter the newborn’s environment is to wash your hands really well. Even if you don’t plan to touch the baby, you will most likely touch things that the baby has contact with, like the crib.

    3. Reduce the chance of bringing germs into the newborn’s environment

    Reschedule if you are ill.

    There is nothing more stressful than needing to care for a sick newborn. Their bodies are too young for medicine, so do the baby’s family (and the baby) a favor by rescheduling if you are sick – especially if you have a fever.

    4. Turn up the heat

    Sensitive Side of Newborn Photography 3

    Babies are happy and sleepy when they are warm, so turn up the heat, but do this safely. If you use a space heater, be careful not to place it too close to the baby or whatever the baby is on or in.

    For instance, if the heater is pointed lower than the baby itself, it can still endanger the baby by heating up the basket she is in.

    5. Use your client’s props, if you can

    Sensitive Side of Newborn Photography 1

    Blankets, hats, stuffed animals, shoes, baskets…they are all so cute to use during your Newborn session.

    If you use your client’s props, then the items in the photos will be more meaningful to them (ie, Aunt Mary crocheted the hat, the basket is from the parents’ wedding, the stuffed animal is the same one the dad had as a child).

    The photos will also be more unique than using the same props over and over.

    6. Don’t force a pose

    You or the parents of the baby may want to get a shot of the baby in a certain position or posed on a particular object. Please assert caution when attempting such feats.

    Newborns are great to photograph because they can be positioned for a photograph, but they are human beings, not dolls. Take precaution and remember that babies are delicate. If they appear uncomfortable or unhappy, call it quits and find an alternative shot.

    Sensitive Side of Newborn Photography 5

    Newborns should be comfortable and safe at all times. So do what you can as their photographer to keep them that way during their photography session.

    Annie Tao is a Professional Lifestyle Photographer in the San Francisco Bay Area who is best known for capturing genuine smiles, emotions and stories of her subjects.  You can visit annietaophotography.com for more tips or inspiration and stay connected with her at facebook.com/annietaophotography.

    Post originally from: Digital Photography Tips.

    Check out our more Photography Tips at Photography Tips for Beginners, Portrait Photography Tips and Wedding Photography Tips.

    The Sensitive Side of Newborn Photography

    The post The Sensitive Side of Newborn Photography by Guest Contributor appeared first on Digital Photography School.

    Digital Photography School

  • Beauty in the Everyday

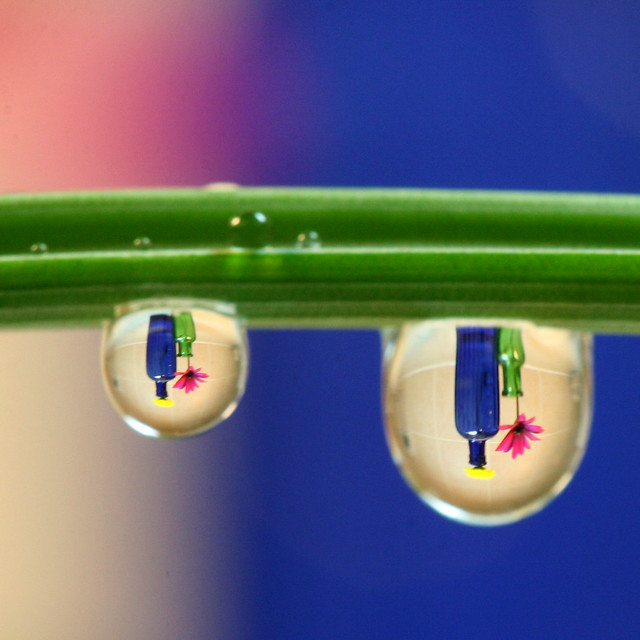
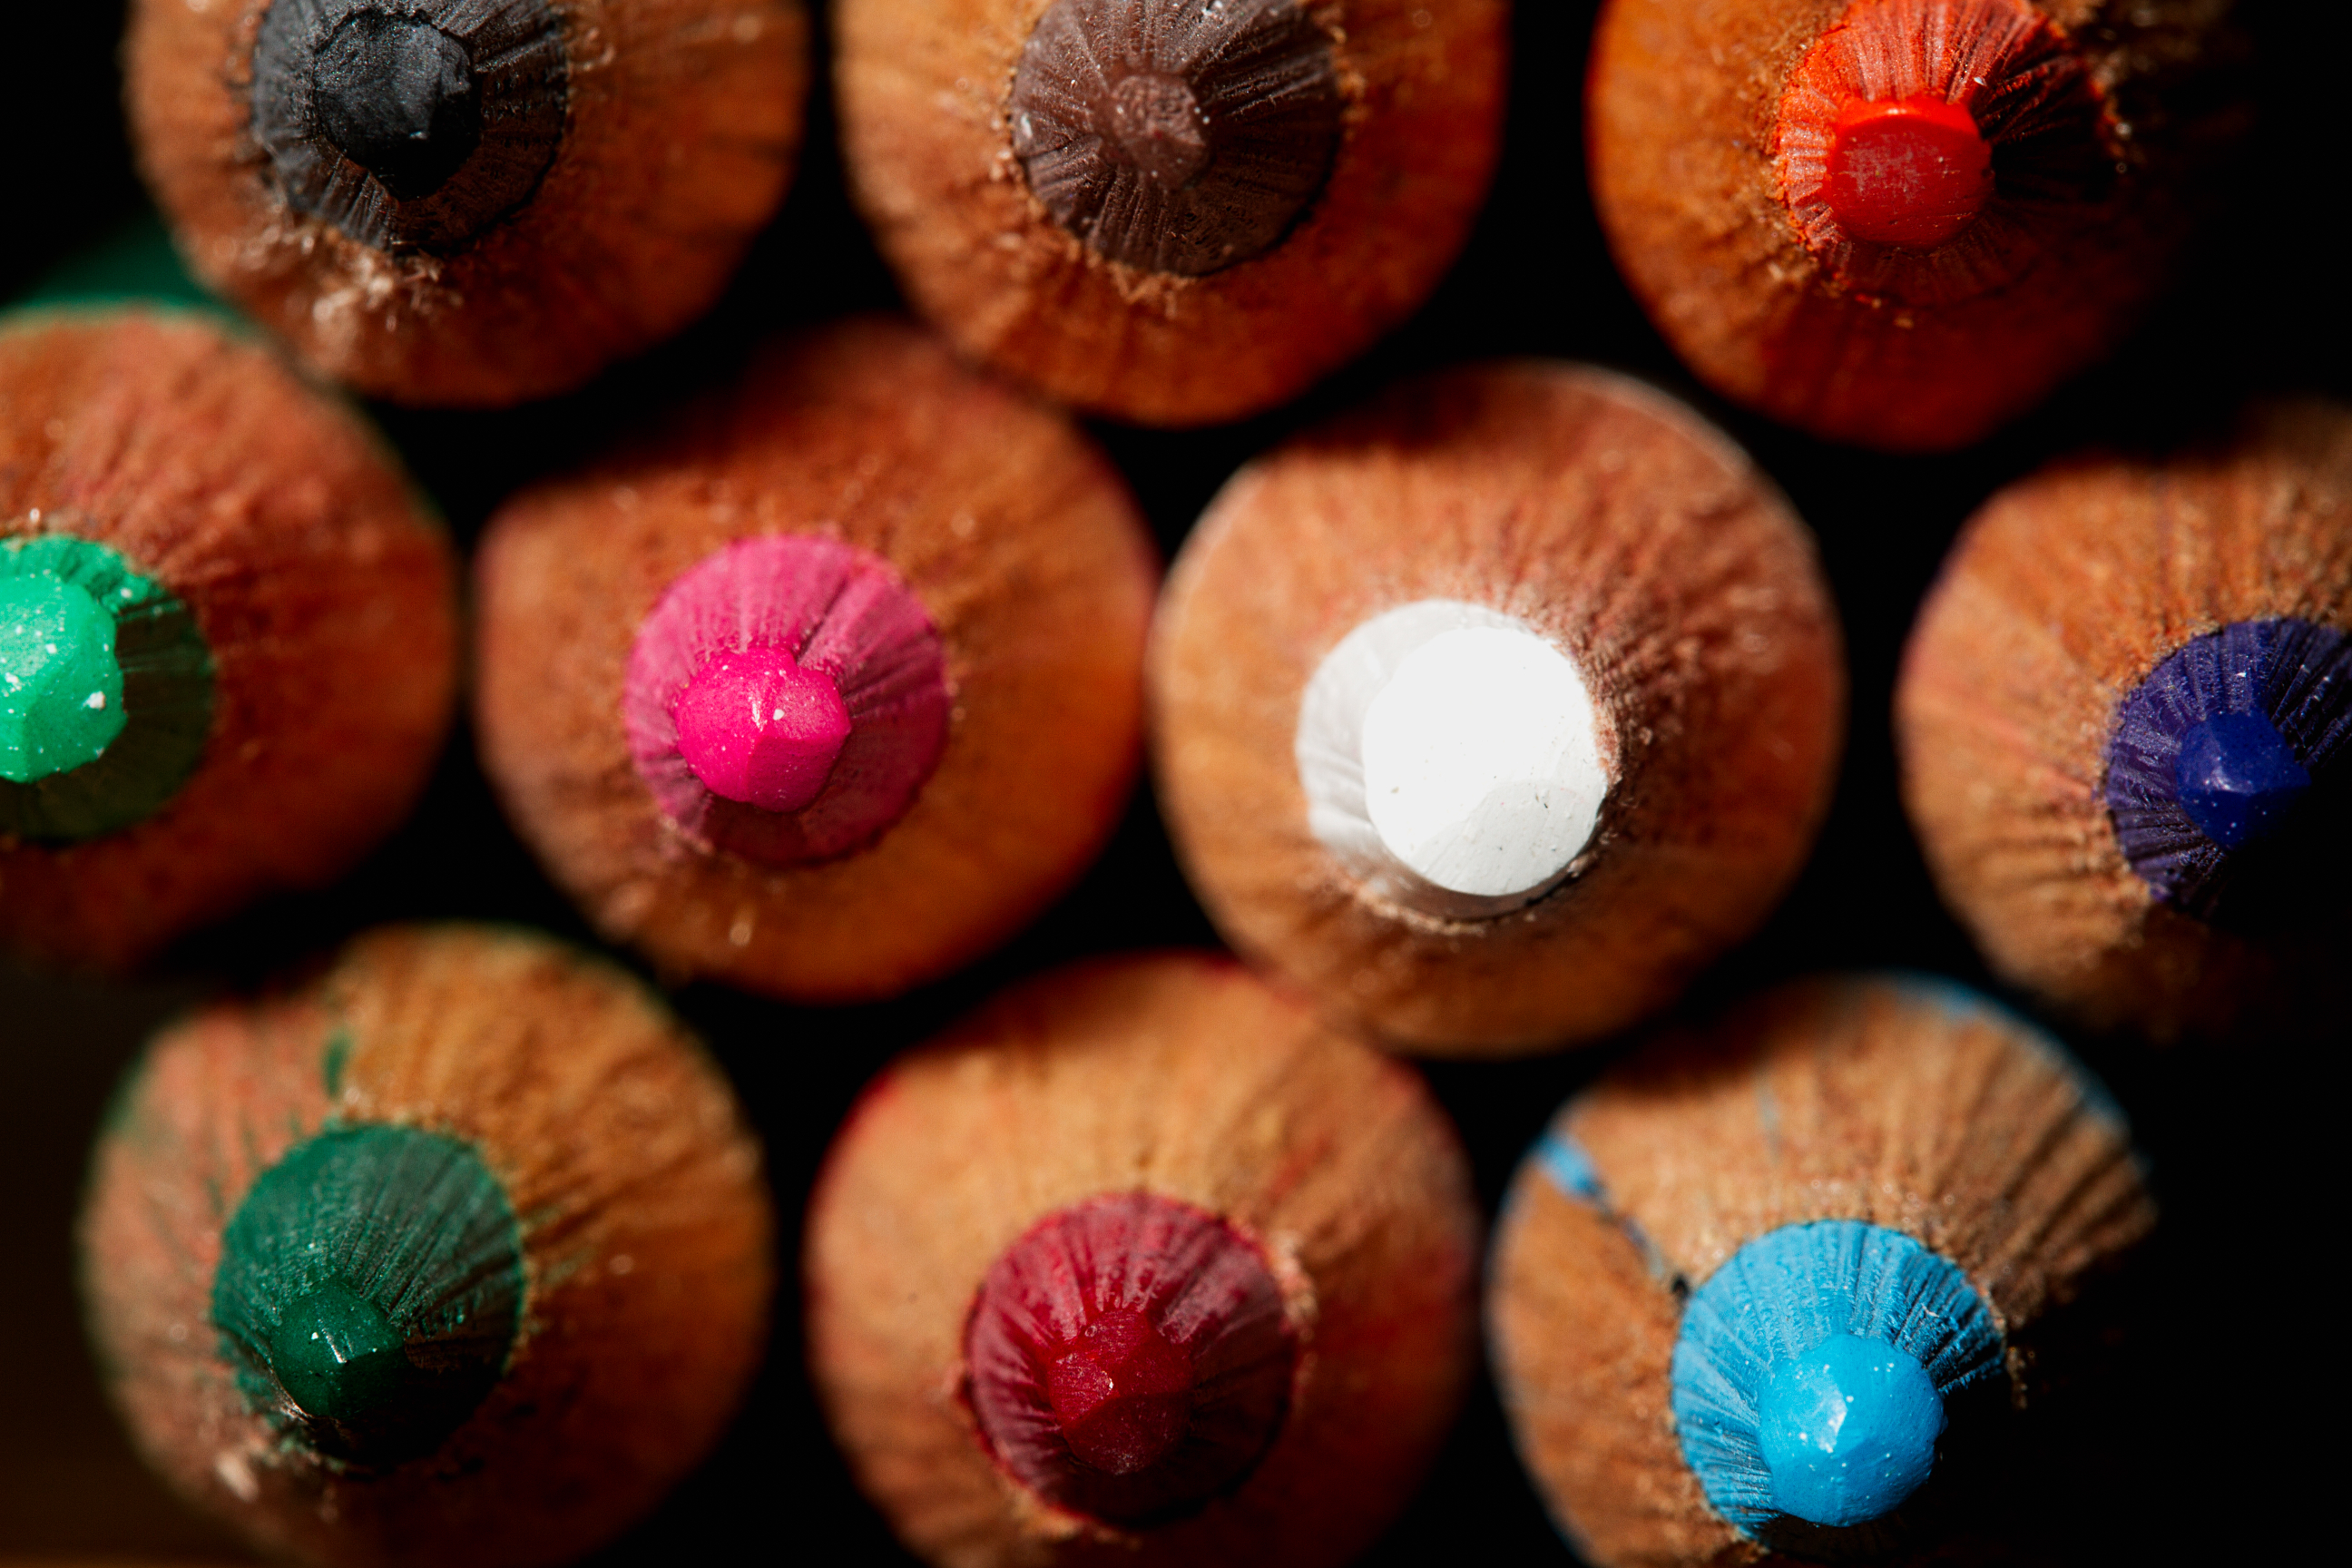
    Bottles, flowers, water drops & colourYesterday I showcased an image collection of 30 fabulous photos of pencils in an attempt to show how sometimes the every day objects around us can provide photographic inspiration.

    Today I thought it might be good to make this the theme of our weekly challenge. Your challenge is to take an share a photo with the theme of:

    Beauty in the Everyday

    I’ll let you interpret that theme any way that you wish but encourage you to carry your camera everywhere with you for at least a day or two and allow yourself to slow down and look for those beautiful things around you that you might normally rush past.

    Once you’ve taken your ‘Beauty in the Everyday’ shots we’d love to see them in comments below. Simply upload your shot into the comment field (look for the little camera icon in the Disqus comments section as pictured below) and they’ll get embedded for us all to see or if you’d prefer upload them to your favourite photo sharing site and leave the link to them.

    If you tag your photos on Flickr, Instagram, Twitter or other sites with Tagging tag them as #DPSEVERYDAYBEAUTY to help others find them. Linking back to this page might also help others know what you’re doing so that they can share in the fun.

    Also – don’t forget to check out some of the great shots posted in last weeks Bugs Eye View challenge – there were some fantastic shots submitted.

    Post originally from: Digital Photography Tips.

    Check out our more Photography Tips at Photography Tips for Beginners, Portrait Photography Tips and Wedding Photography Tips.

    Beauty in the Everyday

    The post Beauty in the Everyday by Darren Rowse appeared first on Digital Photography School.

    Digital Photography School

  • Pentatonix’ Daft Punk Video: Low Budget Meets Awesome Creativity

    If you are one of the five people on the internet who have not yet seen the new video of Pentatonix covering Daft Punk this week, you're in for a treat.

    And as cool as it is, dig a little deeper and it gets way better. This video is one percent budget and 99 percent pure talent and creativity — the latter of which will trump budget and scale every time.

    Read more »
    Strobist

  • 30 Fabulous Photos of Pencils

    By Rilind Hoxha

    It is going to be a rainy weekend where I live and I’m looking for a photographic project to amuse myself with.

    One challenge I love setting myself on such weekends when I’m trapped inside is to take an everyday item and to photograph it. Take the humble Pencil. It is something that most households would have… particularly those of us with kids. We probably see them every day – so why not make it the focus of your attention for the weekend.

    Here’s how 30 other photographers have tackled the challenge of photographing pencils!

    By Bernat Casero

    By Manjari Gopal

    By Rex Boggs

    By J L

    By J L

    By Jen Son

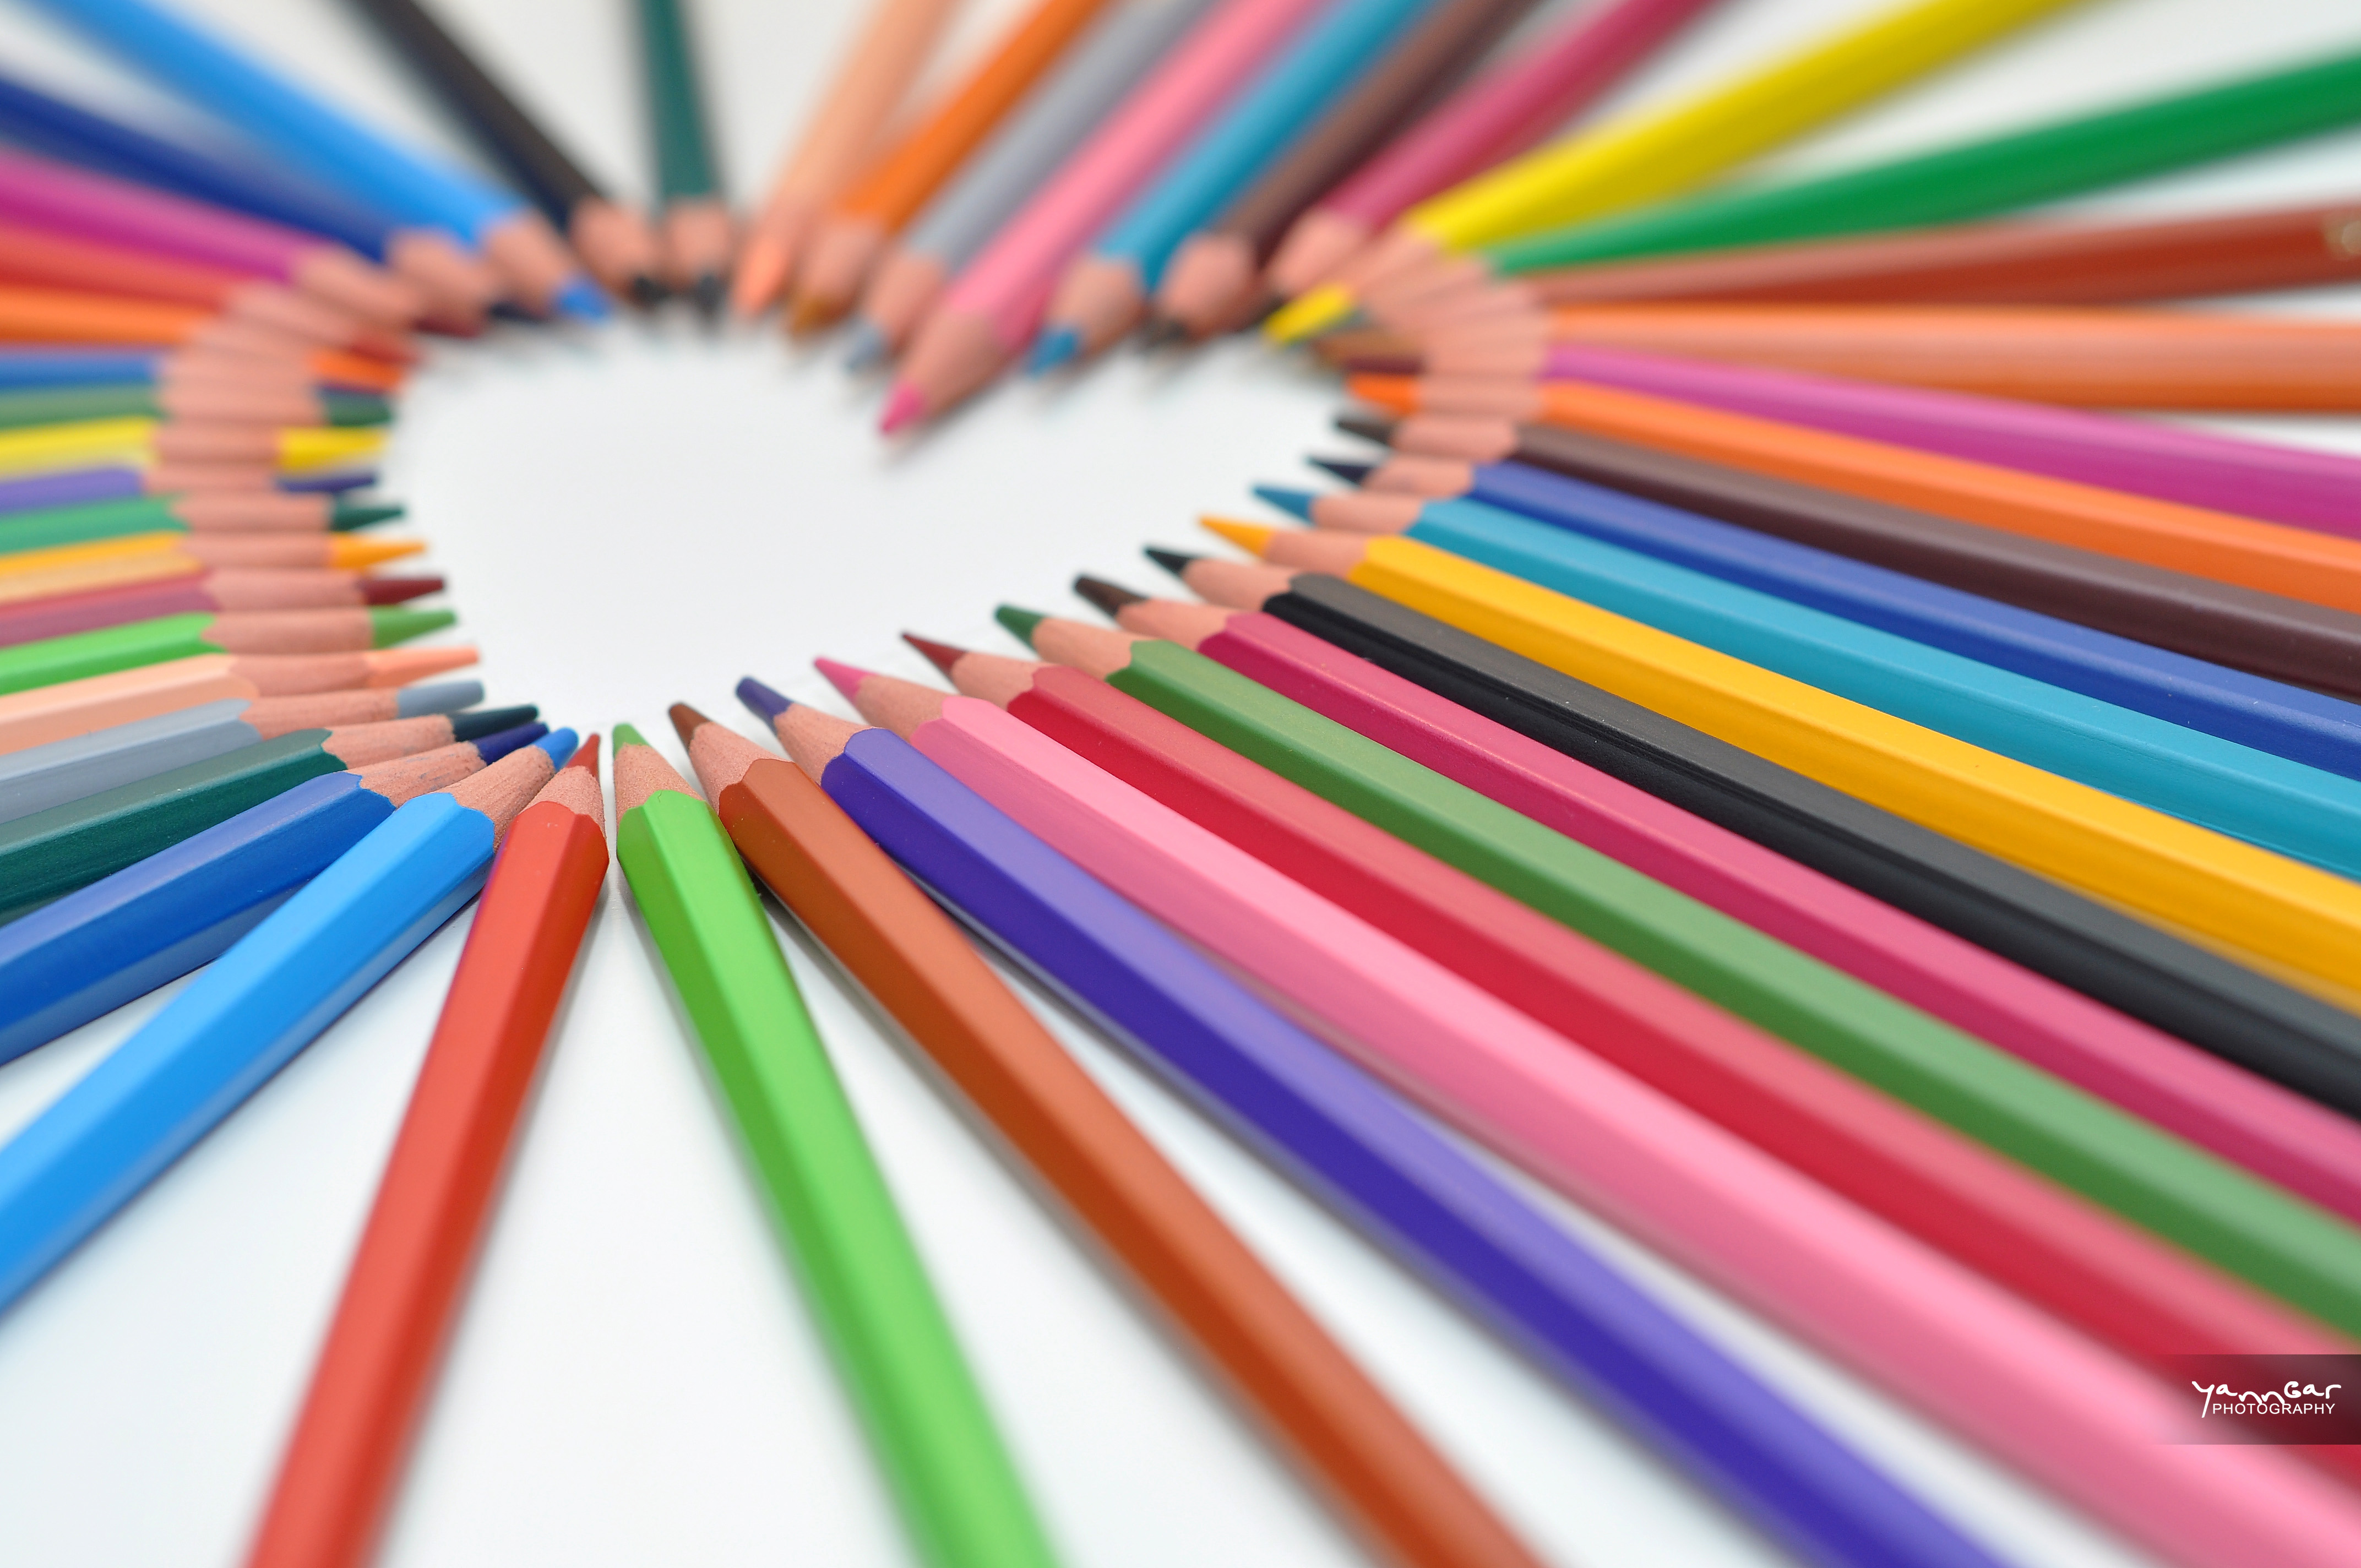
    By Yann Gar

    By David Blaikie

    By @Doug88888

    By Vineet Radhakrishnan

    By Pietro Izzo

    By Shane Mayer

    By Arjan Almekinders

    By Christian Yves Ocampo

    By Emi Yañez

    By Kabilan Subramanian

    By Lynda Giddens

    By Marc Dezemery

    By becca.peterson26

    By D. Sharon Pruitt

    By Bada Bing

    By Manjari Gopal

    By Jeff Carson

    By Natalie

    By Michael Chen

    By Andrés Nieto Porras

    By Jason Hickey

    By Nico Cavallotto

    By Petri Damstén

    Post originally from: Digital Photography Tips.

    Check out our more Photography Tips at Photography Tips for Beginners, Portrait Photography Tips and Wedding Photography Tips.

    30 Fabulous Photos of Pencils

    The post 30 Fabulous Photos of Pencils by Darren Rowse appeared first on Digital Photography School.


    Digital Photography School

  • How to Photograph the Night Sky, Part 1: The Milky Way

    Taking pictures of the heavens can be tricky. Not only do you need a fast camera, but you also need a clear night sky. This can be a tough situation to achieve, as not only are you up against the weather, but you also have light pollution and a number of other factors that can all contribute to making your Continue Reading

    The post How to Photograph the Night Sky, Part 1: The Milky Way appeared first on Photodoto.


    Photodoto

  • Fujilfilm XM1 Review [and XA1/XE2 Thoughts]

    A review of the Fujifilm XM1 by Ben Evans from www.EnglishPhotographer.com.

    I knew mirrorless cameras were the future when Fujifilm launched their X-Pro1. Small and light like a Leica but with the practicality of autofocus, it had the image quality to live up to its name. When Fujifilm put the same innovative X-trans sensor in the X-E1 I recommended it over its bigger brother.

    Fujilfilm XM1 Review 1

    Well, they’ve just done it again; the new X-M1 has the same amazing sensor in a smaller, lighter, cheaper camera body. Don’t confuse it with the X-A1, which doesn’t have the X-trans sensor. Or with the X100s, which can’t change lenses. Or with the XE-2, which is better but more expensive. We’re paying less, so we get less. What’s missing; and what do we miss?

    The X-Pro1 had a hybrid optical and electronic viewfinder and the screen. The X-E1 lost the optical viewfinder so action and low-light photography was trickier, but gave us an upgraded electronic viewfinder (apparently from Sony’s top-end RX1). The X-M1 has no viewfinder so you have to compose with the screen. In practice this means less battery life, shakier pictures and poor visibility in bright light. But now the screen tilts, which I like.

    Fujilfilm XM1 Review 2

    Gone also is the svelte metal toughness of the X-Pro1, replaced with pretty plastic. But gone too what little weight was there before. I carry too much, so lighter wins every time. If I wanted tough I’d get a Pentax.

    The kit lens is back to being a kit lens; cheap and slow with a maximum aperture from f3.5 to f5.6. This also means slower focussing in low light. There’s no aperture control on the lens nor switches for manual focus or stabilization. It’s pretty small and image quality is okay. But better to buy a proper X mount lens; the 35mm f1.4 beats all of Leica’s (it has autofocus!) and Zeiss now supports the system too. Fuji have a sensible roadmap for new lenses, which makes building a kit viable.

    With the same lens, the image quality of the X-M1 should match its pricier siblings. Reading around, it seems the different chip may diminish quality slightly, but this could be that the jpegs are tuned to the consumer’s taste for stronger noise reduction and more sharpening.

    Fujilfilm XM1 Review 3

    You also lose out with the controls. The X-M1 is a machined metal dial short of a immersive user experience. You’ll get used to it but its no X-Pro1. But for people who’ll just be using auto or program it’s really excellent and the quick menu is very helpful.

    Technology gets faster, and technology gets smaller. The X-M1 is as small as we’d want to go. Some manufacturers have made the mistake mobile phone makers made a few years ago; sacrificing usability for diminutive size.

    Fujilfilm XM1 Review 4

    This points to a characteristic of Fujifilm; they seem to understand what photographers want. Why? They listen. The XE1 had slow autofocus; the XE2 addresses this. The X Series cameras were a bit pricey for many people; the XM1 and XA1 were launched. It’s a pleasure to see a tiltable LCD screen on both.

    But there’s a flaw in that clichéd Capitalist aphorism, ‘give the people what they want’ – as Steve Jobs made a billion proving, often they don’t know until you show them. And so it is; the rush to flesh out the X system has led Fujifilm to launch too many cameras, too quickly.

    Fujilfilm XM1 Review 5

    Looking at the images, for the bodies are almost identical, the XM1 has only a small advantage over the XA1. So why pay more? Looking at the XM1, it’s difficult to ignore the similarly priced XE1s rendered obsolete by the XE2. They’re all great cameras, but what’s to choose between them?

    It comes down to how you’ll use it. Photographing an international event for charity that required social media engagement, the XM1 with its built-in wifi was the right choice; it’s simple enough to edit the images on a phone using Snapseed them upload them. The wifi is useful then; but surely it would be worth hiring an app developer to enable proper remote control of the camera too.

    Fujilfilm XM1 Review 6

    If you’re able, spend a bit more on the XE2 or the X-Pro2 if/when it’s announced. The quality will be a bit better, and you’ll benefit from faster focussing. Otherwise, compare the used/ end-of-line price of an XE1 against the XM1 and XA1, weighing up wifi and a tiltable LCD on the XM1/XA1 against slightly better quality and a viewfinder (XE1). Ultimately, it’s the quality problem of too much choice; pick one and just photograph with it!

    Fujilfilm XM1 Review 7

    Check out the new Fujifilm X-Series Video

    Ben Evans is the author of Photography: The Few Things You Need To Know, available at www.GreatBigBear.com. He is an English-speaking Barcelona photographer – www.EnglishPhotographer.com teaching photography with www.BarcelonaPhotographyCourses.com.

    Post originally from: Digital Photography Tips.

    Check out our more Photography Tips at Photography Tips for Beginners, Portrait Photography Tips and Wedding Photography Tips.

    Fujilfilm XM1 Review [and XA1/XE2 Thoughts]

    The post Fujilfilm XM1 Review [and XA1/XE2 Thoughts] by Guest Contributor appeared first on Digital Photography School.

    Digital Photography School