Category: Photography

  • Edit Like a Boss on Photoshop With ATNX Digital

    Photoshop actions are the best thing in the world if you use Photoshop a lot. Not only do they save you time and trouble, but they also empower you to improve your pictures any way you want. We don’t generally spotlight that many young companies, but one that we just thought you absolutely had to know about is ATNX Digital. Continue Reading

    The post Edit Like a Boss on Photoshop With ATNX Digital appeared first on Photodoto.


    Photodoto

  • Pushing the Limits to Overcome Photography Boredom

    By Guest Contributor Matthias Weinberger

    Pushing the Limits to Overcome Photography Boredom

    In the beginning the most interesting part of photography for me was the element of surprise and discovery. I was never were sure if what I did would turn out to be a great picture. Like an athlete I was always looking for the next adrenaline kick.

    Once you’ve been shooting for a couple of years that rush fades – because with the knowledge you have about lighting and composition you pretty much control everything in order for the final product to be perfect. Knowing the end result before a shoot is a must for a professional – but if you are doing it for fun it’s just not enough. That’s why I started to experiment with paint.

    Liquids have a mind of their own so to speak – they behave according to rules you cannot control. All you can do is set up your lights, choose the right gear and hope for the best. In the following series of pictures you can see the evolution and the different colours and paints I have tried over the years. As always the end result is a surprise to me – and that keeps it fun and fresh and makes me want to come back for more.

    Experimentation is part of the process of learning

    I love Portraits. The human face with all it’s features is an endless source of inspiration, wonder and surprise. Faces can express so many different moods and emotions-it’s unbelievable.

    Overcoming photography boredom 01

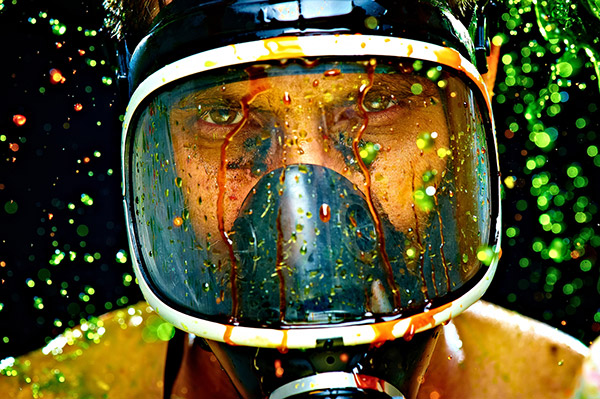
    I also love to be surprised during my shoots. What does a face tell you when it’s partially hidden? How does the mood of a picture change when the subject is wearing sunglasses? Or even a gas mask? What does your brain interpret? What goes on inside your head when you look at it?

    Ask yourself questions, learn from the answers.

    Overcoming photography boredom 02

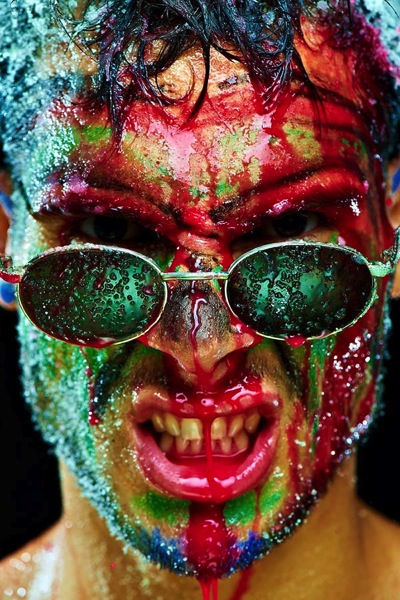
    This is why I started to experiment with applying different colours in my portraits. After I found a model who was willing to try anything, I bought some body painting pens – they looked like a set of Crayons in six different colours.

    We painted the models face and that was it. In this picture you can see the effect of these pens and sugar applied to his wet face, and a bit of red food colouring poured over his head.

    Overcoming photography boredom 03

    Take it up a level – get crazy

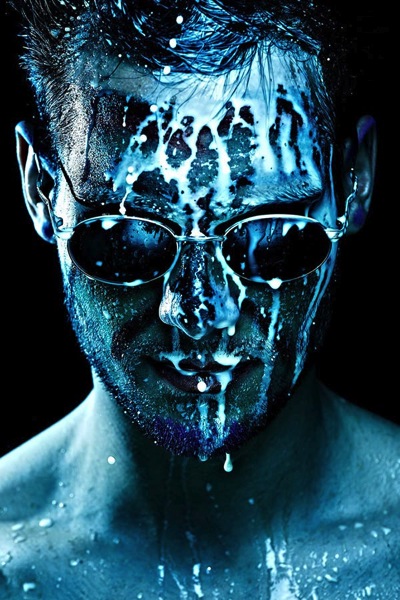
    The next step was to add more “drama” fluids. At first it was milk, again, just observing what would happen. Milk is great: when you pour it on, it runs down the face in completely random patterns-some of them really interesting and fascinating. Sometimes reminds me of a satellite image of a river delta that comes out of the rainforest.

    Overcoming photography boredom 04

    After that we started to add food colouring-red, green, yellow and orange. Some E-bay sellers made a fortune off my purchases.

    I found that food colouring alone didn’t give a good saturated look, the colours looked watered down. So I added tons of sugar and milk, making the mixture almost gel like. The added benefit was it also made it more viscous – so that when it ran down the face and started dripping there werea lot of single drops in the picture and also those long tendrils. Again, this is completely random and different from one picture to the next.

    Overcoming photography boredom 06

    While experimenting with these different recipes for what to pour on the model, I came upon finger painting colours for toddlers. Awesome stuff! Cheap, available in a great range of different colours, and easy to wash off.

    I try to cover as much skin as possible with colour. Normal skin is a distraction in these kinds of pictures.

    Overcoming photography boredom 07

    I’ve tried a lot of different methods for “delivery” as well: syringes, bowls in different sizes, watering cans, etc. Right now I’m using a big sponge which works really well. I just wring it out above their heads and see what happens.

    Overcoming photography boredom 08

    Equipment

    The equipment I use is:

    • a Nikon D600 (used to be a D700)
    • Lenses: either the 85mm 1.4 or the 24-70mm f/2.8 – both at f/7.1
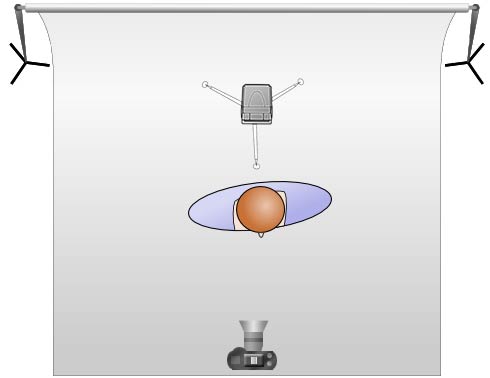
    • Flashes: usually 3 Speedlights. One from above into a softbox, the other two on either side as rim lights
    • A California Sunbounce Mini Reflector with the Zebra side up. CLS works great indoors-so that’s how I trigger the flashes.

    Tips for doing this kind of shoot:

    • Find a warm place, use warm water for mixing the food colouring and the sugar
    • Think about how you can clean up before the shoot!
    • Bring cleaning supplies, and don’t use a syringe to spray red water upwards. There will be hundreds of red dots on the white ceiling!!!

    Make sure the Model knows that he or she will be covered in paint, that the “recipe” tastes awful (and yes-at some point it will get in their mouth and their eyes where it will sting quite badly). Have a clean bowl of water at the ready for when it runs into their eyes so that they quickly can wash them out. If you look at her eyes you can see that it got behind her contact lens.

    Overcoming photography boredom 09

    If you stand in the same spot for an hour or two your back will hurt-so we always stand on pieces of foam, much more comfortable!

    Also since it’s very warm in the room we are shooting in, I’m wearing shorts too. And make sure to check your lens every so often, drops of the “recipe” will find their way to the lens also. Have a clean lens cloth ready.

    Processing notes

    I shoot RAW and post process my shots using Capture One 7. I increase saturation, tweak the levels with the curve tool, add sharpening, and play around with the colour balance and white balance. All in all, it doesn’t take me more than a minute to process a picture.

    Summary and words of wisdom

    As you can see, always keep pushing the envelope. If you have found a point in your work where you know what’s going to happen, move on. The brain likes novelty. Changing things keeps you on your toes, you learn something new and your photography is going to improve. If it doesn’t work out you can always come back to what you did before and try another approach.

    Last and most of all: have fun doing it!


    Matthias Weinberger is a “semi-professional button-pusher” according to his Flickr profile.

    • Find more of Matthias’ photos on Flickr
    • Visit his website
    • Find him on Facebook

    Post originally from: Digital Photography Tips.

    Check out our more Photography Tips at Photography Tips for Beginners, Portrait Photography Tips and Wedding Photography Tips.

    Pushing the Limits to Overcome Photography Boredom

    The post Pushing the Limits to Overcome Photography Boredom by Guest Contributor appeared first on Digital Photography School.


    Digital Photography School

  • 4 Tips for a Perfect White Background in High Key Photography

    A guest article by Tony Northrup, author of Stunning Digital Photography, on sale 20% off – now at SnapnDeals.

    A bright, white background creates a high energy, happy, and distraction free scene, perfect for pictures of your friends and family. Known as high key photography, this technique instantly cures problems with ugly backgrounds and focuses the viewer’s attention on your subject.

    Besides being a popular for portrait photographers, it’s a more modern choice, rather than traditional (ie., painted muslin). Here are my favourite tips for creating high key photos.

    4 tips for perfect white backgrounds in high key photography

    Tip #1 – Use a Solid White Background to Eliminate Distractions

    I used a big, white piece of paper as the background for this portrait of my twin nieces because anything natural for a background would have clashed with their colourful outfits. The brightness also perfectly matches their expressions.

    high-key-white-background-portraits-01b

    High-key backgrounds focus your attention on the subject

    High key photography was the perfect choice for this picture of my daughter eating a strawberry because there’s nothing to distract the viewer from her eyes and the strawberry. You don’t need to use an expensive camera or lens for this type of picture, because you can use any camera for high key photography.

    High key white background portraits 02

    The solid white background eliminates all distractions

    Tip #2 – use sunlight as your background

    A white background isn’t everything you need to create a perfect high key photograph, however. You need one additional ingredient – light. A white background without light doesn’t appear white in the photo, it appears grey. My flash failed to fire for this next photo, causing an ugly, grey background.

    If you don’t light your background, it will be grey

    If you don’t light your background, it will be grey

    To create a solid white background, you need to completely overexpose your background without overexposing your subject. That means you’ll need much more light on your background than on your foreground subject; about 16 times more light (or four stops of light).

    Fortunately, we all share a very powerful and free light source: the sun. For this photo of a radio talk show host and his dog, I had him kneel in my kitchen at midday when the sun was streaming through the glass doors behind him. I added three stops of exposure compensation to properly expose their faces. Because the sunlit background was much brighter than the shade in my kitchen, the camera captured it as solid white.

    High key white background portraits 04

    You can use the sun to create a bright background

    Tip #3 – use a flash on the background

    Another easy way to create a bright background is to light it with an off camera flash. Simply move your model four to six feet away from your background and hide a flash behind your model, pointing it at the background. When you take your photo, the flash will light the background to overexpose it and make it appear completely white.

    An off camera flash doesn’t have to be expensive. Any manual flash with an optical slave will work, including the $ 60 (US) YongNuo YN-560 that I often use. Simply turn on both the flash’s optical slave and your built-in flash. When you take a picture, your flash will trigger the off camera flash to light the background.

    High key white background portraits 05

    Place a flash behind your subject to light the background

    For more information about using flash both on-camera and off-camera, refer to Chapters 3 and 6 of Stunning Digital Photography.

    Tip #4 – don’t over, overexpose the background

    You can overexpose a high key background too much. If you bounce too much light off your background, the backlighting will overtake your model and wash out your picture. For example, the picture on the left had too much light on the background, while the picture on the right had just the right amount.

    If you have too much light on your background, it’ll wash out your subject

    If you have too much light on your background, it’ll wash out your subject

    To get a perfectly white background without washing out your picture, start your background light at its lowest power and increase it one stop at a time until the background is barely overexposed. In this video, my wife Chelsea and I show you exactly how to find the perfect flash output. Our book, Stunning Digital Photography, includes more than six hour of video integrated into the lessons, because photography is a visual art, and often it’s easier to learn by watching than reading.

    Summary

    High key photography is challenging because it requires you to create an intentionally overexposed background while still properly exposing your subject. Once you learn how to use exposure compensation and light your background, you’ll be able to create perfect white backgrounds in just a few minutes.


    Award-winning author and photographer Tony Northrup has published more than 30 how-to books and sold more than a million copies around the world. His photography book, Stunning Digital Photography, is the best-selling photography book in the world and the top-rated instructional book of all time. His photos have been featured on magazine covers, book covers, CD covers, TV shows, calendars, and much more. He runs a stock and portrait photography business with his family, Chelsea and Madelyn, out of his home studio in Waterford, CT. He shoots travel and nature photography everywhere he goes.

    Post originally from: Digital Photography Tips.

    Check out our more Photography Tips at Photography Tips for Beginners, Portrait Photography Tips and Wedding Photography Tips.

    4 Tips for a Perfect White Background in High Key Photography

    The post 4 Tips for a Perfect White Background in High Key Photography by Guest Contributor appeared first on Digital Photography School.


    Digital Photography School

  • Tips for Photographing Star Trails

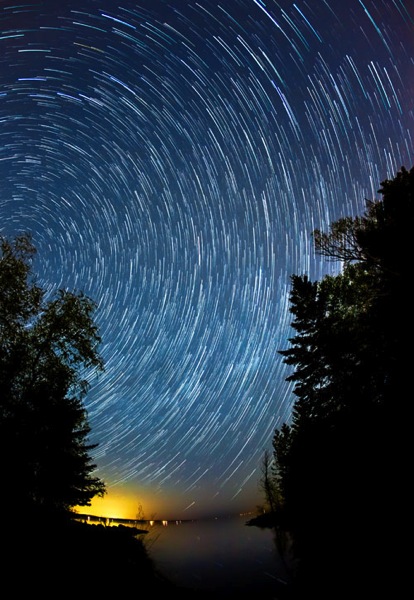
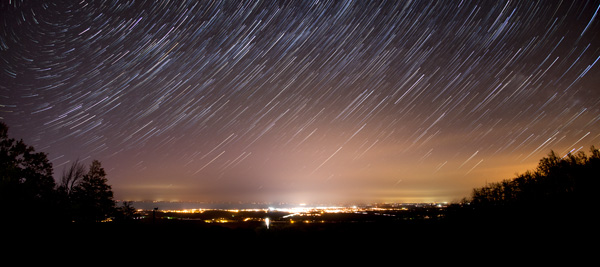
    Photography is a fantastic tool to explore the world around you, especially in ways normally invisible to our eyes. Landscapes at night often reveal untold treasures in the sky, and the stars can be made to swirl around like a dream. The process for photographing the movement of the stars isn’t nearly as difficult as it once was; star trails can be easily captured by any camera with a wired shutter release cable!

    Enjoy these tips for photographing star trails at night! 

    Star trail open

    Composition comes first

    There are a few things to consider when making a star trail image; the first is composition. As with any good landscape photograph, you should be able to visually navigate through the image. A foreground element is very helpful, and having water in the scene is a bonus – the stars can reflect off the surface of the water. The image shouldn’t only be about the stars, but how they interact with the landscape.

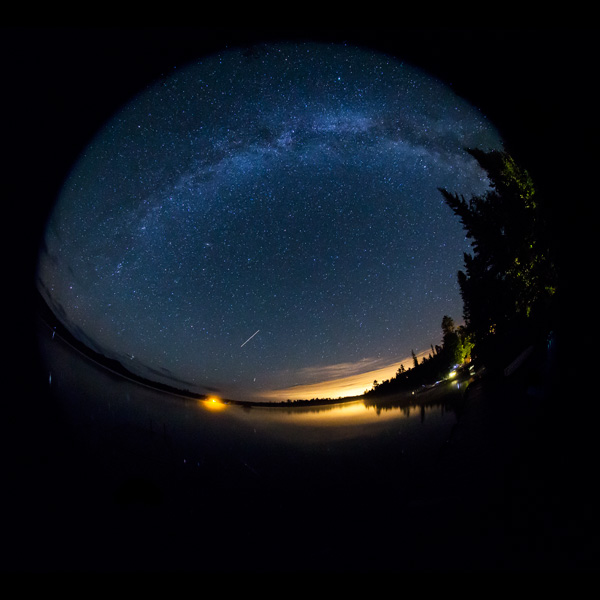
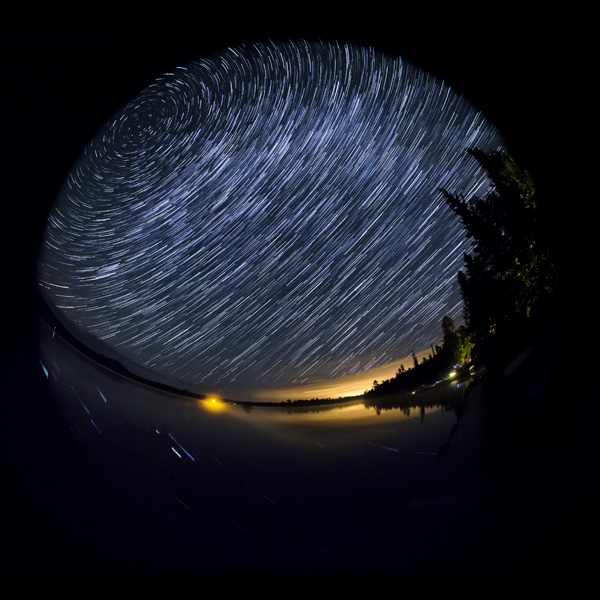
    You should try to shoot with the widest lens you have. This offers more stars to fill the night sky, and also a greater potential to have the North Star somewhere in the frame. Most of my star trail images are photographed with a fisheye lens, because of the 180 degree field of view. The wider the field of view, the more star trails your image can contain.

    As the Earth spins around its axis, the North Star is the only star that doesn’t move (much). All of the other stars appear to spinning around this central location, which can add a visual anchor point in your composition. If you’re not familiar with the exact position of the North Star, simply set your camera to bulb mode and take an extra-long exposure in the neighbourhood of 4-5 minutes. This should give enough of a “spin” so the stars to help you pinpoint the center of the celestial circle.

    Camera settings

    The goal for your final image however, requires a different exposure. Start with the following, set on manual mode:

    • Shutter speed: 30 seconds
    • Aperture: F/3.5
    • ISO: 3200

    Take a test shot and see what you get. If the exposure is too bright, decrease the ISO or choose a smaller aperture (higher F-number). If the image is too dark, try increasing the ISO to compensate. Always leave the shutter speed at 30 seconds. When you get an exposure that looks good on the back of your camera, you’re set. Just make sure the camera is set to continuous shooting mode with long-exposure noise reduction turned OFF.

    Also be sure to set the camera or lens to manual focus. The focus can’t shift from one image to the next, so dial it in manually. I find that focusing on distant light sources using Live View allows for the best depth of field while still keeping the stars sharp. Foreground objects may appear blurry, so going the “extra mile” would be to focus on the foreground and focus-stack the landscape.

    With a wired remote shutter release, press and lock the shutter control. When one exposure ends, the next one will automatically begin. Let the camera continue this way for roughly an hour, and stop it whenever you’re ready to leave. If you left the camera for one hour, it should have recorded 120 separate 30-second exposures. These images can then be combined very easily in Photoshop.

    Forgot your remote shutter release, or haven’t purchased one yet? I’ve found myself ready to make a star trail image and digging around in my camera bag offered me no cable release – it was somewhere at home, far far away. In a rare moment of creativity, I grabbed some tape (always keep some Gaffer’s tape in your camera bag!) and a small pebble from the ground. Simply taping the pebble over the camera’s shutter button with enough force to fully depress the shutter, the camera happily clicked away until the tape was removed. The below image was created this this “rock and tape” trick.

    Rock tape trick

    Post-processing workflow

    Combining 120 images may seem like a daunting task, but the process is fairly straightforward – start by editing one image. In Adobe Lightroom, edit your image to your liking. Common adjustments would usually include shadows and whites, white balance, clarity, and noise reduction.

    Single frame

    Make this one frame as perfect as you can make it, and copy the development settings. Right-click on the image in Lightroom and choose “Settings > Copy Settings” and make sure all of the settings you’ve adjusted are selected.

    You’ll need to paste these settings across the entire range of images. To do this, select all of the images you want to use in the filmstrip, and right-click on any of the selected thumbnails in the filmstrip. Now, choose “Develop Settings > Paste Settings” and your adjustments will appear on all of your images.

    Alternate method to paste settings

    There are a few ways inside Lightroom to copy and paste develop settings. Another way, which is particularly helpful when sharing settings over many images, is to use the “sync” feature. To do a Sync make sure the image you’ve worked on it selected in the filmstrip and visible on screen. Do a “select all” by holding “command+a” on a Mac or control+a on PC. That will select all the images in the folder. Next click the “sync” button in the lower right of the develop side panel. Choose all the settings you adjusted (as above) and click “synchronize”.

    Putting them all together in Photoshop

    You now need to send all of the images over to Photoshop in a single layer. With all of the frames still selected, right-click on any image and choose “Edit In > Open as Layers in Photoshop” and wait. This will take some time as Photoshop loads each frame into the same workspace as layers.

    When all of the layers are finished loading, the next step is simple for users of Photoshop CS6 and beyond. Simply select all of the layers in the layers panel, and switch the blending mode from “normal” to “lighten”. Voila! The path of the stars through the sky will be revealed. This blending mode works by comparing pixels of all layers and displaying the brightest pixel. If the landscape remains static, there won’t be any change there, avoiding the additive effects of light pollution. The stars are moving, and as their position in the image changes the new location will contain brighter pixels.

    Stacked frames

    For users of Photoshop CS5 or previous, this can still be done but it will take some time. You cannot select multiple layers and change the blending mode on them all at once, it must be done one at a time.

    When you’re done, flatten the image and save it. Continue to edit as you see fit, but the star trail is complete!

    An alternative to Photoshop

    Another option if you do not use Lightroom or Photoshop is to use a free program call StarStaX. It’s easy to use, just drop your images in and it does all the magic for you, AND even fills in the tiny gaps between each of the exposures.

    Post originally from: Digital Photography Tips.

    Check out our more Photography Tips at Photography Tips for Beginners, Portrait Photography Tips and Wedding Photography Tips.

    Tips for Photographing Star Trails

    The post Tips for Photographing Star Trails by Don Komarechka appeared first on Digital Photography School.


    Digital Photography School

  • Using Sun Flares and Starbursts to Create Stunning Images

    This is a guest post by Katie McEnaney

    An Introduction to Sun Flares and Starbursts

    A sun flare or starburst is an incredibly cool photographic technique and one that is easy to achieve without any special post-processing or editing tricks. You will be amazed at the effects you can create by learning a few simple settings and knowing the proper situations for taking beautiful sun flare and starburst photographs.

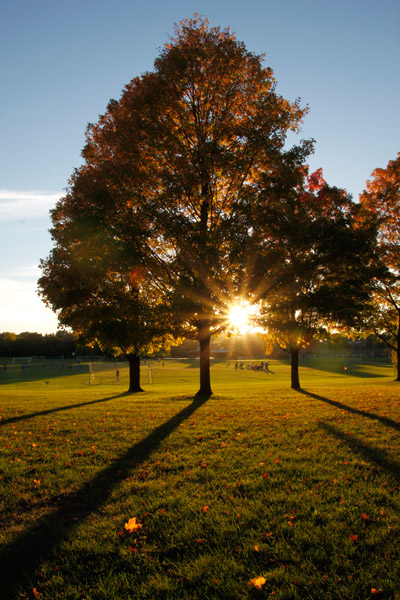
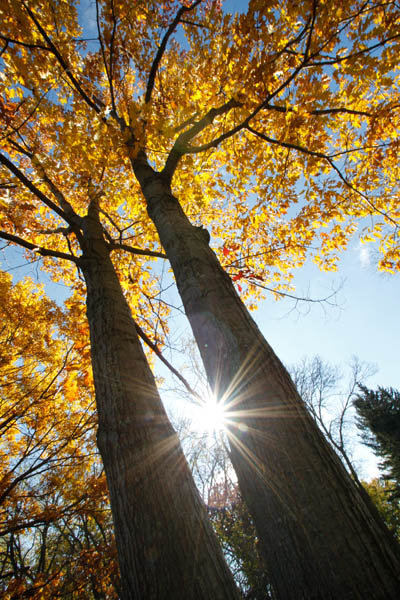
    McEnaney sunflare vertical tree

    How to Shoot Sun Flares and Starbursts

    It is possible to obtain sun flare and starburst images with a point and shoot camera, but for more reliable results, you will want to use a DSLR or interchangeable lens camera with adjustable aperture. A UV filter on your lens is suggested to protect your camera’s sensor, as you will be shooting directly into the sun when capturing sun flares. Stability is critical for capturing starbursts, so a sturdy tripod and remote shutter release are recommended.

    The technique for shooting successful sun flares and starbursts is to use a narrow aperture such as f/22 and a relatively wide focal length like 18 mm. With a narrow aperture, the blades inside your lens close down to create a very small opening for light to pass through. This narrow opening creates a slight diffraction or bending of the light, which causes a point source of light (described below) to become a starburst shape when it hits and is recorded by the camera’s sensor. Different lenses are built with different numbers of blades: the more blades, the greater the number of points on the flare or starburst. The wider the focal length also contributes to the size of the starburst shape, as a wider focal length can create a larger starburst.

    For settings, you want to start by shooting in Aperture priority (Av for Canon or A for Nikon) mode and setting your aperture to f/22. You also want to shoot at a fairly low ISO, around 100-200, to avoid the increased noise of higher ISO values. The camera will then choose the shutter speed. If the final image turns out too dark or too light, you can switch to shooting in Manual mode, dial in the same settings, and then slightly increase the shutter speed for a lighter picture or decrease the shutter speed for a darker picture.

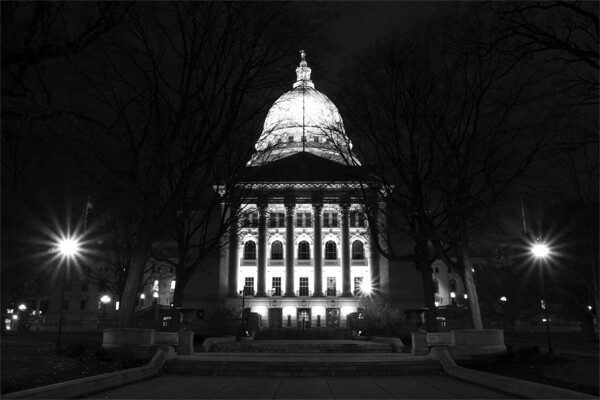
    McEnaney Capitol night starbursts

    In lower light situations, your shutter speed may become so slow that you need a tripod to ensure a steady shot. (The general rule of thumb is that you should be able to successfully hand-hold a shot at a shutter speed of 1 over the focal length of the lens. For example, you should be able to hand-hold a shot with an 18 mm lens at 1/18th of a second or faster or a 50 mm lens at 1/50th of a second or faster.) If you are photographing starbursts after dark, then your shutter speeds will generally be slow enough to require a tripod or other stable surface. The alternative option would be to start increasing your ISO, which will also increase the noise in the final image.

    Along with the tripod, a remote shutter release (corded or wireless) is helpful to avoid shaking the camera when pressing the shutter button. If you do not have a remote, you can set the 2-second or 10-second timer on your camera instead. A remote shutter release also allows you to use the Bulb setting on your camera to get shutter speeds longer than 30 seconds.

    Timing and Strategies for Sun Flares and Starbursts

    Sunbursts and starbursts are created from small point sources of light, rather than larger dispersed or diffused light sources. A point source is one where light is emanating from a singular location: a bulb in a street lamp, a car headlight, a direct flashlight, even strings of holiday lights. A dispersed light source is one where light is emanating from a broader location: a frosted light bulb, an overhead florescent light panel, or the tubes of a neon sign. A diffused light source is one where the location of the light is very spread out or difficult to detect: the sun in an overcast sky, large studio lights with diffusers or softboxes, or light bounced off a large surface or reflector.

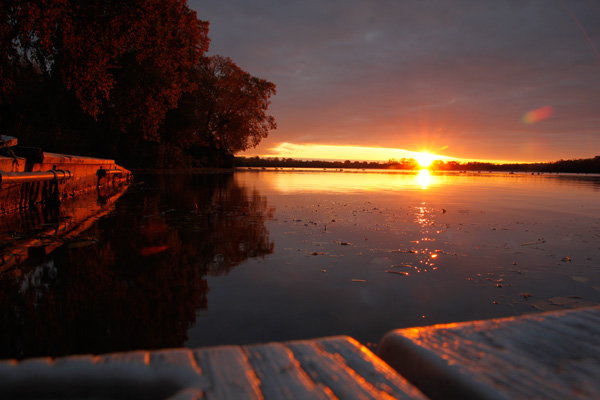
    McEnaney sunrise sunflare

    The sun is not generally a point source of light, as it is often too bright and overwhelming to create a sun flare. So, the best time to capture sun flares is when the sun is low in the sky, either in the early morning or late afternoon. The winter season is ideal for sun flares, as the sun is lower in the sky for longer periods of the day.

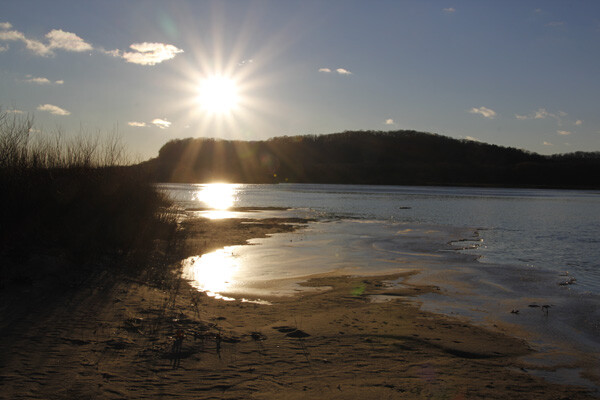
    sun flare and starburst photo

    Once you have the right time of day, the second step for creating a sun flare is to position the sun in your composition so that it is partially obscured behind another object, such as a tree or the edge of a building. Even at low angles, the sun can still be so bright that it will overwhelm your scene and create large bright patches rather than a starburst shape. Partially obscuring the sun also serves to amplify the effect of the narrow aperture. Position the camera so that the sun is directly behind the object and determine your final composition. Then, move the camera slightly until the sun is just beginning to peak out from behind the object and take the picture.

    McEnaney sunflare two trees

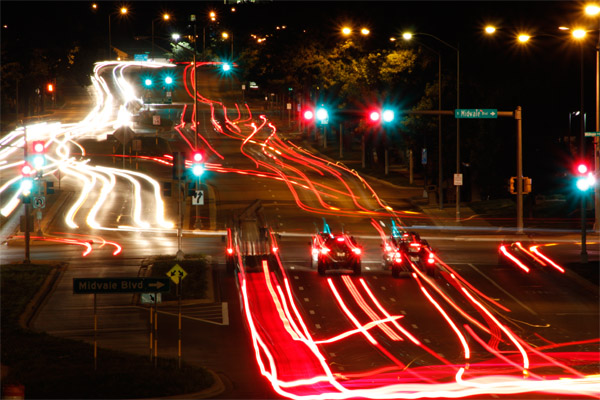
    To create starbursts at night, you need to find suitable point sources of light. Street lamps and strings of lights work well. Because these sources are not as overpowering as the sun, you do not need to partially obscure them. This gives you a wider range of compositional choices. You can also combine multiple point sources of light to create an entire collection of starbursts in a single image. Moving lights will be rendered as blurs or light trails, while stationary lights will become starbursts.

    McEnaney traffic trails

    Composing with Sun Flares and Starbursts

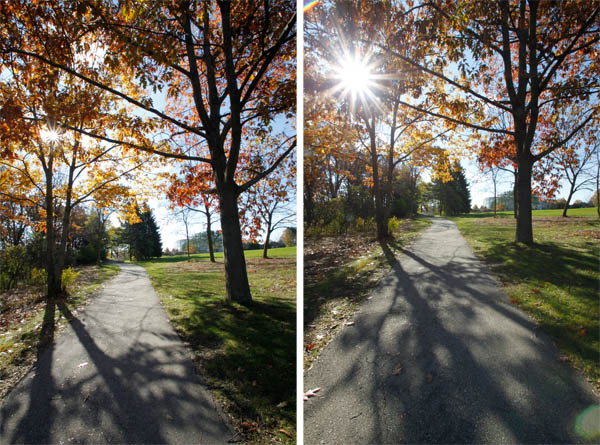
    Be willing to be patient and experiment with your compositions and angles for sun flares. Slight differences in the angle of the sun and the amount of sunlight streaming in can make a big difference in your final image. The two images below were taken of the same tree, two minutes apart. The only compositional difference was backing up several feet for the second image, so that the sun was only barely obscured by leaves rather than partially blocked by the trunk.

    McEnaney sunflare compare

    Once you have mastered the single flare, you can step up the challenge and capture multiple sun flares in a single image. An easy way to do this is to use reflected light. Light reflecting off several points or different surfaces can create multiple individual point sources. Look for situations where sunlight is bouncing off water, vehicles, or other reflective surfaces. In this goodbye photograph of my old car, the multiple flares were created by the sunlight bouncing off the dents and divots of the hail damage on the hood (bonnet) of the car.

    McEnaney car sunflares

    Starbursts are a great effect to use with holiday lights. Each individual light is a point source and can be rendered as its own starburst. The starburst look adds an extra sparkle to your holiday images, but you can use strings of white or colored lights to add starbursts to any kind of subject you choose.

    McEnaney holiday starbursts

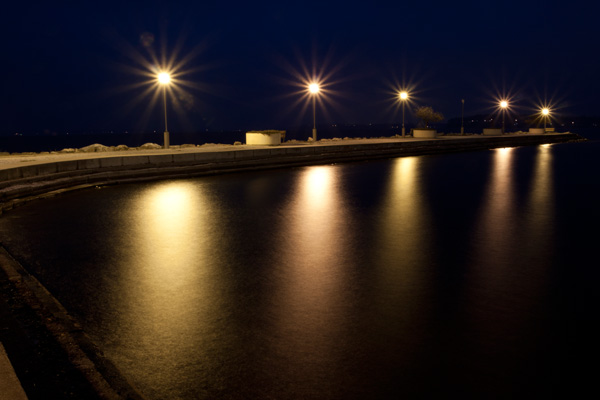
    For cityscape starbursts, seek out locations with congregations of street lights or other point sources of light. The blue hour (the approximate hour before sunrise or after sunset) is an ideal time to photograph lights outside, as the deep blue colors in the sky set off the scene. Your camera will record these blue colors for a short time even after they are no longer visible to your eyes.

    McEnaney starbursts water

    Now that you know the basic idea behind sun flares and starbursts, you will start seeing opportunities everywhere. Get your f/22 aperture ready, and get out there!


    Katie McEnaney is an educator and photographer from Madison, Wisconsin. Read more tips on her blog, Boost Your Photography, and connect with her on Google+, Twitter @archaeofrog, and Flickr. Her first eBook, Boost Your Photography: Learn Your DSLR, will be available soon on Amazon.

    Post originally from: Digital Photography Tips.

    Check out our more Photography Tips at Photography Tips for Beginners, Portrait Photography Tips and Wedding Photography Tips.

    Using Sun Flares and Starbursts to Create Stunning Images

    The post Using Sun Flares and Starbursts to Create Stunning Images by Guest Contributor appeared first on Digital Photography School.


    Digital Photography School

  • Stop Calling Yourself a Real Photographer if You Suck

    It has been about five years since I left my office job to make photos on a full-time basis. Still, I feel quite uncomfortable calling myself a photographer. Yes, my photos occasionally appear on glossy magazines covers; sometimes I see my photos on billboards in the center of the city, but still, am I a real photographer? While this may Continue Reading

    The post Stop Calling Yourself a Real Photographer if You Suck appeared first on Photodoto.


    Photodoto

  • Capture PRO Camera Clip Review

    A Better Way to Carry Your Camera?

    The updated Capture PRO from Peak Design offers a secure, hands-free alternative to traditional camera straps.

    The updated Capture PRO from Peak Design offers a secure, hands-free alternative to traditional camera straps.

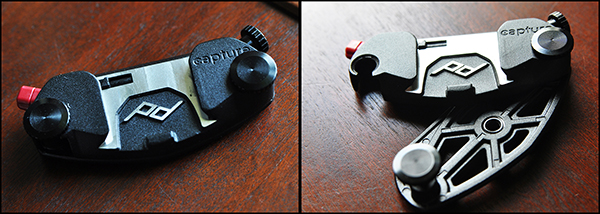
    About a year and a half ago I posted a short review on Facebook of the original version of the Capture Camera Clip from Peak Design Ltd. Since getting my hands on it, Capture has become an integral tool for my location, event, and street photography, as well as a perfect solution for quick camera access while I’m teaching, either in the classroom or on location. That’s why I was so excited last August, when the San Francisco-based company launched two updated versions of Capture in what would end up being a wildly successful Kickstarter campaign. Going back to the community that helped make the original Capture such a popular accessory, the crowd-funded project raised $ 819,108 in just 54 days– crushing its goal of $ 100,00. With numbers like that, I had to find out how Capture Pro measured up to the original. You may have read Sime’s preview of the new versions before their release back in August, but now that I’ve had a chance to put Capture PRO through its paces for a few months, I figured it was time for an update.

    What is Capture?

    So, what is Capture? Imagine taking the quick-release assembly off your tripod and attaching it to your belt. Or your backpack strap. Or the shoulder strap from your camera bag. Or a climbing harness. Getting the idea? Simply put, the Capture Camera Clip allows you to use virtually any strap of almost any thickness to keep your camera close at hand and ready to go. I’ve never been a fan of traditional camera straps. Regardless of whether it is around my neck or over my shoulder, the weight is a strain and at least one hand is always on the camera, making sure it’s not bumping into anything or anyone. Sling straps are a great solution, but still get in the way when you are carrying a camera bag.  Capture not only allows me to “go strapless,” but also frees up my hands.

    On the left, closed and locked. Sturdy-but-lightweight design makes sure Capture stays in place.

    On the left, closed and locked. Sturdy-but-lightweight design makes sure Capture stays in place.

    What’s New

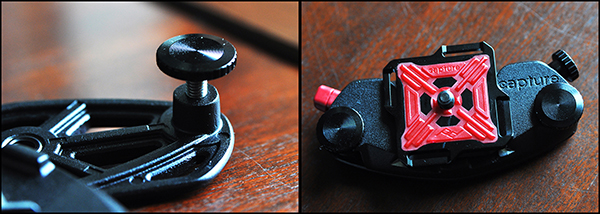
    As great as the original was, Version 1 was not without a few minor drawbacks, most notably its hard corners and uncomfortable screws. It’s always refreshing when companies take the time to not only listen to feedback from their customers, but to implement those suggestions into newer, better products. Constructed from die-cast aluminum, the clip is tightened into place with zinc-alloy clamping bolts. These bolts are what allows the clip to adjust to belts and straps of different thicknesses.  The new streamlined design is stronger and lighter, with a more narrow profile and smoother mechanics, while retaining all of the convenience and functionality of the original.

    Zinc-alloy clamping bolts adjust to the thickness of the strap, and the standard ARCA Plate makes the unit compatible with a wide range of tripods.

    Zinc-alloy clamping bolts adjust to the thickness of the strap, and the standard ARCA Plate makes the unit compatible with a wide range of tripods.

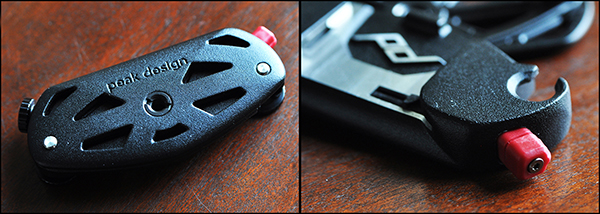
    Perhaps the best added features however, are the mounting hole on the bottom for monopods and tripods (Pro version only), and the twisting safety lock on the quick release buttons for both Pro and V2.  The standard ARCA Plate is already compatible with ARCA-style tripod heads, but making the entire clip tripod-mountable adds a new facet of convenience that did not exist in the original.  While the original version had a twist lock for added security, both Capture PRO and Capture V2 have added an additional  safety lock to the quick release button, making sure that once latched, your camera isn’t going anywhere.  This comes in particularly handy for event photographers who have to navigate through large crowds. In one test, I had a group of friends try to strip my camera from the clip at my waist as I worked a crowd. All were unsuccessful.

    The new tripod socket on the bottom and additional locking mechanism on the quick release button add functionality and security to the original design.

    The new tripod socket on the bottom and additional locking mechanism on the quick release button add new levels of functionality and security to the original design.

    Room for Improvement?

    There is always room for improvement. No product is perfect, but any of the negative things I have to say about Capture are pretty minor– merely a matter of personal preference, and have no bearing on the quality of the product itself. For instance, I would have preferred for the quick-release button on the opposite side of the clip, but that doesn’t affect the quality of the build or the functionality of the device.

    New Accessories

    I prefer using Capture with lenses like the 24-70mm, the 35mm, or the 50mm. I wasn’t crazy about how Version 1 handled the extra weight and awkward movement of a larger lens, like the 70-200mm. With the new Capture PROpad, however, the developers and designers have gone a long way to solving this comfort and stability issue. The firm, compression-molded padding eases part of the load, redistributing some of the added weight of longer lenses.

    Another new accessory– the POV Kit– turns the Capture Clip into a mount for any GoPro or small point-and-shoot camera. Getting POV photos or video from your backpack straps or similar vantage points has never been easier.

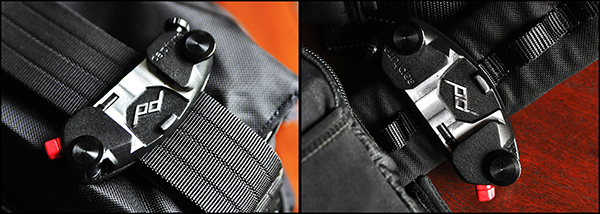
    On the left, Capture attached to the shoulder strap of a Think Tank City Walker 30 camera bag. On the right, attached to a Think Tank Pro Speed Belt.

    On the left, Capture attached to the shoulder strap of a Think Tank City Walker 30 camera bag. On the right, attached to a Think Tank Pro Speed Belt.

    The Bottom Line

    The Capture Camera Clip offers a great solution for photographers who don’t like traditional straps, but still want a well-made, safe, secure, hands-free way of carrying their camera.  One of the best things you can say about Capture– or any product for that matter– is that it does what it’s supposed to do and it does it well.  One of the great things about Capture is that you can expand its functionality by incorporating the Leash and Cuff camera straps, also from Peak Design.

    The last two sentences of that Facebook review I wrote a year and a half ago are even more true now than they were when I first wrote them about the original Capture. “Every once in a while someone comes out with a piece of gear that leaves you scratching your head, wondering why you didn’t come up with the idea yourself.  This is one of them.”

    Capture Pro and Capture V2, as well as the PROPad, POV Kit, Leash, and Cuff are all available on the Peak Design Wesbite.


    Post originally from: Digital Photography Tips.

    Check out our more Photography Tips at Photography Tips for Beginners, Portrait Photography Tips and Wedding Photography Tips.

    Capture PRO Camera Clip Review

    The post Capture PRO Camera Clip Review by Jeff Guyer appeared first on Digital Photography School.


    Digital Photography School

  • Long Exposure Photography Tutorial

    “That Nikon Guy” aka Mark Granger does a great job of showing how to use long exposures in different situations to get some stunning effects.

    Make sure to watch all the way to the end for his extra special tip on traversing the rocks! Worth a chuckle.

    Share your long exposure images

    If you have some examples of long exposure photography, please share them in the comments below.

    Post originally from: Digital Photography Tips.

    Check out our more Photography Tips at Photography Tips for Beginners, Portrait Photography Tips and Wedding Photography Tips.

    Long Exposure Photography Tutorial

    The post Long Exposure Photography Tutorial by Darlene Hildebrandt appeared first on Digital Photography School.


    Digital Photography School

  • 29 Popular DSLR Lenses Among Our Readers [November 2013]

    Two weeks back we released a list of the 13 most popular DSLRs judged according to what our readers have been buying on Amazon over the last 4 months*. Today we’re presenting you with a similar list of the most popular DSLR lenses among our readership.

    As usual – Canon and Nikon lenses were by far the most popular so I’ve divided them into two lists but I’ve also included a third list of lenses from other manufacturers below.

    Nikon Lenses

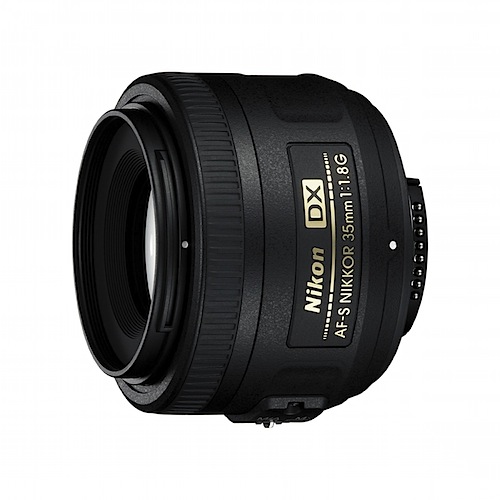
    1. Nikon 35mm f/1.8G AF-S DX Lens for Nikon Digital SLR Cameras

    _images_I_71fojgW-K5L._AA1500_.jpg

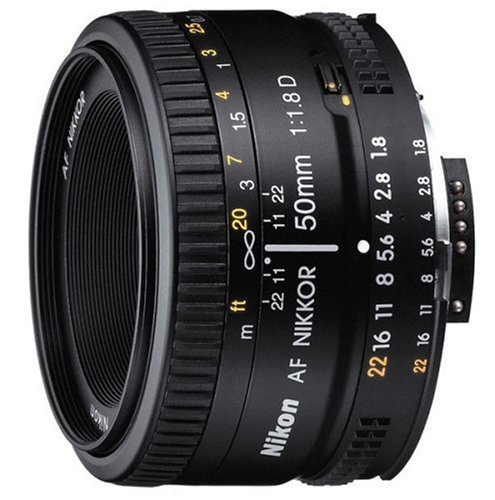
    2. Nikon 50mm f/1.8D AF Nikkor Lens for Nikon Digital SLR Cameras

    _images_I_51CnjgPJ+jL.jpg

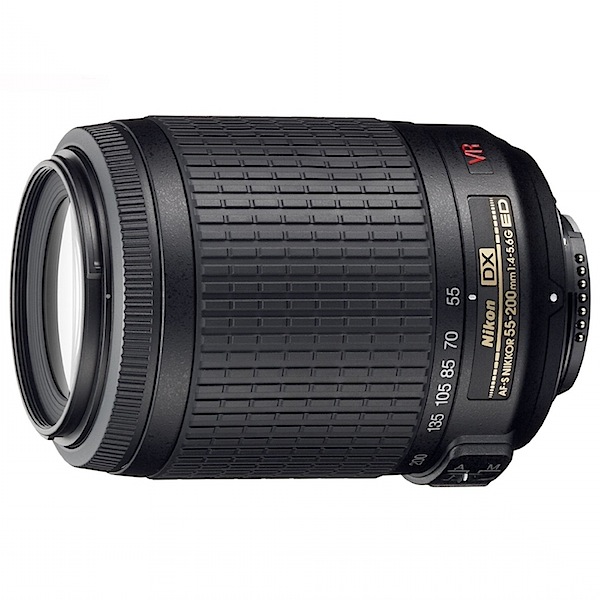
    3. Nikon 55-200mm f/4-5.6G ED IF AF-S DX VR [Vibration Reduction] Nikkor Zoom Lens

    81aelpm45eL._AA1500_.jpeg

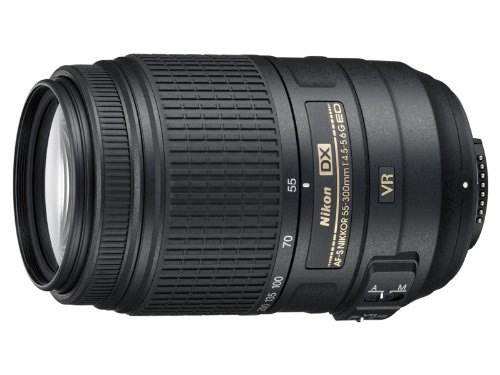
    4. Nikon 55-300mm f/4.5-5.6G ED VR AF-S DX Nikkor Zoom Lens for Nikon Digital SLR

    _images_I_41BQhxfleTL.jpg

    5. Nikon 24-70mm f/2.8G ED AF-S Nikkor Wide Angle Zoom Lens

    _images_I_71NFmoXyeGL._AA1500_.jpg

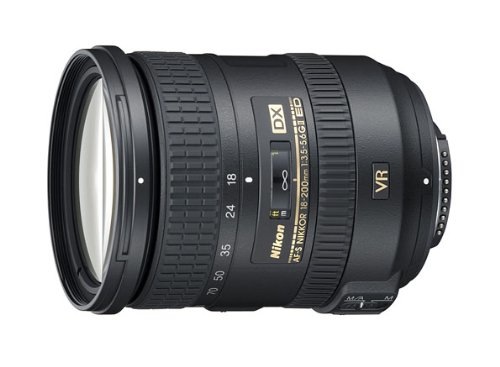
    6. Nikon 18-200mm f/3.5-5.6G AF-S ED VR II Nikkor Telephoto Zoom Lens for Nikon DX-Format Digital SLR Cameras

    _images_I_41Evnjjp6mL.jpg

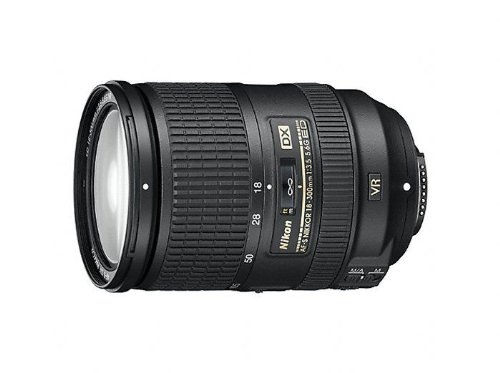
    7. Nikon 18-300mm f/3.5-5.6G AF-S DX Nikkor Lens

    41rXcOrwyoL.jpeg

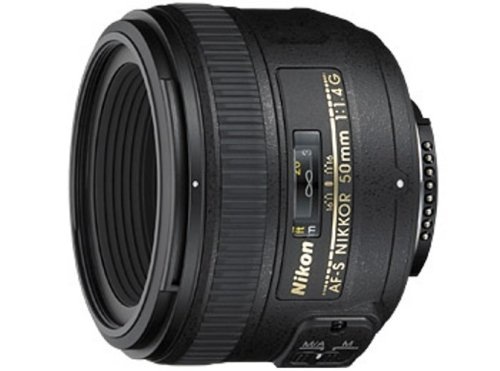
    8. Nikon 50mm f/1.4G SIC SW Prime Nikkor Lens for Nikon Digital SLR Cameras

    _images_I_41lq816JqzL.jpg

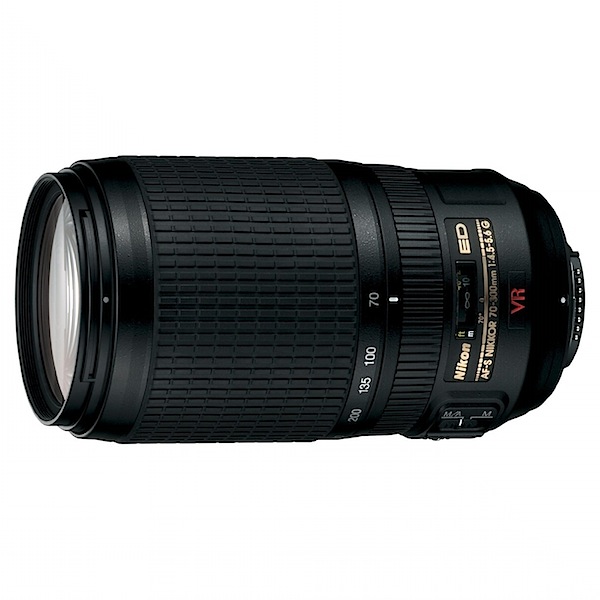
    9. Nikon 70-300mm f/4.5-5.6G ED IF AF-S VR Nikkor Zoom Lens

    71DmoFcpcfS._AA1500_.jpeg

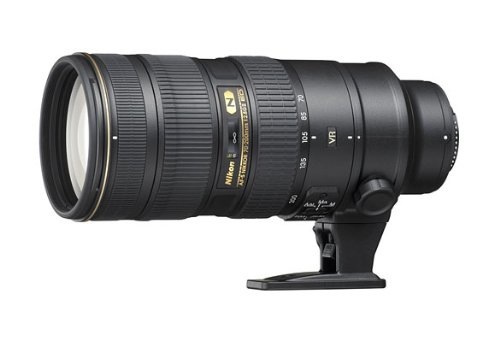
    10. Nikon 70-200mm f/2.8G ED VR II AF-S Nikkor Zoom Lens For Nikon Digital SLR Cameras

    _images_I_41lLtMR4hlL.jpg

    Canon Lenses

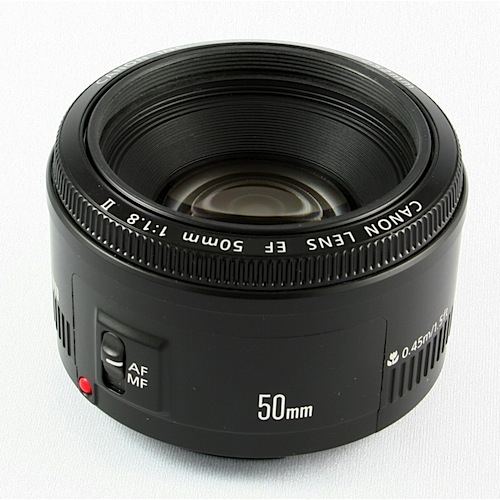
    1. Canon EF 50mm f/1.8 II Camera Lens

    _images_stories_50mm18.jpg

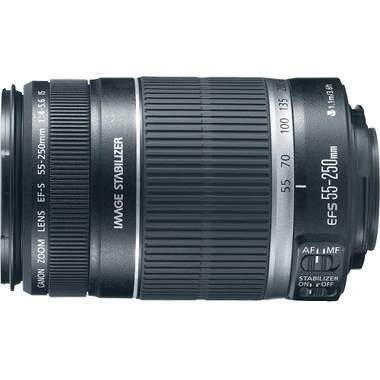
    2. Canon EF-S 55-250mm f/4.0-5.6 IS Telephoto Zoom Lens for Canon Digital SLR Cameras + Lens Cleaning Kit

    _images_I_41iFOthf-oL.jpg

    3. Canon EF 70-200mm f/2.8L IS II USM Telephoto Zoom Lens for Canon SLR Cameras

    _images_I_41nW4a0AjAL.jpg

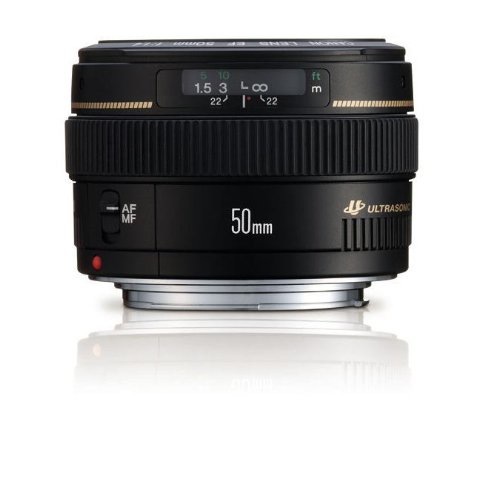
    4. Canon EF 50mm f1.4 USM Standard & Medium Telephoto Lens for Canon SLR Cameras

    _images_I_41QZeK5lgrL.jpg

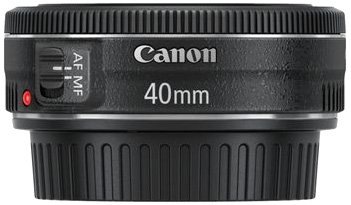
    5. Canon 40mm EF f/2.8 STM Lens

    _images_I_41dMgVaaPlL.jpg

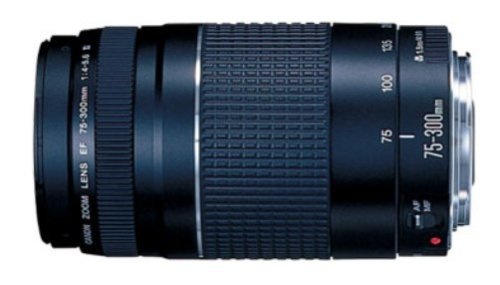
    6. Canon EF 75-300mm f/4-5.6 III Telephoto Zoom Lens for Canon SLR Cameras

    _images_I_41KD00SN1gL.jpg

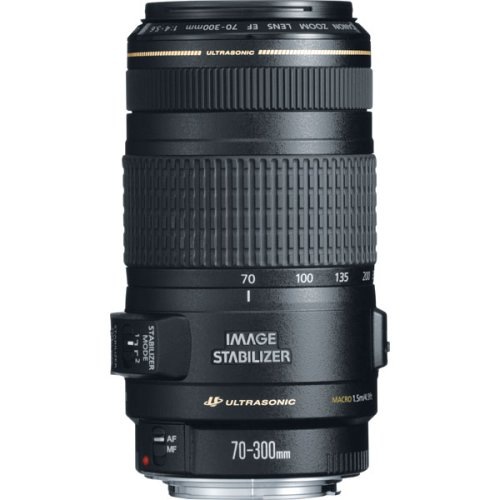
    7. Canon EF 70-300mm f/4-5.6 IS USM Lens for Canon EOS SLR Cameras

    _images_I_41ECW2G8TWL.jpg

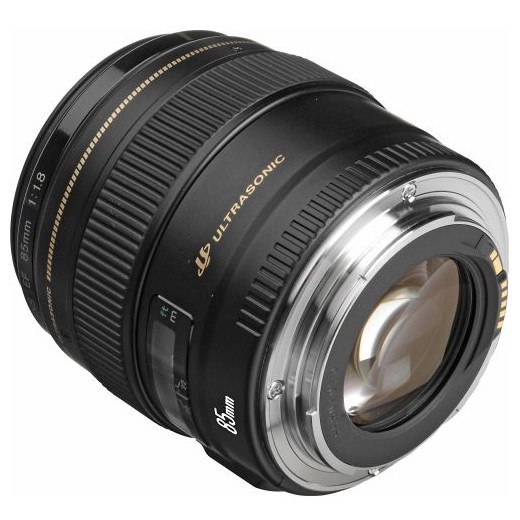
    8. Canon EF 85mm f/1.8 USM Medium Telephoto Lens

    canon-85mm.jpeg

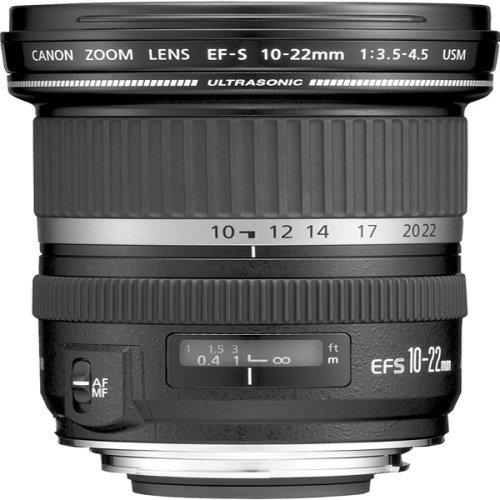
    9. Canon EF-S 10-22mm f/3.5-4.5 USM SLR Lens

    canon-10-22.jpeg

    10. Canon EF 100mm f/2.8L IS USM 1-to-1 Macro Lens for Canon Digital SLR Cameras

    _images_I_819FZMQPWfL._AA1500_.jpg

    Other Brands

    Brands like Signma, Tamron and Tokina continue to grow in popularity with our readers – many times they provide a more affordable price on equivalent lenses focal lengths from the main brands. Here’s the most popular ones among our readers:

    1. Sigma 10-20mm f/4-5.6 EX DC HSM Lens for Canon Digital SLR Cameras (also available for Nikon, Samsung and Sigma DSLRS)

    _images_I_41lE6crotiL.jpg

    2. Sigma 70-300mm f/4-5.6 SLD DG Macro Lens with built in motor for Nikon Digital SLR Cameras

    _images_I_71bTTzWv3hL._AA1500_.jpg

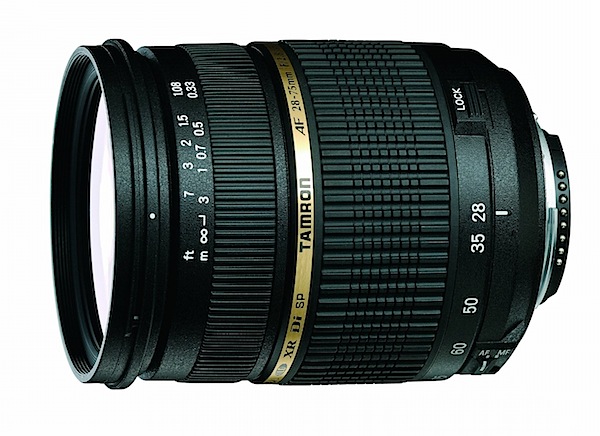
    3. Tamron AF 28-75mm f/2.8 SP XR Di LD Aspherical (IF) for Canon Digital SLR Cameras (also available for Minolta and Sony Pentax, and Nikon DSLRs)

    91EjMKKW3-L._SL1500_.jpeg

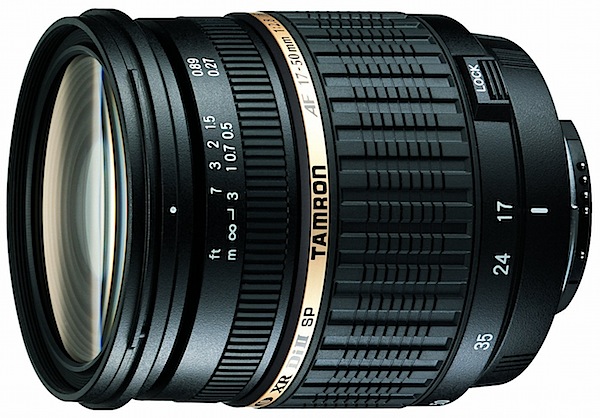
    4. Tamron AF 17-50mm F/2.8 XR Di-II LD SP Aspherical (IF) Zoom Lens for Canon Digital SLR Cameras (also available for Nikon and Minolta and Sony DSLRs)

    tamron

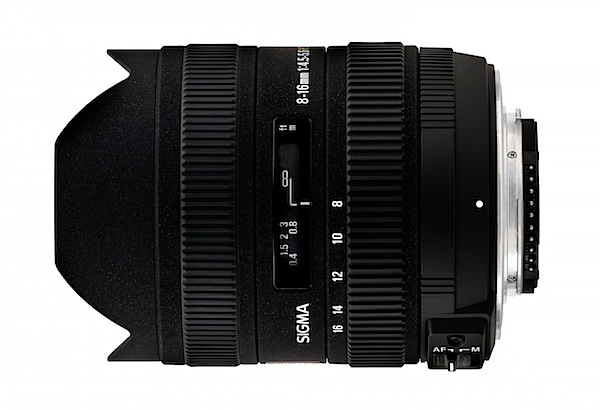
    5. Sigma 8-16mm f/4.5-5.6 DC HSM FLD AF Ultra Wide Zoom Lens for APS-C sized Canon Digital DSLR Camera (also available for Nikon, Pentax, Sigma and Sony DSLRs)

    81kS1-KqfiL._SL1500_.jpeg

    5. Sigma 70-300mm f/4-5.6 SLD DG Macro Lens with built in motor for Nikon Digital SLR Cameras

    71bTTzWv3hL._AA1500_.jpeg

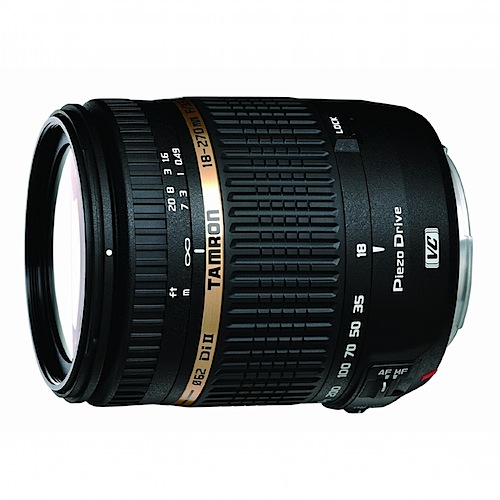
    6. Tamron AF 18-270mm f/3.5-6.3 Di II VC PZD LD Aspherical IF Macro Zoom Lens for Canon DSLR Cameras (also available for Nikon and Sony DSLRs)

    _images_I_81sE17h2DXL._AA1500_.jpg

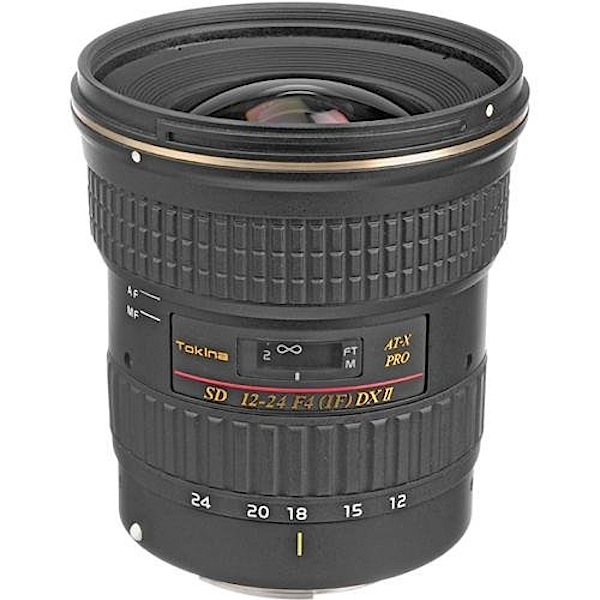
    8. Tokina 12-24MM F/4.0 Pro II Zoom Lens for Digital Canon SLR Cameras (Tokina also make a similar lens for Nikon DSLRS)

    51kjX6Z-VuL.jpeg

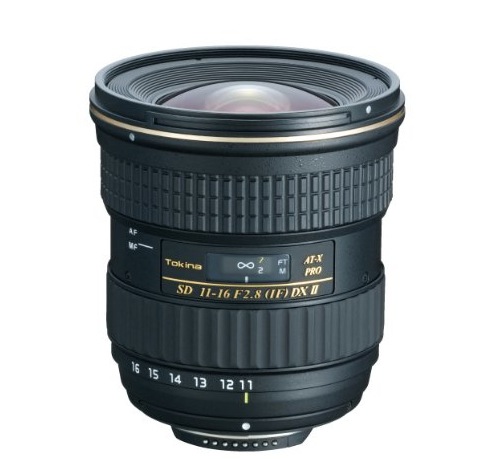
    9. Tokina 11-16mm f/2.8 AT-X116 Pro DX II Digital Zoom Lens (for Canon EOS Cameras) (Tokina also make a similar lens for Nikon DSLRS

    412tBLShXmL.jpg

    * Note: these lists were compiled from reports supplied to us from Amazon.com where we are affiliates. One of the ways dPS is able to cover its costs and be a sustainable business is that we earn a small commission when readers make a purchase from Amazon after clicking on our links (including those above). While no personal details are passed on we do get an overall report from Amazon about what was bought and are able to create this list.

    Post originally from: Digital Photography Tips.

    Check out our more Photography Tips at Photography Tips for Beginners, Portrait Photography Tips and Wedding Photography Tips.

    29 Popular DSLR Lenses Among Our Readers [November 2013]

    The post 29 Popular DSLR Lenses Among Our Readers [November 2013] by Darren Rowse appeared first on Digital Photography School.


    Digital Photography School

  • Lightroom Workflow – from Setup to Finished Sunrise Photo

    One of my favorite times of the day to photograph is sunrise. There’s just something about the peacefulness of being up before the sun, before most of the human world, that allows me to clear my head.

    Sunrise photos have always been high on the list of fan favorites and I know that there are a great many DPS readers who love them as well, so I thought I’d share with you a little bit about how I made the shot above from finding the location to setting up the camera and then a step by step walk-through of my Lightroom workflow.
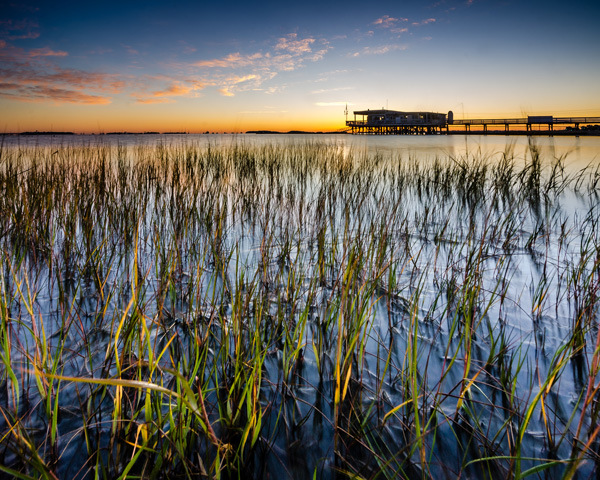
    Lightroom Workflow Final Image

    Determining a location

    To begin a shoot you need a concept, and while photographing sunrise is always a great concept to start with, one of the most important things that you’ll need to do is find a location. This can be difficult to do sometimes, but if you’re struggling to find a new location, check out 5 Creative Ways to Find New Locations for Photography for some inspiration.

    I can tell you that the inspiration for this photo came from my sister who saw this boat house while out on an afternoon jog. She sent me a text message demanding that I come spend a night so that I could photograph it at sunrise – and sure enough that’s exactly what I did. The key point to take away from this is, that inspiration can come from anyone and any where, so make sure that you are paying attention to your surroundings as well as what people are saying about their own.

    As for getting to the location for a sunrise shoot you’re going to have to wake up early. Well before sunrise. For this reason I typically will either spend the night in a hotel or find a friend or family member who lives close enough to the location to allow me to crash for a few hours, otherwise there might not be any point of sleeping at all. Think of it like this… If you can still see stars – you’re doing it right!

    Setting up the camera

    Since camera settings will vary depending on your scene I thought I’d share a couple behind the scenes shots. The first is one that my sister took of me while I was setting up my camera and tripod along the shore – notice how close to the water I get. The second shot is a close up that I took of my camera setup during the shoot, notice that for this particularity shot the tripod was nearly flat against the ground to allow me to get a very low perspective, and allow for the foreground sea grass to take up a good portion of the frame.
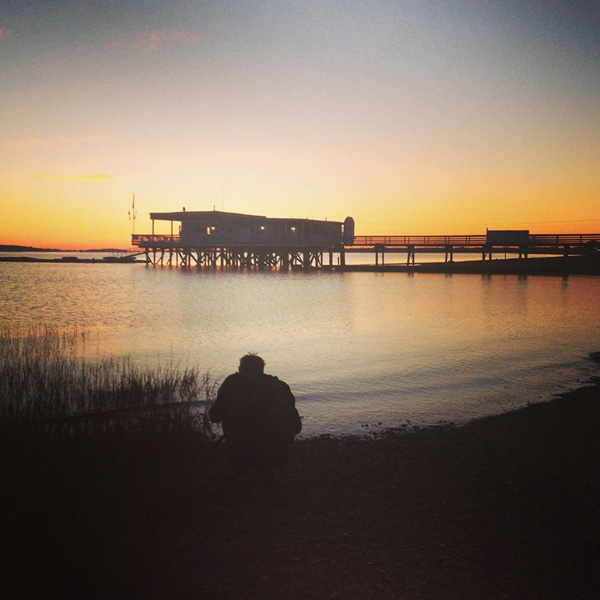
    Lightroom Workflow - Setting up the shot

    A behind the scenes shot of yours truly setting up the camera
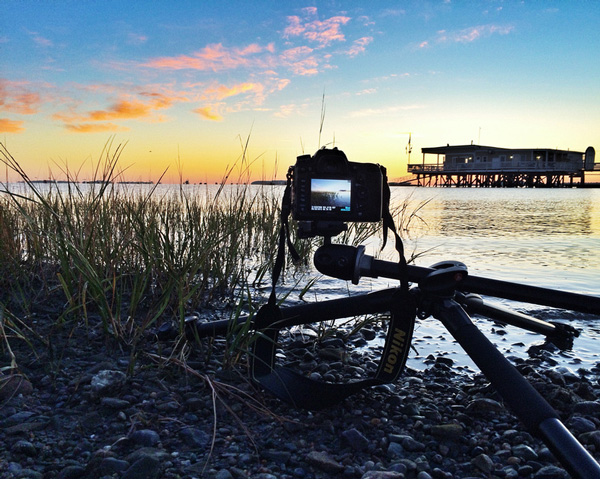
    Lightroom Workflow - Behind the Camera

    A photo of the camera set up – notice how close to the water and how low to the ground I put the camera for this shot

    It’s important to note that each shoot is going to be different and you must realize that with every sunrise and every location there will be challenges that you will have to overcome. While I can show you examples of how I set up the camera and my thought process behind it, when you get out to your own location it’s up to you to determine the best ways to photograph the scene.

    Back home – it’s time to process the photos
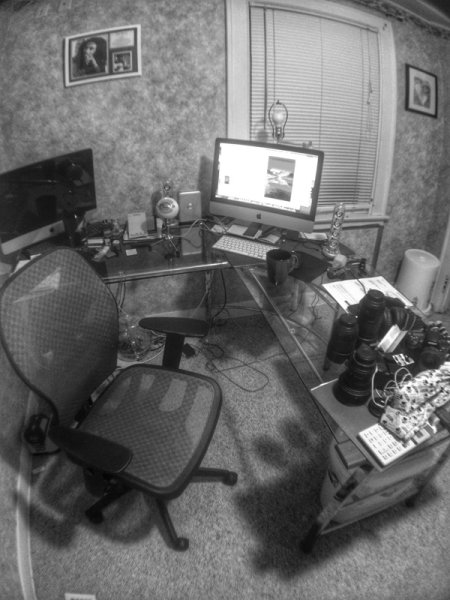
    Lightroom Workflow - Office

    Just for fun I thought I’d throw in this snapshot of my office – What’s your desk look like?

    Lightroom workflow – which frame to process?

    Before you can start processing you must determine which of the frames you want to use. There’s no “one-size-fits-all” way of doing this, it really comes down to the person behind the computer. Some people like to simply process everything from the start of their shoot to the end. Other people like to meticulously rate everything, fill in all the meta data and stay super organized. My own workflow usually consists of a quick browse through all the photos that I’ve captured in a particular shoot, rating each of the ones I want to edit with a 5-star rating, and leaving everything else untouched for the time being. I’ll usually come back to shoots from time to time, to see if anything I may have missed on my first go through jumps out at me on a second glance.
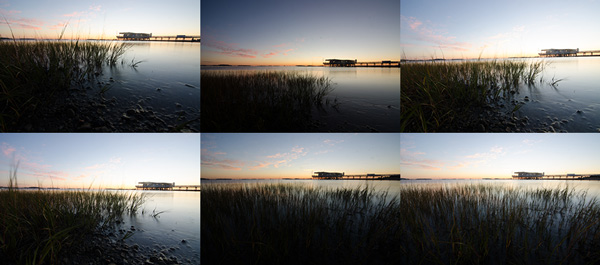
    Lightroom-workflow-collage

    Six different frames from the shoot – I chose the bottom right frame for today’s photo

    Lightroom workflow – making adjustments

    Now that you’ve chosen a photograph to edit, it’s time to dive into the develop panel and get started with the post production workflow.
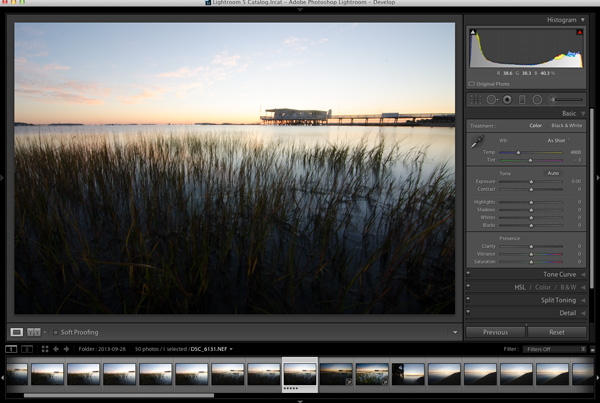
    Lightroom Workflow - Oriignal

    Enter the develop panel and select the photo to be edited.

    Since this photograph is all about the sunrise, the first step is to make sure that you get your sky exposure as close to perfect as possible. By making a small adjustment here to the exposure slider in the basic tab you can have a great effect on the sky which will set the foundation for the rest of the photograph. It might look a bit under exposed at first, but we will be fixing this and fine tuning everything throughout the tutorial.
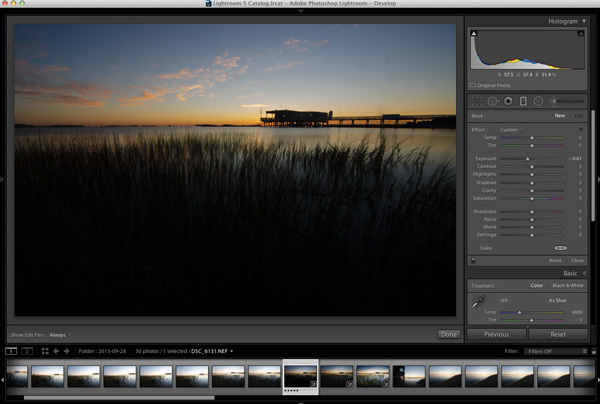
    Lightroom Workflow - Expose for the sky

    Adjust the exposure for the sky

    To bring the foreground back into the image you will want to add a graduated filter into the frame (assuming you didn’t use one in the field of course). To do this simply press the ‘M’ key on your keyboard to open that panel in Lightroom. To apply the graduated filter drag in from the bottom of the frame and place the filter on the horizon line. Remember the filter’s effect is greatest starting from the direction you initially dragged in from so here the effect will be greatest towards the bottom of the frame.

    Next to bring the exposure back into the foreground by increasing the exposure and shadows sliders (moving them to the right) of the graduated filter until you’re satisfied with the look. You will be able to fine tune the image by using the basic tab a bit later. You can always go back to this graduated filter if you need to make a minor adjustment later on, as well, simply by revisiting the graduated slider panel and clicking on the button (dot) of the graduated slider to activate it for editing.
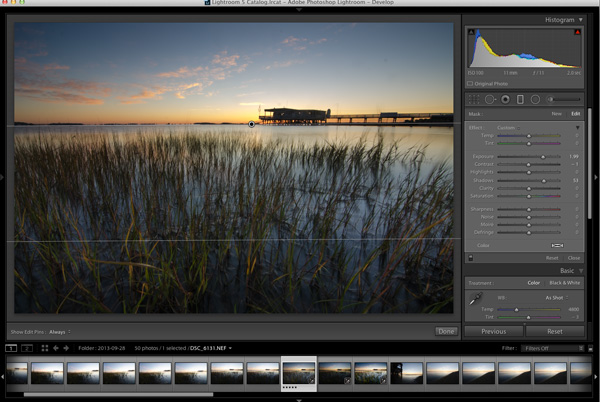
    Lightroom workflow - graduated filter

    Apply a graduated filter to adjust the exposure of the foreground without effecting the sky from the previous step

    Now that you’ve exposed for the sky and brought back some foreground light, the next step is to add contrast, color, and clarity – all of which will help to make your image ‘pop’. This can be done by using the basic tab in Lightroom, which I’ve covered in Master These Five Lightroom Sliders and Your Photos Will Pop, if you’d like more information.
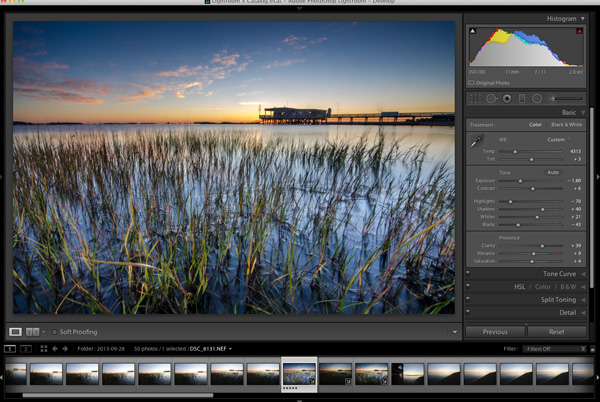
    Lightroom workflow basic tab

    After achieving a general evenness in the previous steps use the basic tab to add contrast, color and clarity

    At some point you’ll want to clean up the dust spots or remove distracting pieces of litter or other unwanted items from your image so now’s a good time to jump into the clone/heal tool and do just that – as you can see I need to get my sensor cleaned.
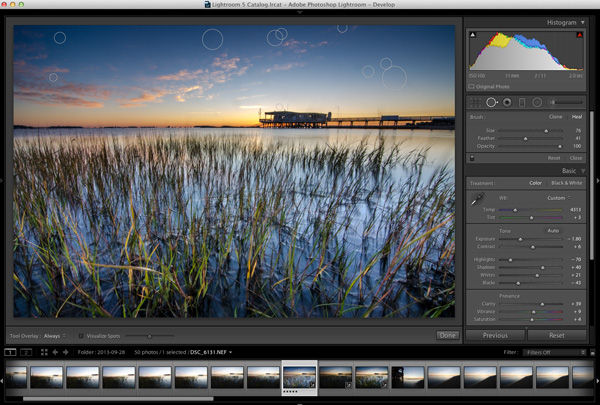
    Lightroom Workflow - Cloning

    Here’s a good chance to clean up those pesky dust spots by using Lightroom’s clone/heal tool

    Final adjustments can be made by using a combination of different adjustment brushes. Usually you’ll want to use this tool to control specific areas of the photograph, or specific parts of the exposure. To open the adjustment brush panel press ‘K’ on the keyboard and click on your image to place a brush. If you’d like to use more than one brush you can click on ‘New’ and again click on your image which will allow you to adjust two different parts of your scene separately from one another.

    In the photo below I’ve added an adjustment brush to affect the highlights, and contrast of the water at varying levels of intensity. You can control these levels of intensity by adjusting the “flow” slider of the adjustment brush which will determine how much of the effect is applied at each pass of the brush – a lower flow has less effect per pass than a higher flow.
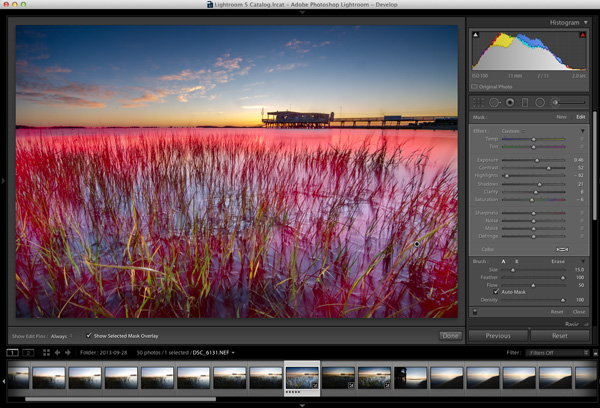
    Lightroom workflow - adjustment brush

    Fine tune the highlights on the water with an adjustment brush. The red overlay can be turned on and off with the check box below the photo (or ‘O’ on your keyboard)

    Before you call it a day – the last step is to dive into the detail panel in Lightroom and apply some sharpening. For some more information on Lightroom’s sharpening options you can watch this Youtube video A Look at Sharpening in LR4, which is part of a weekly series I run on my channel.
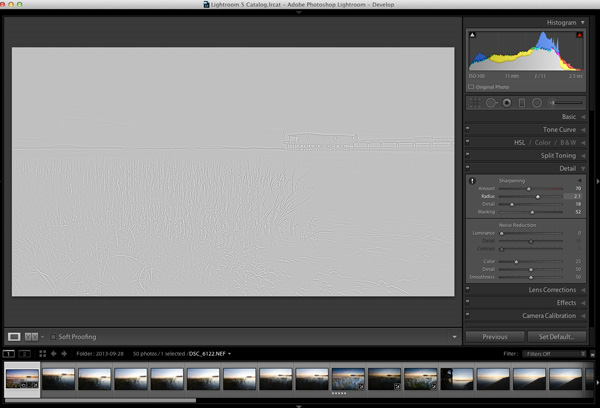
    Lightroom workflow - sharpening

    Apply any sharpening you wish using Lightroom’s sharpen panel.
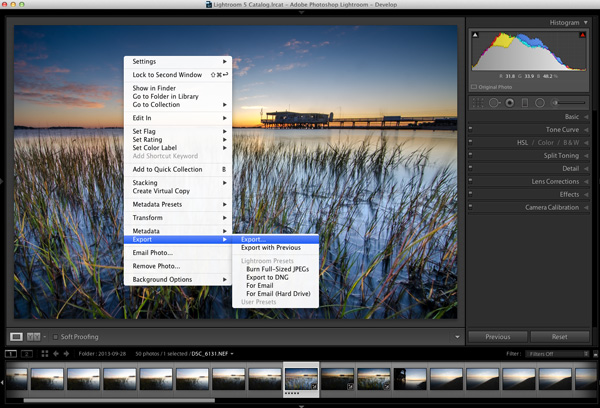
    Lightroom Workflow Export

    All that’s left to do now is export and share your work with the world.

    Exporting and sharing

    All that’s left now is to export the photo and share the results.

    I hope this step by step Lightroom workflow helps you learn a bit about how to process your own photos. Share a before and after Lightroom edit in the comments below, and if you’ve got any behind the scenes shots, those are always fun to see as well. Don’t forget to let us know how you achieved the results.

    Post originally from: Digital Photography Tips.

    Check out our more Photography Tips at Photography Tips for Beginners, Portrait Photography Tips and Wedding Photography Tips.

    Lightroom Workflow – from Setup to Finished Sunrise Photo

    The post Lightroom Workflow – from Setup to Finished Sunrise Photo by John Davenport appeared first on Digital Photography School.


    Digital Photography School