Category: Photography

  • Tips for Indoor Sports Photography – Part 1

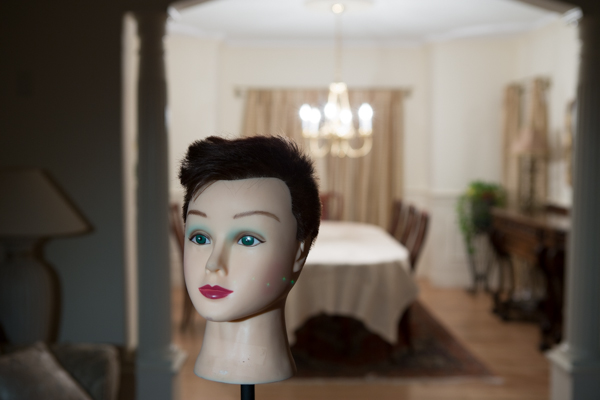
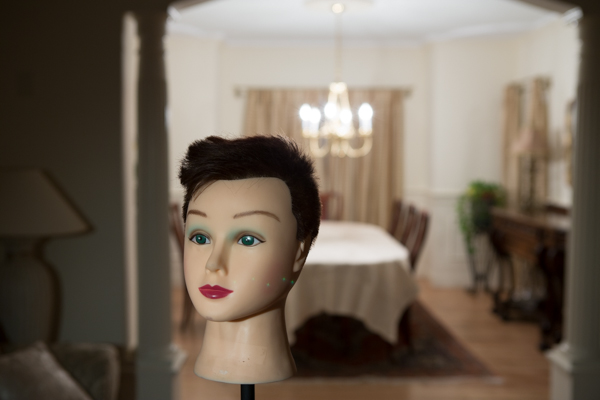
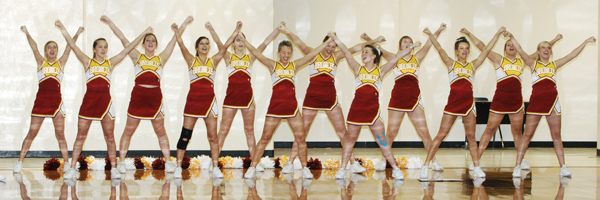
    Shooting indoor sports isn't always easy, but you can get professional-quality results by following these tried and true tips/

    Shooting indoor sports isn’t always easy, but you can get professional quality results by following a few tried and true tips.  1/180, f/4, 80mm, ISO 1250, flash.

    A few weeks ago, we asked our dPS Facebook followers what topics they’d like to see covered here on the blog, and a few of you were in search of tips for indoor sports photography. For purposes of this article, I’m going to concentrate heavily on high school basketball, because it brings all of the challenges of shooting indoor sports together; bad lighting, fast action, ornery coaches, inconsistent referees, and–of course–the unpredictability of sports.

    The Right Gear for the Job

    I’m not going to spend a lot of time here discussing camera bodies. As long as you are photographing with a reliable DSLR, your bigger concern should be the glass. Fast glass. That doesn’t mean I advocate running out and spending all of your money on the most expensive lenses that you either can ,or can’t afford, but a long zoom with a large aperture is going to be a must.

    Unfortunately, while many gyms may be well-lit for sports, most are poorly lit for photography.  Adding to the challenge, many high school sports have a prohibition against using flash. You have to do your homework. In my experience, I’ve never had a problem using flash for basketball. As long as you are shooting from an off-center angle, you should be fine. You have to be careful, though, because you don’t want to blast a player in the face with flash full, and possibly change the outcome of the game. That’s the best way to make sure they never let you in with your camera again. Flashing action on the floor? Shouldn’t be a problem. Flashing a player on the free throw line before the ball leaves his hands? Not so much.  As with any type of shoot, make sure you have all of the necessary backups: batteries, memory cards, etc., as well as a backup body if possible.
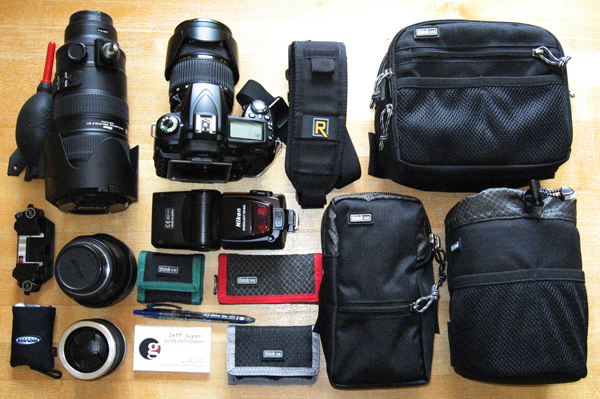
    Contrary to popular belief, it is possible to travel light while shooting sports.

    Contrary to popular belief, it is possible to travel light while shooting sports. Shown: Nikon D90, 24-70mm f/2.8, 70-200mm f/2.8, SB800 speedlight, plus spare batteries, memory cards, etc., that all pack into modular components shown for the Think Tank Pro Speed Belt.

    Get There Early

    Trust me when I tell you that you are going to want to get there early.  Pre-game  warm-ups offer some of best opportunities for quality shots of individual players.  For starters, players tend to move a little more slowly in warm-ups than in the actual game.  You’ll have an easier time capturing motion, and more of an opportunity to isolate individual players in the frame.  You can get a little closer to the action during warm-ups, but PLEASE BE CAREFUL!  Each half of the court is going to be filled with players, coaches, managers, officials, and other personnel. The players are big, fast, and not paying attention to you.  Their job is to play basketball–not give you the best photo op.

    Know the Sport
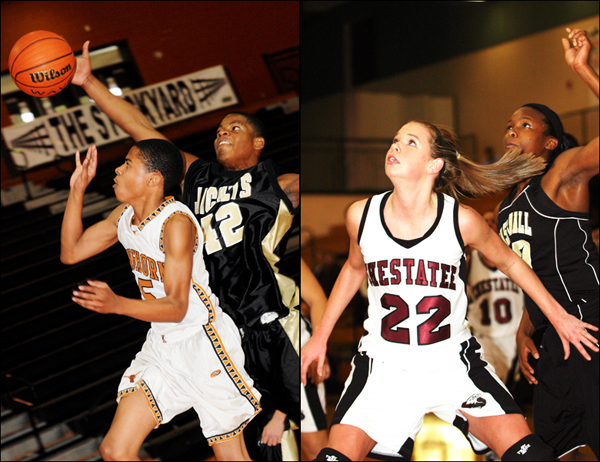
    The most compelling shots will have offense, defense, and the ball. You can get good shots without the ball, but they will be better with it.

    The most compelling shots will have offense, defense, and the ball. You can get good shots without the ball, but they will be better with it.  LEFT: 1/250, f/5, 80mm, ISO 2000, flash.  RIGHT: 1/320, f/2.8, 80mm, ISO 1250, flash.

    The biggest key to getting quality photos of any sport is to have a solid understanding of the game and how it is played.  Every sport has a rhythm all its own. Are they playing a zone defense or man-to-man? Is it a run-and-gun, or are they burning the clock? Can #33 sink the three with impunity, or is he dishing it off to the open center for a lay-up? Do you need to be on the sidelines or under the bucket? Which side is best: the home side of the stands or the visitors’?

    Remember that there is a big difference between shooting as a media photographer and shooting as a parent.  As a reporter or school photographer, you are there for “the big picture.”  As a parent, you are mostly concerned with getting photos of your son or daughter, and they’ll be easy to track with the number on their back.  In either case, the more you understand the subtleties of the game the better prepared you will be.

    Focus

    When I say “focus” I’m not just talking about your photography.  I tell this story a lot because I think it’s important. You have to be aware of your surroundings. I once saw a photographer stand his ground on the sidelines at a football game, despite the fact that a player was being pushed out of bounds right at him.  I watched as his camera, lens, and monopod all went flying in three different directions–as he flew in a fourth.  He was wheeled off the field with cuts to his face, and a leg that had been broken in two places. He was out of commission for six months. No photograph is worth that. Be safe. Focus on where you are and what is going on around you.

    Now let’s talk about the other kind of focus.  Obviously, it’s an action sport and you want action photos.  Some of the best sports photos are those that capture the eyes. Things move fast, though, and your subjects are not always going to be standing still long enough for you to focus on their eyes. Your camera’s auto focus works by looking for contrast. Uniforms usually have a lot of contrast between the color of the jersey and the color of the numbers.  If you can get the eyes, great.  If not, your best bet is to try locking on either those numbers or the ball once players start moving.
    Most professional sports photographers use back-button focus. Check your manual if you aren't sure where to find this feature in your camera's menus.

    Most professional sports photographers use back-button focus.
    Check your manual if you aren’t sure where to find this feature in your camera’s menus.

    Try Back Button Focus

    Another focus option you might wish to try is back button focus. Most DSLRs have an option that allows you to assign auto focus functions to a button on the back of the camera. When AF is linked to the shutter button, the camera continuously maintains focus as long as the shutter button is pressed halfway.

    When a player passes between you and the player you’d been focusing on, your focus will be shifted to the new player in the frame. Pressing the shutter button halfway down to regain focus on your original target starts the process over again and probably means missing the intended shot. With back-button focus, however, all you have to do is remove your finger from the button when another player enters the frame. Pressing the back button again when the distracting player leaves the frame resumes your original focus.

    Continuous Focus Mode

    Part of the secret to shooting sports is using AI Servo (AF-C on Nikon) auto focus mode. With “one shot” AF (AF-S on Nikon) focus locks on a point and cannot move until you release and reengage the auto focus. In AI Servo (AF-C), however, the camera continuously focuses whenever you are pushing the AF button (or shutter button halfway if you haven’t reassigned it). It not only helps you lock focus, but also keep it when trying to photograph bodies in motion.

    Camera Settings

    As with any type of photography, there is not necessarily a “right” or “wrong” exposure.  But this is a sport, after all, and if you come home with 300 blurry photos you aren’t going to be happy–nor will your editor, or your daughter, the MVP.  Remember that since shutter speed controls ambient exposure, the faster your shutter speed is the better your chances will be of freezing the action.  I generally like to start with a shutter speed of 1/500 and adjust my settings accordingly until I get the look I want.  Since this is an indoor sport, your lighting will probably be consistent over the course of the game, unless the gym has windows. Don’t forget, though, that “consistent” can also be “consistently bad.”

    If you are using flash, it’s going to be important for you to determine the maximum shutter speed your flash will allow (usually 1/250, check your manual for “flash sync speed”). Start with that and adjust your aperture and ISO accordingly. This is going to take some practice, so  be prepared for some trial and error. The good news is that cameras are getting better at capturing action in low light.
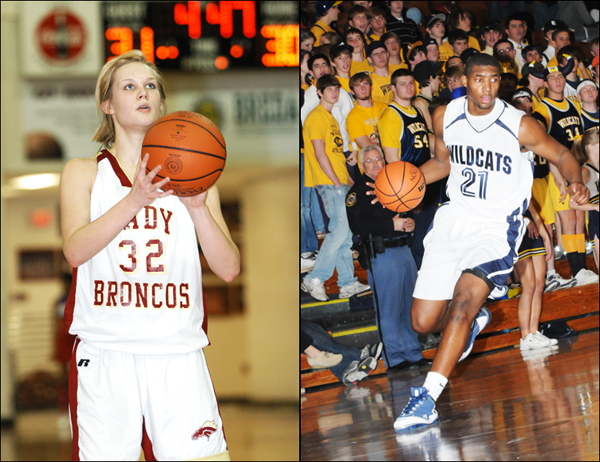
    Look for interesting backgrounds, like the game clock or opposing fans.

    Look for interesting or dramatic backgrounds, like the game clock or crowded bleachers.  LEFT: 1/180, f/3.5, 135mm, ISO 800, flash.  RIGHT: 1/200, f/8, 80mm, ISO 1600, flash.

    Vantage Points and Camera Angles

    Obviously, the closer you are to the action the better your photos .  Unlike some sports, you’re going to be a bit more confined to certain areas. You really only have access to one sideline in basketball because the player benches and scorer’s table take up one complete side of the court. The end zones are often the domain of the cheerleaders, so your time there might be sporadic at best. As noted earlier, a solid understanding of the game will definitely help you decide where to be and when.  This is one reason why veteran sports photographers are hardly ever in one place for very long.
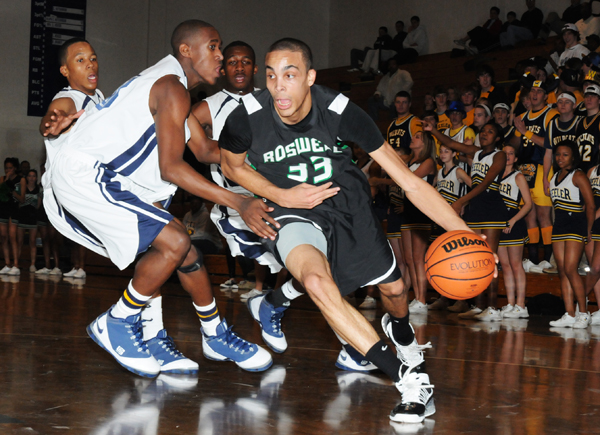
    Basketball is a very vertical sport, but don't forget to get some horizontal shots as well.

    Basketball is a very vertical sport, but don’t forget to get some horizontal shots as well.  50mm, 1/250, f/8, ISO 1600, flash.

    The entire length of the court opposite the player benches offers some great angles. It gives you great vantage points not only for the action on the court, but also for coach and player reaction shots on the bench. Be sure to also take advantage of higher angles from the bleachers (timeout huddles) and the track above the court (players jostling under the net), as well as getting down low for those dramatic larger-than-life shots.

    Be Creative: the Action’s Not Just Between the Lines

    It’s sports. They go one direction. Then they go the other direction. Four quarters of back and forth. That doesn’t mean, though, that you can’t be creative with your angles and composition. Look for interesting or dramatic backgrounds. In the set below, including the game clock over the coach’s shoulder as it ran down provided interesting contrast to his calm demeanor.
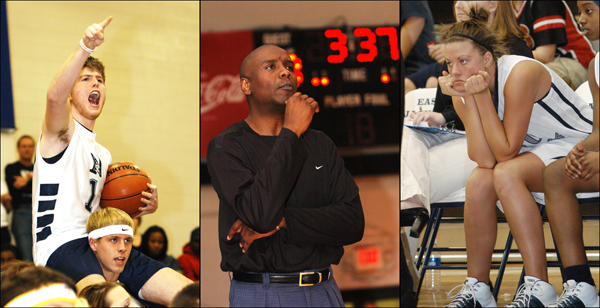
    Keep your head on a swivel. Don't miss the fans, coaches, and player reactions.

    Keep your head on a swivel. Don’t miss the fans, coaches, and player reactions.

    Don’t fall into the trap, though, of assuming that everything worth photographing is right there on the court in front of you. Spend some time in the stands. Shoot the crowd reactions.  Photograph the band and the cheerleaders. Capture the traditions. There is so much more going on in that gym than just a basketball game. Turn your back on the action once in a while and take a look around. There are stories everywhere. Use your camera to tell them.

    Get Your Motor Running?

    Welcome to photography, where five photographers will give you five different answers for everything, and tell you why the other four are wrong. When I first started shooting high school sports I had a slow camera with an even slower buffer that couldn’t handle me just leaning on the motor drive and hoping for the best. I hated it at the time, but it was probably a good thing. I learned to compose my shots and choose my moments more carefully. I developed a pretty fast shutter finger, and, I think, a better eye for the action. Even now, with better equipment, I still tend to leave my camera set for single clicks. That may put me in the minority, but it’s what works for me.

    Etiquette

    If you are covering a particular school or team over the course of a season, introduce yourself to the coaches. Your job will be easier if they know who you are and why you are there game-after-game. These kids may be big and strong, but they are still kids and it’s a coach’s job to look out for them. If a coach or official tells you something, listen to them. If they ask you to move, you move. You’re in their house and you have to play by their rules.

    If one of those rules is no flash, then it’s no flash. It may sound silly to you, but you have no idea what the consequences might be. There may be college scouts in the stands, and you momentarily blinding the point guard with your flash might have an impact on whether that kid gets a scholarship, or if he’s even recruited at all.

    If play stops for an injury, show some respect and PUT YOUR CAMERA DOWN.  While it might make for compelling photography, it is entirely possible that you just witnessed the end of a kid’s dream or their only chance of going to college.  You don’t want them or their parents seeing you clicking away while everyone else in the gym is holding their breath. This is high school, not the NBA. Be sensitive and keep it in perspective.

    Any seasoned photographer will tell you that photographing sports is not easy– particularly indoors. We can debate endlessly on which sport is the hardest to shoot, but with practice, preparation, and the right gear, you’ll see your images start to improve quickly and steadily.

    Stay tuned for Part 2, where we take a closer look at some of the other indoor sports you may find yourself shooting.

    The post Tips for Indoor Sports Photography – Part 1 by Jeff Guyer appeared first on Digital Photography School.

    Digital Photography School

  • Reverse Lens Macro: How to use it as a Great Learning Tool

    Reverse lens macro photography 03

    Reverse Lens Macro: How to Use It as a Great Learning Tool

    Yesterday one of my friends called me late and told me that he was going to buy a DSLR and asked me which one he should choose. As a friend, I knew that this was his first camera and he was in fact a complete stranger to the field of photography. I told him to buy a good compact camera in order to get used to the basic concepts of photography and to buy a DSLR only when he feels his equipment is limiting his creativity.

    On the other hand are the people how have already bought an SLR, but get confused and overwhelmed by the level of control these cameras offer, and the sheer amount of effort they have to put in to make their photographs look beautiful. I write this article for those people who bought a DSLR, and are in distress seeing none of their photos looking as good as someone else’s.

    Considering that you have bought a DLSR and are delving into some advanced levels of photography, let’s see how an interesting and fun technique known as reverse lens macro can teach you a great deal about your camera, light and in effect make the art of photography.

    Reverse lens macro photography 01

    The basic trio of photography

    Before understanding reverse lens macro let’s take a look the basic trio that every photographer needs to know to take a well exposed shot:

    1. Shutter speedreverse-lens-macro-photography-02.jpg
    2. Aperture
    3. ISO

    Shutter speed is in essence the duration for which light falls on the camera’s sensor, shown in most cameras as 1/250th or 1/30, lower the denominator, the longer the duration.

    Aperture is the opening in the lens which controls the amount of light entering your camera and the area in your image which is in sharp focus (aka depth-of-field) usually shown as f/5.6 or f/7.1. The lower the number, the more light getting to the sensor, and smaller the area in focus.

    ISO determines just how sensitive your camera’s sensor is to the light falling on it. ISO usually ranges from 50 to above 100,000 in number. Large numbers represent high sensitivity.

    Macro and reverse lens macro

    Macro photography is a beautiful way to capture subjects as it gives you a very different and up-close perspective of photography. What macro photography does is to help us see the small world around us in a big picture. What your lens in its normal state does is to make the big world around you small, so just think what it will do when used reverse mounted? Yes, make the small world even BIGGER. But the fact is that dedicated macro lenses cost a fortune which puts it out of the reach of many of us. Reverse lens macro technique allows you to get really close without having to lighten your wallet on expensive lenses.
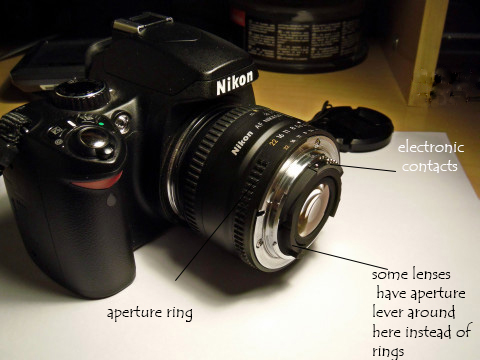
    To take reverse lens macro shots, you have to reverse mount your kit lens (as depicted in the picture below).

    Reverse lens macro photography 07

    HOW DOES REVERSE MACRO TEACHES YOU ABOUT THE ART OF PHOTOGRAPHY?

    Everything is a double-headed sword. So is reverse macro, though it allows us to get really close to your subject it also means you have less light at your disposal, a very tight frame, and a very narrow area which is in sharp focus (depth-of-field). Less light means you will have to adjust shutter speed, aperture and ISO to get good exposure and nice depth of field.

    But the best part lies ahead, when you reverse mount your lens, the camera loses all the electronic means to communicate with the lens, so you will have to move your camera back and forth to get your focus right and you have to use the small lever on the back (now front) of the lens for controlling the aperture. An interesting point to be noted is that the actual focal length (55mm gets you closest to the subject for 18-55mm lens) of a lens in normal operation is also reversed, meaning that you can get closest to your subject when the lens is at its widest (18mm for the same lens). Now when you look through the viewfinder you will see the magic unfolding right in front of your eyes!

    Reverse lens macro photography 06

    Reverse lens macro photography 04

    Suddenly your viewfinder becomes a visual textbook through which you will see all the subtle changes that aperture, shutter speed and ISO makes on your image and how subtle changes to these can bring amazing clarity and depth to your images. At first this may seem a difficult task because of the extreme stillness needed to take them successfully and clearly, but “practice makes perfect”, doesn’t it?

    The interesting part being that you can apply the information you learn, when you use your camera normally. Obviously this can also be learned with time and effort but rest assured many get bored or disheartened because their photos are not looking good before they understand how to use the camera. Reverse macro, as mentioned earlier, magnifies the world beyond what our eye can see. It is because of this magnification that the effect the changes you make to (shutter speed, aperture, ISO) have on our image becomes more apparent than in “normal” use. When doing reverse macro I recommend not using a tripod because that way you will also learn to keep your hands steady (a boon when shooting in dim light).

    Reverse lens macro photography 05

    So because you get to see the magic of light unfold right in front of your eyes it registers quickly, and with practice becomes rather instinctive. This will startlingly improve the way you approach photography and ultimately your photos.

    As Ansel Adams, a master of photography said “A Good photograph is knowing where to stand”. Understand where you stand now (as a photographer) and where you have to be standing to take photographs that exude beauty and share the emotion of the frame with the viewers.

    Happy clicking!

    The post Reverse Lens Macro: How to use it as a Great Learning Tool by Sharath Prakash appeared first on Digital Photography School.

    Digital Photography School

  • 50 Things I Try to Avoid in Street Photography

    street-photography-tips-03

    I am a huge proponent of negative learning, that you can learn more by taking on the opposite approach. Philosopher Nassim Taleb calls this “via negativa”. It is the idea that the best way to gain “happiness” in life isn’t chasing what makes us happy, but by vehemently avoiding what makes us unhappy (a long commute to work, a horrible micro-managing boss, poisonous and negative “friends”, and an expensive house mortgage).

    I also believe strongly that one should never listen to “rules” of anything in life (especially street photography). However, below is a list of things (which has personally helped me) I avoid in street photography . Pick and choose what resonates with you, and leave the rest:

    50 Things I Try to Avoid in Street Photography

    1. “Chimping” (checking the LCD screen) after taking photos on the streets
    2. Using more than one lens for street photography (I prefer a 35mm)
    3. Not mixing my digital and film photos in a project
    4. Letting the number of “favorites” or “likes” dictate whether a photo is good or not
    5. Letting criticism affect me negatively. Rather, I try to use it to empower me to find weaknesses in my work.
    6. Uploading a photo online publicly without having at least 3 people critique it in-person first
    7. Spending a lot of time looking at photos online ; rather I spend more time looking at photo books
    8. Leaving the house without a camera
    9. Hesitating before taking a street photograph
    10. Cluttered backgrounds
    11. Showing my bad photos (I have tons of them)
    12. Shooting more than one type of film at a time (Kodak Portra 400 for color, Kodak Tri-X for black and white)
    13. Going a full day without taking a photographstreet-photography-tips-01
    14. Involving myself in online debates about the definition of “street photography”
    15. Meeting my photography friends without some new work to show them and get critique on
    16. Charging money for my photos
    17. Taking a photo of someone on the streets without saying “thank you” by smiling at them
    18. Not to focus on single images. Rather, I try to focus on projects
    19. Looking at gear review sites (when I’m bored) unless I’m serious about buying a new camera
    20. I don’t own more than one lens for my camera (only a 35mm)
    21. I don’t care about sharpness
    22. I don’t like bokeh in street photography
    23. Forgetting how lucky I am to be able to go out and take photos
    24. Taking boring photos
    25. Taking check-in luggage when I travelstreet-photography-tips-02
    26. Comparing myself to other photographers
    27. Developing my film for at least 3 months after I shoot it
    28. Uploading photos online until letting it “marinate” for at least 6 months to a year
    29. Not to falling into the trap that buying a new camera will make me suddenly become more “creative” and “inspired” in my photography
    30. I don’t mind asking for permission to take someone’s photo in the street
    31. I don’t check comments on my photos more than once a week
    32. Spending more time on social media, and less time out shooting on the streets
    33. Leaving comments or critiques on other people’s photos that are shorter than 4 sentences long
    34. Only taking photos of people
    35. I rarely take photos of homeless people
    36. Taking photos of street performers
    37. Deleting photos (unless they are really nice or the photo is boring)
    38. Taking the film out of my camera when someone asks me tostreet-photography-tips-04
    39. Shooting to please my critics
    40. I ultimately don’t shoot for anybody else but myself
    41. Making excuses when a photo doesn’t work
    42. I don’t like photos without emotion
    43. Recommending zoom lenses in street photography
    44. Recommending lenses longer than 50mm for street photography
    45. Shooting wide open on the streets (generally at f/8-f/16)
    46. Recommending selective color or HDR for post-processing street photographs
    47. I don’t mind “killing my babies” (photos that I think are good but really aren’t)
    48. Shooting in bad light without a flash
    49. Sharing more than one photo a week on social media
    50. I don’t think you should listen to everything in this list. Rather, make your own! :)

    Editor’s note: what things do you try and avoid when you’re doing photography of any kind? Share your list with us in the comment section below!

    The post 50 Things I Try to Avoid in Street Photography by Eric Kim appeared first on Digital Photography School.


    Digital Photography School

  • The Smart Guide to Creating Your Portfolio the Right Way

    Your photography portfolio should be a collection of your work that will encompass your entire career, or it can focus on a single theme or medium. Most photographers who have been at it a while tend to have multiple portfolios that cover a myriad of compositions, mediums and client need aspects. Many of the best will have tens of portfolios, Continue Reading

    The post The Smart Guide to Creating Your Portfolio the Right Way appeared first on Photodoto.


    Photodoto

  • Photography projects that make you feel alive

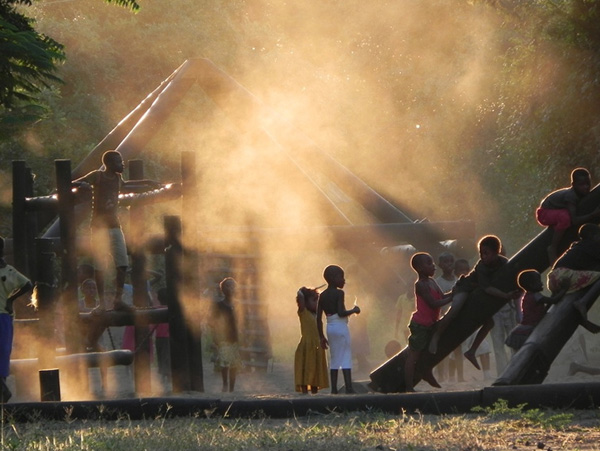
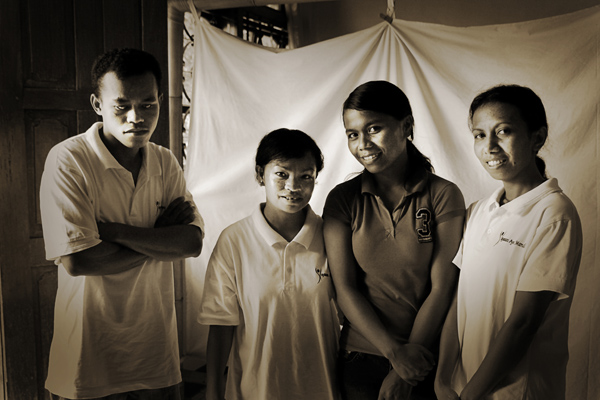
    Malawi orphanage 2

    We live in a new digital world of social media and computer games which makes it all too easy to keep the real world at arms-length.

    Do you ever find yourself thinking you want to do more, feel more and live more, but comfortable familiarity and lack of confidence holds you back?

    Think about why you love photography. For many of us it’s that we’re fascinated by the world we live in and want to share our vision of it. To create great photos you need to feel, but to feel more you may need to push yourself to do things that take you out of your comfort zone.

    How to push your boundaries

    On a Monday morning you probably daydream about doing something more exciting, yet when Friday comes around it ‘s easy to slip into your old routine. How do you break the monotony and start doing something that really excites you, without feeling overwhelmed?

    Photography projects that make you feel alive

    1. Malaysia.jpgStart dreaming. There’s nothing wrong with daydreaming. What kind of photography project would have you leaping out of bed each morning? What ideas haven’t been done before? What do you love? What do you aspire to?
    2. Plan it. Think about what’s stopping you and find solutions. Do you need to negotiate some free time away from your family? What are the steps you need to carry out to take you from where you are now to where you want to get to? Write it all down. Each time you think of a reason not to do it, think of how you might feel if you never gave it a try.
    3. Repetition breeds confidence. The first time is always the scariest, whether you’re photographing a wedding, or learning to scuba dive. Things that scare you can quickly become a breeze, if you’ll just try.
    4. Announce it to the world. If you tell your friends and family that you’re going to do something, it forces you to go through with it. It’s no longer a dream, it’s real.
    5. Start small. You can have the grandest idea in the world, but don’t think about the enormity of the project, just focus on what you need to do first. Once momentum gathers you’ll find that your early successes drive you onwards.

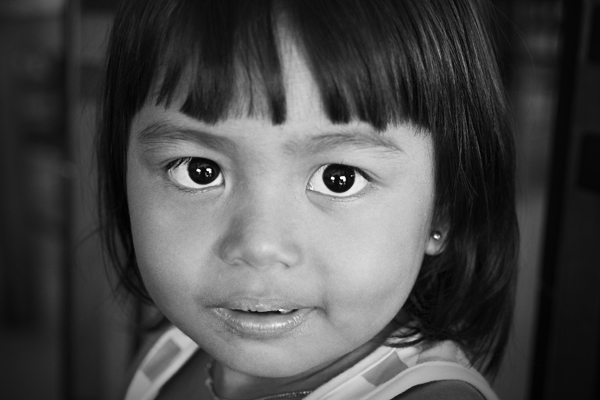
    Malaysian child

    Be a photojournalist

    Do you have a boiling passion that longs to tell an untold story? Maybe it’s a great injustice that needs unearthing, an unsung hero who needs championing, or a wondrous event that deserves attention.

    Do something that’s never been done before

    The human race has an inherent desire for a sense of self respect, achievement, fulfilment and recognition. Any first year psychology student can tell you that. It’s called “Maslow’s Hierarchy of Needs”.

    By endeavouring to accomplish something that has never been tried before you’re satisfying the natural desires the modern world does such a good job of suppressing. To come to the twilight years of your life and be able to proudly state “I did that!” is one of the hallmarks of a life well lived.

    “Get busy living, or get busy dying” Andy Dufresne, Shawshank Redemption

    A great train of thought to start with when dreaming up this kind of project is “I’d like to photograph every (fill in the blank) in the world, or country”. Alternatively you could be the first person to ever photograph a “blank”.

    Massage charity Labuan Bajo

    An exhaustive study of a single subject

    Most things in this world have been photographed at least once, but there are still many subjects that haven’t been studied photographically for an extended period. If you photographed a year in the life of a dementia care home or a homeless person it would be far more interesting than one passing photo.

    A helpful project

    If you have the nagging feeling that you want to do more with your life and your photography, then a project that helps others can help you find your mojo. There are many studies that show lasting happiness and fulfilment can be found through helping others. If you can combine helping people with your passion for photography then so much the better. This is the approach I took.

    For two years I had an idea that wouldn’t leave me alone. I kept putting it to the back of my mind as the idea seemed too big to handle. The idea was to do something nice for someone from every country on earth.

    Finally I took the plunge. I followed my own advice by planning the idea, laying out the rules, and announcing it to the world through my website and social media. I could no longer back out.

    A project like this encourages you to keep picking up your camera and exploring the world around you. You end up experiencing things and talking with people you would normally have overlooked. Without this project I never would have reached out to a local care home to create poignant family portraits for the residents. Now I have happy memories and this fabulous testimonial of how my photography touched people’s hearts:

    Care home

    “I treasure the lovely photos that you took of my mother, husband and me at Avery House back in February of this year. My mother became very ill shortly after those photos were taken with advanced Alzheimer’s disease. She also broke her leg and had a partial hip replacement in August of this year, no mean feat at the age of 87. She had to be placed into nursing care at Wentworth Croft, as Avery House couldn’t meet her needs any more. Sadly she passed away on 19th November after seven weeks in nursing care. So you see those photos are priceless to me, everyone says how natural and professional they are and I always tell them who took them. So a BIG THANK YOU to you for a lasting memory of my mum.” Janice Osborne, Peterborough

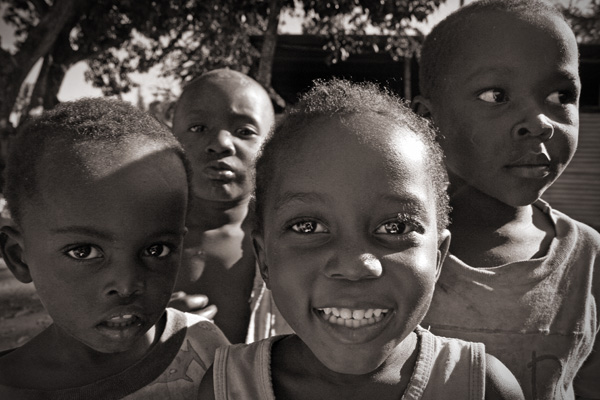
    Visiting and helping an orphanage in Kenya was one of the most humbling experiences of my life. Far more fulfilling than wallowing by the pool like a drunken hippo.

    Kenyan Orphanage 1

    Kenyan orphanage

    Throwing yourself into situations you’d never normally experience opens up a whole new world of photographic opportunities. Great photos often tell a story and projects like this naturally create the necessary environment and atmosphere to help you produce your best work.

    What projects are you working on or dreaming of? When will you take the plunge and get started?

    For more ideas on projects see:

    • 8 Photo Projects in Your Own Backyard
    • 11 Hot Photography Tutorials, Projects, Stories and Tips to Improve Your Photography
    • Start a Personal Photography Project
    • The Importance of Personal Projects

    The post Photography projects that make you feel alive by Dan Waters appeared first on Digital Photography School.


    Digital Photography School

  • The Ruins of Ancient Hauz Khas in Delhi by Jayant Neogy

    Hauz Khas complex in Hauz Khas, south Delhi India houses a water tank, an Islamic Seminary or Madrassa, a mosque, a tomb and pavilions. These were built between 700 and 800 years ago. Today, the ruins abut a subsequently urbanized village which includes living areas, boutique shops and many eating places, A great tourist attraction […]
    dslrBlog

  • Why You MUST Have a Polarizer

    Gavin hardcastle polarizer featured

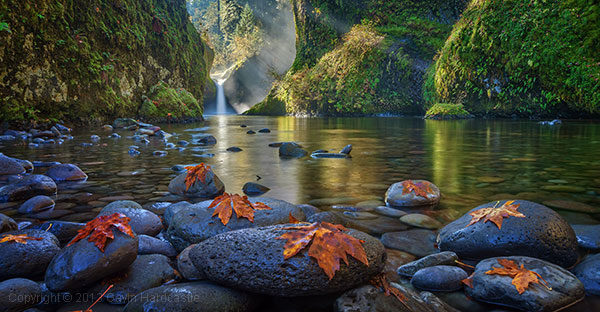
    Ever wondered how professional photographers achieve such lush, vibrant colours and that magical “atmosphere” in their images? BAM – they use a polarizing filter or “polarizer”! I could never have achieved the shot above without a polarizer.

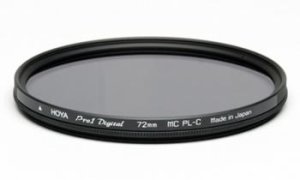
    hoya-polarizer.jpgWho would have thought that just one slice of wafer thin glass slapped on the front of your lens could transform your photographs from “meh” to “woah” with just a quick turn of the hand?

    You MUST Have a Polarizer!

    As a landscape photographer I won’t go anywhere without at least a couple of polarizers in my bag of goodies. My wife loves them too because she never has to ask me what I want for Christmas, the answer is always “a polarizer please”.

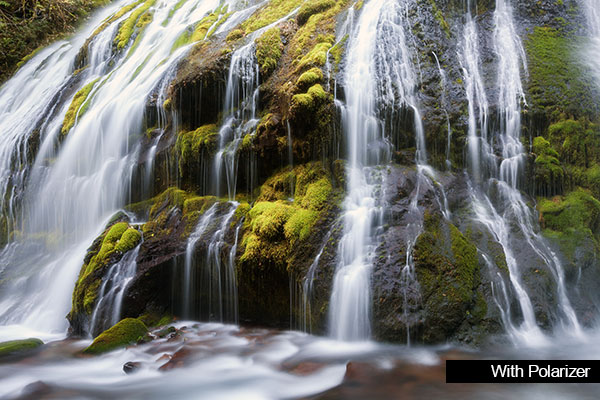
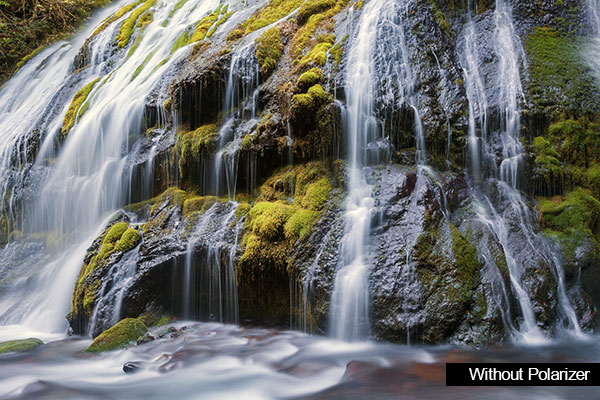
    Can you spot the difference between the two shots below?

    Gavin hardcastle with polarizer

    Gavin hardcastle without polarizer

    The effect is pretty dramatic in terms of how the polarizer removes all of the white glare from the wet rocks. It also allowed for a longer exposure so that I could capture more movement in the water.

    So what does a polarizer do?

    In a nutshell, your polarizer allows you to control the reflected light that you didn’t even realize is messing up your shot. It’s like putting a pair of shades on your camera (or monacle I guess). Here are just a few reasons you’ll love a polarizer:

    1. Allows you to see through shallow water by excluding light reflecting from the surface.
    2. Gives you deeply saturated colours by excluding reflected light, for example, wet rocks or leaves.
    3. Allows you to control which light reflections you want to keep. Lets say you’re shooting a shiny surface like a wet car, a polarizer will allow you to change the angles of the reflected light on the curves of the bodywork. See video below.
    4. Brings back definition to blown out clouds that may appear too bright without your polarizer.
    5. Allows you to use slower shutter speeds for milky water shots. You’ll never shoot another waterfall without one.
    6. Allows you to shoot through glass that would otherwise show obscuring reflections.
    7. It protects your lens from impact and the elements. It’s easier to replace a $ 100 filter than a $ 2000 lens.

    Video of a polarizer in action to manipulate the reflections on paintwork.

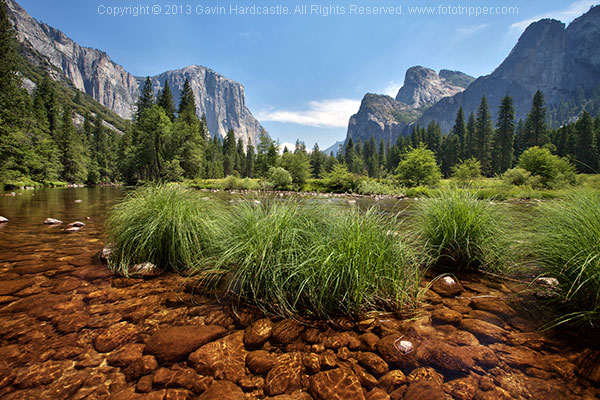
    Here’s another example of the way a polarizer allows us to see right through shallow water.

    Gavin hardcastle polarizer yosemite

    When NOT to use a polarizer

    A polarizer reduces the amount of light that enters your lens. If you need to shoot fast, like in a dark canyon or a night time rock concert, ditch the polarizer. Low light situations won’t benefit from a polarizer because you’ll need all the light you can get for fast shooting.

    If you want reflections, like in a lake scene, use a circular polarizer so that you can take a shot WITH the polarizer engaged and another shot WITHOUT the polarizer engaged. That way you can decide which you like best during editing and maybe blend the two for the ideal look.

    Like to shoot rainbows? Ditch the polarizer or the rainbow will be invisible, it’s reflected light remember.

    Which brand to choose

    In all honesty I’ve used them all and I can’t recommend one brand over the other. Your challenge is to find one that fits the diameter of your lens. Try finding an 82mm at short notice and you’ll know my pain. Shop online for the best deals.

    Invest in the most effective camera accessory money can buy, treat yourself to a polarizer then go create some awesome images.

    What’s your recommendation for an absolute “MUST HAVE” in the camera bag?


    Here are a few filters to check out:

    • B+W 77mm Kaesemann Circular Polarizer with Multi-Resistant Coating
    • Hoya PRO1 Digital CIRCULAR PL – Filter – circular polarizer – 67 mm
    • Hoya 58mm HRT Circular PL Polarizer Multi-Coated Glass Filter
    • Tiffen 72mm Circular Polarizer

    Further reading on using filters:

    • Polarizing and Neutral Density Filters: Essentials for Landscape Photography
    • Getting It Right In Camera: Using Filters To Accurately Capture the Scene
    • ND Filters: Everything You Need to Know
    • Neutral Density Filters
    • Introduction to Filters for DSLRs

    The post Why You MUST Have a Polarizer by Gavin Hardcastle appeared first on Digital Photography School.


    Digital Photography School

  • 5 Tips to Take Better Images in a Zoo

    5 Tips to Take Better Images in a Zoo

    Many photographers think that taking a great animal photo requires extreme patience, sitting and waiting for hours in the wild. Yes, this is how a great wildlife shot is captured. However, if you just want to get some practise, you can still capture great animal photos in a zoo. Taking pictures of animals in a zoo is easier than shooting in the wild. Yet, it is not too easy.
    Many people think that taking a picture in a zoo is not challenging, but I don’t agree. It is not as simple as you think to take a good picture in the zoo. Here are some tips that will help you to capture a better photo next time.

    #1 Be Aware of Both Foreground and Background

    At the zoo, animals usually live in cages. If you are able to shoot inside the cage, beware you do not capture the cage as a background. On the other hand, for those animals you can observe through a thick glass wall, what you can do is to shoot as close to the glass as possible and open up the aperture as wide as you can so as to minimize flare and dirt on the glass.

    Crocodile

    For example, I shot this crocodile outside a glass wall. I used a 200mm lens at f/2.8 because I wanted to blur out all the dirt on the glass. When I was shooting, I removed the hood and stuck the lens to the glass so that no flare would affect my image. You can also use this same technique to blur out the cage if you can only shoot outside a cage.

    #2 Learn About the Animal’s Behaviour

    Although you do not need to wait for your target animal to appear when you photograph in a zoo, you still need to understand their behaviour so as to capture a good image. Most animals feel hot and find shelter at noon. They tend not to move around and just sit still or sleep instead.

    Firefox

    You may not able to get a good pose because they are not going to keep the same pose for hours. One of the solutions is to find out when the feeding times are. When the zoo keeper takes the food into the cage, or glass house, you are going to have the best chance to get the best angle.

    Stilt

    #3 Use a Wider Aperture and Higher ISO

    Do not be afraid of noise. Noise is so much better than a blurry image. When you shoot with a 300mm lens hand held, you have to get at least 1/300 shutter speed in order to achieve a sharp image. Boost up your ISO. I normally use automatic ISO selection so I can focus on composition and catching the target’s movement. You can set a minimum shutter speed and a maximum ISO with most camera models. You will need this because when the target is moving, it will move between both brighter and more shaded areas. You are not going to have enough time to change the ISO if you shoot with Aperture priority or Manual mode.

    Parrot

    On the other hand, open up to the widest aperture unless you are shooting in good sunshine. A larger aperture can give you a faster shutter speed which can reduce the chances of handshake. It can also help to blur out the foreground and background.

    #4 Try a Different Angle

    Unlike shooting in the wild, shooting in a zoo is limited by many restrictions. You cannot step into the cage, or even get as close as you want. Therefore, you need to look for the best angle. You can shoot behind a rock with a telephoto lens.

    Monkey

    This will provide you with a blurry rock as foreground and the photo will have more depth. You may also get a nice perspective by shooting from an extremely low angle.

    Practice, Practice and More Practice

    A zoo is the best place for practicing animal shoots in my experience. You can take more time to think about your images.

    Panda

    You are extremely safe when shooting. Hence, you can get more practice with both your camera and lens. Get the feel for how fast your 300mm focuses. Practice and develop better hand held skills so you may use 1/40 sec for a 300mm lens. (I still cannot do this. Learn how to press the shutter just as an egret is beginning to hunt. When you have enough practice, you can try going ‘wild’.

    The post 5 Tips to Take Better Images in a Zoo by Kevin Choi appeared first on Digital Photography School.

    Digital Photography School

  • The Ugly Truth About Image Theft: How to Protect Yourself

    Back in the Middle Ages, you could have your ears or hands cut off as a punishment for theft. Though in today’s civilized society, lots of things have changed, and we no longer deprive people of the parts of their body. Instead, we, in the worst case, put them to jail, with their ears safe! While theft is an issue Continue Reading

    The post The Ugly Truth About Image Theft: How to Protect Yourself appeared first on Photodoto.


    Photodoto

  • Balancing Color for Flash and Ambient Light using Gels

    Flash with 1 CTO plus 1/8 CTOIn the last article Balancing Flash and Ambient Light Using an Incident Light Meter I did not mention color temperature or any correction for the colorcast in the background. There were however requests for it in the comments section, so in this article we will cover three ways of balancing color for flash and ambient light (tungsten yellow/orange which is approximately 3200°K, flash which has a color temperature close to daylight or 5500°K).

    Color Temperature Explained

    Before you go into the process of correcting color imbalance you will need to understand color temperature. A basic description of color temperature is based on the color characteristics of visible light from warm (yellows) to cool (blues) and the ability to measure this in degrees Kelvin (°K). Degrees Kelvin is a numerical value assigned to the color emitted by a light source. Visualize a lamp filament that is heated using an electric current. It starts off as black and starts getting hot. At a particular point it will become hot enough to start glowing, typically a dark red. As it gets hotter, it will change from dark red to orange to yellow to practically white. It is important to understand that technically, red light has a lower color temperature but is described as warm, while blue light is a higher color temperature but is described as cool. So remember that the terms warm and cool describe color, not temperature. This is a fairly extensive topic but for a quick explanation this should help.

    Read more on White Balance and color temperature:

    • Practical White Balance and Why You Should Learn It!
    • Introduction to White Balance

    Since warm and cool are colors, we can change their characteristics by modifying color. In lighting we achieve this modification by using various colored gels of varying densities. Lets examine the first and simplest method.

    Method One – Using Color Gels on the Flash

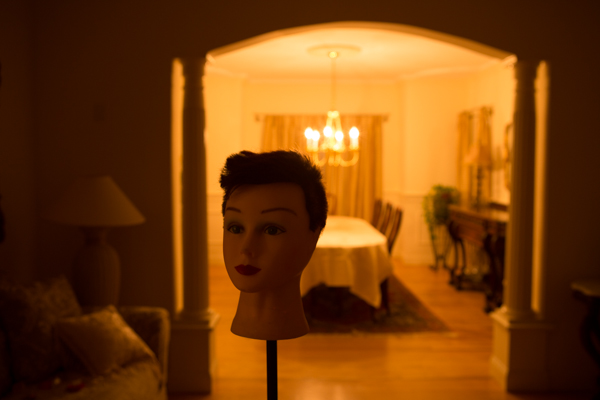
    Here are two images of the same scene, one using Auto White Balance (AWB) and the next using Daylight White Balance (WB). The daylight WB is 5200°K while the AWB applied 3200°K. Clearly the Daylight WB is too yellow.

    Auto WB

    Image captured with camera set to Auto White Balance (AWB)

    Same scene as above captured with the camera set to Daylight White Balance

    Same scene as above captured with the camera set to Daylight White Balance

    The Problem

    The background room is lit by tungsten bulbs (typically around 3200°K). We will use a flash to light the main subject (approximately 5500°K).  This is a considerable difference that you will need to resolve. So if you can make both the light sources match in color temperature, you can then set the WB on your camera to that, and get a perfectly balanced image.

    The Solution

    To achieve this balance, you will use a color correction gel on your flash, to match the orange color of the tungsten bulbs. Theoretically both sources will now produce the same color. So if you set your camera’s WB to “tungsten” you will capture the background without any colorcast and it will look neutral. What about your primary subject? Since the flash output has been color modified to “tungsten”, the entire scene will look natural and devoid of any colorcast as long as the lights are close to the color temperature of tungsten.

    Color correction is achieved using gels. These gels are manufactured by companies like Roscoe, Lee and ExpoImaging. Gels come in all sizes from large rolls to precut sheets. My preferences are the Rogue Gels made by ExpoImaging as they are the perfect size for flash heads and are attached using an elastic band. Each gel is marked for its strength and light loss. As a starter, for under $ 10 you can buy sample packs from most lighting supply stores.

    Gels that create yellow/orange light are known as CTO gels (Color Temperature Orange). These gels are available in various strengths as follows:

    • 1/8 CTO Converts 5500°K to 4900°K
    • 1/4 CTO Converts 5500°K to 4500°K
    • 1/2 CTO Converts 5500°K to 3800°K
    • 3/4 CTO Converts 5500°K to 3200°K
    • Full CTO Converts 5500°K to 2900°K

    I recommend you start with a full CTO and adjust by adding or reducing the color temperature correction by either combining gels or using gels of lesser strength. Since these gels add color they also reduce the amount of light transmitted. Based upon the gel that you are using, you will need to compensate for the loss of light. The typical light loss is mentioned in “f” stops with each gel strength. This information is typically imprinted on the gel or provided on a backing sheet of paper. You should use this information as an initial guideline for compensating your exposure.

    This method will work reasonably well. However, it is not the most accurate, as it relies purely on a visual color correction. See the result in the following image:

    The camera White Balance is set to Tungsten and the flash is gelled using a Full CTO

    The camera White Balance is set to Tungsten and the flash is gelled using a Full CTO

    Notice that the color of the subject is fairly accurate but the background is still a bit yellow/orange. The color temperature of the lights in the background may not be true 3200°K.

    Method Two – Gels on the Ambient Light Source

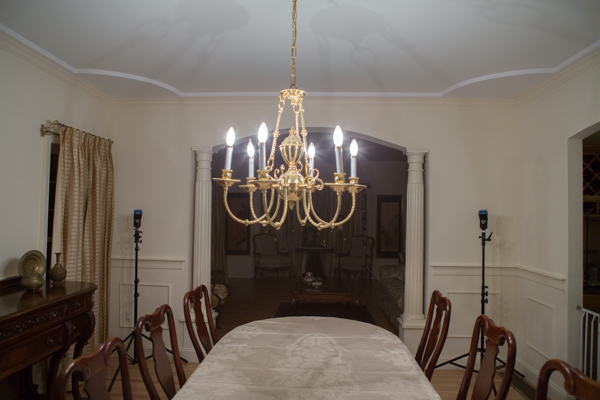
    In the second method, you will use gels over the offending lights if at all feasible. In this example consider it not feasible. However, you can use additional flash heads to overcome the problem of the tungsten colorcast. You do this by applying an opposing color gel to one or more flash light sources to fill the background. Keep in mind that based upon the size or the area and the intensity of the ambient light in the background, this too may not always be feasible. Take the additional flashheads (make sure they can be fired as slaves) and put a CTB (Color Temperature Blue) gel on each. What you are attempting to do is to negate the effect of the Tungsten by adding blue light to the ambient environment. Test your exposure and set the camera to “flash” white balance. Once again, you may need to add or subtract the gel intensity.

    The set up. Note how the flash heads are concealed from view

    The set up: note how the flash heads are concealed from view and pointed into the room that is the background

    The CTB gels like CTO gels are available in multiple strengths as follows:

    • 1/8 CTB Boosts 3200°K to 3300°K
    • 1/4 CTO Boosts 3200°K to 3500°K
    • 1/2 CTO Boosts 3200°K to 3800°K
    • 3/4 CTO Boosts 3200°K to 4100°K
    • Full CTO Boosts 3200°K to near daylight

    Once you are satisfied with the background color, go ahead and photograph the primary subject. Do not gel the main flash and leave the white balance on “flash”.

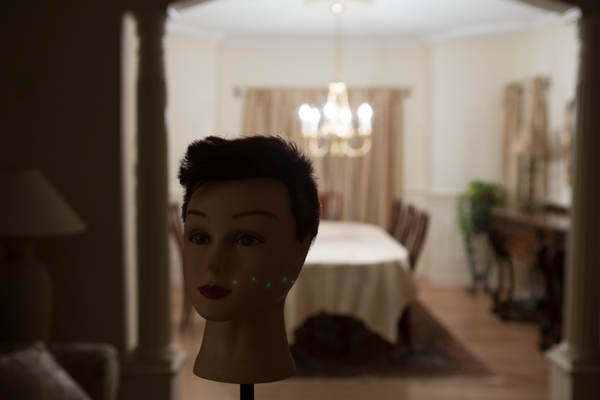
    Color Bal

    Color Correction using blue gels in the background

    In each of the cases above there is still some color cast in the final image. This is because the lights in the background are not true 3200°K and we have been relying on tungsten color temperature for our corrections.

    Method Three – Custom White Balance for Background and Matching Gels on Flash

    Here you use custom white balance to establish an exact white balance setting for the ambient light. It is best to use a “white balance card” or a device like the X-Rite Color Checker Passport.

    Color Checker Passport in Ambient Light

    Image captured of  a Color Checker Passport in ambient light

    Zoomed in for creating a Custom White Balance

    Color Checker Passport – Zoomed in for creating a Custom White Balance

    Image of the Color Checker Passport after Custom White Balance was established

    Image of the Color Checker Passport after Custom White Balance was established

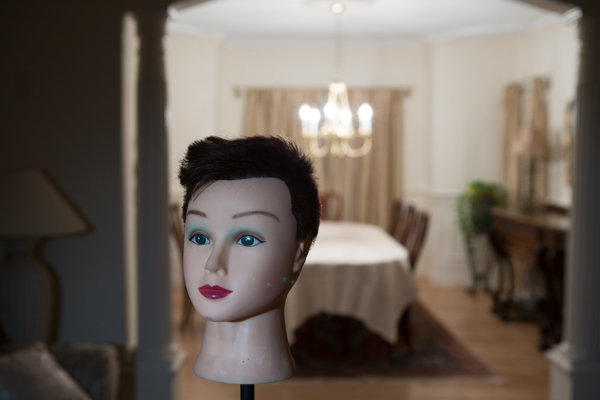
    If possible, bring that image into Lightroom or Adobe Camera Raw and determine the actual color temperature. In this case, it is 2400°K, which, as you can see, is vastly different from the 3200°K tungsten. No wonder there was still a yellow colorcast in the first method. Use this measurement to establish the gel strength needed for the primary flash. If you cannot use Lightroom or any other software to obtain an accurate color temperature reading, you will need to do a bit of trial and error to determine how much CTO to use. In this case we need to get to 2400°K. A full CTO will drop 5500°K to 3200°K and a 1/8 CTO will drop an additional 600°K bringing the correction to 2600°K which is fairly close to what we need. Leave the camera set to the custom WB and gel the flash with one Full CTO gel and one 1/8 CTO gel to get a well balanced image.

    The correct White Balance for the background

    The correct White Balance for the background


    Using a Full CTO on flash head

    Using a Full CTO on flash head

    Flas with 1 CTO plus 1/8 CTO

    Flash with a Full CTO plus a 1/8 CTO – a well color balanced image

    One full CTO and one 1/4 CTO – the subject is a bit warm

    One full CTO and one 1/4 CTO – the subject is a bit warm

    In Conclusion

    Always keep a set of color correction gels in your bag if you use flash on location.  Not only will you need them for indoor flash photography but the CTO gels are a ideal when using flash for portraiture at sunrise or sunset.

    The post Balancing Color for Flash and Ambient Light using Gels by Shiv Verma appeared first on Digital Photography School.


    Digital Photography School