Category: Photography

  • The Mystery of Night Photography – 35 Images of the Night

    By Billy Wilson

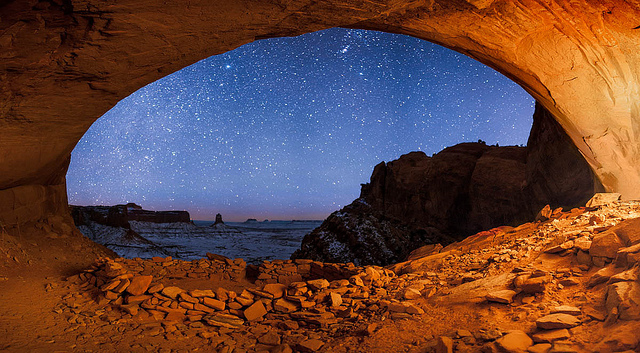
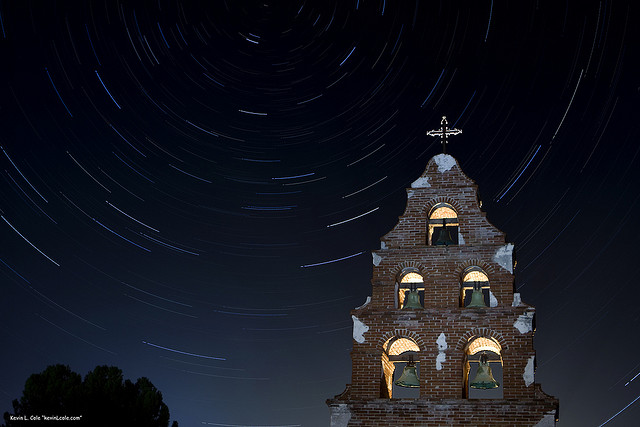
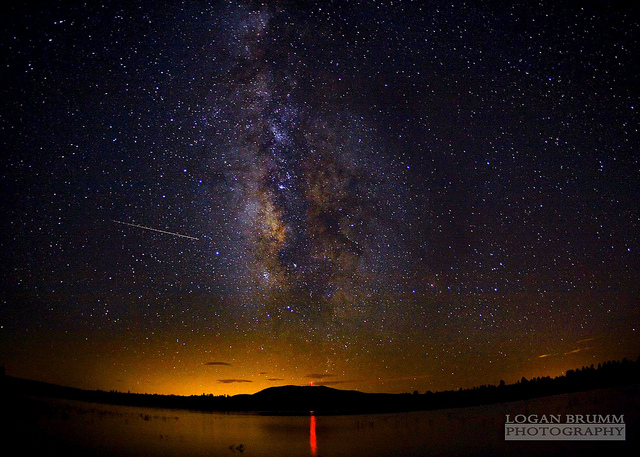
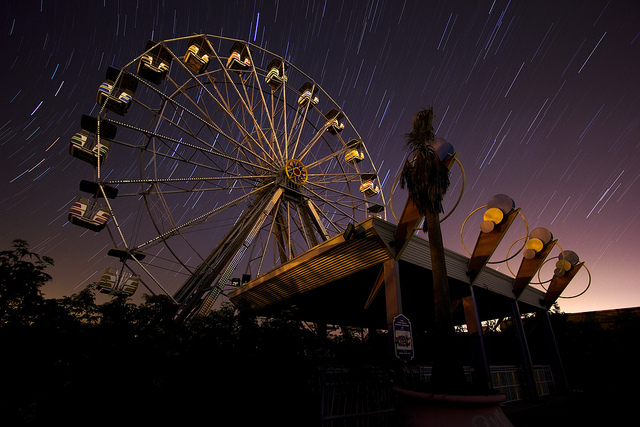
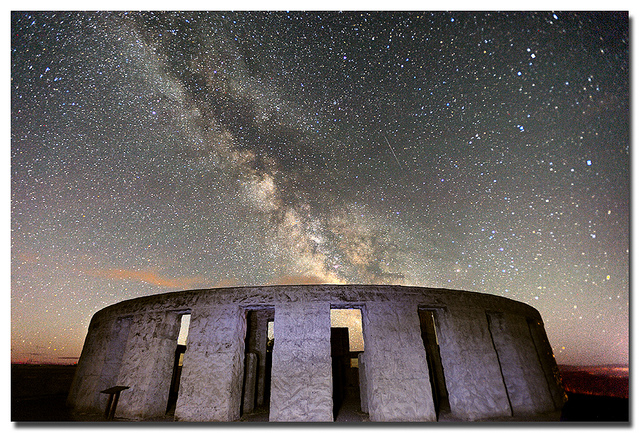
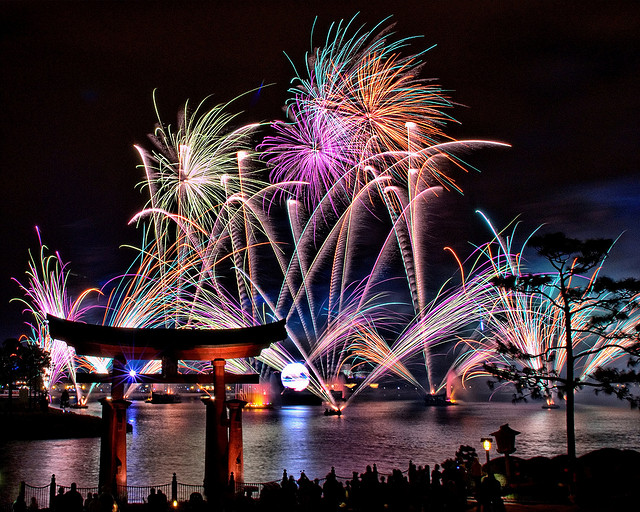
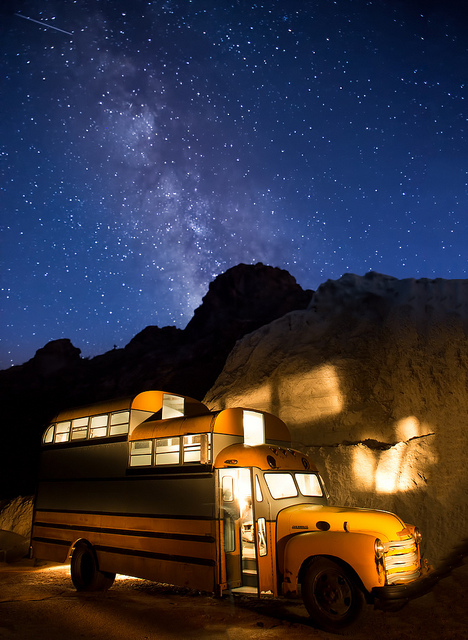
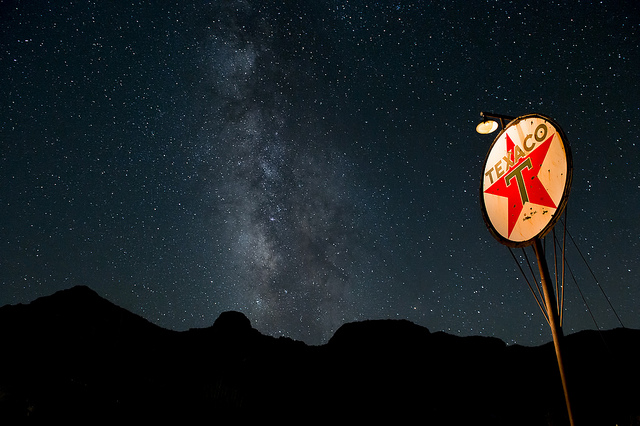
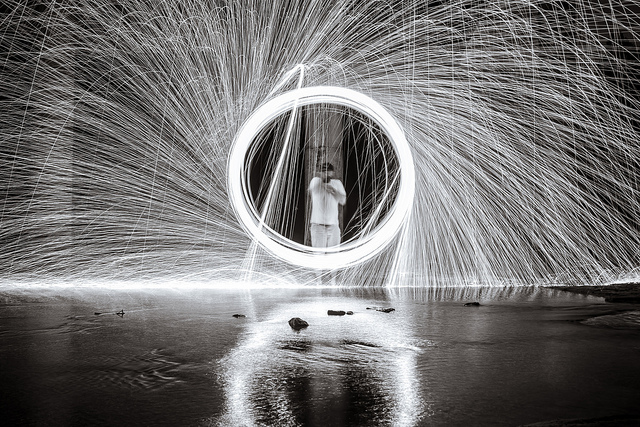
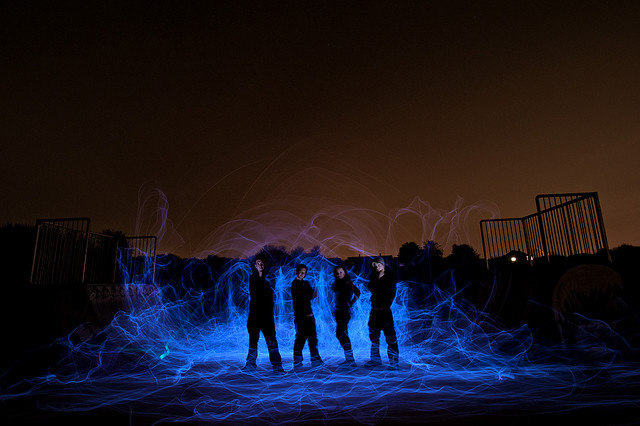
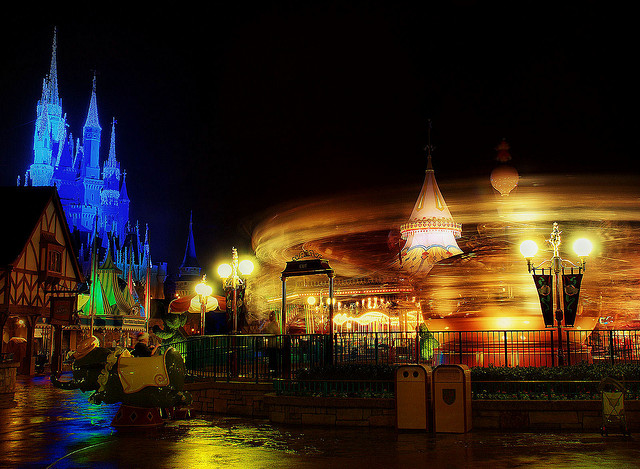
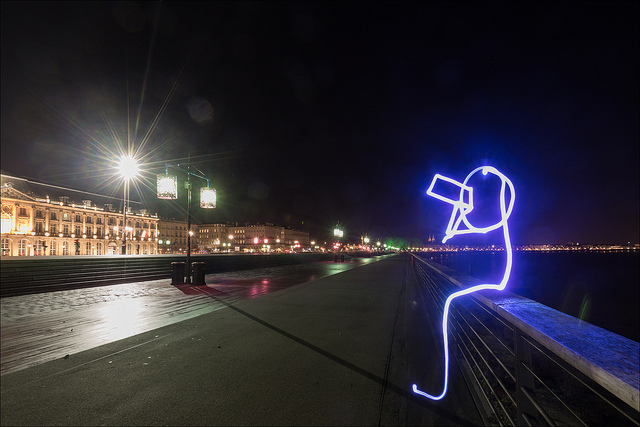
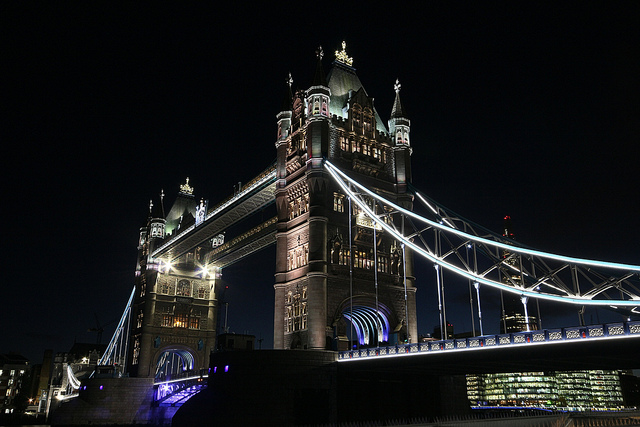
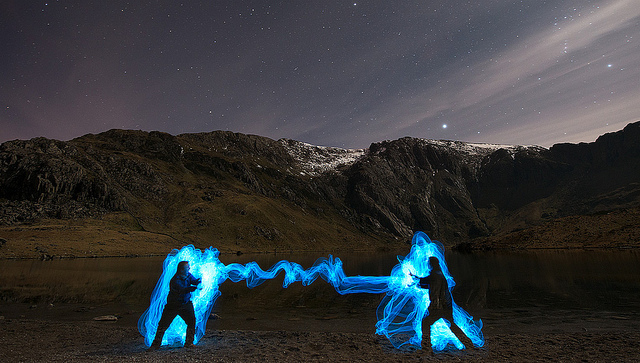
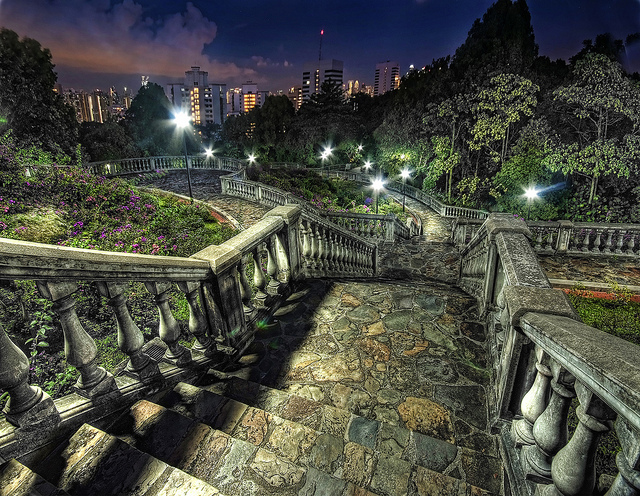
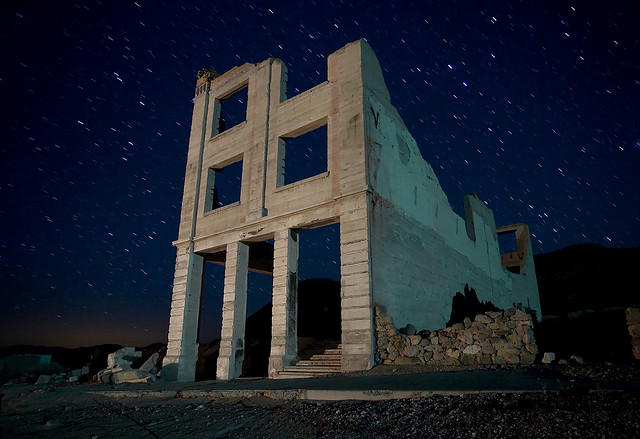
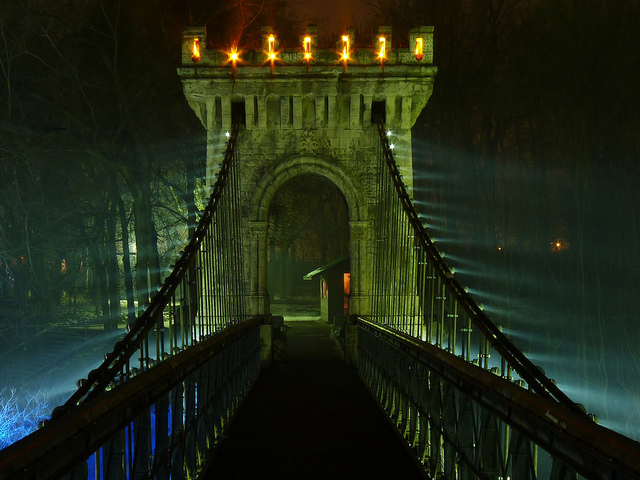
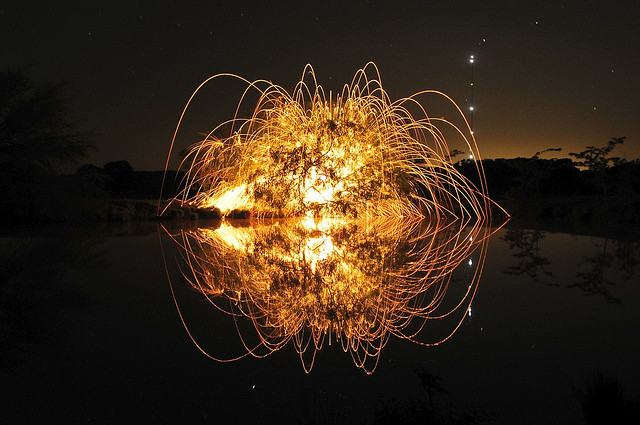
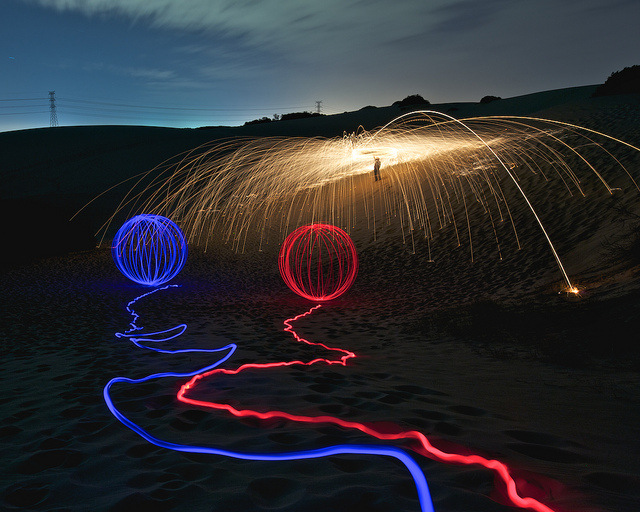
    One of my favorite classes that I teach is on night photography. I find that many beginners haven’t yet ventured out into the dark of night and I love introducing them to the wonders of night photography, and showing them the possibilities. Things like light painting, orb making, fire spinning, zooming exposures and star trails are some of the exciting things possible at night.

    Let’s take a look at a few night photography images to get fired up!

    By Dustin Diaz

    By H. Raab

    By DomiKetu

    By earsaregood

    By Alexander Kesselaar

    By Lotus Carroll

    By Jeff P

    By David Kingham

    By Kevin Cole

    By Logan Brumm

    By Kris Williams

    By Chris Luckhardt

    By Toby Keller

    By Bala Sivakumar

    By Joe Penniston

    By Howard Ignatius

    By Howard Ignatius

    By Lotus Carroll

    By William Cho

    By ben matthews :::

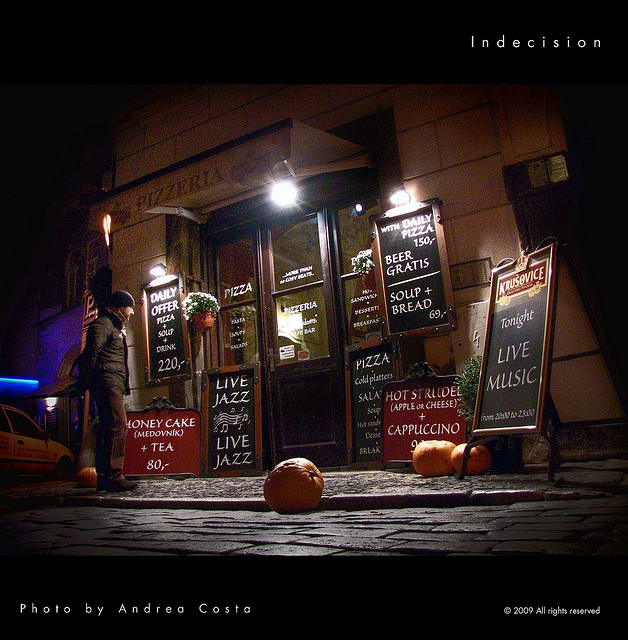
    By Andrea Costa

    By Joe Penniston

    By Adrien Sifre

    By Simon & His Camera

    By Carl Jones

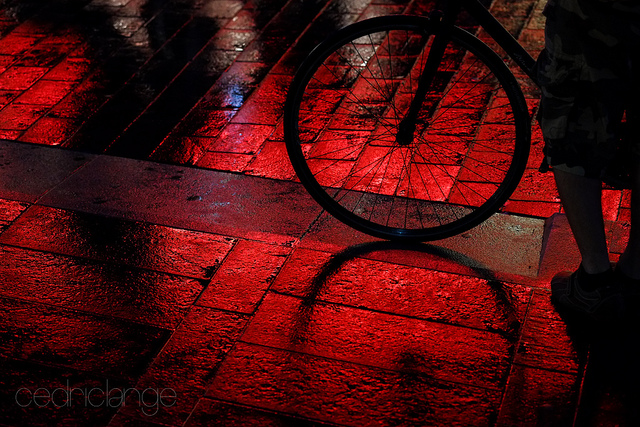
    By Cedric Lange

    By Riccardo Francesconi

    By photophilde

    By Viewminder

    By Duane Schoon

    By Justin Brown

    By Luz Adriana Villa

    By William Cho

    By john curley

    Learn about how to do night photography here:

    • Moon Photography: 6 Tips for Better Moon Photos
    • Painting with Light in the Landscape
    • The Night Sky In Landscape Photography

    The post The Mystery of Night Photography – 35 Images of the Night by Darlene Hildebrandt appeared first on Digital Photography School.


    Digital Photography School

  • The Definitive Guide on How and When to Use ISO on Your Camera

    When people talk about digital camera settings, there are three main ones that pop up: shutter speed, aperture and ISO. They all relate to light and the way your camera captures it: Shutter speed controls the length of time your camera lets in the light, aperture determines the size of the opening in your lens that light travels through and Continue Reading

    The post The Definitive Guide on How and When to Use ISO on Your Camera appeared first on Photodoto.


    Photodoto

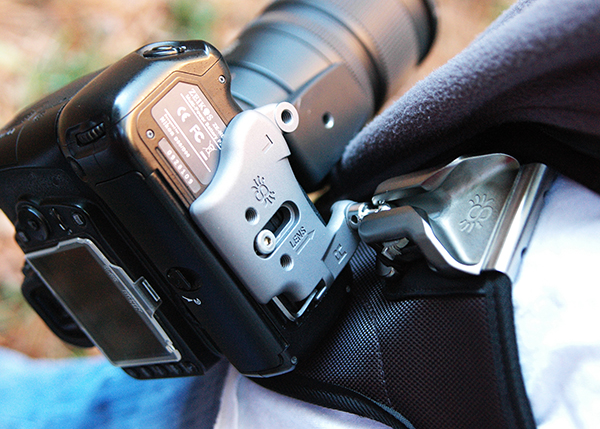
  • Spider Camera Holster Review

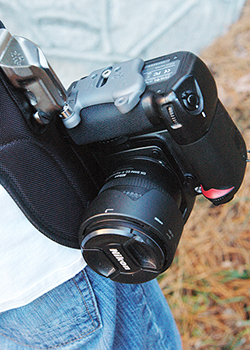
    The SpiderPro Holster provides a secure, durable camera-carrying system that takes away the strain caused by traditional camera straps.

    The SpiderPro Holster provides a secure, durable camera-carrying system that takes away the strain caused by traditional camera straps.

    Many moons ago, someone had the idea to attach a strap to two points on a camera and hang it around their neck. While it may have seemed like a good idea at the time, it’s tough denying that traditional camera straps pose certain problems. Personally, I just don’t like that weight hanging around my neck for several hours at a time, especially if I’m using a longer lens like the 70-200mm. Getting the camera off my neck and over my shoulder isn’t a great alternative, because whether it’s around my neck or over my shoulder, the weight is a strain and at least one hand is always on the camera, making sure it’s not bumping into anything or anyone.

    Sling straps were a good step in the right direction,  but they don’t always work well when I’m carrying a camera bag. They also only partially solve the upper-body strain that comes with carrying a pro DSLR (or two) for an extended period of time. All that changed for me, though, when the Spider Camera Holster came along.  Suddenly, I could completely ditch the strap. By providing a secure, balanced carrying solution at my hip, Spider gives me a truly hands-free carrying experience, and takes the strain off my neck and shoulders. Available in two models with various accessories, Spider has a reliable set-up for almost every situation.

    SpiderPro Camera Holster Kit

    What’s in the Box?

    • Holster
    • Pin
    • Belt/pad combination
    • Accessory plate
    The Pro Kit includes the holster, pin, belt, and pad.

    The Pro Kit includes the holster, pin, belt, pad, and accessory plate.

    How Does it Work?

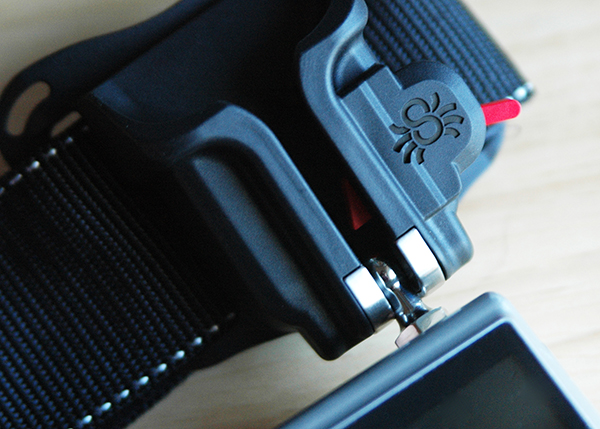
    The holster and pin are at the heart of the Spider system. Made of stainless steel and hardened cast aluminum, the holster provides a durable, safe, and secure place to mount your camera at your hip. A two-position lock gives added peace-of-mind. In its locking position, the camera is locked in place each time the pin slides into the holster. A 15° turn of the lock releases the pin, allowing you to smoothly and easily remove your camera from the holster. In its second position, the locking mechanism is disengaged, allowing for quicker, one-handed removal of the camera from the holster. While I personally don’t recommend disengaging the locking mechanism, some sports or event photographers might prefer this quicker release. Proceed with caution if you do.
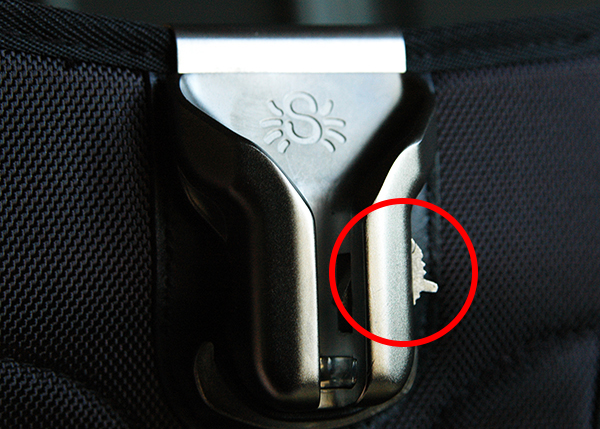
    The red circle shows the locking mechanism in its locked position. Lifting it until it clicks into the "up" position disengages the lock.

    The red circle shows the locking mechanism in its locked position.
    Lifting it until it clicks into the “up” position disengages the lock.

    The pin attaches either directly to the bottom of the camera, or to the included accessory plate. Once attached to the camera, the pin slides into the holster at a 90° angle and locks in place. The camera then swivels into its proper position–upside down, with the lens pointing behind you. It is the very nature of this swivel joint that keeps the camera securely in place, preventing any accidental bumps from dislodging it from the holster.

    The two-inch, reinforced belt is size-adjustable and has a three-way locking buckle to ensure yet another added level of security. The integrated pad helps support the heavier loads of professional size cameras and longer lenses. In the single camera configuration, the holster is actually bolted to the belt. Trust me when I tell you that it’s not going anywhere.
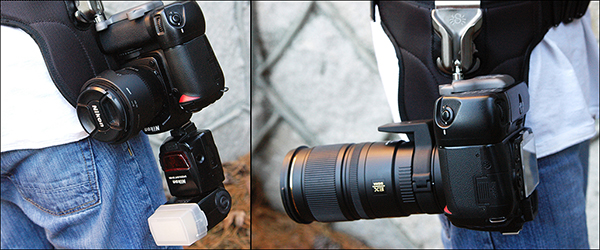
    When loaded properly, the camera will hang upside down, with the lens pointing behind you. The holster offers a comfortable balance, regardless of whether you are using a flash or a 70-200mm lens.

    When loaded properly, the camera will hang upside down, with the lens pointing behind you. The holster offers a comfortable balance, even if you are using a flash or a 70-200mm lens.

    Since cameras are designed with only one accessory hole on the bottom, those of us who have more than one thing to attach are usually forced to sacrifice something. The Spider Holster gets around that by using an accessory plate that allows plenty of room for attaching the pin, as well as additional threaded holes for a tripod quick-release plate. If tripod use is not a concern, you can–as mentioned–attach the pin directly to the camera. During my test-drive, however, I found that using the accessory plate configuration placed the camera in a more comfortable position in the holster.
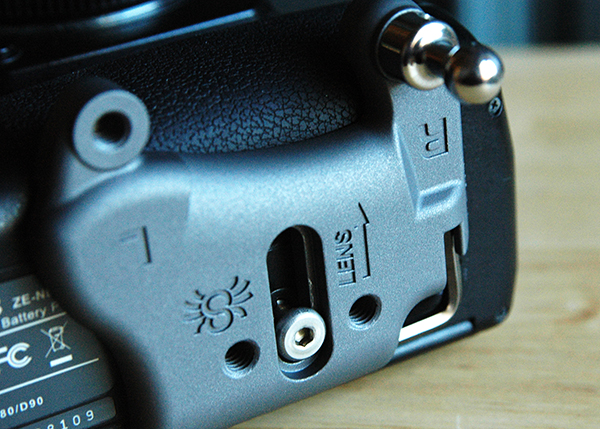
    The accessory and include allen wrench make the system easily adaptable for trip use.

    The accessory plate and included allen wrench make the system easily adaptable for tripod use.

    Black Widow Camera Holster Kit

    What’s in the Box?
    • Holster
    • Pin
    • Belt
    • Pad
    The Black Widow Holster is designed for lighter DSLRs and smaller cameas.

    The Black Widow Holster is designed for lighter DSLRs and smaller cameras.

    How Does it Work?

    The Black Widow Holster is designed around lighter weight, entry-level DSLRs, mirrorless systems, and smaller point-and-shoot cameras. It works almost identically to the SpiderPro, with a few key exceptions. For starters, the holster itself is made of tough, durable plastic, with stainless steel where the pin locks into place. The locking mechanism on the Black Widow only has one position, meaning that disengaging the lock is not an option. Additionally, since the Black Widow is designed with an eye towards lighter cameras, it can be used with either the kit belt or your own.

    Personalizing the Experience

    Fresh out of their respective boxes, both kits are ready to go. Both can also be accessorized, tailoring the experience to your own specific needs. In addition to being able to buy each component separately, the following accessories are available for the SpiderPro and Black Widow.

    SpiderPro

    • Large Lens Pouches  – one or more pouches can be attached to the belt, allowing you to carry your camera on one hip and a spare lens on the other
    • Arca-Swiss Adapter – an additional adapter can be attached to the accessory plate, making it compatible with any Arca-Swiss tripod head
    • Pro Pad Adapters Kits – For those photographers who prefer the belts they already own, the SpiderPro Pad can be attached to belts from Think Tank and LowePro.

    Black Widow

    • Thin Plate – works in conjunction with the tripod plate you already own, allowing you to attach both the holster pin and your tripod plate at the same time
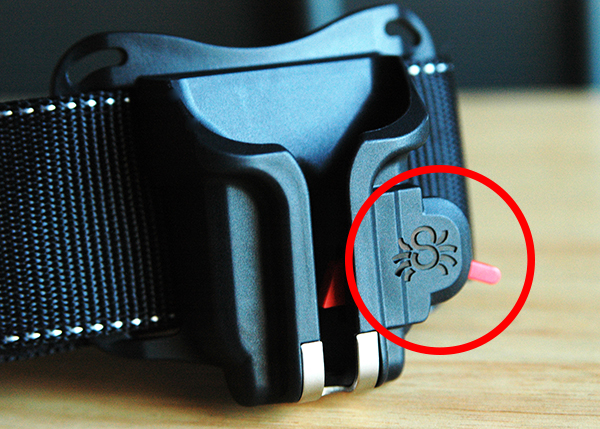
    The locking mechanism on the Black Widow has only one position-- locked-- and cannot be disengaged.

    The locking mechanism on the Black Widow has only one position– locked– and cannot be disengaged.

    Impressions and Recommendations

    The Spider holster systems do what they say they do and they do it really well, providing a balanced, secure, comfortable, and durable camera-carrying experience that takes any possible strain to the upper body completely out of the picture. With what appears to be high-quality materials and workmanship, I’m confident that both of these products are built to last. I’d be remiss, though, if I didn’t offer a few words of caution.

    First and foremost, make sure your camera is properly locked in the holster before letting go. This is absolutely vital. A drop of even just a couple of feet can cause very expensive damage. Secondly, be careful when kneeling while you have a camera in the holster–particularly if you have a flash attached. This applies primarily to photographers who may be using two holsters at once, as well as those who may opt to disengage the locking mechanism. You could accidentally damage your camera or slide it from the holster while kneeling if you aren’t careful.

    No system is perfect, but the SpiderPro gets me closer than I’ve ever been. I still enjoy my sling strap, but when I’m working long hours in a fast-paced event or teaching situation, I find the relief to my upper body that Spider Holster provides to be just what my neck, back, and shoulders ordered.

    The post Spider Camera Holster Review by Jeff Guyer appeared first on Digital Photography School.


    Digital Photography School
  • How the Shot was Done: SNK Police Cosplay

    Cosplay-shoot-first-shot

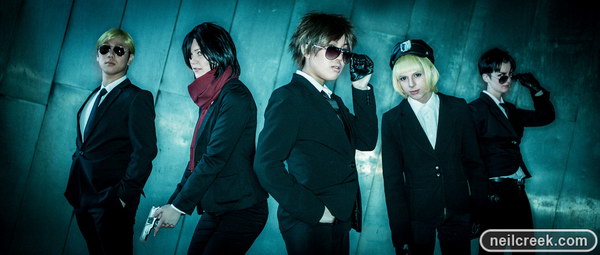
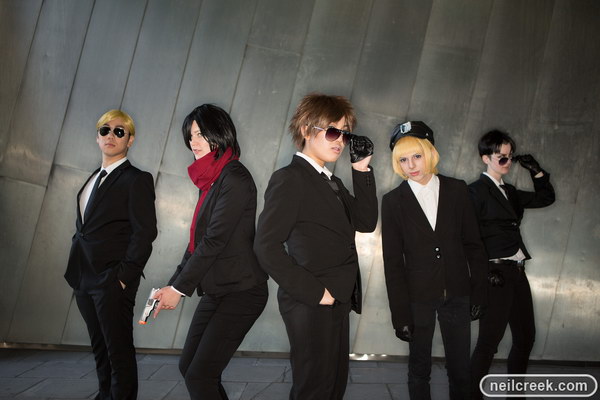
    I do a lot of cosplay (short for costume play) photography with friends, and I was asked by some to do a cosplay crossover photo shot (Shingeki no Kyojin / Psycho Pass) with them. They sent me some reference shots from which I decided to create a slightly futuristic, detective movie kind of look. I also thought I’d experiment with shooting to fit a wide movie crop to suit the look of the shoot. In this article I’ll show you how I set up, shot and processed two photos from the shoot, including the one above. If you’d like to see more photos from the shoot, you can do so here.

    So on to how the shot was done . . .

    The right location

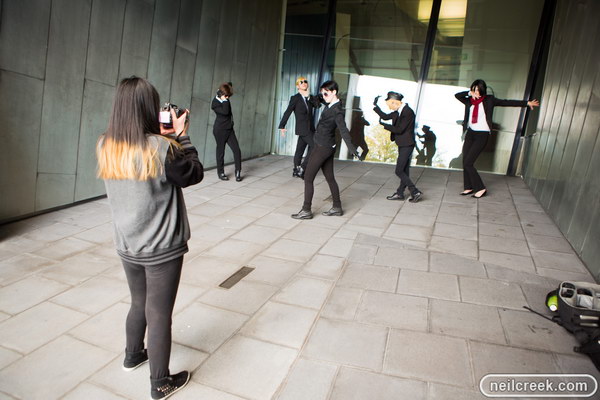
    Our location for the shoot was the rear of Federation Square in Melbourne, Australia. It’s a futuristic looking building with lots of metal, glass and interesting angles in its construction. For the shot above I wanted to take advantage of these textures to accentuate the futuristic look, so we first went to the alcove depicted below in this behind the scenes photo.

    Cosplay-shoot-first-shot-BTS

    Lighting the shot

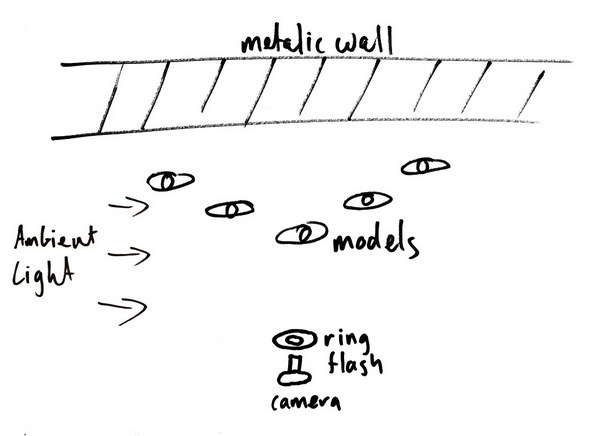
    It was dusk so there was little light getting into the alcove from what became camera left. I wanted to keep that light in the shot as a fill, but my key light was going to be a ring flash – my Orbis ring flash. This kind of light gives a dramatic look with almost no shadow. It’s stark and flat but works well with this kind of scene. In my first test shot I noticed a fantastic unexpected effect of the brushed metal backdrop: anistropic reflection. This created a bright diagonal streak across the back of the shot.

    To get the right balance of fill to key, I set the camera to 1/125sec f/2.8 ISO160 and adjusted the power on the flash to get the right brightness for the shot. This ended up being towards the bottom end of the flash power. Following is a lighting diagram and the photo as it came out of camera:

    Cosplay-shoot-first-shot-diagram

    Cosplay-shoot-first-shot-raw

    Processing the image

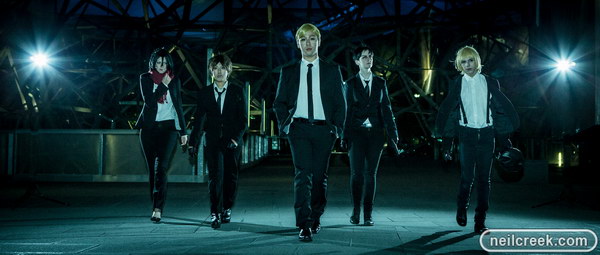
    In post processing the major changes I made were to increase the contrast and clarity, as well as a significant temperature move towards blue, and tint shift to green. With a movie aspect ratio crop and heavy vignette, plus a few small tweaks to the exposure settings, I ended up with this final photo (below).

    Cosplay-shoot-first-shot

    The second location shoot

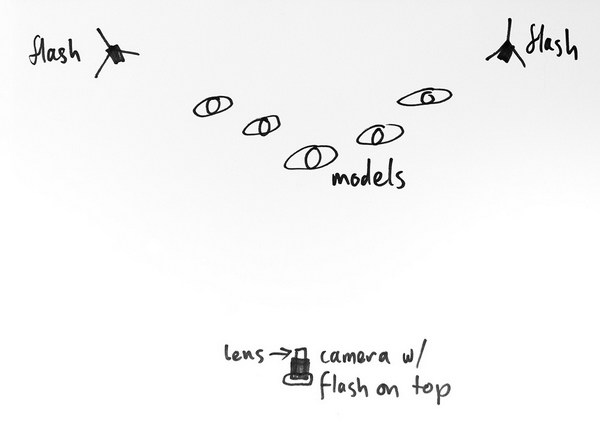
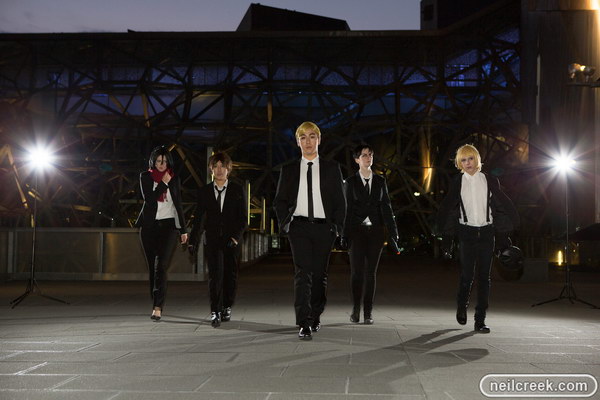
    I love the self-conscious, melodramatic, slow motion walking scenes in movies, and these guys’ outfits were perfect for a shot like that. I wanted to keep a consistent look with the first shot, but give this one its own twist. To do this I took the group out into an area with more space and a cool geometric glass patterned wall as the backdrop. I added a pair of flashes behind the group for some rim lighting, but I deliberately chose to keep them in view for some dramatic lens flares. I replaced the ring flash with an on-camera flash and balanced that to be under the exposure from the rim lighting. This gave me a low key dramatic look (drama was the theme of the night!). Again I set the camera exposure to just give a hint of the background – 1/40sec f/4.5 ISO500 – and dialed the power of the flash to get the balance I was after.

    Rather than try and pose the shot, which would look too forced, I got them into a staggered starting position and simply asked them all to walk toward the camera. To get them in an appropriate mood and make them feel badass, I played this tune (which I consider to be the best slow walking music ever) on my phone and it totally did the trick.

    Following is a lighting diagram and the photo straight out of the camera.

    Cosplay-shoot-second-shot-diagram

    Cosplay-shoot-second-shot-raw

    I processed this photo in essentially the same way as the previous shot, to get a consistent look and feel between it and the rest of the photos in the shoot. Please visit this gallery to see all the images at a decent size.

    Cosplay-shoot-second-shot

    I really love cosplay photography because I get to go crazy and pull out all the creative stops, to make over the top photos, that suit the over the top characters and plot from anime. I’m fortunate to have fun, creative and energetic friends to work with to create these shots. If you’d like to see more of my cosplay and other photo shoots, you should like my Facebook page where I post photos regularly, and occasionally discuss how they were made.

    Which of the two shots is your favourite, and why?

    Models featured in these photos:

    • Ettelle
    • Jase Lube-Sama
    • KnRai
    • Kobito Cosplay
    • Mei at Play

    The post How the Shot was Done: SNK Police Cosplay by Neil Creek appeared first on Digital Photography School.


    Digital Photography School
  • Low Light Photography: How to Shoot Without a Tripod

    A tripod is my most valuable photo accessory. In fact, I view it as an essential item, and not an accessory. But sometimes using one is just not practical. Sometimes you get caught without it unexpectedly, and sometimes they even break. It’s good to know what to do in these situations so you don’t miss any photo opportunities.

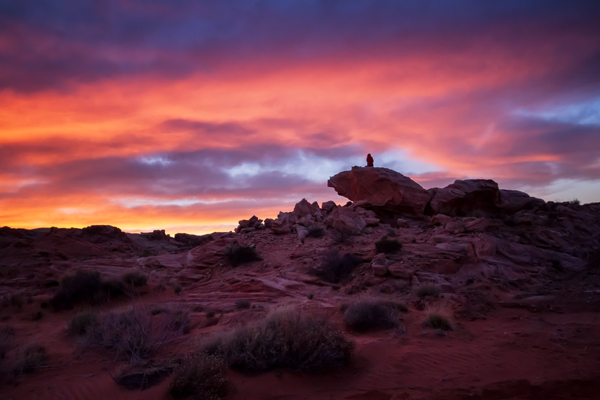
    Sunset in The Valley of Fire, Nevada by Anne McKinnell

    While shooting in the Valley of Fire, Nevada, I broke my tripod. Of course, there was a spectacular sunset that night. I was able to make this photo by increasing my ISO to 2000 and using a wide aperture of f/5.0 (the widest aperture for the lens I was using) when normally I would have used a much small aperture for this scene.

    If you don’t have your tripod with you, or you’re trying to make do without one, you still have some options for low-light photography.

    1. Use a wide aperture

    If you want to handhold your camera in low light, you’ll have to work with a wide aperture, a high ISO, or both. Often landscape photographers want to use a small aperture such as f/18 to get maximum depth of field, but that isn’t practical for low light situations. Instead, use your camera’s widest aperture (the smallest f number) and focus on the most important feature in the frame.

    Most standard kit lenses don’t perform very well in the dark, so if you do a lot of this type of photography, consider picking up a simple 50mm f/1.8 lens; nearly every brand has a cheap one and they’re well worth it for their sharpness and low-light capability. The maximum aperture of f/1.8 is a full 3.5 stops (lets in 12x more light!) wider than a standard 18-55mm kit lens at the same focal length.

    2. Use Image Stabilization

    The rule of thumb for shutter speed is that if you want a sharp image, the shutter speed should be no slower than the same fraction as your focal length – that is, if you’re using a 50mm lens, set your shutter speed to 1/50 second. However, if your lens has image stabilization, the shutter value can be two or three stops slower than this. This leeway makes a big difference in low light situations.

    3. Use proper camera holding techniques

    In low light photography, learning the proper stance and camera holding technique can give you even more leeway when it comes to preventing camera shake. It’s all about stability – plant your feet firmly, about shoulder width apart. With your right hand on the shutter button, hold the lens with your left hand, to steady it. Tuck your elbows tightly into your chest and control your breathing, shooting after you exhale whenever possible. All these things will contribute to your own stillness, minimizing handshake blur.

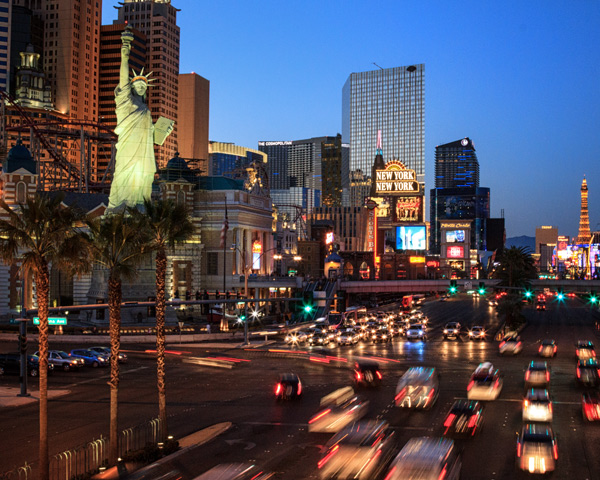
    New York New York, Las Vegas by Anne McKinnell

    In Las Vegas, I wanted to make an image with a fairly long shutter speed to blur the motion of the cars. However, I was standing on a bridge that had a chain link fence, and it was also a narrow pedestrian bridge with lots of pedestrians. Using a tripod was not practical. Instead using ISO 1250 and proper camera holding techniques allowed me to hold it steady for half a second.

    3. Use a high ISO setting

    ISO refers to the level of light sensitivity of your camera. The higher the ISO the more sensitive the sensor is to light, therefore the less light is needed to make a good exposure. The downside is that the higher the ISO, the more “noise” you will find in your image. Noise is a grainy look as opposed to a smooth look. Some noise is okay and it can often be removed in post processing.

    When photographing in low light, turn your ISO up as high as you can before the image quality gets too noisy. This setting is different on every camera and an acceptable amount of noise is different for every photographer.

    I recommend that you do an exercise so you know the maximum ISO for your camera, that results in a noise level you think is acceptable. Take the same shot at a number of different ISO settings and when you view the photos on your computer later (view at 100% size or 1:1), you will see at what point image quality begins to deteriorate. With today’s cameras this point is probably higher than you might think. Often with ISO 800 or 1600 you will see some noise, but not so much that you can’t fix it in post processing. It’s a good idea to try this exercise both in good light, and low light situations.

    Canada Geese at Sunset by Anne McKinnell

    Photographing Canada Geese flying overhead at twilight meant that I needed a relatively fast shutter speed to stop the motion. Therefore, I had to use a high ISO and a wide aperture to enable the faster shutter speed. This image was made at ISO 1600, f/4.5 1/200 second.

    Noise is not necessarily a bad thing and can be used for creative purposes. If you are using a very high ISO, try shooting in black and white – it removes the colour from the noise and instead gives your photos an old-school grainy look.

    Some of the most beautiful landscape photographs are made in low light, so learning these techniques will help you take advantage of low light opportunities and get that great shot even when you don’t have a tripod.

    Further reading on low-light photography:

    • A guide to outdoor low-light photography
    • Better low-light photos without a flash
    • 15 tips for low light landscape photography

    The post Low Light Photography: How to Shoot Without a Tripod by Anne McKinnell appeared first on Digital Photography School.


    Digital Photography School

  • Black-and-White Photography Tips for Beginners

    There are some photographers who like to click images and convert them into black-and-white photos in the post-production phase. There’s nothing wrong with this procedure; it’s just that it is time consuming. So, instead of converting the photos into black and white later, wouldn’t it be better to shoot photos in black and white in the first place? In today’s Continue Reading

    The post Black-and-White Photography Tips for Beginners appeared first on Photodoto.


    Photodoto

  • 4 Not-so-Secret Tricks to Speed up Your Lightroom Workflow

    Lightroom_iconDo you want to speed up your Lightroom workflow? You’re not alone – I get countless requests from people to help them optimize their photo processing workflow. However, because it is so commonly asked, it is also frequently answered and this makes it difficult to add a fresh spin on a topic that hasn’t changed much over the years.

    One of the great things about dPS is the diverse nature of its writers and how we each have our own point of view, own skill set, and own way of explaining a topic. This post won’t be a groundbreaking reveal of some hidden secrets that I just uncovered in Lightroom yesterday, but rather an explanation of some commonly overlooked and ignored features of Lightroom that you’ll want to learn in order to speed up your workflow.

    Speed up your Lightroom workflow

    #1 – Auto Advance rating option

    This is something that I would have preferred Adobe set to “ON” as default and then give you the option to turn it off if you choose. How many of you rate your photos by selecting a rating, and then pressing the arrow right key to advance to the next photo?

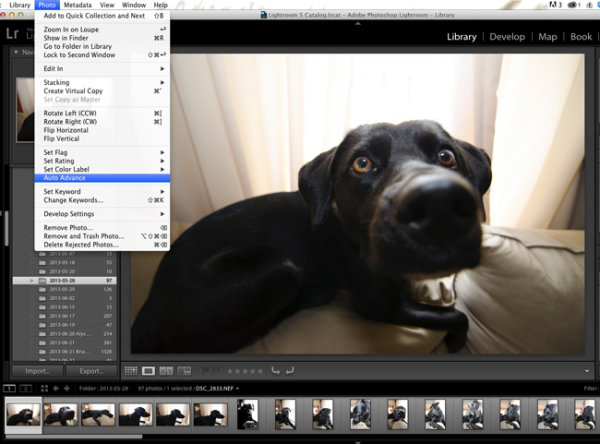
    Do that no longer! Simply turn on Auto Advance either by selecting it from the drop down menu under ‘Photo’ or simple turn on CAPS LOCK. Once activated Lightroom will advance you to the next photo in the queue after every successful rating. It’s amazing how fast you can get through a fresh import with this option turned on.

    Lightroom workflow use auto advance

    #2 – Start with a YES or NO rating system

    I like to think of this as keeping it simple. There are so many different rating options (from flags, to stars, to colors) and while each one serves a purpose, I think it’s best to keep it simple the first time you import a new set of photos. Remember tip #1 above and active Auto Advance, and then use the keys ‘P’ or ‘X’ to rate your photos. ‘P’ tells Lightroom that you want to keep that photo and it is flagged as a “Pick”. ‘X’ tells Lightroom that you want to reject that photo, and it is marked as such. Once you’ve made it all the way through your import, press Command + Delete (control on PC). This will remove all of your rejected photos, never to be seen again. (choose “delete from disk” to not only remove from your LR catalog but delete from your hard drive)

    I find that this will help to keep your Library cleaner, and easier to manage. It will also allow you to remove a lot of the ‘maybe-I’ll-use-this-photo-sometime’ photos which in most cases just end up wasting your time.

    Lightroom-workflow-keep-it-simple

    #3 – Learn and use the magic keyboard shortcuts

    I’ve already mentioned a couple of the keyboard shortcuts above, but the master list is only a shortcut away. Press Command / (Control / on PC)  in any panel of Lightroom and the index of everything possible within that window is displayed. It’s one thing to learn the keys, and it’s another to work them into your workflow (I’m still slowly learning to do this myself), but once you get it down you will be flying through the panels without even thinking about it.

    Lightroom-workflow-learn-keyboard-shortcuts

    Press: Cmd / (Control / on PC) to get this to pop up

    #4 – Use Solo Mode on the side panels

    Another Lightroom setting that I personally feel should have been set as a default option is the Solo Mode option for the various tool panels of Lightroom. This option allows you to automatically minimize a panel when you open another one. For example, if you’re working in the Basic Tab of the Develop Module and want to switch to work on sharpening your photo, clicking on the Detail Tab, Lightroom will automatically close the Basic Tab for you. I find that this keeps the interface a lot cleaner and easier to navigate, especially for someone who’s just starting to get their feet wet with the program (or using a small screen or laptop)

    To turn it on simply right click on any of the sidebar panel names (not the triangle) and select ‘Solo Mode’ from the menu that appears. Once activated you’ll probably never go back.

    Speed-up-lightroom-workflow-solo-mode

    How do you speed up your Lightroom workflow?

    These four tips will certainly help you become faster at working through your photos, but there are countless other ways to speed up the way you work. If you are well experienced with Lightroom, what else can you think of to add to this list?

    For more Lightroom reading check out these articles:

    • How to Upload Photos to Flickr and 500px using Lightroom 5
    • Lightroom Tips for the Develop Module – the Magic Alt Key
    • Creative Ways to use Keywords in Lightroom 5
    • Use Lightroom Collections to Improve your Workflow

    The post 4 Not-so-Secret Tricks to Speed up Your Lightroom Workflow by John Davenport appeared first on Digital Photography School.


    Digital Photography School
  • Tips for Indoor Sports Photography – Part 2

    As the title of the article says, this is Part 2. I strongly encourage you to read Part 1 first, where I covered some of the indoor sports photography basics like gear, auto focus, camera settings, and looking for creative angles. While Part 1 centered primarily on basketball, here in Part 2 we’ll take a quick look at some of the other indoor sports you might find yourself shooting.

    Fencing

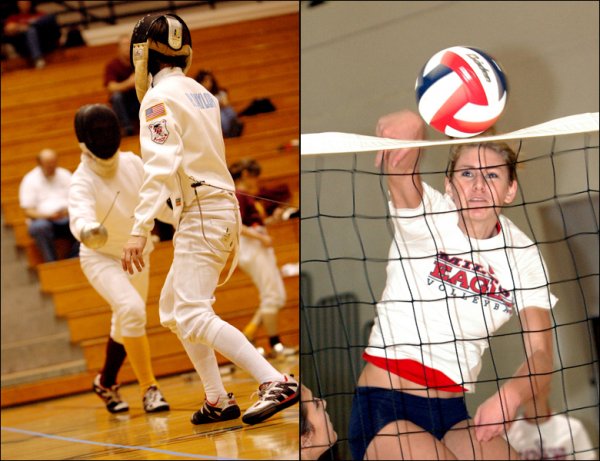
    Whereas flash might be allowed for basketball, it will NEVER be okay for fencing. You’ve got two combatants trying to stab each other with swords. Anything you do that can possibly affect the vision of either fencer–even if just for a moment–can also affect the outcome of the match, and possibly result in injury. Open up your aperture, dial down your shutter speed a bit, crank up your ISO. Rapid-fire mode may not be such a bad idea here, because a certain number of blurry photos are to be expected.

    Fencing and volleyball-- two very fast, unpredictable sports.

    Fencing and volleyball– two very fast, unpredictable sports. FENCING: 100mm, 1/160, f/2.8, ISO 1600.  VOLLEYBALL: 80mm, 1/200, f/4, ISO 1250, TTL Flash.

    Volleyball

    I love the game of volleyball, but I absolutely hate shooting it. The unpredictability of bump, set, and spike can be maddening. Anticipating where the ball is going is perhaps more difficult in volleyball than any other sport. Again, flash may or may not be your friend when photographing this sport. Make sure to talk with the referee before the match begins. In volleyball, there is one referee at the net. Most will allow you to use flash, as long as you are not shooting towards them. That means shooting from the same side as the ref. You’ll most likely have spectators behind you, so try to stay low and be respectful.

    Gymnastics & Competitive Cheerleading

    Just like fencing, flash will never be allowed when photographing gymnastics or competitive cheerleading. Both are a photographic challenge, requiring you to capture very fast action in very low light. Most professionals like to shoot these events at 1/1000 with very high ISO. Being able to anticipate the action is possibly more important in gymnastics than almost any other sport.  Gymnastics moves so fast that if you see it in the viewfinder, chances are you’ve already missed the shot. Watch them warm up. Getting familiar with a routine during practice will help you know what to look for when it’s real.

    No flash allowed when balance is the difference between winning and losing.

    No flash allowed when safety and balance can be the difference between winning and losing, or injury.
    1/250, f/4, 80mm, ISO 3200.

    Swimming

    For swimming, flash is generally allowed, but never on the start. When officials need to signal a false start, swimmers see a flashing light at the end of the pool. Hitting them with flash before they even hit the water can confuse them into thinking a false start has been signaled when it hasn’t. There is no do-over if they mistakenly think it’s a false-start and stop swimming. They are out of the race and it’s your fault.  Also, get there early. At least one hour. This is absolutely crucial for swimming events. Your camera is going to have to adapt to the humid conditions. Getting there in enough time for your gear to acclimate will keep your lenses from fogging up.

    Other than no flash until they're in the water, swimming doesn't place too many restrictions on photography.

    Other than no flash until they’re in the water, swimming doesn’t place too many restrictions on photography.  1/180, f/3.2, 200mm, ISO 800.

    Wrestling

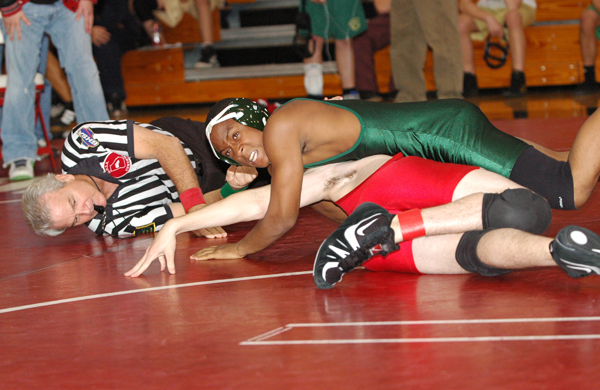
    I love shooting wrestling. Love it. For starters, I’m off my feet, getting my best shots either sitting or lying down on the mat. Many wrestling meets involve a dozen or more teams, with several matches going on simultaneously. If you’re lucky, you can find a spot on the mats with four matches going on around you at the same time. When one bout slows down or ends, simply rotate around to another. The key here is speed and efficiency. Bouts can go for several minutes, or they can be over in the blink of an eye. Flash is generally allowed at the high school level, but a newer model camera with high ISO, combined with some fast lenses, can mean great captures without the use of flash. Experiment and see what works best for you.

    Don't blink. You might miss it.

    Don’t blink. You might miss it.  1/250, f/3.2, 85mm, ISO 640.

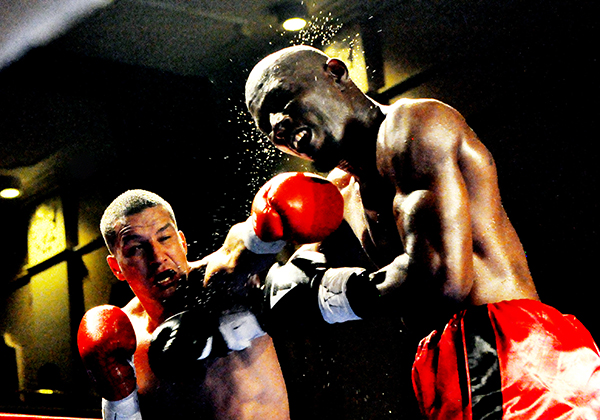
    Boxing

    Similar concerns to fencing, but this time it’s much more up close and personal. Flash is definitely not allowed, but the good news is that the lighting at these events is usually really good. Pay attention to where the light falls on the ring and play to those angles for dramatic results. You are going to be fairly restricted in terms of where you can stand, because fighters take up two corners and judges are situated on all four sides of the ring. You’re shooting up, between ropes, at in-your-face action. Stick to a standard zoom like the 24-70mm or a wide-angle 16-35mm.  This is one of those rare sporting events where the 70-200mm is not your friend.

    Ring-side. 1/500, f/4.5, ISO 6400, 48mm. Leave the 70-200mm at home, but bring a towel.

    Ring-side. 1/500, f/4.5, ISO 6400, 48mm. Leave the 70-200mm at home, but bring a towel.

    Shooting indoor sports is tough. If it was up to me, all sports would be played outside under optimal, natural lighting conditions. Hey, a guy can dream, right? Don’t let the challenges or stumbling blocks get you down. With practice, preparation, and the right gear, you’ll see the quality of of your images improve dramatically.

    Do you have a good tip for shooting indoor sports? Share it with us in the comments.

    For additional reading, one of the best books ever written on the subject of sports photography is “Peter Read Miller On Sports Photography.”  Miller has been photographing the NFL, the Olympics, and portraits for “Sports Illustrated” for almost 40 years. He has over 100 S.I. covers to his credit, as well as 35 Super Bowls, 9 Olympic Games, and countless other sporting events around the world. You can check out my review of the book, as well as my conversation with Peter, by clicking here. The book is available on Amazon.com.

    The post Tips for Indoor Sports Photography – Part 2 by Jeff Guyer appeared first on Digital Photography School.


    Digital Photography School
  • Win One of Five – Three Month Subscriptions from Skillfeed By Shutterstock!

    Over the last few years here at dPS, we’ve run some very popular competitions, and this month will be no different! This month we are working with one of our newest partners – Skillfeed, By Shutterstock – to give away to lucky dPS readers, full access to their creative and technical Video Tutorials!

    For this competition, Skillfeed is giving away FIVE prizes!

    These five prizes are designed to be helpful for all levels of photography and post-production. Each will be won by a different dPS reader. Here’s what you could win:

    Three month subscription to Skillfeed’s library of Creative and Technical Video Tutorials! A $ 57 Value!

    There are loads of tutorials that you’ll get access to including:

    201401211703.jpg

    How to make a Pop Art portrait from a Photo in Photoshop Easy

    201401211704.jpg

    DSLR Digital Photography Course

    How to Win

    To win this competition you’ll need to:

    • Visit the above library of courses information pages and explore the multiple Video Tutorial offerings.
    • Leave a comment below and tell us which tutorials are of most interest to you WHY you’d like to learn these new skills. Please note: there is a limit of 1 entry per person.
    • Do this in the next 16 days and on Thursday, February 6, the team at Skillfeed will choose the best 5 answers and we will announce the winners in the following days.

    The deadline for entries is Wednesday, February 5, 2014, Midnight PST. Entries placed after deadline will not be considered.

    By ‘best’ – we’re looking for people who have an understanding of the Video Tutorials and how they will best suit their needs. So you’ll need to check out the tutorial pages to put yourself in the best position to win.

    There’s no need to write essay length comments to win – but we’re looking to hear what you like about the video tutorials and how it would help your development as a photographer.

    This competition is open to everyone around the world no matter where you live – but there is only one entry per person.

    To enter – simply leave your comment below.

    Disclaimer: Skillfeed is a paid partner of dPS.

    The post Win One of Five – Three Month Subscriptions from Skillfeed By Shutterstock! by Darren Rowse appeared first on Digital Photography School.


    Digital Photography School
  • Perspective in Photography – Don’t just stand there move your feet!

    Photographers often fall into the bad habit of shooting everything we see from eye-level. We are walking around, something catches our eye, and we take a picture right from where we are standing. If you want to make an immediate impact in your photography, you need to get out of your eye-level (or tripod-level) rut. You need a change in perspective.

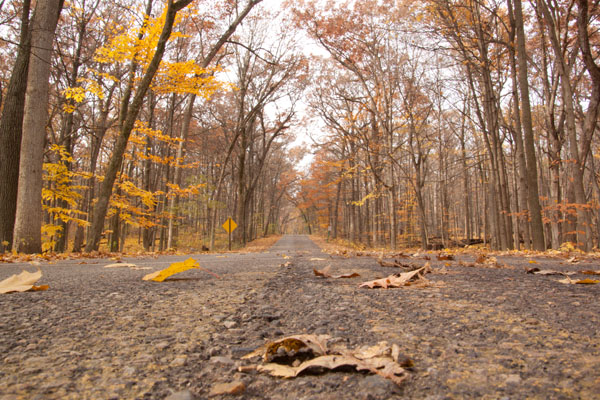
    McEnaney road

    Sure, you can change your composition by zooming in or out with your lens, but if you want to change your perspective, you are going to need to move. Don’t let your feet, or your tripod, root you to the spot: get ready for some bending, turning, walking, and climbing. Start working with perspective in photography, your images will thank you for it.

    Get Low

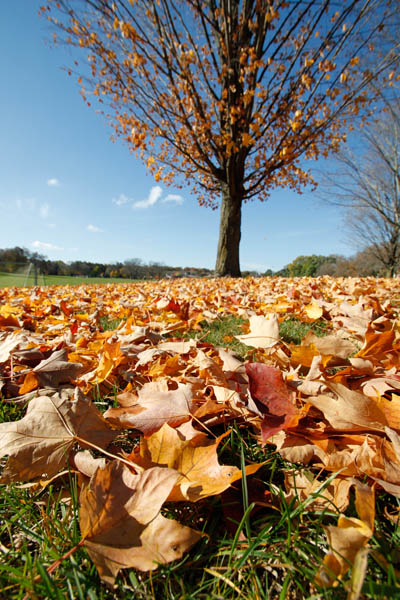
    Get your camera down towards ground level, and see how it impacts your perspective. Getting down low allows you to feature the foreground of your composition, and gives your viewer context for the rest of the photograph. Use a wide angle lens to feature the foreground, while pulling the viewer into the image, as below.

    McEnaney wide angle leaves

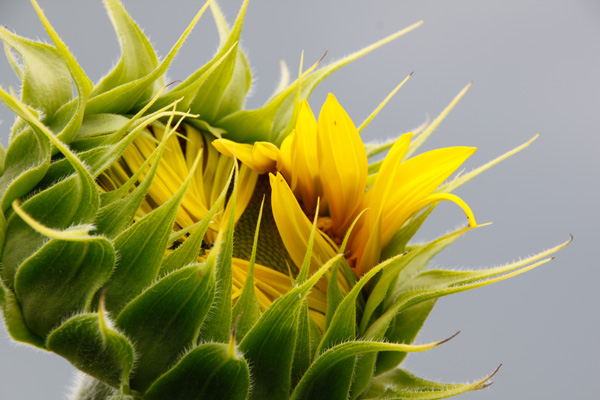
    Getting down low can change the way your viewer feels or reacts to your subject. Getting low can make your subject appear taller or more imposing. Subjects viewed from below can look commanding and powerful. Even a simple sunflower can be seen to tower above its surroundings.

    McEnaney sunflower

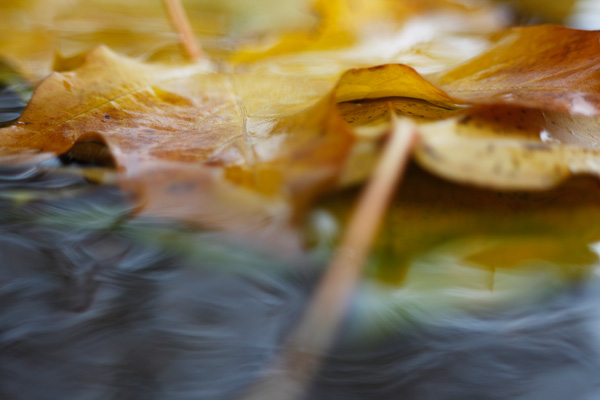
    Getting low can also completely disorient your viewer. This near water-level view becomes a study in colour and texture, as the water and the fallen autumn leaves interact with each other. From eye level, this would simply have been a photograph looking down into a storm gutter. Getting low simplifies the composition and puts the viewer into a different, and unique perspective than their everyday viewpoint.

    McEnaney gutter

    Get Up High or Look Up High

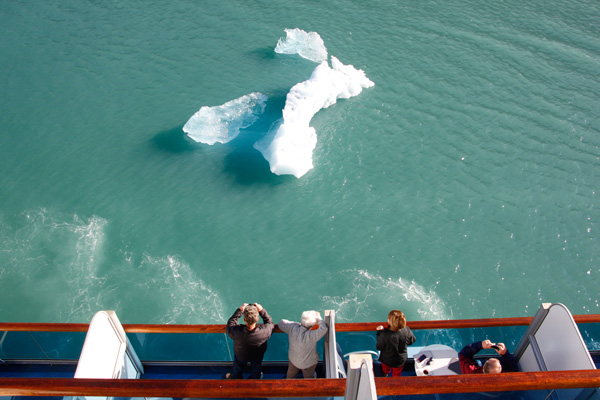
    You can get low and look at subjects from their level, but you can also get up high and take in your subject from above. Getting well above your normal line-of-sight will certainly give you a new perspective. In the photograph below, the other tourists on the decks below give context to the passing iceberg, as seen from the cruise ship. This higher-up view also provides a sense of scale for the large size of the ice berg and hints at the size of the ship.

    McEnaney iceberg

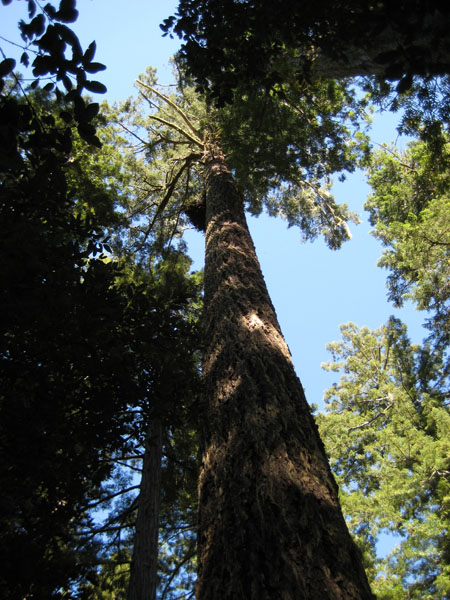
    If you do not want to physically get up high, standing and shooting does not mean you only have to shoot straight ahead. Spend some time looking up, and you will find plenty to improve your compositions and your perspective. With very tall subjects, looking up from below will accentuate their height and size. The power and immensity of these redwood trees are best emphasized by looking up, from directly below.

    McEnaney redwood

    Go for the Lateral

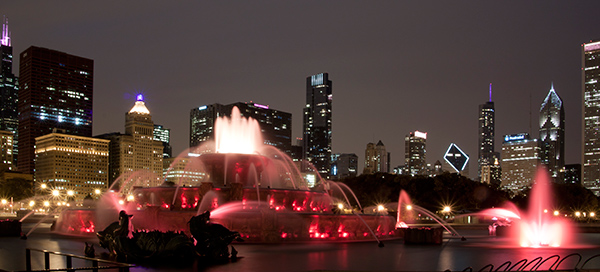
    Finally, do not forget to think laterally. Beyond just changing your stance or your direction of shooting, you also need to remember to move yourself. Talk the time to walk around your subject, to consider the background and foreground. Think about how all the pieces of your final composition fit together. Your first view and your first angle are often not the best available, but you cannot be sure until you have taken the time to investigate others. Walking all the way around Buckingham Fountain allowed me to choose this final composition and perspective featuring the downtown Chicago skyline. I also made the choice to position the spray from the fountain directly in front of a building to make it more visible.

    McEnaney fountain 600

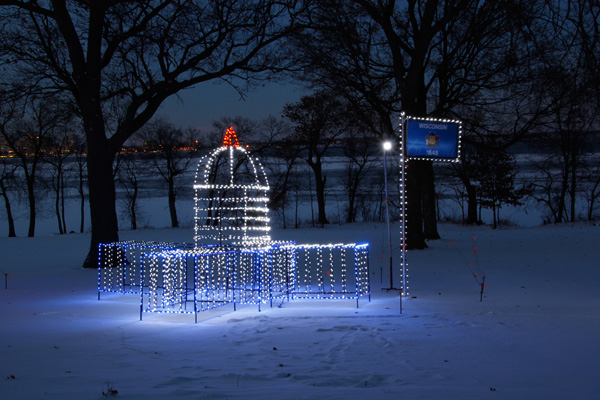
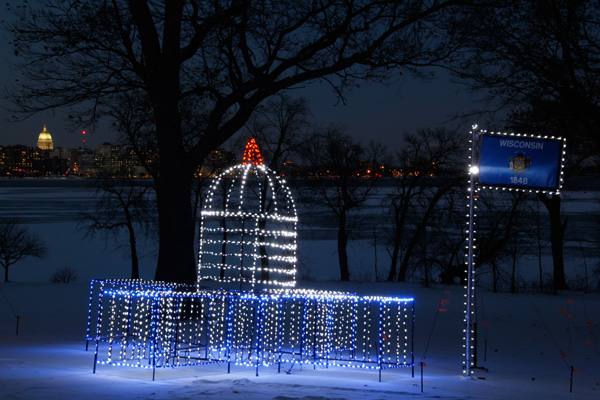
    Moving your feet can change the way that different objects in your photograph interact with each other. While the top photograph of the Wisconsin Capitol in lights was an adequate shot, moving just a few feet to the right and squatting down allowed me to feature the lit outline in the foreground with the actual Capitol building in the background. This juxtaposition of elements improves the story-telling ability of the photograph.
    McEnaney lit capitol

    McEnaney double capitol

    Summary

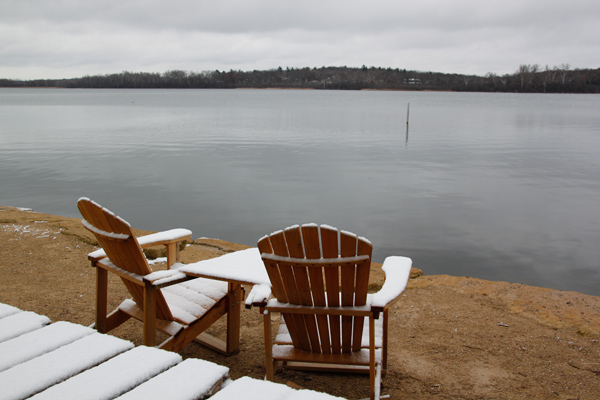
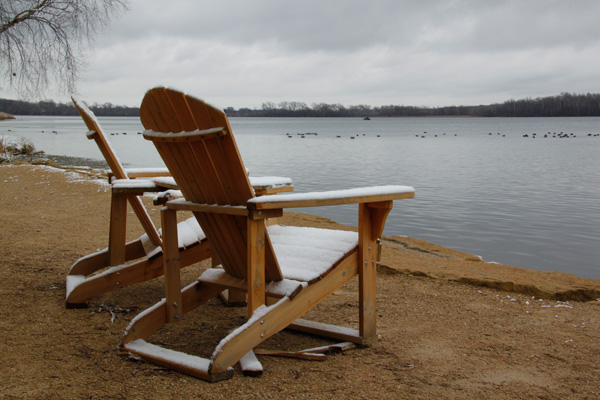
    Do not fall into the trap of shooting everything you see at eye-level, just as you see it. Take the time to explore your subject, and considering changing your perspective. Get low and see what changes, get up high and explore a new view, or move laterally and watch different interactions occur and disappear between objects.

    McEnaney chairs from above

    McEnaney chairs get low

    You may have a hard time choosing a favourite view: from above to emphasize the view of the foreground lake, or get low to show the expanded context and the threatening winter sky? Share your thoughts or your own perspective images in the comments below!

    The post Perspective in Photography – Don’t just stand there move your feet! by Katie McEnaney appeared first on Digital Photography School.


    Digital Photography School