Category: Photography

  • How to use Lens Flare to Your Advantage

    Flare can be a polarizing topic in photography, and many articles have been written about how to prevent or eliminate lens flare. But there are many situations where you can use lens flare creatively to enhance your photographs.

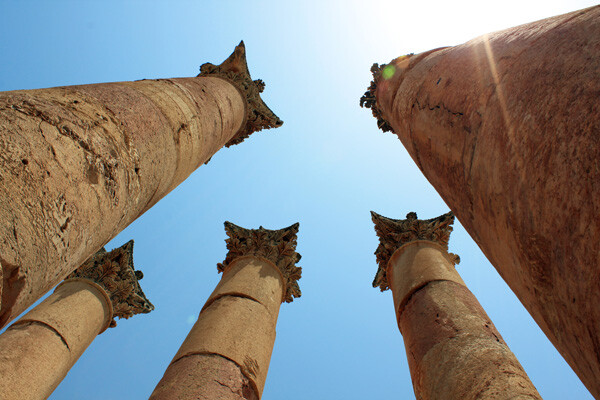
    McEnaney-flare-columns

    What is Lens Flare?

    Lens flare and sun flare are terms that are often confused in photography literature. Sun flare generally refers to turning the sun into a starburst shape, while lens flare is an artifact of stray light bouncing around the lens and being recorded by the sensor. This article will focus on lens flare, but you can read more about Using Sun Flares to Create Dramatic Images.

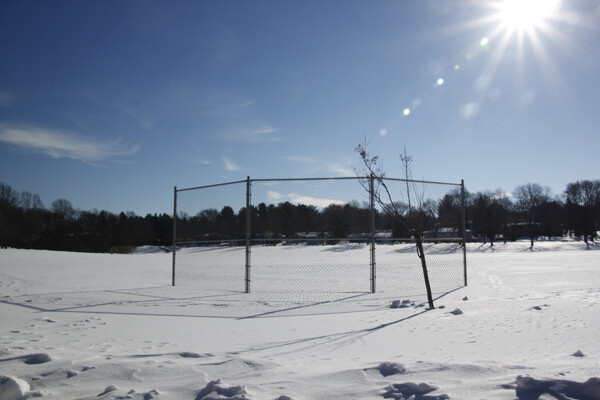
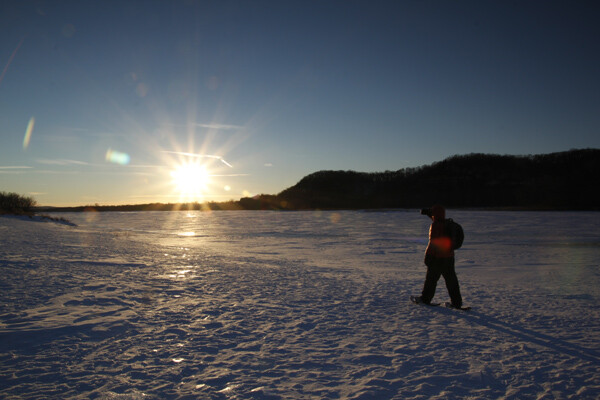
    Lens flare comes in several varieties but all are related to light (generally from the sun) bouncing around inside the lens. It can include circular, or curved areas of light, around the sun, somewhat like a natural sun dog, as well as the more common stray flashes of light, or dots and dashes of light in a line.

    McEnaney-flare-varieties-snowshoer

    Most articles are full of advice for how to avoid lens flare, which is a good place to start if you then want to do the opposite. The first strategy for avoiding lens flare is to use a lens hood on your camera, which blocks light coming into the camera lens from the sides. The second strategy is to limit the use of filters in front of your lens, as additional glass, especially low-quality glass, can lead to more flare. There is some debate about whether a UV filter alone helps to eliminate or accentuate flare, but the pricier the glass, the less likely that there would be adverse effects.

    Creating and Controlling Lens Flare

    So, if you want to create lens flare intentionally in an image, you should first remove your lens hood. This allows more sunlight directly into your lens. As for filters, you can experiment with removing your filters all together or trying to combine more than one filter (such as a UV filter and a polarizer) at a time. I have not found much difference between keeping or removing my UV filter, so I tend to keep it on for ease and lens protection.

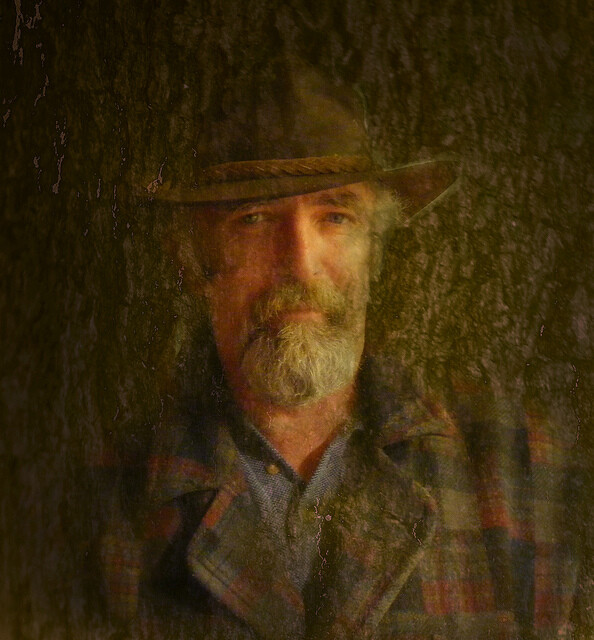
    McEnaney-flare-bw-woods

    Consider using a zoom lens rather than a prime lens when shooting for flare. Zoom lenses tend to have more internal elements than prime lenses, which create more potential to interfere and add flare. Zoom lenses also give you a range of focal lengths and compositional options to allow you to best place and manipulate the flare exactly where you want it in your image.

    You will need the sun in, or near the edge, of your frame to create successful flare. This is easier to accomplish in the early morning or late afternoon when the sun is lower in the sky. Be careful any time you are shooting directly into the sun, as there is potential to damage your camera’s sensor and your eyesight. Be sure to wear your sunglasses and compose shots quickly. You can often get flare effects with just a hint of the sun coming in from the top edge of your image, which will also reduce potential damage to you or your camera.

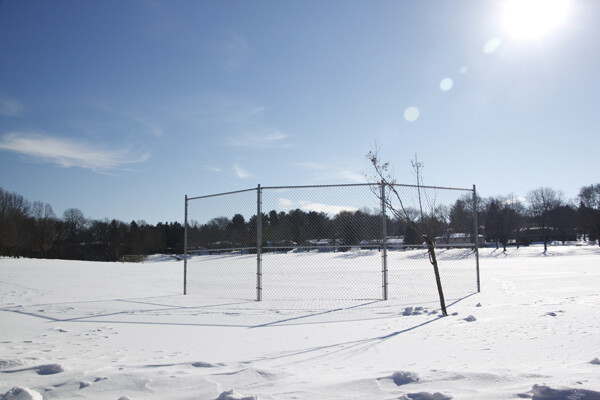
    Flare effects are often more pronounced at narrower apertures, like f/22, as the narrower opening in the lens gives the light more potential to scatter. But, as you can see from the comparison shots below (at f/8 top and f/22 bottom), you can get lens flare at many apertures.

    McEnaney-flare-compare-top

    Shot at f/8

    McEnaney-flare-compare-bottom

    Shot at f/22

    Depending on your subject, you may need to shoot in manual or use exposure compensation to overexpose your scene (positive values) relative to your camera’s sensor. Because lens flare requires additional light entering your camera, your subject might otherwise appear dim or darker than intended. Meter for your subject (or set exposure compensation to a positive value), and you will have a correctly-exposed subject against the extra brightness of the background flare.

    Creative Uses of Lens Flare

    Flare has become trendy as a way to emphasize the brightness or perceived warmth of a scene. Lens flare is even starting to make inroads in movies, as popularized in J.J. Abrams’ Star Trek reboot, where he uses lens flare and lighting to cement the futuristic nature of the film. Post-processing to add lens flare to an image is even common among portrait photographers.

    How will you share your flare? Show us in the comments below!

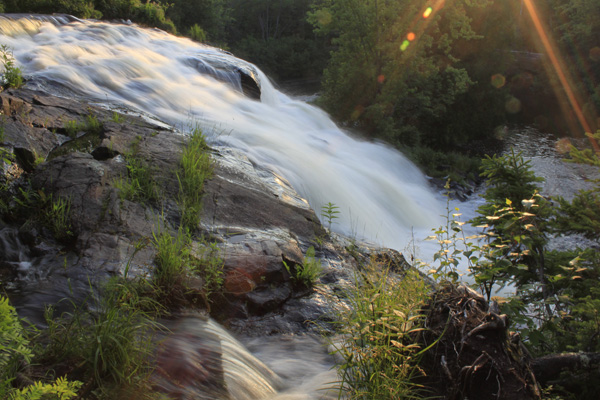
    McEnaney-flare-waterfall

    The post How to use Lens Flare to Your Advantage by Katie McEnaney appeared first on Digital Photography School.


    Digital Photography School

  • Valentine’s Day Photography Tips to Color You Red With Passion

    Ah, amore. That’s what Valentine’s Day is all about, at least nominally. So whether you believe in love, don’t or just think it’s something that Hallmark made up to sell more cards, one thing can’t be denied. The occasion makes for a brilliant photography opportunity. It’s true! Valentine’s Day allows for all sorts of unique and interesting photography because there’s Continue Reading

    The post Valentine’s Day Photography Tips to Color You Red With Passion appeared first on Photodoto.


    Photodoto

  • Your Compete Guide to Outdoor Photography – Part Two

    Continued from Part One of your guide to outdoor photography. Once you’ve arrived at a good shooting spot it’s time to begin.

    Shooting mode
    shooting modes outdoor photography

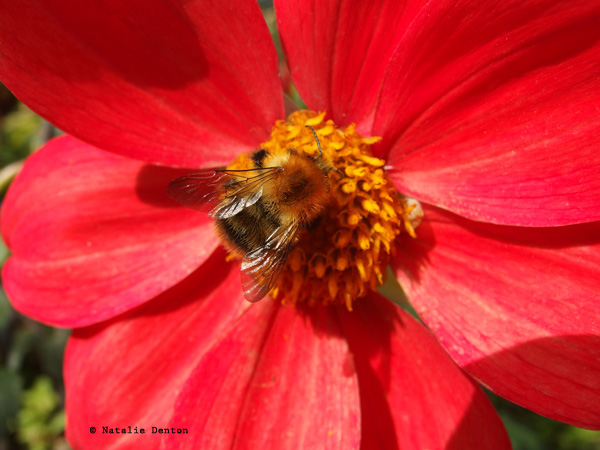
    As outdoor photography incorporates a wide selection of genres you’ll find Manual mode will offer you the most flexible and convenient grounds for setting and changing values on the go. But Manual mode isn’t for everyone, so if you’re not feeling confident enough yet, try using a semi-manual mode. Aperture Priority is great if you want to control the depth of field of your image, for example if you want the majority of the scene to be sharp and in focus. This is helpful when you’re shooting a landscape for example, simply plump for a smaller aperture (larger number) such as f/11. However if you want to soften the area around the subject, to focus attention on one part of the scene or subject; such as the centre of a flower or the tip of a mushroom, then you’re better off using a larger aperture (smaller number) such as f/5.6.

    Shutter priority is ideal for long exposure landscapes when you want to incorporate some ‘movement’ into the frame, for example clouds travelling across the sky, a river flowing down stream or tree branches swaying in the wind. Opt for a slow shutter speed here (but use a ND or polarizer filter if it’s a particularly bright day so that you don’t risk overexposing). If you want to freeze a subject on the other hand, a wild animal for instance, then dial in a fast shutter speed to avoid blur.

    Shoot in RAW if your camera permits, as this will allow greater ability to perfect colours, details and exposure post-shoot.

    Avoid camera shake

    Using a long exposure means keeping the shutter open for a lengthy period of time, and the slightest knock during this window can result in detrimental camera shake. The first step is to use a tripod or rest your camera on something sturdy such as a wall or bench. Then with your shot composed the next step is to fire the shutter using a remote control rather than pressing the button; as even the lightest of touches can result in the camera moving. Wireless and tethered controls are available, and many contemporary cameras can be fired using a Smartphone or tablet. Alternatively you can program the self-timer to start the exposure. If it’s windy, or you are particularly heavy-handed, then set a longer timer to give the tripod and the attached camera enough time to reset to a stationery position.
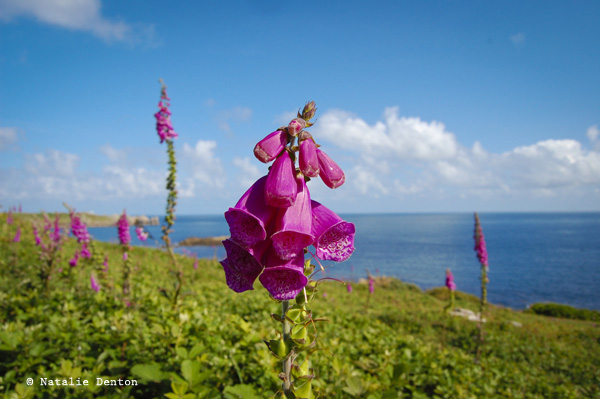
    Scilly Isles pink foxglove Natalie Denton

    Saving power

    If you’re out for the day, or a very long period, but don’t have a spare battery, always consider ways to save power. For starters, if it’s cold out, keep the camera insulated when not in use; wrapped in a spare sweater in the bag, inside your jacket or even under your arm. Avoid using LiveView and rather than use in-camera editing wait until you return home to edit. Minimize the time you spend reviewing shots in Playback mode and use the histogram to nail exposure. It always seem tempting to delete frames on location, particularly if you’re waiting for something to appear (e.g. wildlife, sunset, stars etc) but you’re better off saving the battery for photographing. What’s more – something that seems unworthy on the camera’s LCD may offer some redeeming features on a larger computer screen.

    Time of day

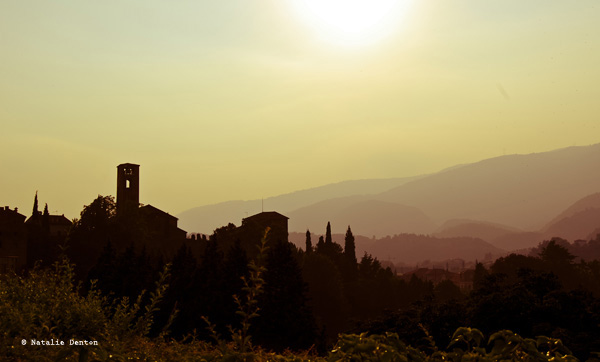
    Sunrise and sunset can make for some truly arresting images. In order to capture the golden-flame light in all its glory you’ll need to arrive at your shooting location approximately an hour and a half before the actual event. Use half an hour to prepare your kit; attach the right lens, secure your camera on the tripod, decide on the composition, ensure the horizon is straight using the in-camera spirit level (if your camera has one) and program the desired values. If you’re using a tripod, turn the lens’ image stabilisation switch to off; and opt for a suitable ISO (ideally between ISO 200-800).

    The best light is born an hour before sunrise and an hour before sunset, which is why you need to be there early – once the sun has risen or set the vibrancy of hues diminish, so enjoy the 60 minute build up with its soft caressing light, and capture the ever-changing colours of the sky and its effect on the land below. To add some extra punch to those tones try using a ‘cloudy’ white balance option for pumped up reds, oranges and yellows.

    The great outdoors can offer up some wonderful subjects for night photography, and by using a long exposure the light of the moon will paint in the elements of your scene. Alternatively, if there is no moon or nearby light source, use a flashlight or even the beam from your phone. Simply compose the scene, opt for Bulb mode to keep the shutter open as long as you need, and flick the beam over the nearby subjects; such as a tree, boulder, hay bale, truck, etc. Move the beam smoothly and steadily, trying not to hold it in one place for too long. When you are finished painting with light, simply end the exposure and review the result.
    Italian sunset landscape Natalie Denton

    Editing

    The hard work has been done and now you’re home with a collection of charismatic captures. While many of them are probably perfect straight out the camera, there might be a few ways you can inject a little extra interest into those not quite up to scratch. Here are a few suggestions for adding the ‘great’ into your great outdoors images.

    Colours

    Editing suites are fantastic for turning the bland into the beautiful; and if you’ve captured your images as RAW files, there’s even more scope for success. Make sure your screen is probably calibrated so that the colours you see onscreen are presented as the same as the ones you’ve photographed.

    The majority of editing software will offer an automatic colour correction tool which is great if you feel the colour values are a little off and unrealistic. Usually you will be able to click on a white area of the image and the software will use this as a reading to change the colours in the image. You can do this manually by offsetting hues. For instance, should you feel the tones are looking a little cold, then warm them up by scaling up the yellow.

    If you feel your image would benefit from some vivacious colouring, ramp up the power of the hues using the suite’s saturation slider, this works well for flower meadows or landscapes of patchwork-quilt fields. Just be careful not to go too far as it can start to look unrealistic and garish. Likewise you can pull the saturation back to make an image appear more sombre or stark, ideal for winter shots for example.
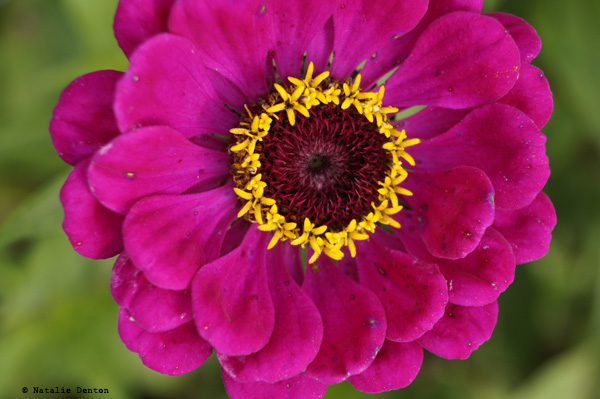
    pink flower macro Natalie Denton

    Blemishes

    Dead pixels, lens spots and smudges can totally distract attention away from the main focus of your picture.  The good news is they are easily rectified. Many suites like Photoshop, Elements and Lightroom offer users the ability to clone out errors. In Photoshop you simply select the Clone tool, hold down Alt and click on an area you wish to copy (i.e. identical colour and shade – the more similar it is the better it will blend in). Next move the cursor to the offending spot and click again. This will cover up the spot and most people won’t be able to notice.

    Noise

    Most new cameras shoot to sensitivities of ISO 25,600 (or higher), with noise making an appearance as late as ISO 6400, providing better support for low-light, night and sports enthusiasts. For those who aren’t endowed with the market’s latest launches it might be wise to administer some noise reduction software if you’ve shot at high sensitivities and noise is visible. Noise-reduction software plug-ins (add-on features that can be used within your editing suite such as Noise Ninja, Topaz deNoise or Neat Image) are fantastic. After a few simple steps the noise can be muted without over-softening the main subjects within the picture.

    Composition

    We’ve all been there – you’ve spent ages composing the frame in the field, only to return home to find it falls flat. Composing images effectively takes time and practice or a good eye and natural talent, but there are a few ways to enhance the composition post-shoot. The first is to bring up the thirds grid while editing. Crop into the frame so that the interesting part of the frame or the main subject lies on one of the intersecting points or lines, this will get rid of unwanted negative space and force the eye onto the subject. You can also crop out areas of the frame that clutter the image, thus directing the viewer’s focus onto the important elements. Lock the aspect ratio to ensure the proportions of the image stay the same – especially if you intend to print it.
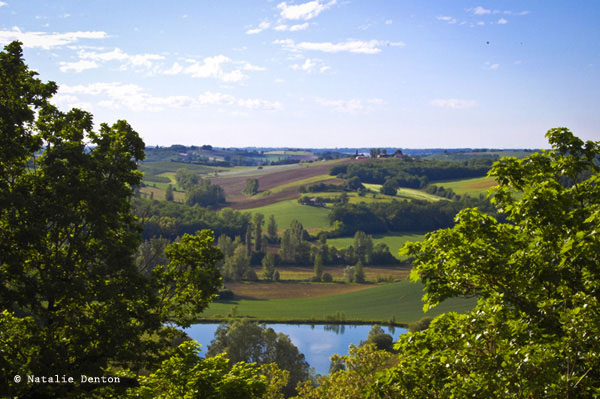
    French landscape fields rural Natalie Denton

    Exposure

    Tools such as Photoshop’s Curves can help photographers correct slightly over or underexposed frames. Using Curves lift the line one third of the way from the top to reveal details shrouded in shadow or drag the line one third from the bottom down to bring edge back details blown out by overexposing.
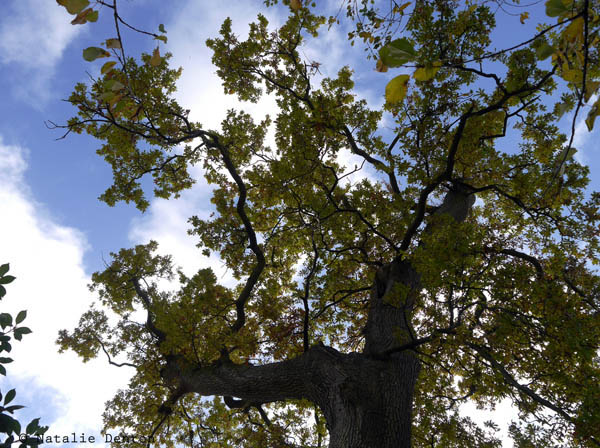
    widen dynamic range correct exposure tree Natalie Denton

    Black & White

    Want to make your images more moody and deep? Simply desaturate them and heighten the contrast. Yes it’s as easy as that; drag the saturation slider down so that all traces of colour vanish from the frame and increase the contrast or tweak using Curves, so that the blacks are richer and the whites are brighter.
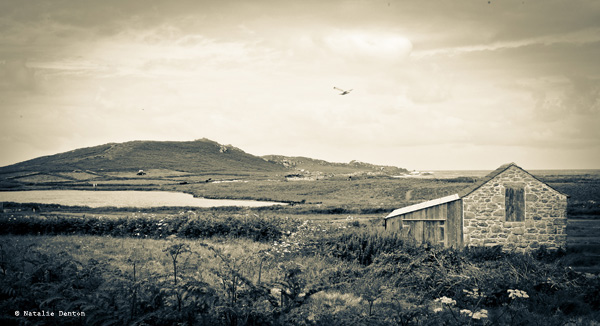
    Cornish fallen down cottage Natalie Denton

    Save and print

    Today’s digital camera sensor’s usually pack an insane amount of megapixels, which means you can print your images at a larger size and still maintain a high resolution quality. Therefore if you want to print your outdoor scenes in all their glory, print using the resolution you shot it at. Alternatively if you intend to share your frames online – either of a social network or your own website reduce the size to 72dpi for quick and easy uploading and viewing. In Photoshop you can do this simply by heading to ‘Image’ on the Menu Bar and then ‘Image Size’ from the drop down menu and change its resolution to 72dpi (and a smaller size in pixels as well for online sharing)

    Now we’ve explored the majority of considerations you need to make when pursuing outdoor photography you’ve got no excuse to give it a try. Maybe you have some tips and techniques of your own you’d like to tell us about? We’d love to see them, so please share them here for your fellow photographers to see and try!

    The post Your Compete Guide to Outdoor Photography – Part Two by Natalie Denton (nee Johnson) appeared first on Digital Photography School.


    Digital Photography School
  • Organizing Images in Lightroom 5

    Another great video right from Adobe Lightroom expert Julieanne Kost on how to organize your images inside Lightroom 5. This is one of those “non-sexy” things that you really need to know and understand or Lightroom can get really confusing for you. Watch as she explains how to move files, create new folders and get organize, all right inside Lightroom!

    Organizing Images in Lightroom 5

    For more on Lightroom check out these:

    • How to Add an Opacity Slider to Lightroom Develop Presets with The Fader Plug-In
    • Lightroom How To – One Tip and One Trick
    • A Concise Guide to Lightroom Develop Presets
    • How to Upload Photos to Flickr and 500px using Lightroom 5

    The post Organizing Images in Lightroom 5 by Darlene Hildebrandt appeared first on Digital Photography School.


    Digital Photography School

  • A Concise Guide to Choosing a New Lens

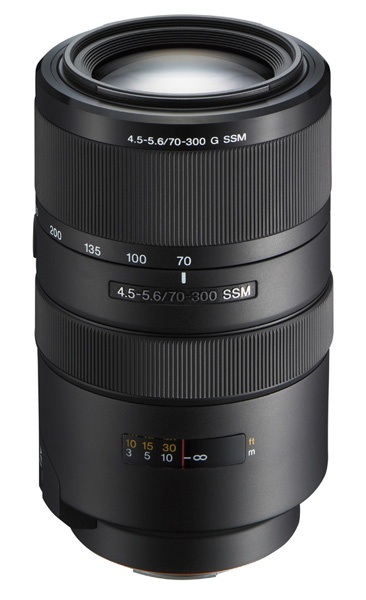
    Sony zoom lens

    I think it’s fair to say that most photographers buy a kit lens with their first camera. It’s a good place to start, as despite the limitations, a good one is versatile (an idea I explored in my article Why Your Kit Lens is Better Than You Think).

    But, however well a kit lens performs in the right hands, at some point you will ask yourself what lens you want to buy next. Or, you might already own more than one lens and be wondering if a new one may improve your photography. I am going to help you answer these questions by outlining some of the things you need to think about when choosing a new lens.

    You may find it helpful to think of lenses in categories rather than specific focal lengths. That’s because the field-of-view of a specific focal length depends on the size of your camera’s sensor (learn why in our article Crop Factor Explained).

    The benefit of considering lenses this way is that each type suits certain subjects. If you are into landscape photography, for example, then a wide-angle lens of some sort is essential. If you photograph sports, then it is difficult to do without a telephoto lens.

    By the way, if you follow the links in the article you will see plenty of photos taken with these lens types.

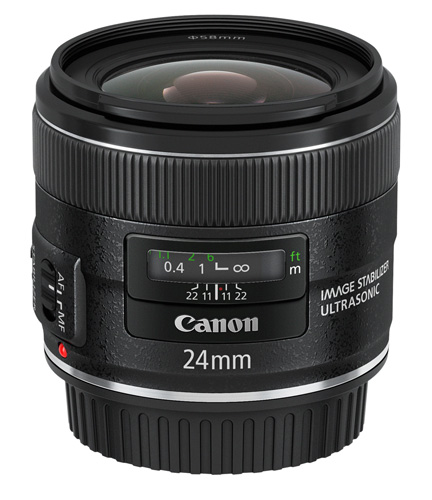
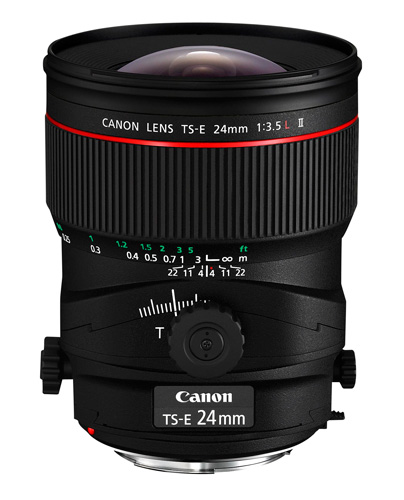
    Canon 24mm lens

    Wide-angle lenses

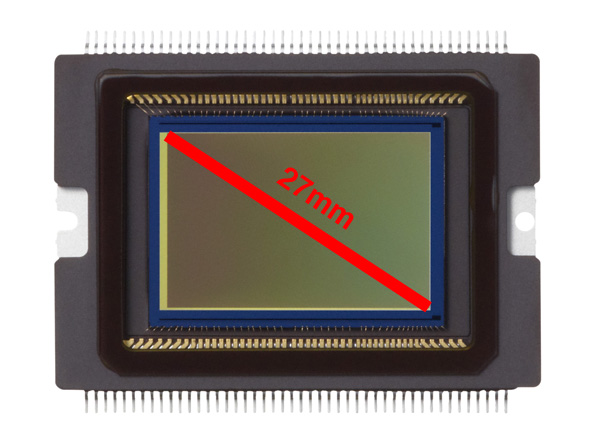
    A good definition of a wide-angle lens is one with a focal length shorter than the diagonal measurement of your camera’s sensor (or negative if you have a film camera).

    The idea of measuring the diagonal is a useful one for understanding the relationship between sensor size, focal length and field-of-view.

    Let’s look at a specific camera to see how that works: the EOS 70D. The corner to corner distance of the sensor is approximately 27mm:

    Canon EOS 70D CMOS sensor

    From that figure, you can say that any focal length shorter than around 25mm is a wide-angle lens.

    Wide-angle lenses are used for subjects like landscape photography and environmental portraiture. My article 7 Ways to Get More Out of a Wide-Angle Lens explores the use of wide-angle lenses in more detail.

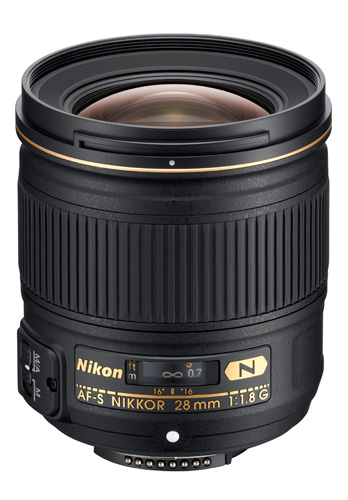
    Nikkor 28mm lens

    Normal lenses and short telephoto primes

    A normal lens is a prime lens with a focal length similar to the diagonal measurement of your camera’s sensor.

    In the example of the EOS 70D used above, a 28mm prime lens is a normal lens. A 50mm lens is considered normal for full-frame and 35mm film cameras (despite the diagonal measurement being 42mm – these things are often approximations).

    A short telephoto lens is one with a focal length slightly longer than the diagonal measurement of the camera’s sensor.

    Normal lenses and short telephoto primes are ideal for portraits, some types of landscape photography, and for close-up photography. Being primes, they have much wider maximum apertures than zoom lenses. This helps limit depth-of-field and create images with lots of beautiful bokeh. It also helps you take photos in low light.

    Learn more about the versatility of these lenses by reading these articles Why a 50mm Lens is your new best friend and How A Humble 85mm Lens Became my Favourite.

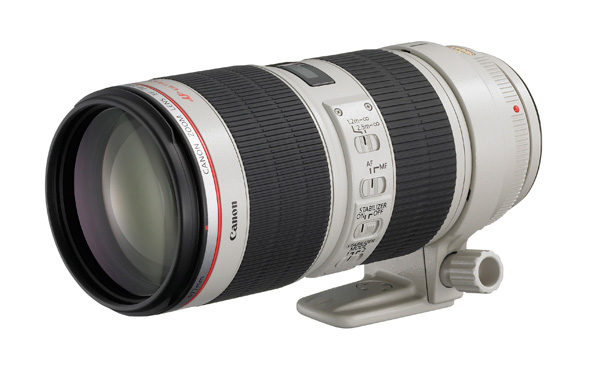
    Canon 70-200mm zoom lens

    Telephoto lenses

    This category includes focal lengths from around double the diagonal measurement of your camera’s sensor and upwards.

    There are two main reasons to use a telephoto lens. The first is for the compressed perspective they provide to pick your subject out of the background. Portrait and fashion photographers often use them for this reason.

    The other is that you need a telephoto because you are photographing something that you can’t get physically close to. This includes subjects like wildlife and sports.

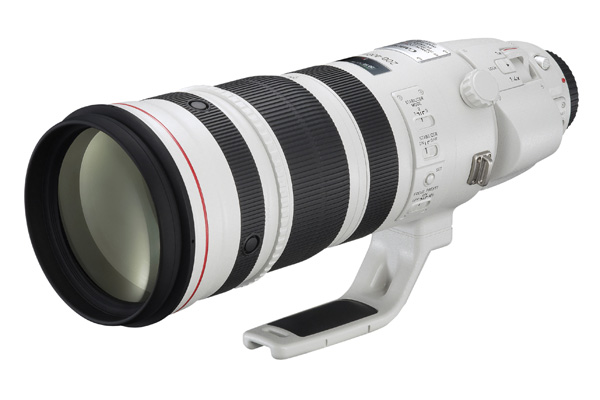
    Canon 200-400mm zoom lens

    Super Telephoto lenses

    These are the large telephoto lenses you often see photographers using at major sporting events. With focal lengths of 300mm and upwards, you will probably want to buy one of these if you are serious in any way about sports or wildlife photography. Be warned – many of these lenses are also super expensive. The new Canon 200-400mm zoom (pictured above) retails for over $ 11,000. Ouch!

    Canon 24mm tilt-shift lens

    Specialty lenses

    The final category includes other types of lens that you would probably only buy if you really wanted to use them, as they are specialty items, and some of them are pricey. They include macro, fisheye and tilt-shift or perspective-control lenses.

    Other factors

    Once you have decided which category of lens you are interested in, it’s time to consider other factors:

    Image quality: You can say a lens has good image quality if it gives you sharp, contrasty images free from chromatic aberrations, colour fringing and barrel distortion from corner to corner at all aperture ranges of the lens.

    No lens is perfect. There is no such thing as the lens that I just described. But good quality lenses come close. Generally speaking, the more you pay for a lens the better the image quality.

    You may be wondering how to evaluate the image quality of a lens you don’t actually own. One tip is to read plenty of reviews, including the ones on the sellers’ websites, personal blogs and on Digital Photography School. DxO Mark has tested lots of lenses and posted the results on their website. You will soon get a feel for what people think about a particular lens.

    Build quality and weatherproofing: These could be important if you subject your lenses to any kind of rough treatment or want to shoot in adverse weather conditions. The higher end lenses in each manufacturers’ range are the ones that have the best build quality and weatherproofing.

    Another benefit of weatherproofed lenses is that they let less dust into your camera to get on the sensor.

    Budget: Also important, for fairly obvious reasons. If you’re on a tight budget, consider buying prime lenses rather than zooms. You can get great image quality from relatively inexpensive prime lenses, much better than you would from zoom lenses in the same price range.

    You could also consider buying second-hand (our article An Introduction to Buying Used Lenses will help).

    Bear in mind that good quality glass should last you a long time. The life span of lenses surpasses that of most cameras. In the words of Sir Henry Royce: “The quality is remembered long after the price is forgotten.”

    How many lenses do you need? I prefer to take the simple approach to photography and that includes equipment. The more gear you have, the more it weighs if you carry it all around in one go, and the more it costs to insure. I currently own four lenses and, depending on the subject, I take two lenses with me at the most on a shoot.

    Your view

    That’s my approach, what’s yours? How many lenses do you own? What are your favourite lenses and what are your recommendations for choosing a new lens? Do you buy new or second-hand? Let us know in the comments. It will be interesting to hear what our readers have to say.

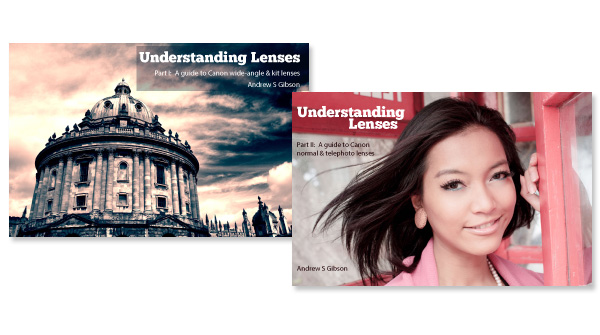
    Understanding Lenses ebooks

    Understanding Lenses ebook bundle

    My ebooks Understanding Lenses Part I and Understanding Lenses Part II will help Canon EOS owners decide what lenses to buy for their cameras. They are both filled with lots of tips to getting the most out of your Canon lenses. Click the links to learn more.

    The post A Concise Guide to Choosing a New Lens by Andrew S. Gibson appeared first on Digital Photography School.


    Digital Photography School

  • Your Complete Guide to Outdoor Photography – Part One

    Outdoor photography encompasses a whole host of genres, like:  landscapes, nature, macro, wildlife and even low-light, thus it can be the perfect opportunity to try new techniques and compositions that are outside your traditional comfort zone.  So while you might have set off to capture some fascinating vistas, you might stumble upon a collection of unusual looking fungi and want to photograph that too, which is great as long as you’ve packed the right kit. The key here is preparation, because once you’re out in wild it can be a long trek home if you’ve forgotten something. Whatever you’re heading outdoors to capture, here are a few things to consider before you leave.

    Guide to Outdoor Photography

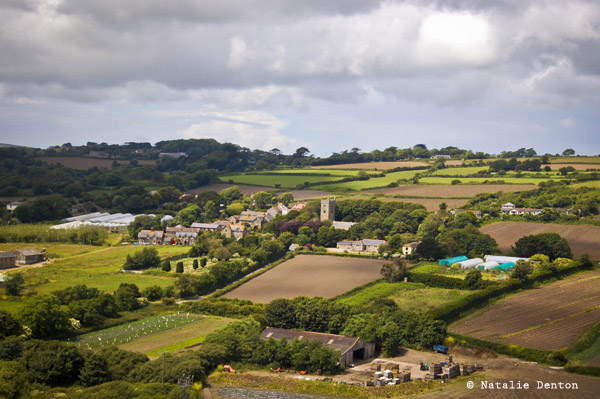
    Farm landscape England rural Natalie Denton

    Backpack

    If you plan on packing everything, including the kitchen sink you’ll need to invest in a large, lightweight yet hard-wearing backpack, ones with Velcro padded dividers are a great choice if you’re planning on packing a selection of cameras and lenses. Ideally waterproofed ones are favourable, for obvious reasons and you’ll be thanking yourself later if you’ve bought one with soft, broad shoulder straps.

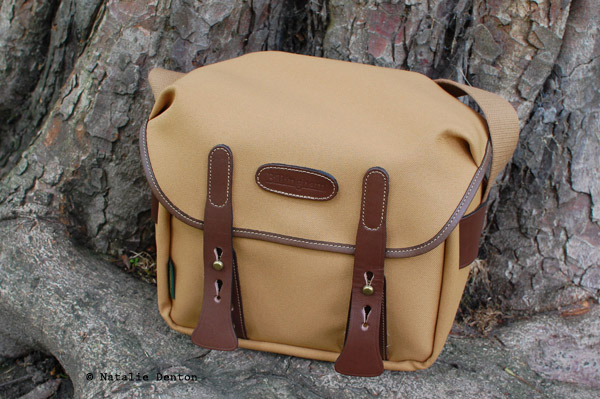
    Billingham camera bag Natalie Denton

    Accessories

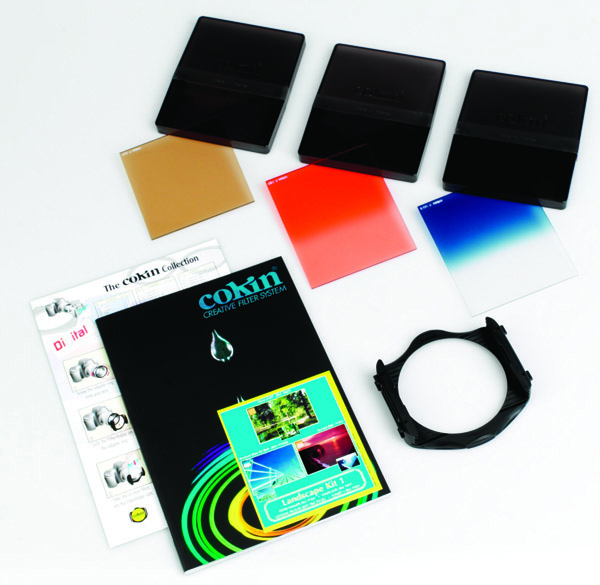
    Bags with zippable pockets will ensure you don’t lose your keys and wallet in the wilderness, but they are also great for securing smaller accessories such as memory cards; a handful ranging in capacity, a lens pen and cloth; for smudge-free glass, spare batteries or battery unit, and a selection of filters. It’s also a good idea to carry some small change with you in case you need to use a pay phone, toilets or parking.

    Cokin Landscape Kit filter set

    Tripod

    For most of the subjects that outdoor photography encompasses, a tripod will be necessary. Select a lightweight one such as one made of carbon-fibre, which is not only lighter to carry than most aluminium ones, but is much more rugged and durable. Opt for one that has a low minimum height (i.e. one where the central column doesn’t prevent you from getting down low enough to capture land-level macros).

    Lenses

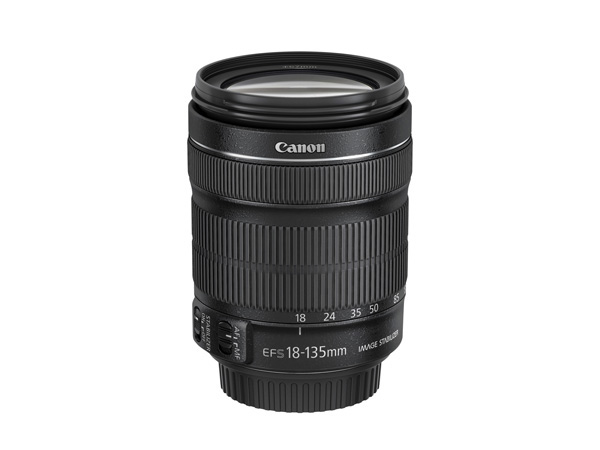
    A good selection of lens covering a range of focal lengths will ensure you’re covered whatever the subject, from wide-angle focal lengths for landscapes to telephoto reaches for wildlife. If you’re budget doesn’t allow such luxury than you might want to consider a zoom lens for varying between all focal lengths, and perhaps one sharp prime lens for ensuring macros and nature subjects are captured in stunning life-like detail.

    Canon LENS EF-S 18-135mm IS STM FRA w CAP 

    Plastic bags

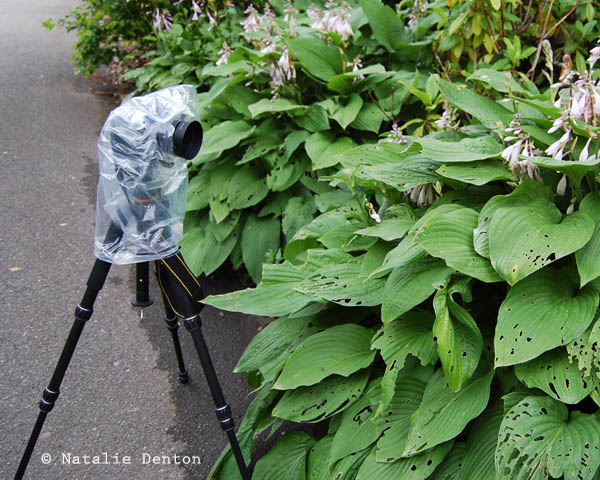
    The all important plastic bag, in fact pack a couple. Never has one item been so useful to the outdoor photographer, and what’s more, they are incredible versatile, take up practically no space and most importantly – are free! If you’re caught in an unexpected downpour pull it over your camera, poke a hole in the bottom and slid the lens through the hole, then make a seal with your lens hood from the outside – et voila a waterproof camera shield. Want to lie down to get a close up of those flowers but the meadow is muddy? Lay down a line of plastic bags to stop you’re clothes getting wet and dirty. Want to shoot a long exposure landscape but the wind is blowing the tripod? Collect a few rocks or stones in your bag and attach it to the tripod’s centre column. There are 101 uses for a plastic bag, if not more!

    Plastic bag for protecting camera in the rain Natalie Denton

    Unless you’re a Bear Grylls (adventurer) type and are used to fending for yourself in the wild, it’s wise to take a few precautionary measures before you leave home, especially if the location you are heading to is dangerous, isolated or you are planning on going at night. These may seem like some obvious precautions, but actually it could make the difference between life and death.

    Phone

    iPhone 4 Apple

    Ensure the battery on your phone is fully charged and to stop it draining in the cold keep it somewhere warm, like close to your body such as an inside jacket pocket. It’s a good idea to put a few helpful apps on your Smartphone too if you can such as Maps, Compass, First Aid, Find My Phone – in case you become lost or injured, plus photography relevant apps such as an app that tells you of your location’s sunset/sunrise times, one that can work out hyperfocal distances or even act as a light meter.

    Tell a friend

    Tell at least one person where you are going, the route you’ll be taking and when you expect to return. Perhaps offer to text or call them when you arrive at your location and also when you are on your way home again, just to put their mind at rest.

    Road worthy

    Double check your vehicle is topped up with gas and oil, and that the tires are correctly inflated and are in a good condition. If you are travelling some distance, or off the beaten track, it is a good idea to carry a small amount of fuel in a jerry can, to get you to the next gas station. Check the lights are working and pack a couple of spares. Keep a copy of your breakdown details just in case, but minimise the need of having to call someone out by having a spare tire and jack in your trunk.

    Weather forecast

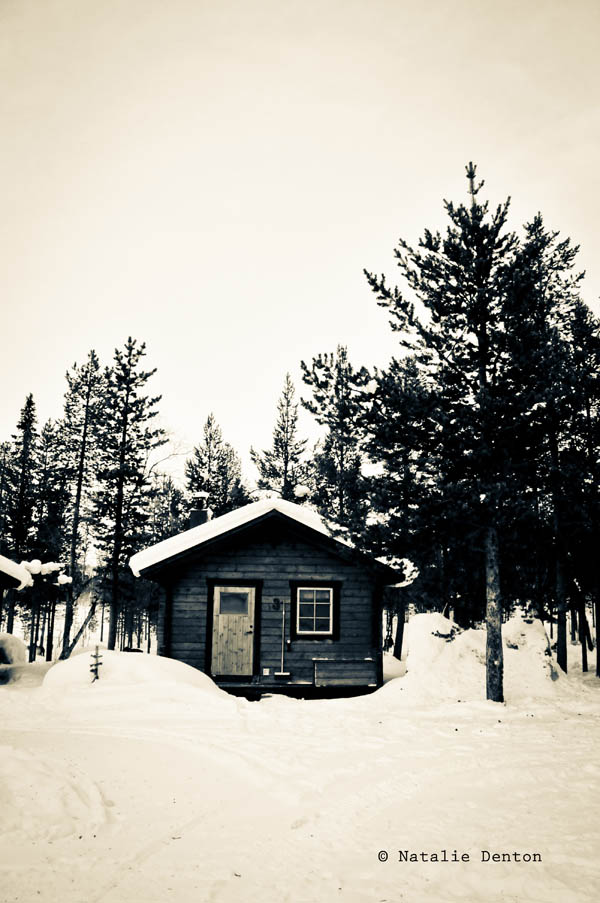
    Check the weather forecast before you go to avoid adverse conditions (unless this is what you’re after) and wear/pack the appropriate clothing. Depending on the type of climate you are working in you may want to consider packing a few extra items in the trunk too, such as; a change of clothes and shoes, a blanket, spade/snow shovel, flask of hot tea/coffee, food, water, and sunscreen. A First Aid Kit and flashlight may also come in useful.

    Lapland cabin snow Natalie Denton

    What to wear

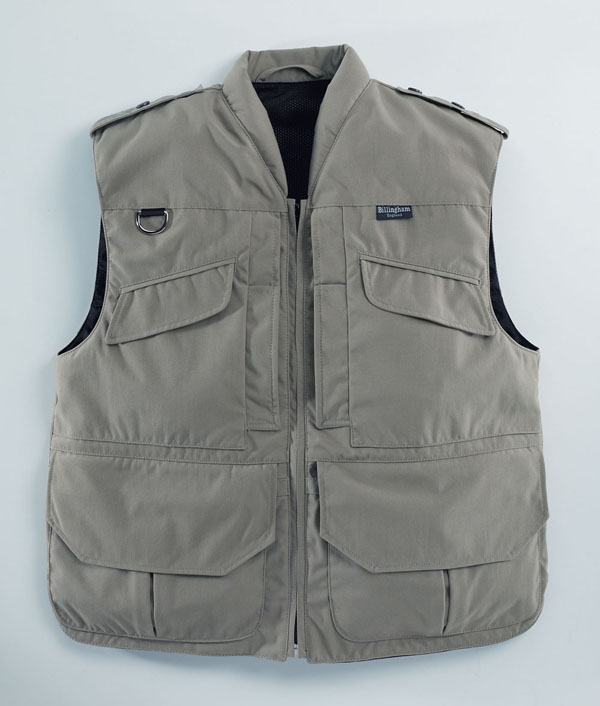
    Comfort and safety is the name of the game here rather than looking like a trendsetting explorer. A pair of hard-wearing hiking boots, or shoes with ankle-support, will keep your feet and legs as comfortable as possible when trekking over long distances. Consider the weather and dress appropriately so; waterproof clothing if it’s raining, thermals and insulated clothing if it snows light, bright cottons if it’s hot. Clothing with plenty of pockets is always a bonus as they are ideal and convenient place for keeping lens caps, cards, filters and cloths at arm’s reach. A hat is surely obligatory if it’s super cold or super sunny out, so opt for an insulated woolly one, or a wide brimmed white one respectively. If you’re venturing out after dark and are near roads or highways be sure to wear reflective or bright clothing so that you stand out, warning drivers to veer round you.

    Billingham photovest

    Read part 2 of our complete guide for tips, tricks and techniques for shooting on location and editing advice, coming tomorrow.

    The post Your Complete Guide to Outdoor Photography – Part One by Natalie Denton (nee Johnson) appeared first on Digital Photography School.


    Digital Photography School
  • Weekly Challenge – Portrait of a Man

    Earlier today I shared an image collection of The Essence of Masculinity – Portraits of Men. Now, of course, it’s your turn!

    First – go look at the image collection if you haven’t already done so. I tried to choose portraits that jumped out at me on Flickr for one reason or another. Usually it was lighting or an expression that caught my eye.

    But there two  things that I think all of these images have in common is connection to the subject, and storytelling. There is a story in each one of these images and men. What stories do you see? What stories do you tell with your images?

    So your challenge this week is to make a portrait of a man, perhaps someone you know, or maybe a complete stranger on the street. But dig a little deeper than just taking a photo of their face. Make a portrait of their essence.

    The say the eyes are the windows to the soul. What better way to truly capture a person’s soul than through the eyes. Expression does not come from the mouth – it starts in the eyes. Go back again and look at the eyes of the men in those portraits, without looking at their mouths. Can you still see the expression? Can you feel them more deeply?

    Here’s a few more portraits to get you inspired:

    By Elvin

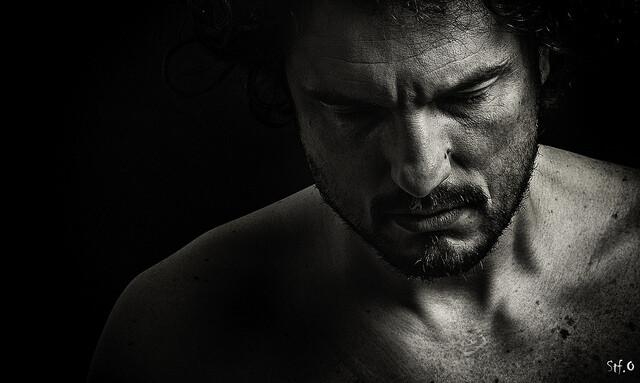
    By StefaniaVS

    By Joe Martin

    By Randi Scott

    By See-ming Lee

    Sorry I thought this image was too funny, I couldn’t resist! Notice, humour is good too!

    When you’ve created your stunning portraits please share!

    Once you’ve taken your “portrait of a man” we’d love to see them in comments below. Simply upload your shot into the comment field (look for the little camera icon in the Disqus comments section as pictured below) and they’ll get embedded for us all to see or if you’d prefer upload them to your favourite photo sharing site and leave the link to them.

    Need more portrait help?

    Try one of the articles from the last two weeks (there’s been one every day) or start here:

    • Portrait Tutorial Feast – Best of dPS 2013
    • The Secrets of Great Portrait Photography – Great Video from Brian Smith
    • How to Make a Portrait of a Stranger in 8 Easy Steps

    The post Weekly Challenge – Portrait of a Man by Darlene Hildebrandt appeared first on Digital Photography School.


    Digital Photography School

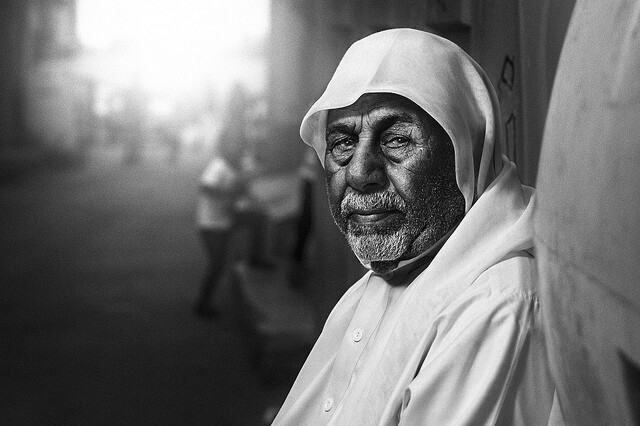
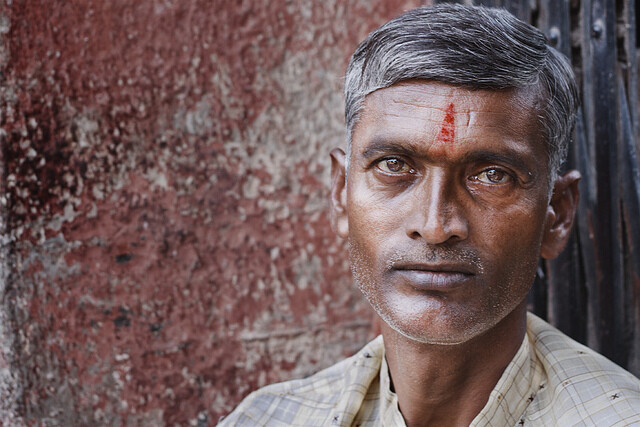
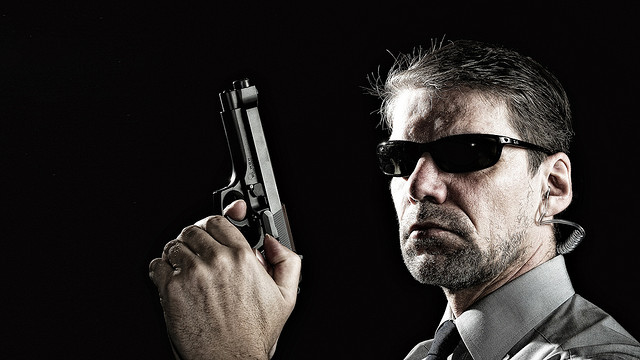
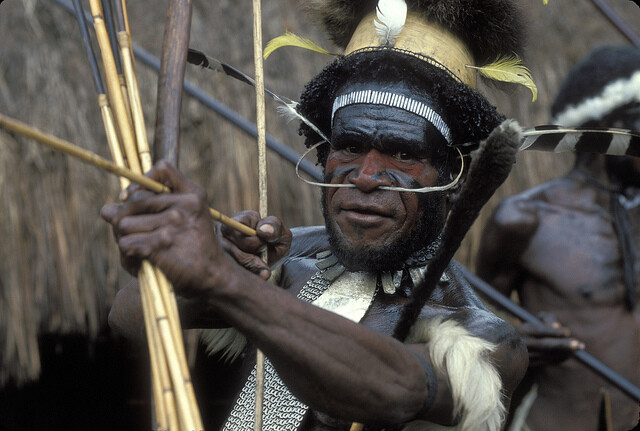
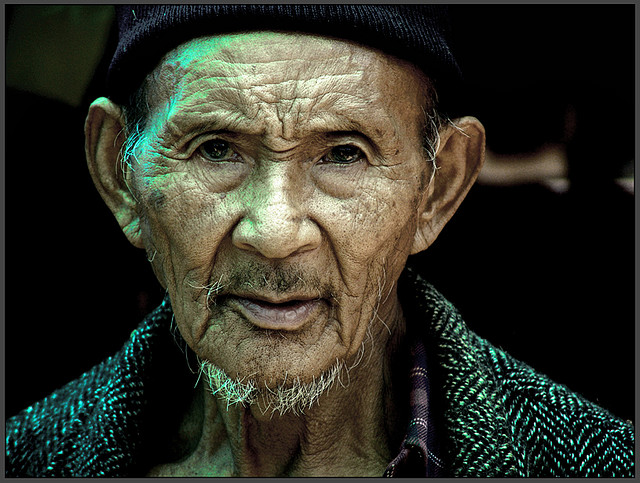
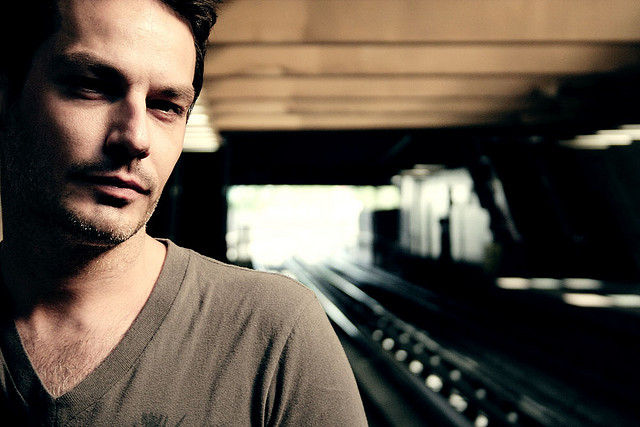
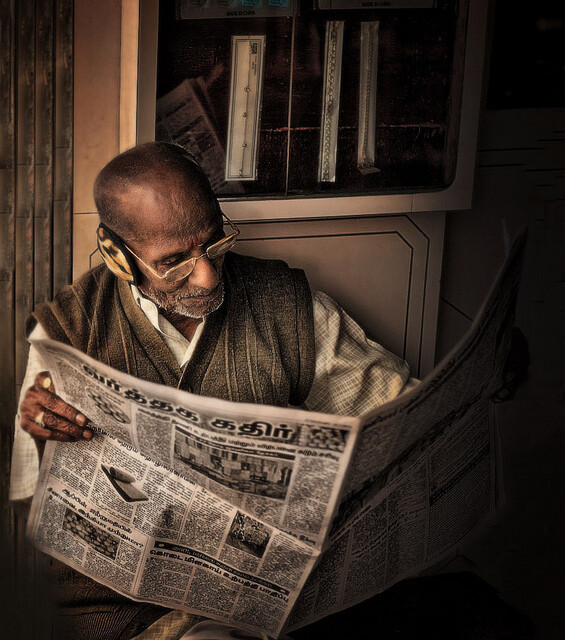
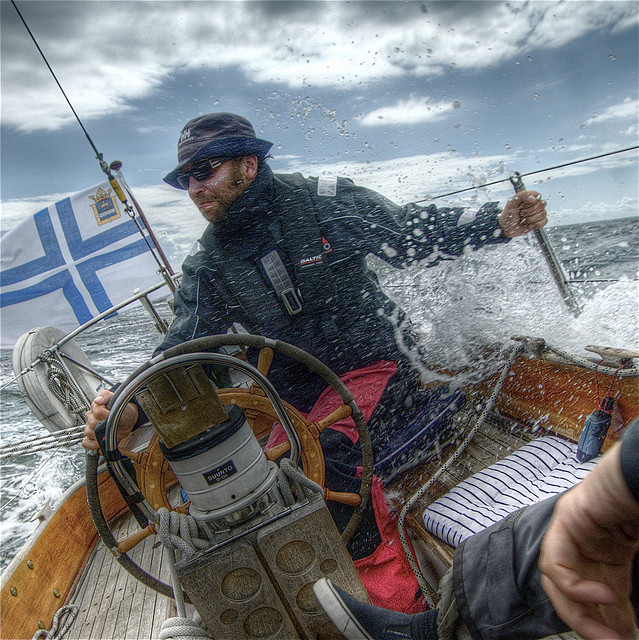
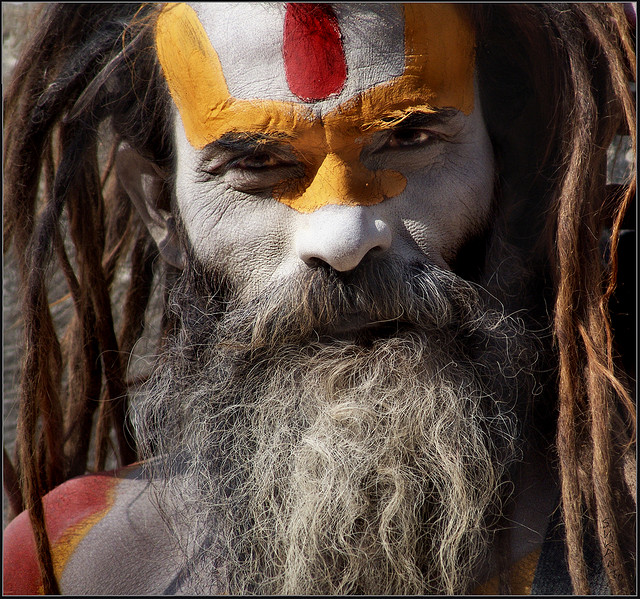
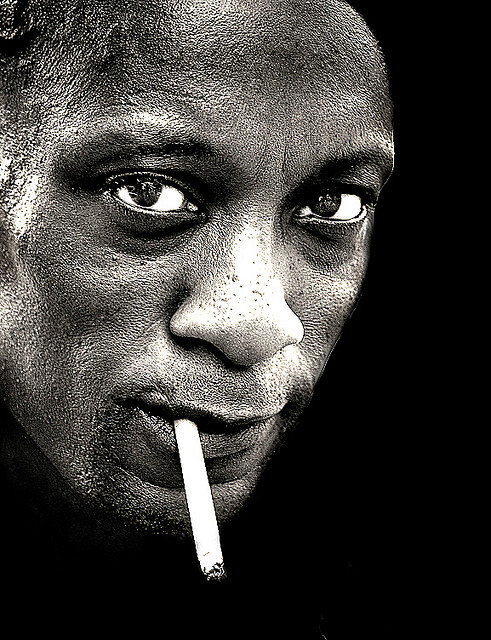
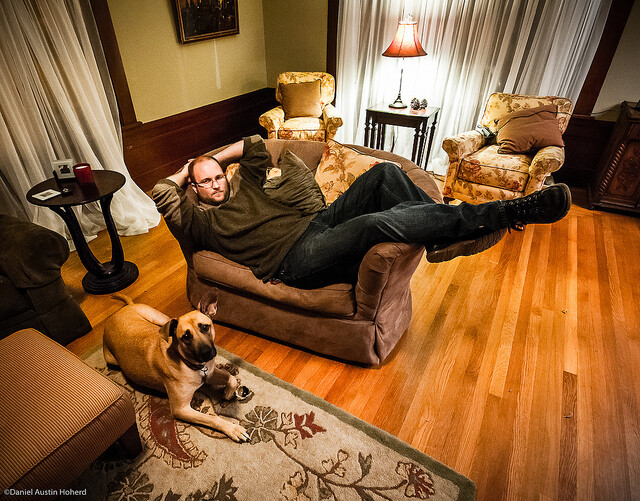
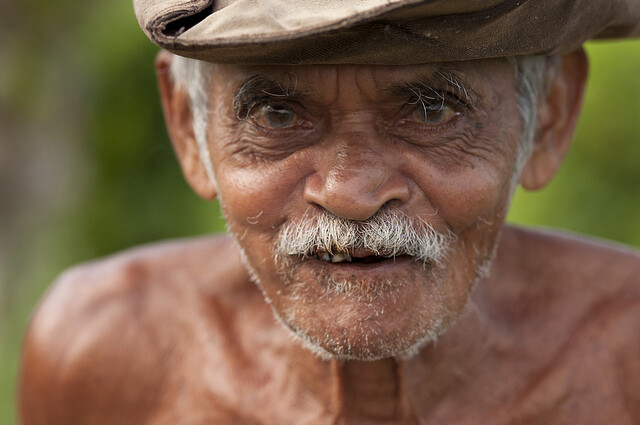
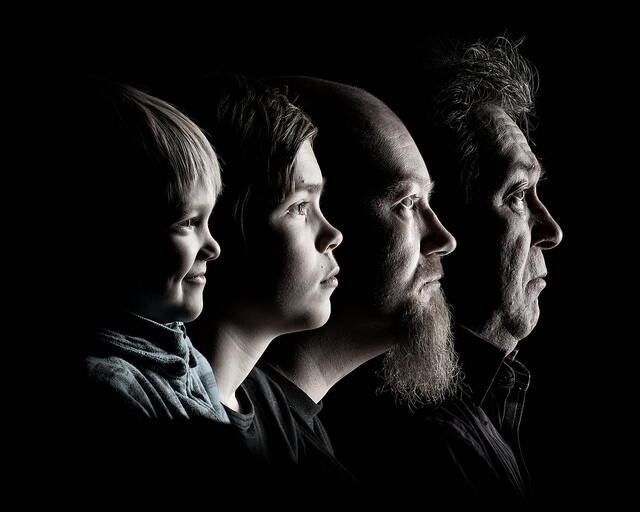
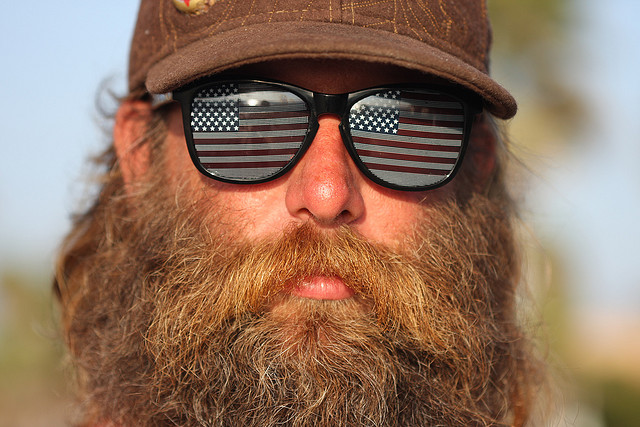
  • The Essence of Masculinity – Portraits of Men

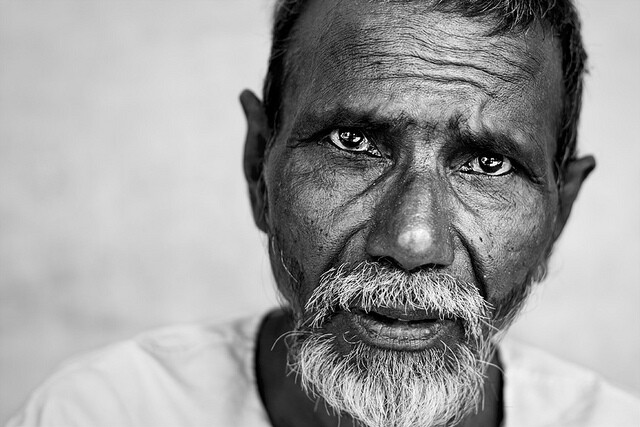
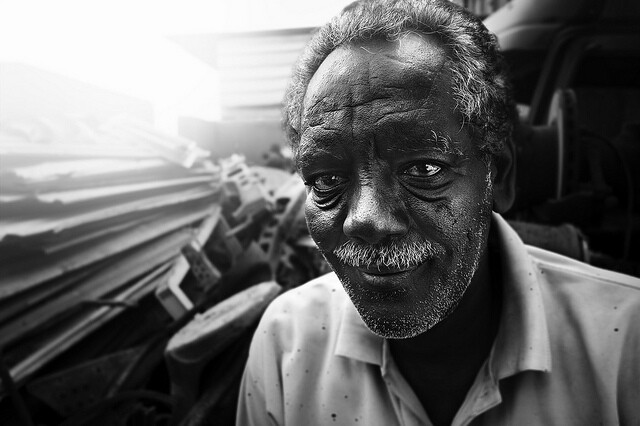
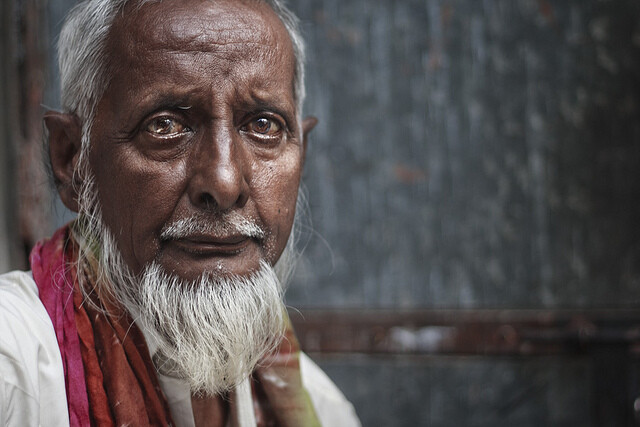
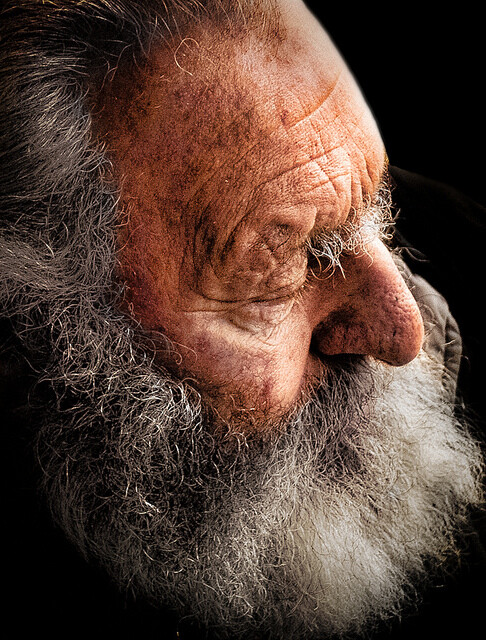
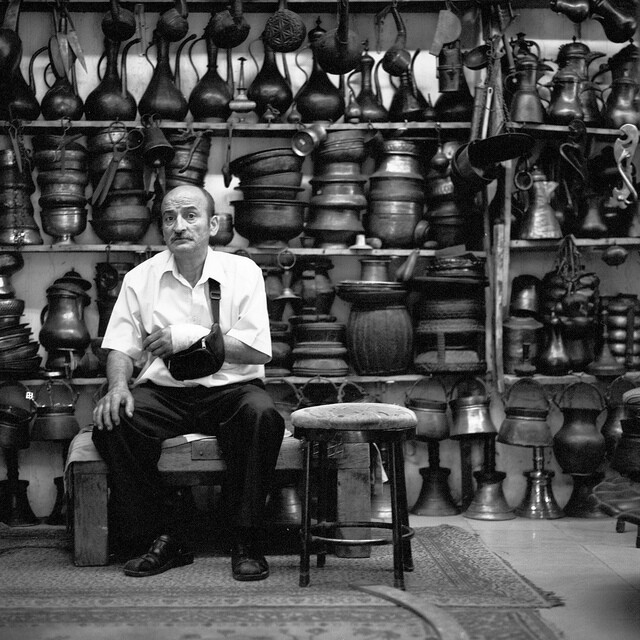
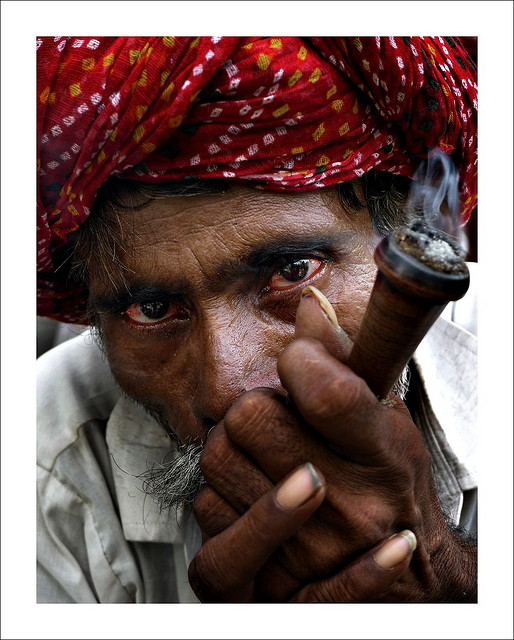
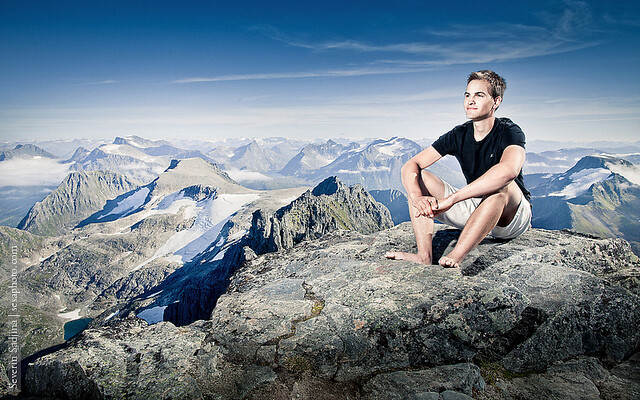
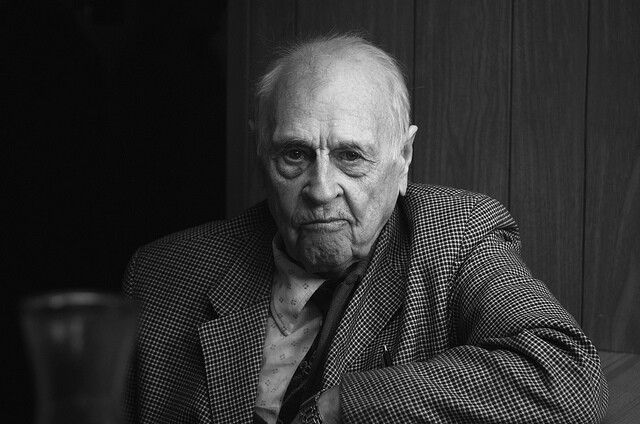
    We are at the end of our two week Portrait Deep Dive and I thought I’d end it with one more portrait collection for you. Last week we had Inspiring Portraits of Women, this week it’s the mens’ turn!

    The Essence of Masculinity – Portraits of Men

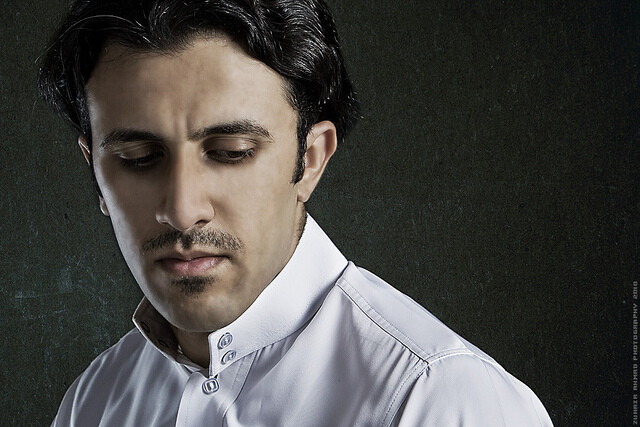
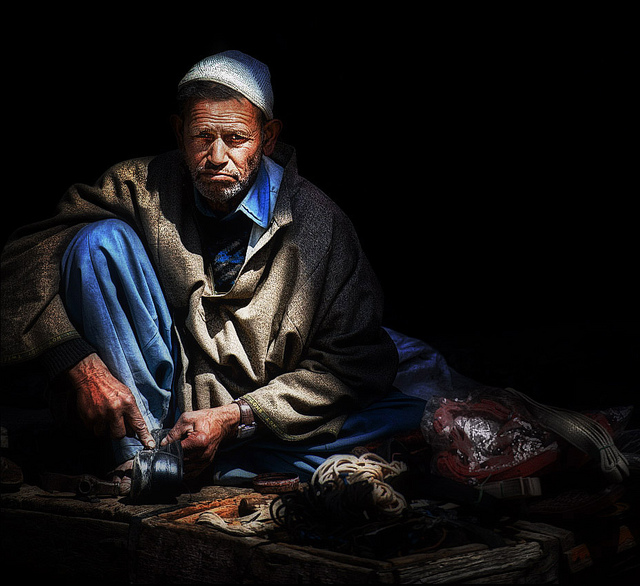
    First I want to share with you some portraits of men, by a man – Zuhair Ahmad. I found Zuhair’s work on Flickr last week and liked it so much I asked him to write an article for dPS and he’s agreed – watch for it soon! Here are a few of Zuhair’s portraits of men to start you off:

    By Zuhair A. Al-Traifi

    By Zuhair A. Al-Traifi

    By Zuhair A. Al-Traifi

    By Zuhair A. Al-Traifi

    By Zuhair A. Al-Traifi

    By Zuhair A. Al-Traifi

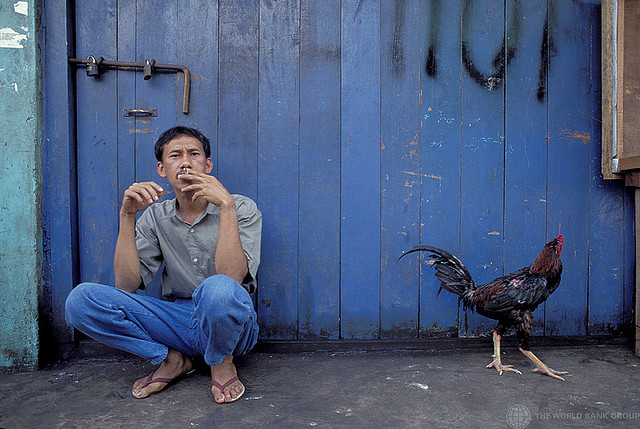
    Tell me it’s not just me and that there’s something special in his images?! The eyes of each of these men speak to me! Do they speak to you? What do they say to you? I see great sadness and wisdom in all of them.

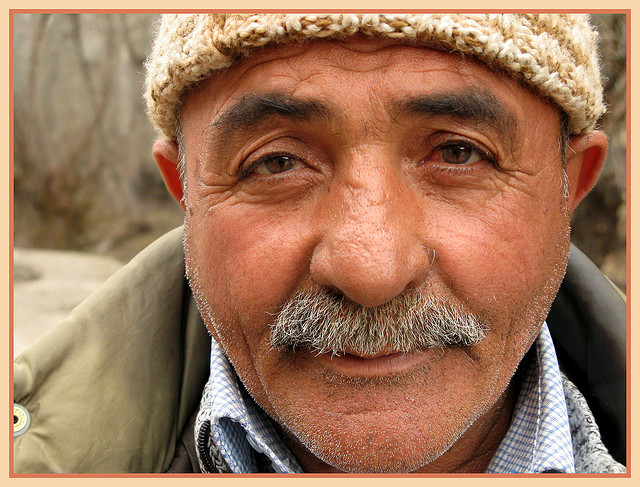
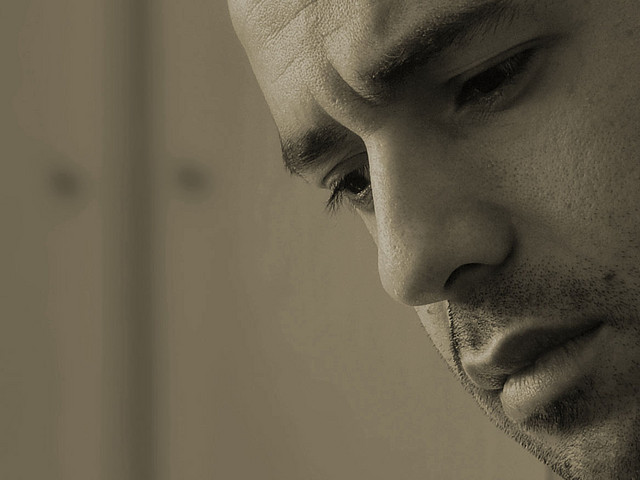
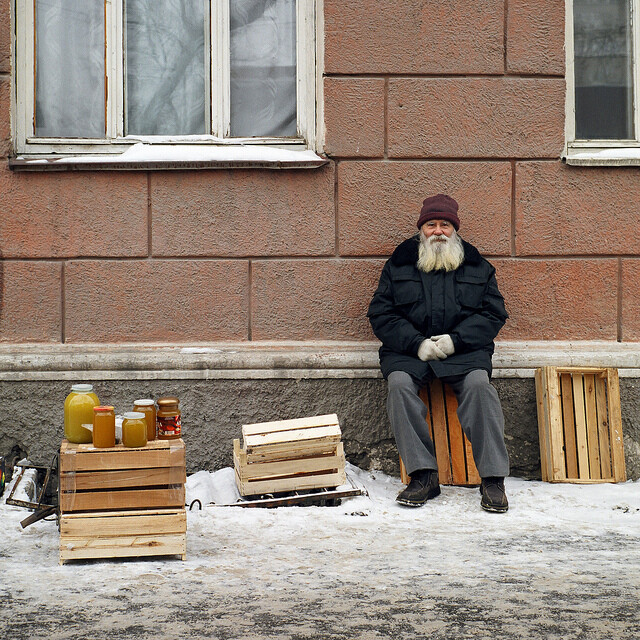
    More from Zuhair later – let’s see more portraits of men! Look at each of them one by one. Give each image its due time. What do you see here that is consistent among all of them?  What is different or special about each?

    By World Bank Photo Collection

    By Christos Tsoumplekas

    By Brandon Warren

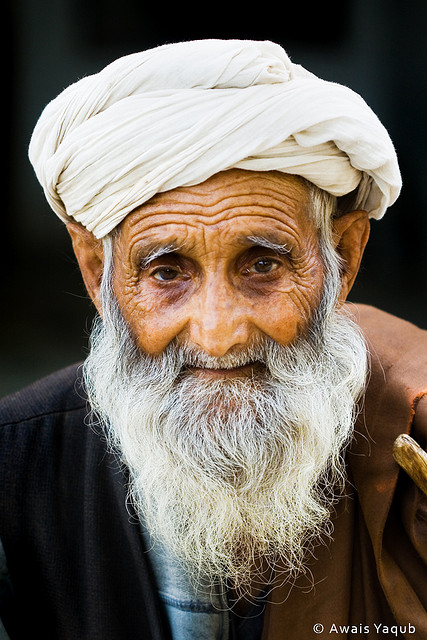
    By Awais Yaqub

    By David Dennis

    By Stirbo

    By Daniel Horacio Agostini

    By Anton Novoselov

    By Christian Senger

    By anurag agnihotri

    By Severin Sadjina

    By Petras Gagilas

    By [martin]

    By World Bank Photo Collection

    By Sukanto Debnath

    By Simón Pais-Thomas

    By Vineet Radhakrishnan

    By Ville Miettinen

    By Sukanto Debnath

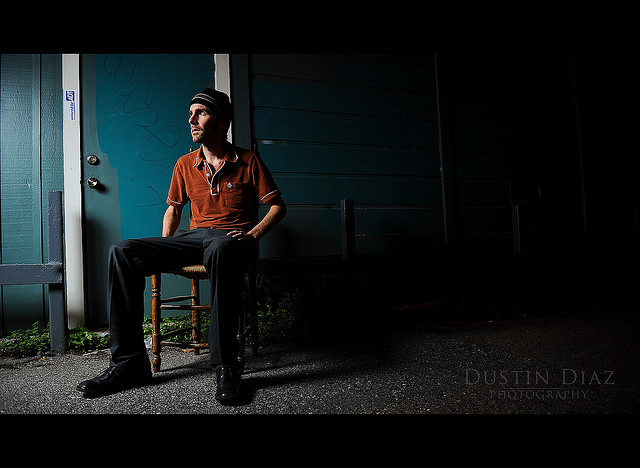
    By Dustin Diaz

    By ram reddy

    By Toruk Macto

    By _marmota

    By Mikael Tigerström

    By David Robert Bliwas

    By stephane

    By Daniel Hoherd

    By Brett Davies

    By Petri Damstén

    By World Bank Photo Collection

    By Vineet Radhakrishnan

    By Nathan Rupert

    By fusion-of-horizons

    The post The Essence of Masculinity – Portraits of Men by Darlene Hildebrandt appeared first on Digital Photography School.


    Digital Photography School
  • Celebration of Light: 50 Sparkling Fireworks Photography Examples to Inspire You

    Since fireworks were created, people all over the globe have used them to pray for happiness, ward off evil spirits, celebrate birth, death, weddings, the New Year and any other occasions. Festive fireworks are a breathtaking sight when vivid, magic colors of light are exploding in the air for a few quick moments. I believe every photographer comes up with Continue Reading
    The post Celebration of Light: 50 Sparkling Fireworks Photography Examples to Inspire You appeared first on Photodoto.


    Photodoto

  • Stealing Light – Using Street Lights for Portraits

    Turn the street into your studio by using street lights for portraits Most people that I see taking photos after dark around the city have a flash mounted on the camera pointing at their subject. If shooting outdoors with nothing to bounce the flash off, the result usually is that rabbit out in front of headlights look, and flat lighting that rarely flatters your subject. As a professional wedding and portrait photographer, I will share with you my secrets of stealing available light when taking portraits around cities. No need for softboxes, beauty dishes, just put that flash away and start hunting for good light available in a city near you. It’s liberating carrying less gear and after a few light foraging trips, you will be well trained to find that tasty light!

    Types of light sources

    Illuminated advertisement signs

    Docklandsphoto 4

    f/1.8, 1/100th, ISO 1600

    One of my favorite methods is to light up my subjects with illuminated advertisement signs, every city has them. Above is a portrait of the couple lit with the bus stop’s advertisement. Just find a nice one with not too much colour if possible and it’s like photographing with a giant softbox. You get a nice soft light perfect for head shots. I’ve even used this method to great effect shooting friends in a nightclub with an iPhone.

    Street lights

    Tungsten streetlights are common, you see them everywhere. I prefer wall lights to give a nice directional light. The second bonus with using tungsten lights is that if there is any ambient light in the picture like you see in the back, it turns into a deep shade of blue. Great effect with no photoshop needed, all you have to do is to set your white balance to tungsten or if your camera has a manual colour temperature setting you can set it to 3000K (degrees Kelvin) during the shoot and play around with it. If I am under time pressure I usually leave the WB to auto and do the colour correction in post production. There is no loss of quality that way when shooting in RAW. Below image shot in London, notice how the background ambient light turns blue.

    Docklandsphoto 1

    f/2.8, 1/80th, ISO 1000, Tungsten White Balance

    LED lights

    LED lighting can be seen all over cites these days. They are getting popular as they are more power efficient than tungsten lights. They will offer a colder colour temperature compared to tungsten lights. The main thing to remember with LED lights is that there is a rapid light falloff. You need to have your subject as close as possible to the light source, normally within three feet, for the best quality of light. The couple below were lit with the LED lights attached to bridge hand rails. In the left image you can see where the light source was coming from, and I had to get the couple quite close to it for the effect.

    Docklandsphoto 2

    f/4, 1/30th, ISO 3200

    Learn to see the light

    When I first started out as a wedding photographer I would quiz other photographers and ask how they took their images. I recall posting on a forum asking a seasoned professional how he created such stunning portraiture, half expecting a response in the form of ISO, aperture, shutter values and lighting setup. He responded to a forum post with what I thought a rather abrupt and smug response. “Learn to see the light”. I now really do “see the light”, excuse the pun. For the photography that I shoot, it really is a case of training myself to understand and recognize good quality light. Below image left was shot after sunset and lit with the flood lights used to light St Paul’s Cathedral. A fast lens such as a 50mm f/1.4 comes in handy in these situations. The right image was just shot outside a Vietnamese restaurant lit with none other than a common halogen spotlight. The key to shooting with light source from above is to pose your subject so that their heads tilt up, to avoid the dreaded panda eyes!

    Docklandsphoto 3

    f/1.4, 1/80th, ISO 1600 left image
    f/1.4, 1/100th, ISO 1600 right image

    For more wedding and lighting tips read:

    • Are you Ready to be a Wedding Photographer?
    • “Photography Business Secrets” – A Review
    • Balancing Color for Flash and Ambient Light using Gels
    • 6 Portrait Lighting Patterns Every Photographer Should Know

    The post Stealing Light – Using Street Lights for Portraits by Garry Chung appeared first on Digital Photography School.


    Digital Photography School