Category: Photography

  • Camera Review – the Sony A7R

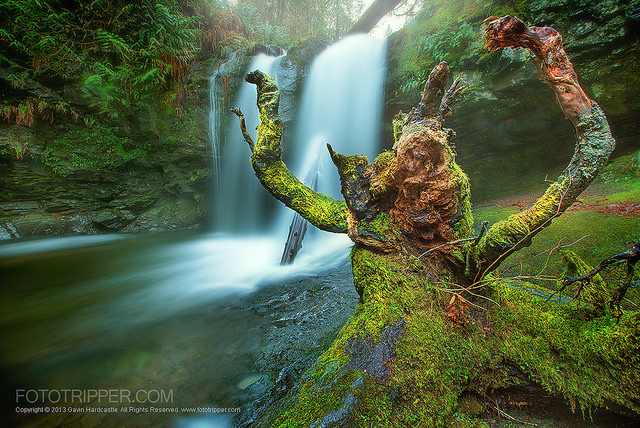
    Sony A7R Example shot from one exposure – ‘Ferocious Stump’ By Gavin Hardcastle

    Initial Impression of the Sony A7R

    I started writing this Sony A7R Review with the sentence ”I hate the Sony A7R”, such was my vitriol over this infuriating yet impressive piece of tech. And that’s what the A7R is, it’s a technological marvel crammed into a tiny, sharp edged box. If you’re like me, converting from Canon or Nikon, you’ll find the learning curve painful as you discard much of the logic you’ve grown so used to.
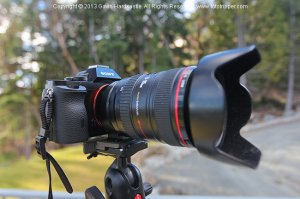
    Sony A7R Review with Canon L LensesThat being said, each day my hatred of the Sony A7R diminished as I chipped away at the quirks to uncover the gems this little Pandora’s box has to offer. As expected, the image quality is superb. Having this kind of dynamic range at my fingertips is pure luxury and I’m seeing such a crisp sharpness from my old Canon 24-105mm lens that it’s quickly become my go-to lens of choice.
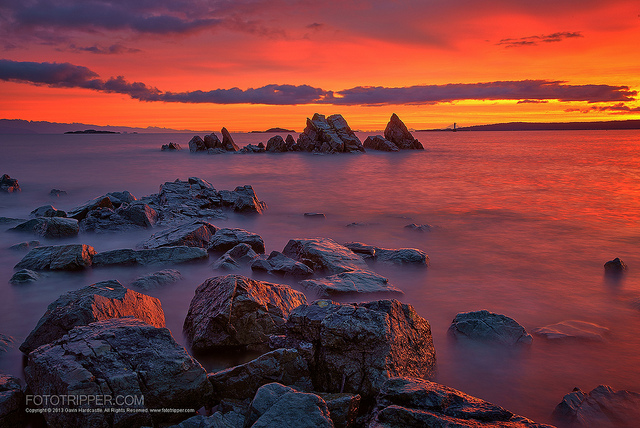
    Sony A7R Example – HDR shot ‘The Frost Fangs’ By Gavin Hardcastle

    Could I Learn to Love the Sony A7R?

    Sony made a great sensor and some really clever technology, but in terms of ergonomics and overall creative workflow, they could learn a lot from the likes of Canon and Nikon. Compared to the sterile feeling A7R, my trusty old Canon 5D mkII feels like a worn in glove that’s perfectly moulded to my hand with everything in the right place. The A7R is like a soulless Cylon that sports the biggest firepower but is completely devoid of heritage or heart.

    The problem is, my 5DmkII perished horribly a couple of months ago so I bought the Sony A7R and even splashed out the $ 412 Canadian dollars for the crappy Metabones adapter that fidgets around in the Sony E-Mount like a 5 year old after a super sized Slurpee binge.
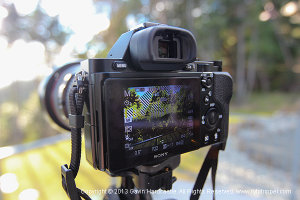
    Sony A7R ReviewAlthough this is not Sonys fault, this entire setup really has its problems and I’ll be honest, if I hadn’t already taken the plunge and fully committed to this purchase, I’d probably have taken it back to the store to exchange it for something else. Oh but wait, there is nothing else that comes close to the Sony A7R in terms of specification versus price.

    So I’m stuck with it, and what do people usually do when they have no choice, but to get along? They figure out ways around the problems and make do. That’s when my hatred of the Sony A7R started to turn into begrudging admiration, dare I say….. even… love?
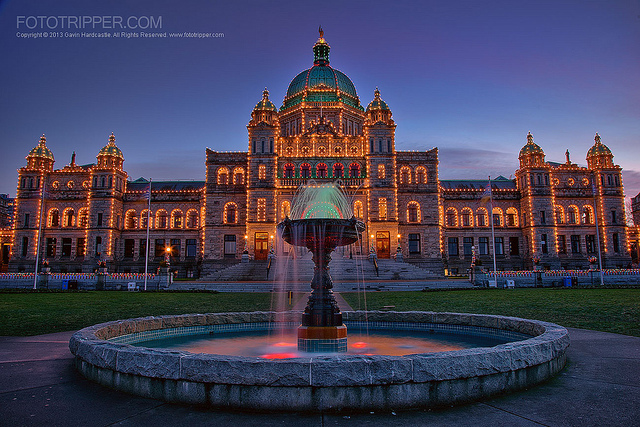
    Sony A7R Example – HDR shot ‘The Capitol’ By Gavin Hardcastle

    Very Customizable

    The good news is that the A7R is highly customizable, so if you’re willing to spend days digging through the menus, reading the useless manual and trying a bit of experimentation, you’ll be able to tweak it your tastes – I hope. NEX users will already be familiar with complicated menus and I’ve heard that the A7R is much simpler. I expect NEX users will read my review and groan, possibly even accuse me of being a purist old fart who can’t let go of the old DSLR ways (cue more groans from film shooters).

    So, without further waffling, here’s a list of things I love about the A7R and a list of things I hate; so that you know what you’ll be getting yourself into should you decide to buy this powerful little beast of a camera.

    What I love about the Sony A7R:

    • The 36 MP sensor is excellent in terms of resolution and dynamic range
    • It’s light weight, my tendonitis loves that – but there are drawback as you’ll see below
    • The digital spirit level in the display – always get perfectly level shots without a green plastic bubble in your hot shoe – nice
    • The manual focus assist – It displays little marching ants to indicate you’ve hit the sweet spot
    • The Live View looks great in the monitor screen
    • I can angle the monitor screen to make shooting near the ground easy. No more lying prone like a sniper and getting a neck crank.
    • The info icons on the display are very helpful once you learn what they all mean.
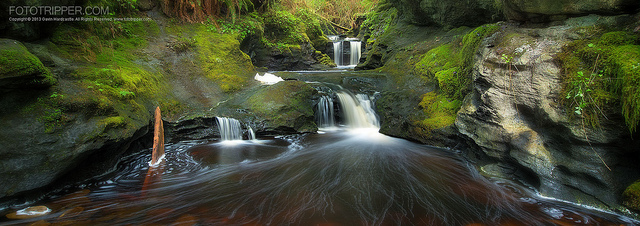
    Sony A7R Example shot from one exposure ‘Tendrils’ By Gavin Hardcastle – click to see a larger version on Flickr

    What I hate about the Sony A7R:

    • It’s too small. By all means keep it light, but for a grown man it would fit much nicer in the hand if it was slightly larger. When it comes to electronics – small isn’t always best.
    • I don’t like the EVF (electronic view finder). Call me old fashioned but I like being able to look through a piece of glass and see my composition even with the camera turned off. Not so much an issue with the A7R specifically, as this is just the way of mirrorless cameras in general.
    • The battery life is pretty shabby due to the EVF and monitor screen always being in use. You’ll be buying that extra battery grip for sure. You can switch off the monitor to save juice.
    • Auto Focus is pretty dire compared to Canon/Nikon but I’ll reserve final judgement until I try out a native Sony/Zeiss lens.
    • If you use the default controls for manual shooting it’s very easy to accidentally hit the adjustment wheel. I’m forever changing my ISO and white balance without meaning to – most enraging.
    • Bracketing will not work in unison with the 2 second self timer. You have to choose one or the other. If you want to bracket without touching the shutter you’ll need to buy a remote.
    • The TimeLapse and Timelapse LE app is utterly useless. No bramping (bulb ramping) and it won’t trigger bracketing mode.
    • It’s slow to save files – If you shoot RAW+JPEG in low light you’ll get very familiar with the ‘Processing’ message on the monitor screen. The drawback of having 36 megapixels I guess.
    • Ergonomics – it’s like a matchbox. Ever heard of curves Sony?
    • Ditch your old SD cards. 36 MP Raw files need some super fast cards .
    • The balance is terrible with legacy DSLR lenses. If you shoot handheld and have a medium to large lens, you’ll hate the feel of the A7R. The native Sony/Zeiss lenses however, are all nice and small so it’s only an issue with your clunky old DSLR glass – which might be exactly why you bought the A7R in the first place.
    • Shutter shock with long lenses causes significant vibration and ruins images due to blurring. Apparently this can be improved by adding a weight to the camera. Some user have reported the battery grip fixes the issue. One more example of the camera being too small for its own good.
    • There is no separate battery charger. You have to connect the camera to the mains via the shortest cable I’ve ever seen. You’ll be shelling out an additional $ 50 for the Sony BC-QM1 battery charger.
    • Auto White Balance fails 80% of the time when using Canon lenses via an adapter.

    The Manual (pamphlet) of shallowness

    The Sony A7R comes with the most useless user manual I’ve ever seen. It has about as much depth as a Miley Cyrus song and leaves you with more questions than answers. On page 82, the manual mentions that there is an in depth ‘Help Guide’ available at a url that is no longer available. After much scouring of the interwebs I found the real link to the Sony A7 / A7R Help Guide which still works at the time of writing. I’m sad to say I’ve read the entire thing and still needed to find answers to my many problems by forum digging.
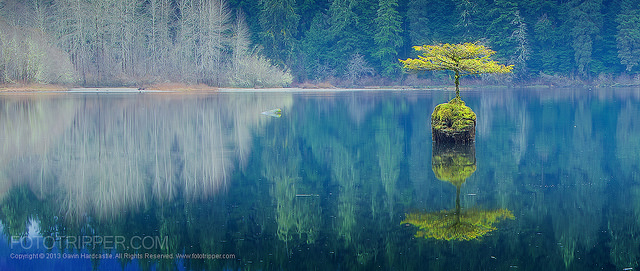
    Sony A7R Example shot from one exposure ‘Tenacity’ By Gavin Hardcastle

    Extra dollars you’ll have to spend on accessories

    • Battery charger
    • Remote shutter release if you want to bracket with 2 second timer
    • Battery grip – for added weight, better balance and longer battery life
    • Extra battery
    • New super fast memory cards

    Do you really need 36 megapixels?
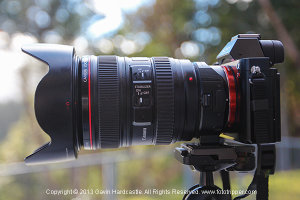
    Sony A7R Review and Example Shots

    Of course you do. It doesn’t matter if you only ever print small images, with 36 megapixels your compositional horizons are greatly expanded because you now have the power to crop like a boss. If you don’t own a $ 6k super telephoto lens, it’s no problem, just take the shot and crop it in post with plenty of resolution left over.

    Will you need a new hard drive?

    Of course you will. These RAW files are humongulous. If you’re squeamish about losing precious disk space, the Sony A7 is probably the better option with its faster auto focus, smaller files and lower price tag.

    Do I recommend this camera?

    If you’re a landscape shooter, I would recommend that you buy this camera. If you’re any other kind of shooter and never have the need to print massive images and don’t do much cropping, buy the A7.

    Why this is an awesome camera

    I admit it, I love the A7R. Even though my list of grumbles is way longer than my list of plus points, it all boils down to the fact that the image quality of the A7R is simply awesome. I’ve learned to work around the annoying quirks and when you consider that Sony’s native lenses are very, very small, it all starts to make sense. Sure, it’s great that we can all attach our old lenses via adapters, but if I could afford to replace my giant, heavy Canon glass with miniature sized Zeiss glass that might possibly do a better job – I totally would.

    Have you tried out the Sony A7R? What is your experience? Share with us in the comments please.

    The post Camera Review – the Sony A7R by Gavin Hardcastle appeared first on Digital Photography School.
    Digital Photography School

  • Beyond Full Moon Photography

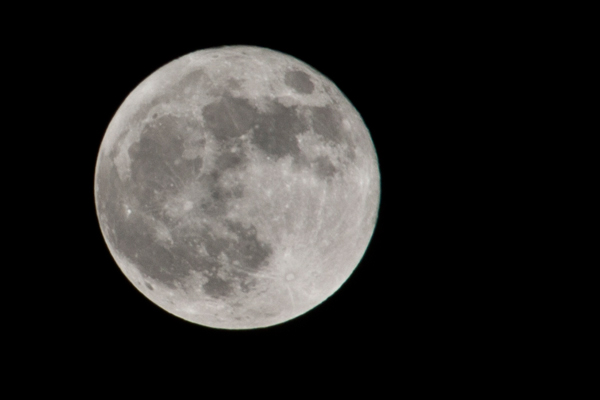
    The rising full moon is a shot on many photographers’ bucket lists, but how many of us remember that the moon is even there on those other 28 days of the lunar month? Forget the moon no longer; there are many great reasons to keep shooting the moon throughout its phases.

    moon, full moon, photography, how to

    Better Craters and Contrast

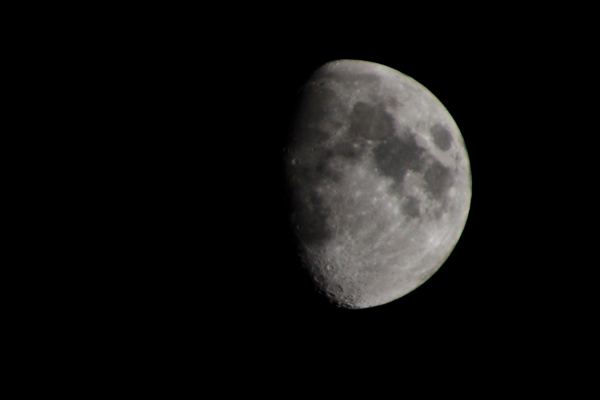
    Craters are a fascinating feature of the lunar surface, and they are easier to feature when the moon is no longer full. During a full moon, an entire side of the moon is visible and reflecting the sun’s light back to us. Craters, by contrast, look better in shadow, as this less direct light highlights the differences in elevation on the surface and bring better contrast and definition. A gibbous moon (the lumpy phase between full moon and the first or last quarter when the moon looks half full) is an excellent choice for craters. Along the edge where the moon fades into blackness, you will be able to capture the deep shadows of the craters in your moon photographs.

    moon, moon photography, gibbous moon, how to, craters

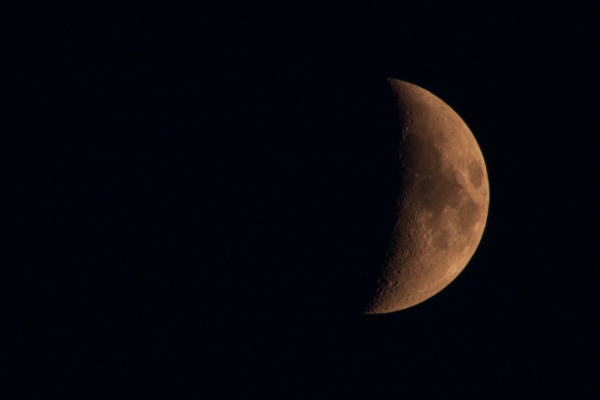
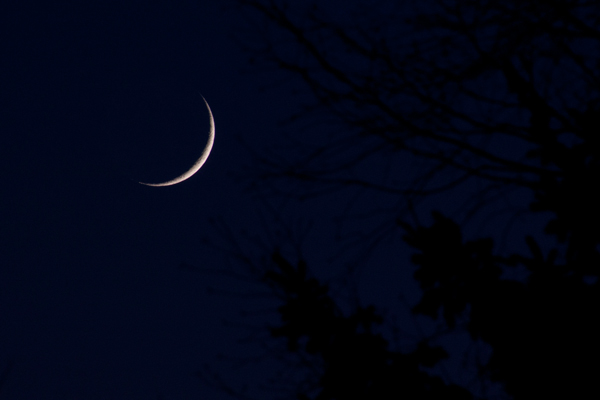
    As the moon continues along its progression, it will pass from gibbous through the first quarter, and enter the crescent phase. Before the moon reaches its classic, skinny crescent shape, there are also many opportunities to capture it that emphasize the craters. Because the moon is visible at different times of day and night during different phases, you will also be able to capture the different colors of its light.

    moon, moon photography, crescent moon, how to, crescent, craters

    Crescents and Earthshine

    The crescent moon is the phase between first or last quarter and the new moon, when the unlit side of the moon is facing the earth. The crescent shape is hugely significant in many cultures. It is often the version of the moon drawn by children, yet it can be overlooked by photographers. The crescent moon is generally visible during the daytime hours, which can make it more difficult to see and photograph successfully. But, as the crescent reaches its smallest size, you will be able to capture it setting in the early evening, against the brilliant deep blue skies that are well-suited to moon photographs.

    moon, moon photography, crescent moon, how to, crescent, craters

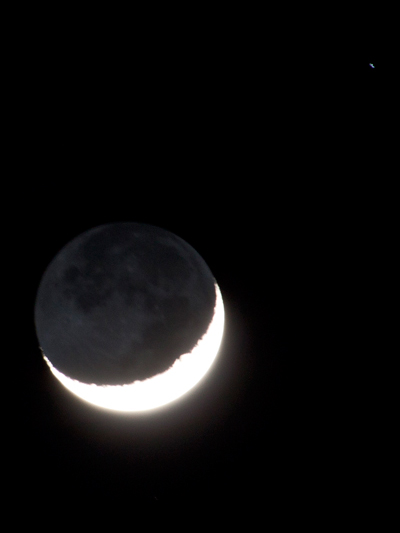
    Another phenomenon to photograph with the crescent moon is known as earthshine. If you stare closely at a slim crescent moon, you should just be able to see the darkened outline of the rest of the moon’s surface. That surface is dark because it is no longer reflecting the light of the sun. The fact that you can see it at all is because that part of the surface is reflecting back light from the earth, hence the term “earthshine”.

    moon, moon photography, crescent moon, how to, crescent, earthshine, star

    If you want to capture a shot of the crescent moon showing earthshine, you will need to shoot in manual and significantly overexpose the image. The crescent part of the moon will become overexposed (very bright) as you bring out details within the shadowed sections of the moon, which can result in a very unique moon shot. A tripod or a camera with good high ISO performance is critical, as is a longer zoom lens. Try to keep your shutter speed below a second or two, otherwise the moon will begin to move during the exposure and blur the image.

    Timing and Backgrounds for Moon Photography

    A moon photographed alone, however, is simply a shot of the moon. To really make an impact with your moon photography, regardless of the phase, you need to feature an interesting foreground or background. The two critical components here are knowing the timing of moonrise or moonset, and knowing the approximate location of the moon in the sky.

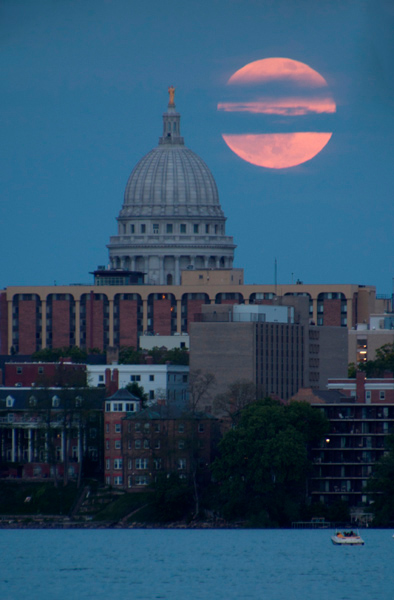
    The Photographers’ Ephemeris is downloadable software (free for laptops and desktops but a paid app for Apple and Android phones and tablets) that lets you view the moonrise and moonset times (as well as sunrise and sunset times) against a map, which allows you to plot out exactly where the moon will appear in the sky, depending on where you are standing. Moonrise and moonset tables and times are also easily available and searchable online. You can use the ephemeris to determine exactly when and where to stand if you wish to photograph the moon rising or setting over a specific place or landmark.

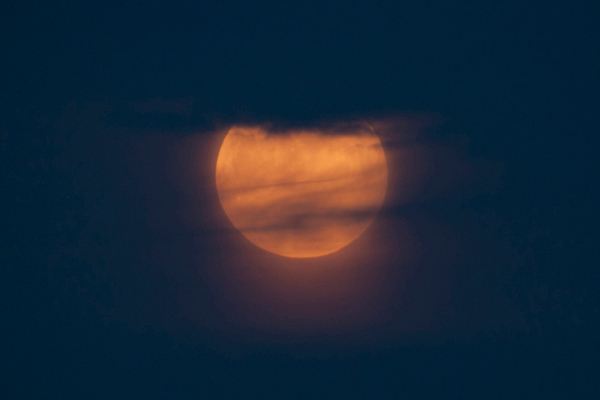
    moon, moon photography, full moon, how to, Madison, Wisconsin, orange moon

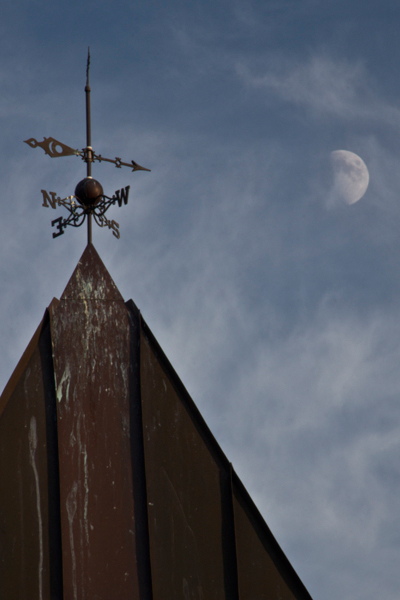
    You are not limited to only shooting the moon at night. Depending on its phase and timing, you can photograph the moon during the daytime too, which makes it easier to experiment with interesting foregrounds. By walking around, moving up and down, and otherwise changing your perspective, you can ‘move’ the moon where you want it to appear in your final image. The longer the focal length that you can use, the larger you can make the moon look, relative to the other objects in the image.

    moon, moon photography, full moon, how to, gibbous, half moon, photography

    Variations

    There are an infinite number of variations on moon photography. Do not let yourself be limited by the full moon, only shooting the moon at night, or only when it is rising or setting. Do not let clouds stop you from looking for the moon. Pay a little more attention to the moon throughout the month, and you will find many opportunities for moon photography.

    moon, moon photography, full moon, how to, clouds, photography

    Have you got some great shots of the moon or some addition tips? If so please share them in the comments below!

    More night photography articles:

    • Moon Photography: 6 Tips for Better Moon Photos
    • The Mystery of Night Photography – 35 Images of the Night
    • How To Photograph Star Trails
    • Light Painting Part One – the Photography

    The post Beyond Full Moon Photography by Katie McEnaney appeared first on Digital Photography School.

    Digital Photography School

  • The 16 Most Photogenic Everyday Objects, Part Two

    In part 1, I spoke about 16 of my favorite everyday objects to include in photographs.  These objects won’t always make a photo, but when included they will almost always make the scene more photogenic.

    The purpose of these lists is to help add some inspiration for the next time you walk out the door to photograph. There is beauty to capture around every corner and sometimes it is the simple things that make the most interesting images.

    What’s on your list of most photogenic everyday objects?

    1. Smoke

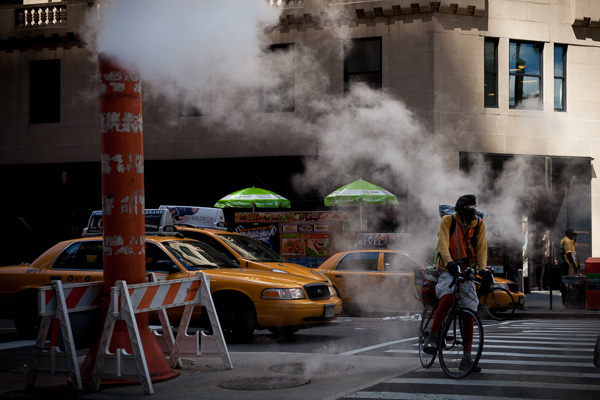
    Find some roadwork and wait for magic to happen. This is an easy way to create an image with a cinematic feel.

    Bike Messenger and Smoke

    Bike Messenger and Smoke

    2. Restaurant interiors

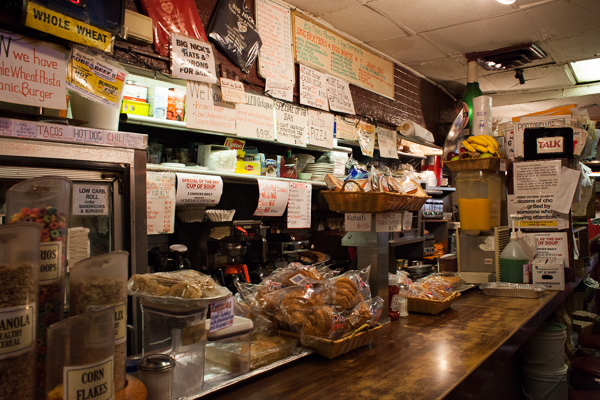
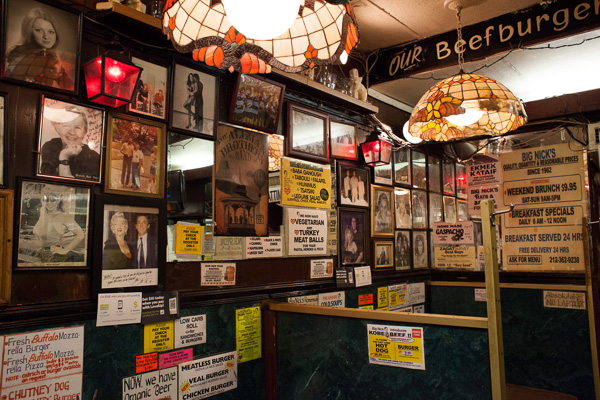
    Many people get caught up in photographing their food and forget what is truly interesting, the restaurant itself. I find the long time, no-frill, and historical restaurants to be the most photogenic, but of course there are exceptions to every rule.

    Big Nicks Diner

    Big Nicks Diner

    Big Nicks Diner

    Big Nicks Diner

    3. Things that are disappearing

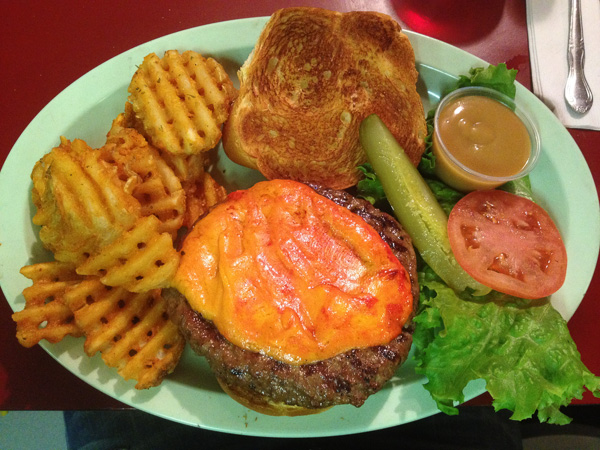
    One of the most important aspects of photography is its ability to document and encapsulate the past. In addition to taking photos when you travel, use the camera to document and remember your life at home. Capture the simple things that you take for granted, because one day you will suddenly find them gone. The above photos are from my favorite restaurant growing up, Big Nicks, which went out of business in 2013.

    If you are going to photograph your food, why don’t you capture your favorite meal from growing up? I present to you all the port cheddar burger and waffle fries with honey mustard from the late Big Nicks.

    Big Nicks Port Cheddar Burger

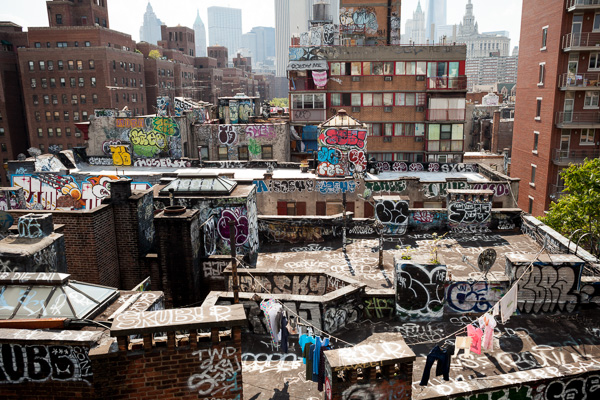
    4. Grafitti

    Graffiti from Manhattan Bridge

    Graffiti from Manhattan Bridge

    5. Interesting hair styles

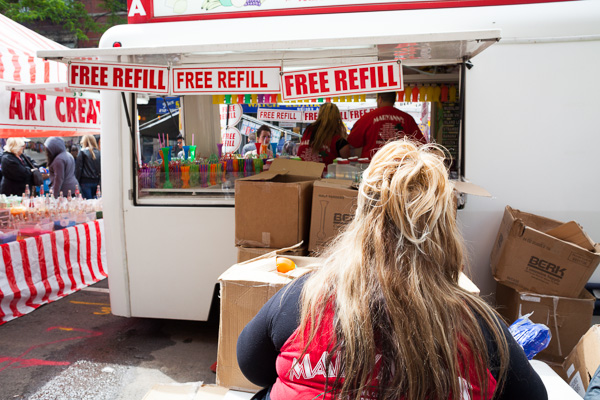
    I prefer to capture people from the front whenever possible, but combining a unique hairstyle from the back with an interesting background behind it can create a very graphic image.

    Loisaida Street Fair, Lower East Side

    Loisaida Street Fair, Lower East Side NYC

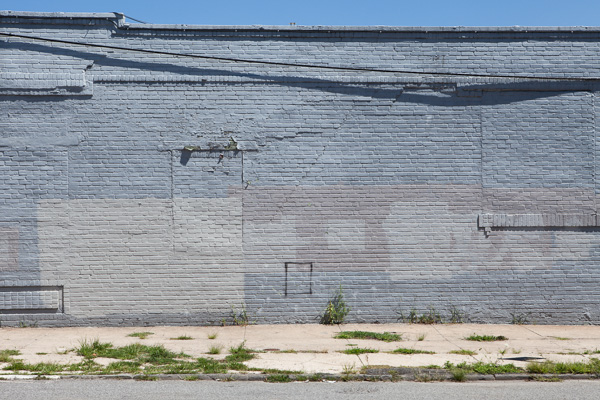
    6. Muted and worn colors

    Don’t let instagram filters fool you. Muted and subtle colors can be much more striking and beautiful than highly saturated images.

    Gowanus Wall

    Gowanus Wall

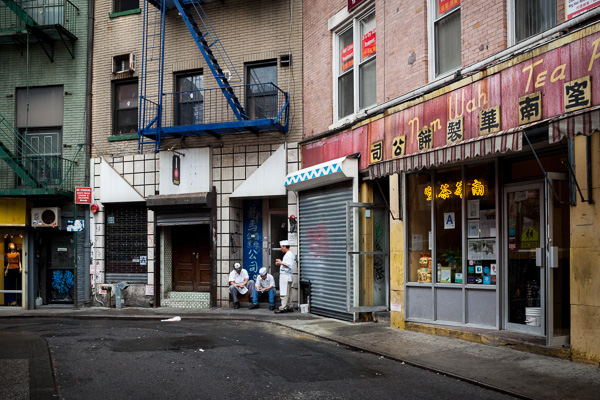
    7. Things in threes

    The number three is the most glorious number in photography. Objects and people in threes always seem to look good in an image. Why? I think it comes down to the triangle. Three objects will create a triangle shape within an image, which gives the eyes a clear route to move around the image, making it feel more balanced.

    As a sidenote, the number three also works when displaying your images. Three images with similar content placed next to each other will help to enhance each individual image. For street photography, a single candid image of a stranger on your wall can look out of place, while three of these images next to each other can work very well.

    Chinatown Chefs

    Chinatown Chefs

    8. Bikes

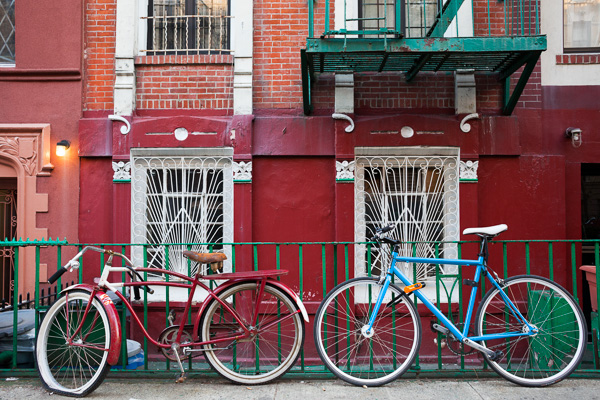
    East Village Bikes

    East Village Bikes, NYC

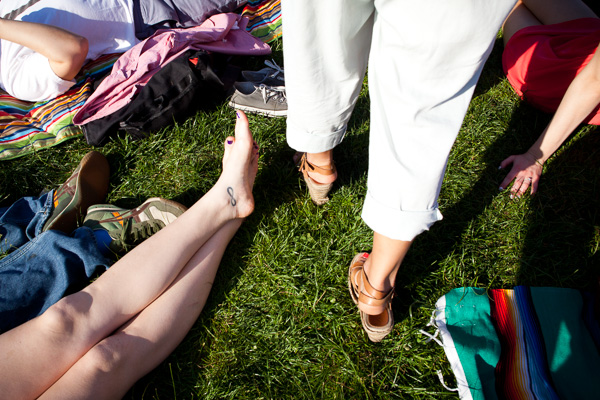
    9. Tiny details

    If your images do not feel graphic enough, then get in closer. It’s surprising how many stories can be told through the tiniest of details.

    Prospect Park, Summer

    Prospect Park, Summer

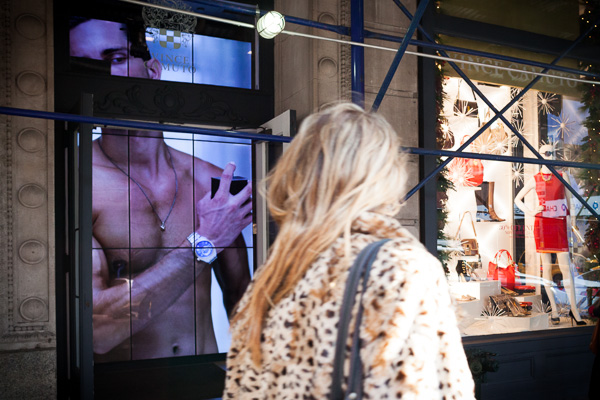
    10. Shops and shop windows

    Shop windows might seem boring now, but they will age the quickest as fashions and times change. Sometimes the images that seem the least interesting now will be the most interesting in the future. Look at the images of Walker Evans of Eugène Atget for reference.

    SoHo Shop Window

    SoHo Shop Window

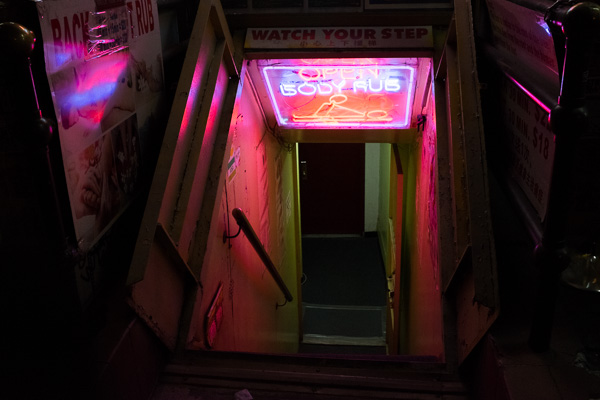
    11. Neon signs

    Massage Parlor, Chinatown

    Massage Parlor, Chinatown

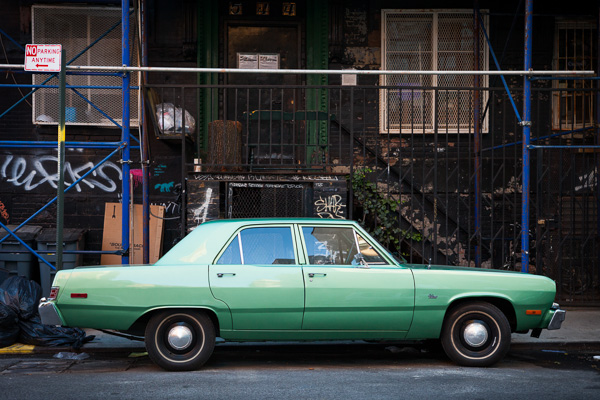
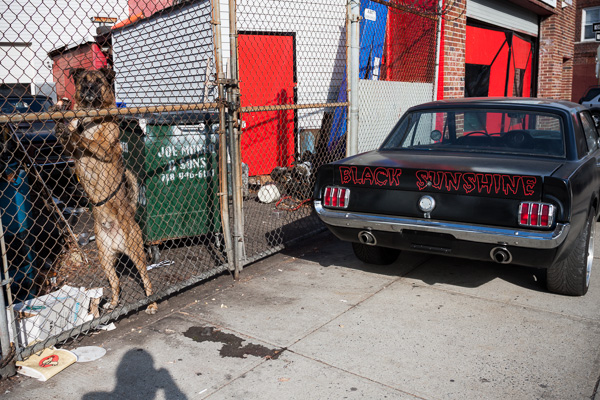
    12. Old cars

    When possible, try to put together a scene and capture the background in addition to the car.

    Old Car

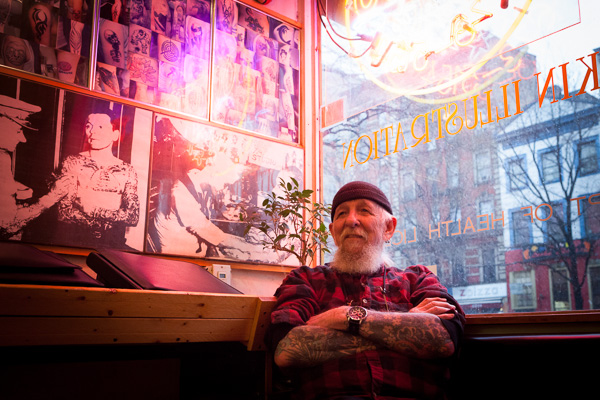
    13. Tattoos

    And tattoo parlors.  Don’t be afraid, go in there!

    Tattoo Parlor

    Tattoo Parlor

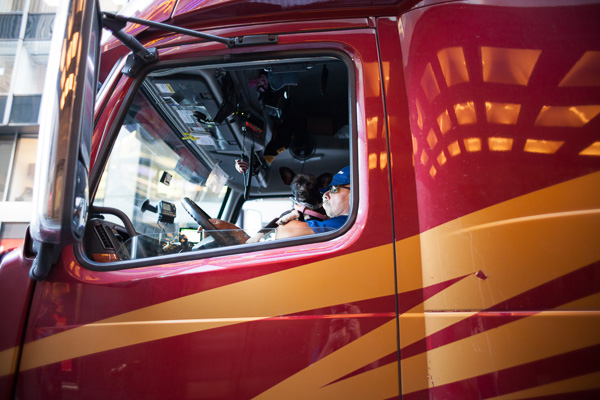
    14. Dogs

    Man’s best friend, except in this case.

    Black Sunshine and Dog

    Black Sunshine and Dog

    Even burly truck drivers like dogs.

    Truck Driver and Dog

    Truck Driver and Dog

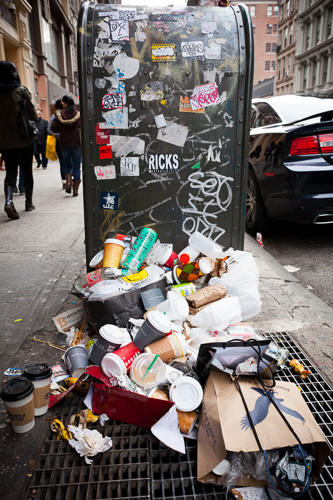
    15. Trash

    This one is meant to stir the pot a little bit.  No, this is probably not going on my wall (my wife won’t let me), but that does not mean it is not interesting and photogenic.  It is colorful, graphic, diverse and poignant. There are a litany of brands represented: Arizona Iced Tea, Snapple, Starbucks, American Eagle, Marlboro, Guess, and Armani, among others.  Just because it’s not the type of image that is fit for a wall does not mean it can’t be beautiful.  Also, in 50 years this image might have some historical interest when many of these brands are out of business.

    SoHo Trash

    SoHo Trash

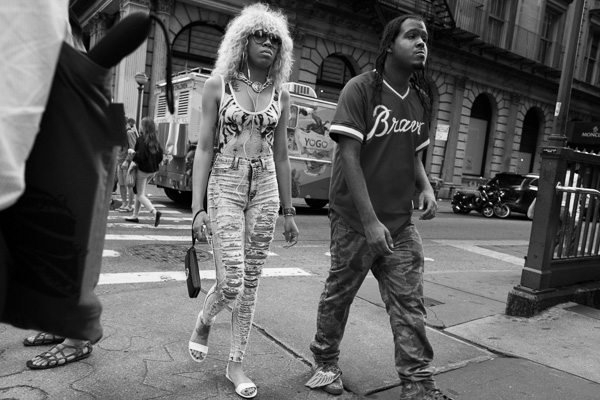
    16. Fashion trends

    The beauty of walking the same areas over and over with a camera is that you are more aware of and able to witness things as they change. Just as you want to photograph things that are disappearing, you also want to capture what is replacing them. New fashion trends are the most obvious ways of capturing times changing.

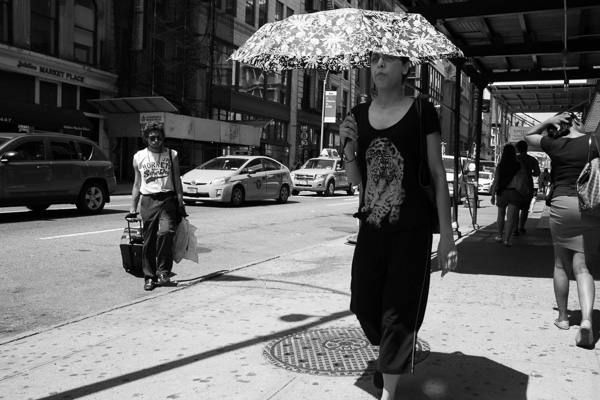
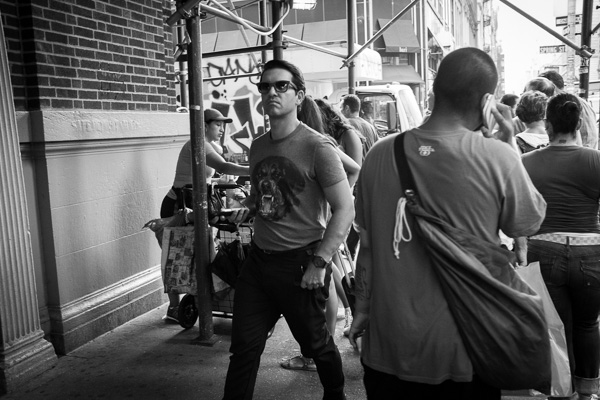
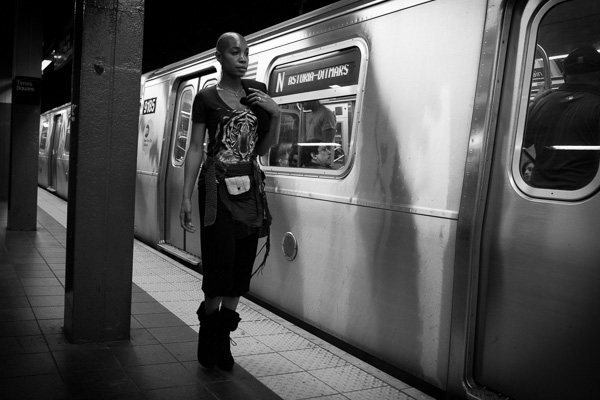
    This last summer in SoHo saw the rise of people wearing shirts with animals that looked exactly like them. So yeah… that’s a strange new trend that makes for a very fun photo series.

    Urban Tiger, SoHo

    Urban Tiger, SoHo

    Urban Tiger, SoHo

    Urban Tiger, SoHo

    Rottweiler Shirt, SoHo

    Rottweiler Shirt, SoHo

    Urban Tiger, 2 Train

    Urban Tiger, 2 Train

    What things that are “ordinary” do you like to photograph?

    More ideas for photography close to home: 

    • Jumpstart Your Photography: Start a 365 Project
    • 5 Good Photography Habits to Start Today
    • 8 Photo Projects in Your Own Backyard

    The post The 16 Most Photogenic Everyday Objects, Part Two by James Maher appeared first on Digital Photography School.

    Digital Photography School

  • Scouting and Paddling the South Platte River after 2013 Flooding

    I paddled the South Platte River twice this year in the upstream/downstream mode covering just a couple of miles above Kersey on January 21 and above Kuner on February 16.

    The river is the same as before 2013 flooding, wide open, without any unusual obstacles. More changes you can see on shores including river access.

    Evans. Riverside Park, a popular launching place, is closed. I am not sure if it is related to the flooding or just temporary closure due to winter/muddy conditions. No information on their website.

    37th street bridge in Evans (left shore, upstream) may be an alternative launching spot with off road parking. It is just below the Riverside Park. Right now, the place is very muddy with a lot of fresh dirt after the bridge repairs. SWA below the bridge is closed.

    Kersey access remains the same (not too easy for larger groups).

    Kuner access remains the same.

    The river flow is good, above 1000cfs, all the way to Fort Morgan. Most dams below Kuner were upgraded with gates during recent years. They may be paddleable if not diverting water. The dam below Kuner (Empire Reservoir inlet) was closed yesterday.

    Only a little bit of snow was left on sandbars. Turkey were very talkative and loud. I saw a whitetail deer crossing the river – it had to swim across the main channel.

    Sea Wind canoe

    Pixel, the “water” Corgi in Sea Wind canoe

    winter paddling on South Platte River

    South Platte River above Kuner, February 2014

    South Platte River above Kuner

    South Platte River above Kuner, February 2014

    South Platte River above Kuner

    South Platte River above Kuner, February 2014

    Related posts:
    South Platte River below Denver – GPS/photo river guide
    12th Annual South Platte River All Club Paddle
    Opening 2014 Paddling Season on the South Platte River


    paddling with a camera

  • A Quick and Easy Way to Make Money with your Photography While Having Some Fun

    Many photographers have the dream of selling their fine art photography and seeing their prints hanging in collector’s homes. I’m sorry to burst your bubble but that is probably the most difficult way to make money. Even the biggest names in photography don’t make a living solely by selling prints. Yet, it is conceivable to make a little bit of extra cash with your pictures and here is a realistic easy way to make money with your photography.

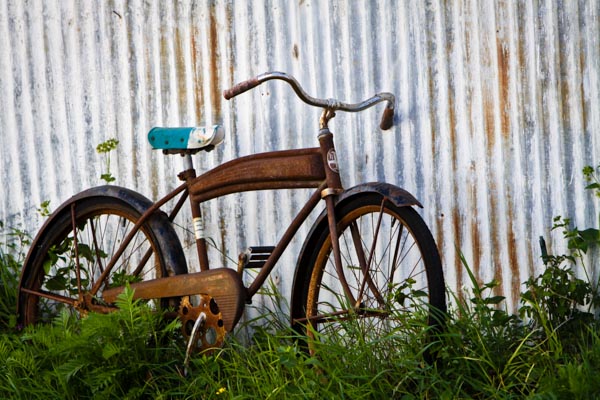
    Everyone loves a card with an old rusty bicycle! ©Valerie Jardin

    Everyone loves a card with an old rusty bicycle!
    ©Valerie Jardin

    Think Locally!

    Instead of trying to reach the world at large and compete with hundreds of thousands of other talented photographers trying to sell their work, think locally!

    You could spend several weekends every year sitting in a booth at an art fair only to sell enough to break even and pay for your entry fee. Yes, art fairs are good exposure, but photography is not the biggest seller and there are usually several photographers trying to sell prints at the same event. Also, those art fair weekends are valuable days for any photographer, wouldn’t you rather be out shooting than selling?

    Another option is to show your work at a restaurant or a coffee shop. If you do, make sure there is an opening party to create a buzz around your work and invite everyone you can think of. Do not leave your images on display for more than a month, no one will notice them after a few weeks.

    I’m going to tell you a little secret…

    Years ago, when I still had a little bit of spare time, I often teamed up with two or three other artists in different media forms and organized private art parties. We combined our contact lists and invited our friends and family to attend an ‘art open house’ for a few hours. We did this several times a year. We took turns hosting the event and split the cost of the snacks and beverages. We also urged people to bring a friend along. By combining our contact lists we would reach a large number of people and always end up with a minimum of 30 to 50 attendees.

    Why is it better to have 50 people coming to your open house rather than hundreds walking by your booth during an art show? The people who come to your private art open house are there for the sole purpose of checking out your work, socializing and spending money! I used to sell hundreds of dollars worth of small prints and greeting cards in just one evening, while having the best time socializing with friends and other artists.

    A card for Mother's Day... ©Valerie Jardin

    A card for Mother’s Day…
    ©Valerie Jardin

    What sells?

    Small ticket items! You can always have a few large, framed prints, on display for the wow factor and a possible sale or two – but small items, such as greeting cards, will sell! People are still very keen on greeting cards, especially in North America. I realize that different countries have different customs. You may think that, in this age of electronic mail, physical cards would disappear. On the contrary, e-cards and social media greetings are so common and impersonal, that receiving an actual card in the mail has become a novelty.

    The advantage of selling cards is that everyone can afford them and has a use for them. Make sure you have a large variety of cards with your best images. If people can’t decide which ones to choose, they are more likely to buy all of them! Another tip: Display some as a pack wrapped with a bow, they make fun gift ideas for friends, co-workers, teachers, etc. Another tip: Offer a ‘bargain basket’ with a limited selection of discounted cards. Some people will only buy if they feel like they’re getting a good deal. Also, use this phrase as incentive “one free card if you buy ten”. It works!

    Everyone knows a musician who would enjoy receiving this card! ©Valerie Jardin

    Everyone knows a musician who would enjoy receiving this card!
    ©Valerie Jardin

    How do you make greeting cards?

    It takes a little bit of time and effort to make those cards and there are several ways of doing it. You can certainly order your cards already made through a wholesaler. It’s the easiest way to proceed but also the most costly and your profit margin will suffer.

    You can make your own! If you have a good quality photo printer, you can download a greeting card template and print them at home on some nice stock paper. Watch out for the high cost of the ink and figure out how much each card is going to cost in ink, paper and envelope. The goal is to make nice cards for as little as possible.

    An inexpensive way to do it, but a bit more time consuming, is to affix photographs on stock paper. Pre-scored card paper with matching envelopes can be purchased in bulk quantities at a craft store for a very reasonable price.Your next step is to print your logo and contact info on the back of the cards. The tedious part is to place the photo on the front of the card with double sided permanent tape.

    You can wrap each card in a clear sleeve to give them a more professional look. Or ‘go green’ and not wrap them at all. Ordering 4×6 prints online to use on your card stock is cheap, just pennies per print (usually cheaper than printing your own).

    Remember, cards you buy at the store are expensive! Yours will be unique and you can easily sell them for $ 5 per card, which adds up when people buy them by the dozen or as a pack to give them as gifts… If you do it right, you can easily make a 300-400% profit on each card.  Remember, the goal is not to make a living by doing this. But you can easily make a few hundred dollars during each party, and feel pretty good about yourself!

    Valerie Jardin Photography-17

    There is a card for every season!
    ©Valerie Jardin

    The fun part and the bonus for you, the photographer!

    Shooting for greeting cards becomes a great photography project. Think of all the different themes you can shoot for: Christmas, Hanukkah, Father’s Day, Mother’s Day, Birthdays, Valentine’s Day, etc. All of a sudden you become a stock photographer for your own little business needs. I used to spend a few hours each week shooting just for my greeting card collection. For example, if I was out shooting for a Father’s Day theme, I would think: golf, fishing, antique cars, etc. Every self-assignment becomes a treasure hunt. It was like shooting for a stock agency. The difference was that I made a lot more money and I had a lot more fun selling those cards than I did with iStock!

    This little experiment was serving a dual purpose. I was having fun and learning a lot while working on a photography project that also brought extra cash for trips or photo gear!

    Another advantage is that it spreads your name around. Many times people emailed or called me to place an order after receiving one of my cards for a special occasion. Hence the importance of having your contact information on the back of each card! Today I don’t make cards anymore but, ironically, I often get requests from greeting card companies to licence my images for that purpose.

    If you love photography and, if you have a little bit of spare time, there is no reason why you can’t make some extra cash selling your pictures. Good luck!

    When you start shooting for your greeting card collection, opportunities will present themselves everywhere and your photo walks become fun treasure hunts with a purpose! ©Valerie Jardin

    A card for the book worm? When you start shooting for your greeting card collection, opportunities will present themselves everywhere and your photo walks become fun treasure hunts with a purpose!
    ©Valerie Jardin

    Do you have any other little tips that have worked for you to make money with your photography? If so please share in the comments below.

    More articles on using your photography to make some extra cash:

    • “Photography Business Secrets” – A Review
    • 5 Things to Consider Before Starting Your Photography Business
    • Top 10 Ways to Sabotage your Professional Photography Aspirations

    The post A Quick and Easy Way to Make Money with your Photography While Having Some Fun by Valerie Jardin appeared first on Digital Photography School.

    Digital Photography School

  • Heartwarming Pictures of Children and Animals on the Farm by Russian Photographer Elena Shumilova

    Elena Shumilova’s photographs catch the viewer from the very first moment and take him away from reality into a mysterious world of dreams, childhood and goodness. The most memorable photos are the ones that tell a story. The pictures you’re going to see below are short stories about two adorable photographers’ sons and their animal friends. It’s hard to believe Continue Reading

    The post Heartwarming Pictures of Children and Animals on the Farm by Russian Photographer Elena Shumilova appeared first on Photodoto.


    Photodoto

  • How to Create Great Photos without Leaving Home

    Photos home easy 01

    So you want to take pictures; or do you want to be a photographer? I deal with a strikingly similar question every time I swing a golf club; I want to be a golfer, but with life events and time constraints the reality is I merely play golf. Fortunately, making a great photo doesn’t consume the amount of time 18 holes does and since you’re here reading this, it’s safe to say you want to be a photographer.

    WHAT TO PHOTOGRAPH?

    Portraits, landscapes, sports, oh my! As a new photographer it is incredibly tempting to photograph everything, and that’s a good thing as it will help you understand where your true passion lies. However, I am a firm believer that early success leads to more success.

    Let me say that again – early success leads to more success.

    As a new photographer there is no better feeling than capturing a truly excellent photo; and if you’re anything like me, time is very limited. Luckily with a simple understanding of light, your home is a great place to create stunning photos.

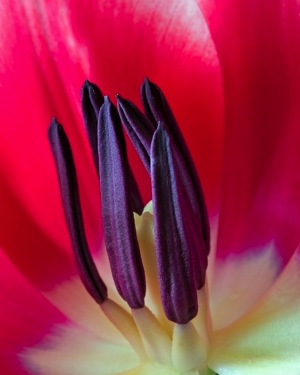
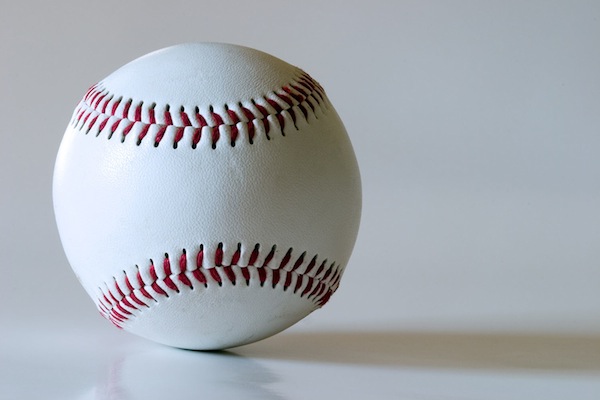
    All of the photos in this article were shot in my home. I do not have a home studio, and as I mentioned earlier, I also have little spare time; but that’s ok because you don’t need either to make great photos. The photos of the tulip and baseball were shot with a cheap piece of white poster board and available light from a window.

    USING WINDOW LIGHT

    While there are no “essentials” to creating great photos with available light from a widow, I always use a tripod and would highly recommend one. However, if you do not have a tripod, you’ll need to raise the ISO to increase your shutter speed if you plan to hand-hold your camera. A generic rule of thumb is you’ll need a shutter speed of 1 divided by the focal length of your lens. For example, I used a 100mm lens for the tulip, and shot it at f/16 and an 8 second exposure. If I did not have a tripod, I would have had to increase the ISO (and realistically open the aperture as well) until I had a shutter speed of 1/100 (because I was using a 100mm lens) to keep the image sharp; but since I was making use of a tripod, an 8 second exposure was no problem.

    There are endless opportunities for photography with available window light. Again, you could certainly hold your camera if you raised the ISO, but I would suggest the following as rough guidelines for photographing next to a window:

    Photos home easy 02

    • Use a tripod, or raise your ISO until the shutter speed is 1 / the focal length of your lens
    • If using a tripod, set your ISO as low as possible
    • Set your camera to manual mode and the aperture to around f/11, then adjust the exposure via shutter speed from there

    For a clean seamless background, such as the baseball photo here, grab a cheap piece or poster board from the school or office supply aisle at your favourite box store.

    What do you do once you’re bored shooting next to the window, or want to learn something more? Stay at home of course!

    WHAT’S NEXT? LEARN ABOUT LIGHT

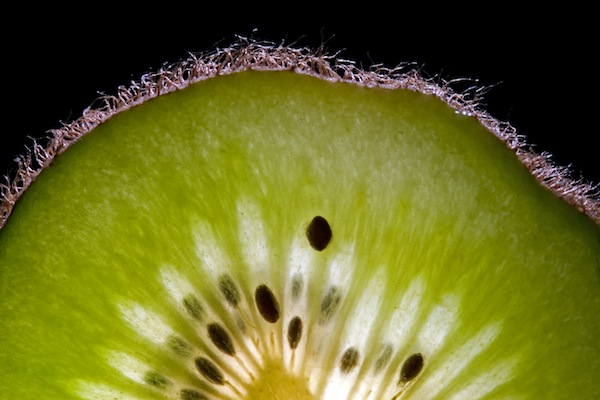
    There’s plenty of room to grow with your photography in the house. After all, what’s the underlying foundation of photography? Light! Even if you don’t have a flash you can still learn about lighting at home. Don’t have an off camera flash? No problem, I bet you have a flashlight! I created the photo of the kiwi fruit in a bathroom with the lights off and a flashlight lighting the fruit from behind.

    Photos home easy 03

    I would take a photo, look at it on the camera’s LCD, and then adjust the angle of light from there. So what if I spent an abnormal amount of time in a dark bathroom by myself, and got strange looks from my wife. I learned a lot about how the position of the light effects the look of the photo, and made a cool photo!

    Bottom line, you don’t need a flash to learn lighting and take a great photo, all you need is a dark room (very dark, as in no light at all) and a flashlight.

    Photos home easy 04

    USING FLASH

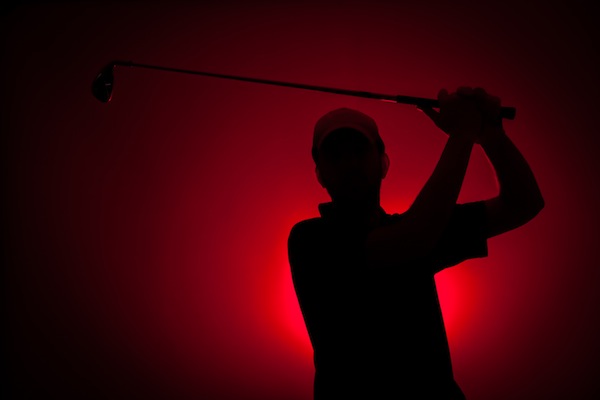
    So what about flash? I think using flash in photos is the key to creating photos that stand out from the rest. If you have a speedlite or other hot shoe flash, the best thing you can do to take your photography to the next level is learn to use it. After that, the next best thing you can do is take it off the camera when you use it. The photo of the little yellow guy smiling and the red silhouette of the golfer were both shot using off camera flash, and aside from a few tweaks in post processing, they look very close to what was produced in the camera with help from the flash. Once you understand about positioning and light fall off, you’ll be able to manipulate the light in such a way that creates great photos right in the camera.

    Photos home easy 05

    The point being here, and something you’ll learn either in due time, or right now as I tell you, all great photos have one thing in common: great light. Whether you use light from a window, a flash, or light from something as simple as a flashlight – there are numerous ways you can get great light right in the comfort of your own home.

    To recap, here’s what I used in the photos:

    • Flower and baseball- window light, white poster board, and a tripod
    • Kiwi fruit- tripod and a flashlight
    • Golfer – single off camera speedlite with a red gel fired into a seamless paper
    • Little yellow smiling guy – white seamless paper, and a single off camera flash handheld above and to the left of the camera

    Once you create one photo with great light at home, I guarantee you will be hooked! Best of luck to you, now go shoot!

    The post How to Create Great Photos without Leaving Home by Brian Barthel appeared first on Digital Photography School.

    Digital Photography School

  • Quick Off-Camera Flash Tutorial

    Using off-camera flash is one of the most requested articles we get here at dPS. I found this short but informative video on YouTube on using off-camera flash. My thought after watching it was “oh that poor girl” at it was clearly shot in some rather nasty weather.

    check it out here:

    For more articles on off-camera flash see:

    • Balancing Color for Flash and Ambient Light using Gels
    • Working with Off Camera Flash and TTL
    • Balancing Flash and Ambient Light Using an Incident Light Meter
    • Yongnuo YN622C TTL Flash Trigger Review – I personally have a set of these and they work GREAT!!
    • The Basics of a One Light Setup: A Lighting Tutorial

    The post Quick Off-Camera Flash Tutorial by Darlene Hildebrandt appeared first on Digital Photography School.

    Digital Photography School

  • Darktable vs Lightroom – Does it measure up?

    Recently I was introduced to a free open source RAW file editor called Darktable. I know most everyone loves free stuff and quality RAW file editors are not easy to come by with a price tag of $ 0.00, so I thought it would be worth taking a quick look at Darktable vs Lightroom here on DPS.

    I’d like to preface this article with a simple disclaimer…

    I’ve only spent a handful of hours with Darktable and therefore by no means have I mastered the workflow and features packed into it. My intention here is to introduce it to you and share with you some of my experiences within the first few hours of opening it up. Is it for you? I can’t say that for sure, but if you’re like me, and you’re saying – “Did he just say free?” – than why not head on over to Darktable’s website and get your own copy today.

    General Overview

    Darktable is no slouch when it comes to RAW file processing. In fact, it is probably one of the better free options that I’ve come across in my travels. If there is one flaw with the software I’d have to say that it boils down to its learning curve. It simply has A LOT of tools, and as a result the interface ends up feeling a bit cluttered and confusing to a first time user.

    Darktables-tool-set

    Basic Processing

    Overall the basic processing will feel very similar to Lightroom. The tools are broken into different groups, you still move sliders around to manipulate the photograph, and you have various ways of doing the same action. It feels very much like it was inspired by Lightroom and while there are some similarities, it is also very different in what it can, and can’t do.

    I’m not going to go through everything in this article, but rather, just show you a couple of generic examples that I ran through both Darktable and Lightroom 5.

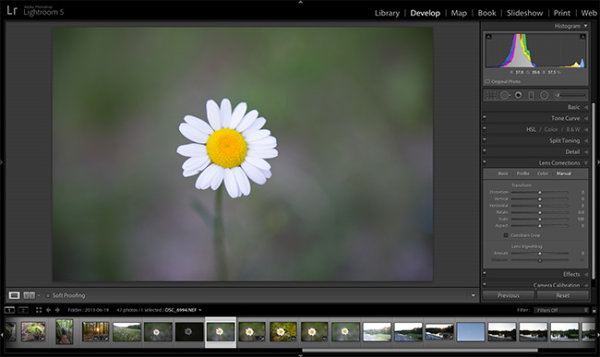
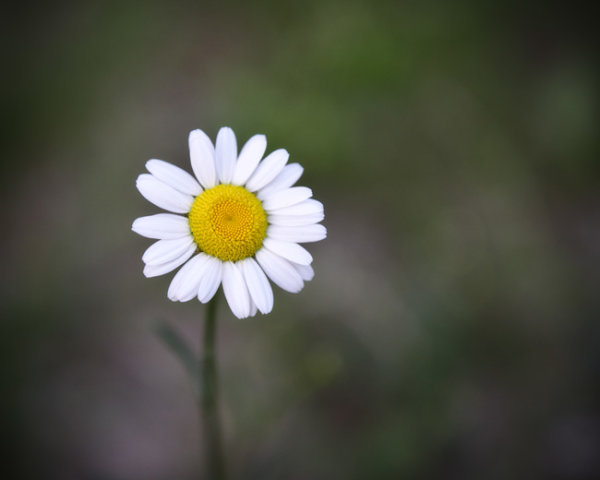
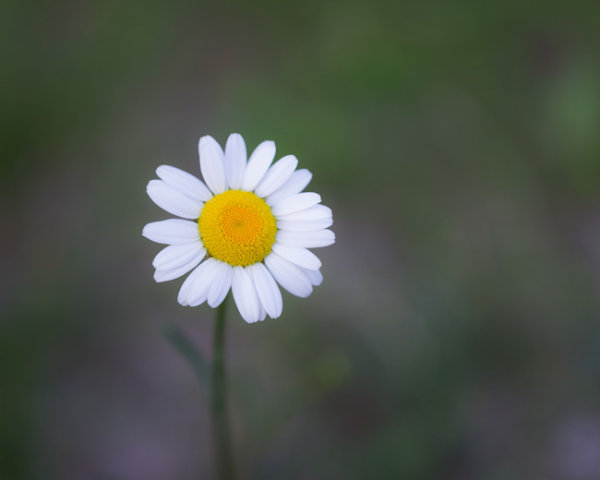
    In this first example I’ve spent a bit of time processing a very simple photograph of a flower. I thought this would be a nice simple start to get my feet wet with the program.

    Darktable-Free-Lightroom-alternate-07

    Darktable Screenshot – Before

    Notice how Darktable’s imported image appears slightly underexposed compared to that of Lightroom. While this isn’t a big deal, it is interesting that the same RAW file displays differently by default within the two programs.

    Darktable-Free-Lightroom-Alternate-08

    Lightroom Screenshot – Before

    Overall the workflow for processing images is much simplier and more streamlined in Lightroom, but both pieces of software do perform quality edits on the flower. While I did try my best to get the two edits to come out to be the same, they did end up a bit different. This isn’t necessarily a flaw of Darktable, just that its layout of sliders, nomenclature, and the way the algorithms and coding behind the scenes work to process your edits are different.

    Darktable-Free-Lightroom-Alternate-06

    Darktable final edit

    Darktable-Free-Lightroom-AlternateLR

    Lightroom final edit

    Another Example

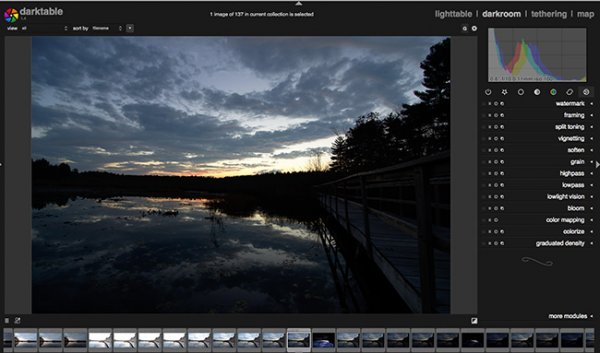
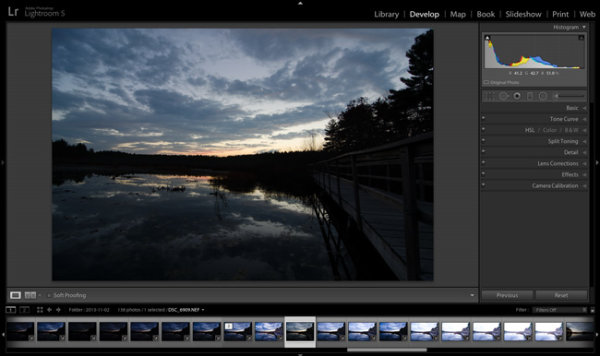
    Another example, which I thought might be more difficult for Darktable to handle, was a photograph taken just after sunset. It was part of a bracketed set of images and was slightly underexposed. My goal here was to see how Darktable performed at recovering shadows from underexposed areas while retaining the highlight details in the sky and reflections.

    Darktable-Free-Lightroom-Alternate-03

    Darktable Screen Shot – Before

    You can see here, once again, the original RAW file imported into Dartable is slightly darker compared to that of Lightroom. Potentially this is something that could be fixed within the settings of the program, but either way, it is a consistent trend in my experience.

    Darktable-Free-Lightroom-Alternate

    Lightroom Screenshot – Before

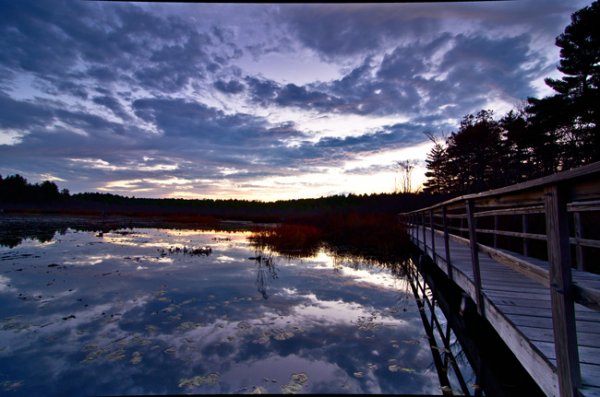
    As I mentioned, the goal for this edit was to recover the foreground shadows along the tree line and retain the highlight detail just above the horizon and within the reflections.

    Darktable-Free-Lightroom-Alternate-04

    Darktable Final Edit

    You’ll notice that while Darktable was able to dramatically improve the photograph, Lightroom was able to retain more detail in the brightest and darkest regions of the original photo. This wasn’t surprising to me as Lightroom has only recently had this much control over these areas of the photograph and I can only imagine how much math goes into creating the code behind the operations that we perform with a simple move of a slider.

    Darktable vs Lightroom

    Lightroom Final Edit

    Bottom Line

    Darktable is a powerful RAW image processor – there’s no question about that – and for the price of $ 0.00 it is an attractive alternative to Lightroom. It’s not going to replace Lightroom for me and probably won’t for anyone who currently uses Lightroom, but if you’re absolutely set on paying nothing for a RAW file processor, Darktable might be the perfect choice for you.

    Over to you – have you used Darktable? What are your own experiences with it? Do you have any tips to share with those who are trying it for the first time?

    The post Darktable vs Lightroom – Does it measure up? by John Davenport appeared first on Digital Photography School.

    Digital Photography School

  • Buyers Guide – Prime Lenses vs Zoom Lenses

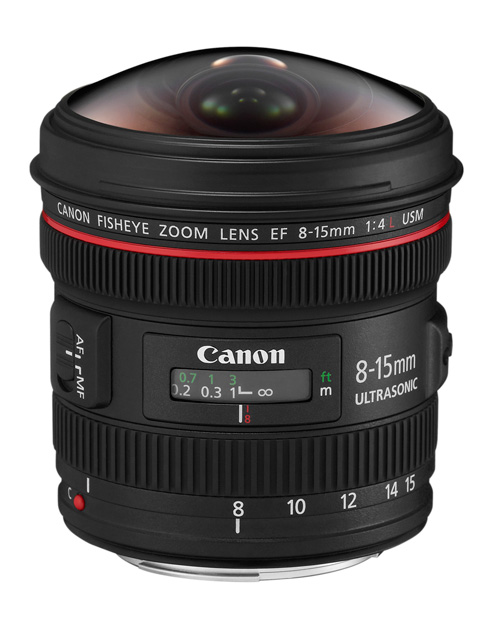
    Canon 8-15mm fisheye lens

    Canon’s 8-15mm f4L fisheye is an unusual lens, the only fisheye zoom that I know of. Most fisheye lenses are primes.

    Following on from my article A Concise Guide to Choosing a New Lens I thought it would be interesting to go a little deeper into the question of whether to buy a prime lens or a zoom.

    First, the definitions:

    Prime lenses have a fixed focal length. There is no zoom ring and no way to magnify the subject other than moving closer. There are two settings to adjust: aperture (often handled by the camera) and focusing distance.

    Zoom lenses have a variable focal length. There are three settings to adjust: aperture, focusing distance and focal length.

    Both primes and zooms have benefits. I’m not going to try and persuade you one way or the other. Rather, the goal is to explore the benefits of both to help you decide which is the best for you.

    Benefits of prime lenses

    Image quality

    Generally speaking, prime lenses have better image quality. It is easier to make a lens with good optical performance at a single focal length than it is to make one that performs well through the entire range of a zoom lens. This is especially true with wide-angle lenses where zooms tend to suffer from barrel distortion at the shortest focal lengths. With longer focal lengths (ie. 50mm plus), there is less difference in the performance between zooms and primes.

    Barrel distortion

    This photo shows the barrel distortion of an 18-135mm zoom lens set to 18mm. The curved lines in the frame should be straight.

    Size and weight

    Prime lenses tend to be smaller and lighter than zooms covering the same focal length range. This isn’t true all the time, high end primes are bigger because they have wider maximum apertures, which need larger lens elements to let the light in. Anyone who has used Canon’s 85mm f/1.2L prime lens knows what I mean – it’s a monster.

    Don’t forget that the size and weight advantage is quickly lost if you end up buying two or more primes to cover the same focal range as a zoom. But if your aim is to use your camera with a single, lightweight lens then primes are the way to go.

    An advantage of smaller lenses is that they are less obtrusive for portrait and street photography. It’s interesting how lens size affects the dynamics of a portrait shoot. In my experience models, even experienced ones, are much more relaxed in front of the camera when I use a smaller lens.

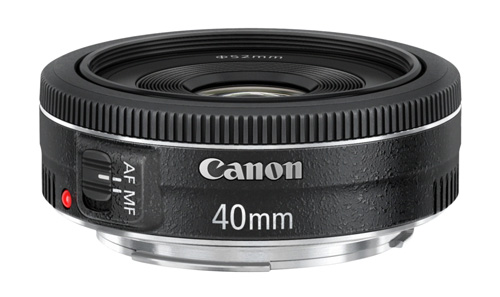
    The Canon 40mm f2.8 pancake is about as small and light as you can get. Pancake lenses are the ultimate in unobtrusive lenses.

    The Canon 40mm f/2.8 pancake lens is about as small and light as you can get. Pancake lenses are the ultimate in unobtrusive lenses.

    Wide maximum apertures

    The wider maximum apertures of prime lenses are useful for taking photos in low light or for creating beautiful bokeh. They also let more light into the lens, giving you a brighter image on cameras with optical viewfinders. However, if you have a camera with good high ISO performance you may not be so bothered about the advantages of using primes in low light.

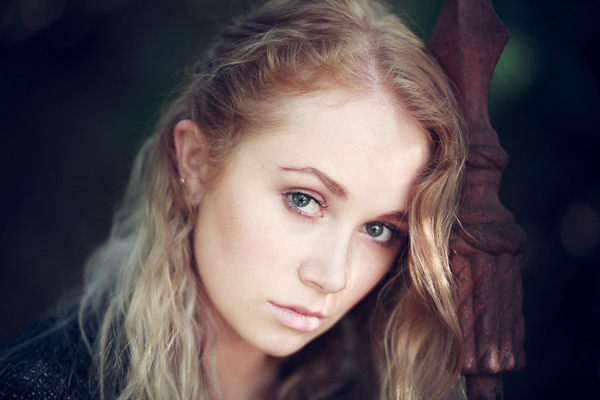
    Portrait

    You can only take portraits like this one that have very little depth of field with prime lenses. Shot at f/1.8 with an 85mm lens.

    Value for money

    Prime lenses often give really good value for money, especially at the lower end of the price range. Most manufacturers have inexpensive prime lenses in their range that give superb image quality, much better than you would get from a zoom lens costing the same.

    Benefits of zoom lenses

    There was a time when the quality of zoom lenses was so poor that most photographers didn’t use them. Thankfully, things have changed and they have become more popular as the quality has improved. These are the main benefits of zoom lenses:

    Convenience

    The main benefit of zooms is the convenience arising from covering a range of focal lengths in one lens. This can save you time (swapping lenses) and money (being cheaper to buy one zoom than two or more primes). Zooms are useful as walkabout lenses, or if you are working in dusty or damp conditions where you don’t really want to take the lens off the camera.

    With so many benefits, are there any disadvantages? Unfortunately the answer is yes. Here are some things to bear in mind:

    The trade-offs for convenience are image quality and size. Zooms tend to be bigger than primes, and if you want one that has good image quality throughout the entire focal length range then you will need to spend some money. One tip is to go for lenses that cover a shorter focal length range, such as a 24-70mm rather than 18-200mm.

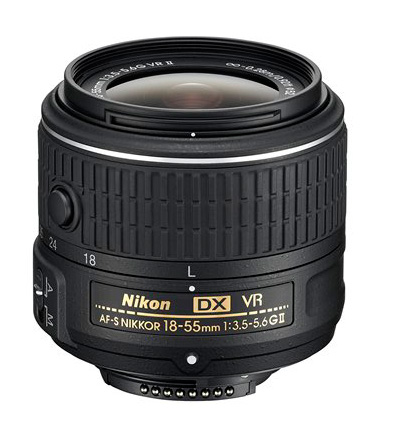
    Nikon kit lens

    A kit lens with variable maximum aperture. Avoid these types of zooms if you can.

    Another thing to watch out for on cheaper zoom lenses is variable aperture. An example: an 18-55mm f/3.5-5.6 kit lens has a maximum aperture of f/3.5 at the 18mm end but only f/5.6 at 55mm. This makes it harder to work in manual mode (what if you have the aperture set to f/4 at 18mm and then zoom in to 55mm?) and is a general hassle all-round. Pay a bit more and get a fixed aperture zoom.

    Saves you having to move

    While some people will tell you that a benefit of prime lenses is that they make you zoom with your feet (ie. move closer to or further from the subject to change the composition) there are times when this isn’t possible. You may be at a sporting event, and unable to get any closer to the athletes involved. Or you may be standing near the edge of a cliff taking a landscape photo, unable to move further forward because you would fall off. Zoom lenses are invaluable in situations such as these.

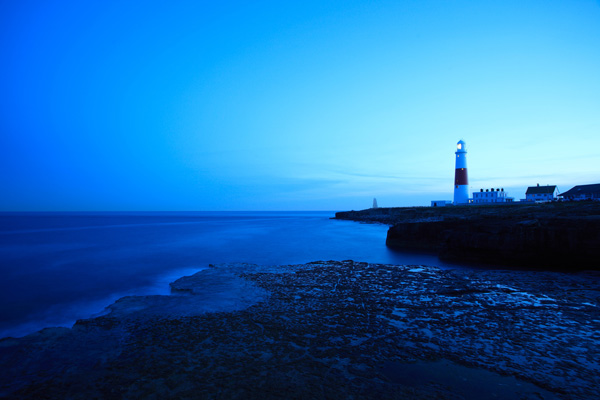
    Landscape photo

    I took this photo standing near the edge of a cliff. I couldn’t move any further forwards, but was able to frame the image precisely using a 17-40mm zoom lens.

    Your view

    Now it’s your turn. What lenses do you prefer to use – zooms or primes? Have you bought any lenses recently and why did you decide to buy them? I’m looking forward to reading what you have to say.


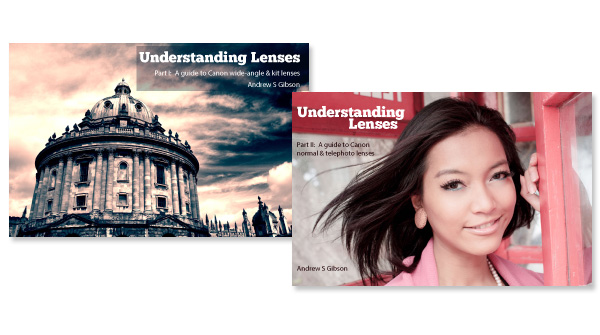
    Understanding Lenses ebook bundle

    Understanding Lenses ebooks

    My ebooks Understanding Lenses Part I and Understanding Lenses Part II will help Canon EOS owners decide what lenses to buy for their cameras. They are both filled with lots of tips to getting the most out of your Canon lenses. Click the links to learn more.

    The post Buyers Guide – Prime Lenses vs Zoom Lenses by Andrew S. Gibson appeared first on Digital Photography School.

    Digital Photography School