Category: Photography

  • Weekly Photography Challenge – Portrait of a Child

    Over the last couple weeks we’ve featured several articles on photographing people and doing portraits. Our newest eBook on How to Pose Portraits is a smash success – grab it here now!

    The weekly challenges have also been portrait related, so to continue that theme and finish off our portrait deep dive, this week’s challenge is Portrait of a Child.

    By CIFOR

    Last week we had Portrait of a Man as the challenge – you can see the great submissions on that post, and some manly portraits in The Essence of Masculinity – Portraits of Men.  The previous week it was the ladies in the challenge, well ladies first you know right? See some Inspiring Portraits of Women here for ideas.

    Here are a few children’s portraits to get you started:

    By Ahdieh Ashrafi

    By Barbara Piancastelli

    By Kalani Odum

    By cheriejoyful

    By Marcos de Madariaga

    By Alexandre Baron

    By Elizabeth Donoghue

    Share your Portrait of  Child images!

    Whether it be a posed portrait in the studio, or a candid shot of the child in action. Show us your Portrait of  Child images in the comments below!

    Simply upload your shot into the comment field (look for the little camera icon in the Disqus comments section as pictured below) and they’ll get embedded for us all to see or if you’d prefer upload them to your favourite photo sharing site and leave the link to them.

    Need more tips – try these articles:

    • 7 Tips for Photographing Kids
    • Cut the Cheese: 5 Tips for Photographing Kids
    • How to go Beyond the Regular Composition Advice for Getting the Best Shots of your Kids
    • 5 Photography Rules Moms [and Dads] Can Ignore

    The post Weekly Photography Challenge – Portrait of a Child by Darlene Hildebrandt appeared first on Digital Photography School.


    Digital Photography School

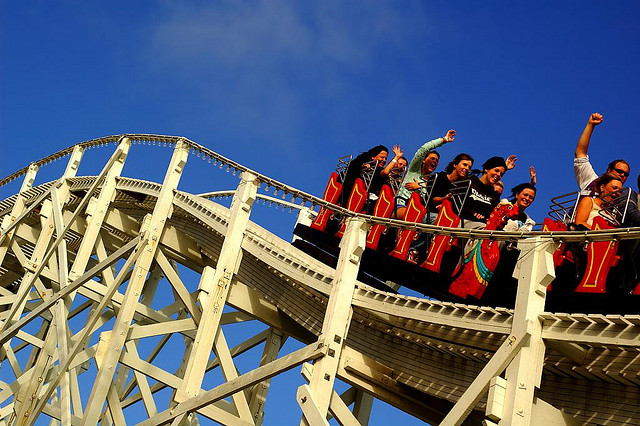
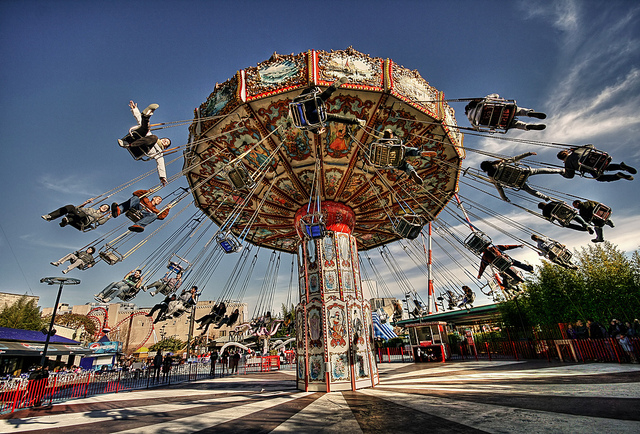
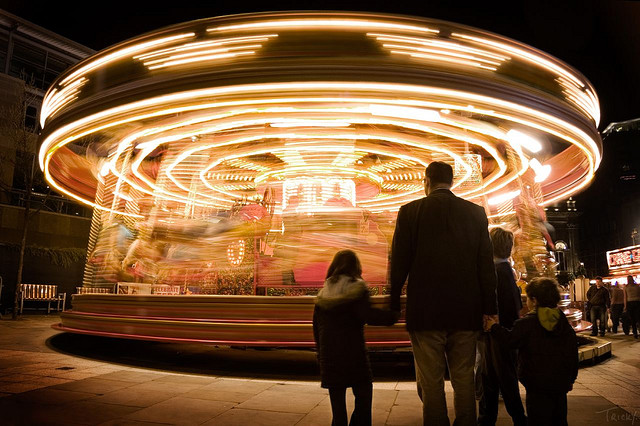
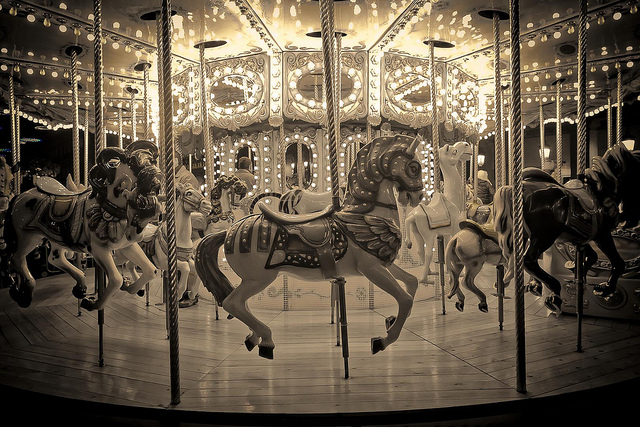
  • 29 Spectacular Images of Carnival and Amusement Park Rides

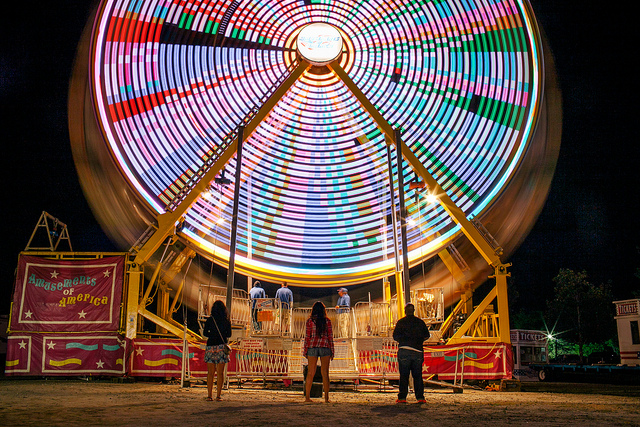
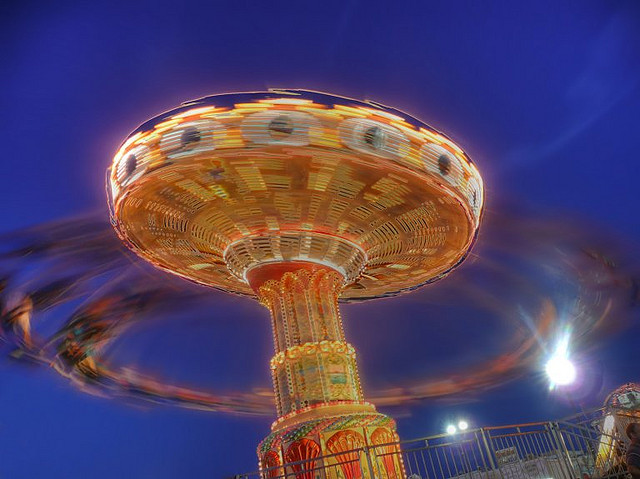
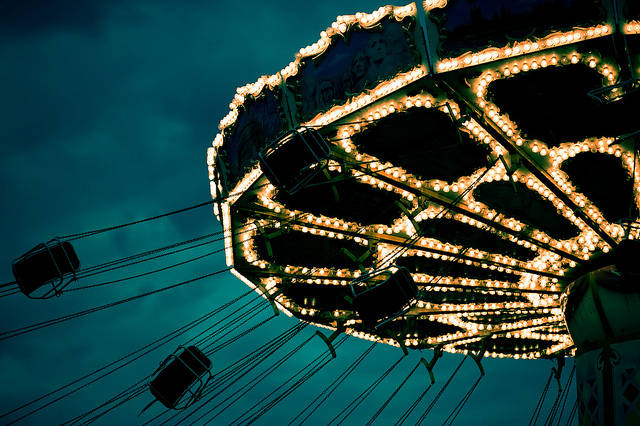
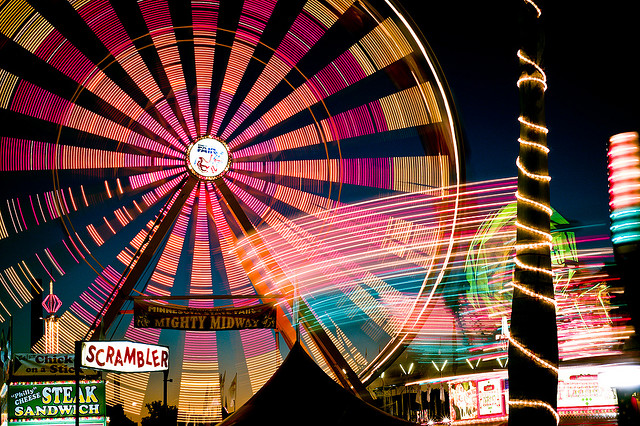
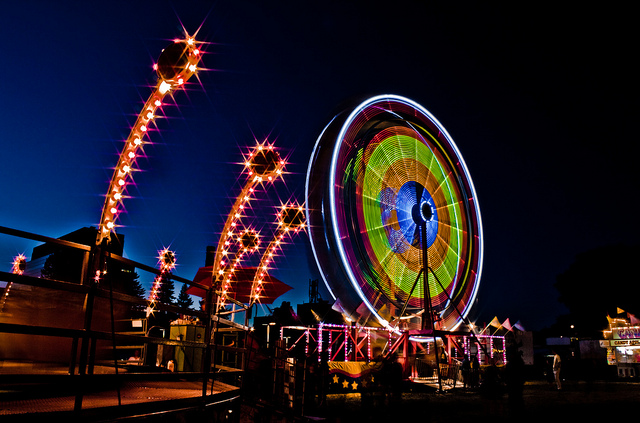
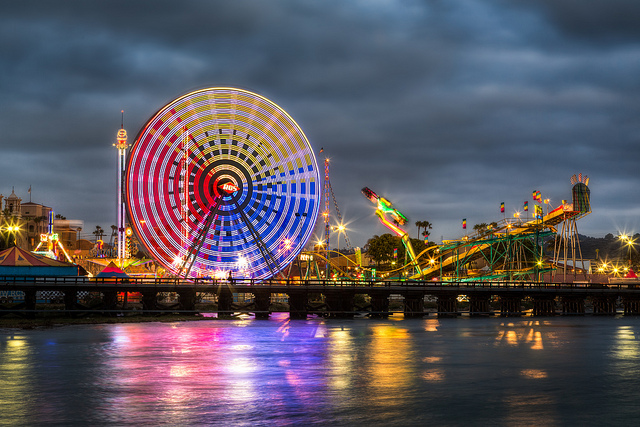
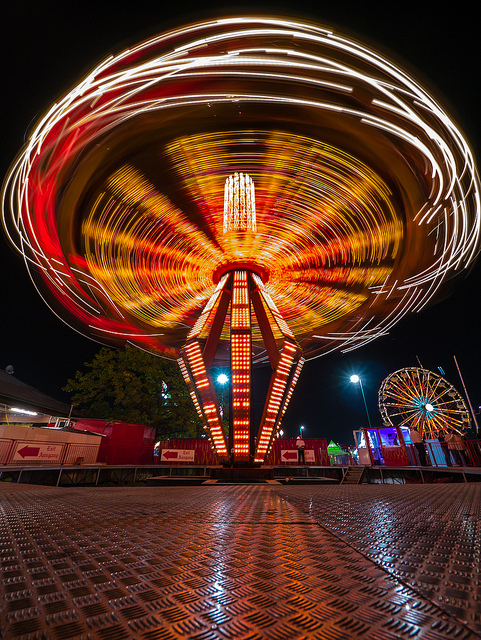
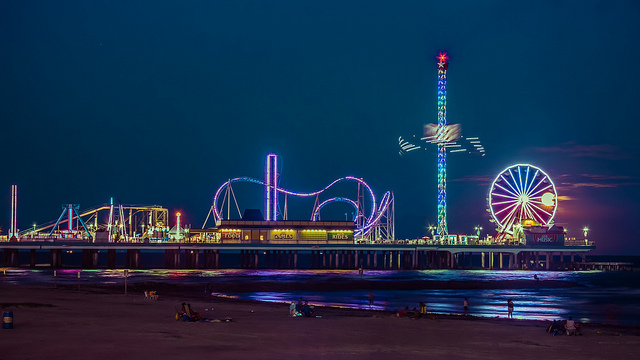
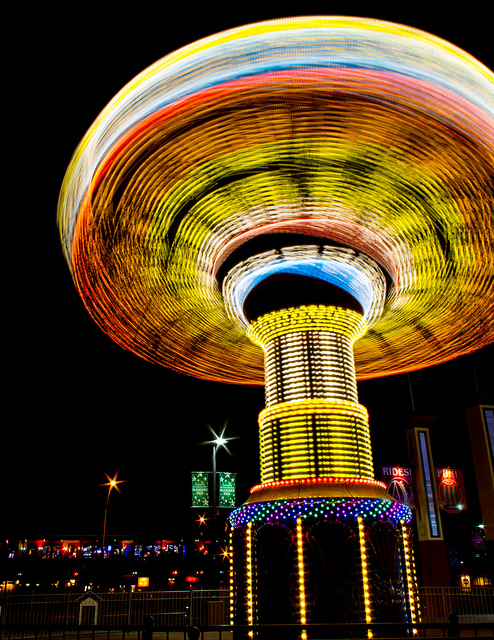
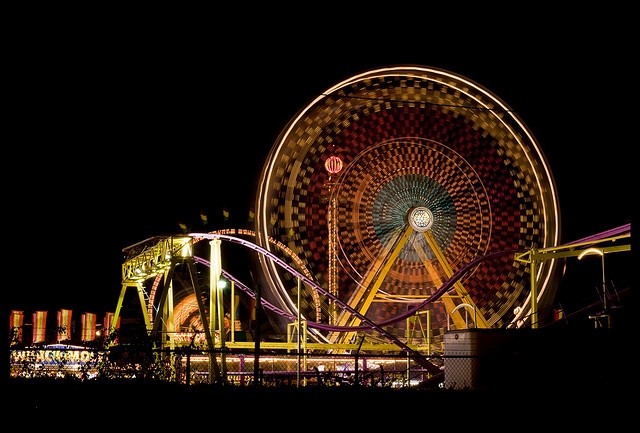
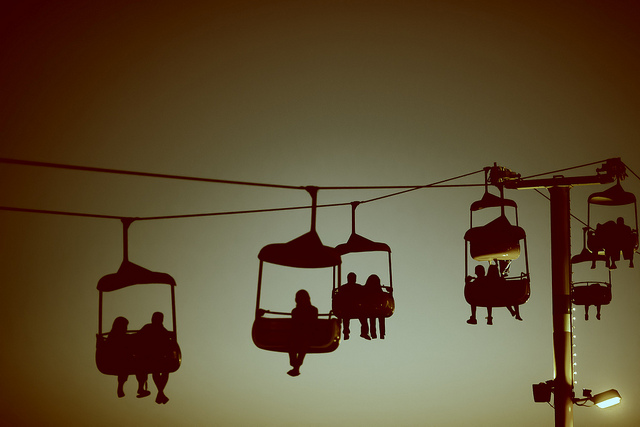
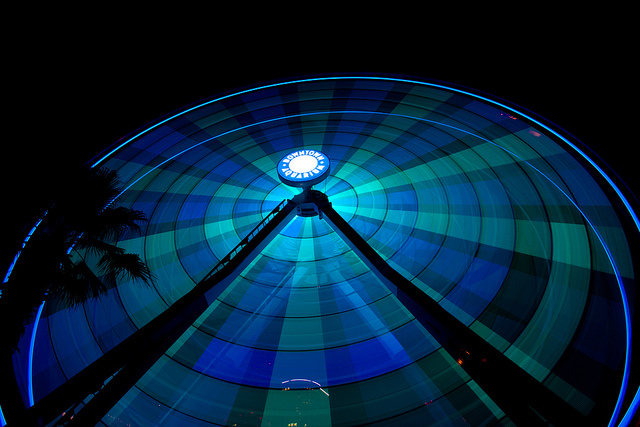
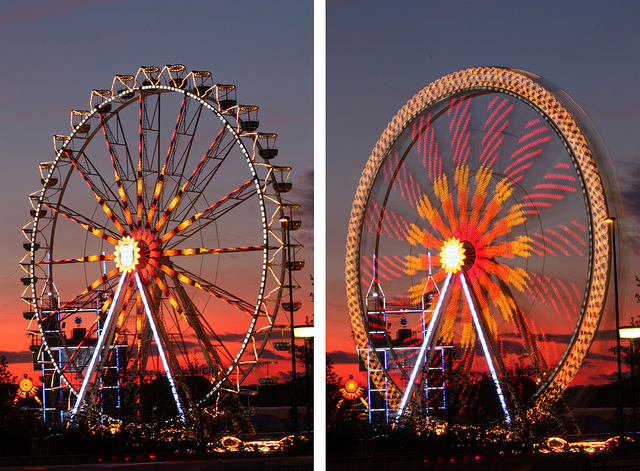
    Who doesn’t love amusement park rides? Even if they make you dizzy or nauseous they are still fun to watch and even more fun to photograph!

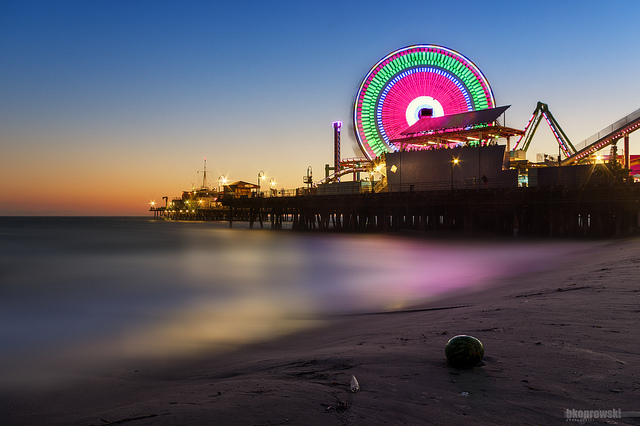
    Here are 29 carnival and amusement park ride images for a little fun this week!

    Enjoy!

    By Jorge Quinteros

    By joiseyshowaa

    By Mark J P

    By Robby Ryke

    By Karlina – Carla Sedini

    By smcgee

    By Thomas Hawk

    By Billy Wilson

    By Justin Brown

    By J.Bower

    By Lotus Carroll

    By Justin Brown

    By Jes

    By Ian Sane

    By Joe Penniston

    By José María Pérez Nuñez

    By Rick Harrison

    By Javier

    By Thomas Hawk

    By Lotus Carroll

    By Thomas Hawk

    By Vlasta Juricek

    By Nathan Harper

    By Clint Mickel

    By Thomas Hawk

    By Victoria Pickering

    By Thomas Hawk

    By Rémi Lanvin

    By Brian Koprowski

    The post 29 Spectacular Images of Carnival and Amusement Park Rides by Darlene Hildebrandt appeared first on Digital Photography School.


    Digital Photography School

  • 10 Highly Useful Photography Lessons You Can Learn Today From YouTube

    It doesn’t matter if you are a beginner or a professional photographer: Learning and perfecting your technique will help you be a better one! Being a photographer is more than shooting and uploading pictures. As in almost any other profession, any good photographer should stay up-to-date with the market and master his skills. By searching for tutorials, you will get Continue Reading

    The post 10 Highly Useful Photography Lessons You Can Learn Today From YouTube appeared first on Photodoto.


    Photodoto

  • Room with a View: How to Create this Window with Blinds Portrait Anywhere

    In this post Gina Milicia – author of our brand new Posing eBook – walks us through the taking of one of her portraits of Christy Vandenberg.

    Final

    I’m constantly on the look out for new and interesting ways to pose my models. This shoot only took me 20 minutes from start to finish and is really basic to set up and photograph.

    The following tutorial is a step by step of how I pose and light my window portrait.

    This set up is great way to add mood to a portrait. The reflections caused by the glass that partly obscure my model add a sense of mystery and romance to the shot.

    This image was taken in my studio using daylight and can be recreated almost anywhere.

    The example I’ve given is of a full-face shot but this also works with ¾ shots and profile shots and with or without venetian blinds.

    Gear Checklist

    • Canon 5D Mark II
    • Canon EF 70-200mm f/2.8L IS lens*

    I’ve used a focal length of 200mm but a focal length of anywhere between 70-200mm will work. If you have a cropped frame sensor a 50mm will also give a similar result.

    • Manfrotto 475B Pro

    I shoot most of my headshots using a tripod because having my camera fixed gives me the freedom to focus on expression and pose rather than having to worry about whether my vertical and horizontal angles are straight.

    The other reason I love shooting on tripod is it allows me to shoot portraits at very slow shutter speeds of 1/15th or 1/8th of a second, which I could never get using hand held.

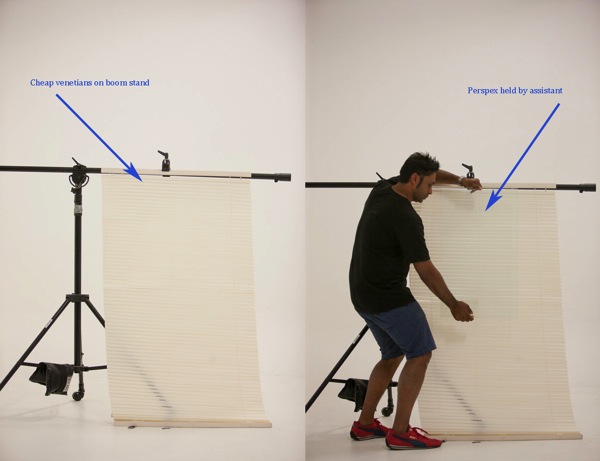
    • 1 x cheap Venetian blind + boom c stand or clothes rack to hold up venetians
    • 1 x sheet of clear Perspex* approx. 3ft x 3ft ( held by assistant)

    * Perspex is lighter and cheaper than glass and easier to transport.

    Camera Settings

    • ISO 400
    • 200mm
    • f/2.8 at 1/80th second
    • Daylight

    I’ve used a long focal length of 200mm and short depth of field of f/2.8 because I wanted my models eyes to be in focus and the background to be out of focus.

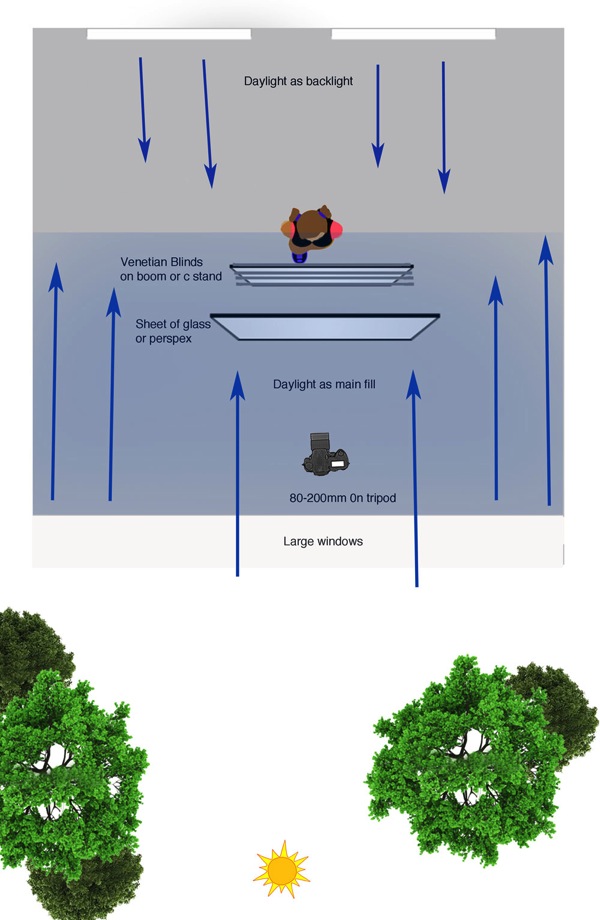
    The lighting in this shot is very simple daylight coming in from a large window directly behind me.

    The model is also backlit by two large windows directly behind her.

    Window Diagram

    Lighting diagram

    Attach venetian blinds to your stand

    Venetians 50

    I positioned my model behind the venetians and then took a test shot to make sure my exposure was correct.

    Venetian no glass 7

    The Perspex is then held in front of the Venetian and tilted forward slightly to minimize reflections.

    Flare 50

    The style and type of reflections will vary depending on the location you shoot in.
    I experimented by having the Perspex tilted at various angles. The example above has a slightly more mysterious vibe because the face is obscured by reflections.

    Finally I introduced texture to the image by spraying water on the Perspex.

    Final

    The post Room with a View: How to Create this Window with Blinds Portrait Anywhere by Gina Milicia appeared first on Digital Photography School.


    Digital Photography School

  • The Ultimate Guide to Going Pro as a Photographer

    Going pro is scary.

    Let’s just say it. Now that we got that out of the way and we all agree that transitioning from being a hobbyist or a part-timer, into a full fledged professional photographer isn’t easy, let’s talk about how to do it.
    DPS Post Picture

    Let me start off by saying, YOU CAN DO THIS! It will be hard work but it’s NOT IMPOSSIBLE. Suspend disbelief for once in your life and let’s focus on how you can take the steps forward to going pro already!

    I know this is going to be hard to believe, but I will ACTUALLY tell you what you need to do, right now. This guide will get you started properly and I’ll leave you with the next steps as well. I’m not going to waste your time telling you who I am, or giving you a typical backstory. I’m going to just give you the goods and then you can thank me later. Crazy right? Let’s jump right into it.

    The Ultimate Guide to Going Pro in Eight Steps!

    Step 1: Get your head right

    Do you know how to compose a shot decently? Do you understand the concept of exposure and basic lighting? Are your shots in focus? If you answered YES to all three questions, then your skills are far ahead of most people that attempt to take a photo with a camera. That makes what you do, worth money. Granted, your skills are beyond this level but the point is you don’t need to be Chase Jarvis to start charging for your skills. You just need to be better than who’s hiring you.

    Many people don’t ever go pro because they never feel they’re good enough to charge money for their skills. At the very least, your time doing any kind of work, is worth money. There are all kinds of budgets out there. Just get started. We’ll talk about your rates later on but if you haven’t charged for your skills as a photographer yet, DO IT NOW. I’m serious. Go to your local pizzeria and tell them you will shoot and edit 10 photos of them tossing pizzas, or whatever, for their website or Facebook page for 50 bucks. Just get it out of your system. That’s the last time you’ll charge $ 50 bucks by the way.

    Step 2: Stop worrying about gear

    DPS Post Step 2

    I live in New York City and pro photographers are everywhere. Want to hear something funny? Many of them don’t even own a camera. And you were worried about not having that Nikon Nikkor 200-400mm lens you might need for the odd chance you’ll need to shoot wildebeest migrating in Tanzania? As they say; it’s not the paintbrush, it’s the painter.

    If you have great gear, awesome! If you don’t, it’s not a huge deal. You can always rent equipment and factor that cost into your prices. Got a great camera, but only have the kit lens? RENT. It’s not a problem. My partner and I shoot video for big clients and we have lots of gear but we still rent because we always need something different given the shoot.

    Stop worrying that your gear isn’t “pro enough” and remember they are going to pay you on how well you capture moments – not how much gear you own.

    Step 3: Put up a website. Have one already? Take another look.

    Having an effective website is critical when going pro. The keyword here is EFFECTIVE. You need to clearly communicate who you are and what value you offer quickly and concisely. The most important thing about any website is the content – what and how you communicate to your audience. The job of design is to augment that message.

    Make sure your opening headline on your website captures your visitor’s attention. If you are someone that is great with kids as a photographer say something like “Getting a decent photo of your kid can be torture. Let me put you out of your misery.”

    If you are confused about the tech or the design side things and you’re on a limited budget, just go with a Squarespace site. Pick a clean and simple theme and start building.

    If you already have a website, the above advice goes for you too. Take another look at your site and see if you are communicating effectively.

    Step 4: Add value

    On your website, you need to offer something your audience will enjoy and find valuable. That’s where your blog comes in.

    Remember your visitors will be people who need photography services and the best way to show you are good at what you do is to share your experiences. Share a story about how you were able to capture a great graduation party even though the guest of honor was camera-shy.

    Share tips on how you can hang great photos in your home or office. Explain the rational behind your advice.

    By creating great content and sharing stories and tips, your visitors get to know you, like you and start to find reasons to hire you. If you’re worried about people finding you on the web, writing useful posts will also help you rank well on Google and other search engines, as others may be searching for topics you write about.

    Step 5: Build a portfolio and get some testimonials

    At first, if you have no work to display on your portfolio, you will need to approach 5-6 potential clients and offer your services for a heavily discounted price or even for free, to build your portfolio. This is also an opportunity to get feedback from clients on your process of working with them and how to improve it.

    You can ask these clients for testimonials in exchange for this incredible deal. They can be written or even video testimonials which you can display on your website. Cool huh? This is just to get you started, you’ll get more testimonials as you take on more clients.

    If you already have work to display, you’re good to go, but make sure you have some testimonials. If that means contacting previous clients, go ahead and do that.

    Step 6: Set your rates

    There are two basic ways to set your rates.

    1. Use a market rate

    Look at another business that has similar services and experience and use a similar rate. A rate can be an hourly rate or prices for service packages. List three businesses similar to yours and note down their rates.

    2. Use your “need to make” rate

    First, how many hours can you dedicate to your service-business every week? Divide that by 2. Half of your time will be spent on actually running, marketing and building your business. The other half will be dedicated to your actual service work. This may come as a shock to some – “half the time?!” But yes, you need to factor this in so that you are not setting your rates too low.

    Second, how much money do you need to make a week to cover your personal expenses? Everyone is different. Your weekly number may be $ 1000, $ 800 or $ 700.

    Third and finally, take your weekly amount of money needed and divide it by the number of service work hours a week. That’s your hourly rate. For Example: $ 1000 / 25 hours = $ 40 per hour

    Step 7: Knowing how to deal with clients

    Guide going pro clients

    Client work is just like any relationship in life. After your first conversation, each party will have already formed an opinion about the other. The client already has imagined what working with you will be like, that’s just human nature.

    The good news is that you are in control of how that all happens. The bad news is that YOU are in control of how it all happens – not a typo. Here are your FOUR MUST DO’s when dealing with clients:

    Must do #1: Discuss why they are hiring You

    Sometimes clients forget when they hire you, that they are not your boss, and you are not their employee. You are a business owner offering a service they need.

    Let me state that again. They need you. That’s why they are speaking with you. They are not a photographer, you are. That’s why they took the time to find out about you, and contact you. Whether they actually state it or not, they probably need you badly.

    Setting the tone of the nature of your relationship doesn’t have to be mean or condescending but it does need to be done. Here is an example conversation:

    • Client: I really need this these photos for my website to look professional and to show what we are all about.
    • You: I completely understand and you’re completely right. As a business owner myself, I know how important it is to convey my brand. Your reputation is at stake.
    • Client: Exactly! It’s essential.
    • You: That’s why I like to take the time to understand you and your business very well before I begin work. My clients don’t work with me only because I’m a great photographer. They hire me mainly because I know how to communicate their message to their audience creatively.
    • Client: That sounds exactly like what I need.

    The point of this whole conversation is to do a few things:

    1. You establish the nature of your relationship. You have something they need. Not the other way around.
    2. You are not just a technician that can operate a camera. You possess skills and talents they don’t, some they might not even comprehend.
    3. It communicates you know your stuff.
    4. It’s understood you’re not an employee. You’re a business owner just like them.

    Must do #2: State Your rates or decide on a budget

    At some point in your first conversation you have to talk about money. You may prefer to save that until the end of the conversation but it needs to be done. Delaying this will not only potentially waste your time, it also conveys to your potential client, your not sought after and you have no real qualifiers.

    If you’re a photographer that will work on any project, of any size, for any given amount of time, for any price, it basically means that you are cool with slavery. I’m not trying to be dramatic here but even Ralph, the $ 10 barber down my street has rates clearly stated. Ever hired anyone and not know how much they cost?

    It’s only fair to both parties. Some clients will try to milk you, and try to get 2-3 meetings out of you. They will attempt to discuss their plans for dominating their market and the world in the near future (writing this out of experience) before even discussing money. You are in the services business. Your time IS money. It’s your responsibility to have this conversation with them. State your rates or decide on a budget they are OK with before you move on to meeting number two.

    Must do #3: Only start work with a deposit

    Unless you have worked with a client in the past and you had a great experience with them, you have no evidence they are committed to you in anyway without a deposit. That’s just reality speaking, not me. A deposit can be whatever you agree on – 25, 50, 60 percent, whatever. Some money needs be put on the table before you roll up your sleeves. Beginning work without a deposit is just flat out asking for trouble. TRUST ME! I didn’t get my grey hair for nothing. A deposit is standard and it’s what professionals do.

    Must do #4: Agree on a timeline

    You are running a service-based business so time is money for you. So agreeing on a timeline early on is essential. They are looking to you for guidance on this one, so propose a timeline. This timeline includes any payment schedules as well as any given revision cycles if applicable.

    Make sure you frame this conversation in a way they know you are doing this to make sure everything is transparent and they know when, and what to expect. This also makes things a whole lot easier for you. This is especially important when it comes to work that needs approval during the process. Make sure clients know there is a deadline for that too.

    Another benefit of setting a timeline is it lets your clients know, you’ve got other clients and you’re not just working with them. You are happy to be working with each other but you are a sought after talent.

    Step 8: Getting your first clients

    In the beginning you just need to get the ball rolling. Here are some tips to get your first regular clients:

    1. Make sure everyone and their cat knows you are now offering professional photography services. Contact everyone on your contact list and in your social media circles. You can even offer a referral fee for friends and family.

    2. Go to some local shops you frequent and tell them what you can offer them. Let them know their photos will be displayed on your website and their business’s website or Yelp link will be hyperlinked. What business doesn’t like free marketing?

    Guide going pro photography local business

    3. You can also use some freelance online services like these to get some clients:

    • Freelancer.com
    • Guru.com
    • Elance.com
    • ODesk.com

    4. Team up with someone that shares your audience and agree to have them refer clients to you. For example, you may want to approach a web designer. They’ll have clients that need great photos to showcase on the new website.

    5. Go where the action is! Go on Eventbrite or sites like it and find out what local events are going on in your area and email the organizer of the event to see if they need a solid photographer to capture their event. If it’s a regular event, they’ll need great photos to market next year’s event.

    Let’s Wrap This Up

    I’m here to say your art, your craft, can be your business. Your actual livelihood. With that said, understanding and doing business properly is probably going to be the defining factor in your success in going pro. That’s just the truth. But just like you’ve learned how to capture an image properly, you can learn how to run your business properly as well. This guide doesn’t cover every single aspect of building your business, but these are ultimately, the essentials to get you started. You can learn the rest as you build. The point is to start TODAY.

    Wow! You made it to end of this post. You are obviously serious about going pro and starting a business around your love for photography so I don’t want your learning to end here. You can click here to get free access to our Building a Service-Based Business course and workbook inside The $ 100 MBA. It’s my way of saying thank you for letting me share what I love, showing others that business is not rocket science and that you can do this!

    The post The Ultimate Guide to Going Pro as a Photographer by Omar Zenhom appeared first on Digital Photography School.


    Digital Photography School

  • Why Lazy Photographers Should Use Lightroom Smart Collections

    I never bother to keyword or tag my images. I often neglect putting my photos into organized collections. It takes too much time away from my workflow to bother with any of that – so how the heck do I find any of my images?

    Lightroom Smart Collections

    It’s easy to keep track of your images without painstakingly organizing them shot-by-shot. Lightroom Smart Collections allow you to filter and organize your images based on metadata contained within the images. Often times this metadata can be unique enough to sort your images based on subject, location, and genre.

    smart-collections

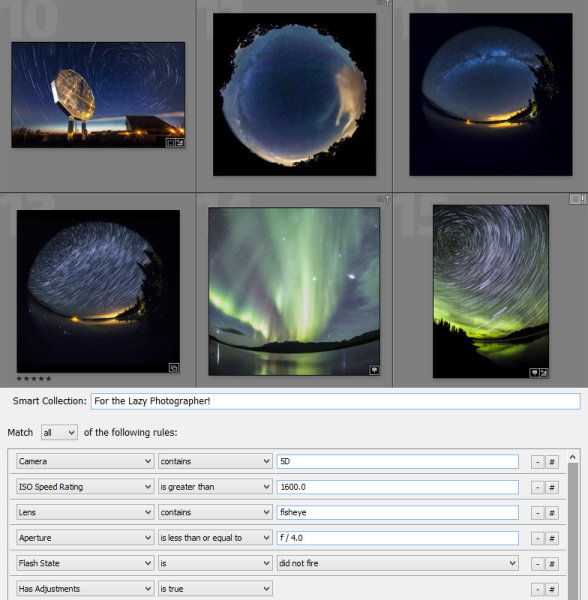
    Smart Collections allow you to define very specific criteria, and you can require many different criteria to be met before an image will be included in the collection. Common settings like ISO, shutter speed and aperture are available, but the options are endless. You can filter based on whether a flash was used, based on GPS data, file type, lens, focal length, capture date, the list goes on.

    Below are a few examples where Smart Collections can define a specific type of image with only metadata:

    Example 1: pan blurs

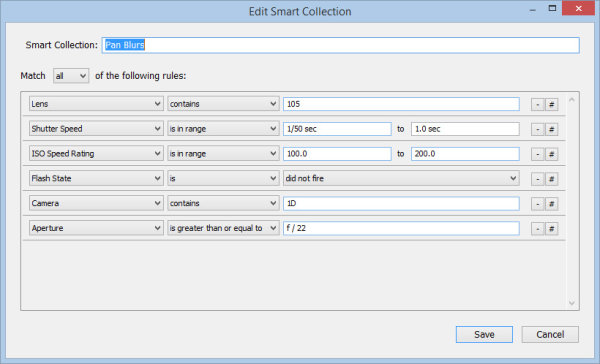
    Some images can easily get lost amongst others, and pan-blur shots are one of them. I usually photograph these on a whim while shooting other subjects, but they all have something in common. I use a zoom lens with a very small aperture, in addition to a few other factors:

    pan-blur-requirements

    Slower shutter speeds are usually used, and typically only with one of my cameras. I built the above list of criteria or requirements which gives me a pretty good list of all the pan-blur abstract images I’ve ever taken:

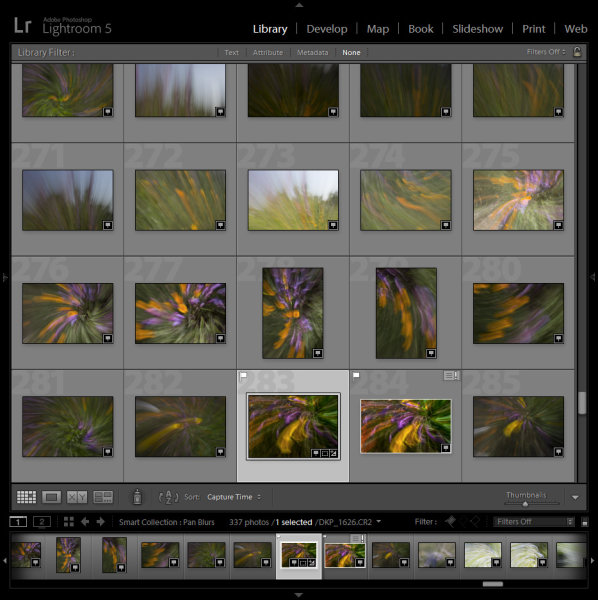
    pan-blur-library

    There is always a chance that an unrelated shot might meet the same criteria and appear in the collection, so try to be as specific as possible and use as many defining conditions as you can.

    Example 2: GPS data

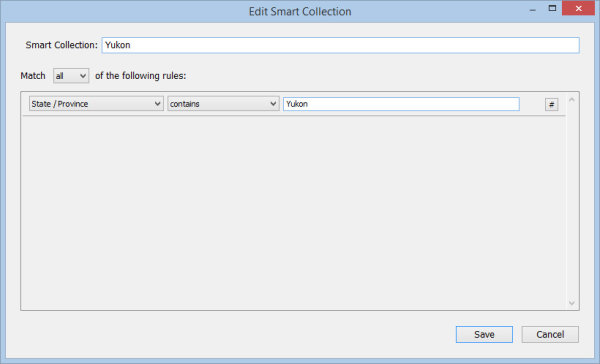
    If you have a GPS unit for your camera (or have a GPS built-in), the extra metadata provided by your location can be invaluable to sorting your images. For example, I can easily specify that I want to create a collection of all images I’ve photographed in the Yukon Territory of Canada:

    yukon-requirements

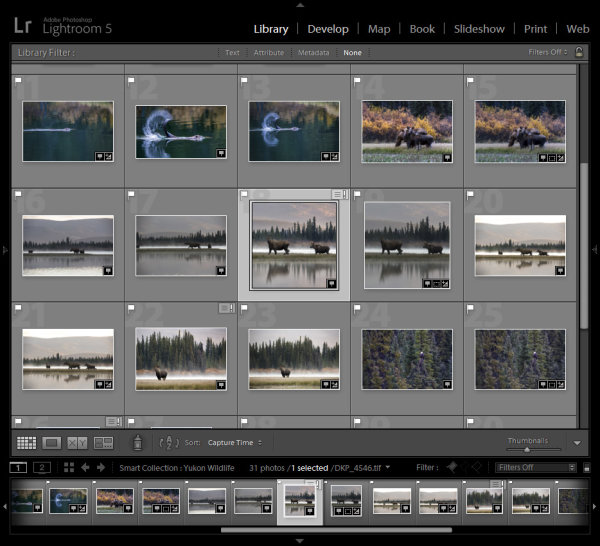
    You could also further to showcase only the wildlife shots. Because I know that I would only have been using focal lengths longer than 200mm for wildlife, I can add that requirement to find only my wildlife images. A few other shots may sneak in, but it’s a great way to narrow things down:

    yukon-library

    Entire vacations or trips can be defined this way, and even specific client location shoots can be identified by this location metadata.

    Example 3: snowflakes

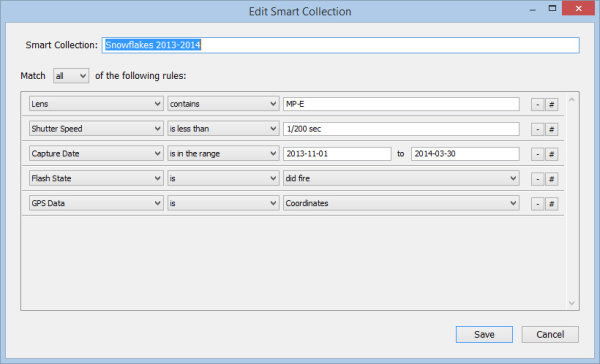
    I shoot a TON of snowflake images each winter, and by looking at the common metadata for each image you can create a “fingerprint” that a Smart Collection can identify. The following Smart Collection will only show snowflake photographs:

    snowflakes-requirements

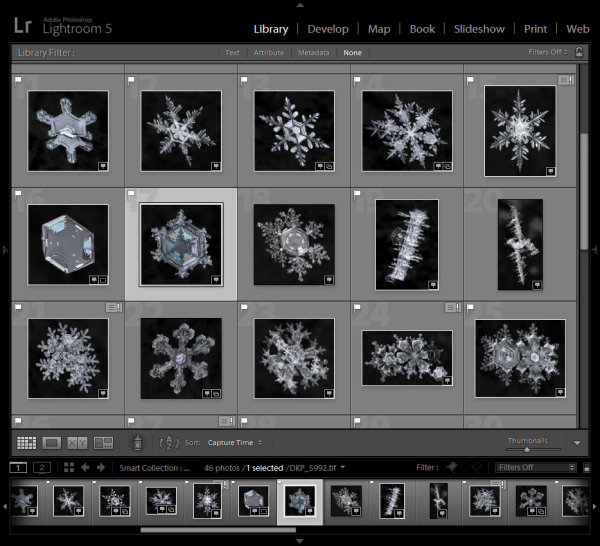
    I can also create a collection of just my final print-ready files. As these images need to be edited in Photoshop as part of the required workflow, the final images would then all be TIF files. That requirement can be added to show only my completed images:

    snowflakes-library

    Conclusion:

    Not every subject will have a “fingerprint” that can be defined by Lightroom Smart Collections, but with a bit of clever thinking you should be able to define a good number of your own. As new images are added to your Lightroom catalog that meet the criteria for inclusion in your new Smart Collections, they will automatically appear. The lazy efficient photographer’s dream come true!

    The post Why Lazy Photographers Should Use Lightroom Smart Collections by Don Komarechka appeared first on Digital Photography School.


    Digital Photography School

  • Sequence Photography Tutorial to Take Your Sports Photography to a Whole, Nother Level

    Sequence photography is a great tool to use when you need to have a more interesting shot to use, but it’s not always easy to do – to take a flawless sequence shot you’ll need to do as much work on the day as you will in Photoshop. What you’ll need is: A tripod to steady the camera Photoshop (or Continue Reading

    The post Sequence Photography Tutorial to Take Your Sports Photography to a Whole, Nother Level appeared first on Photodoto.


    Photodoto

  • Is Full Frame Still the Best?

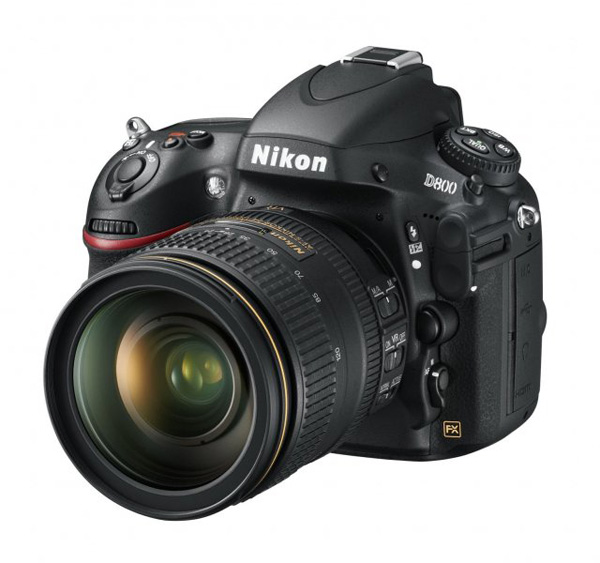
    Nikon D800

    The Nikon D800, a 36.3 megapixel full frame camera.

    For many years photographers have accepted that, when it comes to image quality, a full frame camera beats one with a smaller sensor every time. Let’s look at some of the reasons why.

    Advantages of full frame cameras

    • Full frame camera sensors have larger pixels. This means they create images with less noise and all-round better image quality.
    • Full frame cameras usually have more megapixels. While this doesn’t matter to most photographers, it may be useful if your client demands large images or you want to make large prints.
    • There are more wide-angle primes available. If you prefer prime lenses to zooms, you have more choice at shorter focal lengths with a full frame camera.
    • Legacy lenses can be used as intended. If you own a 24mm prime lens that you used with a 35mm film camera, you can use it exactly the same way on a full frame camera. On a camera with a smaller sensor the crop factor means you are effectively using a longer focal length.
    • There is less depth-of-field at any given aperture, and focal length setting, than there is with the equivalent focal length on an APS-C camera. For example, a photo taken at f/2.8 with an 85mm lens on a full frame camera has less depth-of-field than one taken at f2.8 on with a 50mm lens on an APS-C camera even though the field-of-view of both lenses is approximately the same. This is a benefit if you like to create photos with bokeh.
    • The top cameras in a manufacturer’s range are usually full frame. Let’s say you want to buy a durable, weatherproofed, Canon EOS camera, designed to handle everything a professional photographer could possibly throw at it – then you need the EOS-1D X. An APS-C (cropped sensor) version of this camera does not exist.
    Portrait taken with EOS 5D Mark II

    This portrait was taken with an EOS 5D Mark II. Using a full frame camera helped obtain the out of focus background.

    Disadvantages of full frame cameras

    Full frame cameras have some disadvantages too:

    • They cost more money than cropped sensor cameras. Larger sensors are more expensive to manufacture, therefore full frame cameras will always cost more than similar models with smaller sensors.
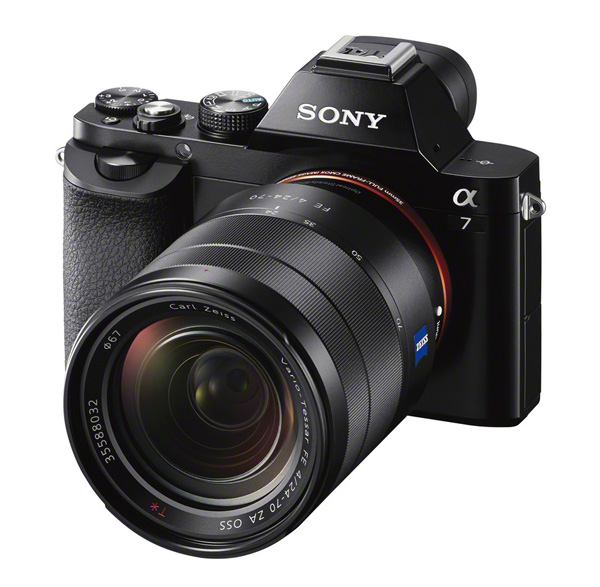
    • Size and weight. Full frame cameras are larger and heavier – they have to be to fit the larger sensor. However, the new Sony A7 and A7R cameras go against this trend.
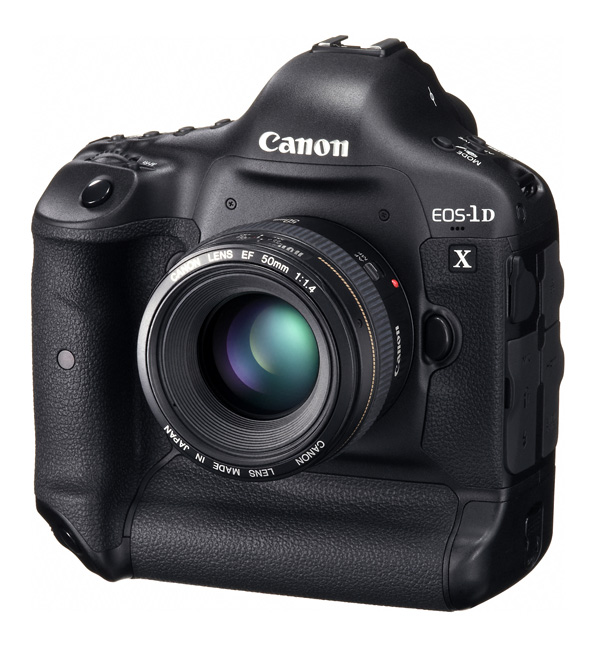
    EOS 1D X

    The EOS-1D X – Canon’s largest and most expensive full frame camera, designed for professional use. It’s an amazing, high precision camera for the most demanding photographer. But it also shows the main disadvantages of full frame cameras: size, weight and expense.

    The rise of the mirrorless camera

    If you’re an aspiring pro, you may feel that you need a full frame camera to be taken seriously. In fact, this has never been completely true. There are plenty of professional photographers who use crop sensor cameras. The quality is more than good enough, and if you’re a sports or wildlife photographer you may also appreciate the extra reach that an APS-C camera gives you with telephoto lenses.

    So far most of these points apply mainly to digital SLR cameras. But over the last few years we have seen the rise in popularity of mirrorless camera systems (sometimes called compact camera systems). It is easy to see why these are popular. Their small size and unobtrusive design means they are easy to carry while travelling, and less likely to draw attention if you in an area where the locals are sensitive to photographers. Mitchell Kanashkevich has written an excellent article on this topic: Istanbul and My Review of Fuji X100S as has our own Valerie Jardin using the same camera.

    Furthermore, the new Fujifilm cameras such as the X-Pro 1 and X100S have garnered a lot of praise for their high image quality, with some reviewers saying it is on a par with that of full frame digital SLR cameras (there is more information on the science behind it here).

    Fujifilm X100S

    The Fujifilm X100S. This camera has had some very positive reviews. Some photographers are moving away from full frame digital SLRs and towards smaller, mirrorless camera systems.

    A new question

    It seems to me the question has shifted. We used to ask ‘what camera gives you the best image quality?’ and the answer was inevitably – full frame. Now the question has become ‘which camera is best for me?’ Image quality is only part of the equation, and has become less important as the gap between full frame and crop sensor cameras has narrowed. So if you’re in the market for a new camera here are the things you might want to consider before making a purchase:

    • Budget – this is important for fairly obvious reasons. Don’t be afraid to buy a crop sensor camera if your budget doesn’t stretch to full frame.
    • Existing lens compatibility – If you’re staying within the same camera system, how do your current lenses work with the new camera? Some lenses are designed for crop sensor cameras and won’t work with full frame. Does upgrading to full frame mean that you will also have to spend money on new lenses?
    • Total cost with accessories –  If you’re moving to a new camera system, how much will you need to spend on lenses and other accessories? For example, there are a lot of photographers praising the merits of Fujifilm cameras and writing about making the switch from their current system. But bear in mind these guys make a living from photography and expect to spend a certain amount on camera gear each year. Cameras are tax deductible expenses and this is effectively a discount on new equipment that hobbyists don’t receive.
    • Size and weight – These are important factors if you like to travel with your cameras, but maybe not so important if you take most of your photos locally. Despite the advances in mirrorless cameras the digital SLR design is still the best for most types of photography. The trade-off is size and weight, as digital SLRs are bigger and heavier than other types of camera.
    • Alternative lens options – Do you want to use lenses from other manufacturers or old lenses on your camera? If you’d like to experiment in this area then think about a mirrorless camera system, as most of them have lens adapters that let you use them with a variety of different lenses. This can be a lot of fun and source of experimentation in itself.
    Sony A7

    The Sony A7 (pictured) and A7R are the world’s smallest full frame digital cameras with interchangeable lenses.

    What do you think?

    What are your thoughts on the full frame versus crop sensor debate? Share your thoughts and experiences in the comments below.

    More reading on this topic here:

    • Review: Comparison Canon 5D MarkIII vs the Canon 6D
    • The Best and Worst Cameras, Lenses and Video Cameras of 2013
    • All about Gear [Best of dPS 2013]

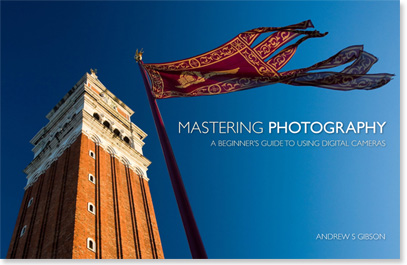
    Mastering Photography

    Mastering Photography ebook

    My ebook Mastering Photography: A Beginner’s Guide to Using Digital Cameras introduces you to photography and helps you make the most out of your digital camera, no matter which one you own. It covers concepts such as lighting and composition as well as the camera settings you need to take beautiful photos like the one in this article.

    The post Is Full Frame Still the Best? by Andrew S. Gibson appeared first on Digital Photography School.


    Digital Photography School

  • Get To Know Your Photographer by Steve Brill

    I have been photographing weddings for around 6 years now, and have been very fortunate to be able to contribute in my own small way, in making these fantastic events a memory that my clients will treasure every time they look back at their photographs and albums. The added benefit for me is that my […]
    dslrBlog

  • Do you pack up and leave after sunset and miss the fun of night photography?

    There’s no question that the best light occurs during the golden hours, but does that mean that you should pack up your cameras after sunset and miss all the fun of night photography?

    city-skyline-example

    Absolutely not!

    Fun of Night Photography

    Night photography offers so many great opportunities for photographers that it’s something that shouldn’t be overlooked. In fact – I think it should be experienced by everyone.

    Of course photographing at night means that you’re going to be pushing your gear to its limits. High ISOs, long shutter speeds, fast lenses, tripods, remote shutters, and patience are a must when it comes to photographing after the sun has set, but the results will be worth it.

    So what is there to capture at night, and more importantly how do you go about capturing each of these subjects?

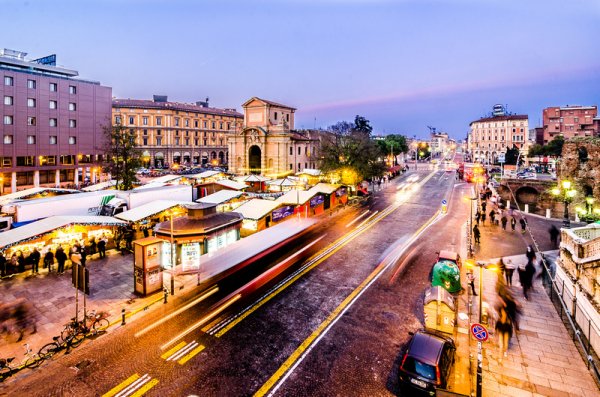
    City Lights

    Walking-the-city

    Cities are great places to take photos any time of the day, but at night, cities come to life. Just think of Times Square in NYC or the Vegas Strip for example. Of course, not everyone’s going to have access to such iconic locations, but that doesn’t mean that your local city won’t offer you the goods.

    When photographing a city you have so many options open to you; from skylines, to the simple every day things that make cities run. Things like the traffic, the people, and the objects they use to get around are a great start. This photograph of a bike, chained to a parking meter, in front of a church lit up for the night, is a great example of what can be found walking the city streets.

    For more tips and examples on photographing cities at night check out these great posts:

    • Nightscapes: Photographing the City at Night
    • 41 City Skylines to Inspire You

    The Night Sky

    When it comes to capturing the night sky there are two basic ways that you can go about doing this. You can either show the vastness of space and showcase the number of stars in the sky, or you can capture the motion of the Earth’s rotation by creating star trails.

    night-sky-photography

    Night photography showing vast open sky and stars

    The basic concepts for capturing both types of night sky photos are the same. You’ll need a tripod, a wide angle lens, and you’re going to be working with a large aperture in most cases.

    When it comes to the shutter speed and ISO that is where things start to differ between the two types of shots. As the Earth’s rotation is what causes star trails to form, you have to limit your shutter speed in order to capture a single frame shot before this rotation creates the trailing effect.

    Startrails-OneWS

    Night photography capturing star trails over a long period of time

    A general guideline for this is known as the 600 rule which basically states that the longest shutter speed you can use is determined by dividing 600 by your focal length corrected for 35mm. So if you’re using an 18mm lens on a 1.5x crop sensor DSLR you’d take 600 divided by 27 (18mm x 1.5 crop factor) which would mean that the longest shutter speed you can use would be about 22 seconds. To control this you’re going to need to set a rather high ISO. However, with modern DSLR cameras being as good as they are with noise these days, this is becoming less and less of an issue.

    However, if you DO want to capture the star trail effect, then the object is to capture the motion that you were trying to avoid before. Often times star trail photographs are created by stacking multiple long exposures of the same scene over a long period of time. Since shutter speed is not going to be an issue here it’s much easier to use longer speeds which will result in less frames in the end. You’ll also be able to use lower ISO and smaller apertures here if you prefer.
    Here are some more great posts to send you in the right direction for taking better photos of the night sky

    • Tips for Photographing Star Trails
    • How To Take Better Photos of The Stars

    Light Trails

    light-trails-example

    Light trails are a lot of fun to photograph and can be done just about anywhere you can find a busy road.

    In general any shutter speed from one second, to a few seconds, should be enough to give you the look you’re after. But it doesn’t just come down to finding a road with traffic and photographing it – make sure you’re aware of your composition as well.

    light-trails-example-2

    As roads make for great leading lines, try to use those to your advantage. You can either shoot from above the traffic on a bridge or a building, or your can try and get down low and shoot from a median or side walk. No matter where you’re shooting from you’re going to want to be super aware of your surroundings and never do anything that would put your life in danger – no photograph is worth getting hit by a bus over.

    For more tips and examples on light trails check out these posts:

    • How to Shoot Light Trails
    • 9 Tips for Capturing the City in Motion

    What else?

    What else can you think of for night photography? I know I left at least one big one off this list and I did that on purpose as I have no experience in light painting – oops did I just give one away?

    The post Do you pack up and leave after sunset and miss the fun of night photography? by John Davenport appeared first on Digital Photography School.


    Digital Photography School