Category: Photography

  • The Power of Perspective in Photography

    How you shoot a scene determines what kind of story you want to tell and what kind of mood you want viewers to feel when they look at a photo. The power of perspective is beyond the consideration of your photography subjects; it is about the angle of your camera, your proximity to the subjects and what you include in the frame that plays an important role in your final image.

    Below are examples of different perspectives and why you’d want to take a photograph in that way.

    Examples of Different Perspectives

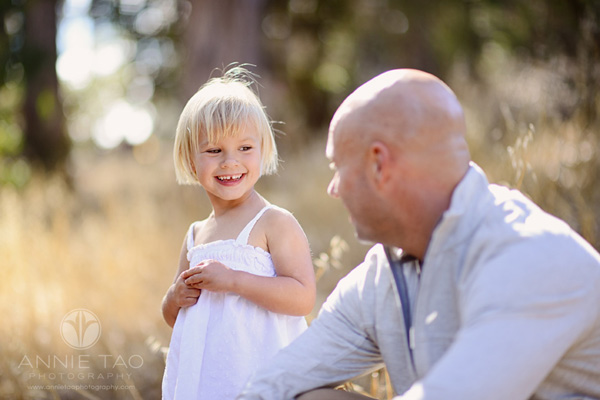
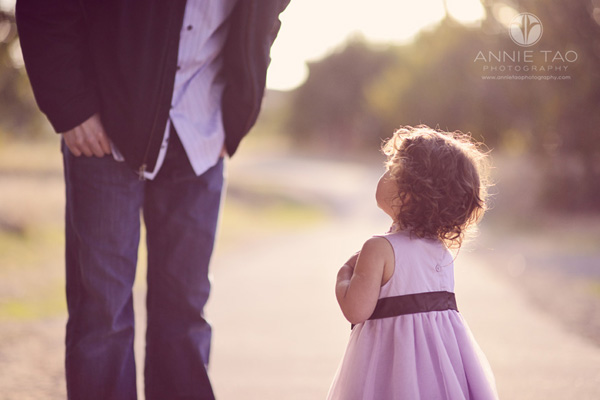
    Shoot from a low position and straight on – to get the perspective of a child

    Annie-Tao-Photography-Perspective-Article-low-and-straight-on-1dps

    Annie-Tao-Photography-Perspective-Article-low-and-straight-on-2dps

    Shoot downward – to get a sense of scale (ie, that the child is small), to eliminate distracting elements in the background, or to get natural catchlights in your subject’s eyes

    Annie-Tao-Photography-Perspective-Article-downward-view-1dps

    Annie-Tao-Photography-Perspective-Article-downward-view-2

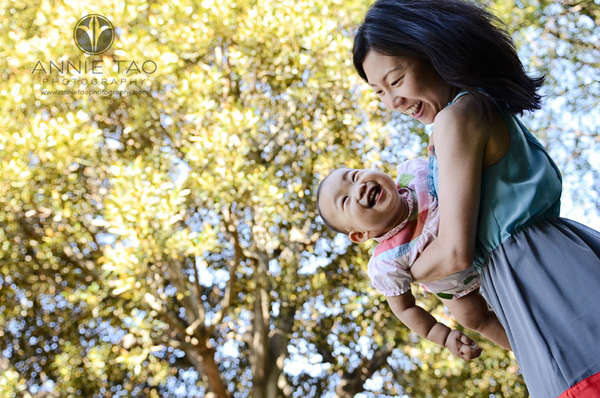
    Shoot upward — to turn tall scenery, like trees or cityscape, into the backdrop

    Annie-Tao-Photography-Perspective-Article-upward-view-1dps

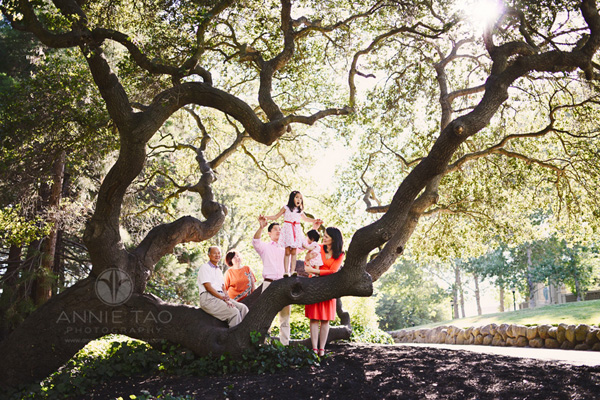
    Shoot wide – to show the environment

    Annie-Tao-Photography-Perspective-Article-shoot-wide-1dps

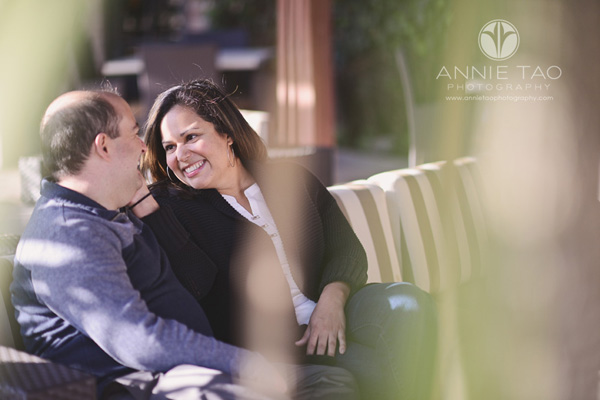
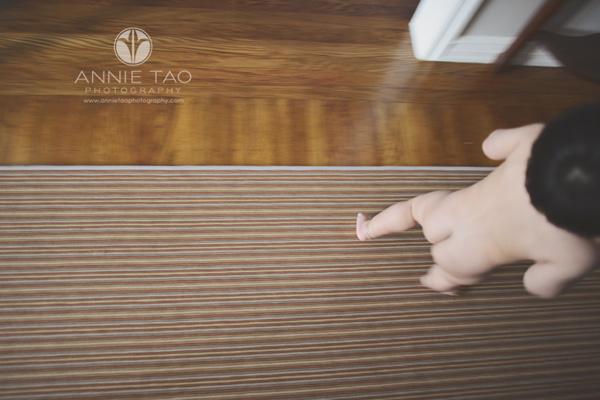
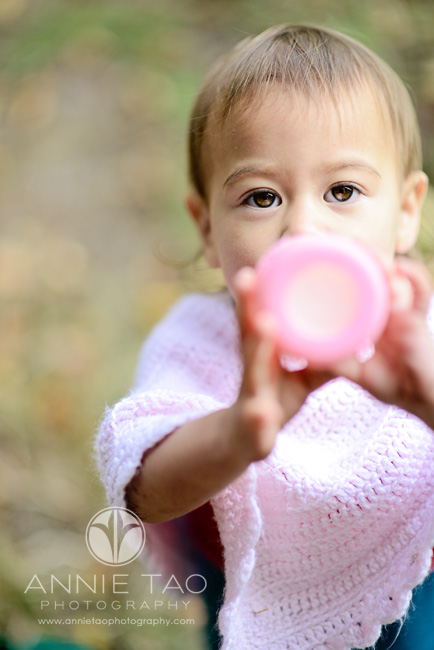
    Shoot up-close – to give an intimate feel or to highlight a particular action or detail

    Annie-Tao-Photography-Perspective-Article-up-close-view-1dps

    Annie-Tao-Photography-Perspective-Article-up-close-view-2

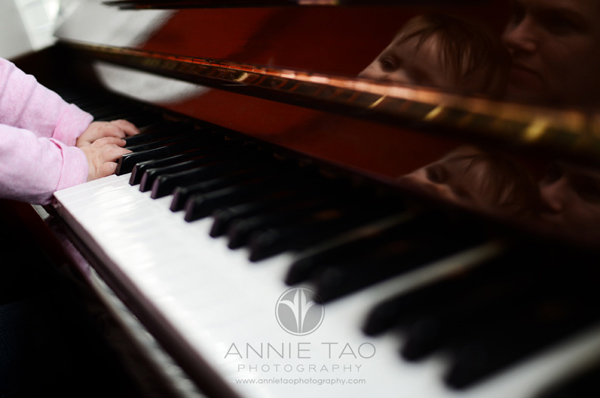
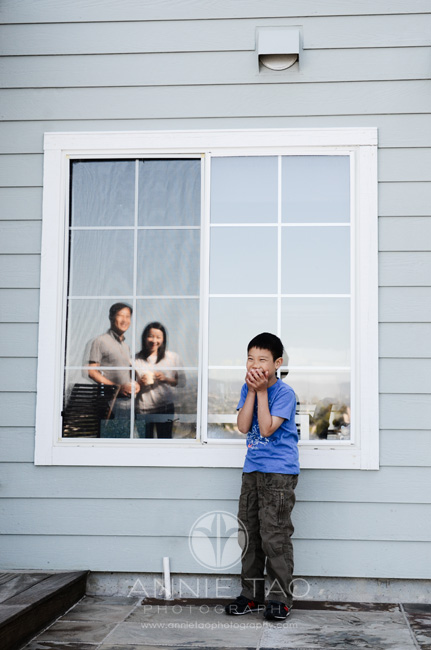
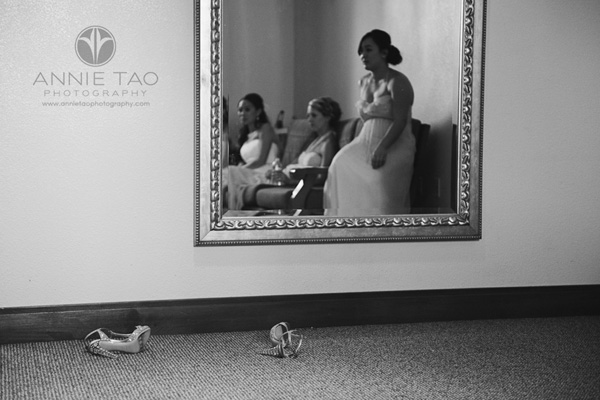
    Include reflections – to give an additional dimension to an image

    Annie-Tao-Photography-Perspective-Article-reflective-view-1dps

    Annie-Tao-Photography-Perspective-Article-reflective-view-2

    Annie-Tao-Photography-Perspective-Article-reflective-view-3dps

    Shoot behind things – to make it feel like you’re peeking into a private moment

    Annie-Tao-Photography-Perspective-Article-shoot-behind-1dps

    Annie-Tao-Photography-Perspective-Article-shoot-behind-2dps

    What you’ll find is:  PERSPECTIVE influences a viewer’s PERCEPTION!

    Conclusions:

    1. Before you press the shutter, take a moment to think about how you want your subject to be perceived in the image. Is there anything you want to highlight? A story you want to tell?
    2. You don’t need fancy camera equipment or a bunch of expensive lenses to create different perspectives. You just need creativity and the ability to move around…and BAM! You have it all.

    Have you got some others to share? Please do in the comments below.

    For more on perspective see these:

    • Perspective in Photography – Don’t just stand there move your feet!
    • Why are my Buildings Falling Over? A Short Guide to Perspective Distortion and Correction in Photography
    • 10 Most Common Mistakes in Landscape Photography – and How to Overcome Them

    The post The Power of Perspective in Photography by Annie Tao appeared first on Digital Photography School.


    Digital Photography School

  • 10 Incredible Bird Photography Tips for Beginners

    What is the most important factor in getting your bird photographs noticed by a large audience? Is it the camera or the lens or the bird?
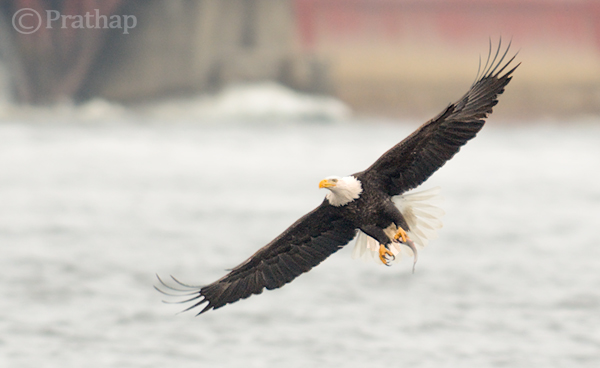
    Bald Eagle Flying Away With A Catch

    Imagine you have a Canon 1DX or Nikon D4 and 800mm lens. You have been to a place to photograph the magnificent Bald Eagles. Everything seems perfect! Isn’t it?

    But, what if you do not know what makes a good bird photograph? Do you think just by shooting a burst of photographs will give you the best photographs? Definitely not…you may get snapshots but not photographs.

    “There is nothing worse than a sharp image of a fuzzy concept.” – Ansel Adams

    Today you will learn some of the core principles of Bird Photography that will give you an understanding of what makes a good bird photograph.

    1. You Don’t Need Expensive Lenses for Great Bird Photography

    A great bird photograph does need several factors such as:

    • Quality and Direction of the light
    • Composition
    • Knowledge about the bird and its activities
    • Background
    • Knowledge about the gear you are using
    • Proper Settings
    • Proper Exposure
    • Your position
    • 3 + 1 Ps (Patience, Perseverance, Practice + Passion)

    You see, it takes a lot more to become a good bird photographer. A decent APS-C or DX format camera body with telephoto lens of up to 300mm is more than sufficient to really get great bird photographs.

    It is important to realize that bird photography is much more than just the camera or the lens. There is no denial of the fact that the longer the lens, the easier it is to photograph birds which are skittish. But, the lens itself cannot make a great bird photograph.

    But, if you do not have a longer telephoto lens, nothing stops you from taking a great photograph of birds like Mallard ducks, geese, gulls, and herons that are easily approachable. If you cannot take a close-up of a Bald Eagle, nothing stops you from taking a unique photograph of a Bald Eagle in its habitat.

    Everything boils down to how you view the situation. “Is the glass half empty or half full?”

    2. Light and Composition
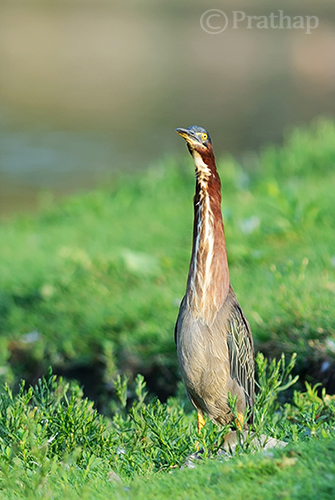
    Green Heron Standing TallPhotography is all about light. Light has few characteristics that will make a photograph wonderful.

    Early morning and late afternoon light is usually the best time for bird photography. The light during these times is soft. As a bonus, the birds are very active as well.

    Soft light has some wonderful characteristics like:

    • It does not cast harsh shadows on the bird
    • It brings out a glow to the bird’s plumage
    • It gives the catch light in bird’s eye

    Composing a bird photograph helps you to convey your message in the best possible way. Bird Photography composition is generally very simple. Following a few basic composition principles will help you make a difference:

    • Use rule of thirds composition to place the bird off-center
    • Use color contrast by aiming for complementary background
    • Fill the frame with the bird
    • Use a clean background

    3. Transport the Viewer into the Bird’s World

    We see our world at 5 to 6 feet high, but birds see the world in few inches to few feet. To get a feeling of the bird’s world, then you need to get down to their level!

    Go Low and Go Slow…

    Always try to photograph the birds from their eye level, except the birds in flight of course. It has greater benefits that will overshadow any of your complaints like I can’t bend down, lie down etc. Some of the obvious benefits are:

    • You get more intimate photographs of birds since you will get an eye contact
    • You will get pleasing blur both in the foreground and background
    • You make the bird less scared since you can hardly move
    • You will transport the viewer into the bird’s world
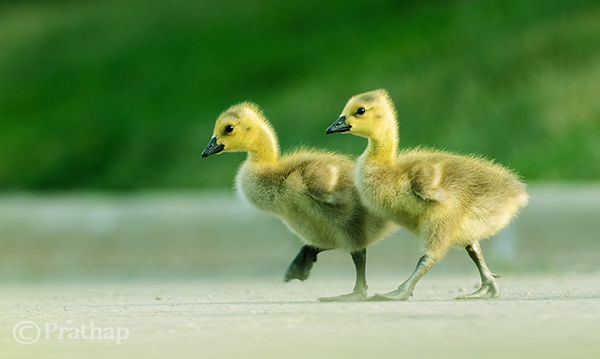
    Goslings Crossing the Road

    4. It’s all in the Eye

    Take a look at any photograph of a bird. What is the first thing you want to see? It’s the eye…right?

    We tend to make an eye connection with any living being. It is no different with birds. The eyes are the windows to the soul. If there is no light in the eyes, then they look dull or lifeless. Birds look lively when there is light in their eye.

    This light in the eye is called a catch light.
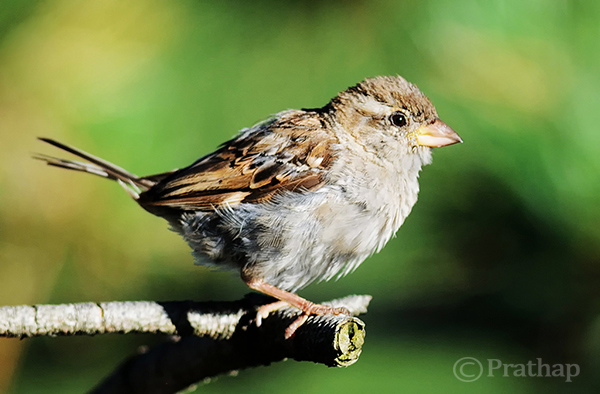
    Sparrow perching on a tree branch

    By following few guidelines you can easily get better bird photographs:

    • Always keep the bird’s eye in sharp focus
    • Check for a catch light in the bird’s eye (easy to get if the bird is front lit)
    • Make sure to photograph from bird’s eye level

    5. Fill the Frame

    In bird photography, mostly we photograph an individual bird. While photographing individual birds, it is always a good idea to fill the frame with the bird.

    Advantages of filling the frame with the bird are:

    • It is easy to focus on the bird
    • It is easy to achieve a pleasing blur or bokeh effect in the background
    • It is easy to properly expose for the bird
    • It is easy to compose in the field

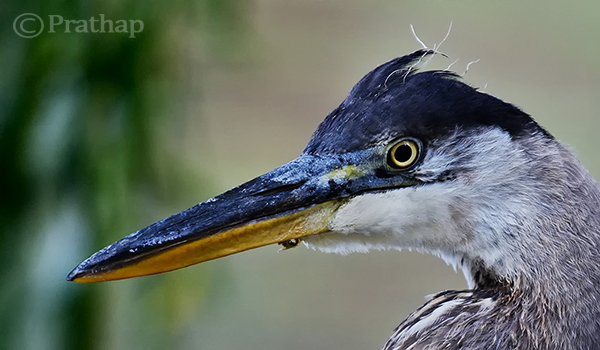
    Juvenile Blue Heron Close Up

    6. Tell a Story

    Storytelling in bird photography should not be confused with the stories that run for pages. Storytelling is a way to express the time of the day, mood, place or activity of the bird in one photograph. Viewers should be able to picture themselves in the scene.

    Simply put, a photograph with bird and its surrounding will give a better sense of story than just the bird filling the frame. Though, it may not always be true.
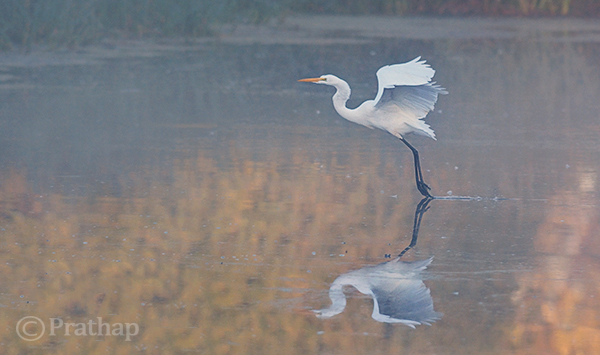
    Great Egret in Misty Morning

    Here are few tips you can follow while you photograph a bird in its habitat:

    • Make the bird an integral part of the photograph by including its natural habitat
    • Show the interaction of birds if there is more than one bird in the photograph
    • Indicate the weather conditions by including either snow, rain or mist
    • Take photographs during sunrise and sunset
    • Show season by including flowers in bloom, autumn colors, or snow

    7. Capture their Action and Behaviour

    Birds are always in action. They hardly sit idle. Capturing birds in action involves more effort and patience compared to photographing perched birds.

    Here are few tips to capturing birds in action:

    • Photograph early in the morning or late in the afternoon when birds are very active
    • Use burst shot mode to take several photographs during the action
    • Track the bird until focus is locked before pressing the shutter
    • Learn to anticipate the action either by observing or reading about them
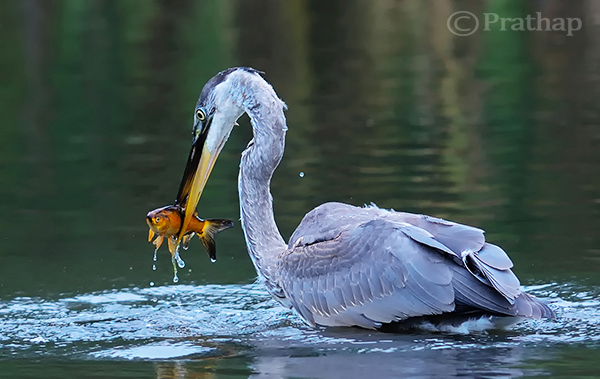
    Juvenile Blue Heron with a Fish

    Birds tend to ignore you when they are very hungry. It is very easy to photograph them in action during these times. But, care should be taken not to disturb them and maintain considerable distance.

    Capturing bird’s behaviour is much tougher than any other aspect. Generally because birds become alert the moment you are in their sight.

    The alert bird is always trying to fly away and rarely will you see its behaviour. You can observe actual behaviours of a bird when it is comfortable. There are few ways to make the bird comfortable:

    • Use a natural place to hide, like a bush or tree or something that obscures you
    • Wait patiently until the bird ignores you
    • Visit the location several days in a row, until the bird becomes comfortable with your presence or you get the right opportunity
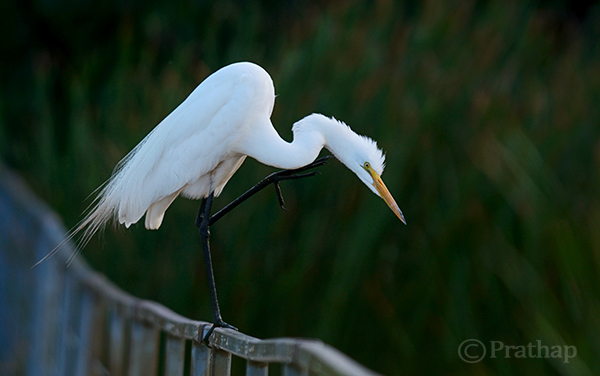
    Juvenile Great Egret Behavior

    Remember to research and learn everything about the bird you are photographing. This will definitely make you a better bird photographer and also you will enjoy knowing about the bird.

    8. Capture their Magnificent Flight

    The most interesting part of bird photography is capturing their magnificent flight. This is a very tricky aspect for beginners and pros alike. It is not easy to take flight photographs that will wow viewers.

    The success with birds in flight photography largely depends on the bird as well as the technique that one employs. Smaller birds are generally very erratic in their flight and also a bit difficult to track since they are generally too small in the frame. But the larger birds are slightly less swift and are not as difficult to track.

    If you want to be successful with flight photography, start with the larger, slower moving birds. Learn all the field techniques to capture the perfect photographs of these birds.
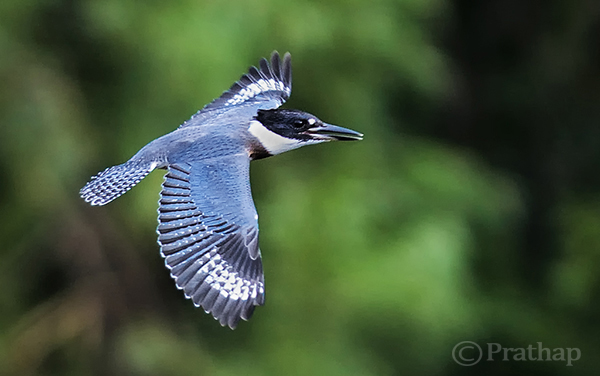
    Belted Kingfisher in Flight

    Here are simple tips that will help you capture those magnificent flight photographs:

    • Learn about the bird’s flight patterns
    • Know their landing and taking off patterns
    • If there is more than one bird, it is almost always the case that if one flies, the rest will follow the suit
    • Track the bird for a while and let the camera achieve focus before pressing the shutter
    • Use Aperture Priority so that you do not have to worry much about the changing light conditions

    9. The Background Makes the Picture

    This is one of my favourite topics which I repeat often. What are your thoughts on this? – Is it the background or the bird which makes the picture?

    Go through all your favourite bird photographs and see it for yourself. Let me know what you think, in the comments below.

    Except extreme close-up portraits of birds, every other type of bird photograph will look great when the background is clean and complementing the bird.
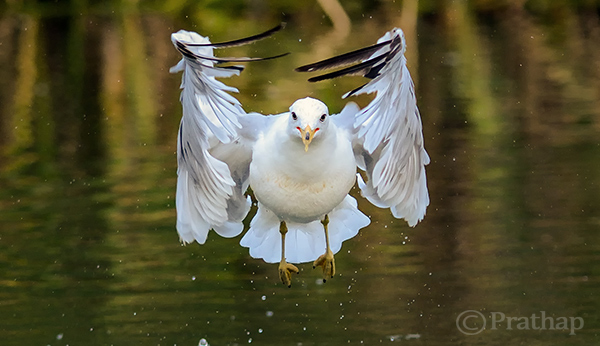
    Seagull the Eagle

    It is very important to keep a check on the background while taking bird photographs. Just follow these simple tips:

    • Avoid taking bird photographs when the background is too distracting
    • Avoid taking bird photographs when the background is plain and boring
    • Wait for the bird to assume a good position or you change your position to get an interesting background
    • Choose maximum aperture values to throw the background completely, or slightly out of focus

    10. Practice with Common Birds

    I urge you to practice with common birds. You might have understood by now that the techniques are not dependent on camera, lens or the bird. I was using 18-200mm lens for first 4 years. I learned and practiced most of my birding techniques with common birds like seagulls, Mallard ducks, geese and herons.

    I spend most of my time photographing these common birds, and I gave myself a challenge to make some unique photographs of them, that has fuelled my passion so long. I put more importance on learning and practicing photography, than whatever gear I possess. I am very glad to say that I learned most of the photography basics here at Digital Photography School.

    I hope my story so far is an inspiration to you to embrace the beauty of these common birds.

    Wrap up
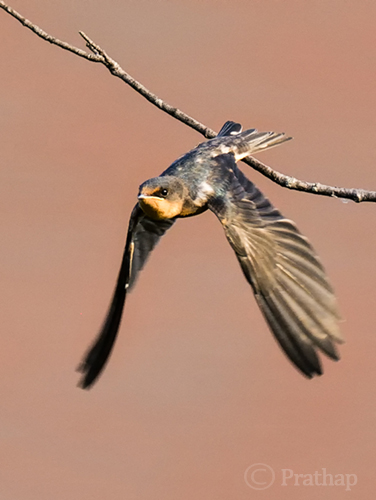
    Barn Swallow Taking OffFocus your time and energy in learning all the core principles outlined above. Prove it to yourself that you have so much passion to go out and photograph the birds every day, or as often as you can.

    Remember that proper techniques will always outsmart equipment. Make every attempt to make amazing photographs of the common birds. Enjoy photographing birds. That is the secret to success.

    Share your experience with us. Do you go out very often to photograph birds? Do you think technique outsmarts the equipment? I would be glad to answer any questions you have. Do let us know if you have any other suggestions on bird photography.

    The post 10 Incredible Bird Photography Tips for Beginners by Prathap DK appeared first on Digital Photography School.


    Digital Photography School
  • The Experience of Newborn Photography at the Hospital by Kim Rix

    I often get asked what my favourite age to photograph is, and although my honest answer is “it’s difficult to choose’. I would have to say that photographing babies, (especially newborns) is a magical experience. Being part of those first days of life and sharing the journey with the parents at such a special time […]
    dslrBlog

  • A Guide to Lighting Indoor Sports

    Newspapers may be circling the technological drain at this point, but for 150 years they were king of the hill. And the 20 years I spent there proved to be a great ride as well as a non-stop idea lab.

    Today we'll take a look back at how we developed our multi-budget solutions for lighting winter indoor sports—specifically in high school gymnasiums. Lighting indoor sports opens up a whole new world as compared to trying to shoot available light. You can both freeze action and define the quality of the light in a much better way than the spotty existing overheads.

    And for the sake of argument, let's assume only one rule: no on-camera direct flash. Because that looks horrible. Other than that, any lighting scheme is fair game for exploitation. Also, I don't have access to all of my sports archives at the papers so we'll be sticking to cookbook-type lighting diagrams to visualize placement and coverage.

    Read more »
    Strobist

  • How to Handle Image Theft Peacefully

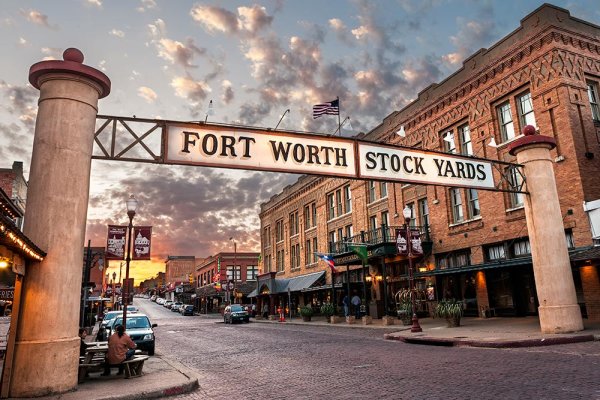
    stockyards-entrance

    First off, I am certainly not a lawyer and am not giving legal advice in this article, I’m simply telling my story and how I handle image theft. If you have questions about legal advice, please consult with an attorney.

    Recently I received a phone call from a family member who believed a local news station was using one of my images as a green screen background. This was interesting considering I hadn’t had any conversations with any news stations recently about such a thing. I asked him to send me a photo of the segment and sure enough, it was mine.

    I’ve dealt with my fair share of image theft over the last five years of being a professional photographer and I’ve certainly seen a lot more situations of other photographers getting their images stolen.

    One thing that has never sat well with me is when I see some photographers attempt to completely destroy people for using their images without permission. Taking a situation like this to social media and damaging the reputation of the offender should be an absolute last resort, not a first knee-jerk reaction.

    Quick Side Story

    I had this same image stolen by a well known wedding photographer in the Dallas/Fort Worth area. I am friends with him on Facebook and was just scrolling through my feed when I saw this image being used as a photo booth background. I could not believe my eyes! What many photographers would have done is create a public post calling him out and saying what a despicable thing he had done. This would damage his local reputation and certainly go a long way toward making sure he never did it again.

    Instead, I sent him an invoice for use of the image (it was in about 30 photo booth images in his wedding gallery), a cease and desist letter and a short email explaining why he was getting all this. Within 5 minutes he paid my invoice and sent very heartfelt apology letter and also thanked me for solving it privately instead of publicly. Turns out he hired someone to man the photo booth and told the person to only used free and clear images, but the person he hired was uneducated in finding the right images and found mine on Google and just assumed. Sure, he should have done a better job educating the hired help but it was a mistake. Not intentional.

    Ok, Back on Topic – How I Handle Image Theft

    Instead of calling the news station out publicly and demanding the image be taken down, I simply stepped back and analyzed the situation. I came to three conclusions…

    • The image was indeed used without my permission.
    • It had been shown on national television to hundreds of thousands (if not millions) of people.
    • Whether they stopped using the image or not, I deserved compensation for the use that had already occurred.

    Now it was time to make contact. I sent this short email…

    Hello,

    My name is James Brandon and your news program used one of my copyrighted photographs without permission this evening (I’m attaching a photo in the email). Also attached is a Cease & Desist letter to stop further use. Since the image has already been used and run on air, I’ll be sending an invoice for the unauthorized use of the photo as well. Please let me know immediately how you plan to respond to this matter, so I can act accordingly.  

    – James 

    I got an email back shortly that simply said, “James, I’m forwarding this to our corporate attorneys.”

    I’m guessing the person writing the email didn’t think I had a case and figured his attorneys would confirm that. The next email I got from him was a lot more wordy and apologetic. It said…

    Second reply from offending party

    James,

    I’m so sorry about the use of your photo.  It was an unintentional error. 

    The editor thought he had found something in the public domain. Obviously, he was mistaken.  He would never have used it if he’d realized it was copyrighted material.

    OF COURSE we will immediately stop using the image.  I’ve already deleted it from our system so it doesn’t get used again. In light of the error, could you please consider waiving the fee you would normally charge for such use? 

    – Mitch (name changed for purpose of article)

    Decision time

    This is where I had to make a decision. I didn’t send them an outrageously expensive invoice for thousands and thousands of dollars. Rather, I went to the Corbis website and used their pricing guide to figure out how much they would typically charge for similar use of a stock image. I then added a small percentage to that amount since it was unauthorized use. Should I just let them off the hook since he apologized? I think that I might have actually considered that option if that latest email had been the first thing he wrote me. I however got the impression that he was very unthreatened by my letter initially and only after talking to his corporate attorneys did he see the need to be nice to me and apologize. So I decided to (politely) press on.

    Mitch,

     I appreciate the apology. Since the image has already been used and run on air (and who knows how long), I really don’t see how it’s fair to ask me to waive the fee. I sent you a very reasonable invoice. 

     I will however agree that once the invoice is paid, I will send over a licensing agreement so that you can keep using the image in the future (provided that it is left in it’s original state and not Photoshopped like it was). 

     Thanks. 

     P.S. Do you know where the editor found the image? Was it on my website? 

    -James

    Assuming that it actually was a mistake, I was more than willing to let them keep using the image if they were willing to pay my invoice. Some would say that’s too nice of me, but that’s just the decision I made. He wrote back quickly…

    Hello, again, James. (<—-That didn’t sound very nice. I think he’s getting tired of me)

     The editor thought he was on a site for which we have rights and somehow managed to get onto another site.

     As to the invoice, I understand your need to charge for use of the image, accidental or otherwise.  The fee is quite high, however, considering that it was on the air for only a few seconds. 

     Could you cut the fee in half?  I could submit that invoice TODAY and we wouldn’t need the license to keep using the image.

     Mitch

    At this point I was getting frustrated. He spoke with his attorneys and they clearly told him that the news station was in the wrong. Now he’s trying to barter with me. I could have said screw it and gone to social media. I could have gone off on him and demanded my money and threatened a lawsuit. Instead I simply stood my ground and let him know my stance on the situation. I also let him know how I could have handled the situation…

    Mitch,

    When bartering, there has to be incentive on both sides to negotiate. If we were speaking before the image aired, there would be at least some incentive to get my image up on your news program. In this case, the image has already aired without my permission. I didn’t get a say in that. 

    This image has been stolen before, I guess there just aren’t that many photos of the Stockyards sign out there. The other people/companies that used the image paid my invoice without question (for the same price) and didn’t try to negotiate it. They understood they were in the wrong and didn’t want to risk having the matter becoming public. They were also nowhere near the size of your news program. 

    What most photographers do in a situation like this is immediately call out the business or person using their image on social media and their website. This gets the photographer’s followers up in arms and they will typically go bombard the Facebook page of the person or company in question. This looks very bad to the person/company’s followers and it usually gets the ball rolling pretty fast to get it resolved. 

    I’ve chosen to take a more peaceful approach, and attempt to settle this matter privately first. Please pay the invoice so we can put this matter behind us and move on.

    -James 

    That was the last contact I had with Mitch. After that email, I got an email from somebody higher up asking for a W-9 and new invoice sent directly to him. I ended up talking to that person on the phone and explained the situation. He apologized for Mitch’s behaviour and for the unauthorized use of my image and said that I had every right to be compensated for it. He also thanked me for handling it privately and not defaming them publicly. He then paid my invoice over the phone and the matter was settled.

    Conclusion

    There are many ways to handle image theft, but most situations can be handled professionally without the need for burning bridges or destroying reputations. It can also nearly always be resolved without the use of attorney or going to court.

    If someone steals an image blatantly and then refuses to take it down or ignores all attempts at making contact, then by all means sound off on social media and send your army. That’s not what happened here. The entire process of finding out about my image being used and getting the issue resolved and the invoice paid took about 6 days. It took some patience but in the end it was resolved peacefully.

    What are your thoughts? Was I too easy on them? Too hard? What would you have done differently? Let me know!

    For more articles on some legal ins and outs of photography and copyright try these: 

    • Intellectual Copyright – What is considered ‘stealing’?
    • Using Image Watermarks In Lightroom
    • Working with a Second Photographer – Legal Ins and Outs

    The post How to Handle Image Theft Peacefully by James Brandon appeared first on Digital Photography School.


    Digital Photography School
  • Anatomy of a Concert Photography Shoot

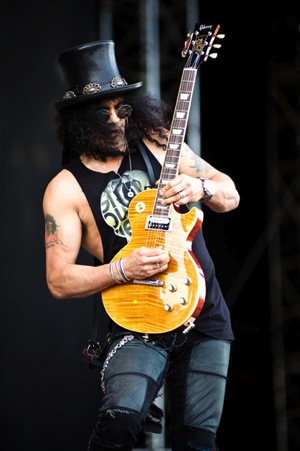
    Concert photography Slash

    Slash from Guns N’ Roses

    In my last article 6 tips for budding concert photographers I explained the basics (and camera settings) of how to start your career as a concert photographer. I would like to say a big thank you for your awesome feedback and your ongoing comments on that post. It really means a lot to me and shows how many talented and hard working concert photographers are out there.

    This article is a follow up, and I will go into more details about the “anatomy of a concert photography shoot“. Especially when you are new to concert photography, it can be overwhelming to stand in the photo pit all alone with your camera. The venue lights go out, the band enters the stage and you have only three songs (average 10 minutes) to get your awesome shots. Honestly, in the beginning it was also scary for me, but trust me, after you have shot some concerts you’ll feel much more comfortable in front of the stage and you’ll learn to know your camera settings by heart.

    One of the points that are often undervalued is the fact that a band consists of various individuals. It is tempting to only shoot the lead singer (the key person), but this would be just one out of the whole band. There’s also a guitarist, drummer, bass player and additional musicians that are worth taking a closer look. Hence, it is more difficult to photograph the other band members, but you definitely should try to catch everyone on stage.

    Let´s break it up:

    The Lead Singer (The celebrity of the band)

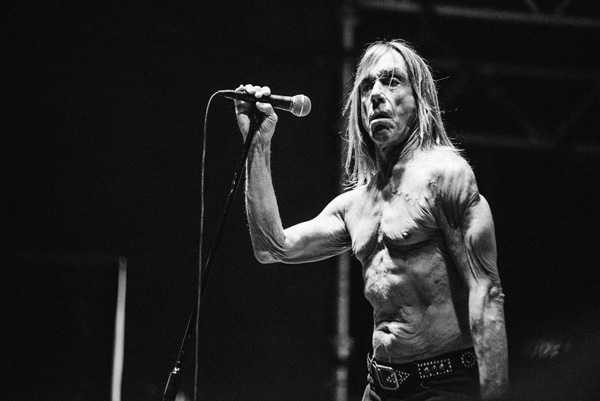
    This guy is the one whose name is often linked to the bands name such as Iggy Pop, Morrissey, David Bowie, Neil Young or Leonard Cohen.

    They are the celebrities and will be shown on every VIP party and on TV. So, to photograph this person is a must have. From a concert photographers perspective, this is the easiest member to photograph. They are always at the front of the stage and get the best lighting. I always focus on the lead singer first and once I’ve got some awesome shots, I will follow up on the other band members.

    Concert photography Iggy Pop

    Iggy Pop

    The Guitarist and the Bass Player

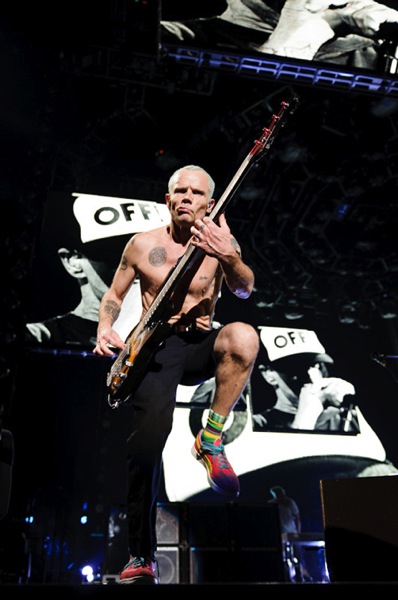
    Next I focus on the guitarist and bass player. Both of them are standing on one side of the stage, either behind the singer or on the same level. I’ve shot concerts where the bass player was standing in total darkness, so I won´t have a chance (even with a full frame sensor DSLR, f/1.4 lens, and ISO 6400) to get a decent picture. These are the hard times of a concert photographer and you just have to accept it sometimes. However guitarists and bass players provide great shots when you catch them e.g. posing when playing a solo or jumping around.

    (See photo below of Flea from the Red Hot Chili Peppers and Slash from Guns N’ Roses top of the article)

    Concert photography Flea bass player

    The Drummer

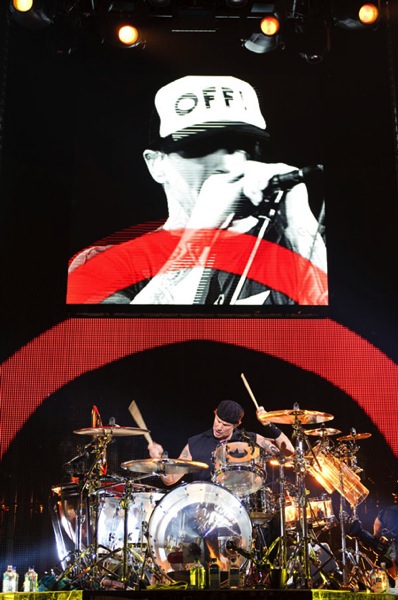
    The drummer is the “heart“ of the band and the pulse generator. A rock band without a drummer doesn’t work, but photographers tend to ignore them in their pictures. The drummer is also the one who gets you awesome action shots if you catch them in the right moment. However, these guys are almost always in the back of the stage and therefore you need a telephoto lens like the 70-200mm to capture his presence. On bigger stages (like festivals) it can happen that the drummer is so far away, that it is not always possible to reach him with your basic lens kit. But try your best, and your efforts will be rewarded.

    Concert photography drummer

    Chad Smith, Red Hot Chili Peppers

    The Band

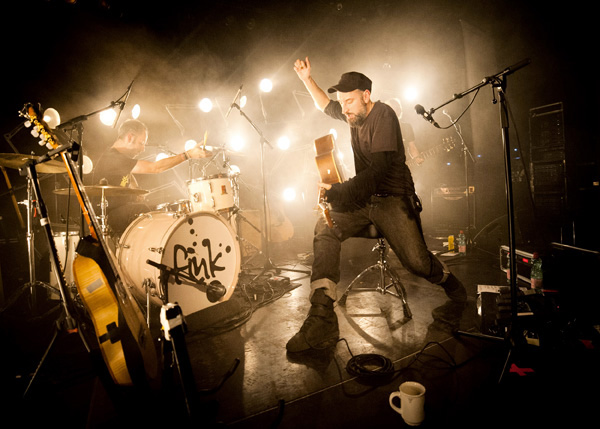
    Also try to get a picture of the entire band. Your best bet is the use an ultra wide-angle lens such as a 14mm lens. This will allow you to get the whole stage in one picture. If you are allowed to shoot the complete show (you have to ask the band first), try to get other viewpoints such as from a balcony, from the back of the venue, or on stage.

    Concert photography band

    Fink

    The Audience

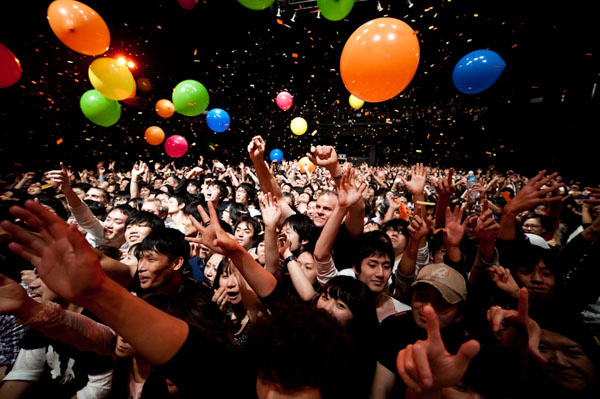
    In addition, you can also take pictures of the audience. Just turn around in the photo pit and you are facing the screaming fans squeezed into the first row. This is a tricky one, because there is lack of lighting there and you need a ultra wide angle lens to capture some good action shots. Try to catch them when they are ecstatic about the band.

    Concert photography Audience

    Some general notes for you as concert photographer:

    • I always try to get the musicians with their instruments. So when I shoot the lead singer, I take care to include the microphone. When shooting the guitarist, get the guitar in the shot and the drummer needs to show his drumsticks, otherwise it looks strange when someone sits behind a huge drum kit, but you can’t actually see him playing.
    • In general I try to frame my pictures in a way that I don´t chop off guitar necks, bass bodies or keyboards. For a close shot of the drummer you need to crop the drum kit. Thats fine, just try to get a clear framing.
    • Shooting famous bands like Metallica, Iron Maiden, Red Hot Chili Peppers, they always provide good lighting on stage. It gets more difficult in smaller clubs where you are confronted with poor lighting conditions.
    • Try to get some details shots too. Shoes, tattoos, fancy stage outfits such as lamps, visuals or flags. Some bands can be very creative.

    Summary:

    • Get to know your gear by heart first (camera settings, lenses)
    • Even though the lead singer is the celebrity of the band, try to also get the other band members
    • For the drummer, you often have to use a telephoto lens
    • Show the context in your pictures e.g. The singer with a microphone, drummer with drumsticks, etc.
    • Frame your pictures to avoid cropping off the instruments
    • Get pictures of the band, audience and details on stage
    • The more famous the band, the better lighting on the stage (rule of thumb)


    The post Anatomy of a Concert Photography Shoot by Matthias Hombauer appeared first on Digital Photography School.


    Digital Photography School
  • 50K Creative Profesisonals Creating Their Websites Code-Free in a Flash with Webydo, See Why

    Some of you may have already heard about Webydo, and some of you may have not, but that’s alright. You’ll probably be hearing plenty more about it in the future. Webydo’s a web-design platform that lets people create pretty rad-looking HTML websites that have a built-in CMS, too. And they’re able to do all of this without even knowing the Continue Reading

    The post 50K Creative Profesisonals Creating Their Websites Code-Free in a Flash with Webydo, See Why appeared first on Photodoto.


    Photodoto

  • World Press Photo 2014 Winners Announced

    Each year World Press Photo holds their annual competition to find the best images of the year in photojournalism and documentary photography. They showcase the winners on their website as well as host a traveling exhibit. I’ve been luck enough to personally see the exhibit twice, in two different cities, along my travels.

    On February 14th the World Press Photo winners were announced

    John Stanmeyer About A Photograph from thinkTank Photo on Vimeo.

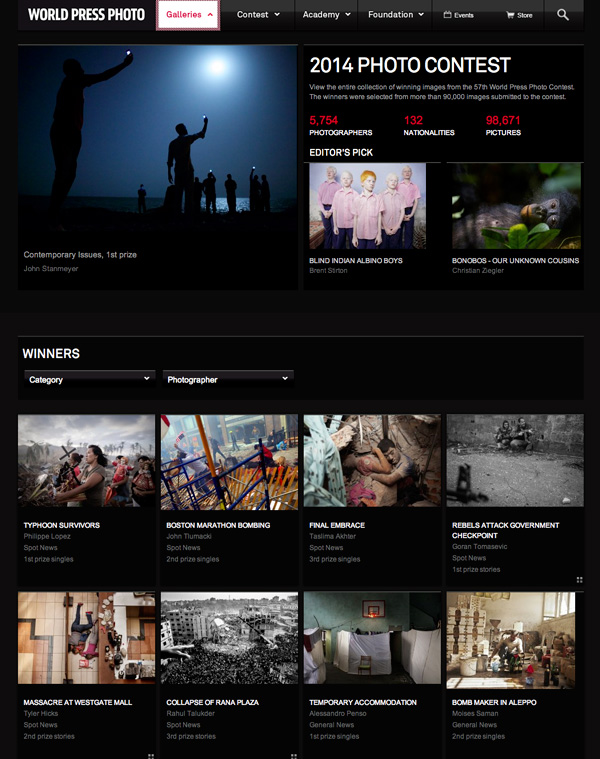
    John Stanmeyer, World Press Photo winner for contemporary issues, is our photographer this week on About A Photograph. John talks you through his award winning photograph – enjoy!

    Please visit About a Photograph.com for more information on John and the entire series of “About A Photograph”

    With thanks to John and Triple Scoop Music.
    Produced by Kurt Rogers and Deanne Fitzmaurice.
    Sponsored by thinkTankPhoto.com

    This is a screenshot of their website

    world-press-2014-winners

    Head over to view all the 2014 award winners here!

    Even if you are not into documentary or journalistic photography, you can’t help but find these images haunting, stunning, and sometimes shocking. Photography has long since been an important tool in documenting our lives and times. See what these, often brave (or stupid) photographers bare witness to and capture with their cameras for the world to see.

    Documentary photography has also historically played a role in social change. You just have to think about the images of the starving children in Africa to realize that’s true. Only after the images showed up on the media, did the world take notice and do something to help.

    So do your part – go see the winning images. Really look at them. Not just for their technical and artistic qualities, but look at the meaning in those images. Be inspired to create deeper, more meaningful images yourself.

    Enjoy!

    For more on documentary and street photography try these tips:

    • Vivian Maier – The Secret Nanny Street Photographer: BBC Documentary Part 1
    • Focus on Willem Wernsen ~ Philanthropist Photographer
    • Documentary Photography – Six Tips for Creating a Legacy

    The post World Press Photo 2014 Winners Announced by Darlene Hildebrandt appeared first on Digital Photography School.


    Digital Photography School
  • 6 of Lightroom’s Hidden Treasures

    Lightroom is very popular for post-processing lately. In this article I will go over a few of Lightroom’s hidden treasures. See if you use these, or maybe you have some others you can share with us in the comments section.

    1. Virtual Copy

    In Lightroom’s develop module you can have any number of something called Virtual copies. The advantage is that each copy can use a different arrangement of settings to make the image look different; thus you can compare several options to see which gives the best results.

    Virtual copies are not a copy of the original image, but a set of instructions copied from the original file, to which further instructions are added. It is not a duplicate image file; it is only the instructions written previously on the original, copied, and kept as a separate instructional file format, very tiny in size. You can backtrack and start over, or you can continue editing where you left in the current virtual copy you are editing.

    To create a new virtual copy Click Ctrl + ‘ on PC (Command + ‘ on Mac) OR right click the image thumbnail and choose “Create Virtual Copy”

    In essence it is different instructional files acting on one single original image, to produce different images as per the different processing strategies you apply (you then need to export each to create separate final files). Virtual copies are an intelligent way to try out different things without duplicating your originals, and consuming hard disk space.

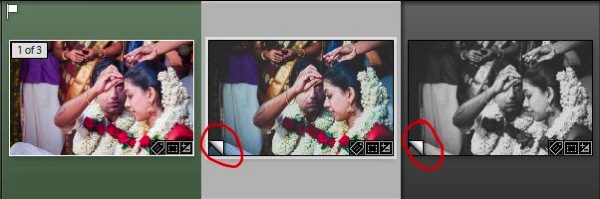
    Lightroom hidden treasures tips 01

    This screen shot from filmstrip shows the Virtual Copies. The page flip symbol
    (circled in red) on the bottom left corner of each image is the sign for Virtual Copy.

    2. Soft Proofing

    This has been one of the most sought after features in Lightroom for long time. Press “S” on your keyboard as you work in the Develop module and your working image’s background turns into paper white (you can change that as well). The photograph will appear as if it is on paper, and a notification shows “Proof Preview” on the top right of the image area.

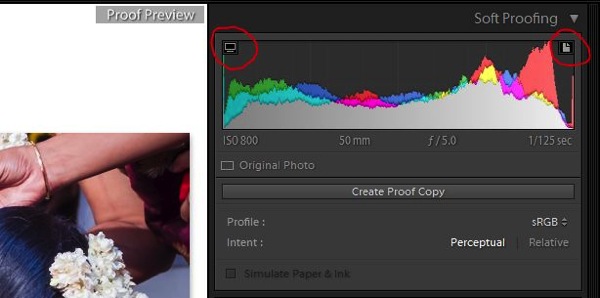
    To check if your image has any colour problems, take a look at the histogram. The clipping indicators are turned into two symbols; one on the right corner is a print colour warning, and the left one is a monitor colour warning. Too much of a particular colour in your image will give you a warning on the same histogram (click the paper and monitor symbol), that those colour regions are unable to make it into print medium. This means you have to reduce the colour intensity of that particular colour.

    Lightroom hidden treasures tips 02

    This screen shot shows the paper symbol on top right and the monitor symbol on top left of the soft proofing window (both are circled in red).

    By clicking “Create Proof Copy” you will be able to create a Virtual Copy of the present settings and after the correction you can compare it to the changes after correcting the colours. You can apply colour profiles too based on the printer you are using. Press “S” again to exit Soft Proofing mode.

    3. Smart Previews

    Smart Preview, as the name suggests, is a smarter way of working when you have hard drive space constraints (say you are working on your laptop but your files are in the external harddrive). Smart Preview creates high res – low size file which can be used for working purposes. The moment you want to export the photographs, connect your external hard drive and export it from the original.

    This tool will be highly useful for people who have already accumulated a lot of files, and utilized hard disk space. The moment you import, the option will be there. If you click the tick box to create Smart Previews, Lightroom will create and store them in a separate folder where your working instructions (your LR catalog) will be stored. The moment you connect your external drive, you will have an option to discard the smart preview files. Before discarding, the instructions will all be written on to the original files.

    Lightroom hidden treasures tips 03

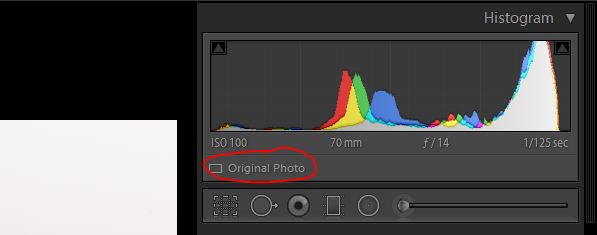
    This screen shot shows the original file without Smart Preview

    Lightroom hidden treasures tips 04

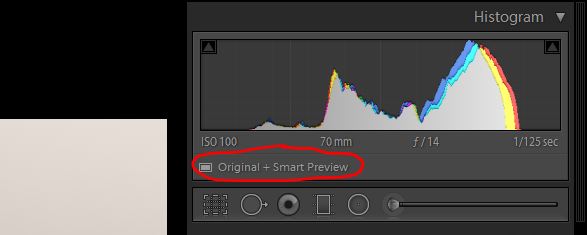
    This shows the screen for the same file with Smart Preview (circled in red)

    4. Lights Out

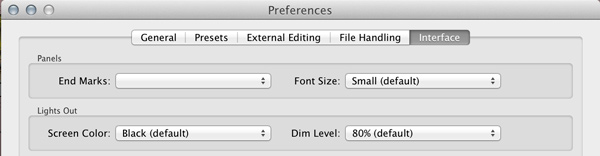
    One of the least used tools in Lightroom; comes with a simple shortcut. Simply press “L” on your keyboard and the entire screen dims (80% dim), except the image area. Press “L” again and the screen will go to pitch black except your image portion. The smart thing about this is that when you first press the “L” you can continue working with the 80% dimly lit, panel sliders. You can also set what percentage you want for your Dim Level by going to your Preferences settings (see below).

    Lightroom-hidden-treasures-tips-08

    Set your Dim Level percentage in Preferences, here

    When you press “F” for full screen you have to wait for resizing the image to full screen. But when you press “L” for lights off it is done in a snap.

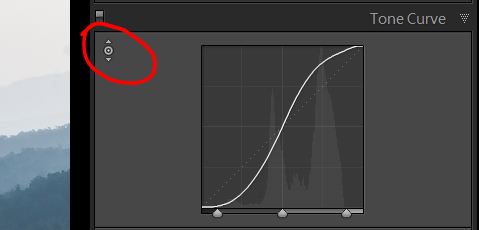
    5. Target Adjustment Tool (TAT)

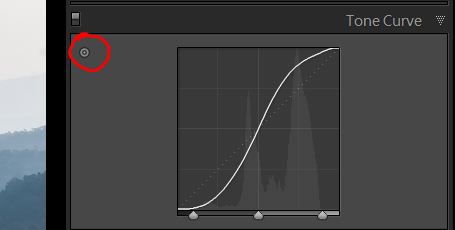
    This tool is available in the Develop module’s Tone Curve and Colours sections. This is one intelligent tool to adjust the tonal values directly on the image, when you do not know which sliders to adjust. You pick the tool from the panel and adjust the image directly by pressing and holding the mouse button, while you drag up or down as you may wish. The changes appear instantly as you drag.

    It is available in the colour section as well, where you can adjust the colour values (Hue, Saturation & Luminance). Click the tool from the panel, place it over the image where you want to make adjustments, while pressing and holding the your mouse button. In B&W conversion you can also adjust the black, grey and white values by adjusting the tones darker or lighter, in a similar manner as you did for colour.

    Lightroom hidden treasures tips 05

    This shows where to find the Targeted Adjustment Tool in the Curves panel

    Lightroom hidden treasures tips 06

    When the tool appears with up and down arrow marks, as seen here, it means the tool is activated.

    6. Visualize Spots

    As you use your camera, with the passage of time, the sensor tends to accumulate dust over itself. The dust spots become visible on your image and reduce its quality and appeal. As there may be any number of reasons for not cleaning the camera sensor, every time you see a spot there is a tool in Lightroom to clean them, at the image level.

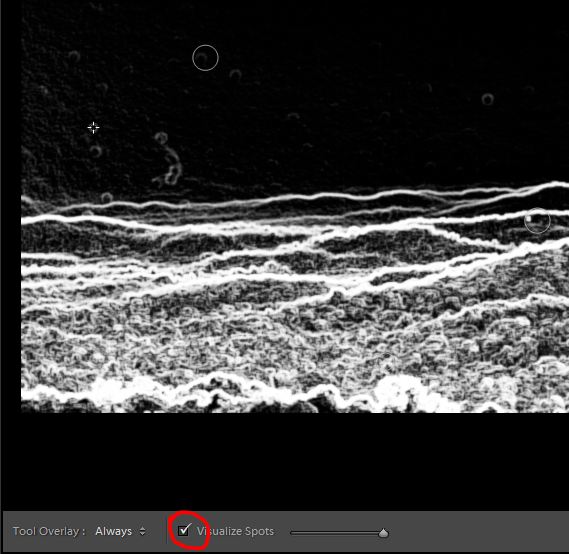
    You are probably aware of the cloning and healing tool, which is on the top of the Develop module – second tool from the left, below the Histogram. You can use this tool for obvious reasons and also for correcting the sensor dust spots. Press “Q” (keyboard shortcut) to activate the tool and look at the bottom of the image (see below).

    Lightroom hidden treasures tips 07

    This screen shot shows the image after the tool is activated

    Click the check box adjacent to Visualize Spots and the image turns into an inverted monochrome one which show the dust spots more clearly (if you do not see the toolbar or that option press “T” to show the Toolbar). You can adjust the intensity of the brightness to find the dust spots using the slider next to Visualize Spots, on the toolbar. This is an easy way to find the dust spots and correct them by cloning the nearest best place.

    Do you have any other Lightroom tips or hidden treasures that you use? Please share in the comments below.

    For more on Lightroom check these articles:

    • Why Lazy Photographers Should Use Lightroom Smart Collections
    • 3 Uses for the Radial Filter Tool in Lightroom 5
    • 4 Not-so-Secret Tricks to Speed up Your Lightroom Workflow

    The post 6 of Lightroom’s Hidden Treasures by Navan Viswa appeared first on Digital Photography School.


    Digital Photography School
  • Confluence of Wildlife and Man – A Story from the South Platte River

    I was looking at paintings by Nancy Rynes, a Colorado artist. I like her texture series and, especially, the picture called “Confluence”. Two red hawks sitting on a wall covered by graffiti. For me the confluence means here the coming together of wildlife and man made objects. It reminds me an old story from the South Platte River paddling – encounter of a young eagle sitting on old trashed car.

    I really hated those cars from 1950s and 1960s when I started to paddle the South Platte River years ago. Then, having no choice, I accepted them and started to photograph them. At least they were put into the river for a reason – to protect river banks. It seems that wildlife is accepting them too.

    Car Photography Session on the South Platte River
    South Platte River – Another View or How to Photograph the River?

    Here is my eagle story originally posted in 2007.

    October 15 was my first day on the South Platte River in the fall/winter paddling season of 2007. I paddled upstream from Kersey in the Thunderbolt kayak. After exploring the Lone Tree Creek I paddled back down river to Kersey. It was just before sunset when I decided to shoot some pictures of old cars dumped there to protect river banks.

    I squeezed my kayak into some standing backwater and started shooting. I didn’t notice anything unusual, but I did sense somebody’s presence …


    bald eagle South Platte River

    eaglet bald eagle south platte river kayak Colorado

    Not farther from me than a length of my kayak there was an old truck and a young eagle was sitting on the top of it. I kept shooting my pictures. However, looking at a beak and powerful talons, I didn’t feel very comfortable balancing my tippy kayak in the front of that chick. Judging from the time stamps in my pictures I spent 12 minutes there. During that time the eaglet did not make the slightest movement.

    I wished I had a better camera than my Pentax Optio W10. It was getting dark, so I backed up leaving the eagle on his truck.

    I have seen adult bald eagles many times during my paddling on the South Platte, but it was the closest and most exciting encounter. As a first guess I assumed that I saw a juvenile bald eagle. After searching internet it seems that it is quite difficult to distinguish between immature bald and golden eagles. Some comments I got indicate that it was the golden eagle. So, who is that chick?

    Breeding Bald Eagles in Colorado

    … from the Center for Biological Diversity:

    Bald eagles commonly nested in and around Rocky Mountain National Park as late as the 1950s (117). By 1974, just one pair remained in the state (93). The population remained perilously low through the 1970s and 1980s, began growing in 1986 and reached a peak of approximately 65 pairs in 2006 (2, 69, 93, 96). One-third of Colorado’s nesting bald eagles occur east of the Continental Divide in the South Platte River watershed (115). Other breeding concentrations include the Yampa River upstream of Craig, the White River in the vicinity of Meeker, the Colorado River upstream of Kremmling, and La Plata and Montezuma counties.

    Bald Eagle – Nesting & Young from American Bald Eagle Information.

    Other bird stories and pictures:

    Do Wild Turkey Swim? A Photo Story of White Water Turkey Hen for Thanksgiving
    Are My Paddlings Days Over?
    Blue Heron – Bird Photography from a Racing Kayak with Pentax Optio W10 Camera?
    From the Love Life of Canada Goose in My Paddling Pond: Rivals or Mates?


    paddling with a camera