Category: Photography

  • Processing an Image in Lightroom 5 – a Video Tutorial

    Lightroom5-processing

    Of course, I always like to get the photo as perfect as possible, right in the camera.  But, sometimes the situation just doesn’t allow for a lot of adjustments to be made before the opportunity is lost. Today’s image of a Canadian Lynx kitten was one of those situations.

    The kitten was in a forest on a bright sunny day with mottled light, pretty much nightmare’ish light.  Fill flash would have helped, but I’m hesitant to use fill flash with most mammalian critters because the flash will often show off hairs that our eyes don’t normally see, thereby rendering an artificial appearance to the critter.  So, instead, I attempted to expose for the highlights, trusting and hoping that my RAW files (later converted to Adobe’s DNG format) would help save the day when I got around to processing the image.  Today, is that day.

    Processing an Image in Lightroom 5

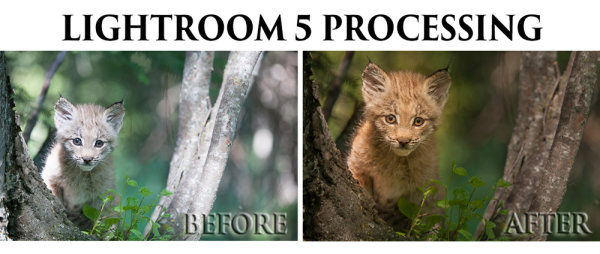
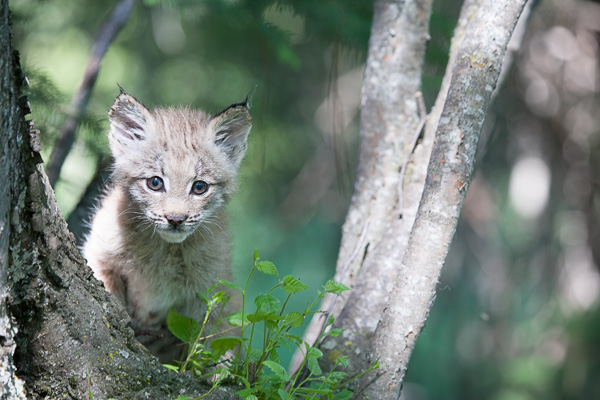
    So here is a video tutorial on using the features in Lightroom 5 to change a photo that started off looking like this . . .

    © Paul Burwell

    Before Lightroom Processing

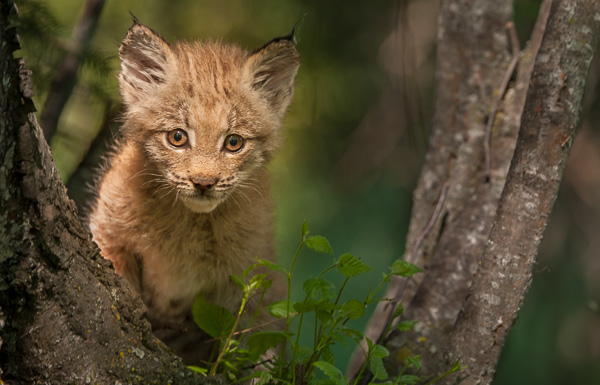
    . . . into a photo that looks like this!

    © Paul Burwell

    After processing in Lightroom 5 – Horizontal Crop

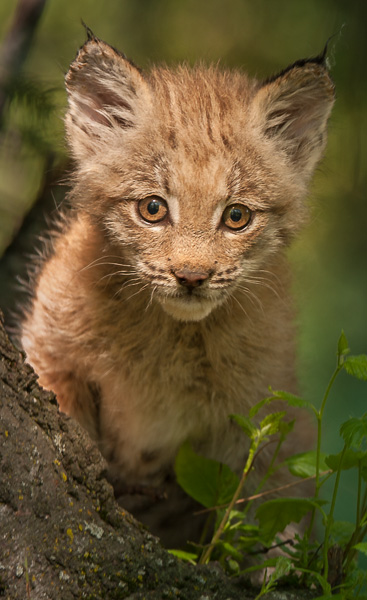
    OR even this . . .

    © Paul Burwell

    After Lightroom Processing – Vertical Crop

    To accomplish this we’ll make use of the Crop tool, the Basic Adjustment Panel, the Adjustment Brush, the Radial Filter, the Detail (Sharpening) Panel and the Virtual Copy feature.

    We’ll take the photo of the Canadian Lynx kitten that started off pretty bland and forgettable, and end up with a nice looking, intimate portrait of a beautiful cat.  The video will cost you about 30 minutes of your life to watch through from beginning to end, but when you’re done, you’ll have an excellent idea on how to use these tools that come embedded in Lightroom to transform (or save) some of your own, less than stellar images.

    Enjoy this video on processing an image in Lightroom 5

    For more Lightroom tips try these articles:

    • 3 Uses for the Radial Filter Tool in Lightroom 5
    • Lightroom 5 Tips – Hidden Gems
    • Lightroom Tips for the Develop Module – the Magic Alt Key
    • Comparing Images with Lightroom 5’s Survey View

    The post Processing an Image in Lightroom 5 – a Video Tutorial by Paul Burwell appeared first on Digital Photography School.


    Digital Photography School

  • Weekly Photography Challenge – What Floats Your Boat?

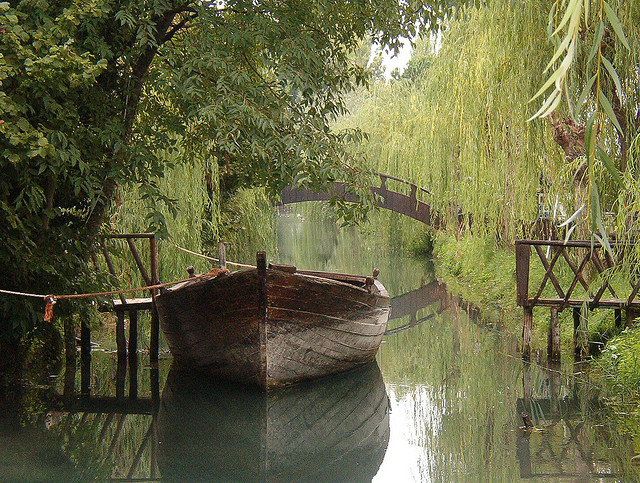
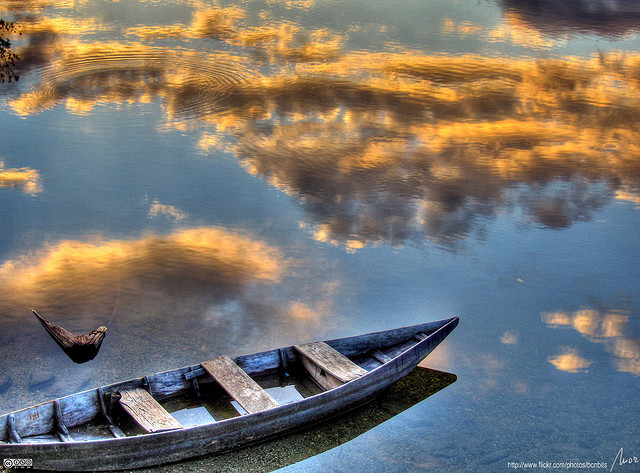
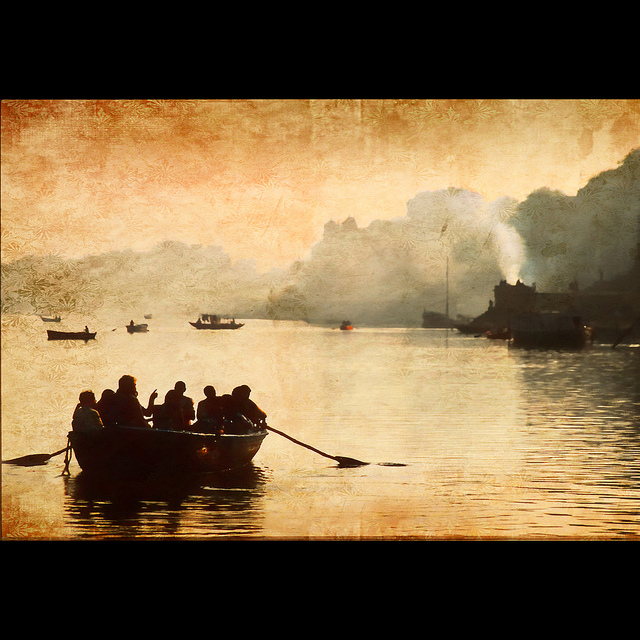
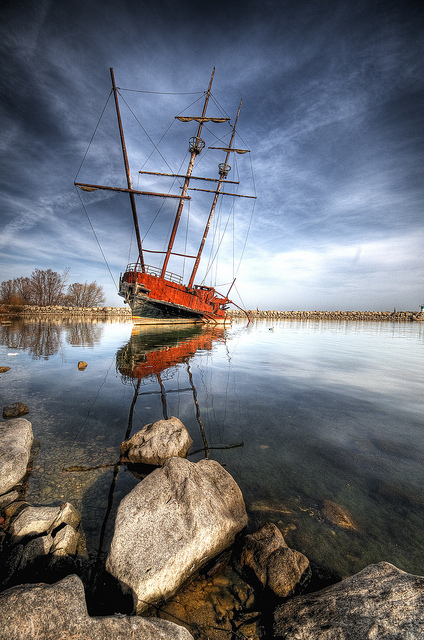
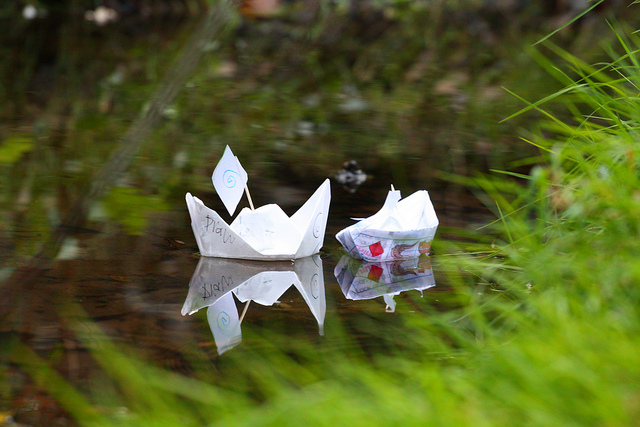
    Earlier today I shared some fabulous images of boats – all sizes, types, and colours.

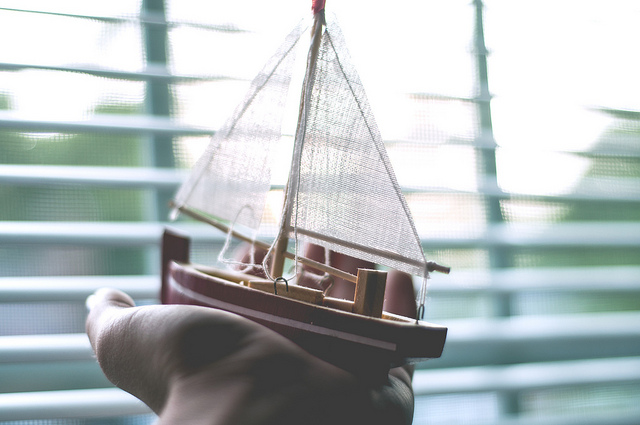
    Now it’s your turn. Show us your best boat images for the weekly photography challenge. Even if you don’t live near the ocean or large body of water, try something creative. What about a toy boat in the bathtub?

    Winter got you snowed in? How about the antique store where they have boats in bottles!

    Think outside the box . . . or bottle, and show us your boats! Here’s couple more images to get you started. The first two are even my own images, just to show you I can do challenges too!

    By Darlene Hildebrandt (yup my image)

    By Darlene Hildebrandt

    By Moyan Brenn

    By Adrian Berg

    By Steve Wall

    By Alan Bruce

    By mjtmail (tiggy)

    Share your boat images!

    Simply upload your shot into the comment field (look for the little camera icon in the Disqus comments section as pictured below) and they’ll get embedded for us all to see or if you’d prefer upload them to your favourite photo sharing site and leave the link to them.

    The post Weekly Photography Challenge – What Floats Your Boat? by Darlene Hildebrandt appeared first on Digital Photography School.


    Digital Photography School

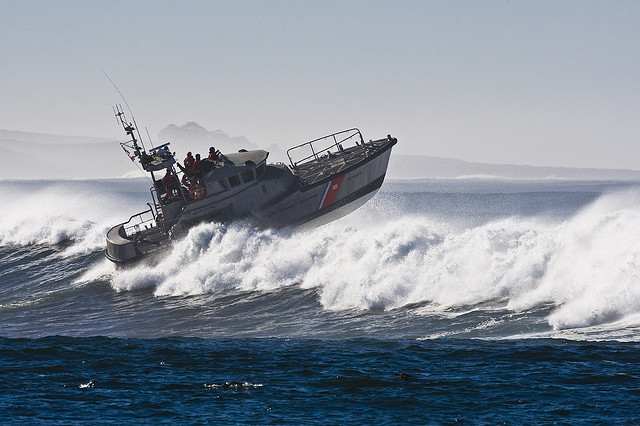
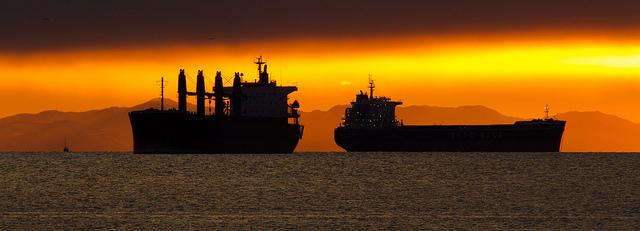
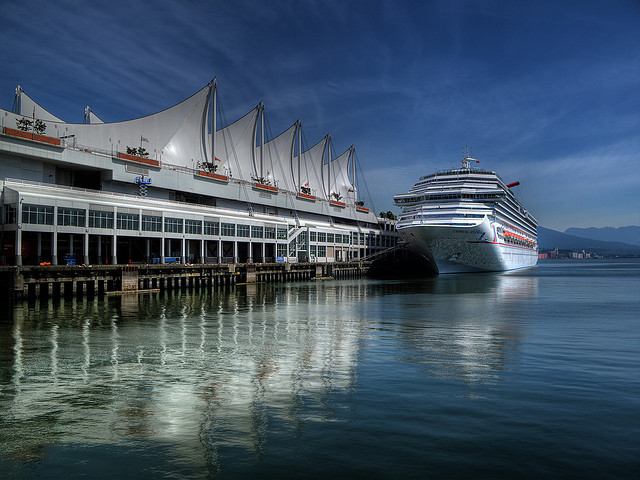
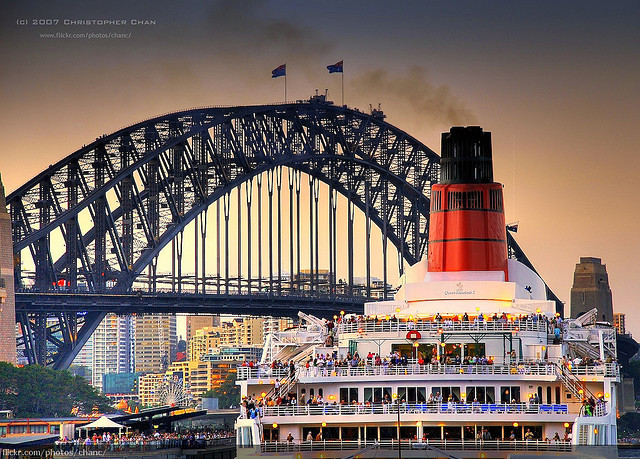
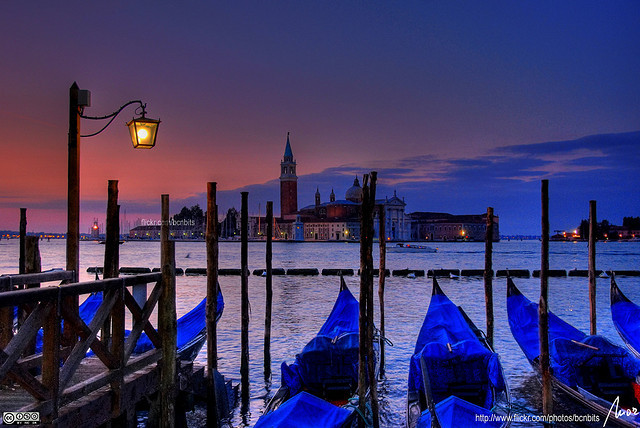
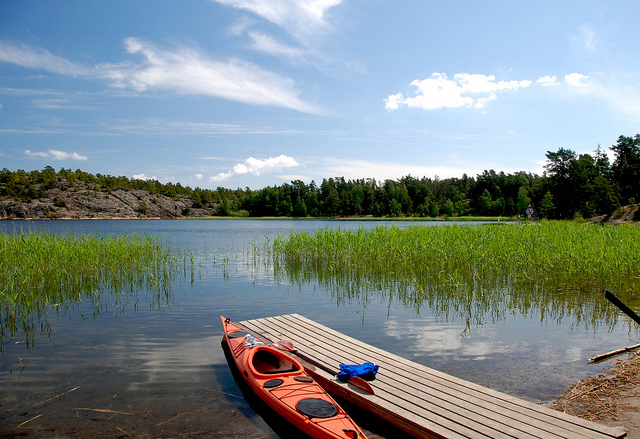
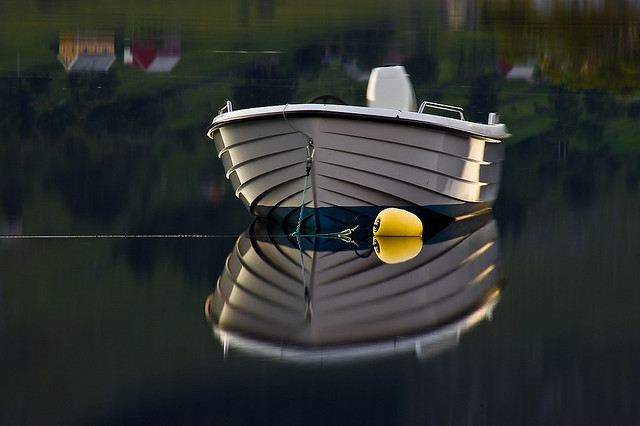
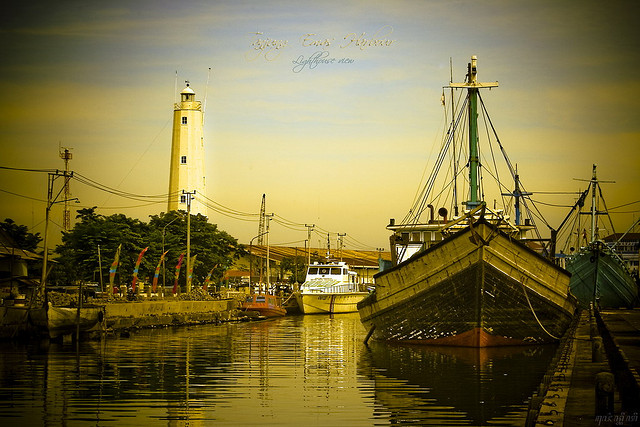
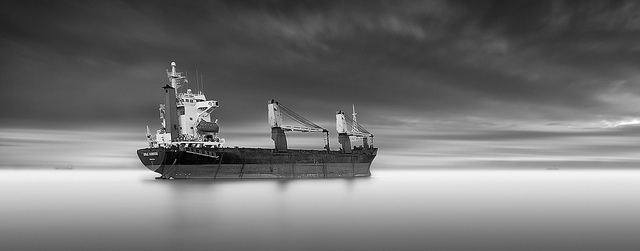
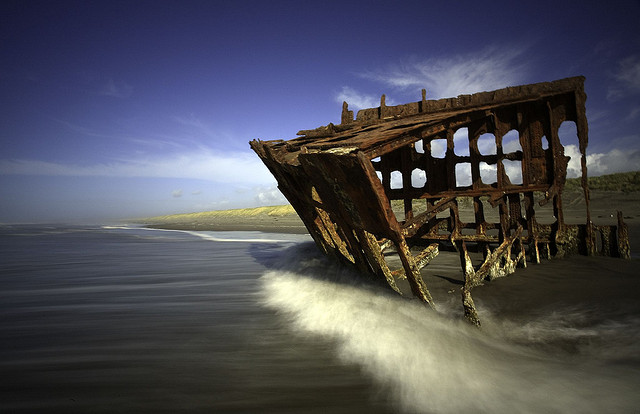
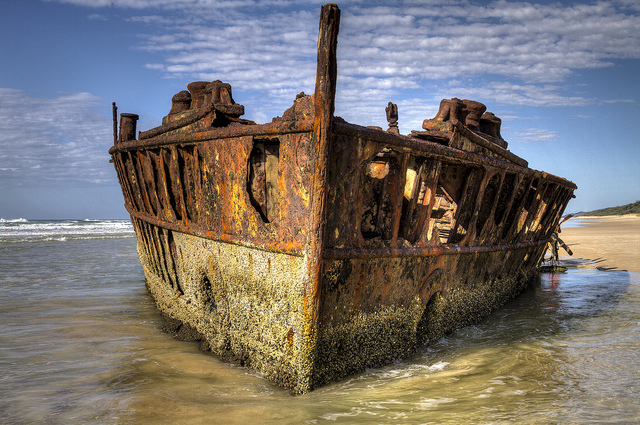
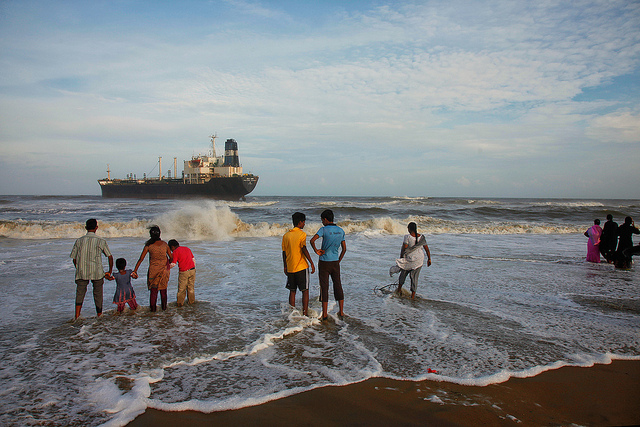
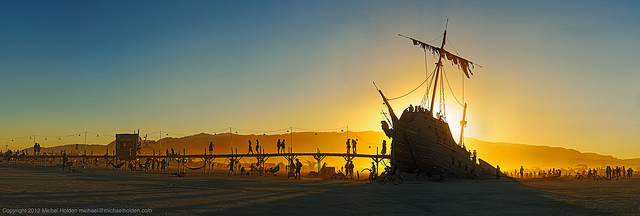
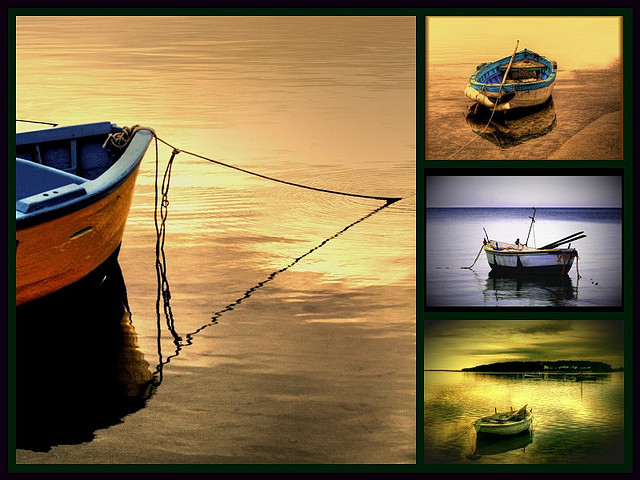
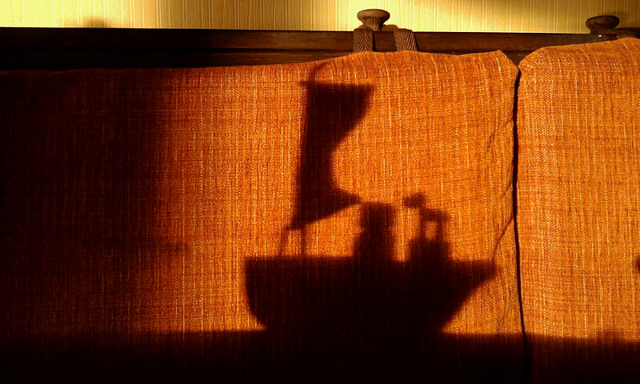
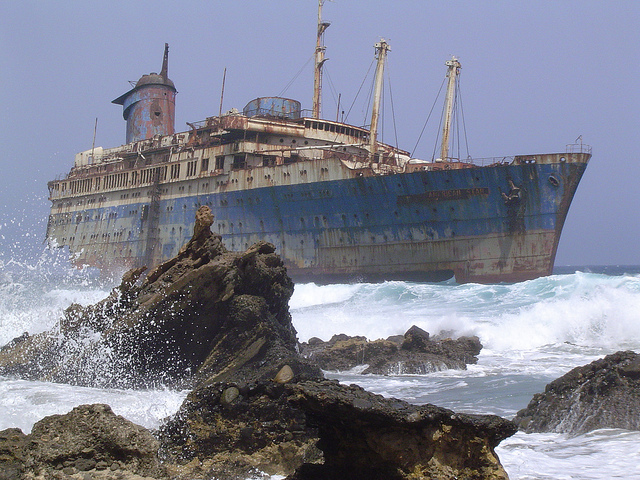
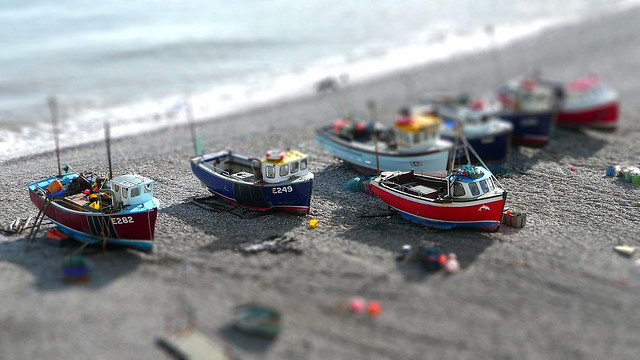
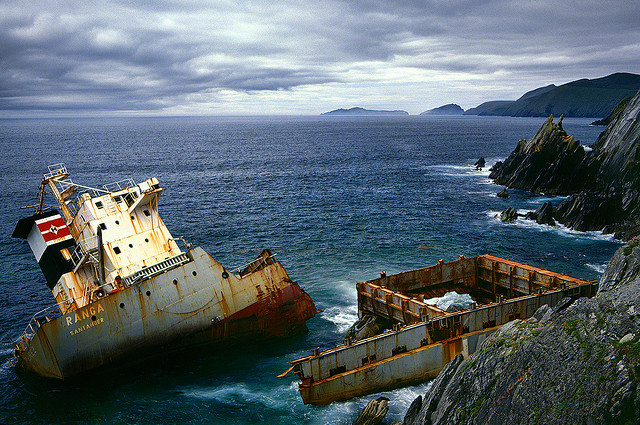
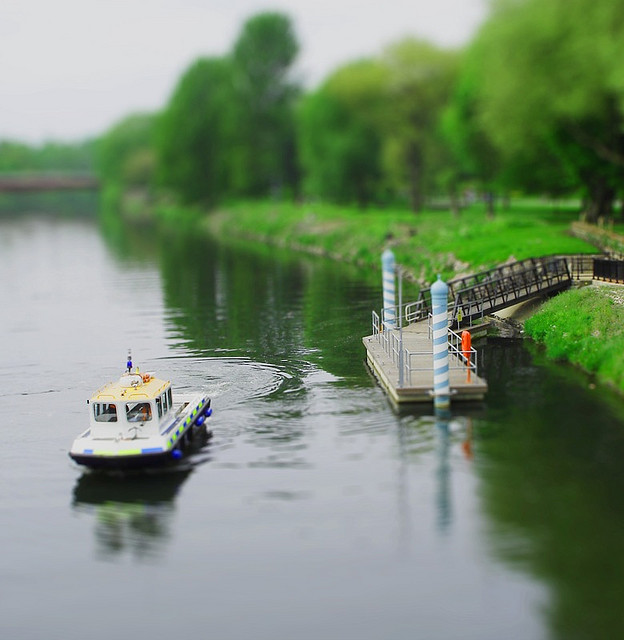
  • 39 Stunning Photos of Boats

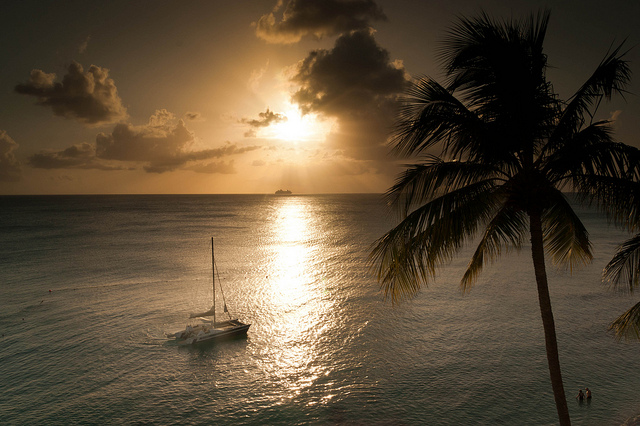
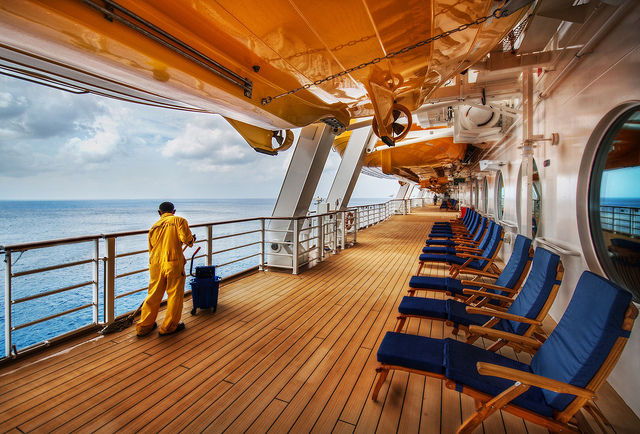
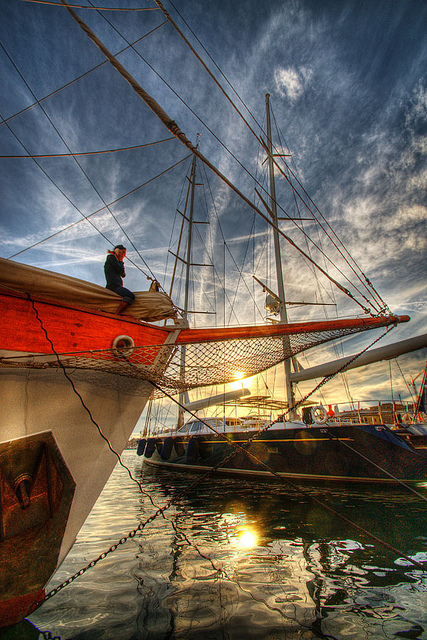
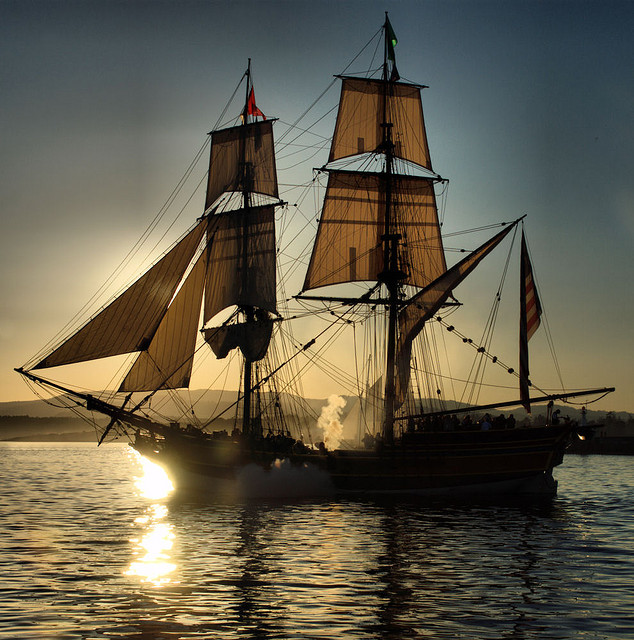
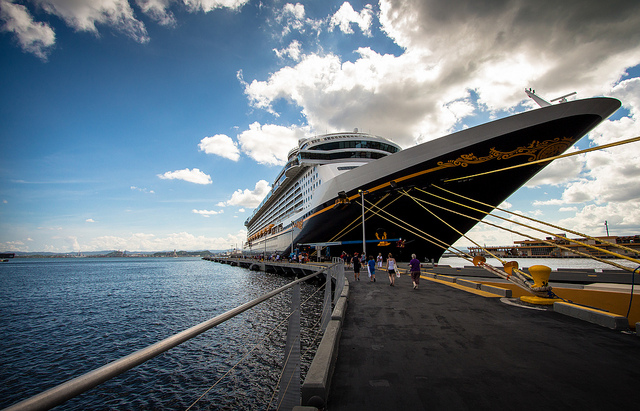
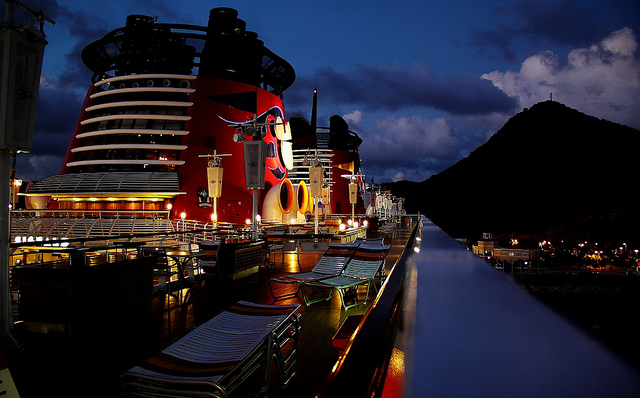
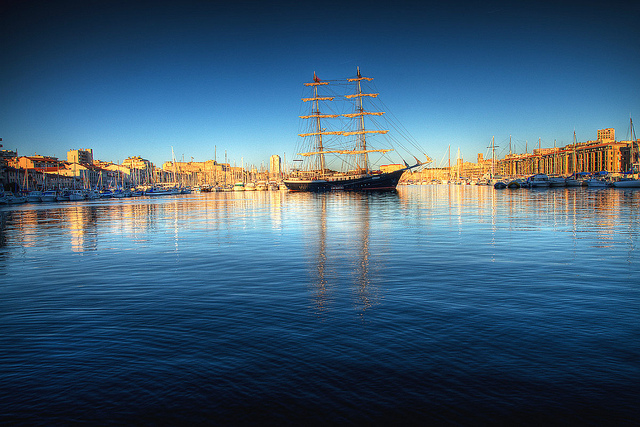
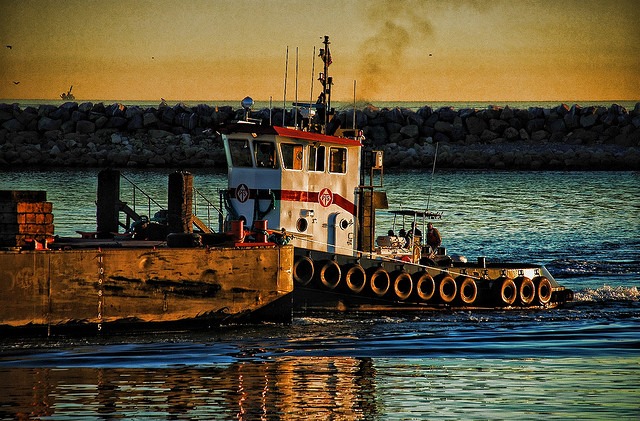
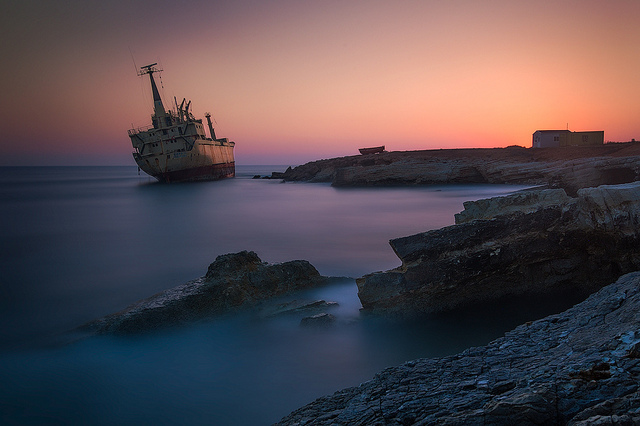
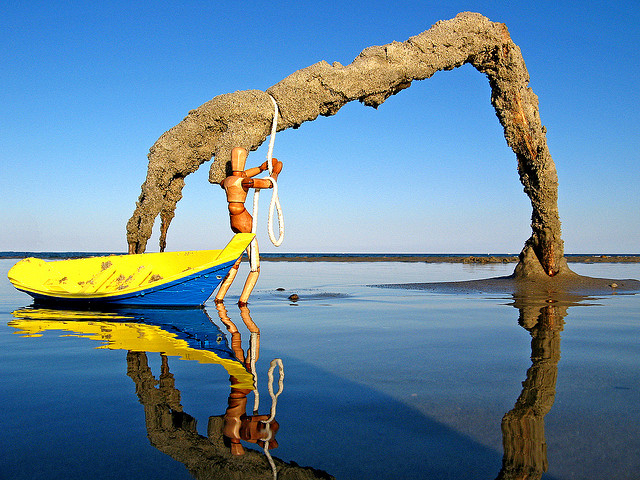
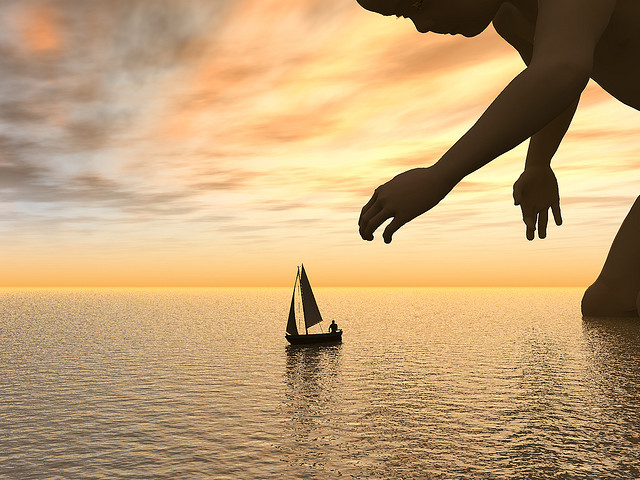
    So in a shift of gears this week after 3 weeks of portrait oriented challenges and inspiring images, this week I’m featuring 35 stunning photos of boats.

    The ocean is a place of peace and turmoil. Boats can be on the water or dry docked. Big boats like cruise ships, and small ones like toy boats. They’re all here.

    Enjoy!

    By Riccardo Cuppini

    By MorBCN

    By zev

    By Nick Kenrick

    By John Ryan

    By Mike Baird

    By Jason Mrachina

    By Evan Leeson

    By Christopher Chan

    By MorBCN

    By Let Ideas Compete

    By Jesper Hauge

    By hendra nugraha

    By Greg McMullin

    By Trey Ratcliff

    By marcovdz

    By Jeff S. PhotoArt

    By Steve James

    By Scott Smith

    By Scott Smith

    By marcovdz

    By Wendell

    By Casete

    By drwhimsy

    By Geee Kay

    By Vinoth Chandar

    By Michael Holden

    By Jon Martin

    By Cinzia A. Rizzo

    By Erich Ferdinand

    By Michael Donovan

    By Ian Usher

    By josullivan.59

    By Oliphant

    By Send me adrift.

    By John Morgan

    By Tomasz Huczek

    By matt

    By Hans Kylberg

    The post 39 Stunning Photos of Boats by Darlene Hildebrandt appeared first on Digital Photography School.


    Digital Photography School

  • Infamous Examples of Really Bad Edits You Could Do to Your Pictures

    Post-processing can be a great tool to improve your photography, whether you do it step-by-step, use Photoshop actions, Lightroom presets or any other product (or app!) for enhancing your images. Retouching a photo is the last step in creating a good photo, and it adds that last touch of the artist. But when is retouching too much? The type and amount Continue Reading

    The post Infamous Examples of Really Bad Edits You Could Do to Your Pictures appeared first on Photodoto.


    Photodoto

  • How to Simplify and Improve Composition with Normal or Long Lenses

    Telephoto lenses and composition

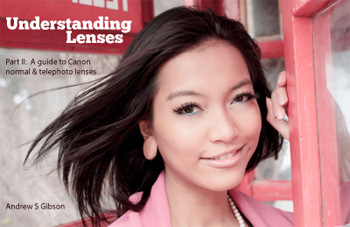
    Andrew S. Gibson is the author of Understanding Lenses Part II: A Guide to Canon Normal & Telephoto Lenses, special deal on now 40% off at Snapndeals for a limited time only.

    Wide-Angle Lenses

    A potential issue with wide-angle lenses is that you try to include too much information in the frame. It takes real skill to create a strong composition with lenses that have a wide field-of-view. It is easier with normal and telephoto lenses, because you can utilise their narrow field-of-view to compose strong yet simple images with little in the background to distract the viewer.

    Let’s take a look at how that works:

    Field-of-view diagram

    Angle of view from a wide-angle lens (left) and long lens (right)

    This diagram shows the difference in field-of-view between a wide-angle lens (left) and a telephoto lens (right). You can think of a wide-angle lens as a lens of inclusion: it enables you to fit a lot of the scene in a photo. You can get close to the subject and still fit in a lot of the background.

    The telephoto lens is a lens of exclusion. You don’t get so close to your subject and there is less in the background.

    Here are a couple of examples:

    Portrait taken with wide angle lens

    I took this portrait using a wide-angle lens (24mm on a full-frame camera). I was able to get fairly close to the model and still include a lot of the background.

    Portrait taken with telephoto lens

    This portrait was taken using a short telephoto lens (85mm on a full-frame camera). I was able to get in close and exclude most of the background. The effect is emphasized by placing the model against a dark background.

    This effect seems to kick in at around 50mm on a full-frame camera (the equivalents are 35mm on an APS-C camera, and 25mm with the micro-four thirds format). Here’s a photo taken with a 50mm lens on a full-frame camera to illustrate:

    Photo taken with a normal lens

    This means that you can use this technique to simplify composition even if the only lens you have is a kit lens. Just set it to the longest focal length and move in closer to your subject.

    There are other ways to simplify composition – you can’t rely just on focal length:

    1. Pay attention to the background. Does it contain bright highlights or anything else that pulls attention away from the subject?
    2. Are the colours in your photo harmonious? If the colours don’t work well together this can also weaken the composition.
    3. Experiment with depth-of-field. Using a wide aperture helps simplify composition by throwing the background out of focus. This works best with prime lenses as they have wider apertures than most zooms.
    4. Move in as close as you can to the subject. One of my favourite techniques is to use a close-up lens (it’s called a lens but looks like a filter and screws to the front of your lenses the same way) to reduce the minimum focusing distance of my 85mm lens and get in really close. Another benefit is that depth-of-field becomes narrower in close up photography, helping create images with beautiful bokeh.

    Here’s an example taken with an 85mm lens fitted with a Canon 500D close-up lens:

    Photo taken with 85mm lens plus close-up lens

    What are your thoughts? Do you use normal or telephoto lenses to simplify composition the same way? What are your favourite focal lengths? Let us know in the comments.


    Understanding Lenses Part II: A Guide to Canon Normal & Telephoto Lenses

    Understanding Lenses ebookMy ebook Understanding Lenses Part II will teach you how to get the most out of Canon’s normal and telephoto lenses. It contains a buying guide, takes a deep look at aperture and bokeh, and shows you how to focus accurately with telephoto lenses. It’s now 40% off at Snapndeals for a limited time only.

    The post How to Simplify and Improve Composition with Normal or Long Lenses by Andrew S. Gibson appeared first on Digital Photography School.


    Digital Photography School

  • Tips for your Next Adventure Photography Trip

    Many landscape photographers’ love for wilderness, drives them to venture far in search of wild and remote locations. The lure of solitude and unfamiliar scenery motivates many to photograph far off the beaten path. Adventure photography at it’s best.

    Backpacking, rafting, canoeing, trekking, climbing, and other self-propelled modes of travel are a few of the ways these remote locations are accessed and used. Those adventures are often with other people and the rewards can be stunning scenery, wildlife, and of course: the wilderness experience.

    On a canoe trip with my son we discovered this campsite on the shore (see image below). Earlier in the day I photographed the mountain reflecting in the lake before realizing the setting would make for a stunning photograph of a camp scene.
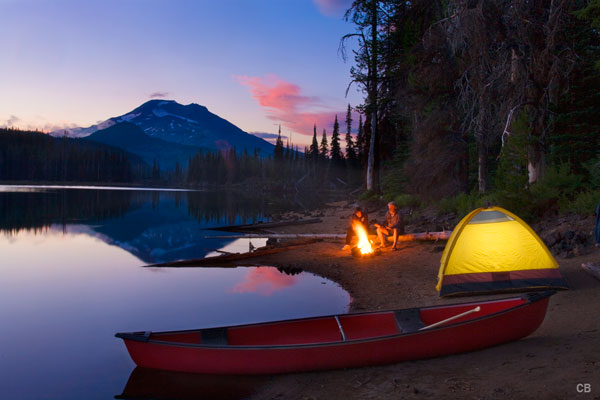
    Sparks lake oregon

    ISO 100, f/16, ½ second – Sparks Lake, Oregon

    That experience is one reason many of us photograph! We photograph because we want to tell a story about the place we visited, what we saw, and how it looked. We do this by capturing wide views,long views and intimate details to create stunning nature images.

    PHOTOGRAPHY IS AN ADVENTURE – PHOTOGRAPH IT

    Photographing the landscape may be the sole purpose for some photographers heading into the wilds, but there might be another story that is often overlooked: the adventure itself. There are many photo opportunities from the scenery to the human experience that tell the story of a successful wilderness photo trip.

    PLAN AND PREPARE BEFORE THE TRIP

    Getting into the adventure mindset starts with pre-trip planning and determining a story line.

    • What is the trip about?
    • Who is going?
    • Will there be any specific events to plan for in advance?

    Whenever I am preparing for an adventure I try to think like a National Geographic photographer. Their job and goal is to tell the story in pictures, in unique ways, and so is mine.

    I have rafted many rivers including the Grand Canyon three times and each trip had a different group, with unique dynamics. To capture great storytelling images of an outdoor adventure, start by simply observing the other participants’ behaviour at the beginning of the trip. What will they do on the trip? Kayak, hike, climb, read, play music, or anything that you can observe and then plan to later photograph.

    Next, I develop a list of photo ideas to reference during the trip. Most trip participants are not committed photographers like me, so it’s not hard to capture great images of them pursuing their interest and enjoying the adventure.

    While I will photograph the scenery, all the activities like hiking canyons, cooking meals, sitting around the campfire, swimming in the waterfalls, dealing with physical challenges, and whitewater rafting through some of the biggest rapids in the U.S., are all on my mental shoot list.
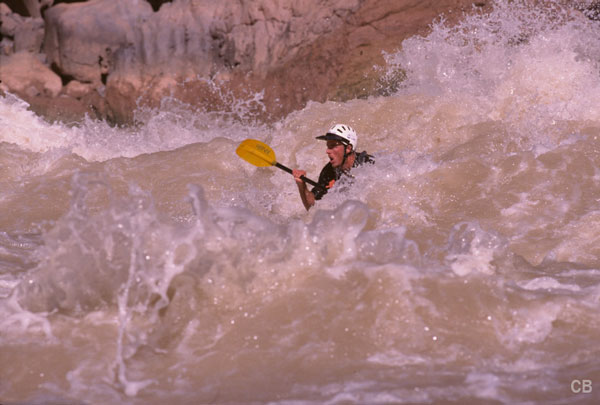
    Kayak grd cyn lava falls rapid 0001

    ISO 100, f/5.6, 1/1000 – Grand Canyon Lava Falls Rapid

    PACK THE RIGHT GEAR

    Besides pre-planning the photo ops, I also plan the equipment and other gear I will need. For rafting trips I will take mostly the same gear as any other trip (when it comes to basic camera gear) keeping in mind limited space. But because it is a trip based around water I also take waterproof devices for the camera gear including Pelican cases, an underwater camera housing, and military ammo cans for accessories.

    On a magazine assignment years ago, I took a horse pack trip into Hells Canyon in Oregon. The focus this time was on the outfitter himself, a cowboy (see image below, right) who ran backcountry horse trips and was also an elected official holding public office. The focus of the photography was the trip he was leading and included landscape imagery, the horses and horse packing, and the guests enjoying the wilderness adventure. I captured the adventure while the writer wrote about the politics. For my camera gear, I wore a hip pack for easy access to my camera while on horseback, while my camera backpack and tripod were tied down on a pack horse. Plan to take the right gear for the adventure.

    During your pre-trip planning, start with some research on where you are going and observe how other photographers have photographed a similar trip. Make a list of the obvious: who, what, where, when, and how. This will remind you during the trip of images you had planned to capture when illustrating the story line.
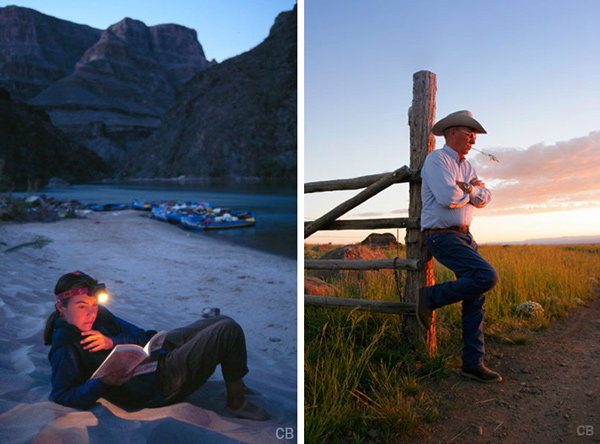
    Adventure photography people

    Left: ISO 100, f/8, 1 second – reading by headlamp
    Right: ISO 100, f/8, 1/30th – rancher Steens Mountain, Oregon

    The woman above was always writing in her journal or reading in the evening, so I asked her to pose and read a book. (see image above, left)

    SHOOT THE ORDINARY BUT SEEK THE EXTRAORDINARY

    People are the key to telling adventure stories. It is images of their behaviour and how they interact with the wilderness adventure that communicates to the viewer just what the trip was about. Photos showing their highs and lows, their pain and their exuberance, how they overcome a physical challenge, all convey a sense of adventure.

    As the adventure progresses you will develop a sense of how things are moving, what people do for activities, and where and when you can setup photo ideas from your to do list. I then suggest you ask people to pose in a storytelling scenario that ideally appears natural and un-posed. Posing can be a challenge to make look real, but by suggesting to the people to just ‘be themselves and read a book’ for example often results in a more natural pose. Other times, work like a photo journalist by keeping your camera in hand and ready to capture spontaneous moments which often lead to powerful storytelling images.
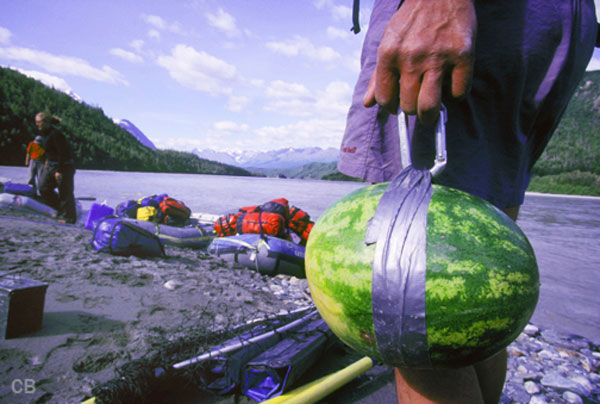
    Alaska Raft Copper River 5

    ISO 100, f/8, 1/200 – Alaska river guide

    Photographing an Alaskan rafting trip, I was intrigued when I saw the river guide carrying this watermelon and in particular, his method of insuring we would not lose the fruit that went with tonight’s dinner. I asked him to stop and hold still.

    VISUAL APPROACHES

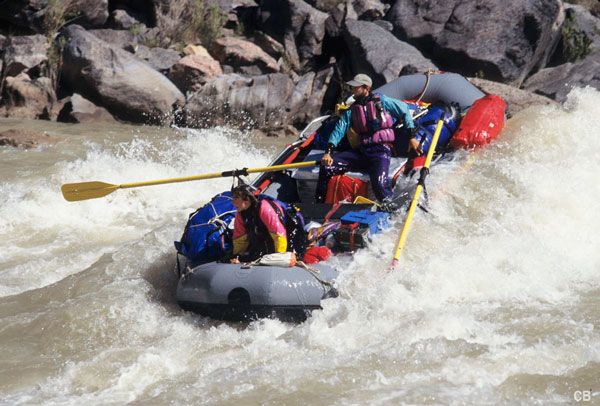
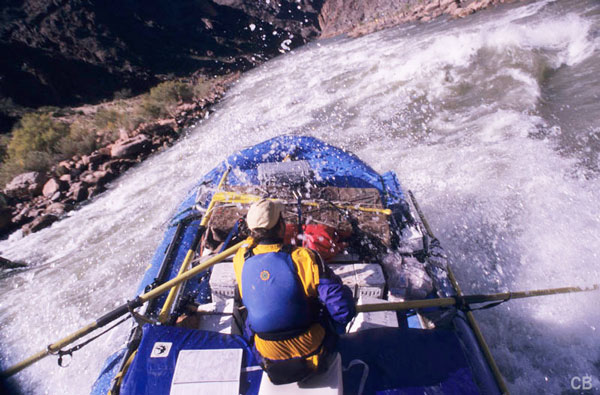
    Look up and down and all around when choosing your camera angles and storytelling compositions. I describe the two approaches I use as Observer and Participant. The photographer as Observer captures the activity as it happens, from the sidelines. The Participant photographs the action while being a part of it. The difference is the Observer captures views easily seen by anybody while the Participant captures views more difficult for everybody to see.

    This is an angle photographed as an Observer from the river bank and while effective, was easy to capture the action and the setting.
    Rafting grand canyon 002

    ISO 100, f/5.6, 1/1000 – Rafting Grand Canyon, Observer viewpoint

    This point of view photographed as a Participant, from within the boat, is very powerful; allowing viewers to feel like they were along for the ride as the boat was tossed around in the waves.
    Gr cyn hermit 4

    ISO 100, f/8, 1/250 – Participant viewpoint

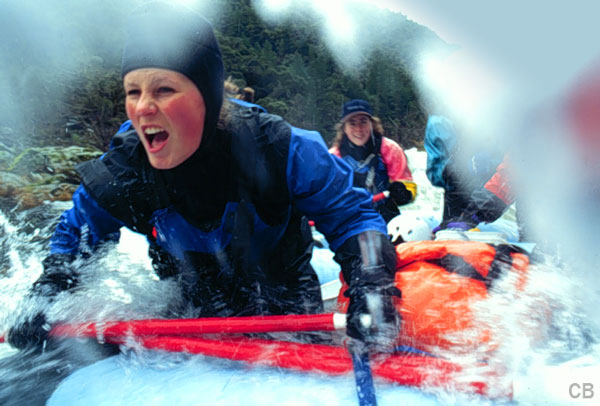
    The advantage for the photographer as Participant is capturing angles of the activity as though the camera was their eyes. Images shot from this approach give the viewer a perspective that can make them feel as if they are immersed in the action. A rock climber taking a photograph of the climber below them offers a unique perspective of what it is like to be on the rock wall. A view that the casual observer would not see without climbing the wall.

    Rafting on a winter day with intermittent snow, I was positioned in the front of the raft when a wave came over the top of me and this paddler’s expression shows her bracing for impact.
    Rogue erica yell

    ISO 100, f/5.6, 1/60th – Participant viewpoint

    ISOLATE AND ILLUSTRATE

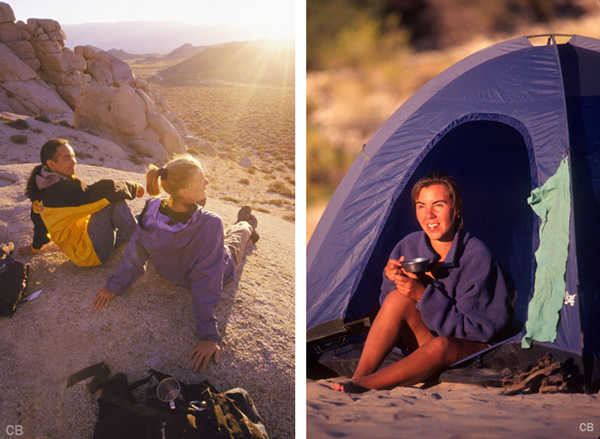
    Another effective visual approach in telling the story is to ‘isolate and illustrate’. Isolate refers to a subject isolated in the composition. They are the sole or dominant subject in the frame; the story is all about them and what they are doing. Nothing else visually is needed. These photos usually say ‘who and what’.

    Here, a woman enjoying her coffee at sunrise was isolated in the composition using a telephoto lens, shot from the other side of the camp. The visual story is her and her camp. (see image below right)
    Adventure photography sunrise tent

    Left: ISO 100, f/8, 1/320th – sunrise
    Right: ISO 100, f/5.6, 1/1000th – morning coffee

    Captured on a 10 day climbing and photo adventure, the image above left, was shot during a hike up to watch the sunrise and it tells a story that the day is beginning. From the sun flare on the lens to the large view, this image clearly Illustrates the story of where they are and when.

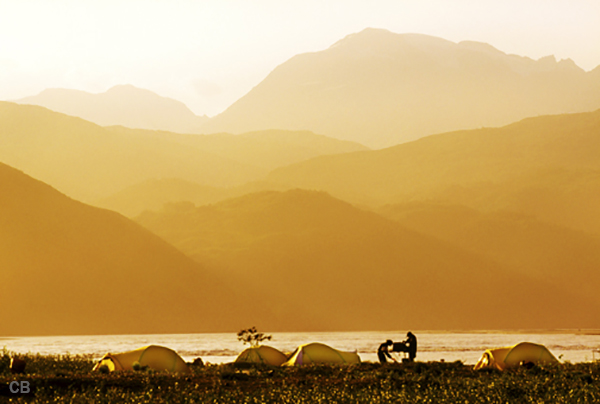
    The illustrated approach to a storytelling composition could be a subject much smaller in the scene in comparison to their surroundings. It’s a great approach for giving viewers the big picture and a sense of scale to the overall scene. An Illustrated image says ‘what and where’.

    The example below of the illustrative approach shows a camp set among large mountains and the river. It tells the story differently by showing the size relationship between the subjects and background providing a sense of scale to the scene.
    Alaska copper river camp 2A

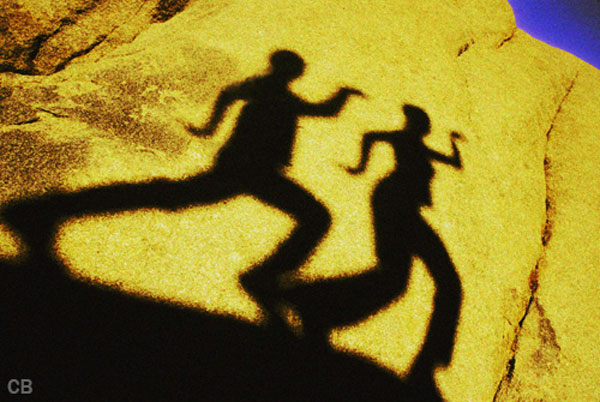
    As we were hiking back to camp, I noticed the shadows on the rocks and stopped and asked them to try various poses like a high-5 and dance on the rocks.
    Egyptian shadow

    ISO 100, f/11, 1/125th

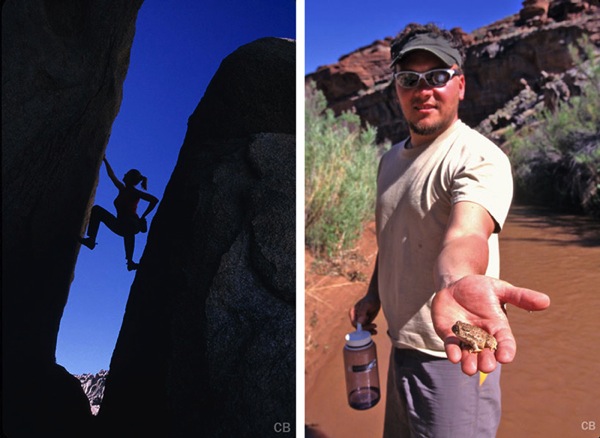
    Captured later in the afternoon, I used the Isolated approach to the composition showing the climber between the rocks. This created an image that’s all about her and what she is doing. (below left)
    Adventure photogrpahy buttermilks climbing

    Hiking with a group in Utah, one hiker spotted a small frog near a pool or water and picked it up to show it. The wide angle, up-close angle tells the story of humans interacting with nature (above right).

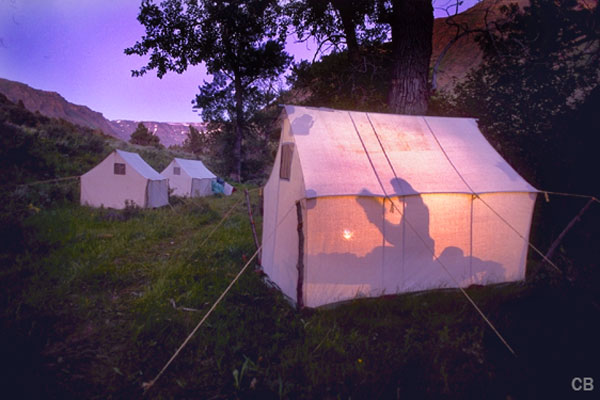
    You can also create storytelling images by adding lighting to further tell that story. Here, one of my preconceived ideas was someone reading in this comfortable wilderness cabin tent. I asked them to sit on the bed and read a book, then placed my flash behind them so it placed a shadow on the tent that told the story.
    Shadowed figure reading inside tent

    ISO 100, f/8, 2 seconds

    Finally…

    There is always a story to be told from any photographic adventure and if you plan to go on an expedition of any kind, large or small, plan to photograph more than just the scenery. Here are a few steps to prepare:

    • Plan ahead of time to make sure you have the right equipment for the adventure.
    • Research the type of trip you are prepping for by looking at other images and methods photographers use to document the same trip. Use those for motivation.
    • Let the story line you thought of be a starting point to determining the images you want to capture.
    • Keep your mind open to other ideas beyond those on your shot list. Often the best images were not on your to-do list.
    • Think like you are on a magazine assignment and work hard to capture the whole story in your own unique way.

    In the end you want your story in pictures to leave viewers feeling a great sense of what the trip was like, what was experienced, and how it might have felt to have been a participant.

    Have you been on any adventures? Do you have any other tips to share? Please do so in the comments below.

    More reading on outdoor photography:

    • Your Compete Guide to Outdoor Photography – Part Two
    • Your Complete Guide to Outdoor Photography – Part One
    • Winter Photography Tips | Bendy straws and Ziploc bags?
    • Living Landscapes a dPS ebook
    • 11 Tips For Eco-friendly Trail Photography

    The post Tips for your Next Adventure Photography Trip by Charlie Borland appeared first on Digital Photography School.


    Digital Photography School
  • How to Make a Signature Brush in Photoshop

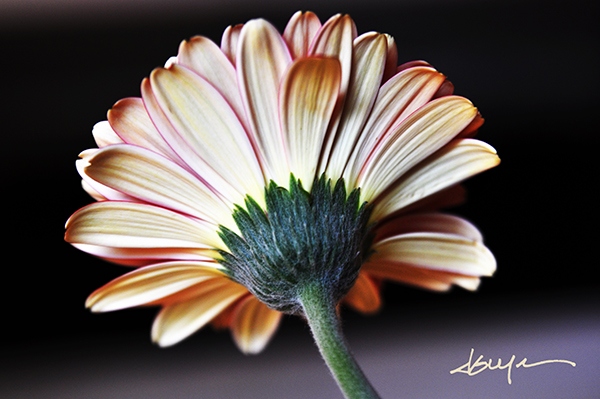
    photossop-signature-brush-dps-001

    The decision of whether to watermark images posted online is a frequent topic of debate. Proponents say it’s an added measure of security–a notice to would-be image thieves that the photographer takes his or her copyright seriously and will defend it like a mama lion protecting her cubs. Others point out that watermarks are distracting, clients don’t like them, and unscrupulous people with decent editing software can make that watermark disappear in the blink of an eye, so what’s the point? Regardless of where you come down on this issue, sometimes you just find yourself wanting to make sure the world knows that you took the photo.

    There are a lot of ways you can do this, but I find most of them to be rather cumbersome. You can create a watermark and save it in various file formats, but that means opening  the file and dragging it onto your image each time you want to use it. Chances are that you’ll have to resize it and/or adjust the opacity for every image. I also tried it as a custom shape tool for a while, but that too was an inefficient way of accomplishing what should have been a pretty basic task. I eventually figured out how to create a signature brush in Photoshop, finally finding my perfect solution. I should point out, that I’m one of those people who has pretty much thrown in the towel when it comes to online watermarking. If someone really wants to steal my image, they are going to find a way to do it–with or without a watermark. I do, however, like adding my signature to some of my fine art images.

    While I’ve outlined the steps for creating a brush of your signature, the same steps will work for making  a brush of your logo.

    Step 1 – Sign Your Name

    Use a plain white sheet of paper and a fine point Sharpie. The Photoshop part of the process will go much easier with the heavier lines of the marker, but you should also scribble out your signature a bit larger than you ordinarily would. Once your signature looks right, scan it at a high resolution and save the JPEG to your computer. You can try taking a photo if you don’t have a scanner, but fill the frame and make sure that your lens is as parallel to the paper as possible.

    photossop-signature-brush-dps-002

    Thicker, bolder lines from a marker will make creating the brush easier, yet still give the signature a normal appearance when applied to an image.

    Step 2 – Open, Zoom, and Select

    Once you open your signature in Photoshop, zoom in nice and tight. Using the magic wand tool (keyboard shortcut W), click on the signature to select it. You should immediately see the “marching ants” flashing across the outline of your signature. If the tool fails to select the entire signature, press and hold the Shift key while you click on parts of the signature that were missed the first time. Since my signature has a break in it, I had to add the second segment with an extra click of the selection tool. You can also right-click and select “Similar” from the context menu, but I find that the shift-click is quicker and more accurate.

    photoshop-signature-brush-dps-003

    The Magic Wand tool shares its spot in the tools palette with the Quick Selection Tool. Make sure you select the correct one.

    Step 3 – Save It and Name It

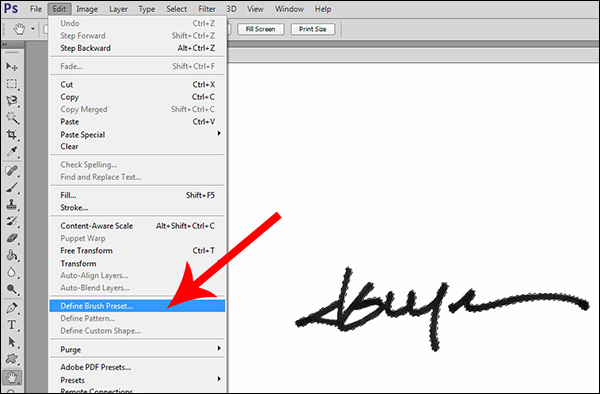
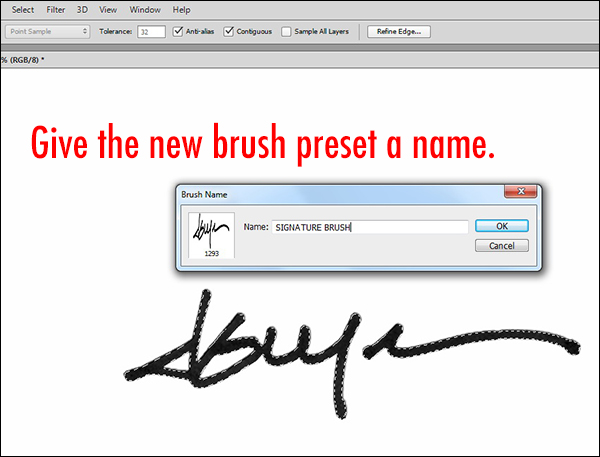
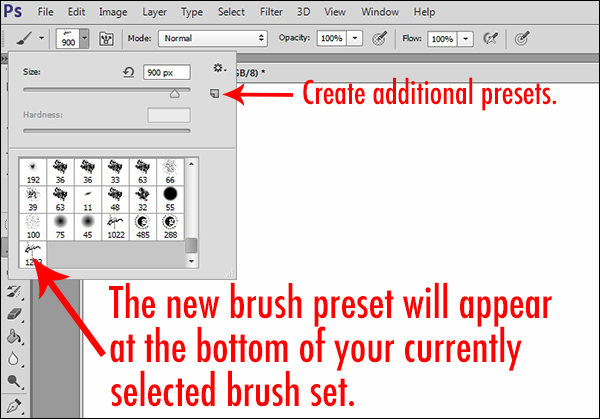
    Once the complete signature is selected, click on the drop-down Edit menu at the top of the window. Clicking on Define Brush Preset will open a dialog box showing a thumbnail of your new brush. Give the brush a name and click “OK.” This will save the brush at its current dimensions in your current brushes set. You can check it by selecting the brush tool (keyboard shortcut B) and opening the preset picker (second drop-down menu from the left at the top of the window). Your new brush will appear at the bottom of the brush set.

    photoshop-signature-brush-dps-004

    The Define Brush Preset command appears in the drop-down Edit menu.

    Finding your signature in the brushes palette will be pretty simple, but give it an easy-to-remember name, just in case.

    Finding your signature in the brushes palette will be pretty simple, but give it an easy-to-remember name, just in case.

    Step 4 – Customize It

    Due to the over-sized signature that we used to create the brush, our new brush is way too big for tastefully marking a photo.  You can adjust the size within the brush panel, but there is a faster, easier way of doing it right from the keyboard. The right and left bracket keys — [     ] — can be used to adjust the size of the brush. The right key makes it bigger, and the left makes it smaller. You can either create a second preset at a more manageable size, or simply use the bracket keys to make quick size adjustments for each photo as necessary. The preset picker contains a small square icon on the right side. Clicking it will open a dialog box that will allow you to save the new preset at its new size. It’s also worth noting that–just like any other brush in Photoshop–you can change the color and opacity, as well as the hardness or softness of the edges.

    You can further customize the brush by saving another preset with variations of size, color, and opacity.

    You can further customize the brush by saving another preset with variations of size, color, and opacity.

    I find that the best use of this brush is small and subtle, with enough contrast for it to be noticeable, but not too distracting. I usually select a color or shade from within the image to help the signature appear more organic and less out of place. You should also experiment with adjusting the opacity of the brush until you find a combination that suits you.

    The post How to Make a Signature Brush in Photoshop by Jeff Guyer appeared first on Digital Photography School.


    Digital Photography School
  • Landscapes Photo Contest! Win One of Two – Year Long PRO Subscriptions from ViewBug!

    Over the last few years here at dPS, we’ve run some very popular competitions, and this month will be no different!

    This month we are working with one of our newest partners – ViewBug – to give away to lucky dPS readers, full access to their Photo Contest and exclusive discounts from photography based partners! ViewBug is an online photo contest community that provides the opportunity for photographers to share photos with chances to win prizes. With ViewBug, everyone can get an opportunity to be discovered!

    ViewBugAvatarViewBug is a community where you can participate in photo contests with cool brands, awesome community of judges, and gain recognition and exposure.

    For this photo competition, ViewBug is giving away Two Year Long PRO Subscription!

    These prizes are designed to allow photographers full access to participation and voting in all of the ViewBug Photography contests. Each will be won by a different dPS reader. Here’s what you could win:

    A Year Long PRO subscription to ViewBugs photography contests! A $ 139 Value!

    How to Win

    To win this competition you’ll need to:

    Visit the ViewBug/dPS Contest page here and upload your entry into the Landscape Photography Contest.

    Do this in the next 60 days and on May 5, 2014, ViewBug and its community of photographers will choose the best landscape photos. We at dPS will announce the winners in the following days.

    The deadline for entries is Wednesday, February April 26, 2014, Midnight PST. Entries placed after deadline will not be considered. Enter Here!!

    This competition is open to everyone around the world no matter where you live.

    Disclaimer: ViewBug is a paid partner of dPS.

    The post Landscapes Photo Contest! Win One of Two – Year Long PRO Subscriptions from ViewBug! by Darren Rowse appeared first on Digital Photography School.


    Digital Photography School
  • Top 10 Pet Photography Tips and Techniques

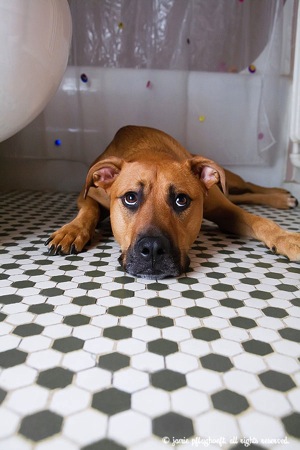
    Fergie bathroom copyright cowbelly pet photography

    Top 10 Pet Photography Tips and Techniques

    The pros make it look easy, but anyone who has ever tried to photograph an unpredictable creature like a cat or a dog knows it is anything but. Here are some pet photography tips that the pros use to help you ‘get the perfect shot’.

    1. Relax

    Animals are like little emotional sponges, and if you are stressed and anxious, they will sense it and become stressed and anxious too. A stressed animal will give you ‘ears flattened’, ‘concerned eyes’ looks, which don’t translate well ‘on film’. Take a deep breath and remember to have fun with it!

    2. Focus on eyes and expressions

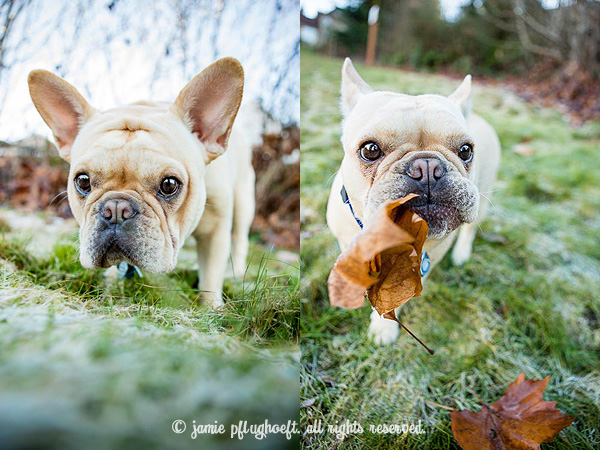
    Ozzie copyright jamie pflughoeft

    The eyes are the most expressive part of an animal’s face, so if you want to create really engaging portraits, focus on the eyes and facial expressions. A well-timed puppy whine (from you) can reel in focus in a puppy or curious dog, and have them staring straight at the camera faster than you can say “woof”.

    3. Get rid of clutter first

    Before you even pull your camera out of your bag, take a look around at your shooting location and get rid of clutter and distracting objects first. Do you really want to see that empty Starbucks cup on your coffee table in the photos of your cat? Is the garden hose snaking through the grass where you are photographing your dog, adding an aesthetically-pleasing element to your photos?

    If an element in your background doesn’t serve to enhance your images in some way, either remove it first or move to a different location. An uncluttered environment produces more aesthetically pleasing images, and reduces post-processing work. Nobody needs to see photos of your puppy with an overflowing garbage can in the background.

    Seamus copyright jamie pflughoeft

    4. Shoot in their world

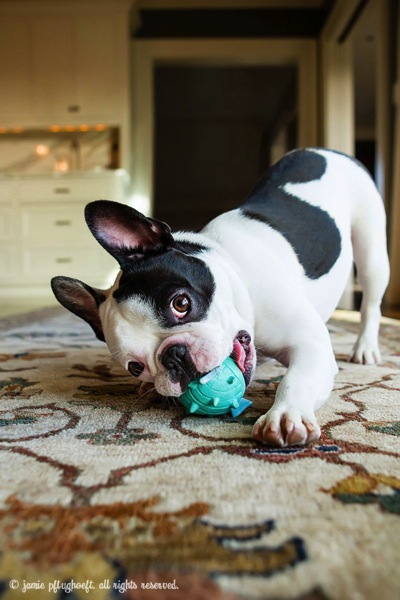
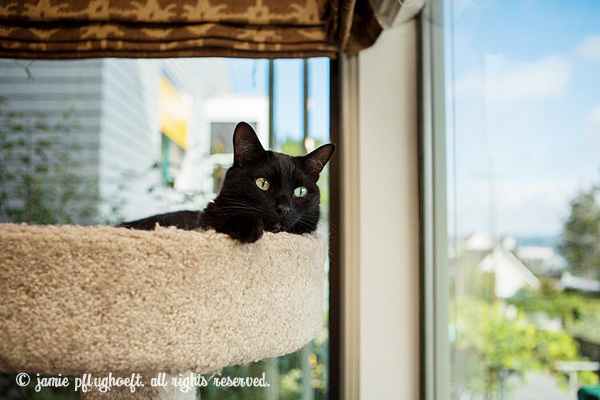
    While a few shots looking down at your pet, while you are standing can be cute – to create the really engaging portraits the pros make, shoot down at their level, ‘in their world’. For a Great Dane their world may be the height of your hips; for a Chihuahua it may be all the way down at the level of your ankles. For a cat lounging on a cat tree, you may need to pull out a step stool to get on their level. Practice ‘shooting from the hip’ to place the camera in their world without having to crouch or kneel if they are on the ground.

    Miles copyright jamie pflughoeft

    5. Be flexible and do some stretching first

    If you have ever watched a professional pet photographer in action, you will notice that they bend and twist and turn and crouch and crawl – whatever it takes to get the shot. Be prepared to get those muscles working in order to get the perfect composition. Sometimes all it takes for a dog to break their sit-stay is for you to go from sitting to standing, and it’s better to reach and lean, than make a large movement that will cause the pet to move from their perfect pose.

    6. Go where the light is best

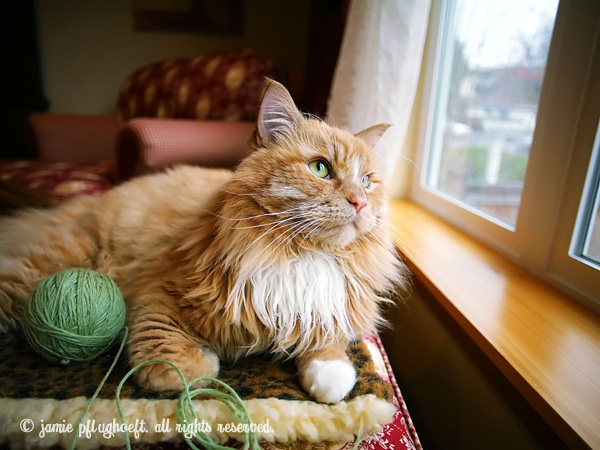
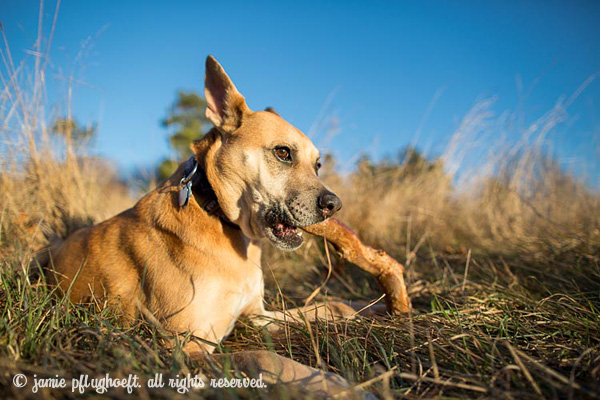
    Good light is everything in photography, especially in pet photography, where it’s critical to be able to see the catchlights in the pet’s eyes (the white reflective parts). Avoid photographing in dark rooms or under heavily overcast days. Bright yet diffused light is the easiest to create flattering pet portraits under, so before you even start shooting, take a look around your subject’s environment and determine where the best bright, yet diffused light is; then move to that location.

    Abbey copyright jamie pflughoeft

    7. Pay your model

    Every animal needs to have some sort of motivation to pay attention to you during the shoot; otherwise they will wander off and become disinterested. Determine what they are motivated by (i.e. their ‘payment’), and provide it to them throughout your shoot. For dogs it may be treats or toys, or simply getting love and affection. For cats it may be a feather toy, a paper bag, tuna fish, catnip or even their favourite blanket. For horses it may be their favourite food such as carrots or apples.

    The biggest ‘trick’ in pet photography is to fool the animal into thinking that they are making the decisions, when it’s really you that is motivating them to do what you want, without telling them so outright . The ‘getting them to do what you want’ comes in the model payment. Get creative when it comes to ‘rewarding’ your models, and they will reward you with great shots and be more cooperative too. Plus the shoot will be more fun, and pet photography is supposed to be fun!

    Penny copyright jamie pflughoeft

    8. Create a concept and a shot list

    The most engaging animal imagery shows them in context. It may be a cat looking up at an owner opening a bag of food in the kitchen (concept: desire), a dog looking longingly through a front door waiting for his or her buddy to come home (longing), a horse owner with her arms wrapped around her equine’s neck (connection). If you can say something with your images, they will speak to your viewers on a deeper emotional level.

    Charlie doughnuts copyright jamie pflughoeft

    9. Be quiet

    There is no quicker way to confuse a dog, or freak out a cat than to bark commands at them repeatedly. Cats will disengage or even leave the room, and dogs will become confused and concerned.

    Try communicating with the pets the way they do each other- nonverbally. Use hand signals or point to invite them ‘over here’. Use the sit hand signal for dogs that understand it. If you do need to say ’sit’, say it quietly and calmly, only once or twice. Avoid saying the pet’s name, because the more times they hear it during a photo shoot, the more inclined they are to tune out.

    In my opinion, there’s nothing worse than a photographer (and an owner), hovering over a little dog and saying “sit Charlie,… no- SIT. I said Charlie sit. Sit. Down! Sit Charlie. Charlie- sit. Siiiit. SIT”. Poor Charlie! No wonder he’s confused. The less talking and ‘commanding’ you do, the better the shoot will be, and the more little Charlie will pay attention and ‘listen’.

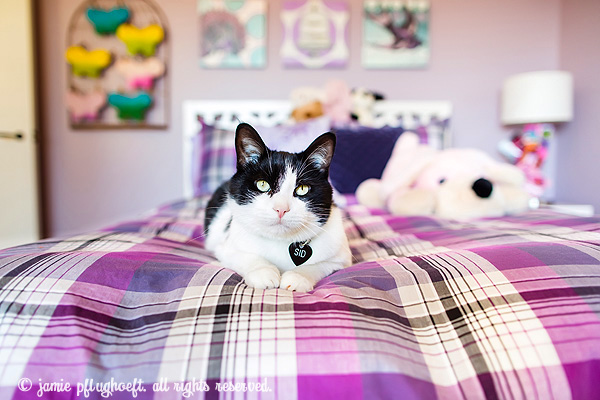
    Sid copyright jamie pflughoeft

    10. Move slowly

    Unless you are adept at documentary, on-the-fly, photography where the animal is moving a lot and you capture the perfect moment of them walking, sniffing, jumping, hunting, etc., learn to move slowly around them while taking their pictures. This is especially important with cats, who are prone to either radically change the expression on their face (and ears) at your slight movements, or split the scene altogether. This is also true of dogs that are in a sit or lay-stay position.

    When you shift position they sense you are off on a new adventure and want to follow you. If you need to move, and you don’t want your model to move, do so very slowly without making any eye contact. And remember to reach, bend, and lean. You’ll not only have a comical pet photography session, you’ll get a workout too!

    The post Top 10 Pet Photography Tips and Techniques by Jamie Pflughoeft appeared first on Digital Photography School.


    Digital Photography School
  • 8 Reasons We’re Looking Forward to Springtime Photography

    Ah, the changing of the seasons. For us photographers, most seasonal changes bring about opportunities to take great photos under differing conditions, and usually no change is more dramatic than the transition from winter to spring.  The world thaws into a new and color-dripped landscape, ripe for capturing its natural beauty through springtime photography. There is always an influx of Continue Reading
    The post 8 Reasons We’re Looking Forward to Springtime Photography appeared first on Photodoto.


    Photodoto