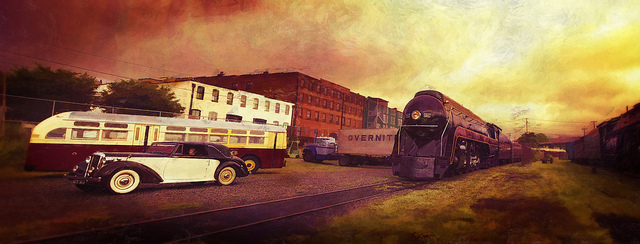
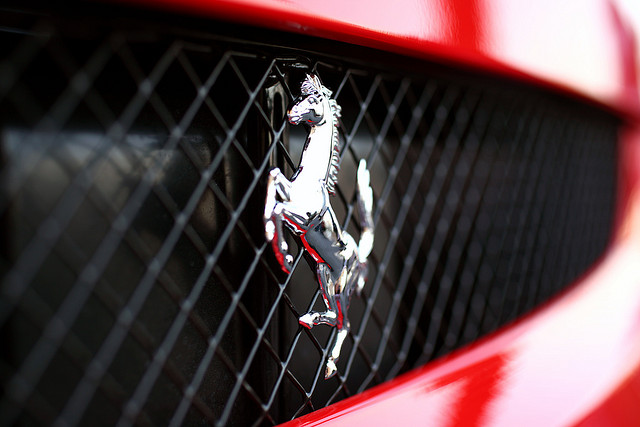
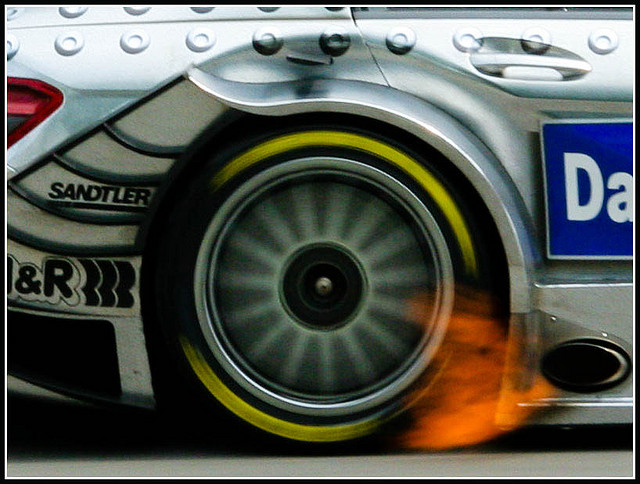
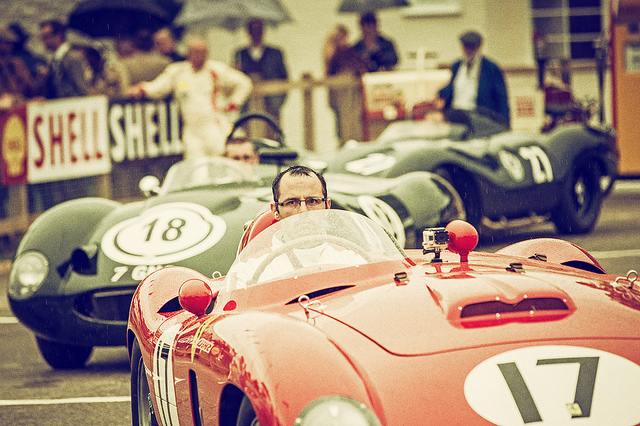
Category: Photography

  • Boat Portrait – Penobscot 16 Canoe from Old Town Canoes

    red canoe on Poudre River

    Red Penobscot 16 canoe on the Cache la Poudre River in Fort Collins, February 2014

    This red Penobscot 16 from Old Town Canoes is a new addition to my paddling fleet. I got it from in Cheyenne. Right now, it is my only tandem boat, although, the Badfish SUP can accommodate two people.

    This is the first boat bought as a photography prop. Now, I need to produce 50-100 saleable pictures to recover the cost. Red canoe on a calm lake with snowy mountains in a background comes to my mind. Maybe, Grand Teton or Clacier National Park? Well, after some abstracts shot in a garage, the first field photo sessions took place in February 2014 on the Poudre River in Fort Collins. There is up to 0.5 mile of calm or slow water behind a diversion dam accessible from the Kingfisher Point Natural Area near Nix Farm. This river section can be paddled even at a minimal river flow including winter time if it is not frozen.

    You are welcome to check new paddling pictures to my stock photography portfolio. There are available for immediate download and licensing as royalty free images.

    I will try to photograph other boats from my paddling fleet: kayaks, canoes, SUPs (stand up paddleboard) and a packraft. I am really waiting for some green color …

    Related posts:
    Waterproof Duffels, Canoe Paddle and Hat …
    Carbon Fiber and Wood Canoe Paddles in Royalty Free Pictures


    paddling with a camera

  • 2 Great Lighting Tutorials with Joe McNally

    Joe McNally is a name you have likely heard before. He’s a National Geographic photographer and a master of lighting. He’s also seemingly fearless, or a little bit crazy – doing things like photographing from the very tip (and I do mean TIP as in climbed up tiny ladders on a harness tip) of the worlds tallest towers, and other hair raising stunts.

    I’ve seen Joe teach live and he’s as entertaining as he is informative. If you ever have a chance to go to one of his seminars, do it! He’s engaging and you’ll go away having had a lot of fun and learning a ton. I promise.

    For today’s video I have two lighting tutorials by Joe. The first is on comparing sizes of the light source and how it effects the final image. He goes from a regular on camera flash direct from camera, to off-camera, to adding diffusers and softboxes.  After each step he shows the resulting image. So if you are having a hard time grasping quality of light and how it is affected by the size of the light source – watch this, it should help.

    Comparing sizes – small flash

    So? Did you get some clarity from that? Hope so.

    The second video has Joe deconstructing a recent shot he did, explaining how it achieved it using both the ambient light from the setting sun and flash.

    Combining flash and ambient light at sunset

    Want more on lighting and more from Joe – check out these books:

    Want more on off-camera flash techniques:

    • Balancing Flash and Ambient Light Using an Incident Light Meter
    • Working with Off Camera Flash and TTL
    • How the Shot was Done: SNK Police Cosplay

    The post 2 Great Lighting Tutorials with Joe McNally by Darlene Hildebrandt appeared first on Digital Photography School.


    Digital Photography School

  • 10 Ways to Improve your Vacation Photos

    dPS-Detail

    This has probably happened to all of us. We’ve just come back from an exciting trip and want to share all the wonderful moments with our friends and family. But after a brief moment we seem to be the only ones still enjoying the picture-show. Everyone else has quickly lost interest.

    So what can we do to stop putting people to sleep with our vacation photos?

    Here are some tips to help you take vacation photos that everybody will love. It’s easier than you might think, and it definitely doesn’t require expensive equipment. Keeping in mind some basic rules, you can take stunning images even with your mobile phone.

    Let me take you to Paris and show you how with these 10 ways to improve your vacation photos:

    #1 – Don’t rush – take your time

    It often happens that you get to a beautiful place and start photographing right away. But wait. Unless it’s a sunset or fast moving group of people, nothing is going to run away from you. Instead take your time to wander around a little bit sucking up the atmosphere.

    Here’s an example. Last month I went to Paris. When I got off the metro and the Eiffel Tower appeared, I was immediately tempted to take a picture. Actually everybody around me started shooting right away.

    I decided to stroll around first. In my mind I was framing, but I left my camera in the bag. This slow approach helped me to get a feeling for the place and to figure out what it was that I wanted to capture.

    #2 – Reflections

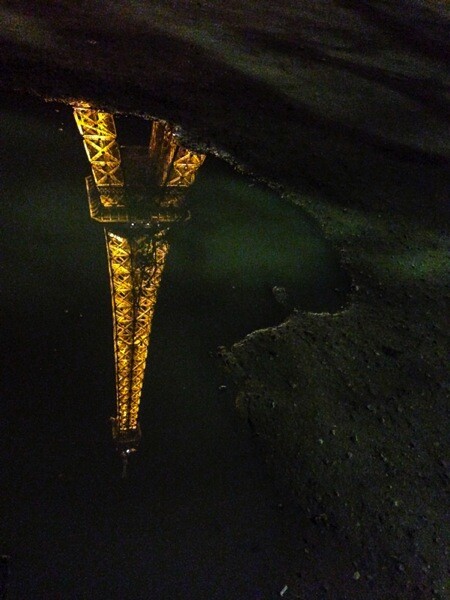
    Avoid the obvious. When everybody is looking in one direction, look the other way. You may be surprised what you’ll find: impressive reflections, for example.

    This is a great way to show a familiar sight in a new light – such as the Eiffel Tower. The giant monument can be seen from almost every point in downtown Paris. It is reflected in car windows or in water puddles at night.

    The distortions add a sense of humour or even mysteriousness. Those viewing the image can quickly identify what’s in the photo, yet the unfamiliar perspective puzzles them.

    DPS Reflection 2

    #3 – Tilt your camera

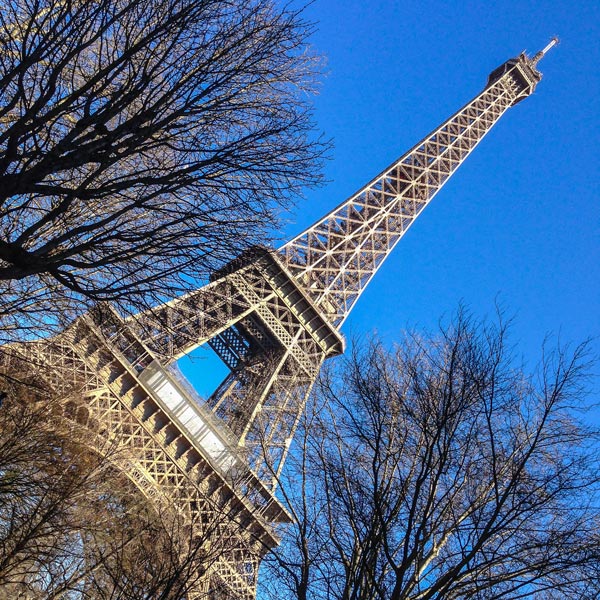
    When taking a picture of a sunset, the horizon should be straight. But when it comes to buildings, it’s perfectly all right to tilt your camera to create a new angle. Don’t be afraid, not everything has to be placed perfectly aligned in the center of the frame.

    Just don’t do it part way. If you opt for an uncommon perspective, do it all the way. That is to say let the observer understand that you tilted the camera on purpose, and that the building is not accidentally inclined either to the left or right.

    dPS-Tilted-Camera

    #4 – Incorporate the surroundings

    dPS-Surroundings

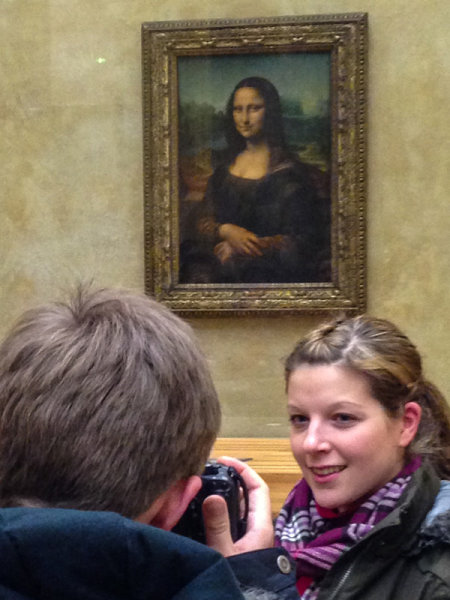
    When sightseeing we are never alone. There will always be other tourists around. Thus getting a clear shot with no one in the picture is often impossible. What you can do instead is to incorporate other people into your composition.

    It’s actually quite a lot of fun to photograph other people taking pictures. You add another story and layer to your images: a picture within a picture.

    #5 – Frame within a frame

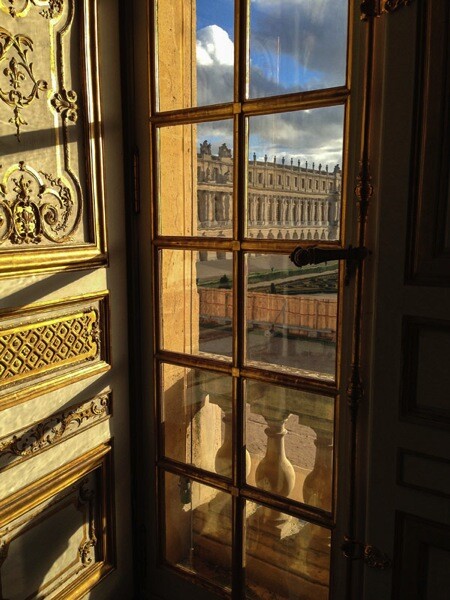
    Holes, doorways or windows are perfect elements to use as other frames within the frame of your camera. This way you can add another dimension and more depth to your images making them appear almost three-dimensional.

    But, that’s not all. Light shining through a window with its reflections and shadows is visually pleasant. And peaking through a window subconsciously suggests some mystery and being able to witness something from a hidden point of view that maybe wasn’t meant for our eyes to see.

    DPS Frame 1

    #6 – Geometry

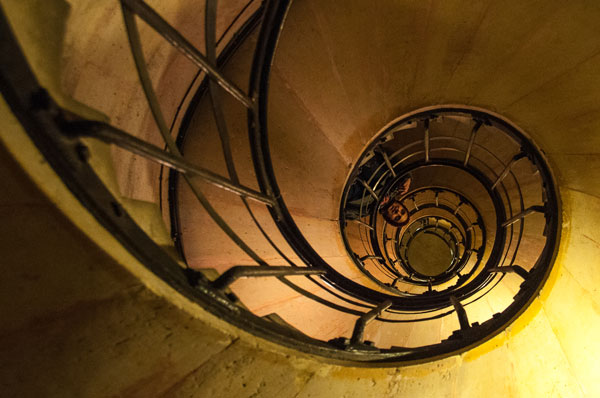
    Look out for lines and patterns that can be used to lead the eye of the observer and make your picture more dynamic, like this winding staircase (below), for example. The eye gets hooked on the left top corner and follows the stair railing as it curls towards the center on the right.

    DPS Geometry

    Lines are a simple, yet very powerful tool, of photographic composition that make images more interesting and engaging.

    #7 – Light

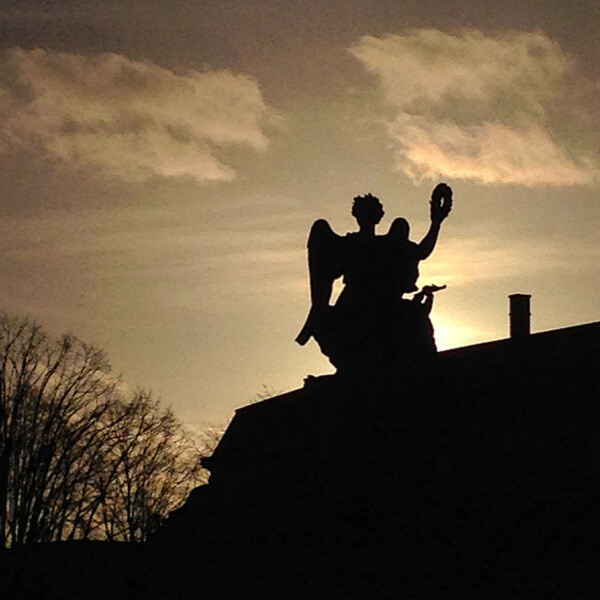
    Photography is painting with light. So the quality of light is very important. Bright sunlight at noon, with its harsh shadows, is different from the soft tones of a sunset. Be aware of the different emotions that can be evoked by light and use it as a tool to create strong effects.

    With backlighting you can create interesting silhouettes, for example, as can be observed in this image of a monument (below). The foreground is heavily underexposed. There are no details in the monument or the tree. Everything is stripped down to its basic shape and form, yet still allowing you to identify at first glimpse what kind of scenery is documented in the image.

    DPS Light

    #8 – Clean frames

    One common mistake is to incorporate too many elements in one frame. A panoramic shot is great to give an overview of a place. But in general it’s more effective to clean up your photos. Keep it simple.

    Simplicity of the frame helps the human mind to better process the information – faster and more efficient than if the observer is confronted with an overloaded image.

    Ask yourself: What do I want to say with this picture? Then throw out all the elements that are not important to the statement you wish to express.

    dPS-Clean-Framing-2

    #9 – Details

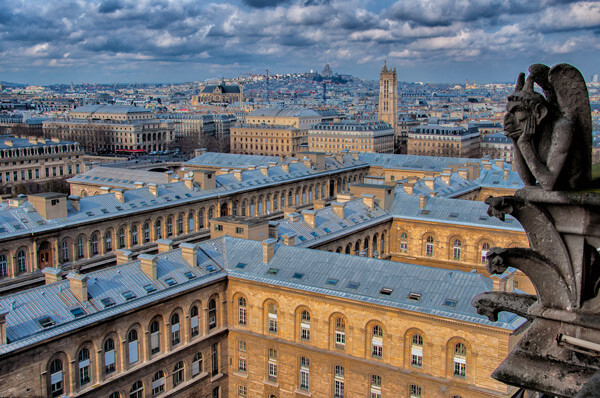
    Zoom in. Sometimes it’s difficult to capture everything that’s unfolding in front of you. When I was standing in front of the castle of Versailles I was overwhelmed by its pure magnitude. The big courtyard leading up to the main entrance, and the impressive long stretched building in the back. What to make of a situation like that photographically?

    A good way to resolve a panorama like that is to focus on details. As hard as I tried I couldn’t get a clean shot of the golden gate and the castle. There were either some other tourists taking picture or all the elements were overlapping each other.

    DPS Detail

    #10 – Be playful

    How many pictures do you have standing rigid in front of an important building, or beautiful landscape? There’s nothing wrong with the typical “I-have-been-there” shot. But it’s more fun to spice it up a little bit.

    Interact with your surroundings, create unusual perspectives and use your imagination. Not just you, but your friends and family back home will also enjoy looking at your next vacation pictures.

    DPS Playful

    Do you have other tips for better vacation photos? If so please share in the comments below.

    Want more travel photography tips? Look here:

    • How to Capture the Essence of a Place – Travel Photography Tips
    • Transcending Travel a dPS ebook
    • 6 Tips for Photographing People When Travelling

    The post 10 Ways to Improve your Vacation Photos by Kai Behrmann appeared first on Digital Photography School.


    Digital Photography School

  • 4 Tips for Post Processing Efficiency in Photoshop

    post-processing-photoshop

    A great deal of post processing can be done in Photoshop, more than most photographers realize actually. As a designer, I didn’t have Lightroom, and just wanted to adjust my photos to look a little nicer, little did I know the power behind Photoshop and its post processing capabilities.

    Today I am going to give you some tips and tricks I learned that increased my efficiency within Photoshop.

    1 – Photoshop Layout and Organization

    The first way to increase efficiency before doing any photo editing, is to organize and optimize your Photoshop layout. Setting up and customizing your Photoshop layout is key to configuring exactly how you want your panels and canvas to look. It is also very easy to do, and can improve your workflow a lot.

    Here are a few things to keep in mind when editing your Photoshop layout.

    • Only keep the necessary, delete all panels that are superfluous to your photo editing process. They really just get in the way and clutter your workspace.
    • Organize your panels based on your workflow. Keeping certain windows paired will help you work faster and make adjusting much easier.
    • Adjust spacing and panels so you can have the largest size available for your image.

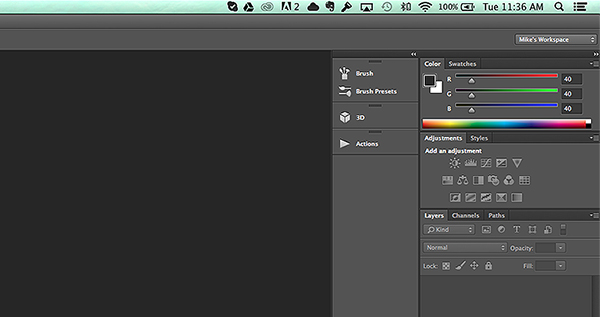
    Here is a quick preview of my layout, in case you need some inspiration.

    Photoshop-Layout

    After you carefully adjust and tweak the panels to perfection, it is really simple to save your workspace. Simply go to the top right corner of your Photoshop Document, where is says Mike’s Workspace in the image above, and click to activate the drop-down menu. Then click new workspace and you can save it as your very own Photoshop layout. You can even save shortcuts and menus within the layout.

    2 – The Basic Effects

    Now that you’ve organized your layout, it’s time to start editing your photos. When I start editing any photo I have a few basic steps I do religiously. These don’t have to be the same for you, and it is totally ok to completely disregard them (or come up with your own), but it is sort of a habit that can help contribute to your photography style.

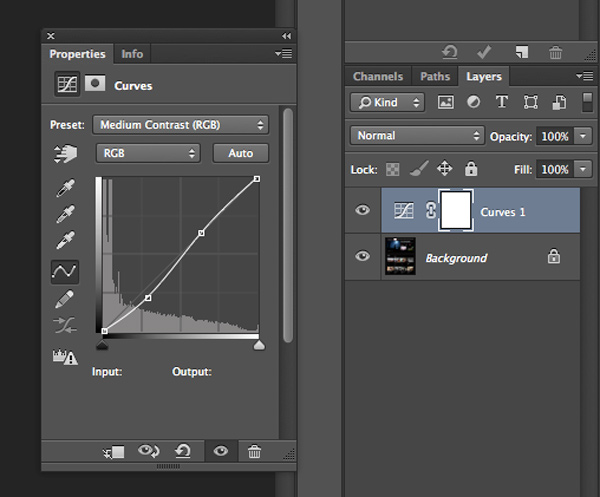
    The first small task I complete is duplicating the image layer. To ensure I don’t damage my original photo. From there I add a few subtle Adjustment Layers to balance the light in the image. It looks something like the image below.

    curves-adjustment-layer-photoshop

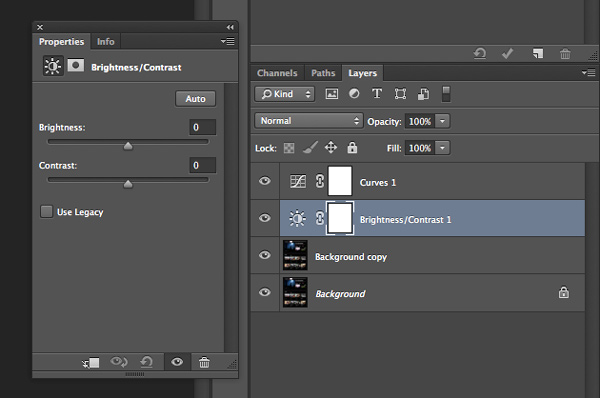
    The above effect is a simple curves adjustment that helps balance light and tone down the colors in a subtle manner. After that I mess with the brightness and contrast just a little bit to get the image looking clean and balanced (as an Adjustment Layer as shown below).

    adjustment-layer-brightness-contrast

    Consider all the above steps as precursory steps to the actual photo editing process. These are simply done to balance light, prevent error, and it is like a little system I use to keep my style inline.

    3 – Grouping and Organizing Layers

    The next thing I do that really helps me work more efficiently is to organize and group my layers. It is really easy and not time consuming at all to rename layers so that you know exactly what effect they are applying to your photo. Then you don’t need to go through all your layers, switching them on and off, to find one you want to remove or readjust.

    These are the key areas I group and label my adjustment layers and filters.

    • Light and contrast adjustment groups
    • Tints and color variations
    • Strong filters such as HDR and blurs
    • Gradients and vignettes

    By labeling these I can easily go to certain effects and adjust them accordingly. This makes photo editing a much faster process, and makes re-editing a photo way simpler and fun.

    4 – Subtle Adjustments that Make a Huge Difference

    As a final tip for efficiency I am going to share a few subtle effects that work wonders for photo editing. The tools used include:

    • Blend Modes
    • The Levels adjustment tool
    • Tints

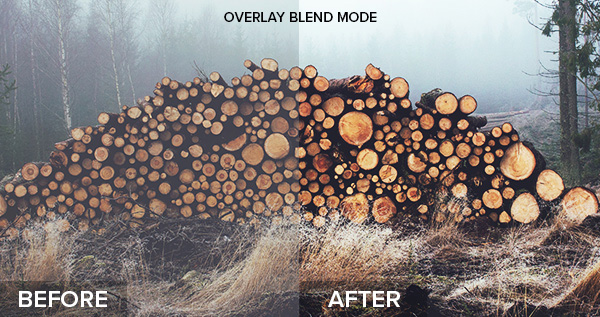
    Take a look at the difference a simple blend mode can do to an image, with just the click of one button. In the example below I’ve used the Overlay blend mode. Remember to duplicate your original layer and play with the blend modes on the top, copy layer. Blend modes dictate how the pixels in one layer behave and react with the layer below it. Try them all and see what they do.

    Blend-Modes

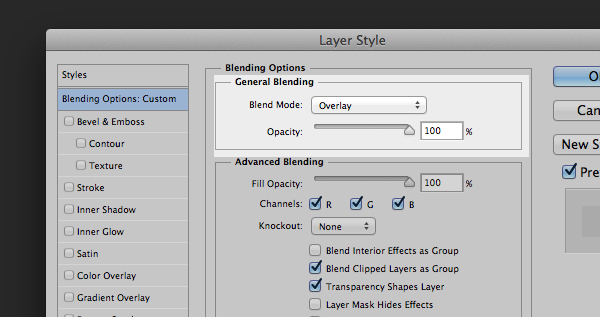
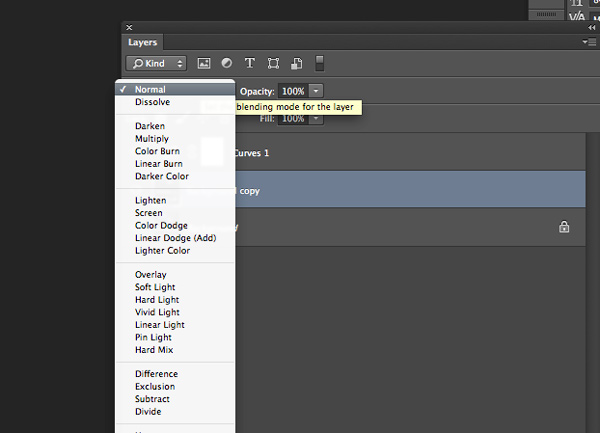
    Blending modes can be applied in a few ways. The easiest way, and the way I achieved the above effect is to duplicate your image and select the blend modes drop-down by double clicking your layer (or selecting it right from the Layers panel)

    Blending

    Double click the layer to get this dialog box

    You can also find layer blend modes here on your layers panel

    You can also find layer blend modes here on your layers panel

    Simply pick the blend mode that looks best and adjust the opacity accordingly. Some of my favorite blend modes are – screen, overlay, soft light, and lighten.

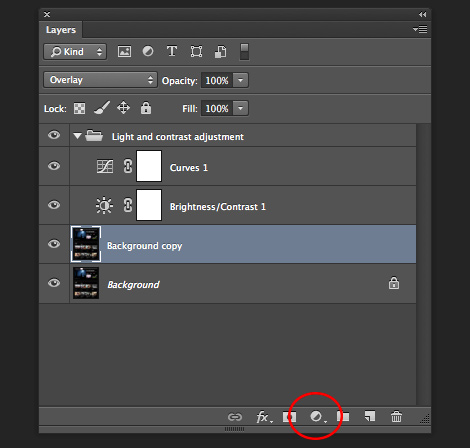
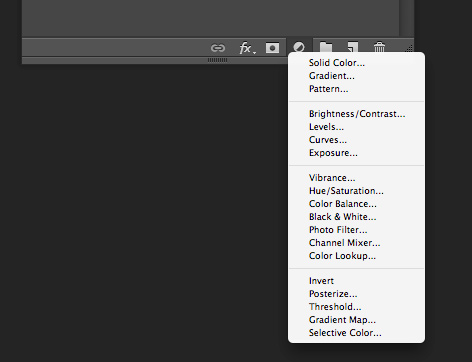
    I then use a Levels adjustment layer to adjust light and colors at the same time, adding a crisp and subtle tint. To add a new adjustment layer go to Layer > New Adjustment Layer > then choose the one you want.  Or select it from the bottom of the layers panel as shown below.

    adjustment-layer-icon2

    Adjustment layer icon location on the layers panel

    adjustment-layer-icon

    Adjustment layer options


    Adjust the various levels by clicking the drop-down and working on the red, green, and blue tones. It is very versatile and easy to use. Just remember – pulling top sliders the ones under the graph) to the left will darken, to the right will lighten. The bottom sliders under the black-white scale, do the opposite.

    Summed Up

    This is the process I used to create ultimate efficiency when I started editing my photos more frequently. These steps probably won’t apply to everyone, but they are helpful in getting organized when beginning. To wrap it up:

    • Organize your Photoshop Layout to improve your workflow
    • Use some basic effects for consistency
    • Group and label your adjustments so you can easily find them for future reference
    • Take advantage of the subtle, but highly effective adjustment layers such as photo tints, levels, and blend modes

    Now it’s up to you

    Got some interesting tips or tricks for efficiency? Share them in the comments and help other photographers improve the way they work and edit photos in Photoshop.

    The post 4 Tips for Post Processing Efficiency in Photoshop by Mike Moloney appeared first on Digital Photography School.


    Digital Photography School

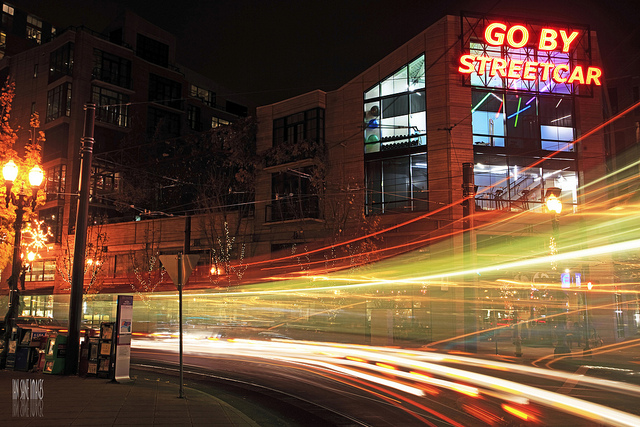
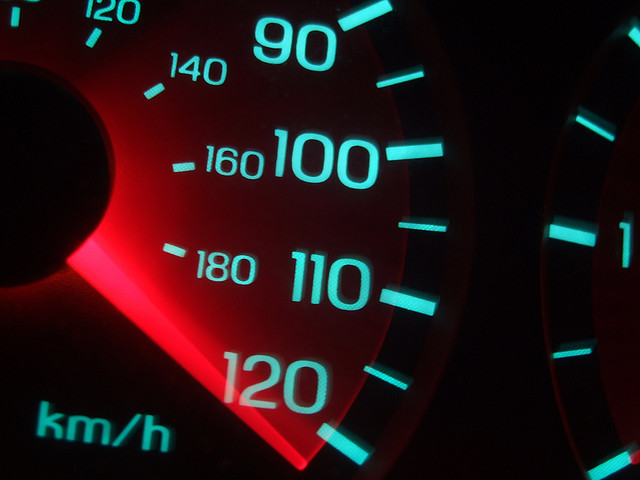
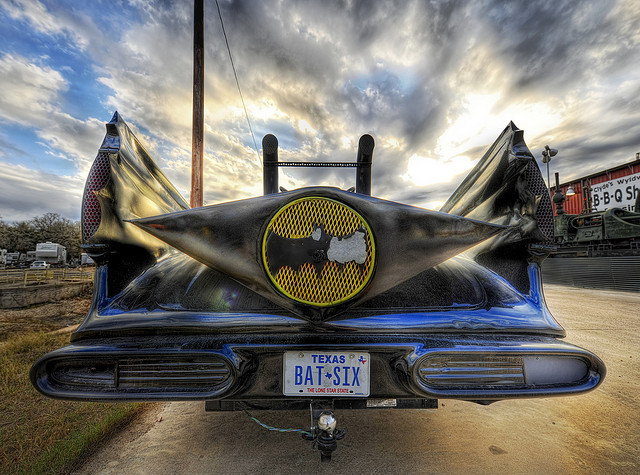
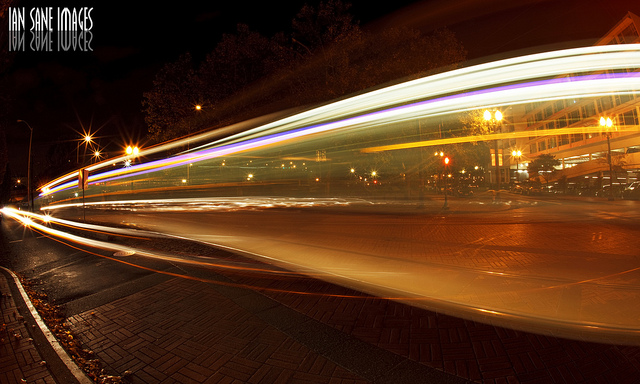
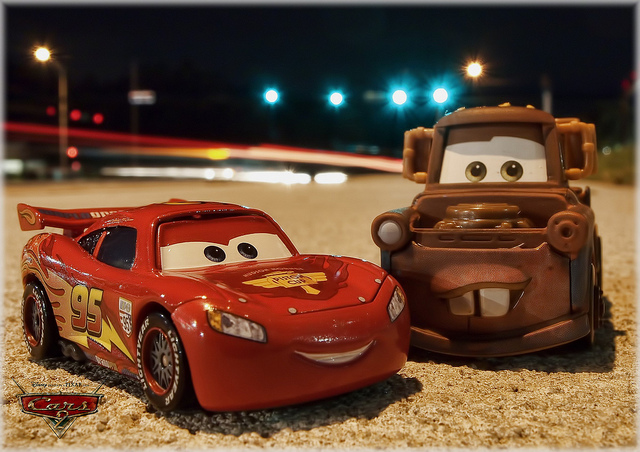
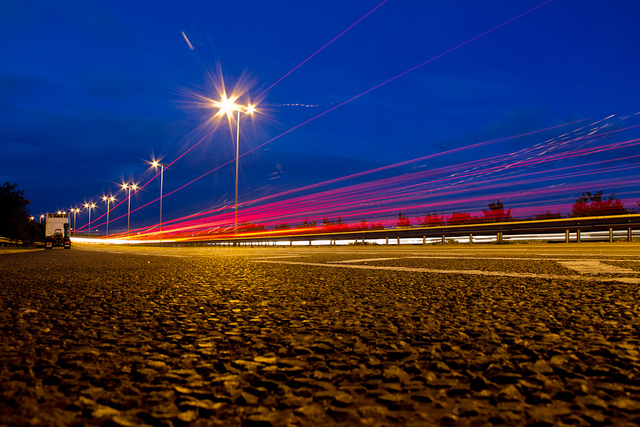
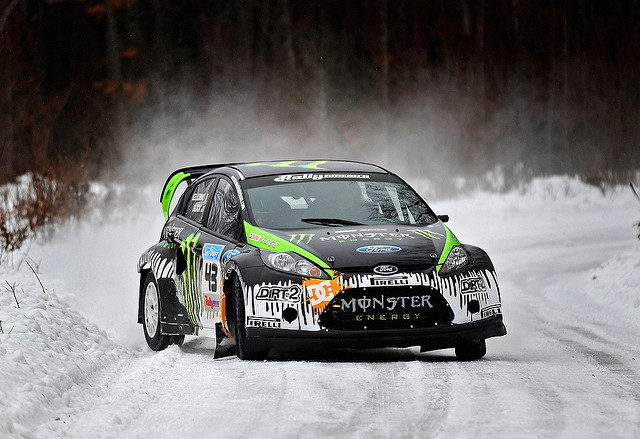
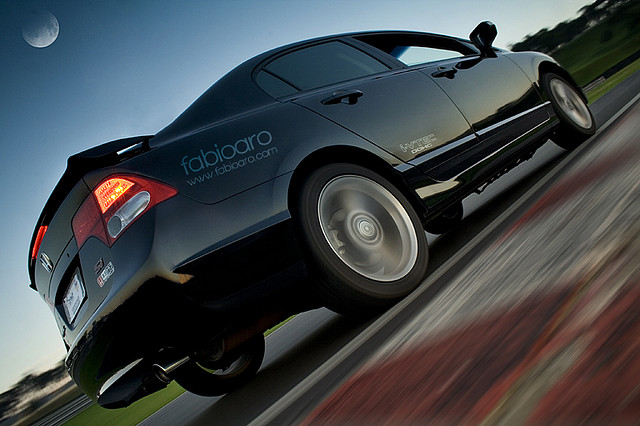
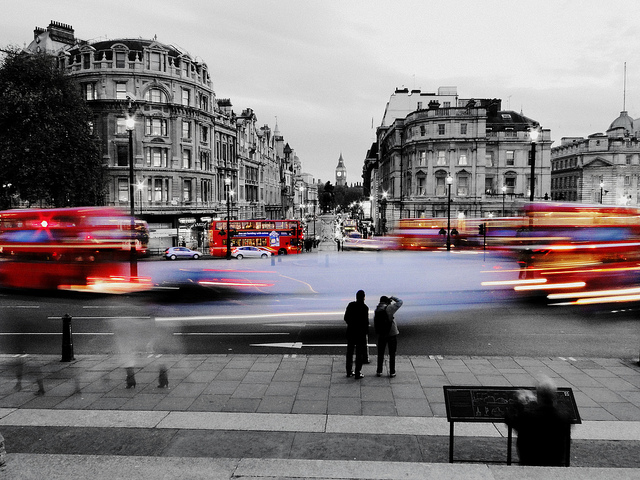
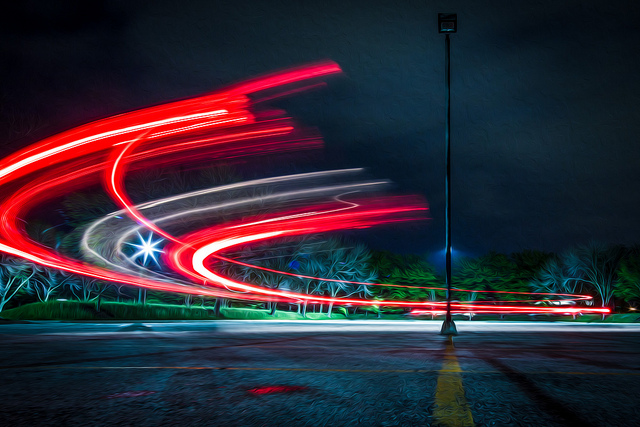
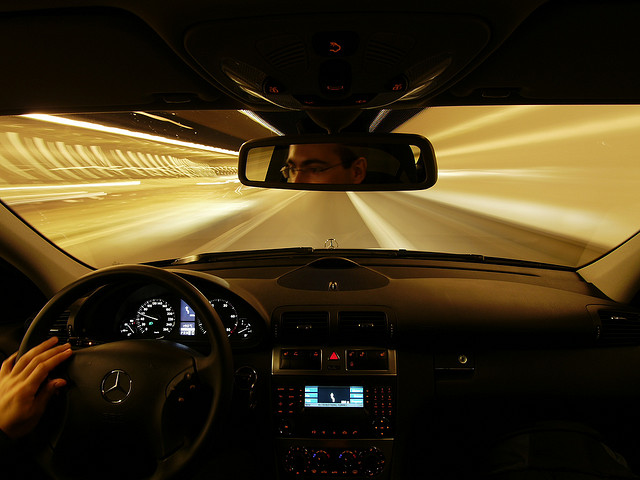
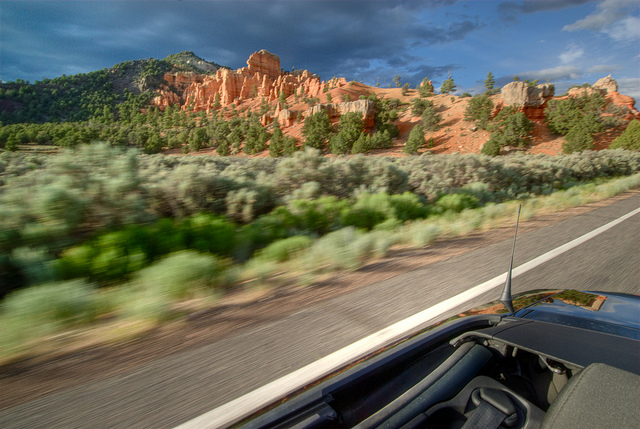
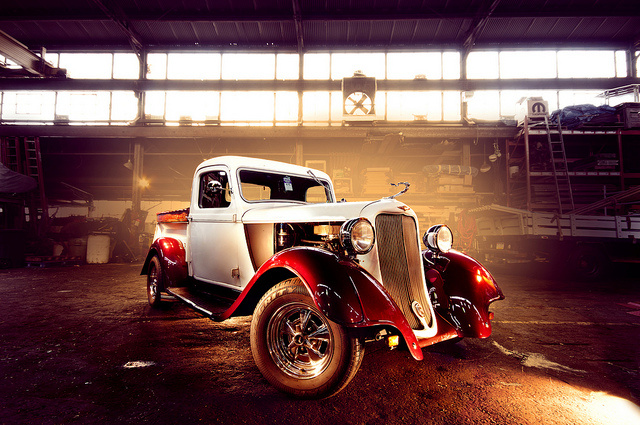
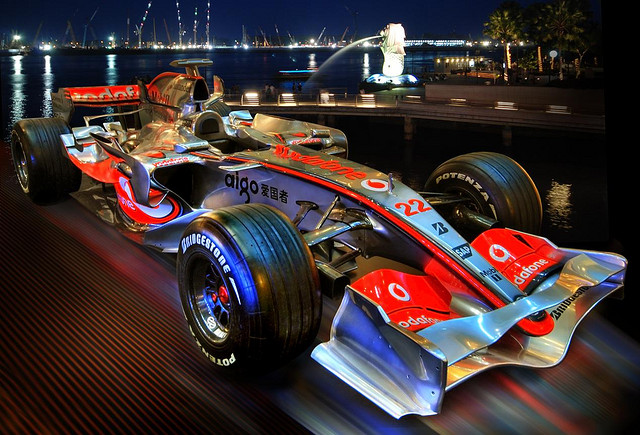
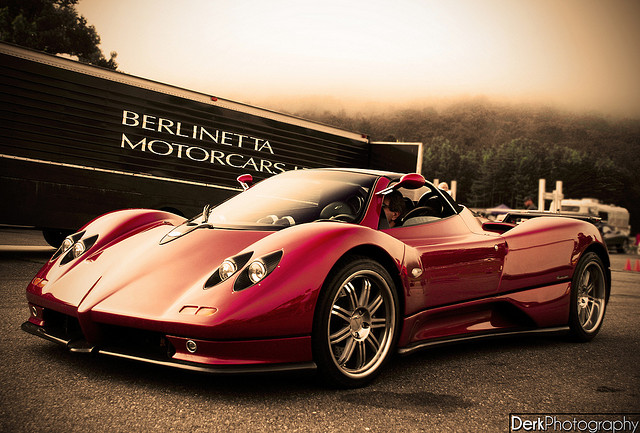
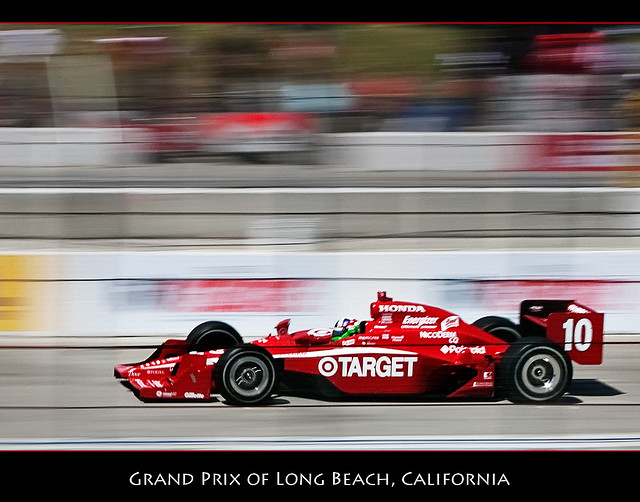
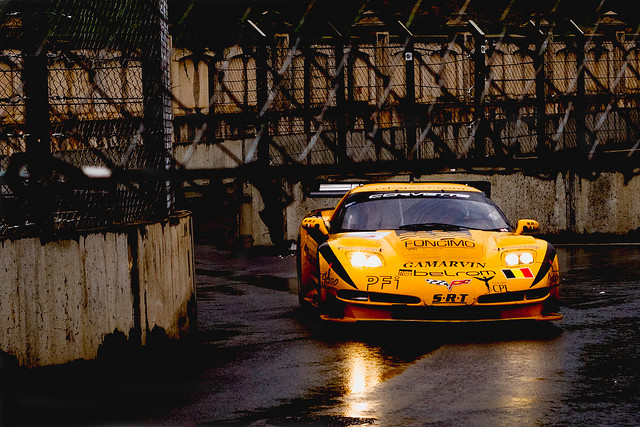
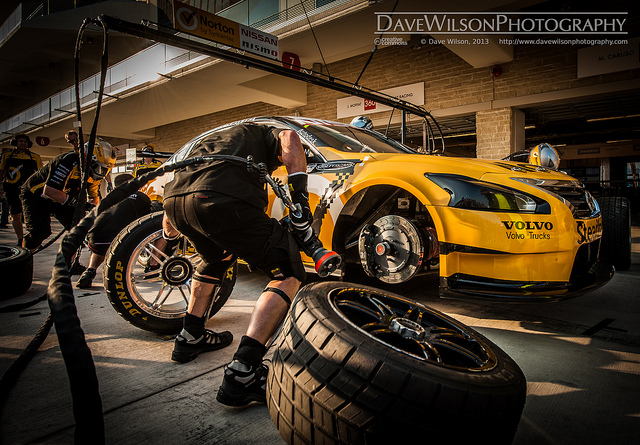
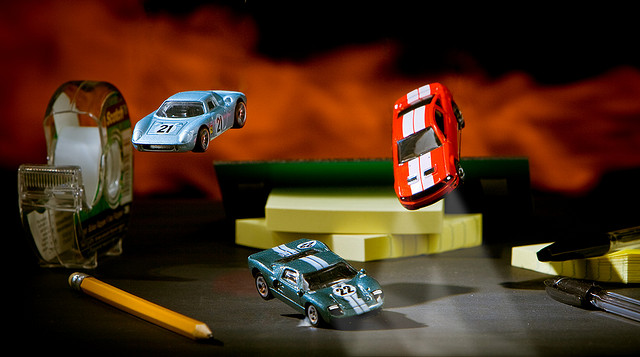
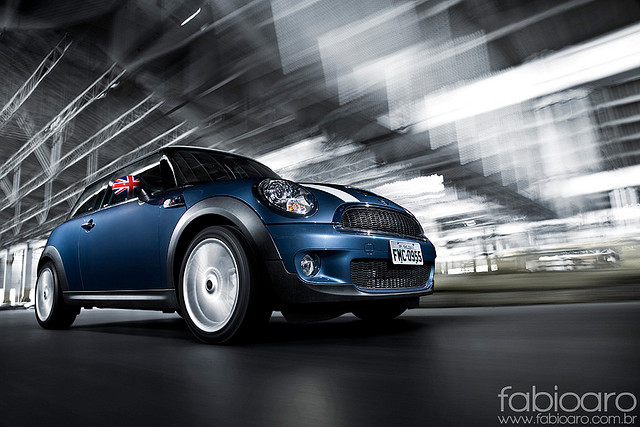
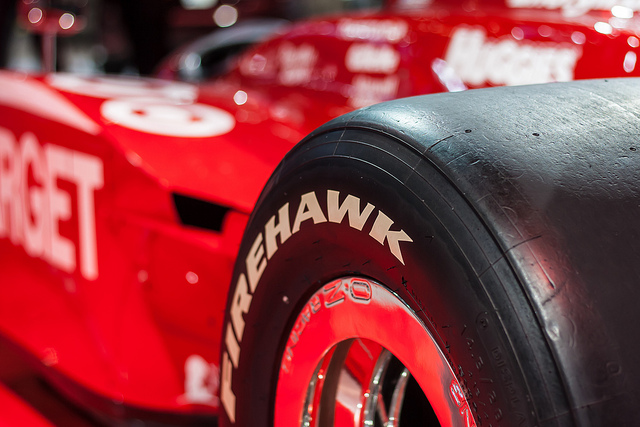
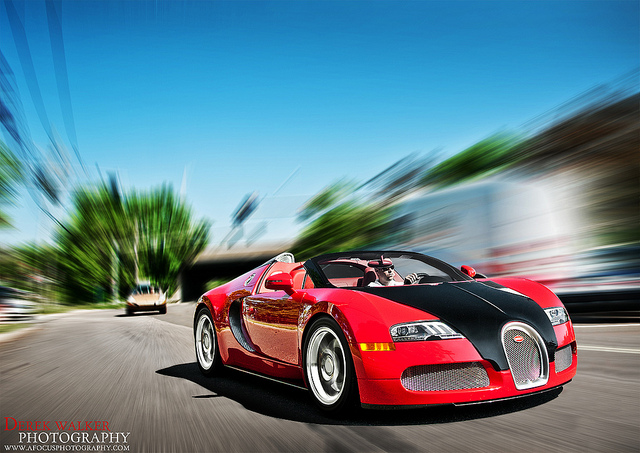
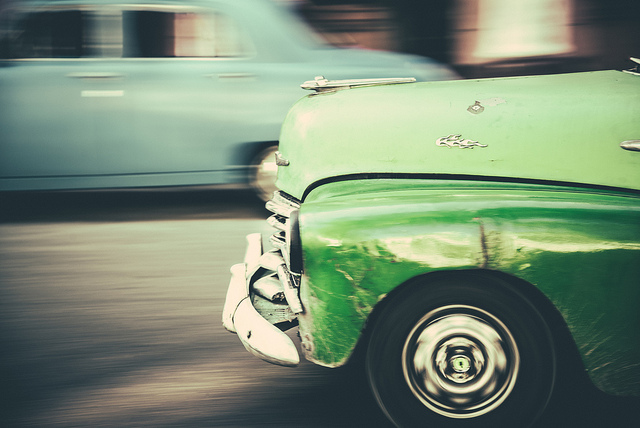
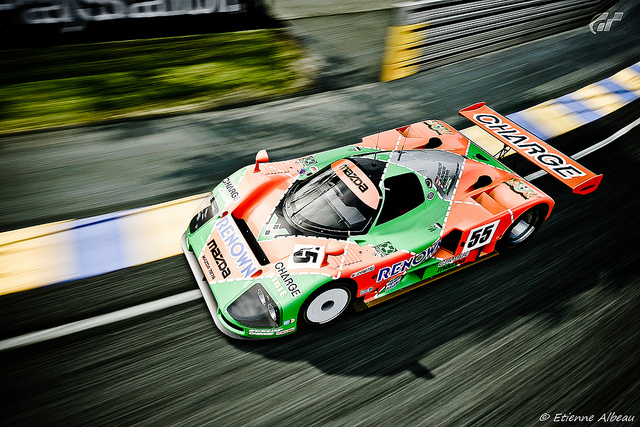
  • 35 Moving Images of Speeding Cars

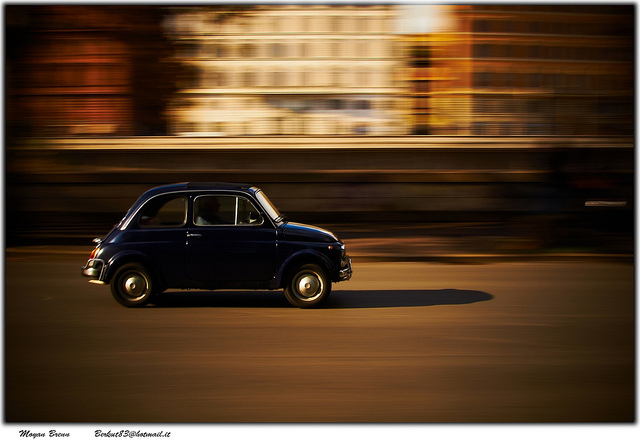
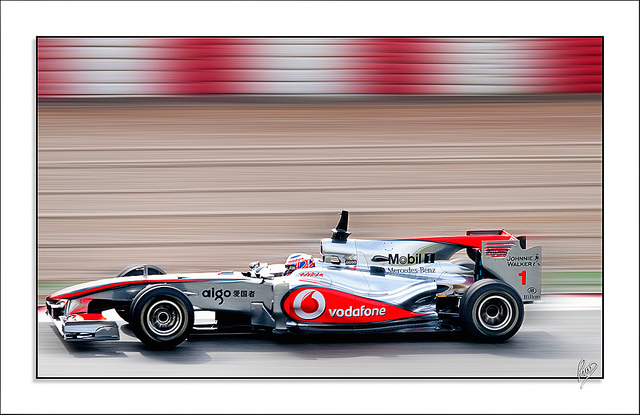
    Last week I shared some great images of boats, so I thought I’d continue with the transportation theme and take a look at some images of speeding cars. Fast cars!

    In fact, some are so fast they didn’t even show up in the image! You figure that one out.

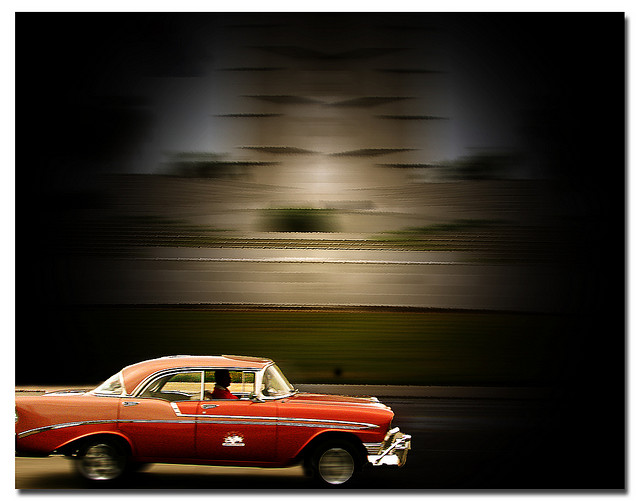
    I love shooting cars by panning to create some motion. Having just been in Havana, Cuba classic cars were in abundance.

    Enjoy these images of fast cars.

    By Moyan Brenn

    By Paco CT

    By Ernest

    By Ian Sane

    By Nathan E Photography

    By Trey Ratcliff

    By Ian Sane

    By Romain Ballez

    By Om

    By Digimist

    By dez&john3313

    By Fabio Aro

    By Caitlin H

    By Chris Smith

    By Luis Miguel Justino

    By Ville Miettinen

    By Dustin Spengler

    By William Cho

    By Derek Walker Photo (Derk Photography)

    By Pedro Szekely

    By Donnie Nunley

    By Mohammed Nairooz

    By Patrick Mayon

    By Jim Monk

    By hjhipster

    By bkdc

    By Dave Wilson

    By Eric Castro

    By Nick Wheeler

    By Fabio Aro

    By drpavloff

    By Derek Walker Photo (Derk Photography)

    By Didier Baertschiger

    By YackNonch

    By Nick Kenrick

    For some car photography tips check out: 7 Tips for Taking Better Photographs of Cars

    The post 35 Moving Images of Speeding Cars by Darlene Hildebrandt appeared first on Digital Photography School.


    Digital Photography School

  • Weekly Photography Challenge – Fast Cars

    Now that I have your attention you might be able to guess what this week’s photograph challenge is right?

    Weekly photography challenge – fast cars!

    You may be thinking, “I don’t live near a race track”, so I’m way ahead of you. Just to clarify this challenge a little, the goal is to make the cars look like they are going fast. They don’t actually have to be doing so!

    How to add motion

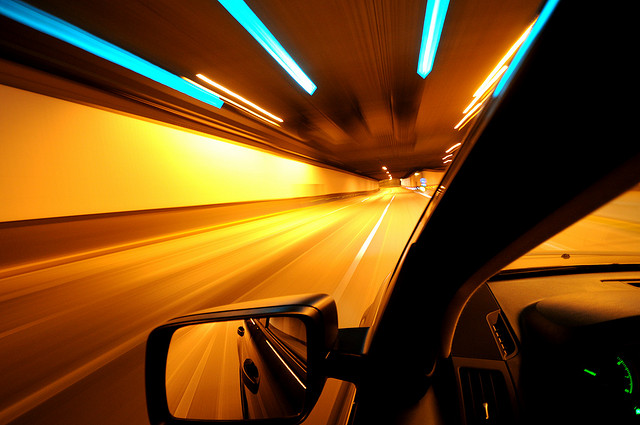
    So how do you add motion to your car images? One way is panning. Another is to shoot from inside a moving car – just please make sure you are NOT the driver! Safety first. Here’s some tips if you need a hand:

    • Showing Speed: Using Panning When Shooting Action
    • 13 Places to Practice Taking Beautiful Motion Blur Shots
    • Mastering Panning – Photographing Moving Subjects
    • 3 Tips for Creating Dramatic Images using Motion

    By Takashi Hososhima

    By Brian Gaid

    By Jim Sher

    Share your fast car images!

    Simply upload your shot into the comment field (look for the little camera icon in the Disqus comments section as pictured below) and they’ll get embedded for us all to see or if you’d prefer upload them to your favourite photo sharing site and leave the link to them.

    The post Weekly Photography Challenge – Fast Cars by Darlene Hildebrandt appeared first on Digital Photography School.


    Digital Photography School

  • Fisheye Photography: 9 Shots That Work Amazingly Well

    Photographs from a fisheye lens look different, which can be a good or not-so-good thing. This uber-wide angle lens let’s you get super close to your subject, yet still see the background. It’s an unusual perspective you can’t get with any other lens. But there are challenges, too. The edges are distorted, which makes some shots look weird, but below, Continue Reading

    The post Fisheye Photography: 9 Shots That Work Amazingly Well appeared first on Photodoto.


    Photodoto

  • SensorKlear Loupe Kit Review

    sensor-klear-kit-review-dps-002

    The SensorKlear Loupe Kit from LensPen.

    A couple of years ago, I decided it was time to face my fears head-on. Since the day I had unboxed my first DSLR I’d fallen victim to all of the various doomsday warnings about the horrors that could befall me if something went wrong while cleaning my sensor. Don’t get me wrong– those warnings are all valid. Messing this up could scratch the sensor, push it out of alignment, or even break it, just to name a few. I’d always figured that if something was going to go wrong, I wanted it to be someone else’s fault– someone who would have to pay to replace the camera or repair the damage. Luckily, I have a great local camera shop that offers sensor cleaning twice a month and does a great job, but I finally got to that “how-hard-can-it-be?” point and decided it was time to learn.

    DOOMSDAY WARNING: I would be totally remiss if I didn’t offer my own caution flag. If any part of cleaning your own sensor makes you the slightest bit uncomfortable, you should absolutely not do it. The consequences I mentioned above are only a few of the things that can happen if this delicate task is done incorrectly. There are a lot of products out there to help you clean your sensor, some better than others. You should thoroughly research any product before sticking it into your camera. Also make sure that it comes with clear, easy-to-follow instructions.

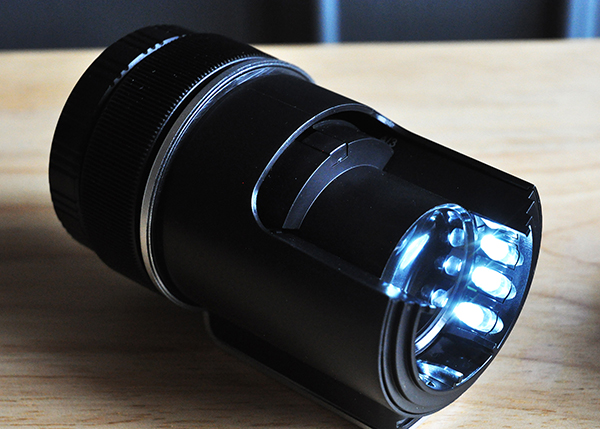
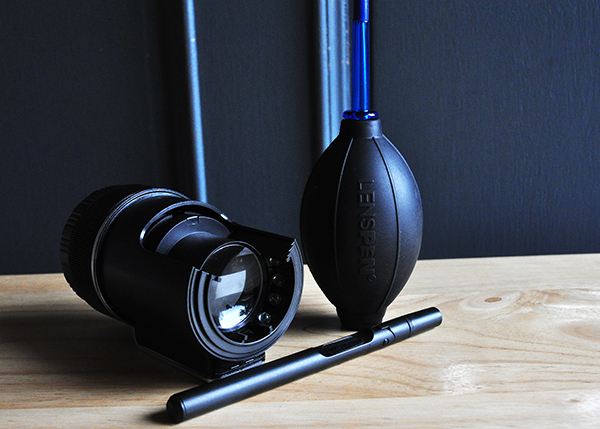
    The SensorKlear Loupe Kit comes from the same company that manufactures the LensPen–one of my favourite lens-cleaning tools. The sensor-cleaning kit contains three components. The SensorKlear Loupe, the LensPen Hurricane Blower, and the SensorKlear II Pen.

    The Loupe

    For me, the biggest drawback to most sensor-cleaning products is that you really can’t see what you’re doing. The SensorKlear Loupe changes that, providing an illuminated, magnified view of the sensor. Being able to quickly and easily detect sensor dust not only makes the task of cleaning it easier, but also tells you whether your sensor even needs cleaning at all. There’s no sense sticking anything in your camera unnecessarily. The loupe is also designed with an opening on the side, allowing access for the cleaning tools while maintaining your view of the sensor. The loupe uses two AAA batteries (included) and fits perfectly over the camera opening. Be sure to check your camera’s owner’s manual for instructions on locking the mirror in the “up” position for sensor cleaning.

    The loupe provides an illuminated, magnified view of the sensor, making dust removal easier.

    The Blower

    Chances are you probably already have a similar blower in your gear bag, so I’m not going to take up a lot of your time describing this one. It’s a blower–plain and simple. By now I’m sure you know to not let canned air anywhere near your sensor. The velocity of the air can blow the sensor out of alignment and the chemical propellant can permanently damage its surface. The hand blower is the most basic solution–and perfectly suited to the task–for removing dry dust particles from your sensor.

    The SensorKlear Pen

    Sometimes, though, you’re battling more than just dry dust. Every once in a while, sticky particles decide to make your sensor their new home. For those situations, the SensorKlear Pen has worked flawlessly each time I’ve used it. The tip is a smaller version of the LensPen tip and is impregnated with a patented carbon cleaning compound that removes and absorbs the more stubborn dust and other particulates that find their way into cameras and onto sensors. The adjustable angle of the pen works perfectly in conjunction with the loupe, allowing you to use it an angle that doesn’t block your view of  the sensor.

    sensor-klear-kit-review-dps-005

    Wrap-Up and Recommendation

    As with anything, there is no one perfect solution to the challenge of maintaining a dust-free sensor. For me, though, the quality of the tools, their ease of use, as well as their results, make this kit a great choice if you are ready to start cleaning your own sensor. If you’re already one of the brave ones, share your recommendations in the comments.

    The SensorKlear Loupe Kit is available on Amazon.

    More on sensor dust and how to remove it:

    • Got Sensor Dust? Here’s How to Check.
    • Do you Clean your Own Sensor?
    • How to Remove Sensor Dust With Lightroom

    The post SensorKlear Loupe Kit Review by Jeff Guyer appeared first on Digital Photography School.


    Digital Photography School

  • Make a Photo Website with Lightroom and Koken

    Photography website created with Koken

    We’ve already looked at how you can use Lightroom Collections to organize your images and how to upload your photos directly from Lightroom to Flickr and 500px using Lightroom’s Publish Services.

    But did you know that there’s a way to upload photos directly to your own photo website from Lightroom? Before I explain precisely how to do that let’s think about the advantages of such a method:

    • You can decide which images to add to your website while in Lightroom. Decision made, it takes only a few seconds to add them to the appropriate Published Collection and publish them to your website.
    • Removing images is just as simple, just remove them from the Published Collection.
    • You can add watermarks to your images in Lightroom. If you change your watermark design, it’s easy to republish all the photos with the new design.
    • You can upload photos to a private album on your website for someone else to view, without having to use the standard Lightroom Web module formatting.

    This is where Koken comes in

    Interested? The software you need to do this is called Koken (rhymes with spoken). The best way to think of Koken is as WordPress for photographers. Like WordPress, it is a free CMS (content management system) and you need your own domain name and hosting plan to use it. But whereas WordPress can be adapted to all kinds of uses, Koken is designed to do one thing only: build websites for creative individuals with portfolios, such as photographers, artists and graphic designers.

    Make a Photo Website with Lightroom and Koken

    You can learn more by going to the Koken website, where you will also be able to download the free software and try it out if you have a domain name and hosting plan.

    Koken website

    But before you do, there are a few things you should know:

    • The main advantage of WordPress over Koken, for the purpose of creating a photography portfolio website, is that there are lots more themes available for WordPress. Koken, at the moment, has eight built-in themes (which you can see here). However, the themes in Koken are easier to modify, although you will need to be familiar with HTML and CSS to do so. You can also create your own Koken themes if you have the know how, and they are starting to appear on some of the websites that sell WordPress themes.
    • The main advantage of Koken over WordPress is that Koken integrates with Lightroom’s Publish Services, enabling you to upload photos directly from Lightroom. This is a huge benefit to Lightroom users.
    • You do not have to own Lightroom to use Koken. You can install the software and upload photos from your computer’s hard drive, just as you can in WordPress.

    Koken close-up

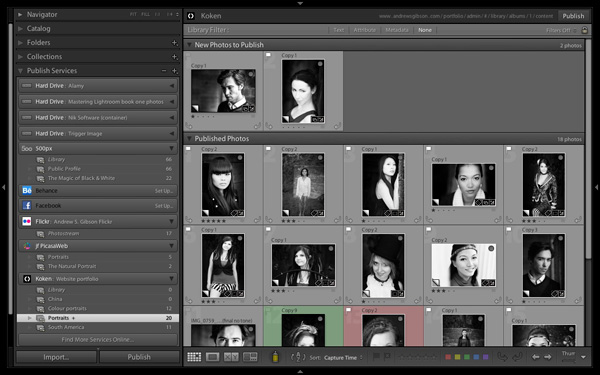
    Here’s a closer look at the Koken interface. But first, let me show you how it works in Lightroom. As you can see in the screenshot below, you can create Published Collections containing the photos you want to use on your website. Lightroom lets you know if you have added new photos, or made changes to existing ones. Click the Publish button to update your website.

    Lightroom interface

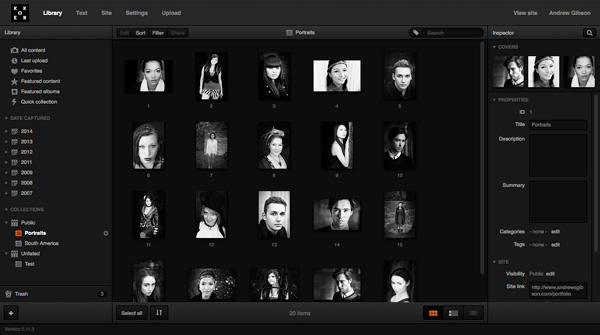
    Then in the Koken interface (accessed through a web browser) you can view the photos, change title, description and keywords, and rearrange the order in which they are displayed.

    Koken interface

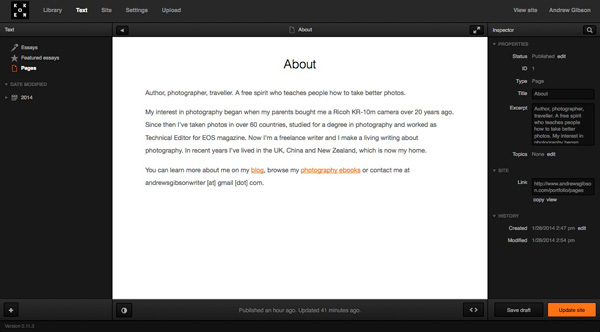
    You can also create static pages (such as an About page) and blog entries (called Essays) in Koken:

    Koken interface

    The verdict

    I’ve only used Koken for a short while, but I’m impressed by how easy it is to use, especially with Lightroom’s Publish Services. The exciting thing about Koken is that the software is in its early days – I’m sure the system will grow as the developers improve it and more themes become available.

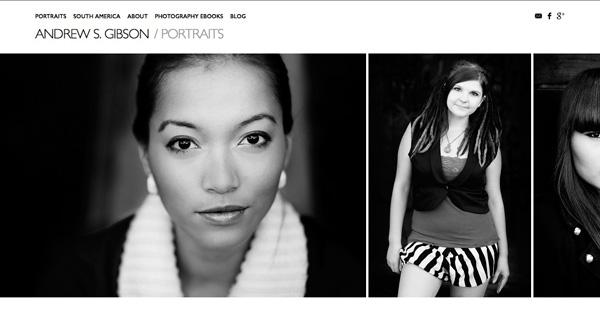
    To get an idea of the sort of thing you can do with Koken, you can check out my portfolio pages (created with a modified version of the Boulevard theme) and the Koken demo site to see the built-in themes in action.

    For more Lightroom articles try these:

    • Why Lazy Photographers Should Use Lightroom Smart Collections
    • 3 Lightroom History Tips
    • Using Smart Previews in Lightroom 5
    • Make Lightroom Faster by Using DNG

    Mastering Lightroom Book One: The Library Module

    Mastering Lightroom ebookMy latest ebook Mastering Lightroom Book One: The Library Module is a complete guide to using Lightroom’s Library module to import, organize and search your photo files. You’ll learn how to tame your growing photo collection using Collections and Collection Sets, and how to save time so you can spend more time in the Develop module processing your photos.


    The post Make a Photo Website with Lightroom and Koken by Andrew S. Gibson appeared first on Digital Photography School.


    Digital Photography School

  • 5 Most Common Mistakes in Wildlife Photography – and How to Avoid Them

    Animals, especially wild ones, make such beautiful subjects that we cannot resist turning our cameras on them to capture images of these majestic creatures in their natural state.

    Unlike a landscape, creatures are constantly in motion, and unlike most people, they can be pretty uncooperative when it comes to getting their picture taken. This can make for a lot of botched pictures. Here are a few tips on how to avoid some of the common pitfalls of wildlife photography.

    1. A Tiny Subject

    Three Brown Pelicans by Anne McKinnell

    It’s tough to approach a wild animal – they are easily spooked. Because of this, many wildlife photos have more wilderness than wildlife, with the animal becoming a tiny speck in its environment. This can be effective in some situations, but for the most part you want the animal to be large enough in the frame to see the detail in its eyes. This is where a good telephoto lens can really help you out. Using a long focal length (over 200mm) will allow you to keep your distance while still filling the frame.

    2. Blurry Image

    Blur comes in many forms. Your entire image could be blurry due to camera shake; a problem which is magnified by the longer focal lengths needed for wildlife photography.

    In landscape photography, using a tripod is a good technique to prevent camera shake, but a tripod is not as practical when photographing wildlife. Wildlife photography requires a more active shooting style – you’ll be moving around constantly – so unless you are using a lens that is too big to hold comfortably, forget the tripod. Also, because the animals are always in motion, you’ll need a fast shutter speed anyway. That leads me to the first method to combat camera shake blur: using a very fast shutter speed.

    In landscape photography, you normally use a shutter speed that is at least 1/focal length of your lens. But usually that isn’t going to be fast enough when photographing wildlife because the animals are always in motion (even when they appear to be standing still). To avoid disappointment, you’ll need to use a much faster shutter speed to freeze both your own motion and the motion of the animal.

    Here is my rule of thumb when photographing wildlife: if the animal appears to be still, use a shutter speed of 1/500th of a second. If the animal is moving, you’ll have to adjust the shutter speed based on how fast they are moving. I suggest a minimum of 1/1,000th of a second, or faster if the animal is moving faster.
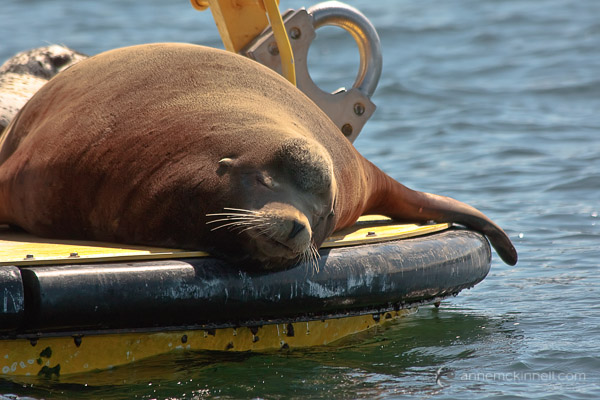
    Sleeping Steller Sea Lion by Anne McKinnell

    Using a lens with image stabilization will also help prevent camera shake blur. A lens with a wide maximum aperture, say f/2.8 or even f/4, will let more light in, allowing you to use a faster shutter speed. Likewise, a camera with low noise at high ISOs will let you turn up the sensitivity. All of these options will enable you to make faster exposures with better results.

    Another type of blur is focus blur. This results from your camera being unable to focus, probably because your subject is moving and the AF motor gets confused. Some cameras and lenses have superior auto focus systems to others, but regardless of what you have, you can get the most out of it by setting it to continuous focus mode, usually called AF-C (Nikon) or AI Servo (Canon). This setting will track the subject’s movement in the frame and focus on it more quickly and accurately.

    3. The Missed Moment

    We’ve all been there. You see the perfect shot, frame it, and hit the shutter. But by the time the camera focuses and the exposure is made, the animal has moved and all you end up with is the second after the perfect shot.

    There are two ways to avoid this heartbreak:

    Anticipation

    This is a skill that can only come with practice and a keen eye. If you can learn to see when the perfect moment is about to happen, rather than when it is happenning, you can hit the shutter right before the peak moment and cause the camera to snap at just the right time.
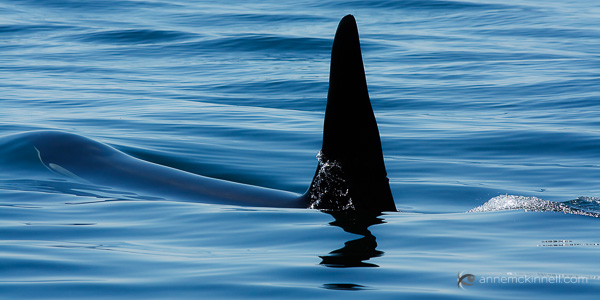
    Orca by Anne McKinnell

    Continuous Shooting

    When animals are in motion, you’ll get the best chance at a good result by using continuous shooting mode (also called “drive mode” or “burst mode”). With this, you can take several images per second and choose the most successful.

    Higher-end DSLRs and mirrorless cameras will have a much faster maximum shooting speed, but no matter which camera you have, there are a few things that will help get the highest continuous shooting rate.

    One is a fast memory card – both SD (standard digital) and CF (compact flash) cards have a certain speed that they operate at, and a faster card will make sure that your camera doesn’t get bogged down trying to save the images.

    The other is a fully-charged battery – as the juice drains, the camera can become sluggish, so it’s a good idea to keep an extra battery or two in your camera bag. For ultimate performance, you can buy a battery grip that fits on your camera. This holds two batteries at the same time for maximum speed.

    4. Where Is Everyone???

    Sometimes wild animals can be hard to find, and they’re not always where you want them to be. Before you can photograph them, you have to learn a few things about how to find them.

    Know your animals

    What types of animals live around you? Before you go out shooting, find out who they are, what they eat, when they sleep, and where they like to relax in between. If you’re photographing birds, research which ones are to be found in your area at which times of year. It’s also important to know how animals might react if, and when, they feel threatened – will they fight, or flee?
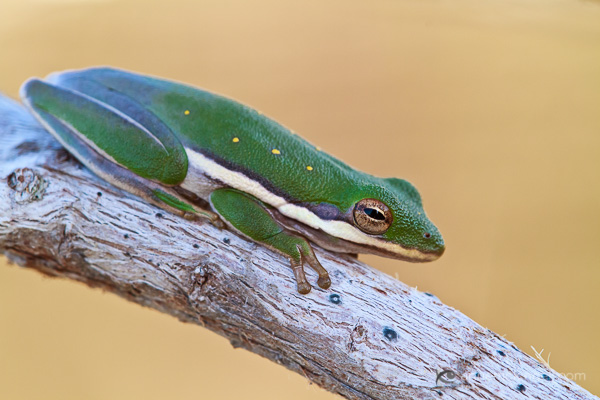
    American Green Tree Frog by Anne McKinnell

    Know the season

    Some animals will be much more active at different times of year – particularly during autumn, as they rummage up enough food for winter, and in the spring when some animals come out of hibernation.

    Camp out

    I don’t mean overnight (unless you’re into that), but it’s often a very effective practice to find a popular area – probably somewhere with a source of water, food, shade or shelter – where animals like to congregate. Set your camera up on a tripod nearby, and disguise yourself among some trees or brush (some photographers go so far as to buy ,or build, a blind to hide their presence).

    Be patient

    Animals work on their own schedule, so don’t try to fit a shooting session in between other appointments. Great photos take time, and you must allow nature to unfold at its own pace. Many animals are easily frightened, so being quiet, still, and inconspicuous will help put them at ease.

    5. Animal Attack!

    We don’t call it “wildlife” for nothing – the biggest mistake you can make is accidentally getting mauled. Animals are not adjusted to polite society, and can be pretty rough customers if you catch them at the wrong time, or in the wrong way. They spend most of their waking lives foraging for food, and a spat over a meal can turn ugly, fast. Never get in the way of lunch, unless you want to take its place.

    Don’t approach a wild animal directly, and if they see you, avoid looking them in the eye. This is usually a sign of aggression. If you need to get closer, keep low and move in a broad zig-zag pattern to avoid frightening the animal.
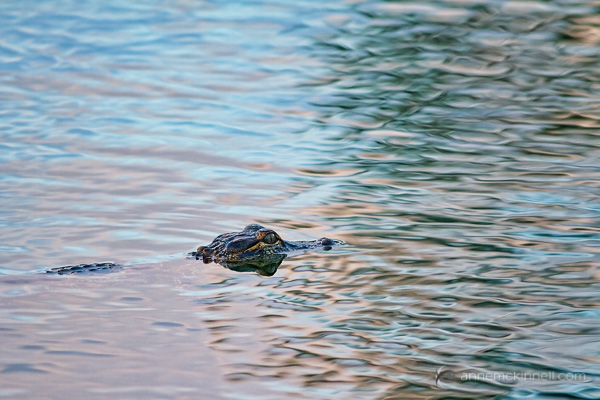
    Baby Aligator by Anne McKinnell

    Be aware of when mating season (or “running season”) is for the type of animal you’ll be photographing. Male mammals are full of testosterone at this time of year, and can be aggressive, violent, and very dangerous. Avoid photographing at these times. Similarly, find out when animals are likely to be giving birth and raising their young. We all know how risky it can be to get in between a mama bear and her cubs.

    Whenever you’re dealing with wildlife, always remember that any creature can be dangerous when provoked, and it’s very important to treat animals and their habitat with the utmost care and respect.

    For more tips on wildlife photography try these articles:

    • Manipulating Natural Light in Wildlife Photography
    • How Low Can you Go? An Illustration of Camera Angle for Wildlife Photography
    • Making Sharper Wildlife Photographs – [Part 1 of 2]
    • Making Sharper Wildlife Photographs – [Part 2 of 2]

    The post 5 Most Common Mistakes in Wildlife Photography – and How to Avoid Them by Anne McKinnell appeared first on Digital Photography School.


    Digital Photography School