Category: Photography

  • 50 Smashing Reflection Photography Examples to Boost Your Creativity

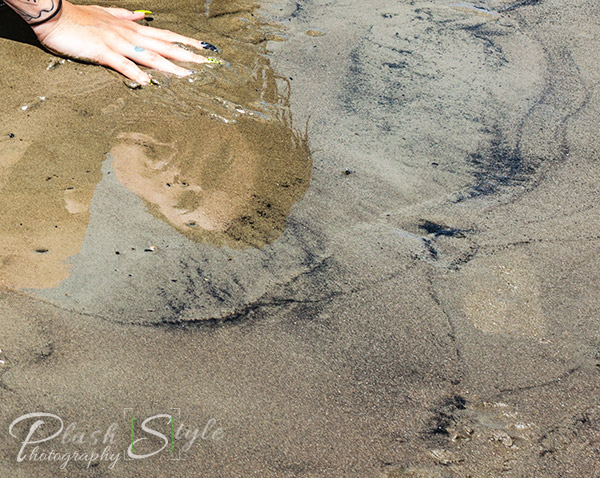
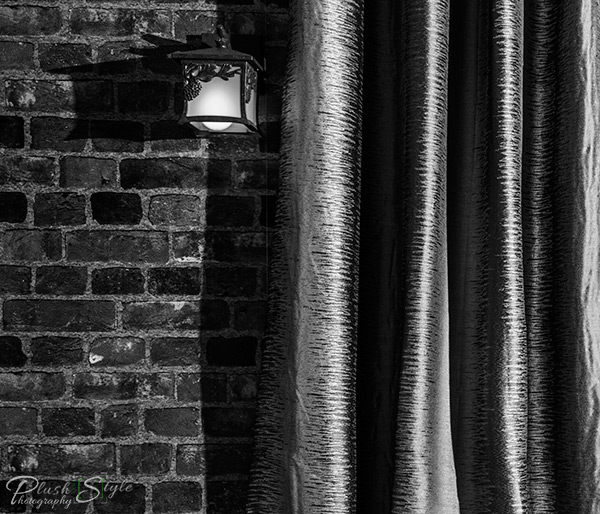
    Reflection is a great way to spice up a lifeless photo and create a beautiful composition. Using water, mirrors, windows or any other kind of reflective surface can change an image into a work of art. The best thing about using reflection is that you can turn something really simple and straightforward into something abstract, richer and even mysterious. However, Continue Reading

    The post 50 Smashing Reflection Photography Examples to Boost Your Creativity appeared first on Photodoto.


    Photodoto

  • The MagMod Speedlight Modifier – a Review

    The MagMod speedlight modifier solves several problems and challenges posed by other systems.

    The MagMod speedlight modifier solves several problems and challenges posed by other systems.

    Until now, most speedlight modifiers on the market have been pretty inconvenient to use. I’m not talking about the quality of their output– just the lengths we’ve had to go in order to attach them to our flashes, and– perhaps more importantly– get them to stay on our speedlights over the course of a photo shoot. If your flash has a permanently attached strip of Velcro, or you have a collection of assorted straps, bands, tapes, attachment accessories, and other DIY solutions for your modifiers, you know what I’m talking about. If you’ve ever had a gel break, tear, bend, or just blow away in a stiff breeze, you’ve probably found yourself wishing for something better at least once or twice.

    Enter the MagMod system. Made from high-quality silicone rubber, each piece of the MagMod system is compact, easy to attach, and gets the job done with minimal hassle.

    The MagGrip

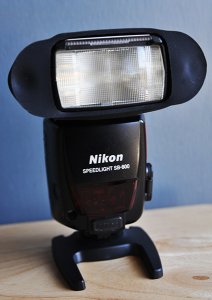
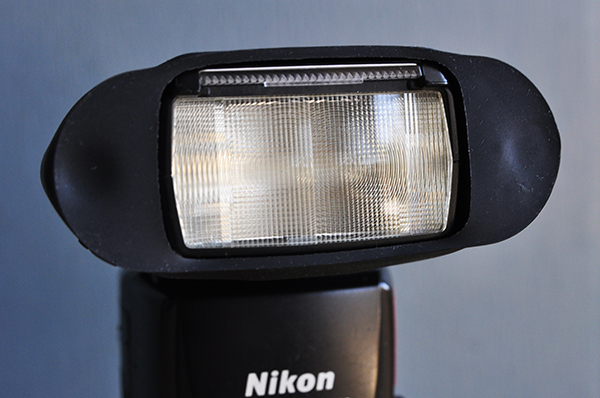
    The MagGrip is the foundation of the MagMod system. Designed to fit virtually any hot shoe flash available, the MagGrip fits tightly and securely around the flash head. Despite my best efforts to shake it off or “accidentally” dislodge it from a Nikon SB800, it wouldn’t budge. At all. It’s easy enough to remove when you want it off, but there’s no need to worry about it while on a shoot.

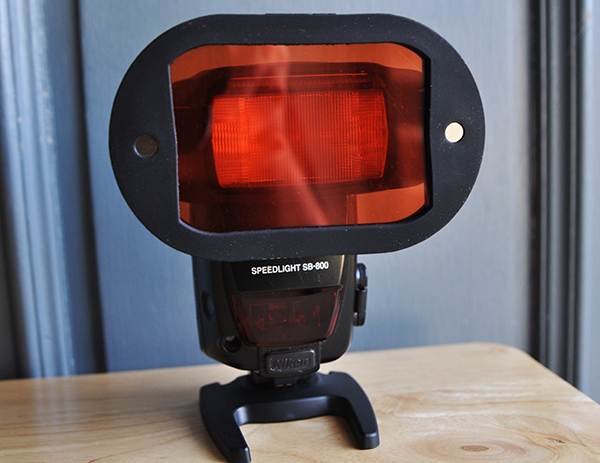
    Another key feature of the grip are the two neodymium (rare earth) magnets that hold the actual modifiers in place. I won’t bore you with the research I did into the science of these magnets. All you need to know is that they are the strongest type of permanent magnet commercially available, which means they’ll do their job without losing any of their magnetism over time.

    madmod-review-dps-002

    The MagGrid

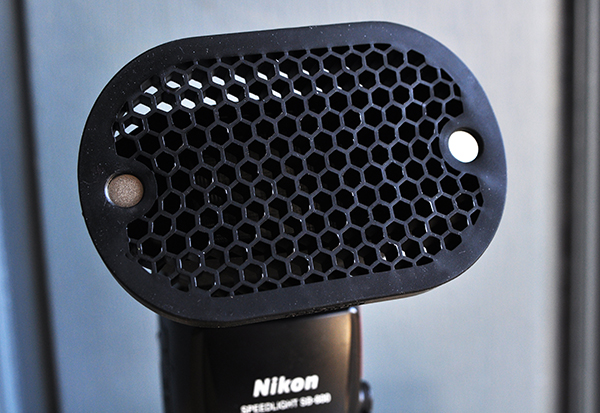
    The basic purpose of a lighting grid is to give you more control over where the light falls, either on the subject or the background. It can be a useful tool for highlighting the subject, a specific part of the frame, or for creating interesting background effects. The MagGrid attaches magnetically to the grip in pretty much the blink of an eye. With no need for attachment straps or bands, I was able to spend more time on shooting and less on managing the equipment.

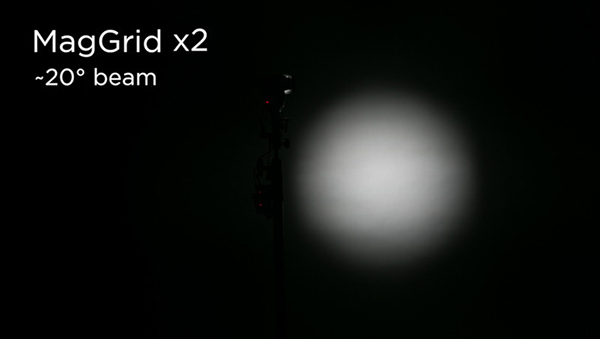
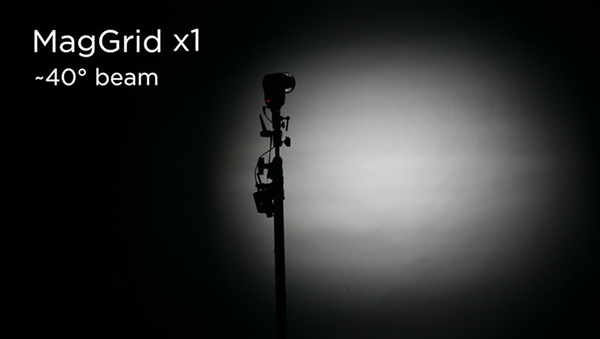
    The single grid included in the basic kit casts a -40° beam with minimal spill and hot spots. The beam can be narrowed even further by attaching a second or third grid to the first. The grid is made from the same silicone rubber as the grip, which prevents the grid cells from cracking or chipping–a fairly common problem with hard plastic grids.

    madmod-review-dps-003

    The images below illustrate how stacking multiple grids affects your ability to concentrate the light precisely where you want it.

    madmod-review-dps-008

    madmod-review-dps-009

    The MagGel Kit

    Let’s face it–gels are awesome, but they are also a pain. They help you fine-tune your lighting, but they are also flimsy, often difficult to attach, and need to be replaced fairly regularly. The rigid sheets of the MagGel Kit, however, are made to last and are held securely in place through tension and friction. They are also stackable, giving you more freedom to create different lighting effects.

    madmod-review-dps-004

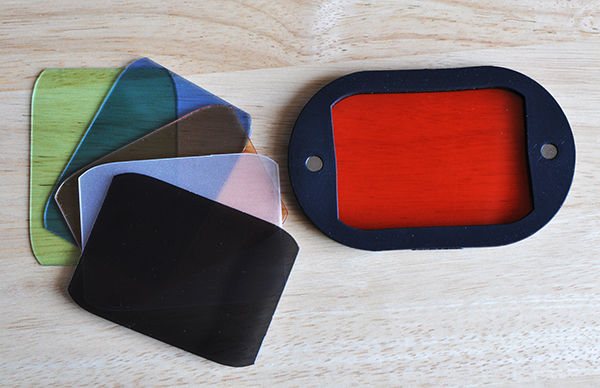
    The Basic Gel Kit includes one of each of the following:

    • Full CTO (Rosco #3407)
    • 1/2 CTO (Rosco #3408)
    • 1/4 CTO (Rosco #3409)
    • 1/2 Blue (Rosco #3204)
    • 1/2 Tough Plusgreen (Rosco #3315)
    • 1/2 CT Straw (Rosco #3442)
    • 3-stop Neutral Density (Rosco E-211)
    • Opal Frost Diffuser
    madmod-review-dps-006

    Gel sheets from the Basic Gel Kit. The MagGel can hold multiple sheets at once. In this photo, it’s holding three warming gels.

    The Creative Gel Kit includes one each of the following:

    • Purple
    • Blue
    • Teal
    • Green
    • Yellow
    • Orange
    • Red
    • Magenta
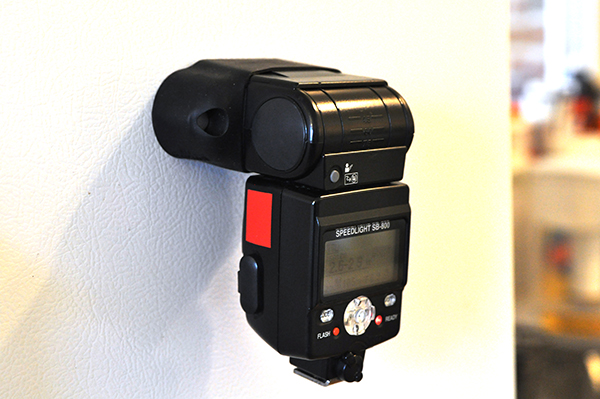
    Probably not the smartest idea to use a speedlight as a refrigerator magnet, but you get an idea of how strong these magnets are.

    Probably not the smartest idea to use a speedlight as a refrigerator magnet, but you get an idea of how strong these magnets are.

    Wrap-up

    Speedlights have become more powerful and versatile than ever before. When combined with a solid grasp of off-camera lighting techniques, speedlights can often narrow the technical and creative gaps between small flashes and their bulky studio counterparts. The MagMod system closes that gap even further, simply by making some of photography’s most basic lighting modifiers easier to use. Obviously, it doesn’t address every lighting scenario or every type of modifier. While the gel kit does include a diffuser, for instance, it’s certainly not going to address the needs of the photographer who relies heavily on softboxes or umbrellas for casting a wide spread of light. It does, however, address some of the most common lighting challenges facing photographers who depend on speedlights to tell their stories.

    For more information, check out the MagMod website.

    The post The MagMod Speedlight Modifier – a Review by Jeff Guyer appeared first on Digital Photography School.


    Digital Photography School

  • Developing a Creative Eye – be Careful Before Deleting Your Photos

    PhotoA Good Eye

    Photo A: ‘Reflections On Land’ by Patrick Elliott

    DEVELOP A CREATIVE EYE

    The more you get out and use your camera, the more proficient you become as a photographer. In the process of learning and using your camera, you will develop a better eye from a creative perspective. It is important that you put this “creative eye” to use on a regular basis, not only to maintain it, but also to improve it.

    Taking pictures isn’t the only time you have to use your creative eye. You can use it by looking at other people’s pictures to see what you could have done differently, or what factors you will take from their pictures to add to your photography. As you go through your daily routine, you can imagine that you are constantly looking through a viewfinder or LCD screen, and as your eye develops, you will have more and more ideas for creative shots everywhere you go.

    You can especially put your eye to use by looking at your pictures before the editing process. Developing this creative eye will benefit you as you are sorting through the pictures after a photo shoot. Put your eye to use by carefully looking at all of your images before deleting any of them. Let me tell you why.

    DELETE IT OR KEEP IT?

    It is very common to come back to your computer after a photo shoot, dump the images into your computer, and start deleting all the “bad” shots. Or, you may be the type who deletes the “bad” shots in the camera before importing them into your computer. Either way, be careful as you do this because you could overlook a good thing in those shots. The photo above (Photo A) isn’t a planned shot that I took during a photo shoot. It is the result of using my eye before deleting a bad shot. If you look at the photo below (Photo B), it is a bad shot that was not the model’s fault. We were outdoors and the lighting kept changing constantly because the sky was rapidly going through changes. She was in the process of getting prepared for a shot, and I was taking test shots while adjusting my settings to get the correct exposure.

    As I got the images from that photo shoot to my computer, the photo that you see below (Photo B) was a “bad” shot that would normally go to the trash bin. But, before deleting it, I put my creative eye to use by carefully looking over it and something caught my eye. I saw a photo within the photo, and decided to open it up in my photo editor to bring this vision to life. I put my crop tool to use, and the result was the photo that you see above (Photo A).

    PhotoB Bad Shot

    Photo B: Carefully look over a bad shot like this before deleting

    HOW SHARP IS YOUR EYE?

    Do all that you can to develop a creative eye. I have mentioned a few techniques for you to practice so that your eye can become sharper. It is more than likely that photography may have you spending more time sitting down at the computer rather than the actual photo shoot. Use that time to really put your eye to use. What ways do you develop your creative eye? Have you ever seen something special in a picture before deleting it?

    PhotoC Bad Shot

    A test shot that would normally be deleted

    PhotoD Good Eye

    ‘Living Outside’ by Patrick Elliott. Using the creative eye to make good use of a ‘bad shot’ you see in the image just above.

    The post Developing a Creative Eye – be Careful Before Deleting Your Photos by Patrick Elliott appeared first on Digital Photography School.


    Digital Photography School

  • Four Ways to Improve Your Photos With the Clarity Slider in Lightroom

    Using the Clarity slider in Lightroom

    Andrew S. Gibson is the author of Mastering Lightroom: Book 2 – The Develop Module. There’s a special deal on now at Snapndeals, get 40% off for a limited time only.

    The Clarity slider is one of the most useful in Lightroom when it comes to giving your images extra punch and impact. Today I’m going to show you several ways you can use it to improve your photos. But first, let’s take a look at exactly what the Clarity slider does, and how it differs from its cousin the Contrast slider.

    This photo is ideal to demonstrate the difference:

    Using the Clarity slider in Lightroom

    Using the Clarity slider in Lightroom

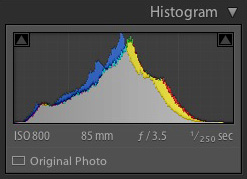
    It was taken on an overcast day and the light was very flat. This is confirmed by the histogram, which has gaps on both the left and right-hand sides (screen capture image to the right).

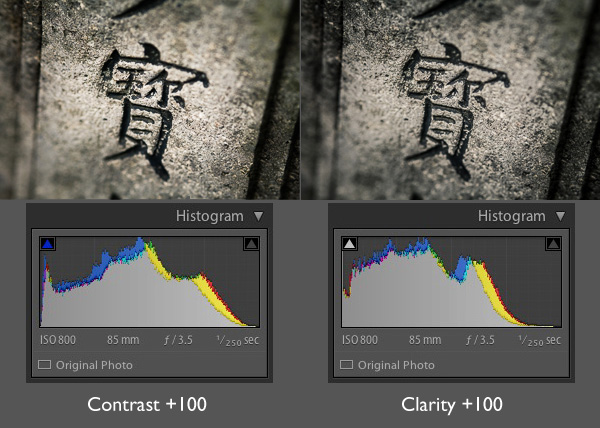
    Now let’s see what happens when we set the Contrast slider, and then the Clarity slider, to their maximum settings of +100:
    Using the Clarity slider in Lightroom

    The most obvious difference at this scale is that the Contrast slider has a more far reaching effect. It makes both the shadows darker and the highlights brighter, stretching the histogram in the process.

    The Clarity slider works differently. It increases contrast, but in the mid-tones only. The highlights aren’t affected, and if anything the photo becomes darker as the Clarity slider has a greater effect on dark tones than the Contrast slider.

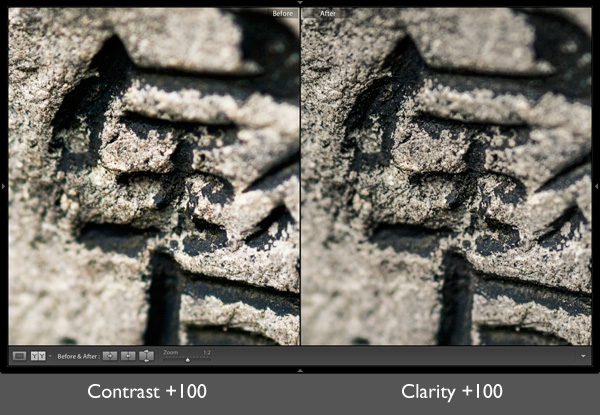
    Here’s a close-up of both images so you can see the effect in more detail. Look closely and you’ll see that the Clarity slider brings out more texture than increasing Contrast.
    Using the Clarity slider in Lightroom

    That’s the key to using this slider successfully. Increasing mid-tone contrast brings out texture and detail, increasing the tactility and apparent sharpness of the image. That’s what the Clarity slider is designed to do. Now I’m going to show you some practical applications.

    1. Emphasizing texture

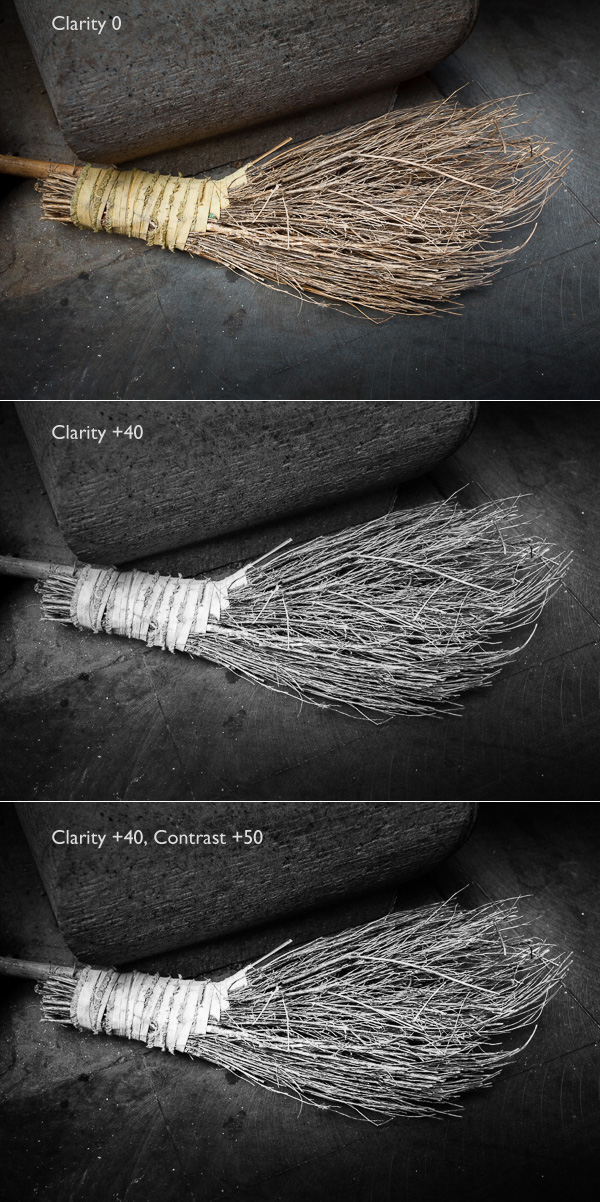
    The Clarity slider in the Basic panel is a  global adjustment – meaning that, moving this slider affects the entire image. A small but subtle boost to Clarity can lift just about any image. Photos with more texture, such as the one below, may benefit from a larger increase in Clarity to bring out the texture and detail. This technique is especially effective in black and white. Plus, there’s nothing to stop you increasing contrast as well, especially in black and white, which usually benefits from higher contrast than colour images.
    Using the Clarity slider in Lightroom

    2. Emphasising texture locally

    There is a theory in photography called visual mass that states that certain elements pull the viewer’s eye more than others (you read more about it in my article Composition, Balance and Visual Mass). One of these elements is sharpness. The eye goes to sharp parts of the image before it goes to unsharp, or out of focus areas.

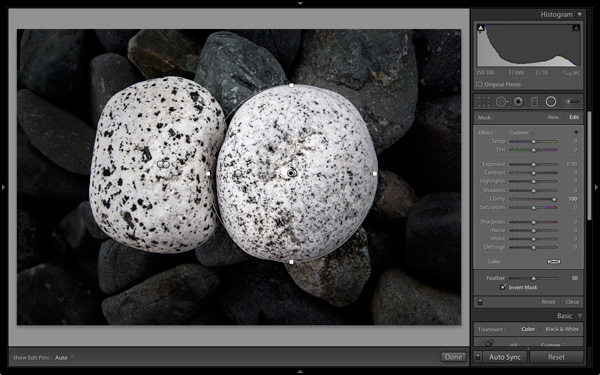
    You can use this to your advantage by making local adjustments to Clarity rather than global ones. In the example below, I wanted the white stones to be the centre of attention. The principle of tonal contrast ensures that they are, and I emphasixed it here by placing Radial filters over the stones and setting Contrast to +100 in each one.
    Using the Clarity slider in Lightroom

    Note: The Radial filter is new to Lightroom 5. If you have an older version of Lightroom you can use the Adjustment Brush tool instead.

    3. Emphasize the eyes in a portrait

    There’s another area where increasing Clarity locally can make a huge difference and that’s in portraiture. Use either the Radial filter or Adjustment Brush to increase the Clarity of your model’s eyes. Again, it’s a subtle, but often effective change. You can also do the same with your model’s mouth to emphasize the lips. Remember that as Clarity tends to make things darker, you’ll probably need to increase Exposure a little as well.

    Using the Clarity slider in Lightroom

    4. Soften skin

    So far we’ve just looked at what happens when you increase Clarity, but you can also go the opposite way and decrease it in order to obscure detail, or soften part of the photo. You do have to be careful with this as the result can look a little false. A light touch is essential.

    You can use negative Clarity as a kind soft focus effect in portraits. The most effective way is to increase Sharpness at the same time that you decrease Clarity. This helps retain realistic looking texture in the skin and avoids the false effect I spoke of earlier.

    Lightroom has a built-in Adjustment Brush preset called Soften Skin which does exactly that. You can see the effect here. It’s subtle, look at the area under the model’s eyes if you’re not sure what the difference is:
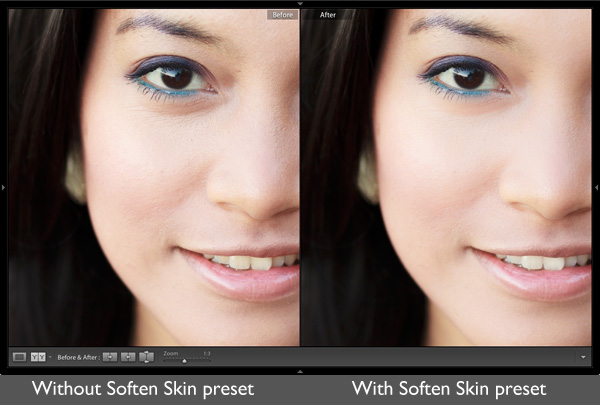
    Using the Clarity slider in Lightroom

    To use the Soften Skin preset, start by activating the Adjustment Brush and paint in the area you want to apply the preset to (shown in red below). Leave the eyes, eyebrows, mouth and tip of the nose alone as you don’t want to soften those areas.
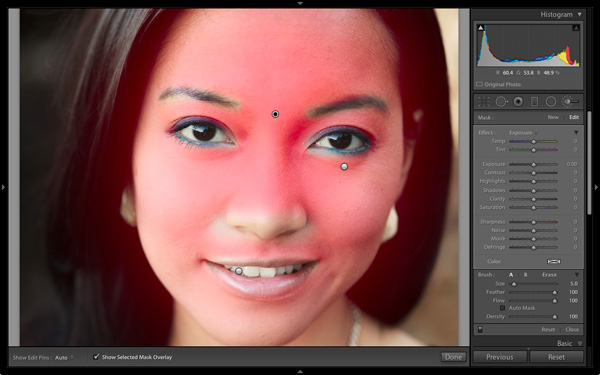
    Using the Clarity slider in Lightroom

    Select Soften Skin from the Effects menu. Lightroom sets Clarity to -100 and Sharpness to +25.
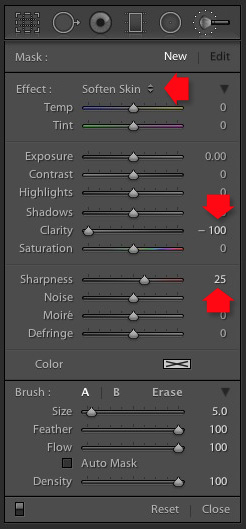
    Using the Clarity slider in Lightroom

    Using the Clarity slider in Lightroom

    This is the strongest Soften Skin preset. If it’s too strong, you can reduce it by hovering the mouse over the Adjustment Brush pin until the double arrow icon (left) appears. When you see it, hold the left mouse button down and move the mouse left. Lightroom reduces the Clarity and Sharpness settings proportionally. Moving the mouse left, reduces the settings, moving it right increases them. Let go when it looks good to your eye. (You can also adjust the sliders manually)

    Your turn

    How do you use the Clarity slider? I’m curious to see what applications you have come up with for it.

    Let us know in the comments, and feel free to share your photos so we can see what you have done.


    Mastering Lightroom: Book Two
    Mastering Lightroom: Book Two – The Develop Module ebookMy new ebook Mastering Lightroom: Book Two – The Develop Module teaches you how to process your Raw files in Lightroom for spectacular results. Written for Lightroom 4 & 5 it takes you through every panel in the Develop module and shows you how to creatively edit your photos. It’s now 40% off at Snapndeals for a limited time only.

    The post Four Ways to Improve Your Photos With the Clarity Slider in Lightroom by Andrew S. Gibson appeared first on Digital Photography School.


    Digital Photography School
  • Weekly Photography Challenge Landscapes

    Yesterday I shared a collection of stunning landscape images and asked a question at the end of the list. If you missed it, you can see the collection and my question here.

    By Eric Bryan

    If you haven’t figured out the three things that I think make all, or most of those images a cut above – let me help you out:

    1. The light – having the right light in landscape photography is crucial to creating an image that is better than good, it’s great. Light is everything and what landscape photographers drool over when they find the “good light” or they wait hours and hours, or sometimes even days to get it.
    2. Simplicity – look at many of the images in the collection again. See how some have very few elements in the image? More is less. Keep things simple and draw the viewers attention.
    3. Going the extra mile – getting off the main road and beaten track is another key to great landscape photography. Anyone can stop at the “viewpoints” along the highway and get the same shot. But if you really want to take it up a notch it’s being willing to hike into the back country and camp overnight just to get a shot of the sunrise in a remote location. Or even getting up for sunrise in the first place (see not on light above again). Are you willing to stand in the creek and get wet if it’s going to add more drama to your image, or climb a mountain, or freeze your butt off in the cold? Those are the things that the best landscape photographers do that most of us don’t and therefore they get the images we all wish we had.

    Now it’s your turn! The weekly photography challenge is of course, landscape photography. 

    Here’s a few more example which exhibit some of those qualities:

    By Trey Ratcliff

    Camped overnight on the great wall – go read the full story about this image on Trey’s blog (linked to from the image on Flickr)

    By skoeber

    By James Jordan

    By Yasin Hassan – ????? ???

    By Eleder Jimenez Hermoso

    By Trey Ratcliff

    Willing to risk life and limb on a rickety, questionable boat/raft on a river in China, in the pitch black darkness, to get this shot above. To read the story of the making of the image – click the image to go to Flickr.

    Share your landscape masterpiece images!

    Simply upload your shot into the comment field (look for the little camera icon in the Disqus comments section as pictured below) and they’ll get embedded for us all to see or if you’d prefer upload them to your favourite photo sharing site and leave the link to them.

    And don’t forget to share the story of your image as well. Did you do #3 above and go the extra mile? Tell us about it!

    The post Weekly Photography Challenge Landscapes by Darlene Hildebrandt appeared first on Digital Photography School.


    Digital Photography School
  • On Manufactured Opportunities

    Every day I try to spend as much time walking as my schedule will allow. Ideally, I just head off into the woods and shoot for at least ten miles a day. I don't always hit that goal, but even on a bad day I'll get most of it.

    That's because long walks invariably pay for the time they cost in many ways—health, mental well-being, increased fitness and—maybe most important—a steady stream of ideas.

    Of those ideas, there is one type that constantly proves itself to be the most valuable to me as a photographer. And that is the concept of the manufactured opportunity.

    Read more »
    Strobist

  • A Collection of Stunning Landscape Photographs

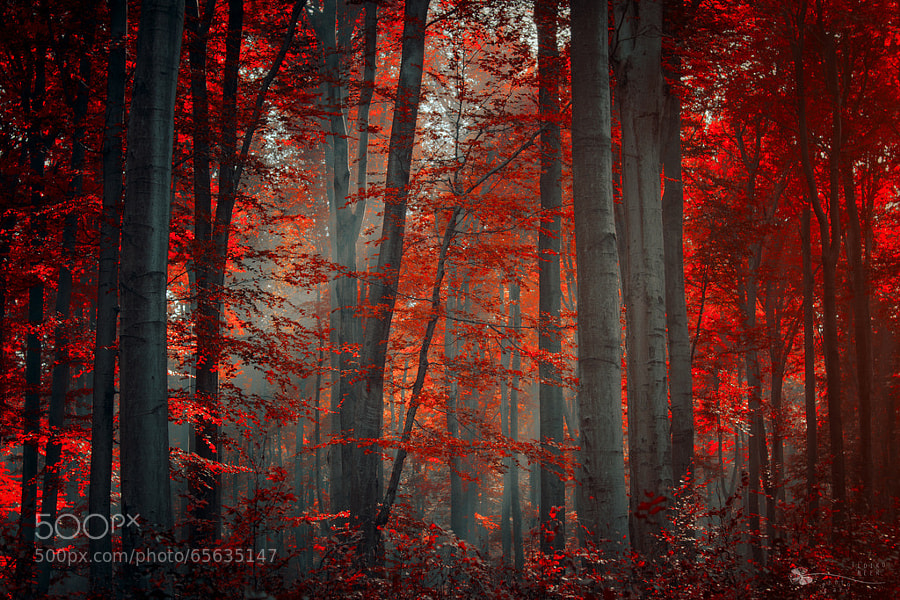
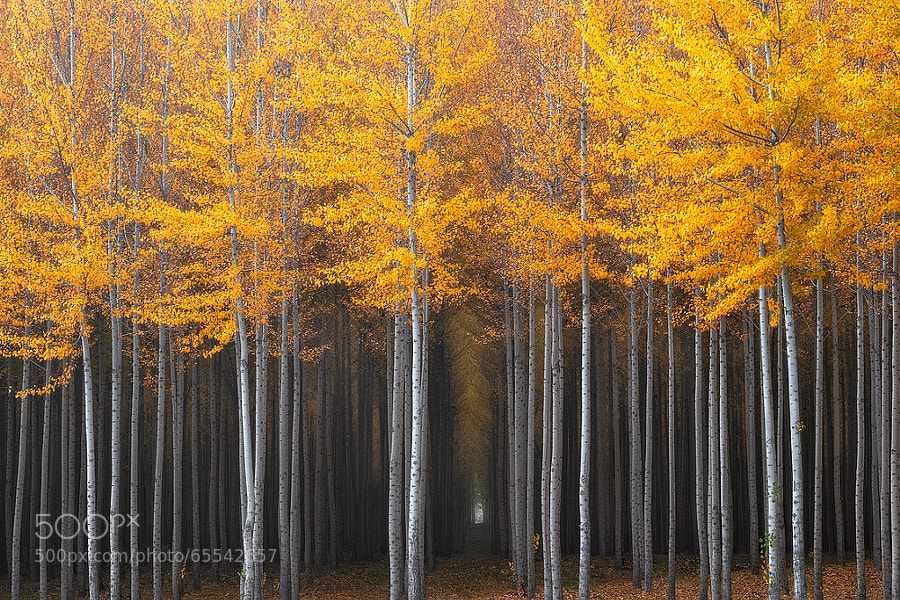
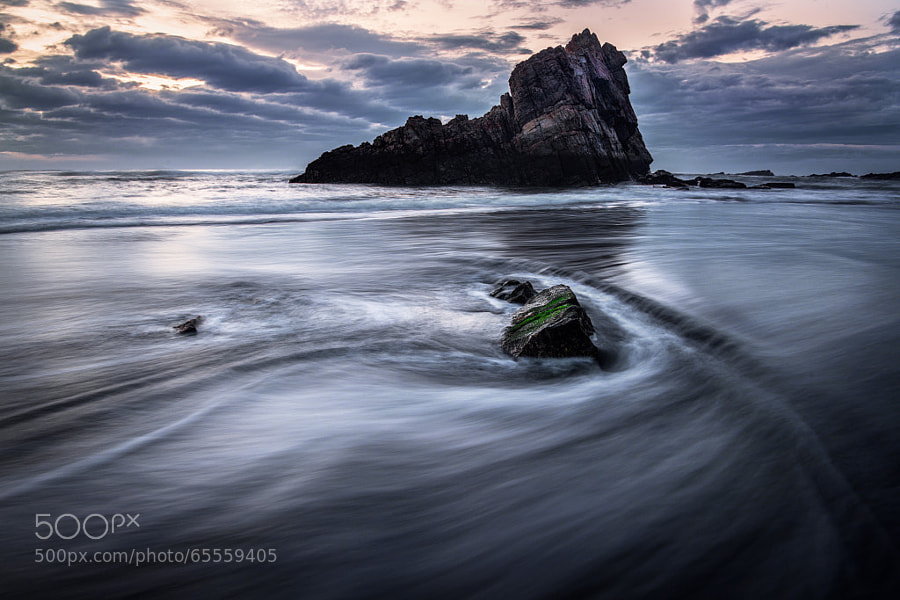
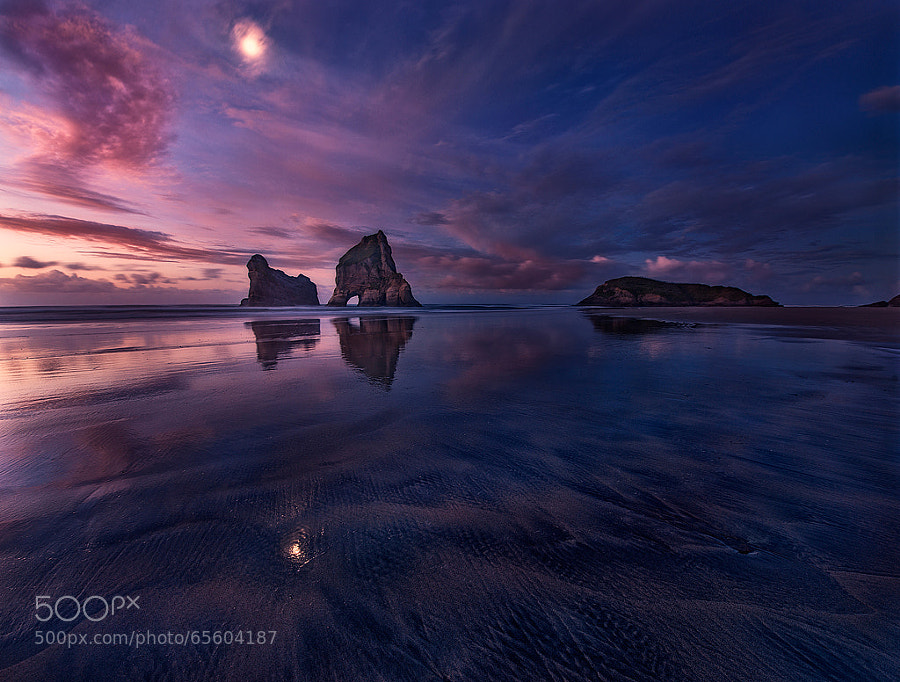
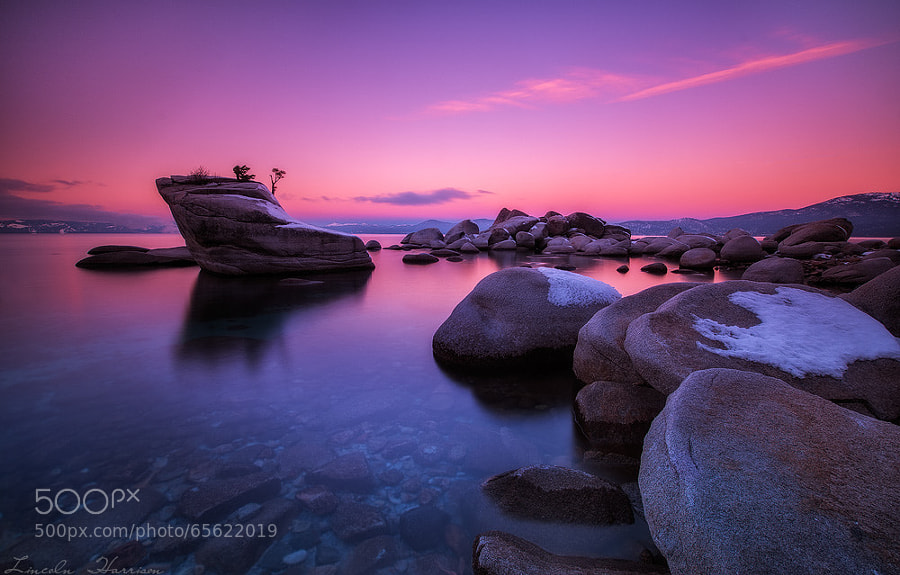
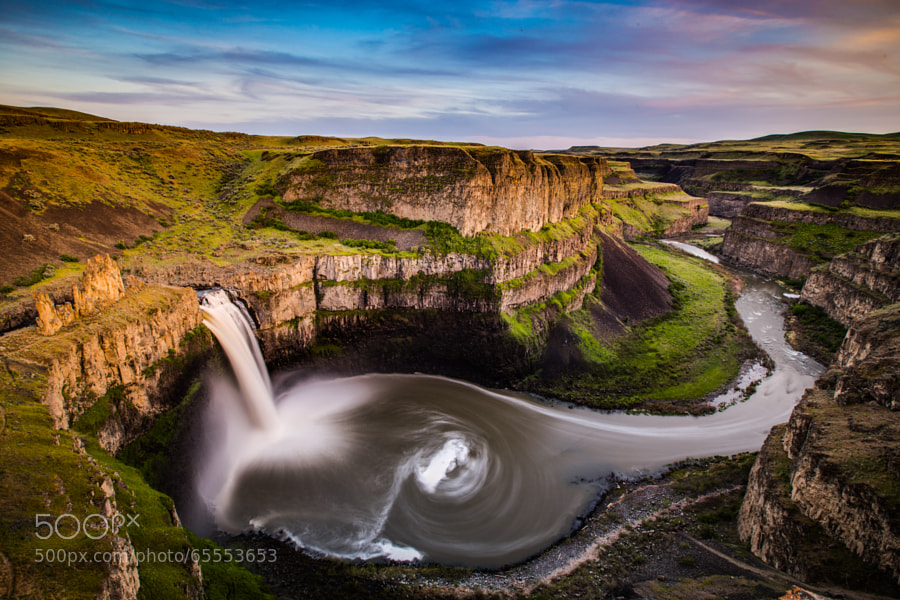
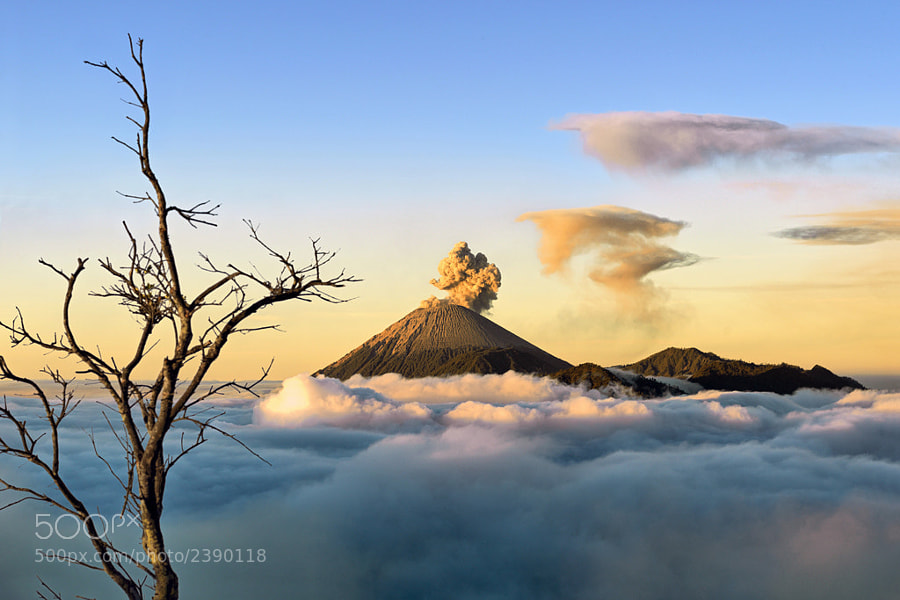
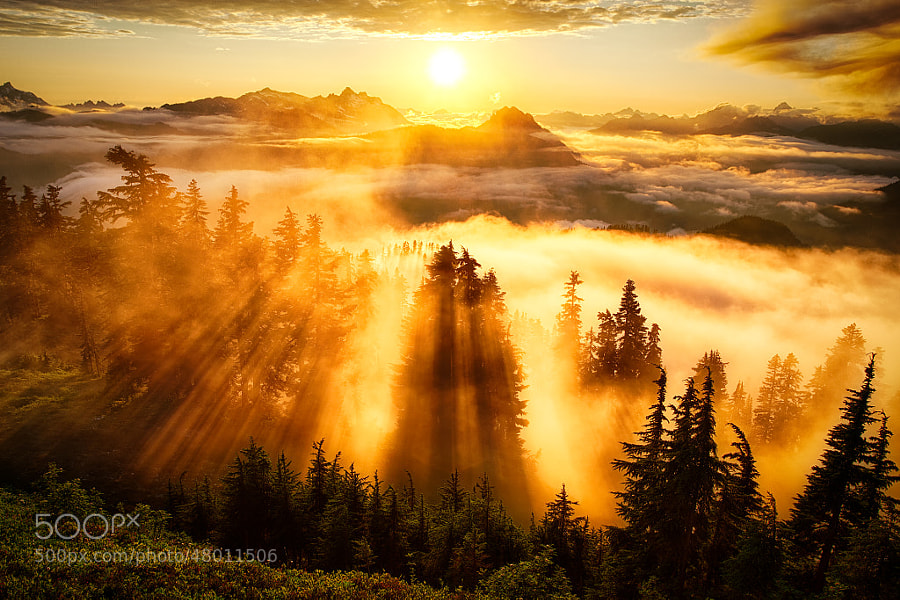
    This week’s collection of images to inspire you comes from 500px! Thanks to Evgeny Tchebotarev (founder of 500px) for letting us use these images, and for housing such a great website full of amazing images. To view any of them larger in all their glory, just click on the photo credit below the image.

    Enjoy these amazing landscape photographs!

    Photograph stille wasser by Ralf Thomas on 500pxstille wasser by Ralf Thomas on 500px

    Photograph Firewood by Ildiko Neer on 500px Firewood by Ildiko Neer on 500px

    Photograph blue dreams by dpicture on 500pxblue dreams by dpicture on 500px

    Photograph Mysterious Hallway by David Thompson on 500pxMysterious Hallway by David Thompson on 500px
    Photograph Time Lapse by Danny Velasco  on 500px Time Lapse by Danny Velasco on 500px
    Photograph Golden Bay: When Night Falls by Yan Zhang on 500px Golden Bay: When Night Falls by Yan Zhang on 500px
    Photograph Tahoe by Lincoln Harrison on 500pxTahoe by Lincoln Harrison on 500px
    Photograph Sweet Tuscany by Marcello  Spiazzi on 500pxSweet Tuscany by Marcello Spiazzi on 500px
    Photograph Spring has Sprung by Iron Scaggs on 500px
    Spring has Sprung by Iron Scaggs on 500px

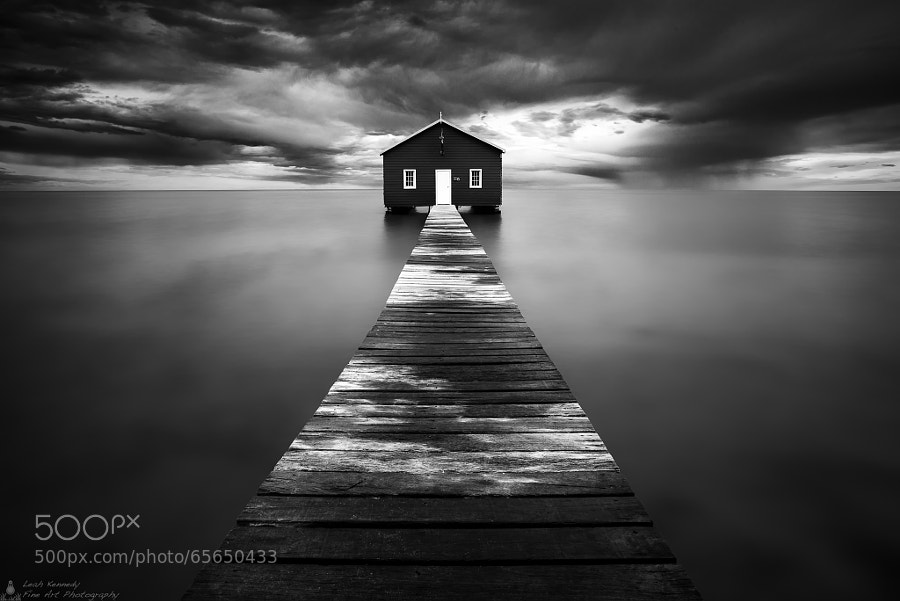
    Photograph The Boatshed by Leah Kennedy on 500pxThe Boatshed by Leah Kennedy on 500px

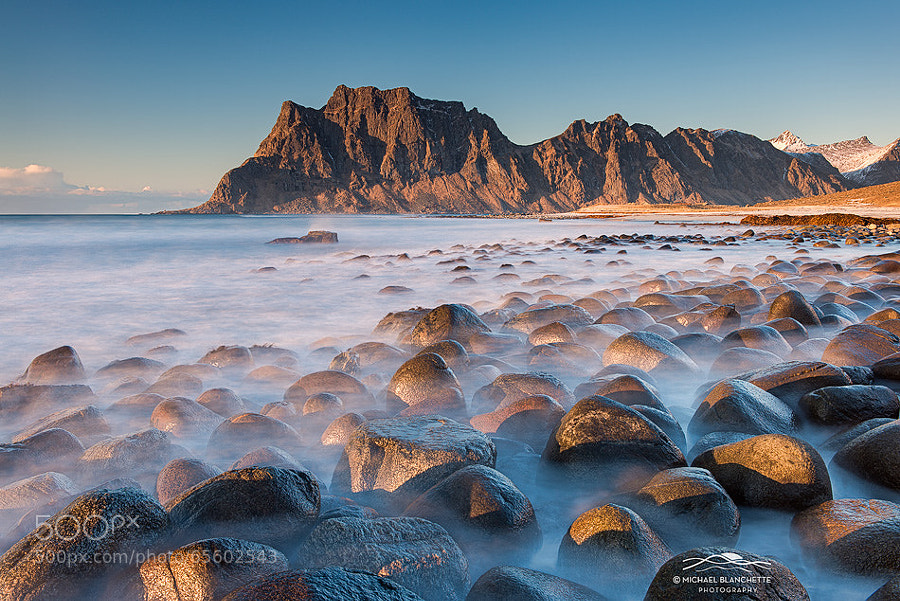
    Photograph Ghostly Rocks by Michael Blanchette on 500pxGhostly Rocks by Michael Blanchette on 500px

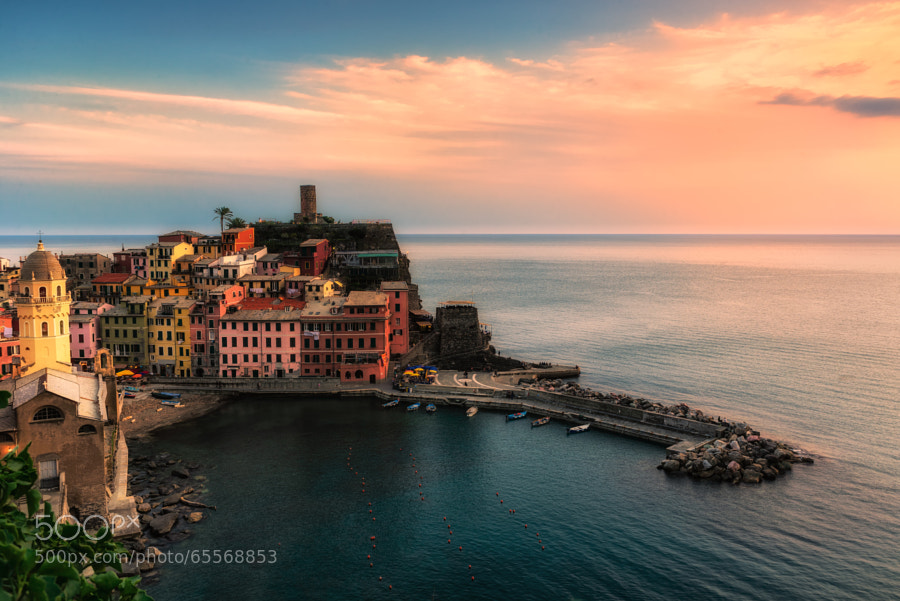
    Photograph Vernazza at sunset by Fabrizio Lunardi on 500pxVernazza at sunset by Fabrizio Lunardi on 500px

    Photograph Heaven on Earth by Hartono Hosea on 500pxHeaven on Earth by Hartono Hosea on 500px
    Photograph Breaking Through by Michael Woloszynowicz on 500pxBreaking Through by Michael Woloszynowicz on 500px
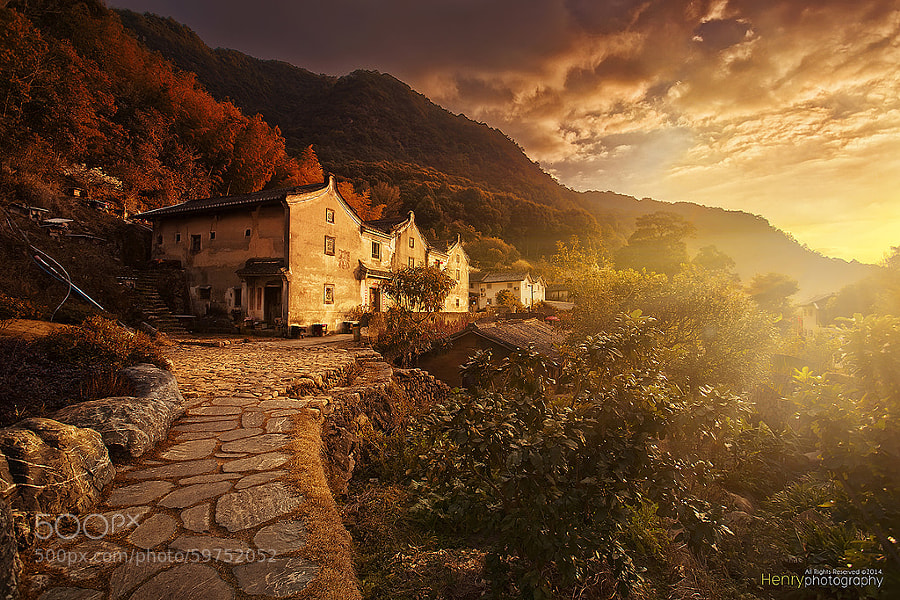
    Photograph Sunset in Old Village by Henry Wang on 500pxSunset in Old Village by Henry Wang on 500px
    Photograph Golden Hour at its Finest by Michael Matti on 500pxGolden Hour at its Finest by Michael Matti on 500px
    Photograph Heart Reef by Tanya Puntti on 500pxHeart Reef by Tanya Puntti on 500px

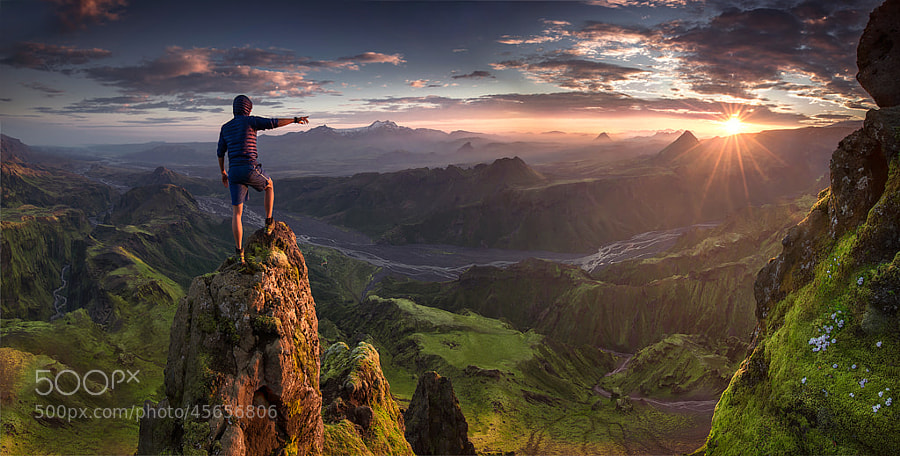
    Photograph First Contact by Max Rive on 500pxFirst Contact by Max Rive on 500px

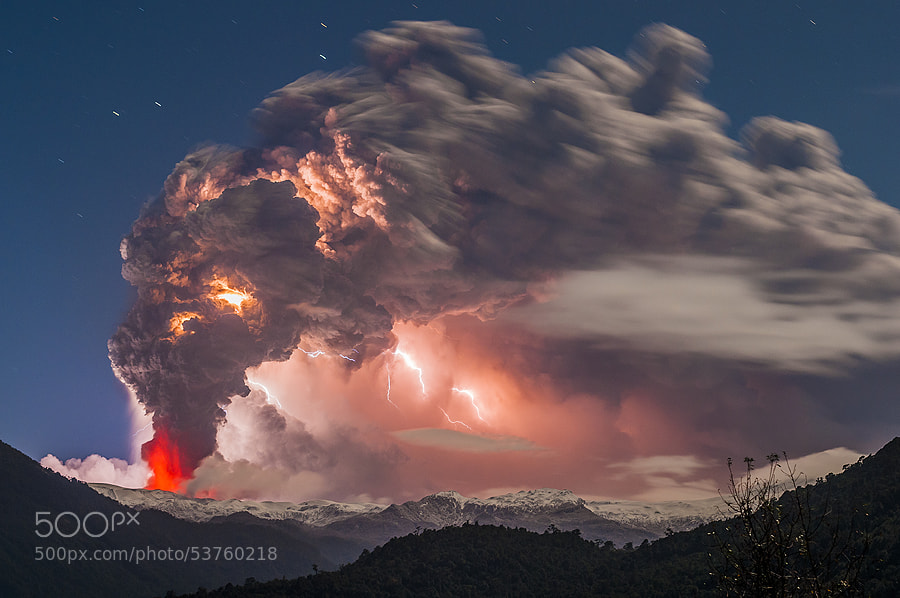
    Photograph Postcard from hell by Francisco Negroni on 500pxPostcard from hell by Francisco Negroni on 500px
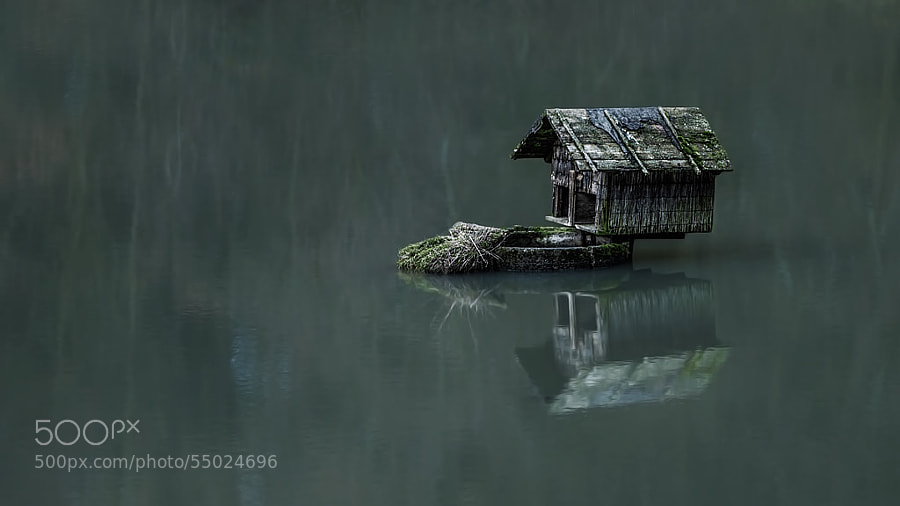
    Photograph house of the duck by Ronny Engelmann on 500pxhouse of the duck by Ronny Engelmann on 500px
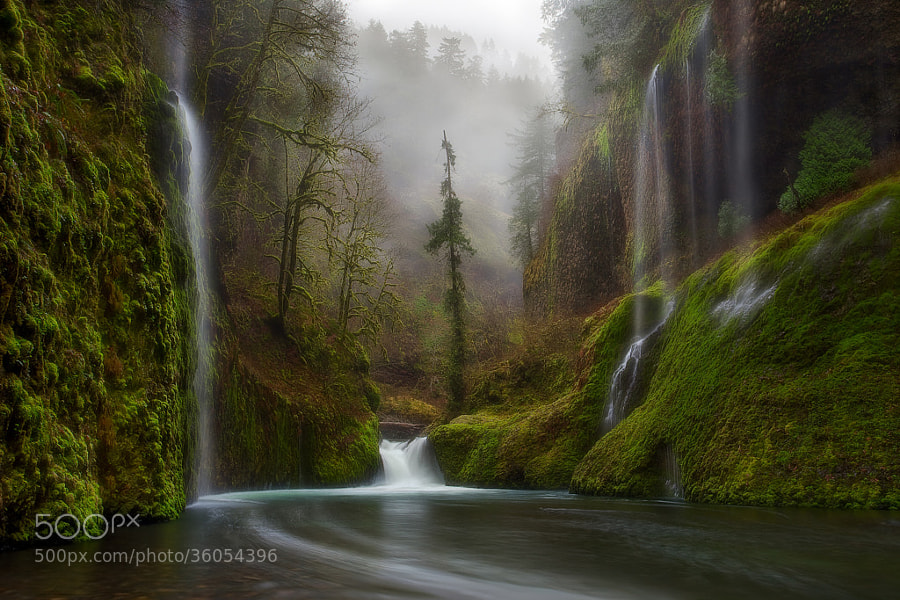
    Photograph Curtains in the Fog by Miles Morgan on 500pxCurtains in the Fog by Miles Morgan on 500px
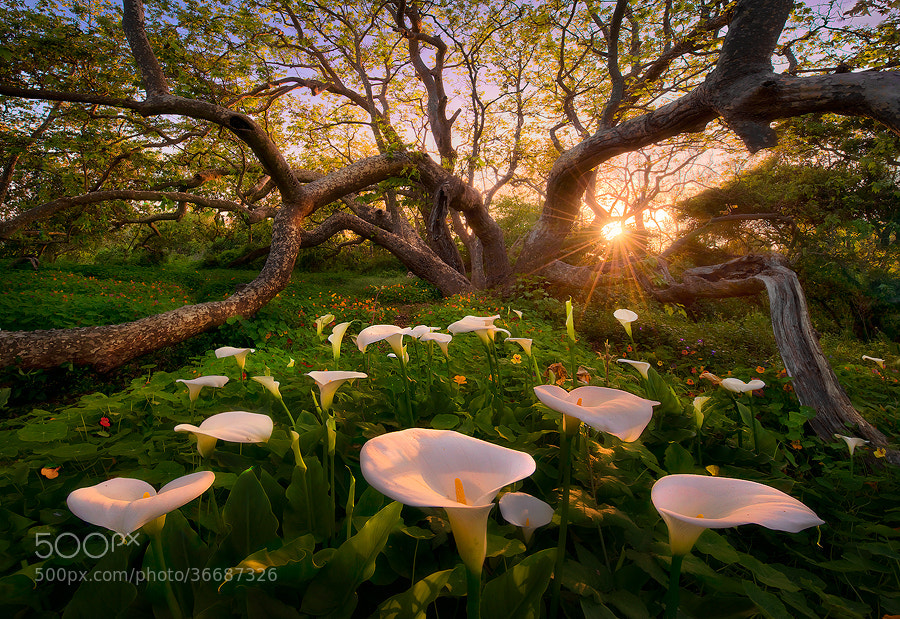
    Photograph Heaven on Earth by Marc  Adamus on 500pxHeaven on Earth by Marc Adamus on 500px

    Photograph To Hogwarts! by Daniel Korzhonov on 500pxTo Hogwarts! by Daniel Korzhonov on 500px

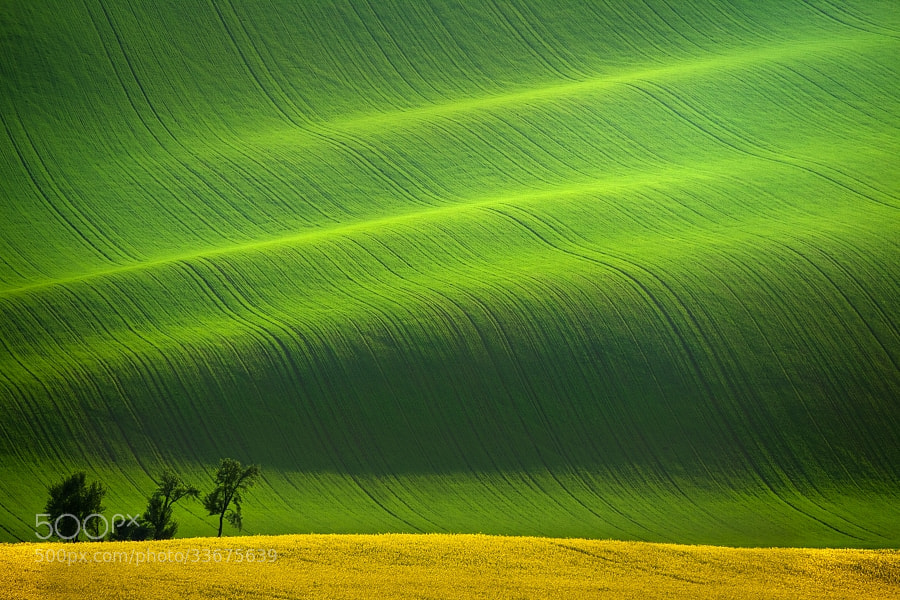
    Photograph South Moravia II by Daniel ?e?icha on 500pxSouth Moravia II by Daniel ?e?icha on 500px

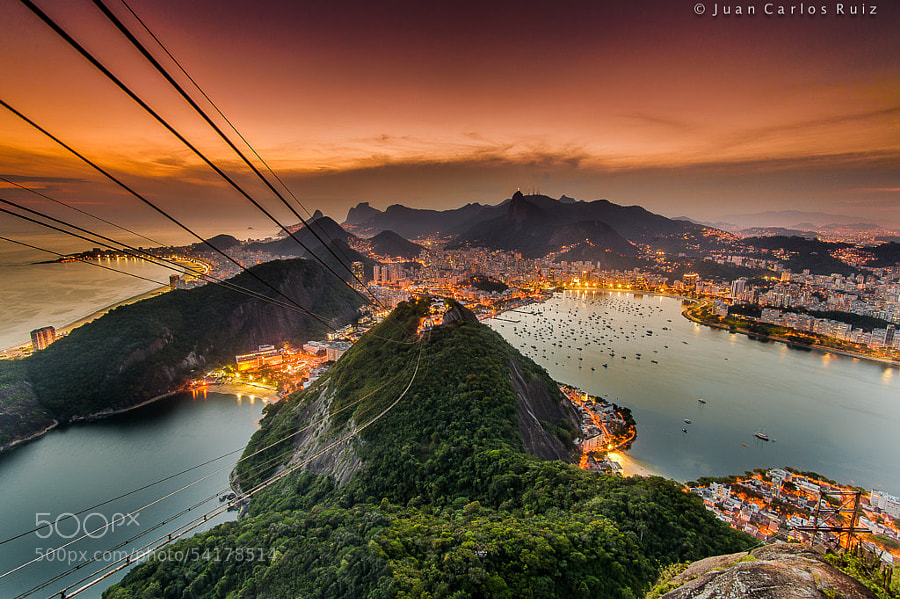
    Photograph Amazing Rio by Juan Carlos Ruiz on 500pxAmazing Rio by Juan Carlos Ruiz on 500px

    Photograph Squaw Rock Falls in the Fall by debbiedicarlo on 500px

    Squaw Rock Falls in the Fall by debbiedicarlo on 500px

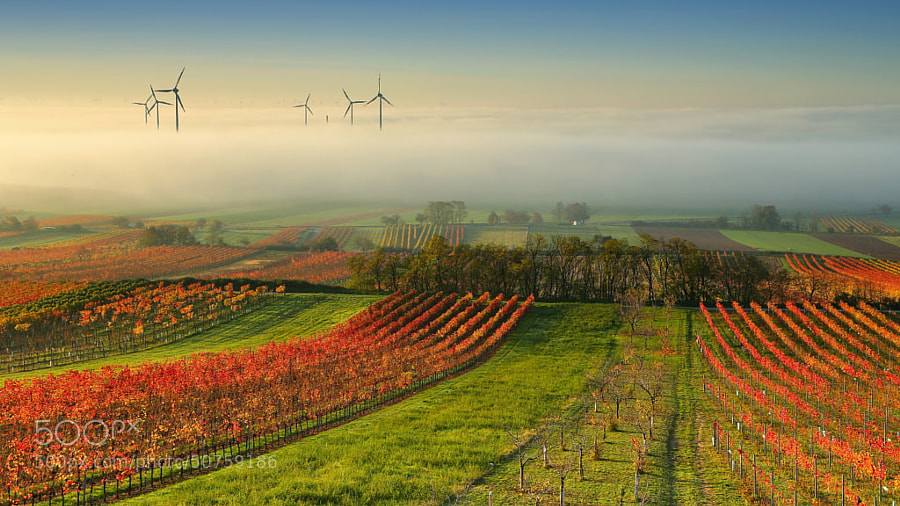
    Photograph Wine Country in the mist by Matej Kovac on 500pxWine Country in the mist by Matej Kovac on 500px

    Photograph Wood Cart Rail #1 by Justin Jones on 500px Wood Cart Rail #1 by Justin Jones on 500px
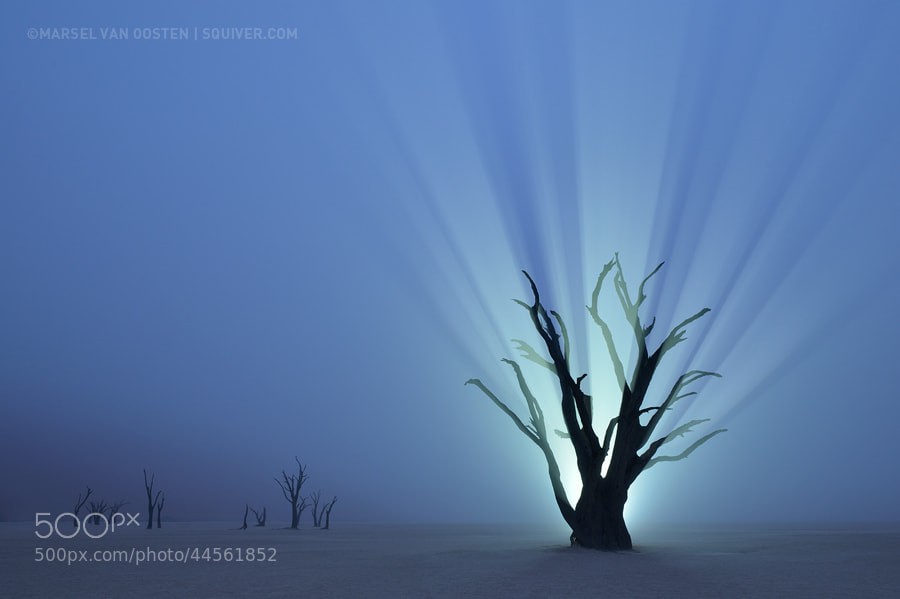
    Photograph Resurrection by Marsel van Oosten on 500px Resurrection by Marsel van Oosten on 500px
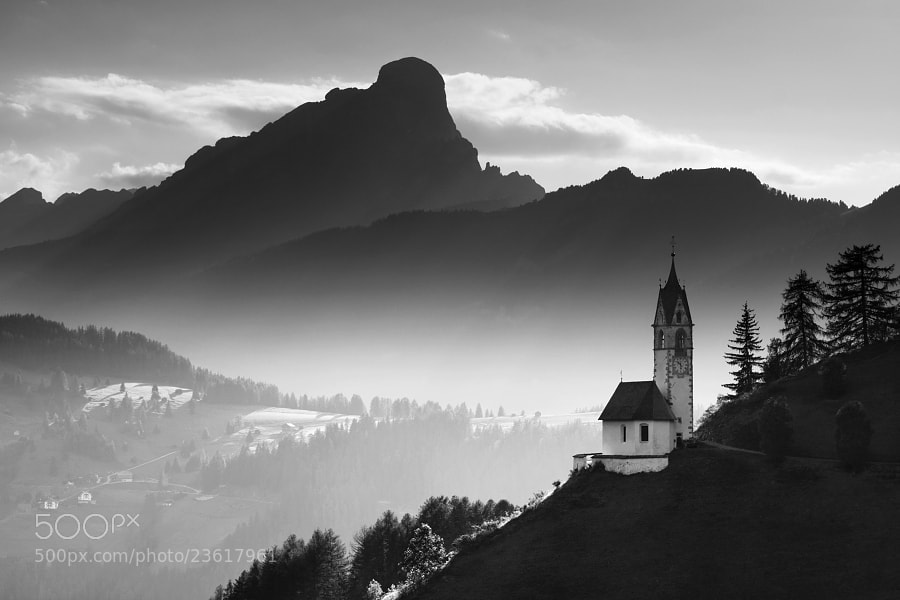
    Photograph Alpine Church  by Daniel ?e?icha on 500pxAlpine Church by Daniel ?e?icha on 500px
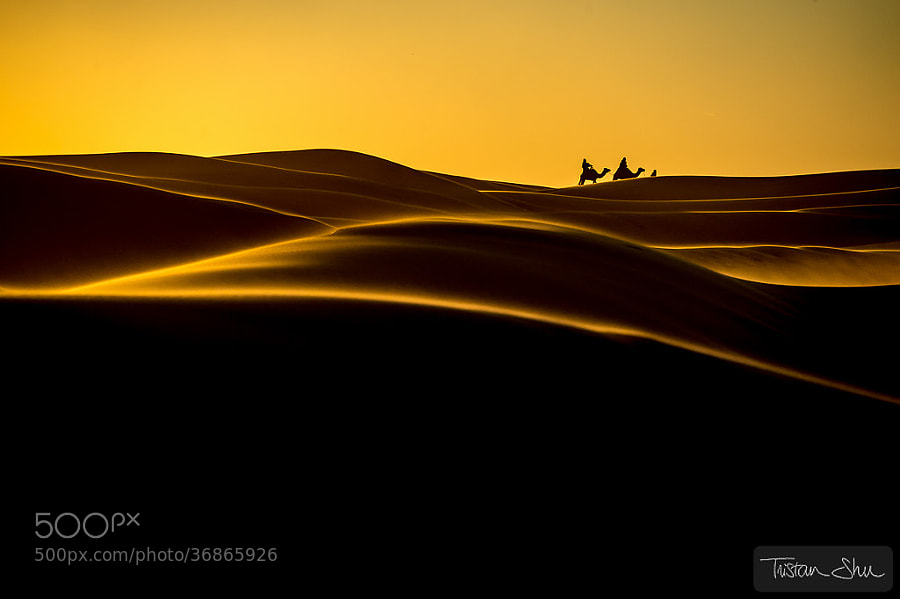
    Photograph The Desert Life by Tristan Shu on 500pxThe Desert Life by Tristan Shu on 500px
    Photograph Zaanse Schans by Iván Maigua on 500px Zaanse Schans by Iván Maigua on 500px

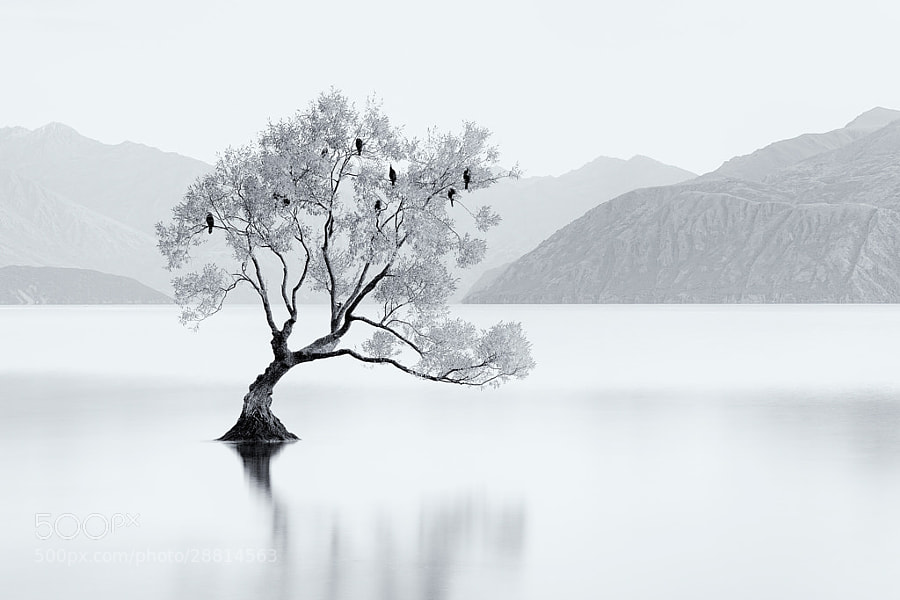
    Photograph Bird Tree by Jordan Ek on 500pxBird Tree by Jordan Ek on 500px

    I hope you notice something about many of these images. What is it that makes them great photographs? I can think of at least THREE qualities exhibited by some or most of the images above that make them a cut above the average landscape photo. Can you tell me what those three things are? What do you see that makes them stand out?

    Share in the comments if you think you know what I’m thinking!

    The post A Collection of Stunning Landscape Photographs by Darlene Hildebrandt appeared first on Digital Photography School.


    Digital Photography School
  • 5 Easy but Amazing Light Painting Experiments for Beginners

    Light painting is a photographic technique using a hand-held light source to “paint” on the film or sensor of your camera. Essentially, you’re waving lights in front of your camera, and you never know what you’ve made until you’re done, so trial and error is required. If this sounds like fun, you’ll find five light painting experiments below you can Continue Reading

    The post 5 Easy but Amazing Light Painting Experiments for Beginners appeared first on Photodoto.


    Photodoto

  • Using Daminion with Lightroom [for Advanced Users]

    daminion-opener

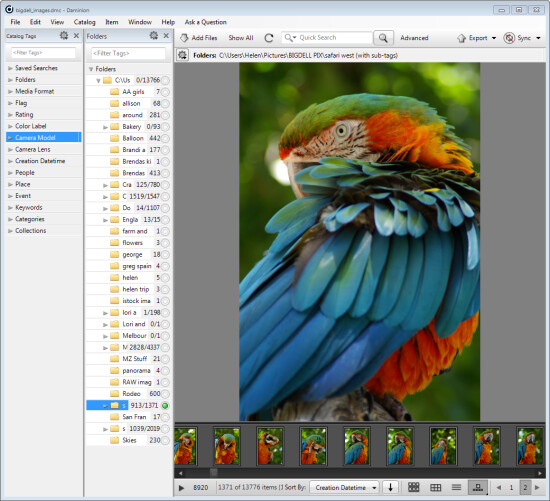
    If you have Lightroom you might assume that you have all you need for managing your images. That may not be the case and many professional and keen amateur photographers benefit from combining Lightroom with the image management software Daminion.

    Daminion is an image management solution which helps you manage large image libraries. You can think of it as being the rough equivalent of the Lightroom Library module operating on steroids. Daminion’s biggest advantage is that it is true multiuser software so, with Daminion server installed, multiple users can access a single catalog. This is something that Lightroom is notoriously poor at doing and which Adobe has so far failed to address despite multi-user/multi-computer access being one of the top ten feature requests for Lightroom.

    You can download a version of Daminion at Daminion.net using the Download link. At the time of writing the current release version is 2.5 and version 3 is still in beta. Daminion comes as both a standalone and a server version. The Daminion standalone Free version handles up to 15,000 images per catalog. The for fee versions are Basic, Standard and Pro which give you 25,000, 75,000 and unlimited images in a catalog respectively. There are also multiple Daminion server versions, one for noncommercial use and others for individual professionals and small teams. Daminion is available for the PC only and not for the Mac.

    You can install both the server and client versions on the same computer – the server version will run faster than the client version so it has value when you have a lot of images in a catalog. When you consider that some Daminion users have catalogs of a million or more images, speed of accessing and filtering these images becomes important.

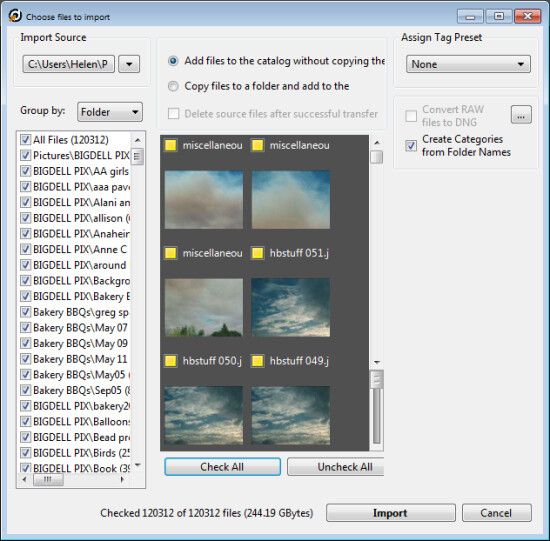
    Once you have downloaded and installed Daminion, launch it and you can create a catalog. Like Lightroom you must import the images you want to manage with Daminion into the catalog. If the Add Files dialog doesn’t open automatically you can find it by choosing File > Add Files and then select the folders to import from.

    daminion-import

    While you can create and manage multiple catalogs in Daminion, like Lightroom, you can’t search across multiple catalogs so you should be careful about how you organize your images in catalogs. What makes sense in terms of catalog organization will depend on how you work with your images and if it makes sense to have them all in one catalog or in separate ones.

    Daminion will recognize and manage a wide range of file types including common raster and vector formats as well as camera RAW images, video, music, and PDF formats. This gives it a broader scope as a management tool for digital media collections than Lightroom which is limited to photo and video formats only.

    You can copy the images to another location on import or import them from their current locations. You can also group images by folder, date or file type on import. As the images are being imported you can begin to work with those already imported.

    daminion-work-while-importing

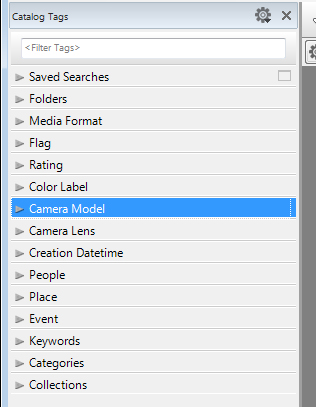
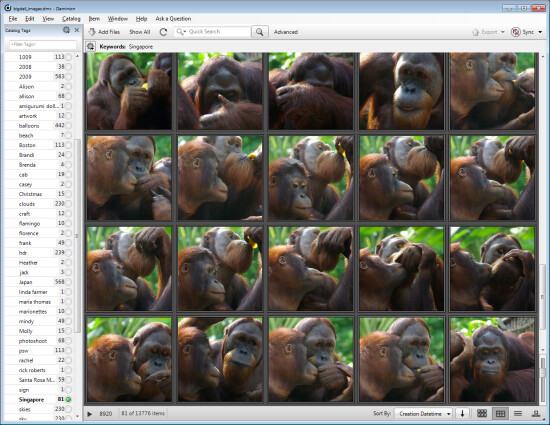
    When you have some images imported into Daminion you can investigate the tools you have for managing and organizing them. The Catalog Tags panel on the left of the screen is pre-populated with tags. Some of these are created from the image metadata, such as Camera lens and Camera Model, and others are those that you may have applied to the images in other programs such as keywords, ratings and color labels.

    daminion-catalog-tags

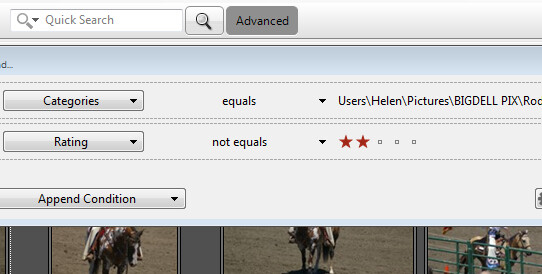
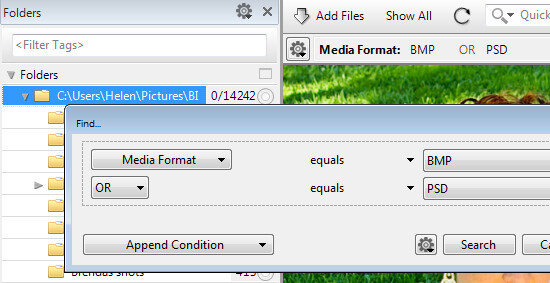
    To filter the images by any catalog tag click the tag group and the tag to view and click the circle icon to view images that match that tag. You can perform AND and OR filtering using the Find dialog which you can find by clicking the Advanced link immediately to the right of the search box on the toolbar.

    daminion-searches

    You can also add tags and keywords to your images using the Catalog Tags panel. These can be written to the image XMP metadata so they will be accessible not only within Daminion but also in other applications such as Lightroom and Bridge.

    There are benefits to using Daminion for image management and filtering in preference to Lightroom. Daminion provides multiple ways to categorize your images including Categories, Collections, Events, Places, People and more. It also supports hierarchical tags, with no limitation on nesting levels. So you can configure hierarchical tags for categories, people, places, keywords, events and so on whereas in Lightroom you can create hierarchical keywords only. You can also create your own custom user defined tags in Daminion to categorize images by criteria that are meaningful to you. Daminion can write metadata directly into the RAW images rather than needing to do so to sidecar .xmp files, and it makes it easy for you to filter your image collection by writing complex searches using Boolean (AND/OR) operators.

    daminion-boolean

    Viewing your images
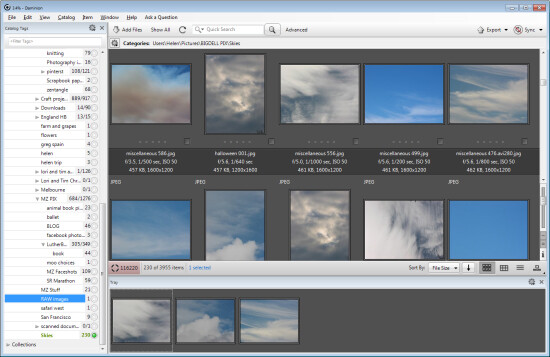
    You can view your filtered images in one of a number of ways. You can sort them using a range of sort options including by shutter speed, file size, file name and so on. You can also view the images as thumbnails, using a compact view, details or filmstrip view.

    daminion-compact

    In Thumbnail view you can customize the information displayed above and below the image so it is easy to see the image properties that are meaningful to you. At any time you can view an image full screen by pressing Enter or click View.

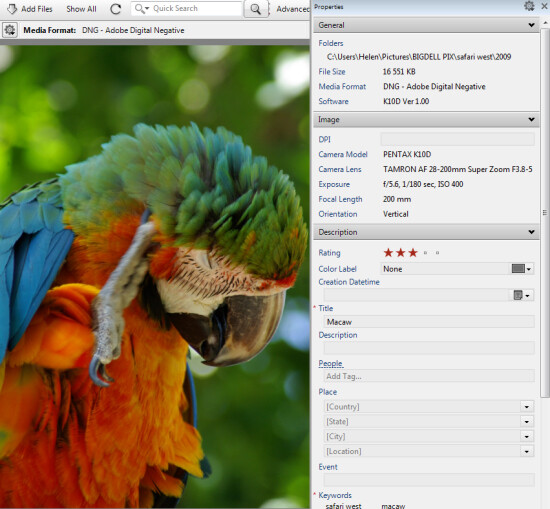
    You can select any image and view and edit its properties using the Properties panel. And while Daminion is not an editor you can use it to rotate your images.

    daminion-properties

    As you work through your images you can drag images you want to do something with into the Tray. The Tray stores these images until you are ready to work with them such as by sending them to an external editor or using the multiuser checkout feature. The checkout feature helps you manage multiple people working with the same catalog, it maintains an audit history and gives you the ability to undo changes if, for example, a newer version of an image is replaced by an older version.

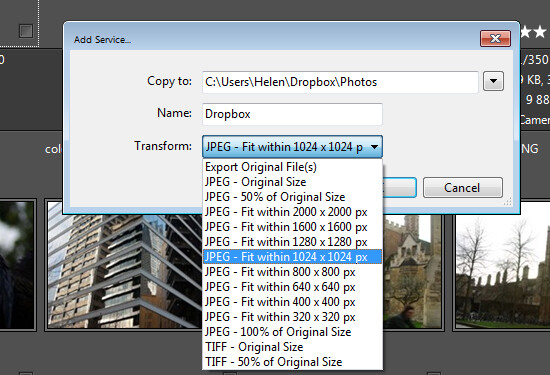
    One handy feature of Daminion is the ability for you to publish images from Daminion direct to Dropbox so they are viewable on your iPad or other device. The Publish panel can be set up to convert and resize images including raw format images and then export them to a Dropbox folder on your computer. When this folder syncs to Dropbox the uploaded images can then be viewed on other devices.

    daminion-publish

    If you’re looking for a way to allow multi-user access to your image collection then Daminion is a great tool. It can be used along-side Lightroom for managing and organizing images which you then develop in Lightroom. The metadata changes made in either program can be easily viewed in the other program and the two work in tandem very well.

    The post Using Daminion with Lightroom [for Advanced Users] by Helen Bradley appeared first on Digital Photography School.


    Digital Photography School
  • Change Your Point of View – Literally

    Canon Powershot G16; Exposure 1/60, f/1.8, ISO 640. Lens was zoomed all the way out to 6.1mm (28mm equivalent on a full-frame camera)

    Canon Powershot G16; Exposure 1/60, f/1.8, ISO 640. Lens was zoomed all the way out to 6.1mm (28mm equivalent on a full-frame camera)

    When starting out in photography, it’s easy to focus (pardon the pun) on the gear and learning about proper exposure, that you can overlook one of the easiest ways to improve your images, whether you use a DSLR, a point and shoot camera, or even just your cell phone’s camera.  It’s amazing how a simple change of your point of view can make a bland image, into something much more exciting.

    Get off of the usual eye level

    When presented with a scene, try and think of unique ways to view it.  Think about getting up high, getting as low as possible, or somewhere in between.  The main thing is, try to avoid viewing the scene, and shooting the scene, at eye level.  Everyone in the world sees things from eye level. To create a really eye catching photo, a good place to start is by getting out of most people’s eye level range. This can be as simple as dropping to one knee, laying on the floor, or getting up on a step ladder. Look through your viewfinder as you try different points of view. If you’re using a zoom lens, try zooming it over the entire range from these different points of view to see how that affects the image.  I find the combination of getting low and close, and then using a wide angle lens is a great way to get started.

    Get down low

    In the image at the top of this article, I used a Canon Powershot G16, and creeped in low and close to the birthday cake, to get my son’s expression as he blew out the candles. I wanted the glow of the candles on his face, and I wanted something with more impact than the standard eye level shot from a normal distance.  I wanted something with a little impact.  Is it the best shot I ever took? Definitely not.  But it’s probably the best “blow out your candles” shot I ever took!

    EOS 5D Mark III; with EF 8-15 f/4L. 1/60, f/4, ISO 800.

    EOS 5D Mark III; with EF 8-15 f/4L. 1/60, f/4, ISO 800.

    Take the high road

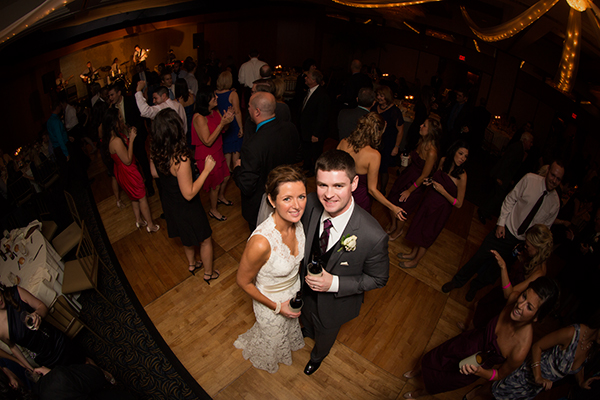
    By the same token, getting a higher angle can also add some impact to your image. In the image above, I wanted to capture the newly married couple on the dance floor, surrounded by friends and family, and the jubilation that goes with a wedding celebration. To get this shot, rather than use a step ladder, I simply mounted the camera on a monopod with the Canon EF 8-15mm f/4L fisheye zoom.  I used the TC-80N3 remote to fire the camera. The wide angle accentuates the higher point of view and allows me to get plenty of background action as well. I mounted a flash on the camera, and the light falloff created a spotlight effect on the couple, and falls off softly toward the corners.  The wide angle also helps to ensure the subject is in the frame, since I am essentially doing this shot blind, unable to see the image through the viewfinder. Ultimately, the elevated point of view is one that most people don’t see, so it adds interest to the shot that wouldn’t be there had I simply been photographing from eye level.

    EOS 1D Mark III, EF 24-105mm f/4L IS. 1/80, f/8, ISO 800.

    EOS 1D Mark III, EF 24-105mm f/4L IS. 1/80, f/8, ISO 800.

    The same is true with landscape photography as well. In the image above, I was able to get on one of the upper floors of the Hancock Tower in Boston, which gave a spectacular view of the city. The pattern created by this Back Bay neighborhood when viewed from above made a great scene through the viewfinder.  After that, it was just a matter of framing the shot, and getting the exposure right.

    EOS-1D Mark III with EF 24-105 f/4L IS. 1/60, f/8, ISO 400.

    EOS-1D Mark III with EF 24-105 f/4L IS. 1/60, f/8, ISO 400.

    Look in all directions

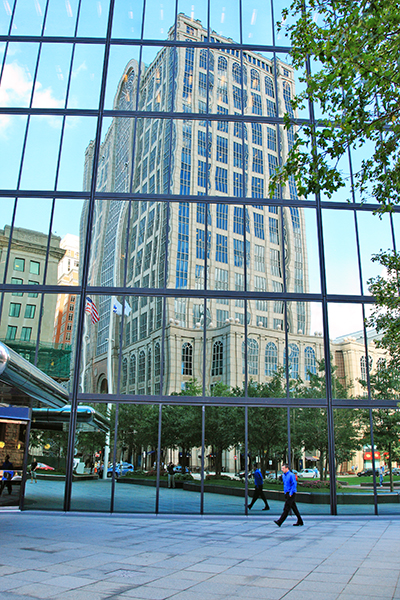
    On that same day, as I was leaving the Hancock Tower, I was taken by the architecture of the building just across the street. However, I wasn’t thrilled with the scene overall, when looking directly at the building.  But then I turned around and looked at the building another way, through its reflection in the Hancock Tower. I happened to catch a businessman walking into the Hancock Tower, which added some interest as well.  The image to the left is what I captured.  By changing my point of view, through the reflection, I was able to take an average scene and add a little more interest.

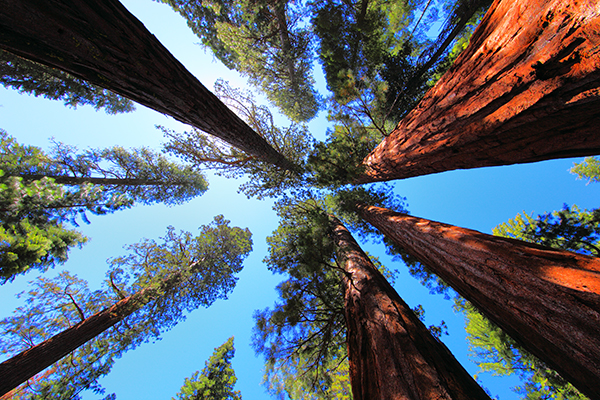
    Try to see these other points of view as much as possible. Make it a habit not to settle for your eye level as the only shot you take.  Look for ways to get high, or a lower angle that can really change perspective for you.  The more you force yourself to do this kind of exercise, the easier it will become for you to imagine these points of view before you even put your camera to your eye.

    EOs 5D Mark II with EF 14mm f/2.8L II. 1/100, f/11, ISO 200.

    EOS 5D Mark II with EF 14mm f/2.8L II. 1/100, f/11, ISO 200.

    For more ideas on shifting your perspective try these articles:

    • The Power of Perspective in Photography
    • Perspective in Photography – Don’t just stand there move your feet!
    • Get Down Low For a Unique Perspective
    • Get a New Perspective By Getting High… with your Camera

    The post Change Your Point of View – Literally by Rick Berk appeared first on Digital Photography School.


    Digital Photography School