Category: Photography

  • MindShift Gear’s rotation180 Panorama Rotating Backpack – a Review

    The rotation180 Panorama from MindShift Gearis designed around the needs of outdoor photographers.

    The rotation180 Panorama from MindShift Gear is designed around the needs of outdoor photographers.

    Last time I checked, I think I had something like 14 camera bags. I think it was when I got #8 or #9 that my wife asked me how many would be enough. I made the egregious mistake of replying with something along the lines of, “I don’t know. How many pairs of shoes will be enough?” Thankfully, I have quick reflexes and was able to dodge the flying stiletto and we’ve never spoken of our addictions again.

    Seriously, though. Regardless of whether you are a professional photographer or an avid enthusiast, at some point along the way it becomes abundantly clear that a single camera bag is simply insufficient. Sometimes the bag that gets the gear to the gig is too big and cumbersome for the actual assignment. Sometimes you need to travel light with a bag that can handle a few essential pieces of equipment. Two of my bags don’t hold cameras or lenses at all, having been reconfigured for lights and cables. The point is, there’s no shame in being a camera bag addict. Between my shoulder bags, rolling bags, backpacks, and belt systems, I’m fairly well-covered for every eventuality. There is one type of bag, however, that I’ve wanted for a very long time. Unfortunately, it didn’t exist until just recently.

    Photo backpacks are great for travel and location shooting, but they are rarely designed to allow room for anything but camera gear. Even when they are, though, you still have to deal with the inconvenience of stopping, taking off the backpack, getting the camera out of the bag, taking the shot, putting the camera back, closing the bag, putting it back on, etc. The backpack I’ve been craving can handle both the gear for a day’s photography outing, as well as plenty of room for a jacket, lunch, gloves, or other essentials…without having to stop and take the pack off my back.

    Enter MindShift Gear and their rotation180° backpacks. Founded just a couple of years ago by the creators of Think Tank Photo and conservation photographer Daniel Beltrá, MindShift currently has two backpacks– the rotation180° Professional and the rotation180°Panorama– that solve the problem of accessing the gear without taking off the backpack or even missing a stride.
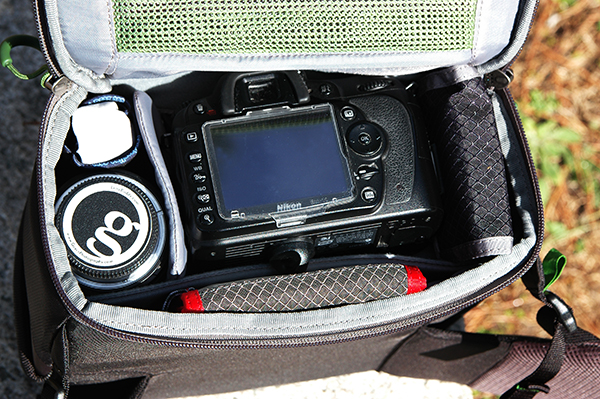
    mindshift-panorama-camera-bag-dps-review-001

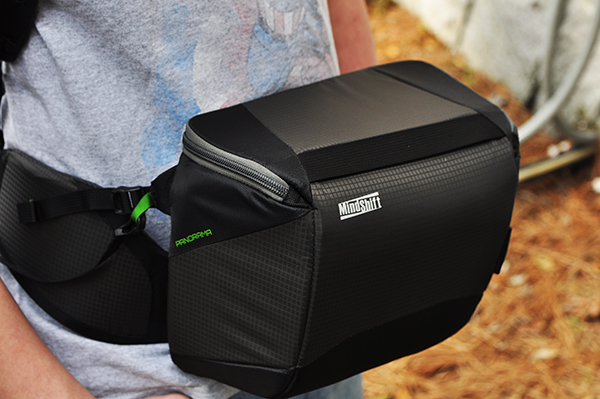
    Panorama beltpack, containing Nikon D90 (85mm prime attached), 16-35mm lens, spare cards and batteries, lens cloth, and Hoodman Loupe (not shown).

    rotation180° Panorama Backpack – the Specs

    Weight

    • Backpack: 2.o lbs (0.9 kg)
    • Beltpack:  0.9 lbs (0.4 kg)
    • Total:  2.9 lbs (1.45 kg)

    Dimensions

    • Backpack Exterior: 9.8″ W x 20.5″ H x 8.3″ L (25 x 52 x 21 cm)
    • Beltpack Interior: 9.4″ W x 7.5″ H x 4.7″ L (24 x 19 x 12 cm)
    • Beltpack Exterior: 9.8″ W x 8.2″ H x 5.1″ L (25 x 21 x 13 cm)

    Volume

    • Backpack:  329 cubic inches or 5.4 litres
    • Beltpack:  1013 cubic inches or 16.6 litres
    • Total:  1342 cubic inches or 22 litres
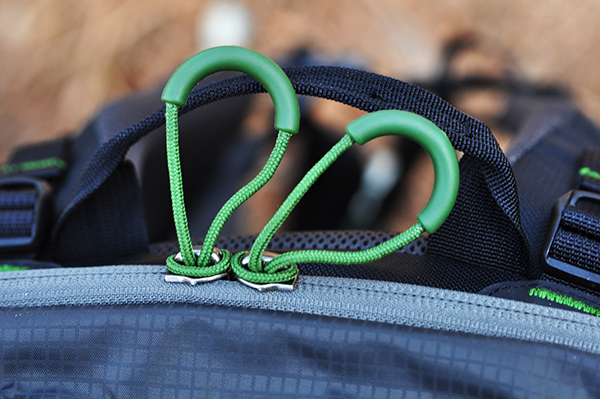
    The zipper pulls are definitely high-quality and built to last, but got a little awkward while wearing gloves. Just took a little getting used to.

    The zipper pulls are definitely high-quality and built to last, but got a little awkward while wearing gloves. Just took a little getting used to.

    First Impressions

    It’s obvious as soon as this bag comes out of the box that it boasts the same high-quality construction and attention to detail as its cousins at Think Tank. The all-fabric exterior is treated with a durable water-resistant coating, while the fabric underside is treated with polyurethane for superior water resistance when you put it down on a wet trail. While I’m not a huge fan of the zipper pulls on this bag – they were a little tough to grip with gloves on – the YKK zippers themselves are fairly indestructible, which is a huge plus. Available in either Charcoal or Tahoe Blue, it’s nice having a bag that goes beyond the basic black that takes up most of the space in my gear closet. With plenty of pockets and storage space, this bag seems to address every aspect I’ve been looking for in a photo day pack – especially the fully rotating beltpack and dedicated hydration pocket that can hold up to a three-litre reservoir.
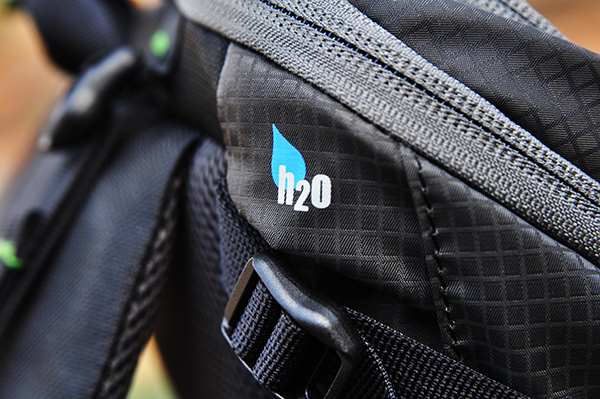
    mindshift-panorama-camera-bag-dps-review-003

    The dedicated hydration pocket can hold up to a three-litre reservoir (not included)

    The Beltpack

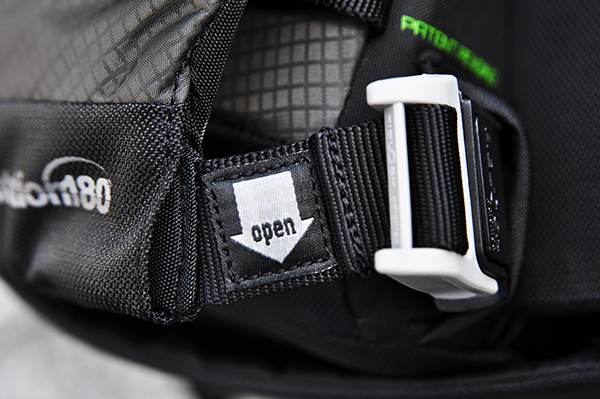
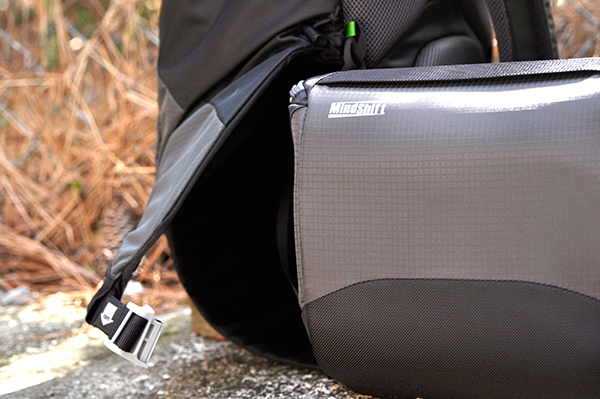
    It’s the rotating beltpack that makes this bag really special. Without it, it’s just another camera backpack that doesn’t fully address my needs. Secured in the lower section of the backpack with a sliding magnetic clasp, retrieving your camera, binoculars, maps, or other essentials is as easy as unhooking the clasp and pulling the beltpack around to the front. As an added bonus, the beltpack can be completely removed and used by itself for shorter outings or location shooting.
    mindshift-panorama-camera-bag-dps-review-005

    The sliding magnetic clasp is easy to release, but holds the beltpack securely in place.
    mindshift-panorama-camera-bag-dps-review-006

    Hitting the Trails

    Beyond the quality of its materials and components, it’s once the Panorama is loaded and on your shoulders that you realize just how comfortable it is. Obviously, this is a pretty important factor. If a bag is designed around the concept of not having to take it off as often, it had better be comfortable. Starting out at a lightweight 2.9 pounds empty, the Panorama includes load-lifter straps on both the beltpack and shoulder harness, as well as a breathable padded airflow harness and curved back panel for increased stability. All this translates into a bag that can hold a lot of stuff, while keeping the load balanced, comfortable, and secure.mindshift-panorama-camera-bag-dps-review-007
    Additional Accessories

    While the Panorama is an awesome bag straight out of the box, MindShift has obviously given a great deal of thought to the needs of outdoor photographers. There are several accessories available which have been designed to enhance the overall experience of this bag. Each is sold separately, including:

    • Photo insert that fits the upper compartment of the bag. providing additional padded gear storage.
    • Two-piece rain cover for the main bag and beltpack
    • Tripod suspension kit
    • Filter Hive
    • Lens Switch Case
    • Contact Sheet ground tarp
    • For more information on the rotation180° Panorama and accessories, check out the MindShift website.
    mindshift-panorama-camera-bag-dps-review-008

    Wrap-up

    The best thing I can say about any product I review is that it does what it says it does, and does it well. The rotation 180° Panorama Backpack from MindShift Gear is just such a product. Designed around the special needs of outdoor photographers and enthusiasts, this bag is going to set a new standard–one that takes into account not only how you transport your gear, but also how you use it along the way.

    Have a favorite bag? Or a wish list of features in your ideal bag? Share your comments with us below.

    The post MindShift Gear’s rotation180 Panorama Rotating Backpack – a Review by Jeff Guyer appeared first on Digital Photography School.
    Digital Photography School

  • 10 Photography Tips to Help You Take Your Photography up a Level

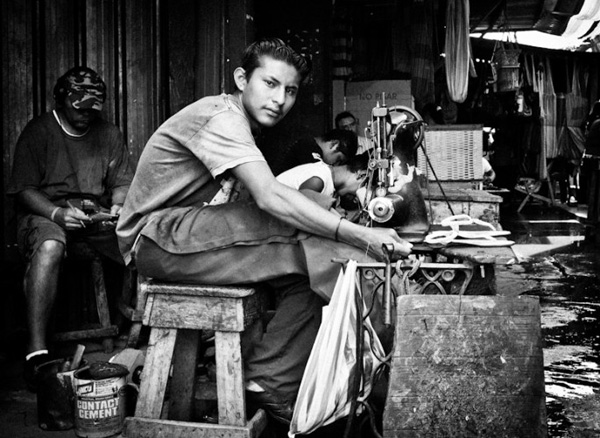
    Man working

    The best lessons are the ones you learn the hard way. Here are 10 photography tips I learned after lots of frustration, discouragement, money lost, and forever lost opportunities. These tips are not very common, I never heard them hence you probably never heard of them either. I hope they help you avoid the mistakes I made, and help you improve your photography. Let’s get to it shall we?

    10 Photography Tips

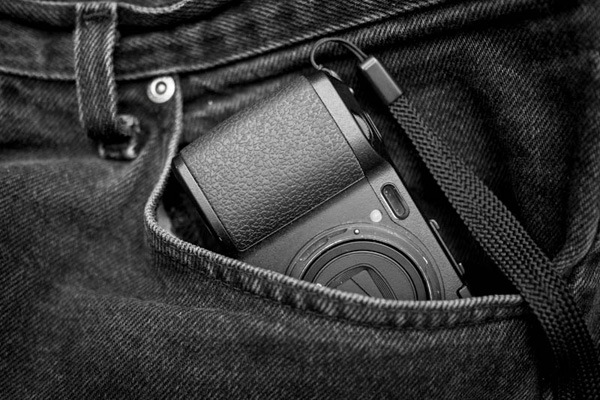
    1 – Always have a camera in your pocket. Always. Or else.

    Pocket Camera Ricoh GRD IV

    How many times have you been a situation where you kinda wanted to take your camera bag, but ended up not doing so because of the thought of lugging the bag, or even the DSLR itself?

    It’s understandable. Do you want to take that DSLR everywhere you go? Who would want to dangle that thing while going to the grocery store? Nah. But one thing I’ve learned, is that images don’t wait for you. I’ve been through too many “I wish I had my camera with me” scenarios to know so.

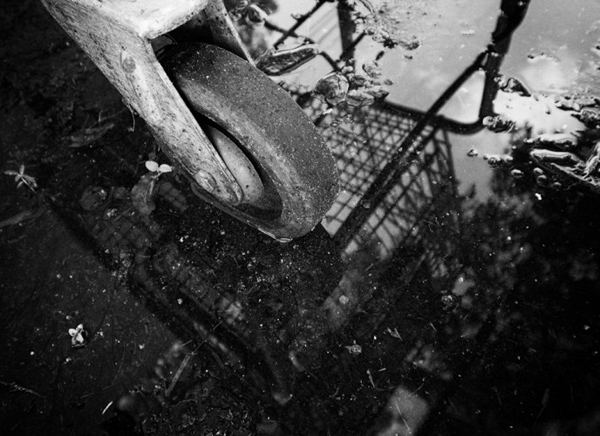
    Abandoned Cart Ricoh GRD IV

    Caption: An abandoned cart on my way to get a sandwich

    One of the best things I did as a photographer was to get myself a pocket camera (The Ricoh GRD III, now I have the Ricoh GRD IV) and take it everywhere with me. It freed me photographically, and it made me stop thinking in terms of “photo shoots” and start thinking in terms of “life photography”.

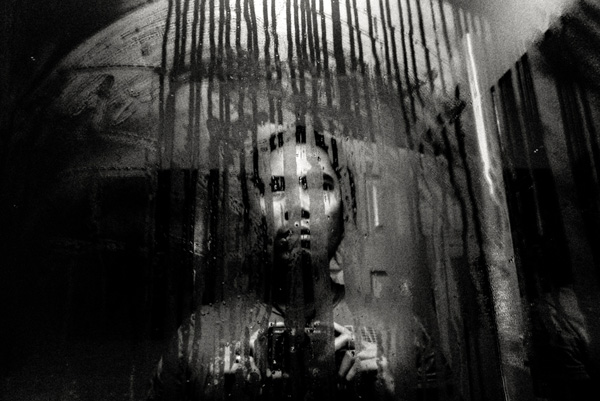
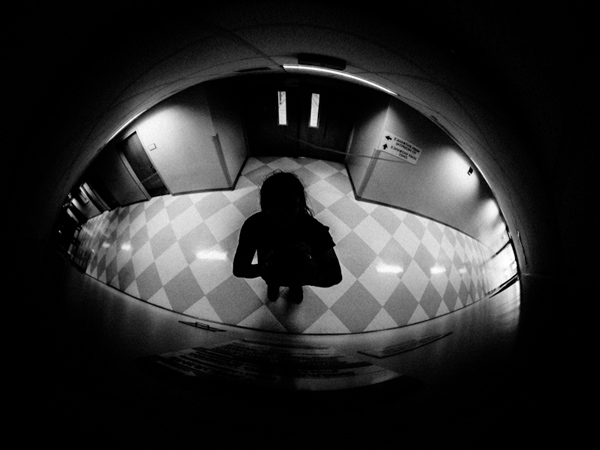
    Distorted figure Ricoh GRD IV

    Caption: At a hospital for a baby checkup

    While the small compact ended up being my main camera, you don’t have to do the same, but do get a pocket camera. You have no idea how many images pop up in otherwise mundane situations like grocery shopping, or taking a stroll at the park.

    In the park

    Caption: In the park

    In a nutshell: photographs don’t wait for you, get a pocket camera to fill in the gaps where your DSLR is absent.

    P.S: Your phone might do but I don’t know about you but I can’t stand using it, there’s no buttons nor dials! Also check out the Canon S120,

    2 – Your background is as important as the subject

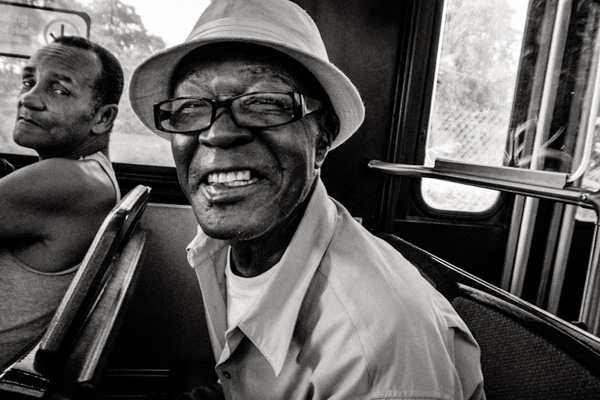
    Man bus Ricoh GRD IV

    When making an image, there’s bound to be a subject. But the subject is rarely alone, there’s the background to deal with. When looking through the viewfinder and you spot your subject, the first thing to do is not to press the shutter release button….it’s to pay attention to your background first.

    There’s only two things a background can do for your subject: it can either bring attention to it, or detract from it. Say you are having a conversation with a friend, you wouldn’t want someone else’s voice distracting from your own, would you? So why let your subject be distracted by the background?

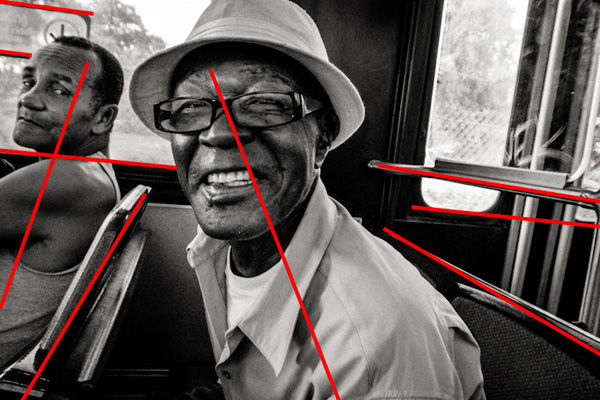
    Man bus explanation Ricoh GRD IV

    This guy was on the bus and was just priceless, after some entertaining conversation (too much, he was drunk and the whole bus was watching), I told him I would make his portrait. Even before rising my pocket camera, while talking I was wondering how I could draw attention to him.

    At first I wasn’t going to include the guy on the left, but by changing the guy in the back leaned back and bought further attention to my subject. I happily made the shot.

    In a nutshell: be attentive to your background, ask about every object, line, color: Does this distract or enhance what I am trying to focus on?

    3 – Everything is light

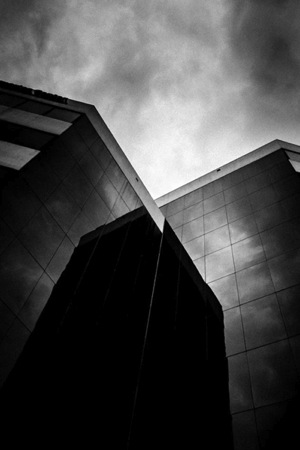
    Building black white

    What is the first thing you notice when you see your child or significant other? A person, right? Well that’s fine and all if you are dealing with them as another person, but when it comes to photography, you are dealing with LIGHT, so you have to train yourself to see everything in terms of LIGHT.

    Did you ever notice how the face lights up when someone is watching TV? Did you notice that you feel differently when a landscape is shot at twilight versus dawn? Do you notice how there’s ugly shadows in the eye area when there’s harsh light?

    The examples are infinite, but the skill starts when you force yourself to pay attention to the light. In the image above of the building, I was going to the bank and it was pretty overcast out, and I looked up. While I didn’t go to the bank to get this image, I knew what to expect (soft light, nice reflections of the clouds) and simply looked up and made the image.

    In a nutshell: start noticing light, its qualities, the shadows it makes, the shapes it forms.

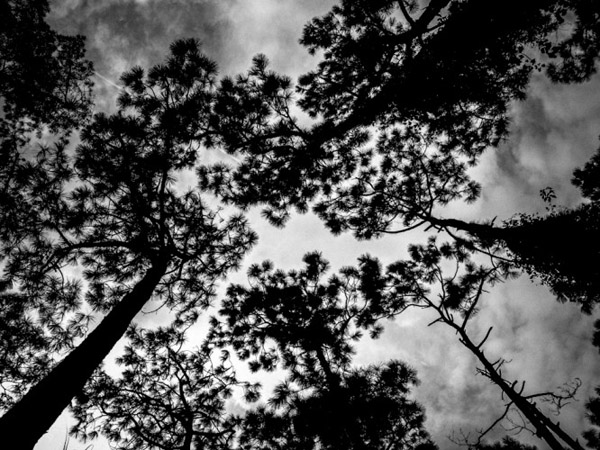
    Clouds

    4 – Treat your work as wine

    Some photographs are either made by luck, or maybe you’re just a genius and you didn’t know it. I’ll vote for the second option because I like you. In all seriousness though, while your best photos might be made tomorrow, you could potentially have gold in your older work.

    Woman walking

    Caption: An image I found months later, I overlooked at first

    Fact is, you might have something that you wouldn’t know the value of until you look at it with more mature eyes. I have shots from 10 years ago, (I never dreamed of becoming a photographer back then) that are stellar.

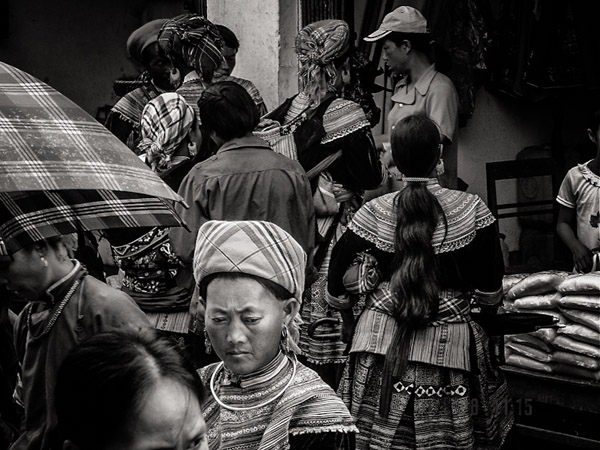
    Vietnam hmong

    I wouldn’t have seen them if I didn’t revisit the work. The image above was shot 10 years ago. Granted, there were only a few nuggets of gold in the whole pile, but who says no to gold? Plus after time has passed you won’t be as emotionally connected to the images, making you able to judge the images more objectively. Sometimes I go through my old stuff and I can’t believe what I missed! Or I am amazed at how I can recover images I believed were ruined.

    In a nutshell: your photos are like wine, they get better with age, but you have to dig them up

    5 – Shoot with your heart first

    You know your stuff. You know what aperture is, when to bump up your ISO, you know how to expose well. But when you look at your images, you just can’t put your finger on what exactly is missing. Let me suggest that it’s the heart element that’s missing. You are not emotionally engaged with your work.

    Photography is not about capturing what’s out there in the world, it’s about capturing what’s inside your heart. Shoot what matters to you and put more of yourself in the images.

    Here I was in a dark spot:

    Dark photograph

    Don’t judge me by this image, I was just in a really bad spot. Here I was more optimistic:

    Hopeful

    Here I was feeling the familial spirit:

    Family

    In a nutshell: shoot how you feel, your images will be more powerful. Plus, humans are hardwired to relate emotionally.

    6 – Ask why

    Not everyone is into photography for the same reasons. Some want to get rich, others do it because they like it, others for fame or to document their kids growing up – you get the point. We all have different motives for doing photography.

    Question your motives and your photography path will become clearer. Knowing your why is like having a loupe in front of a light source, it will help you focus and get where you want faster. I can’t tell you your reasons because only you know that.

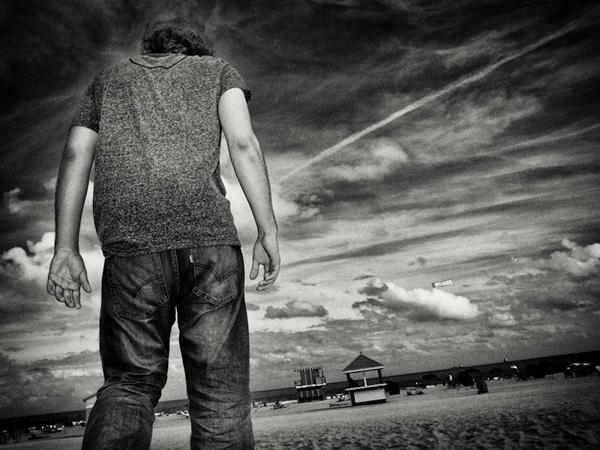
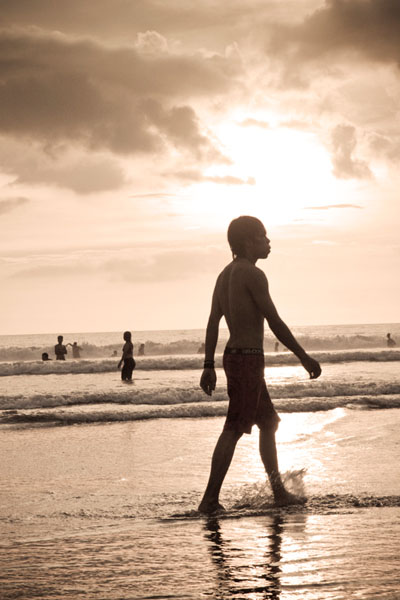
    For me, photography is my way to dream awake. Don’t worry, my mom knew she had a dreamer in her hands early on. Don’t call the looney bin on me, but everyday I SEE things, no, not dead people, but slithers in the fabric of time that reveal my imagination. Take this image:

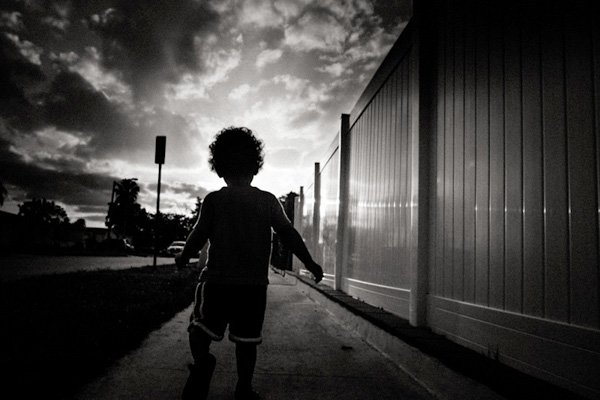
    Take on life

    When I saw this guy, I saw a hero ready to take on life itself. In reality, it was just a guy going to the beach. That’s my reason for photography: It helps me be in the world and in my imagination at the same time.

    In a nutshell: it’s your turn, what’s your reason for photography? What is it about photography that attracts you so much?

    7 – You are less limited by your gear than you think

    Airplane

    Take it from a guy that lost $ 1000s in gear buying and selling, it’s not about what gear you have, it’s what you do with it. As a photographer, there are things that can keep you from doing your work, one of them is being too focused on your next purchase.

    All the images in this article, (with the exception of 3-4) were made with a pocket, small sensor camera, with a 28mm fixed lens which I used with its upgrade for 4 years (the Ricoh’s mentioned above). Other cameras used were other compacts, my phone and one image with the NEX7 (the next point’s portrait).

    Man running

    Believe it or not you are more creative with less than more. The puzzle-solving brain is much more creative when limited in some way or another. For example, if we could fly, we wouldn’t have invented airplanes.

    In a nutshell: whatever gear you have, find new ways to use it. Plus having too much simply makes you miserable anyways (been there).

    8 – Let go of technical perfection

    Son portrait

    I think you should learn to expose correctly, learn when something is in focus, etc., and then let it go. I think too much time has been spent arguing on how a photo is slightly out of focus, or other small technicalities.

    Some of the world’s most iconic photographs are slightly soft, some are outright blurry (Robert Capa – D.Day soldier), some even have white skies (Alberto Korda’s iconic image of Che Guevara – Guerriero heroico) amongst others.

    Why didn’t you notice these imperfections? Well you didn’t seek them out, so you didn’t see them. The artistic qualities of a photograph are superior to its technical imperfections, so let go of them. Heck the Japanese have a concept, “Wabi-sabi” that basically means beauty in the imperfect.

    So stop worrying about if you are 10000% in focus, if your white balance is the neutral greyest of neutral greys and start looking at what the photograph is about and how it makes you feel.

    In a nutshell: let go of technical perfection, and focus on emotional impact.

    9 – Think making photographs, not taking pictures

    Being a photographer is an attitude, and one of the fundamental shifts that must happen is making the difference between taking a picture and making a photograph. What are you doing when you rise your camera up to your eye?

    • Are you taking a picture? In other words, are you content replicating what’s in front of the lens?
    • Or are you making a photograph? In other words using what’s in front of your lens as a starting point to communicate what’s inside you?

    If you learned how to use your camera through the dPS Newsletter, you have the power the express yourself. Now you have to understand that you don’t take pictures, camera owners do that; you make them, photographers do that.

    Angel heaven

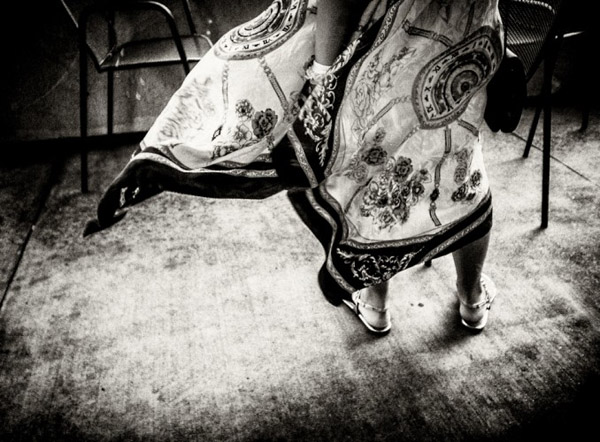
    I was at a coffee shop, sitting down, writing on my device when I saw this dress flow in front of me. For one second I believed I was in heaven and looking at an angel. I used what was in front of me (a girl’s dress, how boring) and made a photograph, replicating the feeling I felt.

    In a nutshell: start thinking like a painter, focus on making something, not taking.

    10 – Make your photographs sticky

    Picture this with me for a moment: a beautiful van is driving down a road, a soothing voice enumerates all the features of the van, AC, GPS, windows, kids are smiling in the back. Ah, life is good, the van flows nicely in the streets. The van is making a turn when all of a sudden, a nasty crash happens. Shock!

    “You didn’t see that coming” says the tagline. It wasn’t a commercial for a van, it was one for safety.

    This commercial stuck in the minds of many because the ad spent its time building up a pattern (that of a typical van commercial) and then broke it. The human brain sees in terms of patterns and expects things to go in a certain way, when it doesn’t, it forces us to remember to be ready for next time.

    You can also do that with photographs. You can create a pattern and then break it. Roland Barthes, a philosopher, named the pattern the Studium, and the pattern breaker the Punctum in his book Camera Lucida. So, if you want your images to stand out, seek the Punctum.

    Studium punctum

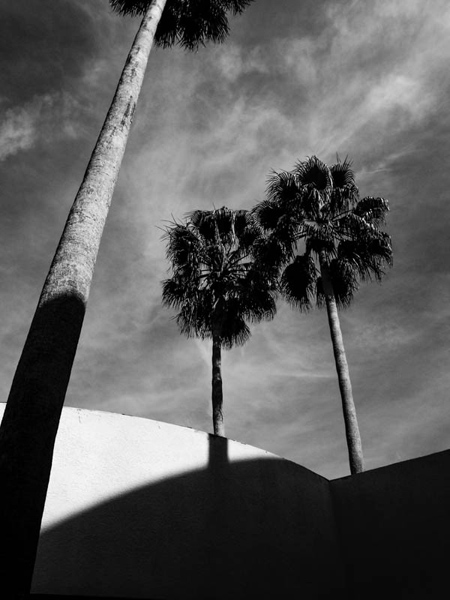
    Meh. How many palm tree images have you seen in your lifetime? Well I’ve seen them a lot too, so in order to make this one stick out from the crowd, I decided to align the shadow of a tree that was behind me, to the tree in the middle in front of the camera. What started as an average palm tree image is now much more interesting because of that pattern breaker. It’s unexpected. You expected a complete tree trunk and I replaced it with a shadow.

    In a nutshell: anticipate the expected in your photograph, then break it.

    So what other tips do you have for beginners? If you are just beginning yourself what do you struggle with the most? Share with us in the comments below.

    The post 10 Photography Tips to Help You Take Your Photography up a Level by Olivier Duong appeared first on Digital Photography School.

    Digital Photography School

  • Tips for Boosting Your Confidence Doing People Photography

    Feelings follow actions

    We all know most people aren’t comfortable being photographed. What’s less well documented is many photographers actually feel nervous about photographing people.

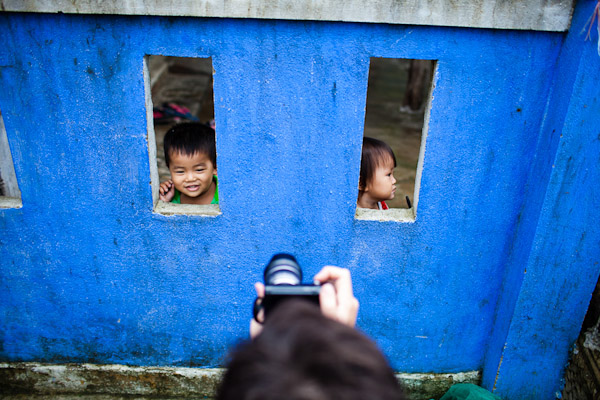
    It’s understandable when you think about it. Since we know that the people we’re photographing don’t want to be photographed, we feel we’re invading their space. We also feel just as ‘on show’ as the subject. We have to perform, be charming, build rapport, make people smile, effortlessly change the settings on our camera and ultimately show them how great they look in the photo. It’s a lot of pressure!

    But hey, there’s never going to be a big sympathy movement for photographers, so we have to overcome our confidence demons on our own. I know how you feel. I used to quiver with fear when photographing people, too. Over the years I’ve picked up many helpful tricks and now I can actually enjoy the spotlight and hectic pressures of a large wedding. Here are a few for you:

    Tips for boosting your confidence doing people photography

    Plan the photo before you speak to them

    Plan the photo Plan the photo3

    Once someone has agreed to be photographed you don’t want to be standing there flapping about wondering what you’re going to do with them. Have a clear image in your head that’s based on the available light, backgrounds, and the message you want to convey through the environment and their pose.

    Think about why you wanted to photograph them in the first place and then use your composition, posing and photographic skills to tell the story. The better prepared you are the more confident you’ll feel. You’ll be able to give your subject instructions and explain why you’re doing what you’re doing.

    For example, you could say “Your hair looks fantastic and if we take the photo over here then the sun will create a beautiful halo as it shines through it.” The model will feel great, you’ll feel in control and you’ll really sound like you know what you’re doing.

    Help your model feel confident

    Help model feel confident 2 Help model feel confident

    The more relaxed your model is, the easier the process will feel for you too. Stay positive. Even if you can see you’ve screwed up a photo just keep sounding positive. Tell them how well they’re doing and never let silence descend. As soon as you stop talking, your model will instantly tense up. Imagine someone staring at you without talking and you’ll know how the model feels.

    Often when we’ve just gotten started I’ll say, “Right, I’m just going to take a couple of practice photos to make sure I’ve got the exposure perfect, so you can pull funny faces at me if you like.”. Whether they pull a face or not they’ll often be more relaxed or even smiling naturally at this point. Because of this, some of the best images in a session can be your first.

    How to keep the conversation going

    Keep conversation going

    We’ve already established that silence is kryptonite for a photography session, but what do you say to help take the model’s mind off the photography? As a portrait and wedding photographer I prepare what I’m going to say during the session almost as much as I plan the photos.

    Here is a selection of the techniques I use in different circumstances:

    • When photographing a group I might ask everyone to look at the person with the smelliest feet, or who spends the most time in the shower, etc.
    • I ask them to keep their eyes open for as long as possible. You start with a glazed expression but as their eyes begin to dry out they start to smile and then laugh. I turn it into a competition if there are several people.
    • Do you have any nicknames for each other?
    • For group photos I have a method for avoiding people blinking. I ask everyone to shut their eyes and then open them on the count of three. Just after I say ‘three’ I tell them to remember where I’m standing!
    • I ask them to guess the two people I get told I look like (it’s the comedian Harry Hill and the TV chef Heston Blumenthal, by the way)

    Keep conversation going2

    For travel portraits some of the above ideas might work, but you can also just ask simple questions like:

    • What do you love most about this place?
    • Is there anywhere you recommend I go?
    • Where’s the best place to eat?
    • Do you have any hobbies?
    • Don’t forget to tell them how beautiful their country and food is!

    To help make the conversation even more natural I sometimes use a tripod and remote shutter button once I have the photo composed. This means I can maintain eye contact and build rapport more effectively. It helps the model feel like they’re in a proper conversation rather than staring at a piece of machinery.

    Talk with them first

    For a posed photo you should speak with the model first, whether you’re photographing a stranger or an old friend. Tell them why you want to take their photograph (I love your hair, you look cool, etc.) so the model isn’t left wondering.

    When I’m on holiday I like to chat with the locals before I ask for the photo. Maybe I’ll buy something from their shop or pretend I need directions to get the conversation going. Once you start chatting and build rapport it feels much easier and more natural to ask for the photo.

    *Note: for more read:  Practical Tips To Build Your Street Photography Confidence  for Tips for Photography People when Travelling. 

    Talk with model first Talk with model first3

    Camera tricks for the super-nervous

    If you’re really too shy to speak with people, or want a reportage style – then the obvious solution is to use a long lens. However, it can feel a bit creepy doing this and it’s even more embarrassing when you get caught!

    An alternative is to put your camera on a tripod and use a remote shutter. This way people don’t realize you’re taking a photo at that exact moment because you’re not looking through the viewfinder. You then wait for people to walk into your composition and fire the shutter at the right moment. You’ll have to pre-focus the camera and use a deep depth of field to increase your chances of a sharp image.

    Another method is to use a wide angle lens and place the person you want to photograph at the edge of the photo. The camera won’t be pointing at them so your motive is less obvious.

    Camera tricks for the nervous

    Feelings follow actions

    When talking about building confidence most people talk about ‘positive thinking’. Psychological tests have shown that in reality feelings follow actions. What this means is that if you act like you feel confident then you’ll actually become confident.

    If you smile, project your voice, dress sharp and stand up tall you’ll actually start to feel more assured.

    Do you have any techniques, games or phrases you use when photographing people? Write them in the comments box below – we’d love to hear them. If you really want to step out of your comfort zone try How to Photograph Strangers: the 100 Strangers Project.

    The post Tips for Boosting Your Confidence Doing People Photography by Dan Waters appeared first on Digital Photography School.

    Digital Photography School

  • 40 Wonderful Hot Air Balloon Photographs for Your Inspiration

    Hot air balloon photography is rewarding, both professionally and spiritually. Aerial photography done right can produce terrific results. Ballooning has various advantages for photographers when compared to more traditional methods of flight. One of the best things about balloons is that they have no windows, thereby giving you an opportunity to take photos in 360 degrees. If you’re standing on Continue Reading

    The post 40 Wonderful Hot Air Balloon Photographs for Your Inspiration appeared first on Photodoto.


    Photodoto

  • Solving the Problem of Duplicate Photos

    I usually write about tips for Photoshop and Lightroom, but today I’m going to cover more of a workflow solution, solving the problem of duplicate photos on your computer or hard drives.

    find-and-remove-duplicate-images-opener

    If you’re like me, from time to time you’ve encountered the problem of duplicate photos. You might have imported a set of photos twice, accidentally duplicated a folder of photos, or you might have totally lost control of your photo collection to the extent that you now have multiple copies of your images and you don’t know where to begin finding, and cleaning them up.

    While it’s easy enough to clean up a few duplicate images, if you have a lot of duplicates spread across multiple folders, the problem can be overwhelming. This is where some good software can make a big difference – the problem is finding that software.

    There are a number of good quality, free programs that can help you find and delete duplicate photos if those images are in jpeg and tif formats. However, when you throw a folder of raw files at these programs, most of them flounder – they either don’t support raw formats or they don’t support a wide enough range of raw images to be of much use.

    One program that can handle a wide range of raw formats and which is well up to the task of handling large image collections is Visual Similarity Duplicate Image Finder from MindGems (NOTE: this program is currently available for Windows computers only). This program comes in three versions – you will need the Professional version ($ 39.95) which can find duplicate photos, and which supports raw images – the entry level version doesn’t have this feature.

    You can download a demo of Visual Similarity Duplicate Image Finder here. The demo is severely limited in its overall functionality, but it is very good for helping you decide if the program will work for you. You can scan folders for duplicates, view the first few that are found, and see a little of how the program will perform day to day.

    find-and-remove-duplicate-images-1

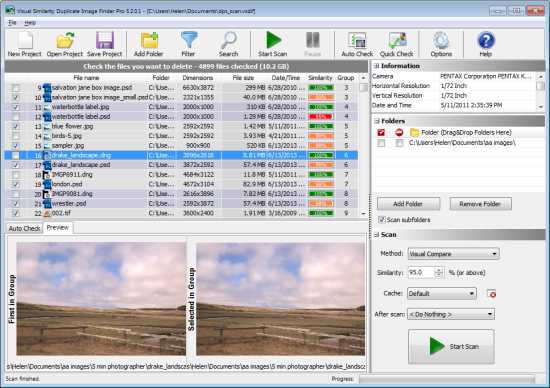
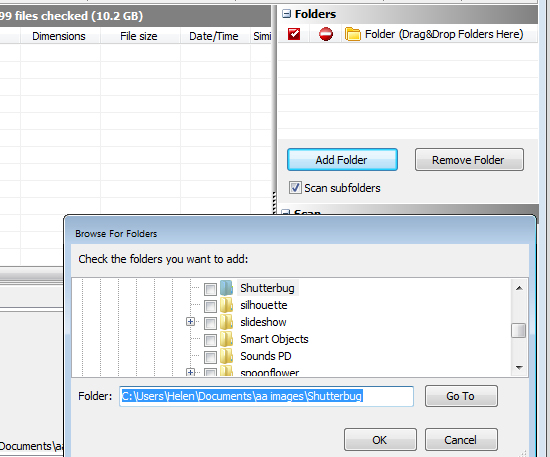
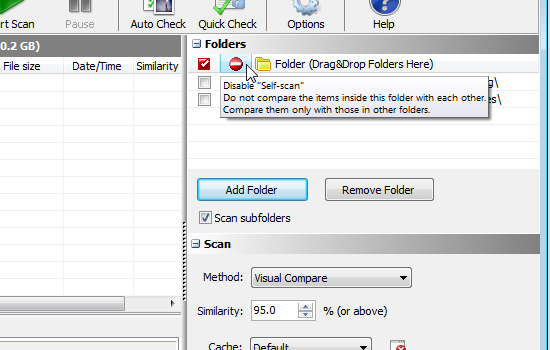
    Once you download and install either the Demo or Pro versions, launch the program and on the right of the screen locate the Folders box. Drag and drop folders of photos that you want to search into the folders box or click Add Folder to browse to select one or more folders. You can select to scan subfolders of these folders if desired as well.

    find-and-remove-duplicate-images-2

    Once you have the folders selected, you need to decide if you want to compare images inside a folder or not – the program refers to this as “self-scan”. If, for example, you think that one or more folders may contain duplicate photos you would select self-scan so the program compares the images inside the folders with each other, as well as making comparisons between all the folders. You may disable this self-scan option if you have a folder of images and you want to import some additional images into that folder but need to check first that you won’t be importing duplicates.

    find-and-remove-duplicate-images-3

    While the developer recommends leaving the program options at the default settings you can, if you wish to do so, change the scan method. The default is Visual Compare, but there are three other options: Hash, File Size and EXIF Date Time Original. If you leave the setting at Visual Compare you can determine the amount of similarity required between images for them to be considered duplicates – the higher the Similarity value the more similar they must be to be considered duplicates. The default is 95%.

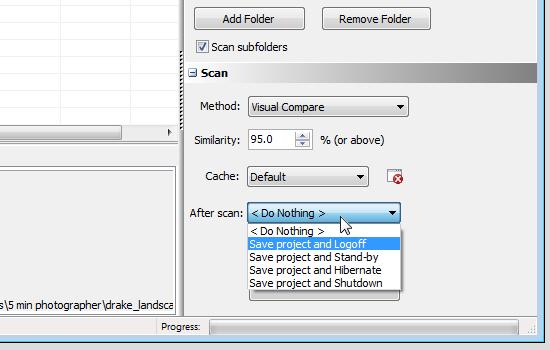
    If you are using the Pro version you can configure an After scan option so you can, for example, set the program to save the scan results as a project file and then close down the computer. This means you can run the application unattended and have it shut everything down when it is finished the scanning process.

    find-and-remove-duplicate-images-4

    This ability to save the scan results as a project is enormously useful because the scanning process can take some time. By saving the results to a file you can return at any time to work on the duplicates that were found without having to do a new scan. In the Demo version you cannot save and load projects.

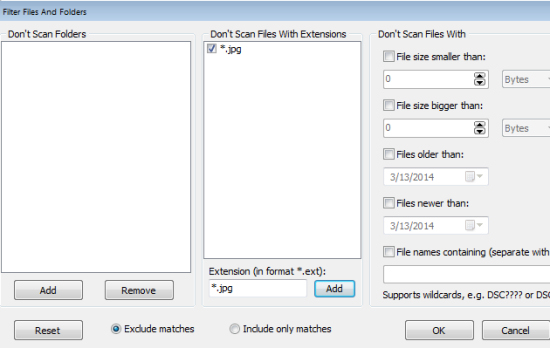
    If you don’t want to include certain file types or folders in a scan click the Filter button to set a filter to filter out these files. There are other filter options too for file size and age of file.

    find-and-remove-duplicate-images-5

    To start the scan click the Start Scan button and wait until the scan is complete. Depending on the number of files involved this may take some time.

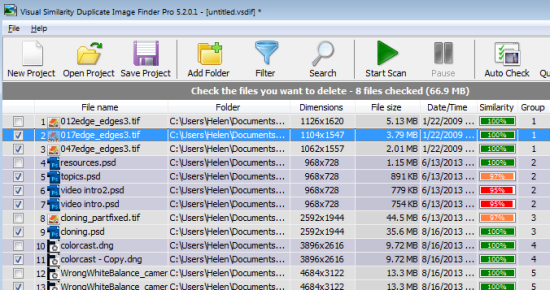
    Once the scan is complete you will see a list of the identified duplicates. The list contains the filenames, folders, dimensions and file size as well as the date/time. Each set of duplicates is given a group number which is useful as there may be more than two duplicates. If you selected Visual Compare as the Scan method, then the percentage Similarity is also shown for each image.

    find-and-remove-duplicate-images-6

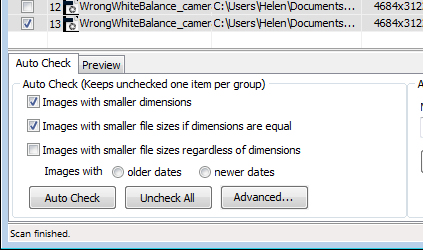
    In the Auto Check panel you can have the program automatically mark the images for deletion according to rules you set. Options include Images with smaller dimensions, Images with smaller file sizes if dimensions are equal or Images with smaller file sizes regardless of dimensions. You can also choose to mark the images to delete as being those with the Older Dates or Newer Dates. This feature only selects the images and you can undo or change any selection before deleting the checked images.

    find-and-remove-duplicate-images-7

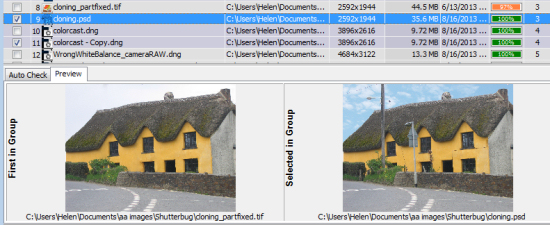
    Click the Preview tab and you can make a visual check to see if the images are indeed identical or close enough that you will delete one of them. In many cases even images which are 99% similar can show significant differences so you will probably want to check all that are not 100% similar to decide what you want to do with them. The Preview panel makes this easy and you can, if necessary, click on an image in the Preview Panel to open it full screen size to check it and those similar to it.

    find-and-remove-duplicate-images-8

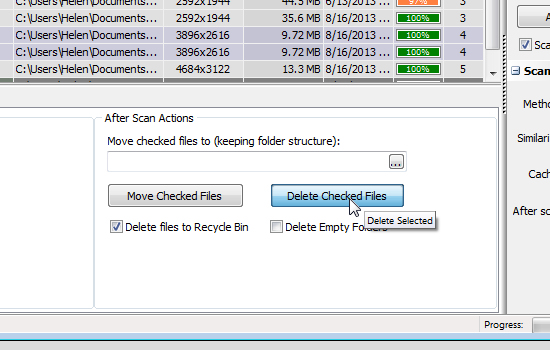
    Once you have checked the images to delete, you can delete all of them in one step. You can send them to the Recycle bin, or you can move them to another location and, if desired, you can choose to automatically delete empty folders. It is also possible to delete images one at time by clicking on the file name and pressing Delete.

    find-and-remove-duplicate-images-9

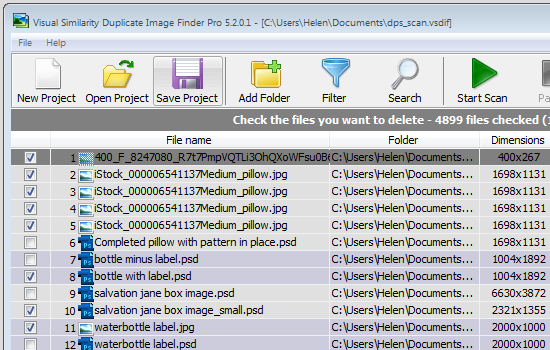
    If you don’t complete all the work on your duplicates in one session, click Save Project to save the project file. Next time, click Open Project and select the project file to load it again and you can continue working immediately without having to scan first.

    find-and-remove-duplicate-images-10

    Visual Similarity Duplicate Image Finder is a professional tool and is designed to help manage large image collections. It has a lot of handy options that will speed up the process of determining what images are potential duplicates and for helping you to manage them according to your workflow requirements. When you consider the time that it will save you in organizing your image collection its purchase price looks like good value indeed.

    Do you have other methods of sorting images? Please share your ideas in the comments below.

    The post Solving the Problem of Duplicate Photos by Helen Bradley appeared first on Digital Photography School.

    Digital Photography School

  • 10 Ways Photography Makes You a Better Parent

    When I began my journey down the wonderful path of becoming a photographer, I never realized how this camera of mine would totally transform my world.

    Better parent photographer 02

    I picked up a camera before becoming a mom, not because of burning passion, but because I knew how important it was to document our life. I felt like taking pictures was an essential part of remembering all of the details of growing our family.

    What I’ve realized over the years though, is that photography isn’t simply about the technical details of achieving the perfect white balance, using the best gear and accessories, or researching perfect posing and staging techniques. It’s about the surprising and hidden benefits you’ll receive from the camera in rediscovering yourself and igniting a new passion; helping you become a better person in the process.

    Below are 10 ways I’ve found photography has made me a better mom. The points I make are quite ‘mom focused’, but I’m sure these would apply to dads, grandparents, aunts, uncles, or anyone else who has a love of capturing their family as well.

    10 Ways Photography Makes You a Better Parent

    1) Keeps your adult brain working

    Photography is way to keep the ‘adult’ side of your brain actively learning and growing, as you conquer the technical side of what makes the camera work.

    When I became a mom, I quickly became overwhelmed with all the ‘kid stuff’ in my life. Cartoons, arts and crafts, Play Doh ©, Legos ©, dolls, action figures, books. As a lifetime lover of school and learning, I needed something that would allow my brain to continue stretching and growing alongside my child’s.

    Better parent photographer 01

    2) Allows you to practice self-care

    Photography is a creative outlet that that allows you to be an active participant in self-care while raising kids.

    Getting out for even a quick 10 minute walk and capturing your surroundings is sometimes all you need as a mental reset on particularly long or hectic days.

    3) Connect with other like-minded parents

    It’s is a hobby that allows moms to connect with other moms who are passionate about memory making. It can be so hard meeting other moms who have similar interests once you become one yourself. Photography provides a place to start finding common ground as you search for new friends.

    Better parent photographer 05

    4) More family activities to new places

    You’ll be excited to plan more activities as a family because you’ll want to document fun adventures together.

    Never one to enjoy taking photos in the same place twice, I’m always on the hunt for new places to go see, and explore with our family to make the experience of documenting new and exciting every time. We’ve been to the zoo, the park, apple picking, the local alpaca farm, the pool, the playground, etc.

    5) You document important childhood details

    Better parent photographer 07

    Photography allows you to become more mindful about documenting childhood details that are too easily forgotten.

    You may think you’ll always remember how tiny they are, the first time they smile, or how cute they looked in that amazing outfit from grandma. But, unfortunately if there isn’t photographic evidence those memories can quickly fade away. A photography project can help you sharpen your skills and preserve these memories.

    6) Provides you a way to relax after bedtimes

    Looking through photos is a way to rest and unwind at the end of a long tiring day. After the kids are in bed it’s such a confidence booster to look over your work, pick the best shots, edit a few to really make them pop, or order a few prints to frame and hang in your home.

    7) Helps you ‘play’ with the kids more

    Taking pictures can be accomplished in small chunks of time without a whole lot of resources or equipment required.

    Settling into creative play with my kiddo doesn’t always flow naturally for me. In order to make play time activities more fun for us all, I’ll often participate for a little while, and then have the camera nearby so I can switch away from participating and snap a few photos when I start getting antsy.

    Better parent photographer 06

    8) You are creating a family legacy that will be treasured

    You are giving your children a precious gift of memories that they’ll cherish for a lifetime. Every time I snap a ‘keeper’ I always think about how much our daughter will appreciate that shot when we’re all older.

    Better parent photographer 03

    9) Looking over family photos creates great bonding time

    Sitting down and looking at old photos is the perfect way to earn some extra snuggle time with the kids. Looking through photo albums is a favorite activity for our family and is also one of the only times we get some snuggly bonding time with our preschooler which is always a treat.

    10) It helps you be a better role model

    Better parent photographer 04

    Kids will see an empowered and confident role model as their mom (or dad) embraces a hobby she loves. Children are sponges and will mimic parents’ actions. By showing your children that you are willing to make time for your own fulfillment by embracing hobbies and passions you love, you’re granting them permission to do the same in their own life.

    How many of these can you relate to? Has photography always been a passion for you? Or has parenthood taken your love of photography to an entirely new and more passionate realm as it has done for me? I’d love to hear about your photography story in the comments.

    The post 10 Ways Photography Makes You a Better Parent by Beryl Young appeared first on Digital Photography School.

    Digital Photography School

  • 5 Steps to Building Relationships to Help You Get More Photography Clients

    How to Build Relationships to Get More Photography Clients

    So you’re trying to make a go of it as a freelance photographer. Maybe you are just looking for a few paid gigs on the side, or perhaps you really want to go pro. But the problem is actual paying gigs are still few and far between, even though you’ve tried everything.

    Shooting every day. Doing free portrait sessions for family or friends. Spent hours and hours editing photos in Photoshop or organizing images in Lightroom.

    So what should you do? Well, I have some good news – it may not be your photography. In fact, you may be an excellent photographer. But here’s the rub: being a successful freelance photographer takes more than artistic skills and technical knowledge. It takes something most photographers would rather not acknowledge is important.

    Hang tight, because what I’m about to say may shock you.

    By thinkpanama

    Successful Photographers Know the Value of Relationships

    Really successful photographers are good at developing relationships. That’s right, I said it. You need to focus on relationships. (I realize this is a photography blog so you can burn me for witchcraft now.)

    You need to build the right relationships with key individuals who can help you to achieve your freelance dreams.

    Now, this may not sit well with you, especially if you consider yourself a little shy. But the good news is you don’t need to be the life of the party to be good at developing key relationship to support your freelance work.

    You just need to have some discipline and focus your energies in the right direction.

    How Cultivating Relationships Can Support Your Freelance Photography Career

    There are many ways in which cultivating and maintaining key relationships can help your freelance career. For example:

    • Clients like to hire service professionals they already know, like and trust.
    • According to public opinion surveys, 45 percent of people find work through other people. Thus, keeping in touch with a wide network is crucially important for landing gigs.
    • By keeping in touch with editors, publishers and clients, you’ll be top of mind when new gigs come up.
    • You may find out about photography gigs and projects that are not advertised.

    Now, let’s turn to how you can be proactive about identifying the people who you want to establish relationships with and then go about nurturing relationships with them.

    By Zuhair A. Al-Traifi

    How to Establish and Nurture Relationships to Grow Your Freelance Photography Career

    Below, I have laid out five specific steps you can take to start establishing, and building relationships that will help your freelance photography career.

    1. Create a list of key relationships

    By Eric Heupel

    One of the biggest mistakes I see aspiring freelance photographers make, is they fail to think in advance about the types of people they need to be meeting and getting to know better. In other words, they let their relationships evolve naturally and organically. That works well for friendships, but it’s a poor strategy for if you want to make a living using your photography skills.

    A much better approach is to sit down and proactively make up a list of at least 50 people who you want to develop a deeper relationship with over the next 12 months. I call this list your “Conversations List” because that’s really all you’re aiming to do – to have an ongoing conversation with people who matter.

    Who do you include on this list? Well, picture yourself five years from now as a famous and in-demand photographer. Who is in your ideal circle of contacts? Who are the photographers, editors, agents, publishers or bloggers who you’d like to count as friends and peers five years from now?

    Whoever you picture being in this group, write them down. These are the people who you are going to focus on getting to know better.

    2. Choose your relationship-building tools

    By zzpza

    Once you’ve identified who you want to focus on getting to know, the second step is to decide on what tools you plan to use to develop and nurture relationships. These tools may include:

    • Lunches and coffee meetings. One of the best sources of getting new gigs is the simplest. Invite a person off the list you created in Step 1 to lunch or coffee. Get to know one another. Repeat.
    • Interviews. I am a huge fan of using interviews to develop relationships. For example, dPS’s own managing editor Darlene Hildebrandt and I got to know one another better when I interviewed her for my podcast and when she interviewed me on photography and the law. You also generate useful content that can lead to new clients finding you.
    • Business meetings. There may be local business community meetings (such as Chamber of Commerce meetings) that present a good opportunity for you to meet and connect with others.
    • Industry Conferences. You should identify conferences where you can meet and get to know people from the list you created in Step 1.

    Next, let’s talk about your mentality as you do begin to reach out to others.

    3. Give to others long before you ask for anything

    By Brandon Warren

    Steps 1 and 2 are critical, but may not be as important as Step number 3, which is to provide value to others before asking for anything for yourself.

    Dr. Ivan Misner, the founder of BNI (Business Network International) says you need to make deposits into the relationship bank before you can make withdrawals. In other words, you need to help others before you can ask for help for yourself.

    Too often, people try to make withdrawals before they’ve made any deposits. They ask before they give. That’s a recipe for failure. What you “give” of value doesn’t need to be big. It can be simple suggestions or recommendations of a restaurant to try or a new TV show.

    For example, let’s say you manage to get to know an editor at a publication or website which just purchased some of your photos. You want to sell them more photos in the future.

    You should try hard to learn as much about that editor as you can, so you can be as helpful to him or her as possible. In other words, be human and be useful, helpful and giving. As a result, the editor will have a positive feelings for you because you were so giving, and they will be more likely to want to work with you again.

    4. Create an easy follow-up system

    By slackorama

    So far, we’ve identified who you are going to connect with, talked about the tools you are going to use to connect with them, and discussed a philosophy of giving value first.

    Now, the challenge is to keep it up over time. If you want your connections to think of you first when a freelance gig comes up, then you need to always be “top of mind” with that connection. And to be “top of mind,” you need to have a good system for following up.

    What does that entail? A follow-up system is simply a dedicated means for checking in with people in your network.

    You can create a manual follow up system, or put reminders on your calendar, but neither works well. I suggest using a simple CRM (customer relation management) system such as Insightly or SugarCRM. I use a system called Contactually. Whatever system you use, following up is an excellent way to manage your relationships, particularly with people you do not see often.

    5. Revisit and revise your conversation lists annually

    Around once a year, revisit your Conversation Lists and determine who you should cut out and who you should add. You will naturally meet new people over time. You may decide that certain people on your list are not a good fit for you. And you may even decide to take your photography career in a different direction. These are all perfectly fine.

    By revisiting and updating your lists annually, you can make sure you are developing and nurturing the right relationships, proactively, to support your photography career.

    Now get out there and start meeting people

    Now it’s time to put these ideas to work. The last thing I want you to do after reading this far is to give up now without acting on what you’ve learned.

    So sit down and write out your list of the 50 people who you want to get to know better. Then use your chosen relationship-building tools to start developing relationships with them. And have some fun.

    How do you nurture relationships to support your freelance photography career? Share your tips in the comments!

    The post 5 Steps to Building Relationships to Help You Get More Photography Clients by John Corcoran appeared first on Digital Photography School.

    Digital Photography School

  • The Worst Mistake a Travel Photographer Can Make

    As a travel photographer and photography teacher, I meet a lot of photographers on a daily basis. Whether they’re amateur or pro, newbie or experienced, first-timers or old-timers, they often have one thing in common: too much gear.

    The pro shooters who join me on my photography tours in Southeast Asia tend to look more like pack mules than people: they’re loaded with lenses, lights, filters, and a veritable menagerie of photographic accoutrement – you know, the kind of gear that makes you look like you know what you’re doing.

    Travel photography mistakes 02

    Being comfortable with your equipment allows you to compose your images better and faster.

    The problem? None of them ever use any of the gear they’ve broken their backs to bring!

    Ok, fine, there might have been one guy, one time, who made it a point to use every single lens he’d brought with him. But normally I see people sticking to one or two lenses per shooting session, never giving the extra gear a second thought. This is actually a really good thing, and all the more reason to ditch the extra baggage, and rely on one or two lenses alone.

    Why am I so anti-gear?

    1. Gear is heavy!

    How are you going to move your feet, get down low, and capture your subject during the millisecond when the light is just right?

    The first thing I teach beginning photographers is to get moving – move quickly, get close to your subject, and don’t be a lazy photographer. When you’re weighed down with kilos (pounds) of heavy gear, you’re not free to respond as each moment arises.

    Travel photography mistakes 01

    Having less gear allows for freedom of movement and enjoying interaction with the locals.

    2. Gear is expensive!

    I don’t mean you shouldn’t buy it because it’s expensive; I mean you shouldn’t bring it because it’s expensive.

    As a travel photographer, I’m often in remote parts of the world where getting your gear stolen or damaged is a very real possibility. You can’t focus on the photo you’re taking, if you’re constantly worrying about your stuff getting jacked.

    3. Gear is distracting!

    If you have one or two lenses with you at any given time, your choice in a shooting situation is simple – A or B. If you’re hauling around 12 different lenses, you’ll not only face a major crisis every time you want to take a photo; you’ll feel the need to constantly switch lenses precisely because you brought so many lenses in the first place.

    You’re also much more likely to use the wrong lens, in the wrong situation, just because it’s there. Bring less gear and eliminate the chance of making silly mistakes by 300%.

    Travel photography mistakes 04

    Keeping the same lens allows to react faster and more flexibility.

    4. Gear makes you lazy!

    I think of gear like a crutch. Instead of improving your skills, you become a slave to the latest and greatest gadget, thinking it will improve your craft. The thing about gear is that it takes years, even decades, to learn how to use a single piece of equipment masterfully. After 20 years of shooting with a certain lens, your brain begins to think in terms of its focal length. You effectively merge with the lens, become it.

    That’s basically a hippy-dippy way of saying you should be a gear monogamist. Sure, you might play the field every once in a while, experimenting with a 35mm or 100mm lens, but you should remain faithful to your main squeeze in order to truly master her.

    My main squeeze for the past three years has been a 50mm lens. Once in awhile I also use my 35mm and 100mm lenses, and it’s this trio that I plan to focus on for at least another decade in order to fully master their potential.

    Travel photography mistakes 03

    Knowing your equipment allows you more anticipation for better results in your composition.

    A true travel photographer, or any photographer for that matter, is one who can capture a moment and communicate with his or her audience without the burden of a crap ton of gear. You’re much better off choosing one or two lenses and mastering them than you are having 17 lenses you can only sort of use.

    All the photos in this article were taken during my photography tours in South East Asia.

    How much gear do you bring with you on a shoot? Which lens can’t you live without?

    Share your thoughts in the comments below.

    The post The Worst Mistake a Travel Photographer Can Make by Etienne Bossot appeared first on Digital Photography School.

    Digital Photography School

  • 10 Bad Photography Habits and How to Break Them Now

    There are some very common habits that we develop as photographers. Especially in the beginning when there is so much to learn! Among the tips and secrets to good photography, a valuable one is to avoid bad habits that will be hard to shake off later. Bad habits are fairly common to create, as we  create habits in everything we do. Continue Reading

    The post 10 Bad Photography Habits and How to Break Them Now appeared first on Photodoto.


    Photodoto

  • Is it REALLY the Gear?

    EOS-1D X with EF 200-400 f/4L IS USM +1.4x Extender. 1/1000, f/5.6, ISO 800.

    EOS-1D X with EF 200-400 f/4L IS USM +1.4x Extender. 1/1000, f/5.6, ISO 800.

    Recently, I’ve noticed some comments from readers who seem to feel that the gear I use for my shots is the reason I get the images I do. They seem to feel that similar results cannot be achieved using consumer level gear. True, I use some top-of-the-line gear, and there are many reasons for that. But rare is the shot that I was able to get with an EOS-1D X or 5D Mark III that I could not also get with a Rebel T5i.

    So that begs the question: why do pros spend so much money on top-of-the-line cameras and lenses? 

    There are three basic reasons:

    #1 – The first is speed

    The EOS-1D X and Nikon D4s, the top two leading pro level cameras available, both shoot at 12 frames per second (fps) or faster. Often, shooting that fast is unnecessary. But when you are a working pro, and your paycheck depends on you capturing just the right moment at a sporting event, or when shooting a news event, that speed can mean the difference between missing the decisive moment, or capturing the exact shot your editor or client is looking for. In the series above, I was shooting at 12 frames per second, and these three consecutive frames were the peak action of a save made by the goalie.

    Rebel_Sports

    Rebel T2i and EF-S 55-250 f/4-5.6 IS – 1/500 at f/5.6, ISO 640

    Could I have gotten this shot with a slower camera? If my timing was good, I’d have gotten one of these frames, or something close. But when I’m shooting for a paycheck, I need to be sure, and if possible, come away with several shots. Keep in mind, of these three shots, for a camera that shoots at 5 fps, you’d be getting less than half of this sequence. For the average person shooting their child’s sporting event, five frames per second may seem like plenty. But a lot can be missed in those spaces between images. In addition, processor speed is faster, and the camera is able to get images from the camera’s buffer to the memory card faster. It’s all about what is good enough for you. For most people, five frames per second is plenty.

    #2 – The second reason is durability

    Canon’s EOS-1D series cameras, and Nikon’s D4s camera, are among the toughest cameras ever made. They are built to withstand heavy use, with shutters rated to handle several hundred thousand frames. The bodies are constructed of magnesium alloy, making them resistant to impact damage, and they are sealed to resist dust and moisture. A working pro is dependent on his cameras and lenses to put food on his table, and professional cameras are designed to help him do that over and over again. While these features may help make the camera more reliable to a working pro, it has very little to do with that pro’s ability to capture a compelling image.

    #3 – The third reason is an expansion of basic features

    Autofocus systems tend to have more focus points, and are more configurable than in consumer grade cameras. AF systems in pro level cameras generally have more cross-type points as well, which helps them to focus more quickly. Metering systems are also generally more elaborate in higher level cameras, offering RGB metering in some models, as well as face and color recognition. These enhanced features may make it somewhat easier for a pro to get a shot, but also keep in mind that pros are often working in more extreme situations, for both lighting and action, than the average person with a camera.

    EOS 5D Mark III with EF 70-200 f/2.8L IS II. 1/320 at f/5.6, ISO 640.

    EOS 5D Mark III with EF 70-200 f/2.8L IS II – 1/320 at f/5.6, ISO 640

    This brings us to the next topic – lenses

    EOS-1D X with EF 85mm f/1.2L II lens. 1/4000 at f/1.2, ISO 100.

    EOS-1D X with EF 85mm f/1.2L II lens. 1/4000 at f/1.2, ISO 100.

    One particular comment asked how I expected others to be able to achieve the results I did using top of the line lenses, when others were using only kit lenses. The bottom line answer to this is, that some shots you won’t be able to duplicate without a particular lens. Others can be done regardless of which lens you have, like the image above. While it was taken with an EF 70-200 f/2.8L IS II, the focal length was 135mm, and I was stopped down to f/5.6. This means that someone using an EOS Rebel T5i, with the EF-S 18-135 f/3.5-5.6 lens could easily duplicate the shot. The differences will be notable when a fast aperture is used – for instance, when I use the Canon EF 85mm f/1.2L II lens wide open, while you may using a 70-200 zoomed to 85mm at f/2.8. While the framing will be the same, the depth of field will not be, and the bokeh (the quality of the out of focus area) will be different. This is evident in the shot to the left. While the EF 85mm f/1.8 lens will come closer to achieving this look, the bokeh is quite different between the 1.8 and 1.2 apertures. Certain lenses have certain characteristics and often photographers use these lenses specifically because of these characteristics. This is not to say that equally stunning images cannot be captured with a kit lens- they most certainly can. I am simply stating that certain lenses have a quality I prefer for certain shots.

    Read: the most popular lenses among dPS readers here

    So, is it the gear? Really? Yes, and no.

    The bottom line is that compelling images can be captured with a point and shoot just as well as can be captured with a top-of-the-line DSLR. But a point and shoot, or an entry level DSLR have some limitations that a pro level DSLR doesn’t. As a photographer, it’s up to you to learn to work around these limitations, or to decide if it’s time to upgrade to a higher level camera or lens. But don’t simply assume that because an image was made with a pro-level camera that it could not just as easily have been made with a consumer-level camera. In the image below, I would have loved to have a 5D Mark III with EF 100mm f/2.8L IS macro. I didn’t have that with me the day I shot this. Instead, a Rebel XSi with EF-S 55-250 did the job, and got me just as nice a shot. Saying it’s the gear is giving the gear too much credit, and it also sells the photographer short.

    EOS Rebel XSi with EF-S 55-250 IS. 1/250 at f/5.6, ISO 100.

    EOS Rebel XSi with EF-S 55-250 IS – 1/250 at f/5.6, ISO 100

    The post Is it REALLY the Gear? by Rick Berk appeared first on Digital Photography School.

    Digital Photography School