Category: Photography

  • Tips for Photographing Auto Racing

    “Racing is life. Anything that happens before or after is just waiting.” – to quote Michael Delaney (played by Steve McQueen) in the movie ‘LeMans’. You don’t have to be a race car driver to feel the adrenaline rush that is auto racing. Being a photographer, and being part of the action can also be very exciting and a lot of fun.

    There are a number of different types of racing such as sports cars, stock cars, rally cars, open wheel cars and even your local short track cars that might race on dirt or asphalt. Each type will have different tracks with their own level of accessibility for you to take photos. Nothing beats having unlimited access and if you can get a press pass, that is definitely the way to go. But if you don’t have that option available what can you do?
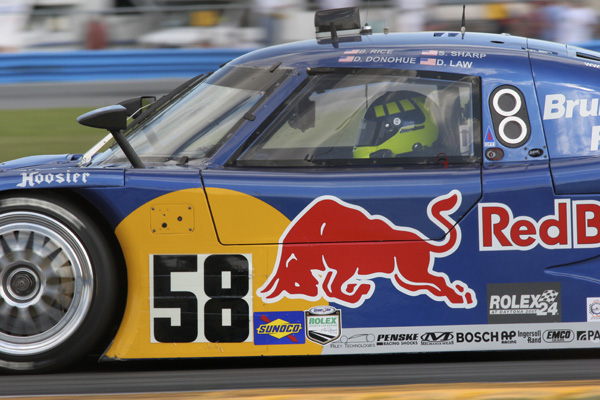
    Fig 1

    PANNING

    Road courses offer opportunities to get great action photos without having any special access. The images above was taken from the same vantage point of all spectators. By using a short ladder, I was able take this image over the fence instead of trying to look through it. A 300mm lens was enough to more than fill the frame, so an extreme telephoto lens was not required to get this photo.

    I also used the technique known as panning. Panning with the car allowed the focus to stay on the main subject, but by slowing the shutter speed down enough you are still able to get the feeling of speed. You will need to find the right balance between aperture, shutter speed and ISO. If the shutter speed is too fast the car will look like it’s just stopped on the track. If it’s too slow then everything could be blurred. You want to slow your shutter speed down until the lettering on the tires just transforms into a nice short blur. Photograph a few laps at different speeds and then check them on your camera’s LCD screen until you get the right effect that you’re looking for.

    Next, take notice of your aperture because this will determine your depth of field. Depth of field is typically less with a telephoto lens than it is with a wide angle. Adjusting your aperture will require a corresponding adjustment of the ISO to compensate and keep your exposure accurate. A depth of field that is too shallow may make it difficult to obtain a critical focus, so again take a look at a few practice images and make sure that your focus looks good to you (zoom in to 100% on your screen to be sure).

    PREFOCUS

    Autofocus is still sometimes unpredictable and it may lock onto a subject in the foreground or background just as you are about to take the shot. By switching to manual focus you can prefocus a location on the track and just wait for the cars (or motorcycles) to come to you. Once there, a simple click of the shutter and you’ve captured your racer in focus. There’s always an ideal racing line on any track so more than likely all racers will speed through at that same location unless they’re passing or being passed.

    BLUR
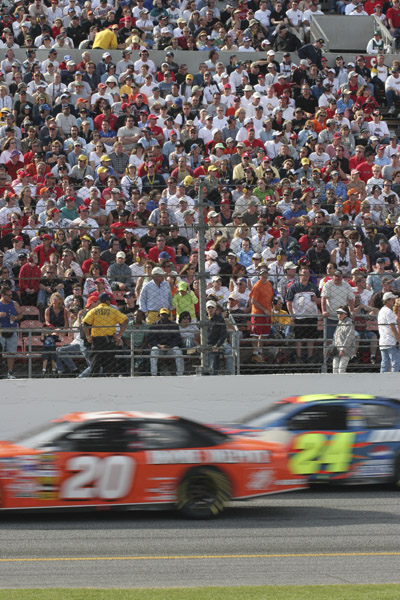
    Fig 2

    This photo (image above) shows that sometimes you need to look around, notice your surroundings and try something a little different. By focusing on the spectators you can allow the cars to become a blur and emphasize their action on the track. Try different shutter speeds until you get the effect that you desire. This technique can be used for daytime or nighttime racing. A neutral density or gradual filter was not used for this image, but one could be used to increase the blur.

    TRIPOD or MONOPOD?

    Tripods and monopods are helpful to stabilize the action and help give you a sharper image. If you don’t want to use them there’s a formula for hand holding a camera with a long lens and it is as follows:

    The shutter speed should be equal to or greater (faster) than the focal length of the lens (eg., 200mm lens = 1/200th shutter speed or faster) to avoid camera movement as you take your photo.

    If you have a zoom lens like a 75-300 then this rule would apply at the longer focal length (1/300th of a second or faster). Don’t forget to add in the crop factor if this applies to your camera’s sensor also. With cameras that have stabilization systems either in the lens or camera body you can typically bend this rule by a couple of stops, but the tripod and monopod are still there to help when you need them. They are definitely preferable when using a super telephoto that you may be carrying around all day. I prefer a monopod because they are lightweight and easy to move around with, but you will need to find what works best for you with a little trial and error.

    TWO CAMERAS

    Photographing auto racing does require a certain amount of photographic equipment. We would all like to have the best that’s available, but most times that is not the case. Get the best equipment that you can afford and learn to make the best with what you have. If you can, carry a second camera with you so that you’re ready for that unexpected shot. Keep a telephoto lens on one camera and a shorter lens on the other. Being prepared for the unexpected to happen is when you’re going to get that great action photo.

    ANGLE OF VIEW
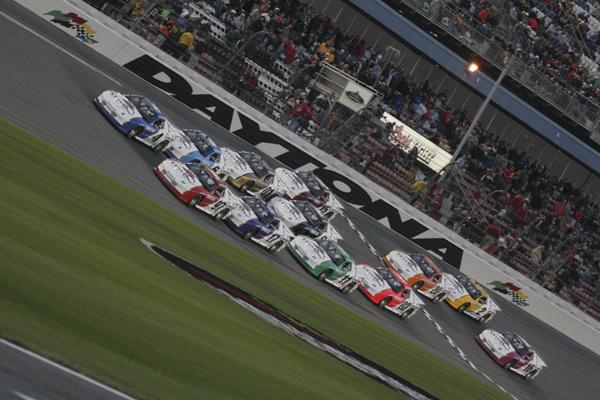
    Fig 3

    Be on the lookout for creative images. If you see a crowd of photographers in one location – try looking for an angle of view that they haven’t seen. You can hold the camera at a 45 degree angle and take photos with cars going across the screen diagonally to emphasize speed (see image above). Try taking photos from a low angle or a high angle. You can attach your camera to a monopod with a remote release and capture a high angle such as this car being rolled out to the starting grid (image below). Even though there are crowds of people around, this car is isolated and not something that you see everyday.
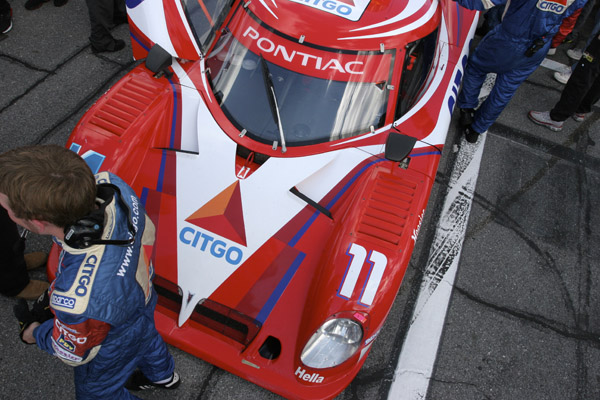
    Fig 4

    PIT STOPS

    Pit stops are some of my favorite things to photograph because there is always a lot of action! You can get a lot of great images with a relatively inexpensive wide angle such as this image (below) taken with a 20-35mm lens. Some race tracks will allow you to purchase a pit pass, or a press pass will gain you access to pit road. If you do obtain access to photograph pit stops maintain your ‘situational awareness’. Be aware that every one of the pit crew members around you has a job to do and you don’t want to get in their way while they’re doing it. There is the potential for serious injury for you and crew members. So pick the moment that you want to get in there, take your images and step back so that they can do their job.
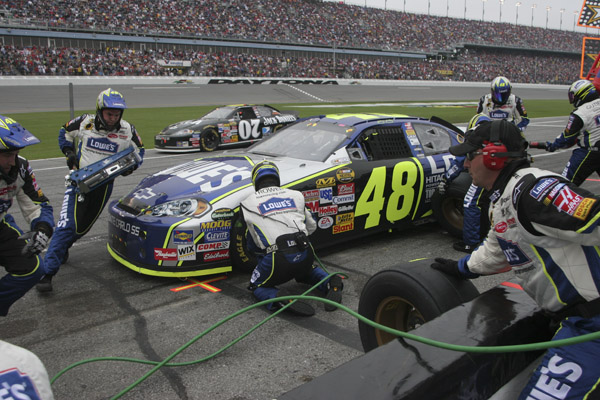
    Fig 5

    Some forms of racing allow photographers over the pit road wall to photograph pit stop action as long as you wear a firesuit. This type of access, in my opinion, is the ultimate and you are able to move around the car taking images that few photographers get to take (like the image below). If you are able to gain this type of access you also need to be aware of cars (or motorcycles) entering and exiting their pits.
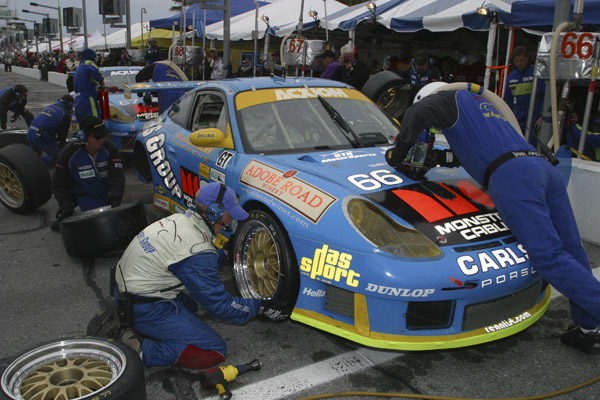
    Fig 6

    IN SUMMARY – ACTION PLAN

    Photographing auto racing can be challenging but a lot of fun. Take the best photos you can from the areas that you have access to and buy a pit pass to get closer to the action. The camera equipment required can be expensive, but learn to work with what you have, and upgrade your equipment when you can. There are also numerous rental companies available now and you may want to consider renting equipment to try before you buy. Good luck and good racing!

    If you have racing photos that you’d like to share with others here please add them in the comments.

    The post Tips for Photographing Auto Racing by Jim Wise appeared first on Digital Photography School.
    Digital Photography School

  • Better Landscape Photography Tips and Video Tutorials

    This week I’m going to turn the focus to landscape photography. Your photography challenge this week being “Flora” it’s a good time to get out and there go find some great landscapes. So I’ve actually found not one, but three, short video tutorials with some really good landscape photography tips.

    #1 Top 10 pro landscape shooting tips

    As the title eludes to, this video shares 10 quick tips to help you get going. At just over four minutes you don’t have to waste any time before you get out shooting. The tips include: focal point, tripod, time of day, rule of thirds and more.

    #2 Low Light Landscape Photography Tips

    This one is by Stuart Low Photography and he goes over some tips for shooting when the light maybe isn’t so great like a gray gloomy day, and how to create interesting compositions. Besides, I just love his accent!

    #3 The Australian Photography Show Ep1 – Landscapes

    Last but not least is a really good video by Zulu Media. They go on a location photo shoot with landscape photographer Adam Monk at the famous Australian landmark, The Pinnacles. You don’t have to live in Australia to be able to use his tips though, you can apply these to any location and use them immediately. Some really good stuff in here as the two photographers show different ways of approaching the same subject matter and talk about lenses, camera settings and composition for impact.

    I hope you enjoy these landscape photography tips. If you want more you can check out the Best landscape articles of 2013 here on dPS, or Living Landscapes, one of our most popular eBooks!

    The post Better Landscape Photography Tips and Video Tutorials by Darlene Hildebrandt appeared first on Digital Photography School.

    Digital Photography School

  • Useful Lightroom Plug-ins

    Lightroom Export to PicasaWeb plug-in

    In previous articles you learned: how to create a photo website using the Koken plug-in for Lightroom, how to use The Fader plug-in to add an opacity slider to Develop Presets, and how to upload photos to 500px using their own plug-in (scroll down to read that section).

    Today I’d like to look at some other Lightroom plug-ins you may find useful. To clarify, I’m referring to plug-ins that add extra functionality to Lightroom by enabling you to do things with finished photos. Not programs such as those made by Nik or OnOne Software that are also plug-ins, but are used for editing photos.

    Jeffrey Friedl plug-ins

    Jeffrey Friedl has written lots of plug-ins for Lightroom (there’s a full list here). I’m going to highlight a few interesting ones here, but feel free to go and check the full list at the link above because there’s a lot of useful stuff there.

    Jeffrey’s plug-ins work on a donation-ware basis. They are free to download and install, but will stop working properly after six weeks unless you register the plug-in. To register, you need to make a payment using Paypal. The amount you pay is up to you, the minimum is just one cent, making the plug-ins virtually free. You can pay more if you’d like to make a donation to support Jeffrey’s work.

    Lightroom Publish Service

    Export to Facebook

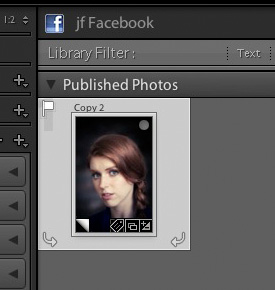
    Lightroom’s Publish Services has built-in support for exporting images to Facebook. However, the photos are published to your personal Facebook page, not a business page. Jeffrey’s Export to Facebook plug-in lets you publish to Facebook pages as well.

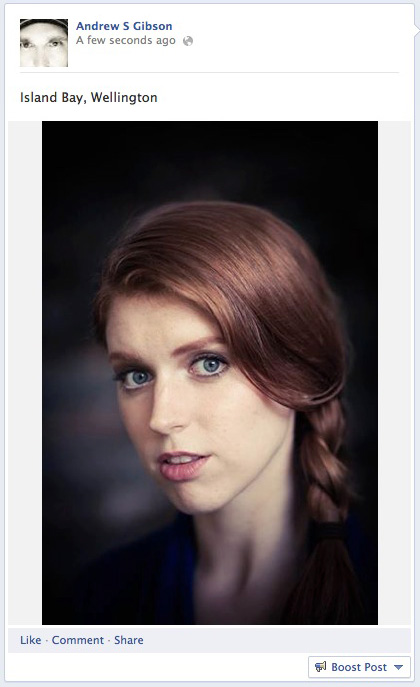
    For those of you unfamiliar with Lightroom’s Publish Services, these are found in the Library module and let you export photos directly to a location on your hard drive or a photo sharing website such as Flickr without leaving Lightroom. You get from this (photo right) > to this (below), with just the click of a mouse button.

    Portrait published on Facebook page

    Export to PicasaWeb

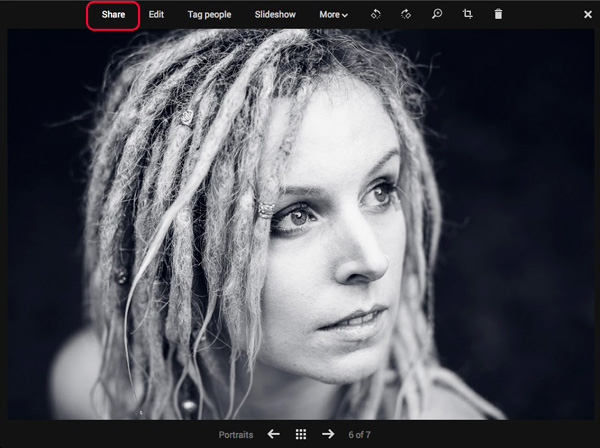
    Lightroom’s Publish Services don’t support Google+, but you can get around that using the Export to PicasaWeb plug-in. PicasaWeb albums are used by Google+ to store your photos. Once your photo is uploaded to a PicasaWeb album, go to the photo albums in your Google+ account, select the photo and click Share to share it with your circles:

    Lightroom Export to PicasaWeb plug-in

    Export to Tumblr

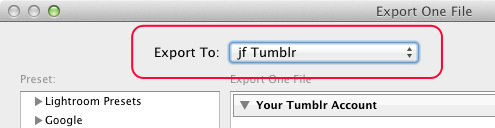
    The Export to Tumblr plug-in allows you to export images to a Tumblr account. It works a little differently from the previous two in that in doesn’t set up a Publish Service. Instead, go to File > Export and select jf Tumblr from the Export To menu at the top. You will need to authenticate your Tumblr account to get started:

    Export to Tumblr plug-in

    Adobe Plug-in Exchange

    Plug-in exchange

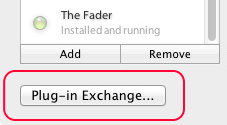
    If you click the Plug-in Exchange button in the Lightroom Plug-in Manager the Lightroom Exchange Classic website opens in your browser. This is the official Adobe marketplace for Lightroom Plug-ins and Develop presets. You’ll find a wide range of both, and plug-ins to do all sorts of things including exporting photos to SmugMug, Zenfolio and Dropbox.

    Photographer’s Toolbox

    The Photographer’s Toolbox website sells plug-ins written by Timothy Arnes, John Beardsworth and Matt Dawson. They are not free, but you can test them out by downloading them and using them (within the trial limitations). Some of them, such as LR/Mogrify 2, a plug-in that exports your images with borders, watermarks or text annotations, are donation-ware, letting you decide how much you would like to pay for the plug-in.

    LR/Blog is another useful plug-in that lets you export photos directly to a WordPress, Blogger or TypePad blog, or a NextGEN gallery for WordPress.

    Website Creation

    I’ve already mentioned Koken, a free CMS (content management system) that lets you build a photo website, but there are a couple more websites that sell more sophisticated plug-ins for creating photo websites. One of those is The Turning Gate, and another is Sean McCormack’s Lightroom-Blog. Take a look at both of these if you want to create your own website from within Lightroom.

    Installing Lightroom Plug-ins

    The easiest way to install a Lightroom Plug-In is to start by saving the uncompressed file in a folder on your computer’s hard drive. If you use the same folder for all your plug-ins, you will know exactly where to go each time.

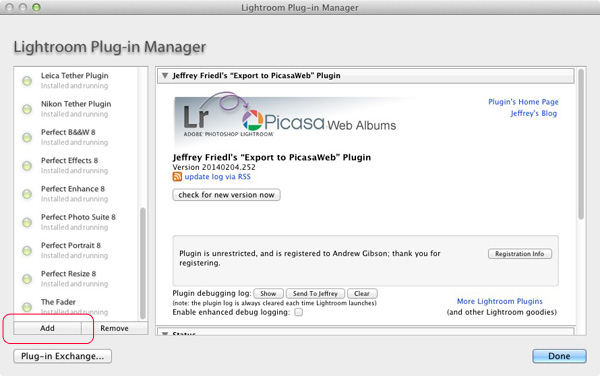
    In Lightroom, open the Plug-in Manager (File > Plug-in Manager) and click the Add button in the bottom left-hand corner. Go to the folder where the plug-in is saved, select it and click the Add Plug-in button. If you get a message asking you to update your Catalog, then click the Update button. From this point on the process may vary, so check the installation instructions that come with the plug-in you have added to finish the installation and set-up.

    Lightroom plug-in manager

    More plug-ins

    Here are links to the Lightroom plug-ins covered in earlier articles:

    Koken Lightroom plug-in
    500px Lightroom plug-in
    The Fader Lightroom plug-in

    Over to you

    I’ve touched on a few of the more popular or useful Lightroom plug-ins in this article, but I can’t possibly cover them all. So now it’s your turn. What Lightroom plug-ins have you used? What do you recommend for other readers? Let us know in the comments.


    mastering-lightroom-bundle-1

    Mastering Lightroom: Book One and Two

    My Mastering Lightroom ebooks are a complete guide to using Lightroom’s Library and Develop modules. Written for Lightroom 4 & 5 they take you through every panel in both modules and show you how to import and organise your images, use Collections and creatively edit your photos.

    The post Useful Lightroom Plug-ins by Andrew S. Gibson appeared first on Digital Photography School.

    Digital Photography School

  • A New Photographer’s Guide to Camera Settings

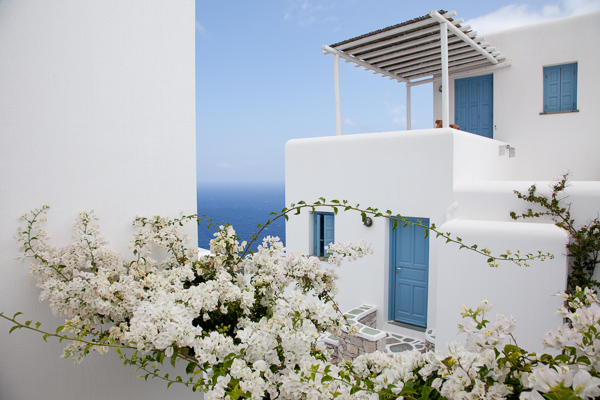
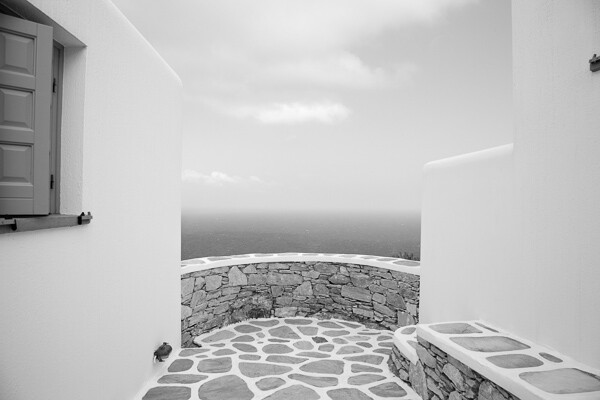
    Folegandros, Greece.

    Folegandros, Greece – 24mm focal length at f/11

    Without experience, looking at the endless functions and dials on a camera can seem daunting, and it is at first, especially with many of the newer digital cameras that have about 5,000 functions (I’m looking at you Nikon).

    Luckily, you only have to learn the major functions at first to significantly improve your photography. It might take a few reads through the content below, but it does not take long to learn the most important abilities of your camera to significantly improve your photography.

    Depth of Field

    Before we delve into the settings, you first need to understand depth of field. The term refers to the area in front of, and behind the subject, that the camera is focused on that is acceptably sharp. We use the term acceptably sharp because as you get further from the object you are focusing on, the sharpness gradually declines.

    Another way to think of depth of field is as a range of sharpness. A shallow depth of field refers to a small range of acceptable sharpness, while a deep depth of field refers to a large range of acceptable sharpness in an image.

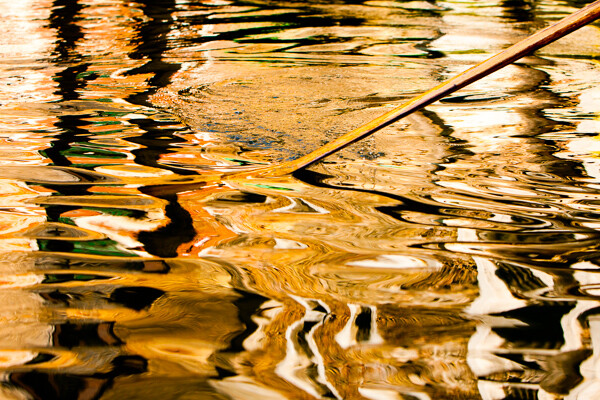
    Venice, Italy.

    Venice, Italy – 70mm focal length at f/5.6. This image has a fairly shallow Depth of Field; the oar and wave are sharp, while the rest is out of focus.

    When standing at the same distance away from your scene, there are three ways to alter the depth of field:

    1. Changing your aperture setting
    2. Changing the focal length on your camera (i.e. 24mm versus 200mm lens) will give you the appearance of more depth of field.  Technically, this is an optical effect due to the magnification, but it will create the appearance of more depth of field.
    3. Changing the focus distance. Focusing on a closer subject will give you less depth of field than focusing on a subject at a distance.

    Focal Length (wide-angle versus telephoto)

    Changing your focal length alters the relationship in size between the foreground objects and the background objects. It also affects the appearance of depth of field due to the change in magnification.

    Wide angle:   a wide angle lens (i.e., 28mm) will make foreground subjects larger in comparison to the background. This allows you to have a main subject that is prominent in the foreground while simultaneously fitting in more of the background, since it is proportionally smaller. When standing at the same distance from your subject, there is the appearance of more depth of field throughout the frame with a wide angle lens than with a telephoto lens when the same aperture is used.

    Folegandros, Greece

    Folegandros, Greece – 24mm focal length at f/11. Notice the size of the foreground stones in relation to the middleground stones.

    Telephoto:  a telephoto lens will compress and tighten the view. The longer the focal length, the larger the background objects will appear in comparison to the foreground objects. This makes the background objects look closer to the foreground objects than with a wide-angle view.

    While not a steadfast rule, portraits are often thought to be more flattering when a slightly telephoto lens is used (around 80mm to 120mm), which will compress a person’s features. If you photograph someone with a large nose at close distance with a 17mm lens, that nose will look gigantic when compared to the subject’s ears.

    Florence, Italy.

    Florence, Italy – 170mm focal length at f/6.3

    ISO

    Before you learn about the Aperture and Shutter Priority modes, you need to understand ISO. The ISO setting is a way to change the sensitivity of your camera’s sensor to light.

    ISO is the first setting you should set when you walk out the door and you should always be aware of what it is set at. Practice altering it, because once you get familiar with ISO you will change it constantly.

    A lower ISO number (100, 200, or 400) means that the camera sensor will not be as sensitive to light but the quality of the image will be to the best of the camera’s ability. Low ISO images will have little to no digital noise. The best times to shoot with a low ISO are in strong daylight, when using a tripod, or when using studio lights.

    A high ISO number (800, 1600 or 3200) means that the camera sensor will read more of the light, but the tradeoff is that the images will have digital noise. Higher ISOs are generally used when the light is not ideal and one does not have a tripod. You should review your camera’s ISO abilities to find the upper limit that you are comfortable using. Higher end cameras typically have a stop or two more ISO ability than entry level cameras.

    East Village, NYC.

    East Village, NYC ISO 3200. – grainy, but beautiful

    The key here is to not be afraid to raise your ISO. Its capability has improved so much that many cameras can shoot at ISO 800, 1600, and 3200 or even higher for some. It is much better to have the ideal shutter and aperture settings when creating an image than having the ideal ISO setting. Grain is beautiful, while bad aperture and shutter settings are not.

    Once your ISO is set, you will then have to figure out whether you want to shoot in Aperture Priority or Shutter Priority mode.

    Aperture Priority (A/Av)

    The aperture is the hole in the lens that allows light to enter the camera. The term f-stop (i.e. f/2.8, f/3.5 … f/16) is a number that refers to the size of the aperture opening, where f/2.8 is a much larger opening than f/16. Using Aperture Priority Mode will allow you to alter your f-stop and the camera will then use its internal light meter to choose a corresponding shutter speed to expose the scene correctly.

    A “smaller” aperture (which refers to a larger number, such as f/16) will allow for a deeper depth of field in a scene but will allow less light to enter the camera.

    Montalcino, Italy.

    Montalcino, Italy 28mm focal length at f/14.  The small aperture yields a deep depth of field.

    The photo above is an example of this type of deep depth of field, which occurs with a small aperture. The chimney in the foreground is perfectly sharp and both the mid-ground and background are very sharp.

    A “larger” aperture (which refers to a smaller number, such as f/2.8) will create a shallow depth of field (with more bokeh, or out of focus blur) and will allow more light to enter the camera.

    63mm Focal Length at F2.8.

    63mm focal length at f/2.8 in a dark setting. The large aperture yields a very shallow depth of field.

    The primary reason to shoot in Aperture Priority mode is to control your depth of field and it is a common way of shooting for portraiture and for event and wedding photography, especially in situations where the events are held in venues with low levels of light.

    While the above photograph looks bright, it was taken in a fairly dark room. Because it is shot at f/2.8, only the bride’s eyes are perfectly sharp. When photographing with a shallow depth of field, always make sure the most important element is in focus.

    Shutter Priority (T/Tv)

    Shutter speed is the speed at which the camera’s shutter opens and closes to allow light to reach the sensor or film. Using the Shutter Priority mode will allow you to set your ideal shutter speed, while the camera will pick a corresponding aperture to expose the scene correctly.

    A faster shutter speed (a smaller fraction, such as 1/320th of a second) will allow less light to reach the sensor but will freeze your subject’s motion or offset the camera shake when your camera is handheld. 1/320th and faster is an ideal setting to freeze motion in people.

    SoHo, NYC.

    SoHo, NYC 1/320th of a second with an 80mm focal length

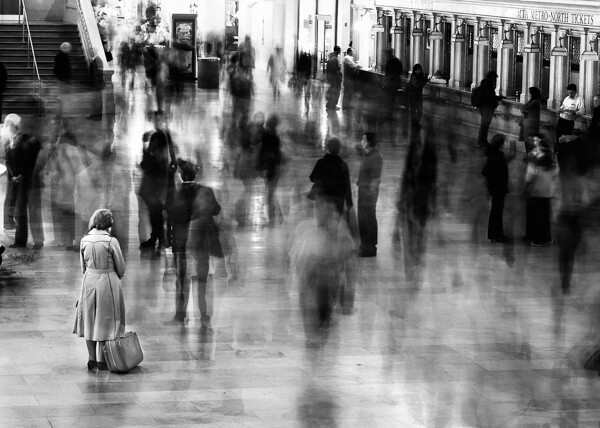
    A slower shutter speed (a larger fraction, such as 1/8th of a second) will allow more light to reach your sensor and, if slow enough, will create blur in an image. Depending on the rate of motion of your subject, anywhere from approximately 1/30th to 30 seconds and more will introduce noticeable motion blur. A tripod is recommended when introducing blur into your scene, although it is possible to handhold the camera and achieve a sharp background and blurred subject if the subject is moving fast enough.

    Grand Central, NYC.

    Grand Central, NYC 6 seconds at f/8. The woman is sharp because she remained motionless.

    *Important:  to offset blur caused by handheld camera shake, the shutter speed must be at least 1 over the focal length. So if your focal length is 100mm, your shutter speed should be at least at 1/100th of a second. Add some leeway into that rule when you can, so 1/125th or 1/160th at 100mm will be safer. When using cropped sensors (such as APS-C or micro-4/3rds), the real focal length is the important number. If your APS-C camera sensor has a 1.6x crop, a 100mm lens will have the equivalent of 160mm view, leading you to need at least 1/160th of a second to achieve sharpness.

    The main reason to shoot in Shutter Priority is to freeze or introduce motion into your scene. I use this mode primarily when traveling, exploring, at dusk when I’m handheld and the light is low, or shooting street photography.

    Manual Mode (M)

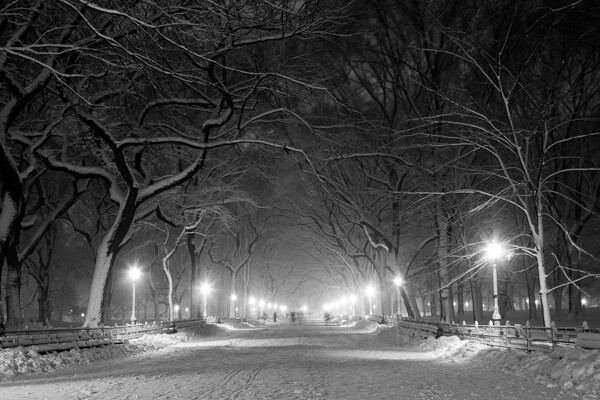
    Manual mode allows you to set the shutter, aperture, and ISO settings without the camera’s interference. This is a difficult way to shoot because you need to know the strength of the light to set your camera accordingly, but even if you do not want to photograph this way it can be worth practicing in manual mode to help you better understand light.

    Manual mode is ideal when you use a tripod and have the time to fine tune the exposure. It is also good in situations where the lighting is consistent, such as on overcast days, photographing indoors, or when using strobe lights or flashes.

    Poets' Walk, Central park, NYC.

    Poets’ Walk, Central Park, NYC 15 seconds at f/11, ISO 100. 28mm focal length on tripod.

    However, the Shutter Priority and Aperture Priority modes are very important to use, particularly in situations where the lighting is variable. On a sunny day where you are shooting both into and away from the sun, it is beneficial to use these modes because it is usually not practical to continually change your manual settings every time you alter your direction. Let the camera do some of the work.

    Exposure Compensation (+/-)

    Exposure compensation is the +/- mode on your camera that is used when you are in the Aperture or Shutter Priority modes. Increasing the exposure to the plus side will brighten a photo and decreasing it towards the minus side will darken a photo.

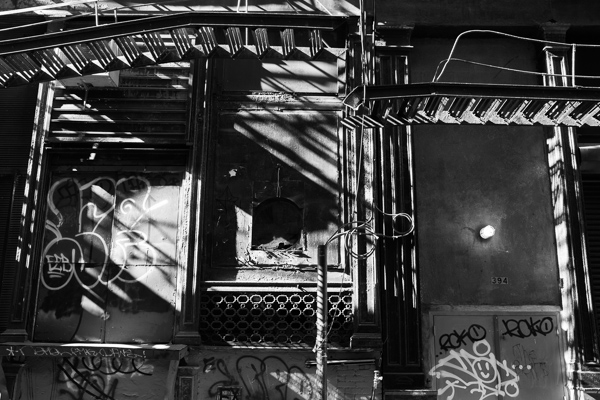
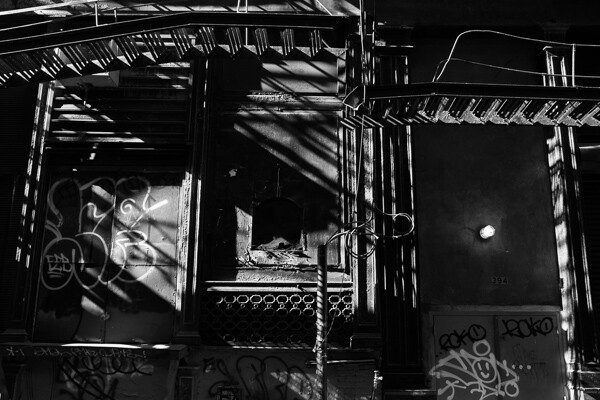
    This is especially helpful when you are in an overly bright or dark situation that can fool the camera’s light meter, such as a scene with a lot of bright sky or a scene in a dark alleyway. The camera will read these levels and try to turn these overly bright or dark situations into gray. We typically do not want that.

    When capturing a bright scene, cameras will read all the bright areas and calculate that it needs to darken the photo to achieve the correct exposure. You would need to raise the exposure compensation to offset this. When photographing in a dark alleyway, cameras will try to brighten the blacks to gray, leading you to need to offset this by lowering the exposure compensation.

    Cortlandt Alley.

    Cortlandt Alley, NYC – The camera’s light meter slightly overexposed the image

    Cortlandt Alley.

    Cortlandt Alley, NYC –  Correctly exposed

    Bonus – White Balance

    Focus on the above settings first, but once you feel comfortable with them, the next step is to study up on white balance.

    The post A New Photographer’s Guide to Camera Settings by James Maher appeared first on Digital Photography School.

    Digital Photography School

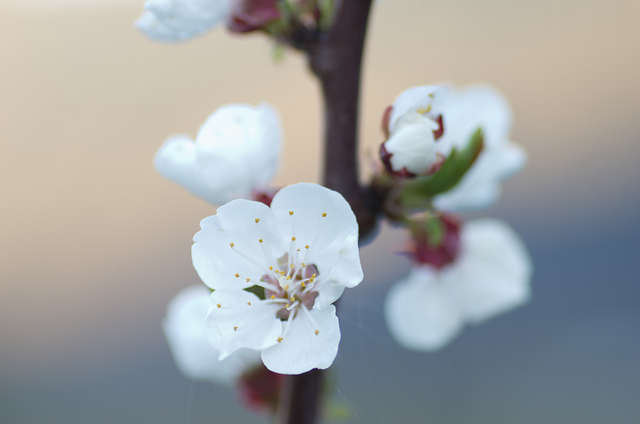
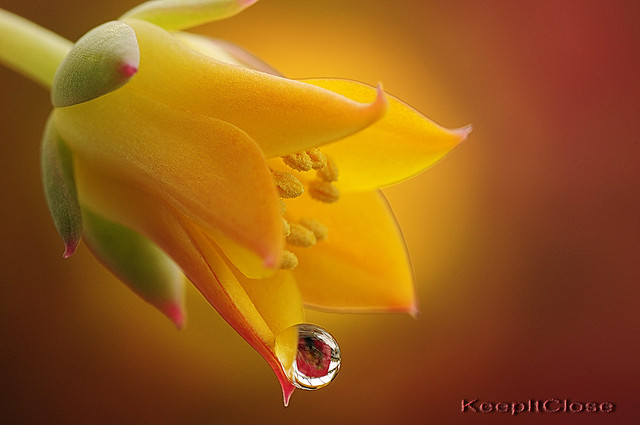
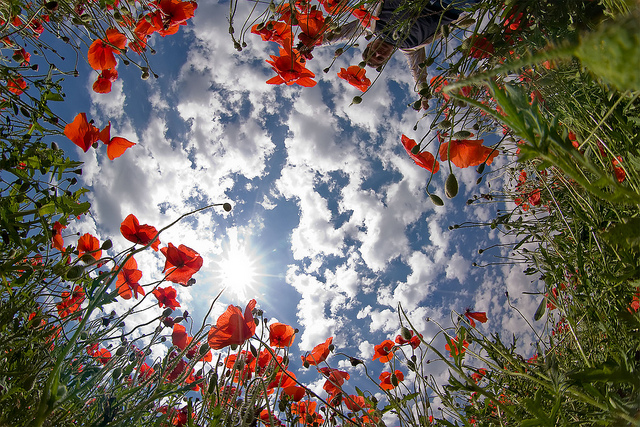
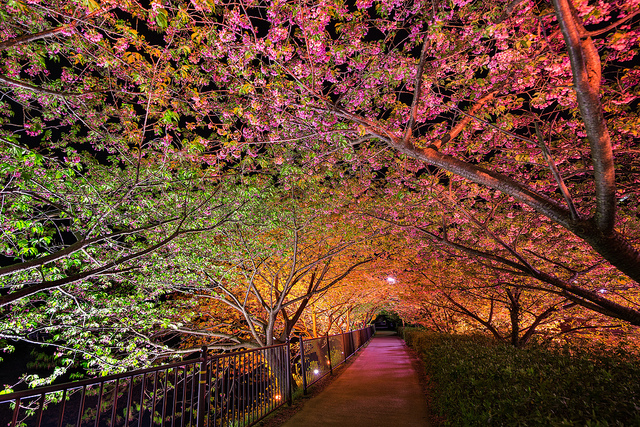
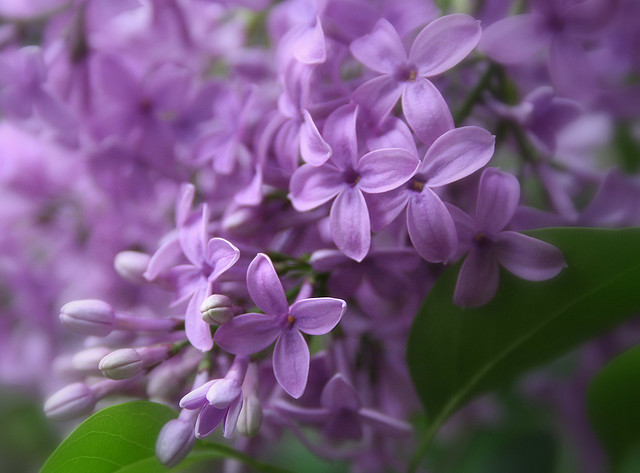
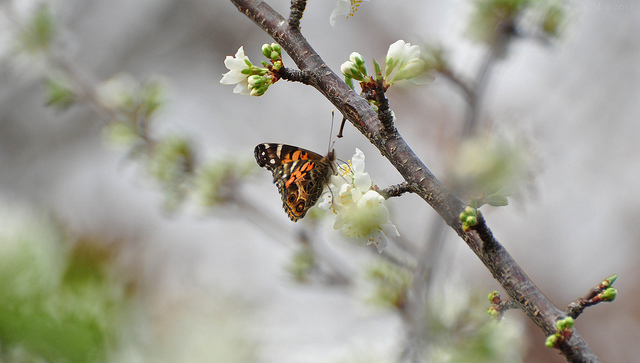
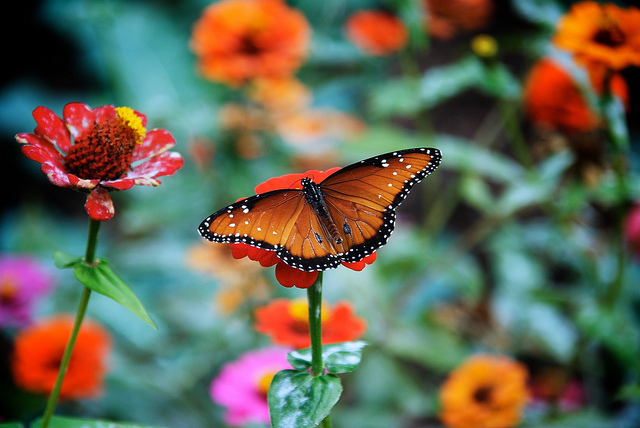
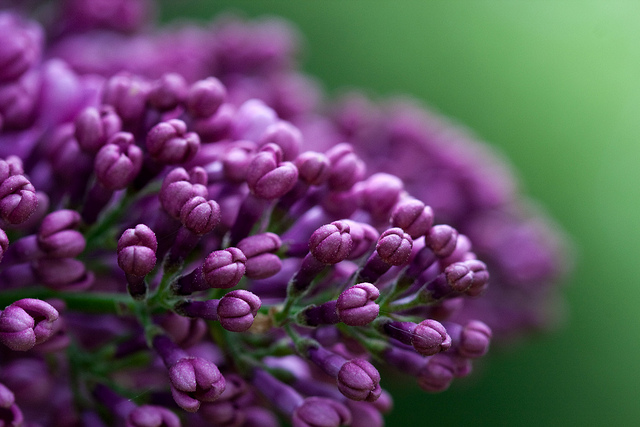
  • A Collection of Spring Flower Photos to Brighten your Weekend

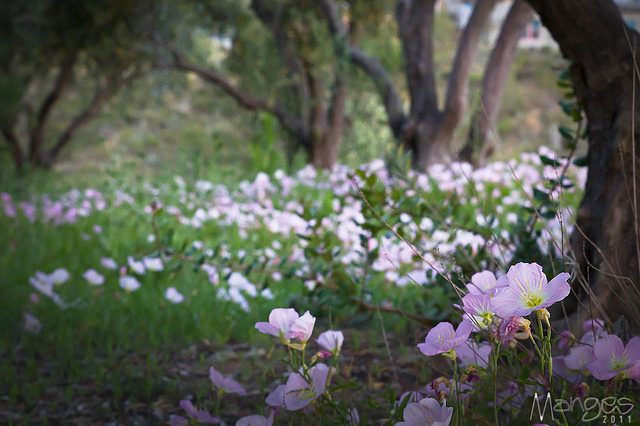
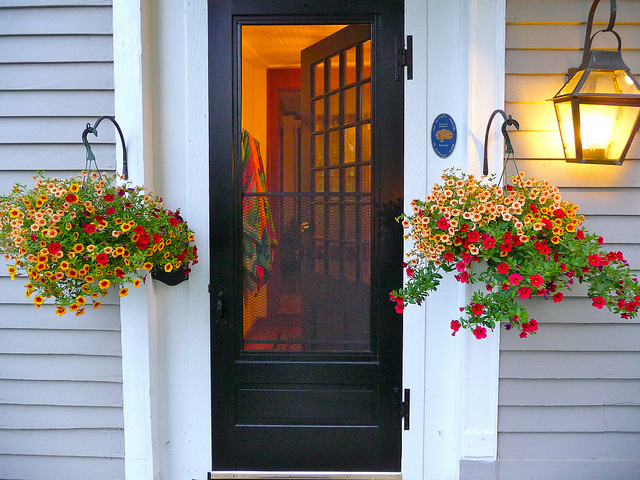
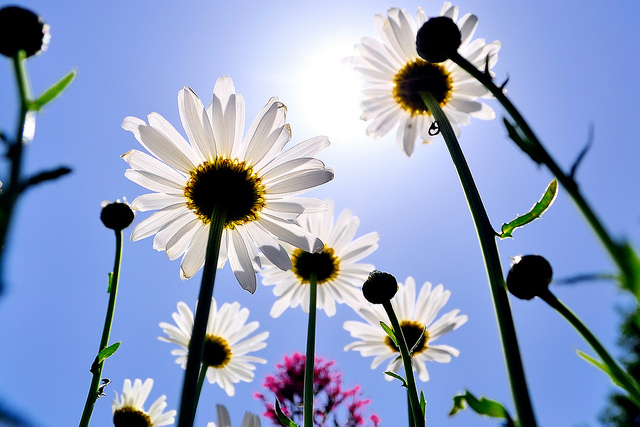
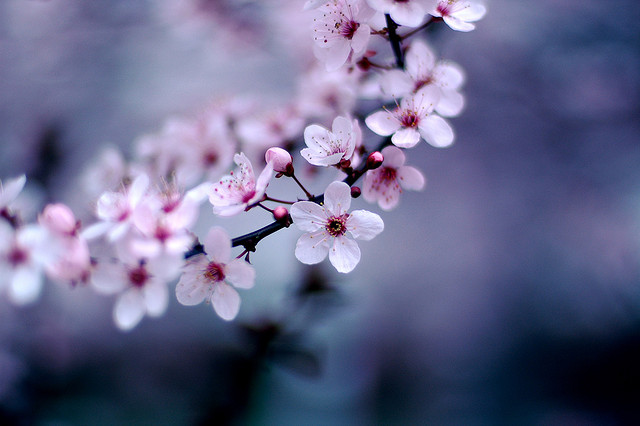
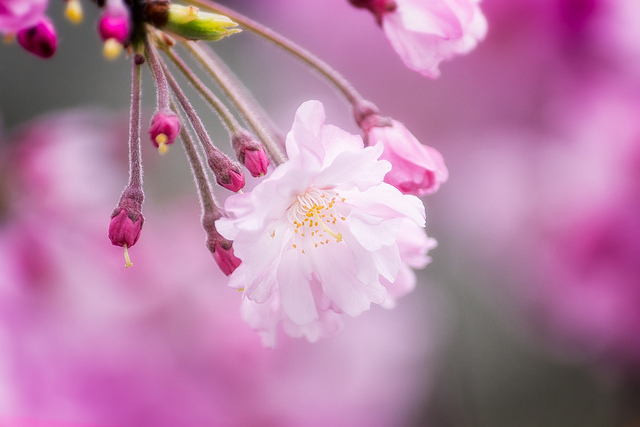
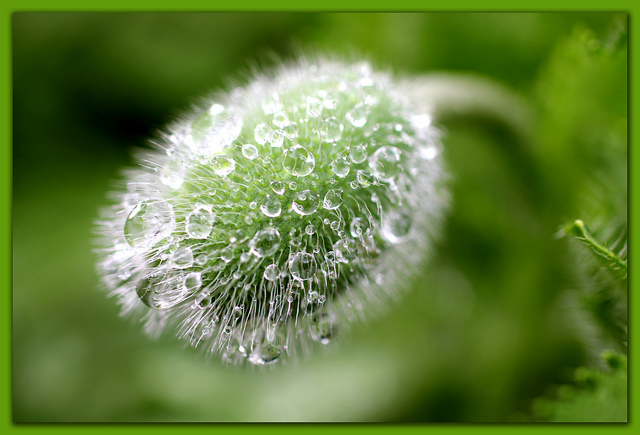
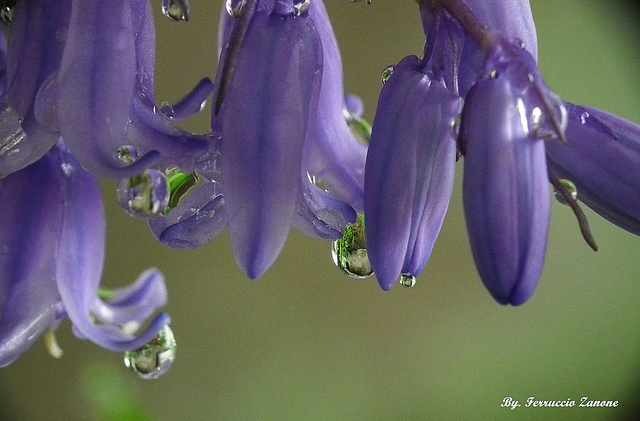
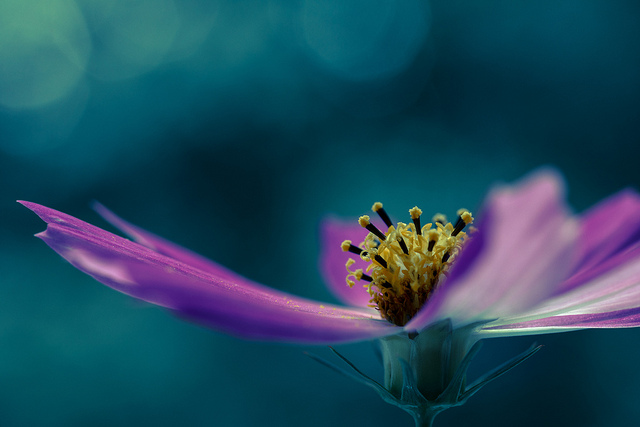
    If you live in the northern part of the world hopefully you will start to see some signs of spring soon. I know where I live we still have some of the yucky cold white stuff but I got flowers for my birthday and they brightened my week, so I was inspired to do a collection of them to brighten yours!

    Even if you’re in the southern half of the world you can still enjoy pretty flowers and know they’ll be back soon. Can’t you just smell them?

    Enjoy!

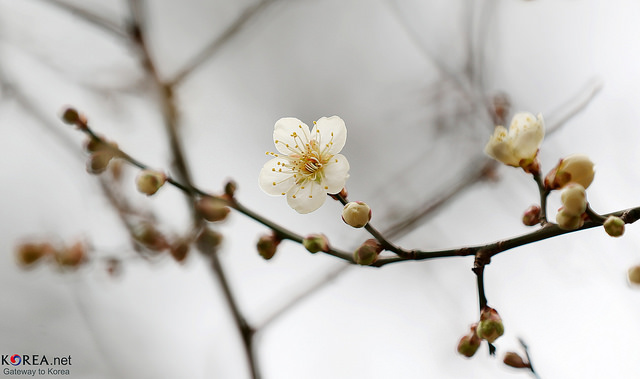
    By Republic of Korea

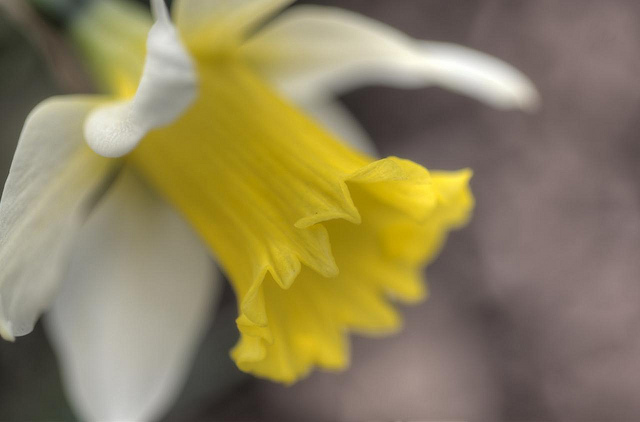
    By Tim Hamilton

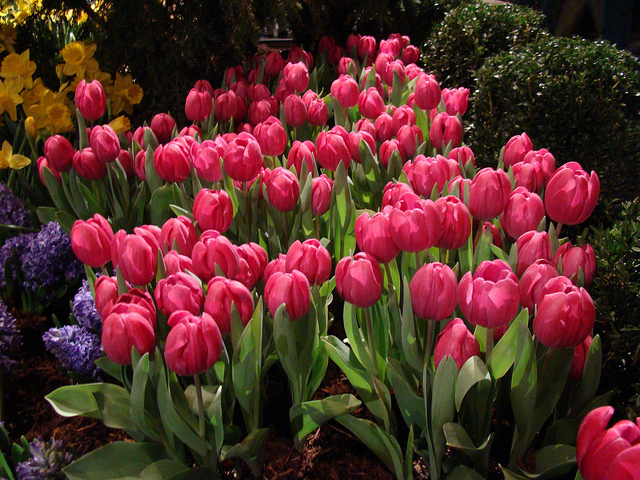
    By Mike Mozart

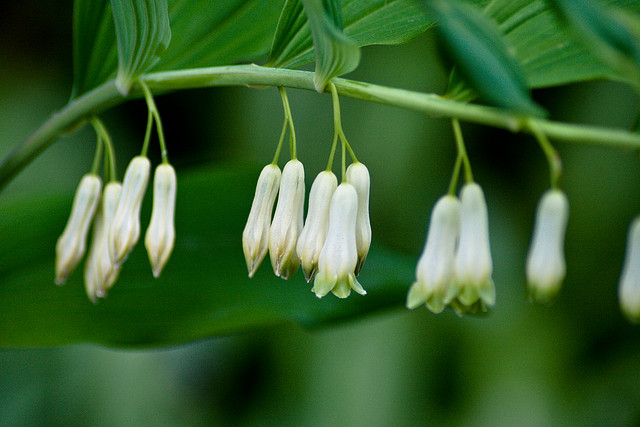
    By Davide Simonetti

    By Ross Manges Photography

    By slack12

    By ZakVTA

    By Jeff Kubina

    By Maurice Perry

    By Mike Keeling

    By Xavier

    By Agustin Rafael Reyes

    By Steve Wall

    By Gwen Harlow

    By nutmeg66

    By Chris Gin

    By Brian Carson

    By MARCOS VASCONCELOS

    By casch52

    By Jose Maria Cuellar

    By David A. LaSpina

    By LadyDragonflyCC – >;<

    By Ferruccio Zanone

    By Daniel Kulinski

    By mendhak

    By ruben alexander

    By aussiegall

    By George Thomas

    By Rachel

    By J Labrador

    By Jim Nix

    By kataaca

    By Cath in Dorset

    By Steve Corey

    By Lisa Plymell

    By keeva999


    The post A Collection of Spring Flower Photos to Brighten your Weekend by Darlene Hildebrandt appeared first on Digital Photography School.

    Digital Photography School

  • Weekly Photography Challenge – Flora

    Earlier today I shared a collection of spring flower photos to brighten your weekend. So can you guess what this week’s photography challenge is?  You got it – flora!

    But I want you to get creative with it. Think outside the box and do something different. 

    • Try some macro flower shots
    • Read about How to Photograph Flowers or get some tips on improving your flower photos
    • Shoot some wild flowers if they’re blooming in your area
    • Use some dramatic backlighting for effect
    • Seek out and find some bold colors and use them in your composition
    • Try a shallow depth of field, or focus stacking to get a wider focus range.
    • Shoot some using a slower shutter speed to add some motion
    • Convert some to black and white
    • Put them in reflection
    • Try out hand coloring in Lightroom
    • Using a flashlight or flash and paint with light at night or in a dark room
    • Shoot one flower
    • Shoot a whole bunch of them or a field full

    By Paul Reynolds

    By Flower’s.Lover

    By greg

    By Louish Pixel

    By @Doug88888

    By Deborah & Kevin

    By Srdjan Stojiljkovic

    Getting some ideas?

    Share your floral images!

    Simply upload your shot into the comment field (look for the little camera icon in the Disqus comments section as pictured below) and they’ll get embedded for us all to see or if you’d prefer upload them to your favourite photo sharing site and leave the link to them.

    The post Weekly Photography Challenge – Flora by Darlene Hildebrandt appeared first on Digital Photography School.

    Digital Photography School

  • Practical Tips To Build Your Street Photography Confidence

    MWTL1001921

    The noble pursuit of street photography requires a good measure of cunning and bravado. Of course, there is the ever present hurdle of luck and opportunity. Beyond knowing your streets, their patterns and ad hoc events, getting that wonderful shot is a guessing game.

    When you are in the right place and you see the converging paths that will result in a great decisive moment, you need to be able to capture the scene. This can be learned and practised. Here are some practical tips to help you build your street photography confidence.

    I feel like I’m wearing a sign that says, “Look everyone, a street photographer!”

    I know what you mean. When I first started out, doing street photography, I was so focused on seizing photo opportunities I could see people staring back at me. On numerous occasions people I spotted as a potential photo saw me and moved away. Market vendors are deeply suspicious and, even now, I still get glared at.

    I quickly realized I was missing shots because I was looking conspicuous and acting a bit weird. That slow purposeful walking and excessive bobble headed looking, then stopping and staring for longer than normal people stop and stare. Very conspicuous.

    MWTL1004072

    What changed?

    Tourists. London is a tourism mecca and even on week days, the capital is buzzing with visitors from all corners of the globe. I take quite a lot of photos of tourists but, when I don’t want them in my shot, they can be quite annoying. In fact, tourists annoy everyone as they parade through other peoples’ photos with no remorse. Here’s the real value though. While people are irritated with tourists being in their way, they are also tolerated. Others, particularly locals, don’t shy away from their business. They jostle through the visitor throng, or continue their conversations. Tourists are, for the most part, ignored!

    This was a great revelation for me and, as a street photographer, I decided to be just like a tourist.

    Don’t look conspicuous

    MWTL1002538

    Dress casually and for walking

    Check the weather and wear layers for the best and worst of the predicted forecast. I would steer clear of photographer jackets and other ‘practical’ photographer clothing. Think tourist: jeans, sweaters, hoodies, etc. I’ve tried a street photo walk in a three piece suit after a morning meeting. Don’t wear a suit either!

    Personally, I recommend a small camera

    Before you all jump to berate me, this is my recommendation for being inconspicuous as a street photographer. I used to walk the streets with a 1D Mark IIn and a 50mm f/1.2L lens. An extraordinarily capable camera with a decent fast lens. More often than not, the people I paused to photograph would see this camera and curtly move aside because the professional wants to take a photo and we’re in the way. And the shutter! On a train, I would stealthily raise this camera and fire off a shot. The looks I would get from people being loudly ‘papped’!

    Use the neck strap on your camera

    Raising a camera from your side to your face could be enough to be seen. With your camera around your neck, raising it to your eye is much less apparent. Of course, you can point your body and shoot ‘from the hip’ without moving the camera.

    Carry a small bag or backpack

    I take a spare battery, SD card, lens cleaner pen, business cards and a waterproof bag. That’s all, for the entire day’s shooting.

    You don’t need a tripod.

    Now step forth and be bold

    MWTL1003373

    So now you look pretty much like a stereotypical tourist with a camera, how do you act like one?!

    Tourists look around a lot and walk slowly, but casually, taking in the scenery. As an exercise, try putting your camera in its bag and just walk around taking in the location. Can you still carry off that casual saunter with your camera in your hand or around your neck?

    The second tip, and equally as important as the first, is to look through people rather than at them. Tourists look at the scenery and other people are simply obscuring their view. People will quickly realise they are not the focus of your attention if you are looking past them to what is behind them. It will take a while, but you’ll become practised with seeing a potential photo whilst still looking nonchalant.

    Personally, I shoot with a rangefinder. Most of my shots are from around 15 feet away, so I leave my lens focused at that distance for quick response captures, like when someone walks toward you.

    Otherwise I will focus for distance and then frame the shot. The trick here is to focus on another object which is the same distance as your subject. Then turn to your subject and shoot. You have minimized the time you are gazing at them by focusing elsewhere.

    Street Portraits

    MWTL1001783

    Occasionally I will see someone who would make a great street portrait. I carry business cards around and this supports my brand as a street photographer. It’s this that gives me that needed boost to actually approach someone.

    Be bold and polite and, this is imperative, know how you want them to pose. You have one chance to get them in position, after all, they’re doing you a favour.

    As I approach the person I might say, “Hi, I really like your outfit/tattoo/hair/etc and I wondered if I can take your portrait?”

    Take one shot. Check composition on your LCD. Take one more if necessary.

    This is where I thank them and hand over a business card. I explain I’m a street photographer and point out my web site so they can go find their picture. This post photo exchange makes me feel less of an intruder and, hopefully, they are not fazed by the two minute distraction either.

    Final thoughts

    Hopefully these small tips will help you take street pictures while getting over the nervousness of simply trying to take photos. Through practice and experience, you will learn how people react and what you can get away with.

    I don’t like to invade the intimate privacy of people or chase them down or ask them to walk back along the route I liked, so I do have a line I won’t cross, but I don’t miss a shot through lack of confidence.

    Good luck!

    The post Practical Tips To Build Your Street Photography Confidence by Michael Walker-Toye appeared first on Digital Photography School.

    Digital Photography School

  • How To Make A Cinemagraph for Photoshop Newbies

    A cinemagraph is “more than a photo, but not quite a video.” Or at least that’s how Supermodel Coco Rocha summed them up. Technically, a cinemagraph is just a GIF or a Graphics Interchange Format. Basically, a short, animated file that is everywhere online these days. You’ve probably seen them on Tumblr, Reddit or 4Chan. Maybe you even remember them Continue Reading

    The post How To Make A Cinemagraph for Photoshop Newbies appeared first on Photodoto.


    Photodoto

  • Light Tent Comparison – DIY Versus Kit Tents

    A light tent is an invaluable photography tool for shooting smaller objects and items and for achieving even, near-shadowless lighting. In our earlier post, we looked at How to Use a Light Tent for Product-Style Photography, which covered the basics for using and shooting with a light tent. In this post, we will take a look at a head-to-head comparison between buying a light tent kit versus making your own DIY version.

    The light tent contenders

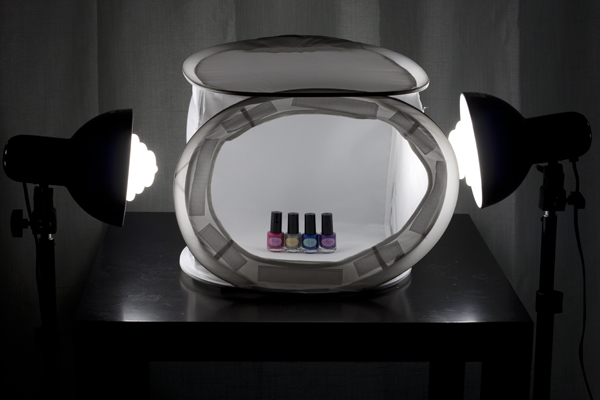
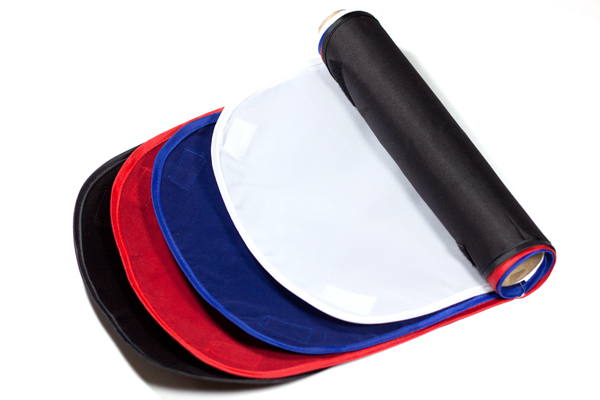
    In this corner, we have the Square Perfect SP500 Platinum Photo Studio In A Box. This kit contains: two pop-up light tents (one 30 inch cube and one 12 inch cube – 12 inch shown below); two lights with adjustable stands; two 30W, 5400K daylight fluorescent bulbs; a tripod; a carrying case; and two sets of four colored fabric backdrops (white, black, red, and blue) sized for each light tent.

    light tent kit, Square Perfect, photography, setup

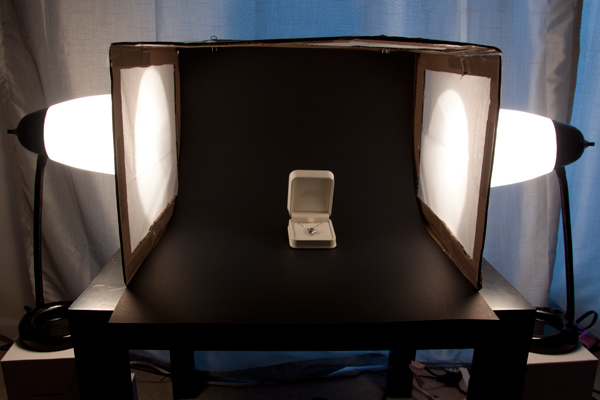
    And in this corner, we have the DIY Light Tent, built using these specifications: Foldable DIY Photography Light Tent. This light tent will be lit by means of two adjustable desk lamps and 60W, 2900K halogen bulbs. The backdrops are made from standard poster board and cut to size. You can purchase daylight-rated light bulbs for your DIY kit as well, but you may need to order them online from a photography or home improvement site.

    light tent, DIY, how to, photography

    To make this an even test, we will be comparing the 12 inch kit cube against the 12 x 16 x 18 DIY tent. The first set of comparisons will feature each set as described above (the lights that come with each kit), while the second set will put the two up against each other using the same lighting set up for both kits.

    Light tent comparison: using their own lights

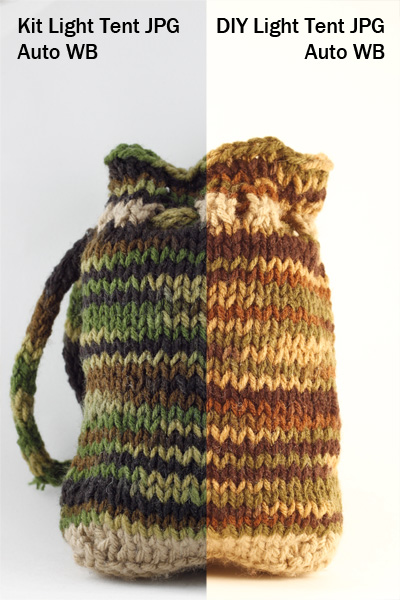
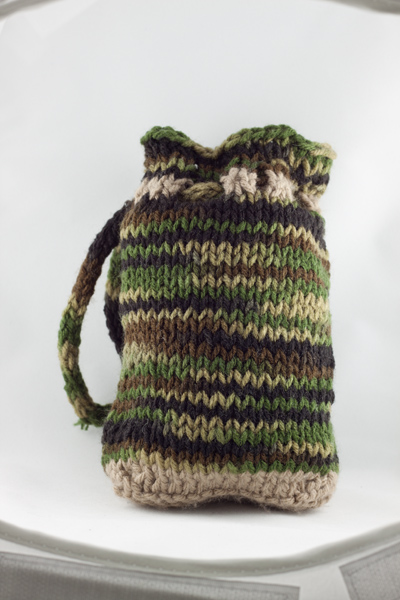
    light tent, product photography, knit bag, photography, how to, light tent

    For this first photo-face-off, each light tent will be evaluated using its own lights (daylight fluorescents for the light tent kit and halogen bulbs for the DIY light tent). A major consideration when shooting with a light tent is controlling or choosing the correct white balance to match the lights being used. You want your white backdrop to look white and not have any color tint from the lights used. Read more about that issue in: How to Use a Light Tent for Product-Style Photography.

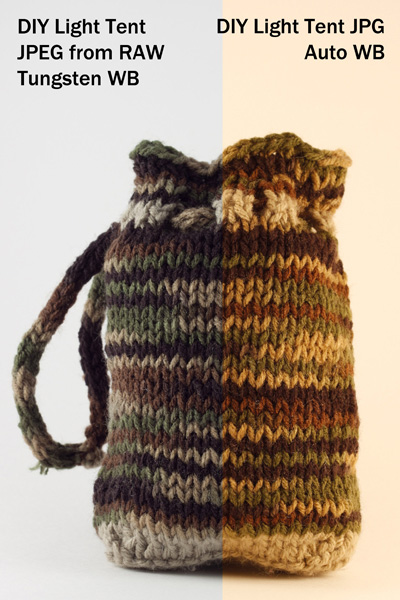
    These shots show SOOC (Straight out of Camera) JPG files for the kit and DIY light tents using auto white balance.The kit’s light gives a cooler (more neutral) look to the background, and the colors of the knit bag are much truer to life, while the DIY lights impart a yellowish hue to the bag and the background. Setting your camera on “Tungsten” white balance for the DIY table lamps may give you a more neutral color, or you can also do a custom white balance using a gray card or even the white backdrop as a test shot. Consult your camera manual for how to perform a custom white balance with your camera.

    compare-bag-autoWB-darker

    This image is a little dark on purpose so you can see the color tint of the background more easily

    If you want perfectly clean whites and neutral blacks, then I would recommend shooting in RAW, which will give you greater flexibility regarding the white balance in post-processing. These images (left) show a comparison of the same image of the bag with a Tungsten white balance setting as compared to the Auto. The Tungsten white balance was selected in post-processing from the RAW image file, or it can also be selected as a white balance preset on the camera when shooting, especially if using JPG format.

    Light intensity

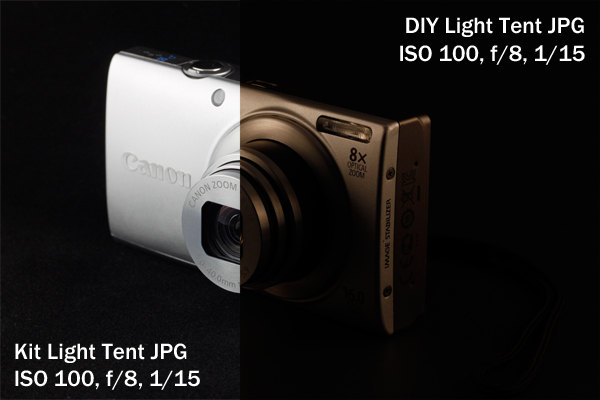
    As you can see by the image below the DIY lights are considerable less intense (not as bright), which will mean you will either need to use a much longer exposure (shutter speed) to get a correct exposure, or increase your ISO. If working on a tripod (recommended for this type of set up) exposure time shouldn’t be an issue though so just stay at ISO 100 and adjust accordingly.

    light tent, product photography, camera, Canon, point and shoot, Canon A4000IS

    Light tent comparison: using the same lights

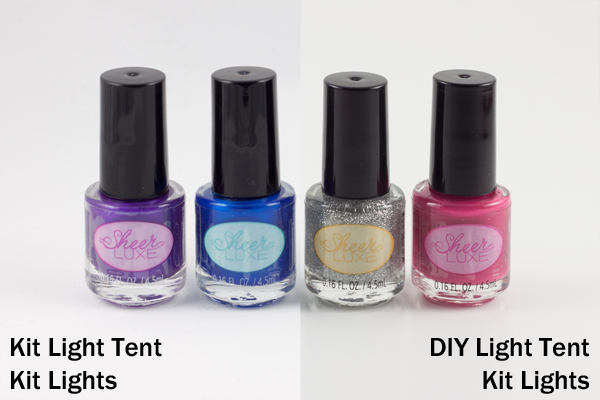
    A final test was done to see whether this difference in light was due to the different light bulbs being used or to a difference in the light tents themselves.

    light tent, product photography, nail polish

    Left image shot at 1/25th – right image at 1/13th

    These two shots were taken using the daylight lights from the light tent kit with both the kit tent and the DIY tent (again, in aperture priority, ISO 100, f/8). The kit light tent shot was taken at 1/25th of a second, and the DIY light tent shot was taken at 1/13th of a second, which is a full full stop difference. This means that even with the same lights, the DIY light tent blocked more light than the kit light tent and required longer shutter speeds to shoot the same exposure. The background also came out a little more gray than the kit light tent.

    Light tent comparisons: practicalities

    There are many other considerations to keep in mind when deciding which kind of light tent would be best for you. Think about how much room you have to devote to gear use and storage, as well as how much the benefits of a pricier kit outweigh the cost investment.

    Use of ease

    light tent, product photography, knit bag, how to

    Notice edges of tent showing in places

    The lighting stands that come with the light tent kit have greater range and reach than a typical desk lamp, but they cannot get down as low. This makes it difficult to use the kit lights for shooting with the 12-inch cube sitting on a table top, as the lights are too tall to sit beside it on the table and too short to reach up from the floor. A coffee table seems to be the ideal height. For the desk lamps, they work well when sitting on a table next to the light tent, but they will need to be placed on a stack of boxes or books if shooting from something like a coffee table (as shown earlier).

    The 12-inch cube also has a lip around the edge, making the functional shooting space a bit smaller, as you want to avoid the edge appearing in your frame. This is far less of a problem with the 30-inch cube. One workaround is putting a book underneath the backdrop to raise the bottom up. The benefit here of the DIY box is that you can make it the size you want for the subject you have, and there is no lip to shoot around, so you can shoot straight-on at your subject.

    Backdrops

    Backdrops require careful handling and attention, and the poster board DIY versions are much easier to replace than the fabric ones from the kit. If you are going to be shooting something potentially messy or greasy, consider using a poster board backdrop regardless of which light tent you use.

    light tent, how to, photography, fabric, backdrops

    Care for your fabric backdrops by ironing out the wrinkles before hanging. If you roll them up on a cardboard tube when you are finished shooting, you should be able to reuse them again without having to iron every time. Keep a lint roller or clear tape on hand to deal with any dust or lint, and save yourself the time of editing it all out in post-processing.

    Portability

    The light tent kit has the edge in portability, as it comes with its own carrying case. The case is not particularly sturdy or padded, however, so you would not want to travel with it other than carefully placing it in your car (without stacking anything on top of it).

    Storage

    The DIY light tent folds down flat for easy storage, and you can simply put your two desks lamps back where you borrowed them from, until the next time you are shooting. The light tent kit takes up significantly more space, and the process of folding the light tents back down into themselves is a little complicated and requires some practice, though there are plenty of “how to” videos online. There is also the risk of deformation if you leave the tents stored too long in their folded down state.

    Cost

    The DIY light tent is the clear winner in the cost department, particularly if you already own a desk lamp or two, which are the priciest elements. The cardboard box and tissue paper should not set you back more than about five dollars. The light tent kit is currently listed at $ 143, a very discounted price on Amazon, which makes it reasonable to consider as an investment.

    Final verdict: which light tent to choose?

    There are a lot of different variables to consider when making the final choice about whether a DIY light tent will serve your needs or whether you should invest in a light tent kit. If you are looking at exploring what a light tent can do and whether it would be useful, then definitely build your own to experiment with. Keep the white balance in mind and shoot in RAW. But if you are shooting JPG, remember to adjust the white balance setting when shooting by using a preset or doing a custom white balance.

    If you know that you will be consistently shooting a lot of this style of shots, perhaps for selling jewelry or crafts online or for displaying directions for your own DIY projects on a blog, then you should consider investing in a light tent kit. The time savings of having bulbs that match your white balance is considerable if you are doing a lot of light tent photography. You will also have significant flexibility with a kit that offers different sizes of light tents and a better range of motion and height for the lights and light stands.

    Do you shoot with a light tent? Do you prefer a light tent kit or a DIY version? Share your thoughts in the comments below.

    The post Light Tent Comparison – DIY Versus Kit Tents by Katie McEnaney appeared first on Digital Photography School.

    Digital Photography School

  • How to Apply the Look of Hand Coloring in Lightroom

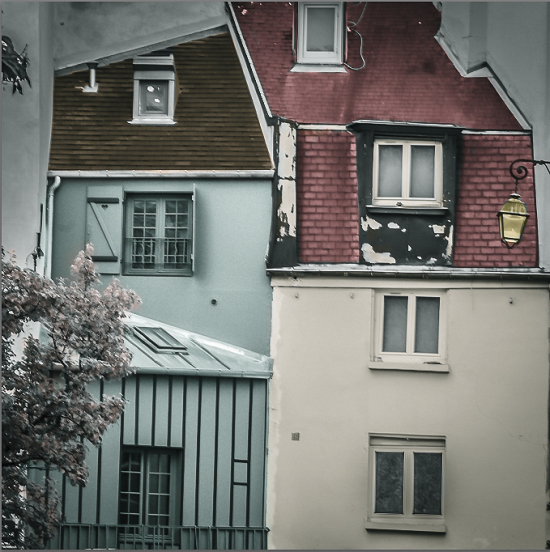
    Give a photo the look of a hand tinted image in Lightroom

    Give a photo the look of a hand coloring in Lightroom

    Before there were color photos there were black and white photos, colored by hand using paints or dyes. Today, courtesy of any good photo-editing program, you can apply your own hand coloring effect to your photos.

    Here’s how to apply the look of hand coloring in Lightroom.

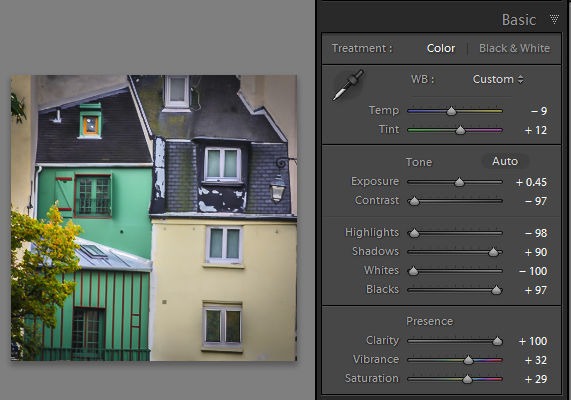
    To get started, open the image in the Lightroom Develop module. You will want to make the usual basic edits to the image so it shows a good tonal range and contrast.

    Before colorizing the image, make sure to adjust the tonal range and contrast.

    Before colorizing the image, make sure to adjust the tonal range and contrast

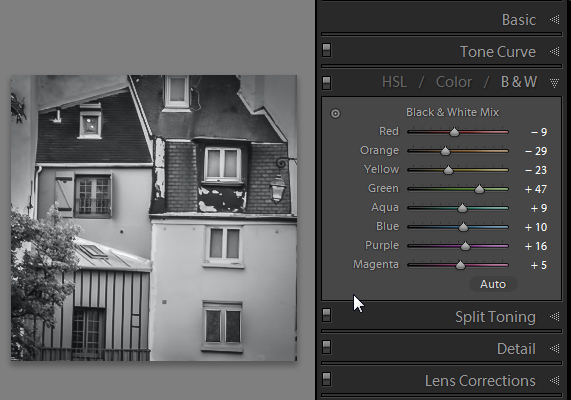
    Then convert the image to a black and white by clicking B&W panel and adjust how the underlying colors in the image are converted to black and white using the sliders. Lighter areas will show the color better and darker areas will show a more subtle tint.

    Use B&W to create a black and white image.

    Use the B&W panel to create a grayscale or monochromatic image

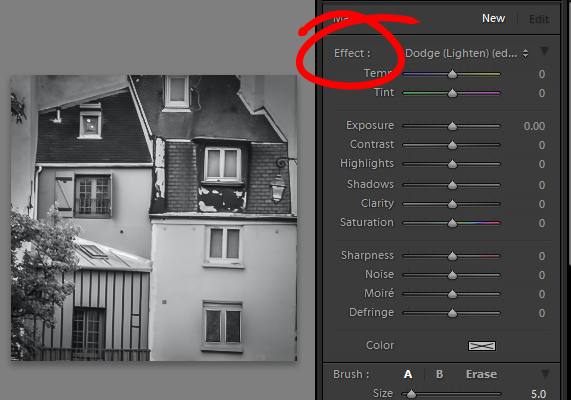
    When you’re ready to add color to the image, click the Adjustment Brush and return all the sliders to zero by double clicking on the word Effect at the top of the panel (circle in red below).

    Double click Effect to reset all the Adjustment Brush sliders.

    Double click Effect to reset all the Adjustment Brush sliders

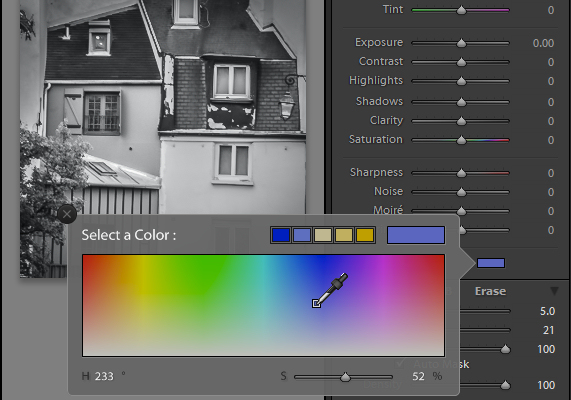
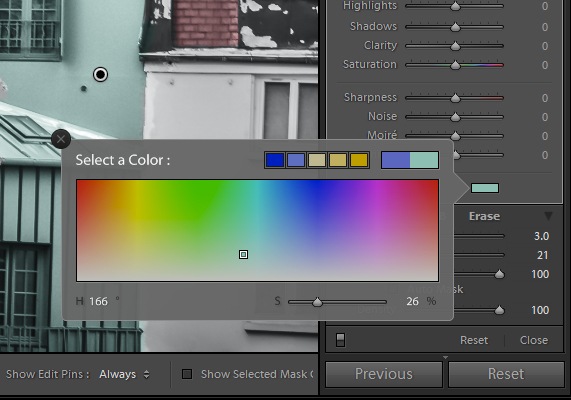
    Click on the color sampler and choose a color to use.

    Select a color to tint the image with from the Color selector

    Select a color to tint the image with from the Color selector as shown here

    Now click on the area that you want to recolor to set an Edit Point. Paint over the area to apply the color to it. As you paint with the Adjustment Brush a layer of partially opaque color is applied to the image.

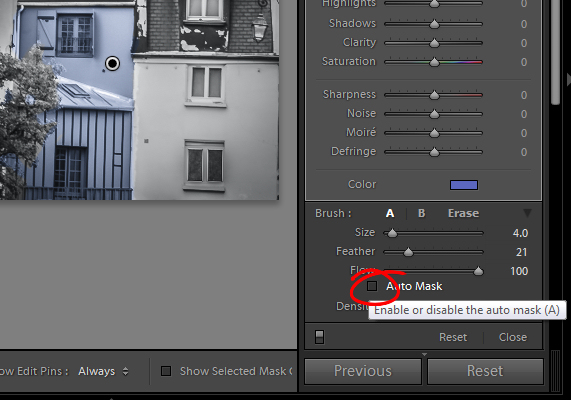
    Select the Auto Mask checkbox if you are working on an area of the image that has distinct edges. Doing this makes it easier to limit the painting to only the desired area. The roof tops and buildings here are good examples of areas with distinct edges.

    Selecting Auto Mask helps paint in areas with defined edges.

    Selecting Auto Mask helps paint in areas with defined edges (stay within the “lines”)

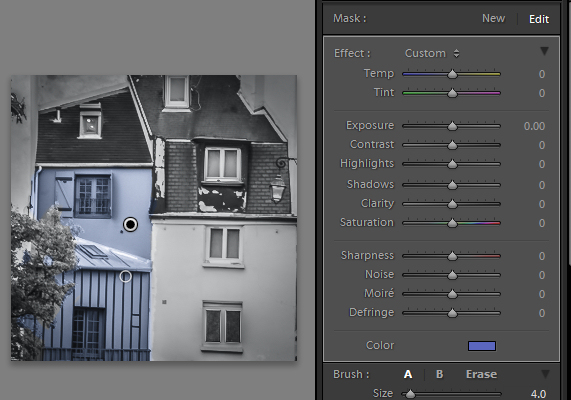
    When painting an area that is less defined, disable the Auto Mask checkbox. The tree in this image has less defined edges so you should disable Auto Mask when coloring this area.

    The buildings have defined edges so use Auto Mask when painting them. The tree does not, so disable Auto Mask when painting it.

    The buildings have defined edges so use Auto Mask when painting them. The tree does not, so disable Auto Mask when painting it.

    If you mistakenly paint over an area and want to undo the painting click the Erase brush link or hold Alt to select Erase and paint to remove the mistake.

    To zoom into the image press Z on the keyboard and click on the image to zoom in or out. To move the image hold the spacebar so the mouse pointer turns into a hand and drag on the image.

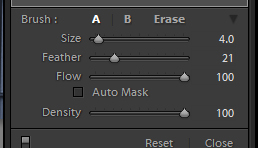
    Size the brush using the Size slider

    Size the brush using the Size slider

    To resize the brush either use the [ and ] keys on the keyboard or adjust the size using the Size slider.

    When you have finished working with the first color, click New to set a new Edit Point. Select a different Color and paint that onto the image.

    Continue creating a new Edit Point for each color until the coloring is complete.

    If desired, you can alter a color or adjust a painted area by selecting the Adjustment Brush and then click the Edit Pin for that adjustment. You can then change the color using the color picker.

    Give a photo the look of a hand tinted image in Lightroom

    Give a photo the look of a hand tinted image in Lightroom

    Do you have some other tips:

    If you have some other ways of doing this technique in Lightroom please share. Or share your images if you give it a try!

    For more Lightroom tips and tutorials try these:

    • Processing an Image in Lightroom 5 – a Video Tutorial
    • 6 of Lightroom’s Hidden Treasures
    • Why Lazy Photographers Should Use Lightroom Smart Collections
    • 3 Uses for the Radial Filter Tool in Lightroom 5
    • Lightroom 5 Tips – Hidden Gems

    The post How to Apply the Look of Hand Coloring in Lightroom by Helen Bradley appeared first on Digital Photography School.

    Digital Photography School