Category: Photography

  • HDR Vertorama Photography – How to Create Mind-bending Images

    If you are anything like me, then you are always looking for ways to create something original in your photography – images that have not been taken and presented a thousand times before. But being truly original and creating photos that have real impact is the hardest thing of all. It seems there is nothing that hasn’t been done yet. Or is there?

    In this article, I am going to show you a technique for creating interior photos that you will certainly not find in every other portfolio – photos that will turn heads for sure. The technique that I am referring to is called HDR Vertorama Photography.
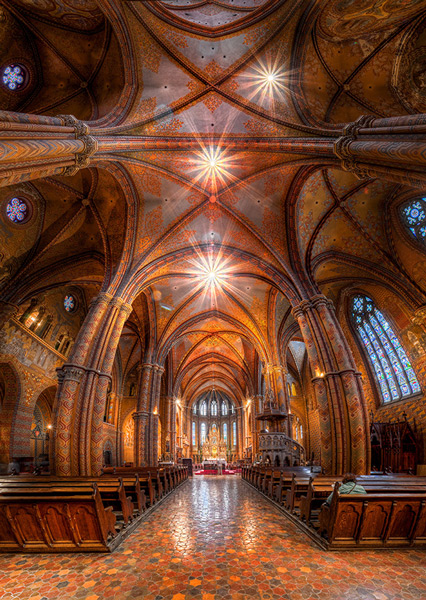
    Matthias Church Budapest Hungary HDR Vertorama

    What is a Vertorama?

    Panorama photography is a well-established photographic discipline: you take a series of photos while you pan your camera in a horizontal direction between each pair of shots, ensuring that adjacent photos have enough overlap. Such a series of photos can then be combined into a single image with a much wider angle of view, a process that is called stitching.

    But what happens if you turn panorama photography sideways? Turning an idea on its head can sometimes produce ingenious and unexpected results, and doing this literally with panorama photography falls into this category.

    To answer the question: what you get is a Vertorama – a panorama in vertical direction. This may sound trivial, but when applied to interiors, this technique can present scenes in unseen ways. A room photographed as a Vertorama, seems to be opening towards the viewer. It depicts an interior in a way that you can only experience if you scan the actual scene with your own eyes, and it puts your audience inside the scene rather than in the spectator’s seat.

    Why Does This Require HDR?

    Photographing such a wide angle of view presents some challenges. One of them is the unusually high dynamic range encountered in such scenes. When you scan an interior (like a church, for example) from bottom to top, you will see very dark areas as well as extremely bright parts (e.g., the windows). In order to capture the scene realistically, combining the Vertorama technique with HDR (High Dynamic Range) photography is a natural choice. HDR will allow you to depict the details in the highlights and shadows in such a scene, despite the unusually high dynamic range. The resulting photographic discipline is called HDR Vertorama Photography.

    The Anatomy of an HDR Vertorama

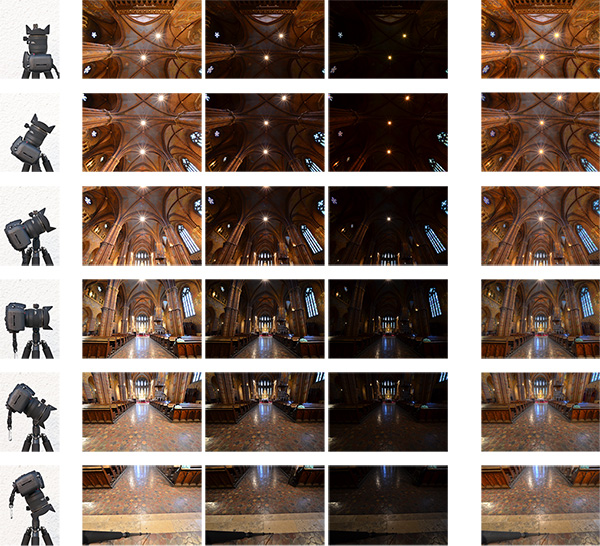
    Vertorama and HDR photography are combined in such a way that each section of the final image consists of an exposure series, taken with a different tilt angle. Each of these exposure series is merged into an HDR image and tone mapped into a section HDR image.
    Hdr vertorama anatomy 01

    Camera positions (left), exposure series (middle) and tone mapped section HDR images (right)

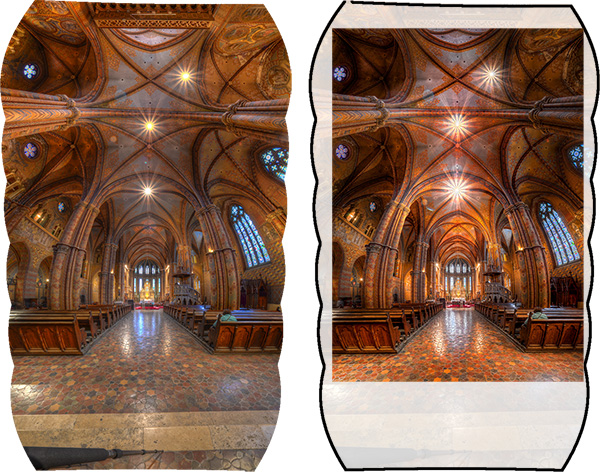
    The section HDR images are stitched to produce a Vertorama, and finally, the Vertorama image is cropped and post-processed.
    Hdr vertorama anatomy 02

    Stitched HDR Vertorama (left) and final cropped image (right)

    All the source photos for a single HDR Vertorama are called a set, and depending on actual scene, you may end up with 12 to 30 photos in a set.

    The Camera

    As long as you are shooting from a tripod, the range of cameras that can be used for this technique is wide. Any DSLR and mirrorless camera will be just fine. Having a camera that lets you change lenses is an advantage because in order to get the most out of your HDR Vertorama shoots, you should be using an ultra wide-angle lens with a shorter focal length then you will find on most fixed-lens cameras.

    The Lens

    You should use a rectilinear lens with a short focal length – the sorter, the better. With an ultra wide-angle lenses, you get a very wide angle of view, enabling you to capture more of an interior scene. If you own a DSLR with an APS-C-sized sensor, for example, the Nikon 10-24mm f/3.5-4.5G ED AF-S DX Nikkor, Canon EF-S 10-22mm f/3.5-4.5 USM SLR or Sigma 10-20mm f/4-5.6 EX DC HSM may be good choices, depending on which camera you are using and what budget you have available.

    In contrast to a fisheye lens, a rectilinear lens has little or no barrel distortion. This means that straight lines in the scene are also (almost) straight in the image, and this creates the characteristic look of these images.

    The Nodal Point Adapter

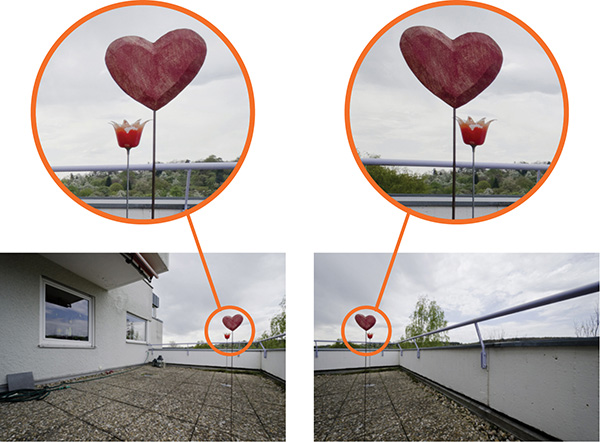
    A nodal point adapter is a device that you screw on top of your tripod and that allows you to rotate your camera/lens combination around the nodal point of the lens. This avoids so-called parallax errors where objects at different distances from your camera move relative to each other in the overlapping areas of two consecutive source photos. If you are using a well-adjusted adapter, the overlap regions of the different sections of your Vertorama will perfectly match which is important for the stitching.
    Hdr vertorama parallax error

    Example of a parallax error

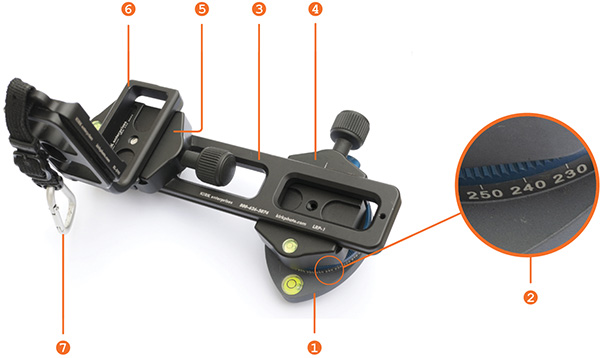
    You can buy off-the-shelf nodal point adapters that are usually quite bulky and expensive, or you can assemble your own as shown in the example below: This do-it-yourself nodal point adapter consists of:

    • a panorama plate (1 diagram below)
    • with a scale that helps you control the rotation (2)
    • a macro rail (3) that enables you to move the camera back and forth for finding the nodal point
    • two quick release clamps for mounting the camera on the rail (5) and the rail on the panorama plate (4)
    • an L-bracket (6) for conveniently mounting the camera in landscape and portrait orientation
    • a snap hook (7) connects the L-bracket (and the camera that is permanently mounted to it) to the camera strap when the camera is not mounted to this adapter
    Hdr vertorama nodal point adapter


    Before you can produce usable source photos with an adapter like this one, you need to adjust it such that your camera is really rotated around the nodal point.

    Setting up Your Camera

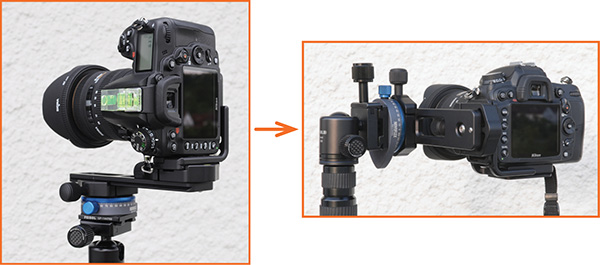
    To prepare for the actual shoot, mount your camera onto the nodal point adapter and the adapter onto the tripod. Set up the nodal point adapter and tripod such that your camera can rotate around the horizontal axis.
    Hdr vertorama camera orientation

    To set up your camera, do the following:

    • Aperture – put your camera in aperture priority mode (“A” for Nikon, “Av” for Canon) and dial in an aperture that puts more or less the entire scene into focus – f/8 usually works pretty well
    • Focus – focus your camera and then put it into manual focus mode to avoid focus changes between the exposures
    • White balance (optional) – set the white balance to a fixed value depending on the type of light at the location. If you are shooting in Raw format, you can also skip this step
    • Mirror lock-up (optional, DSLRs only) – turn on mirror lock-up to reduce camera shake caused by the slapping mirror
    • Cable release – attach a cable release (remote trigger) to release the shutter without touching the camera
    • Cover the viewfinder (for long shutter speeds) – cover your viewfinder to prevent light from entering and falling on the camera’s sensor during the exposure

    Finding the Right Exposure

    There are many ways of finding the right exposure values for your source exposures. Here, I will show you a quick and simple one that uses the auto exposure bracketing (AEB) function of your camera to shoot the exposure series for your HDR process. Your goal is to set up the camera for an exposure series that remains the same for every section of the Vertorama.

    To do this, put your camera in aperture priority mode, set the correct aperture, and scan the scene from the bottom to the top by rotating your camera. While you do this, your camera will adjust the shutter speed to get a correct exposure of the part of the scene it currently sees. Take note of the range of shutter speeds you see in the viewfinder (highest and lowest).

    To set the correct exposure, put your camera in manual mode, dial in the respective aperture again and set the shutter speed to a value that is in the middle between the highest and lowest speed you saw during the scan. Now, set up your AEB function such that it goes above and below that shutter speed as much as possible.

    For example, if your camera measures between 1/20s and 1/640s, the right shutter speed would be around 1/125s (roughly the middle between 1/20s and 1/640s). If your camera can do 3 shots with +-2 EV, set your AEB function to that setting. This gives you an exposure series of 1/30s, 1/125s and 1/500s for each section, and this produces a result that is close enough to what we need in this situation.

    Taking the Shots

    Your camera is now ready to take the photos. You should try to take the photos as quickly and fluently as possible as follows:

    1. Rotate your camera down: Your first section should be the floor right at your feet. This section will contain your tripod and possibly your feet. These things are not meant to be in the final image, but this gives you some room to maneuver in post-production.
    2. Wait for the right moment: Check the conditions before you start to shoot the series. When there are no people around and the lighting conditions are stable, you can start shooting.
    3. Action! When the conditions are right, start photographing the first section. When the section is done, rotate the camera to the next section such that the overlap with the previous section is about 30% and shoot, and so on. Do this until your camera points at the ceiling for the last section. It is important that you take the photos quickly to avoid that movement and changes in lighting interfere with your shoot.

    Post-processing

    The post-processing stage involves a number of steps. If you shot your source photos in RAW mode, you need to develop them in some RAW converter. Depending on the ISO setting you used to capture the photos, you may want to apply some noise reduction already at this early stage to keep the noise at bay over the remaining workflow.
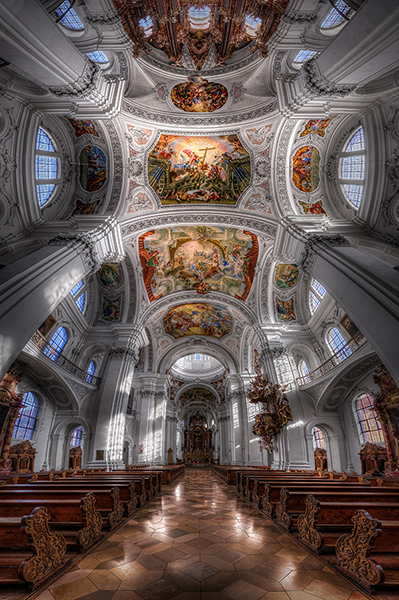
    Basilica St Martin Weingarten Germany HDR Vertorama

    Vertorama Creation

    When the preparation of the source photos is finished, it’s time for the merging and the stitching. Remember that the source photos have to be combined in two different ways:

    • The exposure series for each section needs to be merged into an HDR image
    • all the resulting HDR images for all sections need to be stitched to generate the final HDR Vertorama

    Depending on the software you use, the order of these two steps can vary. We will do the HDR merging first and then the stitching. This is generally easier.

    For creating the HDRs, you need to load each exposure series into your HDR software (e.g., Photomatix), and merge them, one by one. This is straightforward and there are not a lot of decisions to be made. The result will be one 32-bit HDR image for each section (we call these the section HDR images in the following). Then you need to tone map each section HDR image, using the same settings for each one of them:

    1. Load one of the section HDRs into your HDR software and find the right tone mapping parameters. How you set the parameters is completely depending on your personal taste and style. There is no right or wrong here.
    2. Once you have found pleasing settings, apply these settings to all section HDRs and tone map them.
    3. Save each of the tone mapped images as an 8 or 16-bit image. Saving 16-bit images will give you a better quality but produces larger files.

    After this step, you have a tone mapped image for each of the sections, and these images need to be stitched. There are many software products that can stitch photos. I prefer to use Photoshop for this task as it has a very simple but yet powerful stitching module called Photomerge.

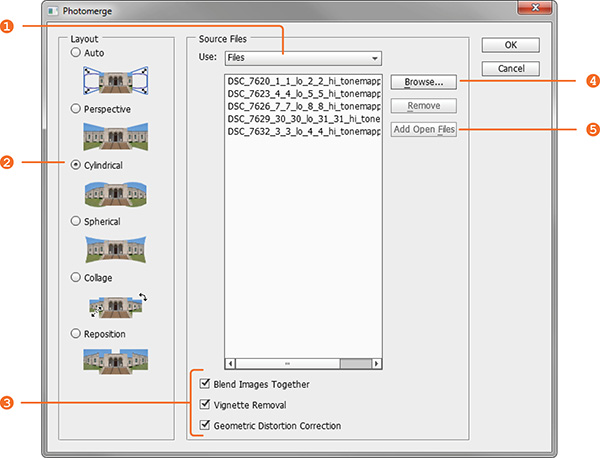
    Stitching your tone mapped images in Photomerge (File > Automate > Photomerge) is simple: the Use drop-down menu (1) lets you work with individual files or whole Folders of images. Browse your disk (4) to select the files or add all files that are currently opened in Photoshop (5). Choose Cylindrical (2) as your Layout and check the three check boxes at the bottom (3) to let Photomerge apply a number of corrections to your images. When you press Ok, your images are stitched fully automatically.
    Hdr vertorama photomerge

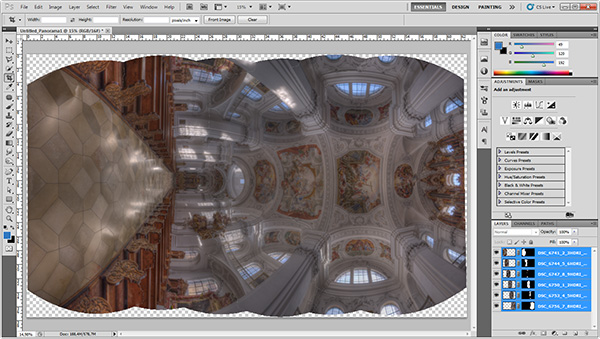
    When the stitching is complete, Photoshop presents you with the result. The edges are a bit wonky and it is laying on the side because Photoshop thinks it is a panorama. Merge all the layers into one (Layer > Merge Layers) and rotate the image accordingly (Image > Image Rotation).
    Hdr vertorama after stitching

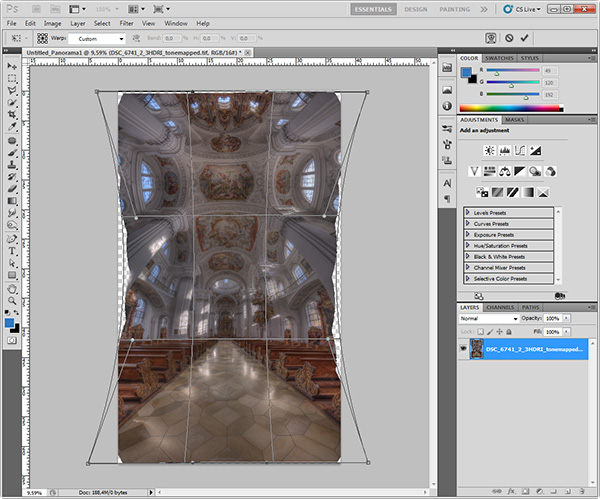
    Use the Warp tool (Edit > Transform > Warp) to correct the typical distortion of an interior Vertorama image that makes it wide in the middle and narrow at the top and at the bottom. You can do this by dragging the corner handles of the Warp box to the outside and the right and left edge handles to the inside.
    Hdr vertorama distortion correction

    Apply the warp distortion and crop the image such that the uneven edges are removed and the composition is symmetrical.
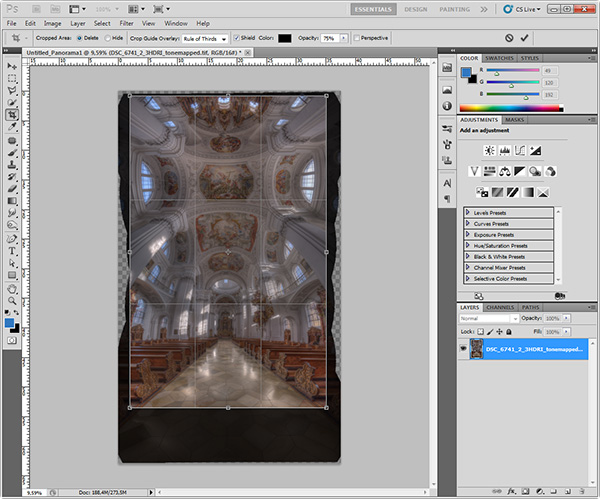
    Hdr vertorama cropping

    This completes the actual HDR Vertorama creation. You now have a stitched image that covers the entire tonal range of the scene (due to using HDR). The remaining post-processing steps are not specific to the HDR Vertorama technique. As with any other photo, you will at least want to correct the colors and increase the contrast. But you can also apply arbitrarily complex adjustments to the image and process different parts of it selectively.

    In this particular case, I applied selective adjustments to the white interior to desaturate it slightly, to the floor to enhance the reflections, and the paintings on the ceiling to balance the colors and make them stand out. I added more saturation to the windows and more contrast to some of the ornaments. Finally, I added a vignette to the edges and a spot light effect to the paintings in the ceiling to guide the viewers’ eyes.

    Conclusions

    HDR Vertorama Photography is a technique that lets you depict interiors in a unique way. If you are willing to invest the effort and time it takes to master this multi-exposure technique, you will be rewarded with images that will stand out in your portfolio.
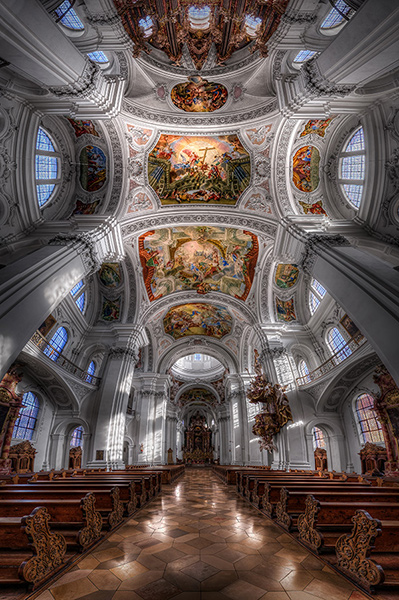
    Basilica St Martin Weingarten Germany HDR Vertorama

    Please share your comments, suggestions and tips below.

    For more articles on HDR check out these:

    • Five Minutes to Realistic HDR using Lightroom and a 32-Bit Plugin
    • 5 Tips for Successful HDR Photos
    • How to Create Realistic Looking HDR Photographs
    • Tips for Great HDR Sunsets

    The post HDR Vertorama Photography – How to Create Mind-bending Images by Klaus Herrmann appeared first on Digital Photography School.
    Digital Photography School

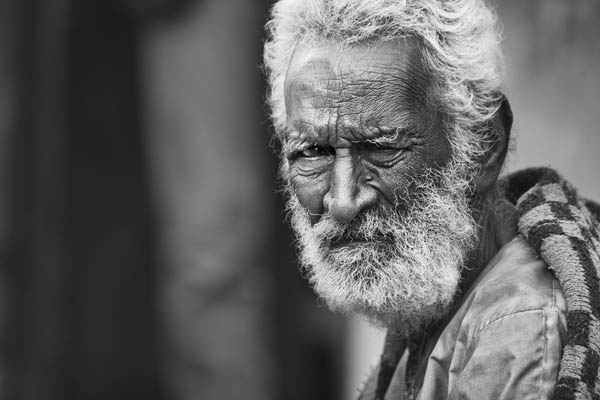
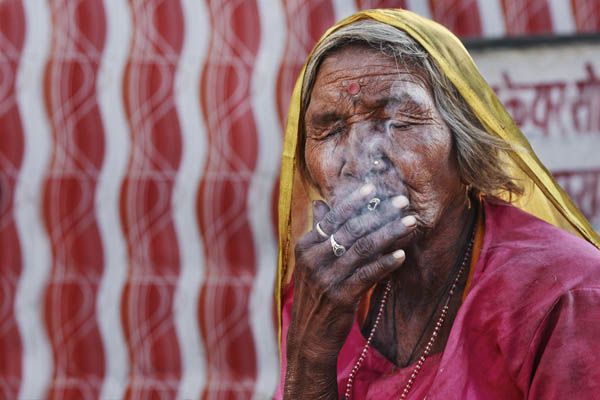
  • Tips for Taking Street Portraits – Lessons Learned in India

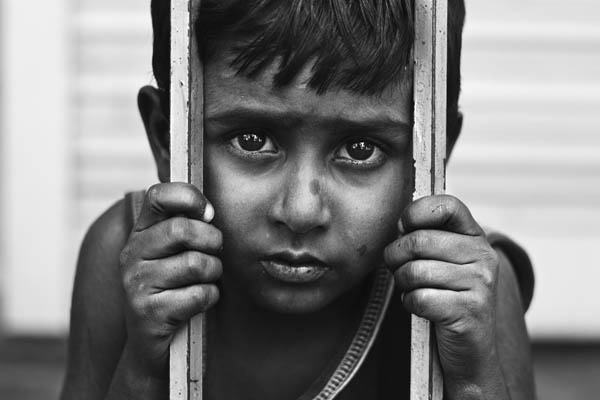
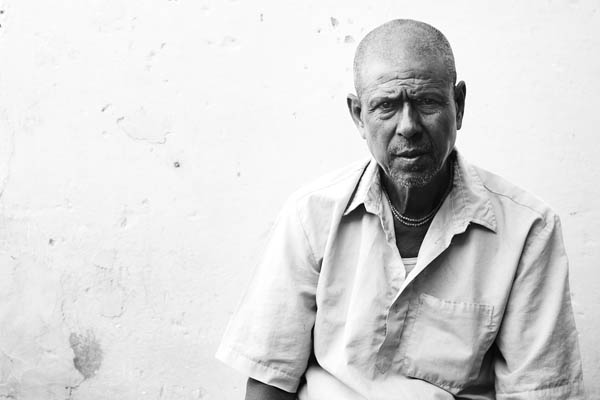
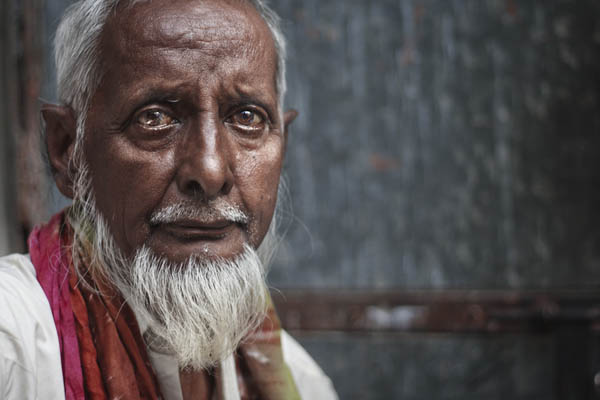
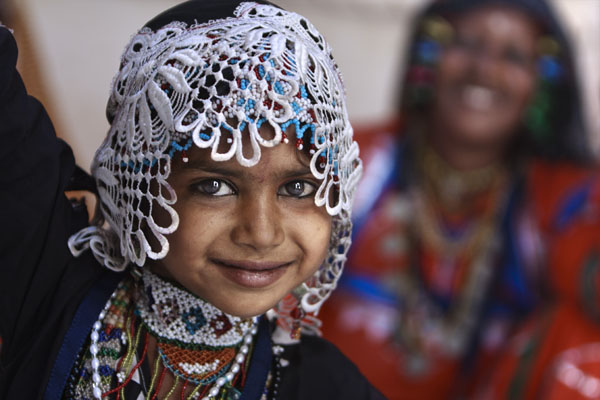
    On my trip to Rajasthan, India I packed my Canon 400D (Rebel XTi) with two lenses: my Canon EF 70-200mm f/2.8 IS USM (for long and candid photos) and my Canon EF 50mm f/1.8 II (for indoor portraits and low light photos) because I was aiming for portrait on the streets and specially head shots. Here are a few tips for taking street portraits, from my humble experience, and how to approach people before you take you shot.

    #1 Always smile

    11

    You always want to let anyone who sees you with a camera know that you are a cheerful person and therefore they won’t mind being photographed by you. Even if they become angry because you asked, just smile and back off. You need to remember that being a photographer in the street is an image for all photographers in the public eyes.

    #2 Avoid using the built-in flash on your camera

    A common mistake that most beginners fall into is using the built in flash. For me this is meant only for quick shots of friends or family. But if you want to a portrait with great light, use natural daylight in the shade by making the subject face towards the light not the opposite.

    21

    #3 Don’t shoot in the sun

    The reason is simple, hard light means hard shadows! Normally when you take a portrait for someone in the sun it creates hard shadows under the eyes, which is very bad for a portrait most of the time. Try to draw your subject to the nearest shady area available, or you can use a smooth board (or reflector) to make the light more even on the subject, that is if you dare to do all that with a stranger.

    31

    #4 Think about the light and shadows

    It’s not enough just to take the shot in the shade during the day, away from the sun. You also need to consider how the light and the shadows are becoming on the subject’s face. You can do that by taking a test shot, then reviewing it on your camera screen by looking for the highlights and the shadows. If you don’t know how, practice it at home with your family or friends before going out to the streets.

    41

    #5 Don’t ask the person to smile

    The good portrait comes first from the subject, then from you. So when you ask someone to smile, and they will, it won’t be a natural smile and sometimes it will bad for the shot. So don’t ask and they will reveal their true expression to the camera whether it’s a smile or sadness, sometimes you will be surprised.

    51

    52

    #6 Use a large aperture for a blurry background

    One of the key important things in portraiture is to focus on the eyes and blur the background, and sometimes part of the face. It will make a more dramatic and more attractive portrait to the viewer. And it also blur the background so it makes the viewer’s eye go only to the subject’s eye.

    61

    #7 Think about the background

    What lies behind the subject is important, sometimes it’s good to have people in it and sometimes it’s better empty with no one. It really depends on how you intend to show your portrait.

    71


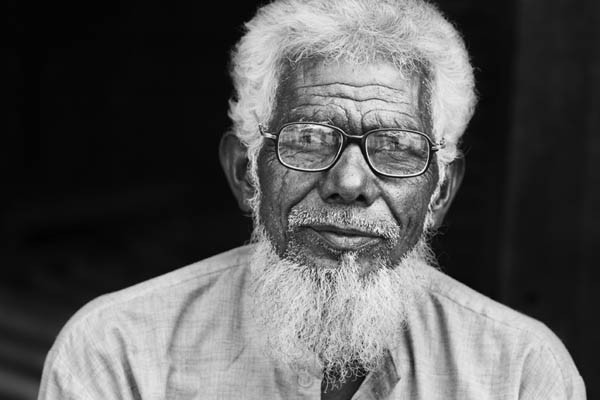
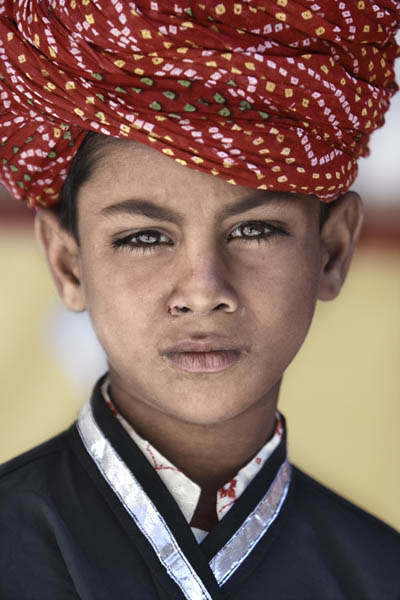
    Editor’s note: as I was searching Flickr for portrait images for the weekly inspiration collections (Portraits of men – portraits of women, I kept finding Zuhair’s portraits stood out among the rest. So I approached him and asked him to share some tips with us and he was gracious enough to do so. I hope you enjoy his images as much I do. If the eyes are the windows to the soul, I feel Zuhair’s portraits do a great job of showing us his subjects’ souls. 


    The post Tips for Taking Street Portraits – Lessons Learned in India by Zuhair A. Al-Traifi appeared first on Digital Photography School.

    Digital Photography School

  • How to Create a Family Photo Essay

    Family Photo Essay 1

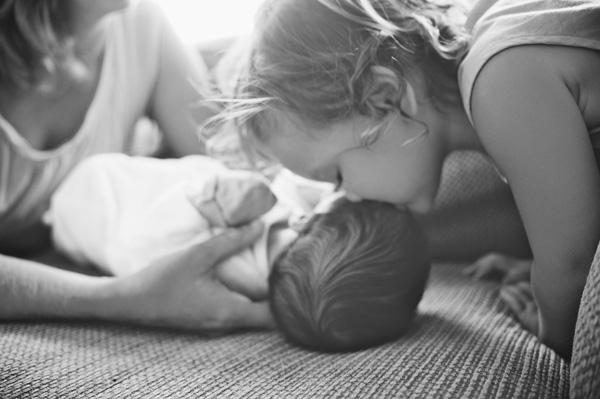
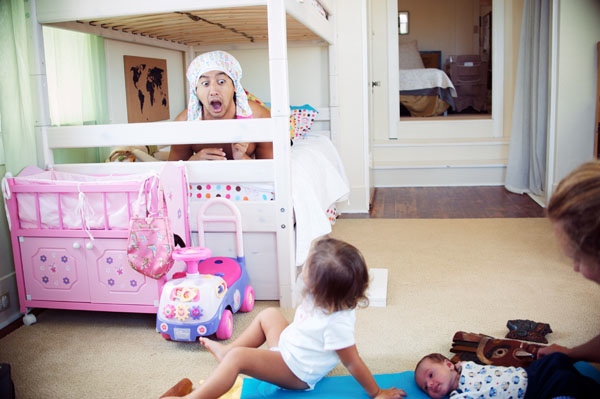
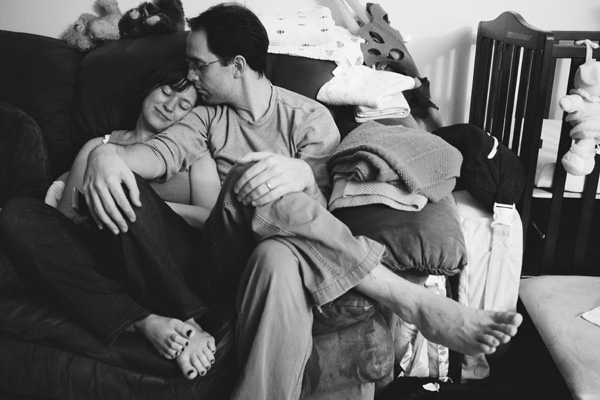
    The way your son wraps his little arms around your leg to hug you. The way your daughter leaves little notes for you around the house. How it feels to snuggle, dance, and play. His crooked smile. Her knobby knees. Eyelashes. Elbows. Ankles sticking out from socks.

    As parents, these are the little moments that we live for, the ones that make our hearts swell, the ones that reflect the spirit of the people we hold most dear.

    And yet, as photographers, these are the very moments that we tend to gloss over in their familiarity.

    We’re drawn to that moment that makes us feel something. It’s often what leads us to pursue photography in the first place. Reminding ourselves why we love this art form so much, how it connects us to the world around us and brings our experiences to life, places it into a larger context.

    Enter the family photo essay!

    The family photo essay puts your technical know-how to work in service of telling an emotional and meaningful story.

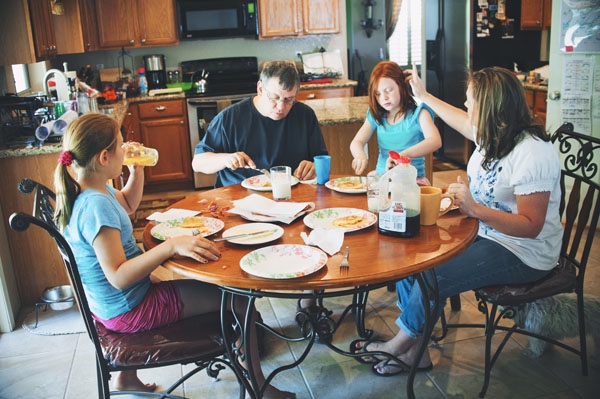
    You see articles on family life in parenting magazines, but in them everything and everyone looks so perfect and polished. And yet, you know that real life looks nothing like that. Your kids go to school with un-brushed hair, mismatched socks, and cream cheese on their faces. Your floors need sweeping, your dishes need washing, and your laundry needs folding.

    And that’s ok. That’s real. That’s true. That’s you. You don’t need to vacuum the carpet in order to find beauty in your everyday life. In many ways, the most important story is the perfectly imperfect one you live every day.

    Turning your lens toward home to create a photo essay of your family allows you to capture not only what you look like, but also what it feels like to be you, belonging to your family, at this moment in time. And in this way, you can literally show your loved ones just how much they mean to you.

    There are three stages to creating an effective photo essay: photography, selection, and structure. Here’s what to focus on in each stage of the process.

    Phase one – photography

    Family Photo Essay 2

    This is the time to ignore the old saw about “picture takers” and “picture makers” and give yourself permission to shoot A LOT. Yes, be intentional, be careful, be thoughtful. But also let yourself experiment. Let yourself play. Take a different angle than you do in your other styles of work.

    Create a diverse body of work from which to draw: close ups, details, wide angle. The more variety in your images, the more complete your story will be.

    Life moves quickly. Life is messy. Kids don’t sit still. It’s ok to let go of the pressure to create the “perfect” shot in the service of capturing real life. What to look for:

    1) The moment

    Family Photo Essay 3

    “Photographers deal in things which are continually vanishing and when they have vanished there is no contrivance on earth which can make them come back again. We cannot develop and print a memory.” ~ Henri Cartier-Bresson

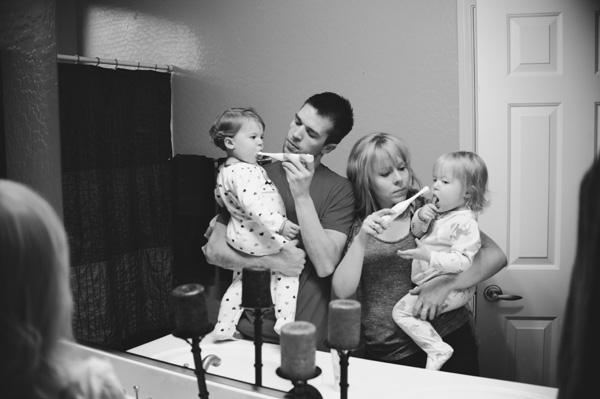
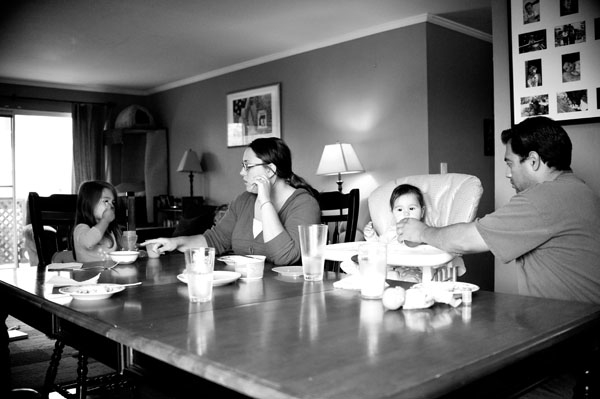
    As you move through your day with your family, pay close attention to your rituals and routines, the things you do every day with each other. Take a step back from habit and mine these moments for your story. When people are actively engaged in something that matters to them their essence shines through.

    The messes, the tears, the comforts and the struggles—these are the things that make our real lives so beautiful. These are the moments that matter. These are the moments that we look back on and wonder, “Where did the time go?”.

    Let yourself slow down. Pay attention. When the moment arises, keep shooting all the way through it. Your attention is an act of love, and as you let the love well up inside you, you’ll find that the moment becomes clear.

    2) Shape

    Family Photo Essay 4

    Shape is often the thing that helps bring the moment into focus in a beautiful way. Often, when discussing photography the discussion centers around the general term “composition”, but when I think about it as “shape,” it helps me really see what I’m looking for.

    That moment when her head tilts ever so slightly. The moment when he jumps in the air and his feet lift off the ground.

    Shape and moment are almost inextricably intertwined. Shape is what gives the moment form, interest, impact.

    As you look through the viewfinder, look for shapes between people, shapes between kids and their environment, the shape of their body as they lay on the floor reading. Diagonals, s-curves, c-curves, triangles–shape is what gives an image it’s life.

    3) Simplicity

    Family Photo Essay 5

    “There’s a lot of beauty in ordinary things. Isn’t that kinda the point?” ~ Pam, from the final episode of The Office

    One of the struggles of documentary photography is how to get your subject to stand out from all the other stuff around you. Remember that the camera is only a tool; it can only see what you tell it to see.

    As you compose your image, look for simplicity and harmony between subject and environment. Can you frame your images in such a way that the background and surroundings add to the story you’re telling? Don’t be afraid to move your feet.

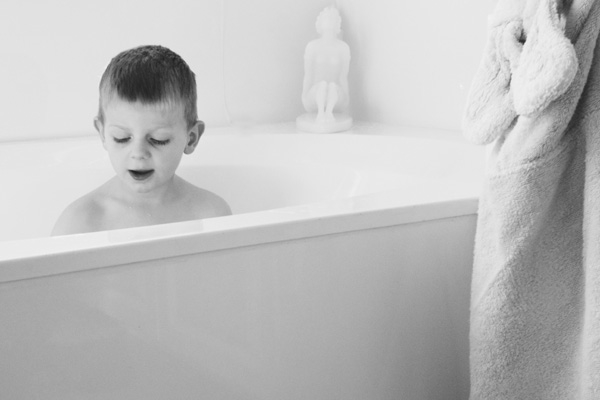
    Notice how the environment also impacts the meaning of your image. Your home, even on its messiest days, holds so much love. The way your kids interact with their surroundings says so much about who they are as people (not to mention gives you a reminder of just how big, or small, they are at this moment in time).

    As the photographer, you get to choose what to focus on. You get to show us what’s important to you. You get to show us how you see the world, your unique view on your unique life.

    NOTE: For those of you whose kids are old enough, I highly recommend getting them involved in this project. Get them access to a camera and let them show you what they see. And that way, images of you will be included in the essay as well.

    Phase two – selecting images

    Family Photo Essay 6

    After you finish gathering your images, sift through them and see what stands out to you. What do you notice? Are there moments that feel like they “sing”? Moments, themes, or attitudes that recur throughout your collection? You’ll begin to see what matters, what you value.

    Look for patterns and through lines in your images. Look for moments that take your breath away or that “just feel right.” The images to include in your essay are the images that tell a story, reveal a truth, capture an essence, or evoke an emotion. Who is this person? What is their essence? What matters to them?

    For each image you select ask yourself why it’s important. What story does it tell? And then ask again, why is that story important? You may also enjoy writing these stories down and adding them to your final product.

    Phase three – deciding on structure

    Family Photo Essay 7

    Once you’ve created and selected your images, it’s time to give them structure. There are several ways to go about this depending on the story you’re trying to tell:

    • A day in the life
    • The same event over time
    • A theme that emerged that represents what matters to you
    • A focus on each member of your family and the things that make them special

    How you choose to structure your images may change from project to project, but the most important thing is to make a tangible copy. Print it, bind it, collage it, but make it a living document you share with your family and not just something that sits on your hard drive.

    A family photo essay will grow to be a cherished part of your family’s legacy, giving your children a sense of belonging. Your story does indeed matter. It’s time to reclaim the art of the family snapshot.

    Family Photo Essay 8

    Please share any other tips or comments you have below, as well as your family photo essay images. Have you done a project like this? Tell us about it.

    The post How to Create a Family Photo Essay by Miki DeVivo appeared first on Digital Photography School.

    Digital Photography School

  • Understanding and Working With Natural Light to Get Stellar Pictures Every Time

    Understanding the different forms of light is one of the keys to achieving good photographs, as photography is all about light. For most photographers, the most available light, the one that is free, is natural light. To learn how to get the most of natural light requires a lot of observing and practicing, but once you understand how to work Continue Reading

    The post Understanding and Working With Natural Light to Get Stellar Pictures Every Time appeared first on Photodoto.


    Photodoto

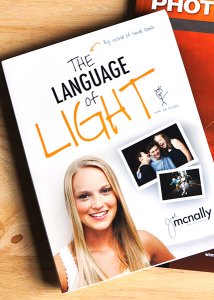
  • “The Language of Light with Joe McNally” – a Review

    language-of-light-digital-photography-schoolOn the one hand, I could make this article one of the shortest I’ve ever written– a rousing recommendation of only three words: “It’s Joe McNally!”

    Thank you. Good night. Drive safely.

    Okay…I get it. Some of you may not be convinced. I respect that. That’s why we’re going to take a closer look.

    For those who may not know, Joe McNally is one of the very best in the business. In a career spanning 30 years and 50 countries, his work has appeared in National Geographic, LIFE Magazine, Sports Illustrated, TIME, Newsweek, Entertainment Weekly, and a host of other magazines you’ve probably read. Even if you’ve never heard his name (where have you been hiding?), I’m pretty sure you’ve seen his work. If you are ever able to attend one of his workshops, I highly recommend it.

    Joe is a master (a word I don’t use lightly) of at least two things–lighting and teaching. As a photographer, light defines or plays a part of everything you do. Regardless of whether you are talking about speedlights, studio lights, street lights, or sunlight, it’s a given that every light source has three attributes–color, quality, and direction. Since every photograph requires light, it stands to reason that having a firm understanding of how to control, manipulate, and manage light would be an important step towards raising the bar on your photography. As he puts it himself in the intro,

    “Light is how we speak as photographers.” – Joe McNally

    A typical Joe McNally seminar or workshop tends to be filled with sentences that begin with things like, “The photo editor at National Geographic once told me…” or “My editor at LIFE Magazine used to say…”  These are your cues to start feverishly writing down every word that follows.  The Language of Light lets you put the pen down and take it all in–a three-hour guided tour through the how and why of Joe’s “big world of small flash.”

    There are a few things that really stand out, separating this DVD lighting class apart from the rest. For starters, it’s conversational. To the extent that this language of ours has words and concepts that need explaining, who better to do it than the man who’s written some of the best books on the subject? The other huge advantage to The Language of Light is the ability to watch as Joe starts each shoot with a basic premise, then explains and demonstrates each step in the process–walking you through from concept to finished image.

    Remember that old line? “Those who can, do. Those who cant’ teach?” Well, here’s a guy who does both and doesn’t hold anything back. If he knows it, he wants you to know it. It’s not just about the “how.”  It’s also about the “why.” And that, my friends, is worth the price of admission.

    Here is a basic breakdown of the set.

    Disc 1 – the Language of Light

    They say the best place to start is at the beginning, and The Language of Light takes that to heart. Disc 1 gets you going, explaining light and why it does what it does in simple terms. Prepare to be blown away by what he can do with a single speedlight. Topics include:

    • Turning one small flash into one big light
    • Controlling harsh natural light
    • Dramatic one light portraiture
    • Tour of small flash light modifiers
    • Light placement

    Check out the Disc 1 preview in the video below:

    Disc 2 – the Language of Light

    Disc 2 moves out of the studio and goes on several location shoots, with lighting setups ranging from the basic to the complex. Topics include:

    • Location assessment
    • Basic strategies for one and two lights, as well as three or more
    • Getting the most out of a location
    • Environmental portraits
    • Conquering the sun with high speed sync
    • Mixing color temperatures
    • Athletic portraits
    • Lighting in small places
    • Group portraits
    • Engaging your subject

    Take a look at the Disc 2 preview:

    The three hours of photographic education contained in this set is some of the best I’ve ever seen. Knowledge, talent, energy, and passion come together in what I can only describe as a moment of enlightenment (no pun intended), where all the pieces seamlessly come together– and it all makes sense. It’s perfect for beginners just learning how to get the flash off the camera, as well as seasoned veterans looking for a refresher.

    The Language of Light is available on Amazon.  Still hungry for more? Check out our very own e-book, “Portraits- Lighting the Shot” in the Digital Photography School Bookstore.

    The post “The Language of Light with Joe McNally” – a Review by Jeff Guyer appeared first on Digital Photography School.

    Digital Photography School

  • How to Apply the Look of Hand Coloring in Lightroom

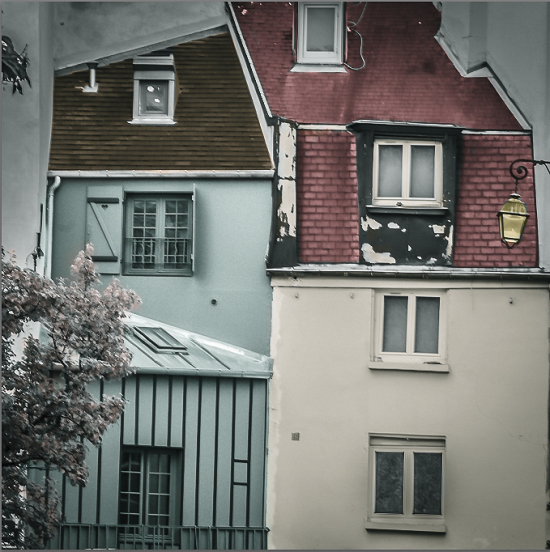
    Give a photo the look of a hand tinted image in Lightroom

    Give a photo the look of a hand coloring in Lightroom

    Before there were color photos there were black and white photos, colored by hand using paints or dyes. Today, courtesy of any good photo-editing program, you can apply your own hand coloring effect to your photos.

    Here’s how to apply the look of hand coloring in Lightroom.

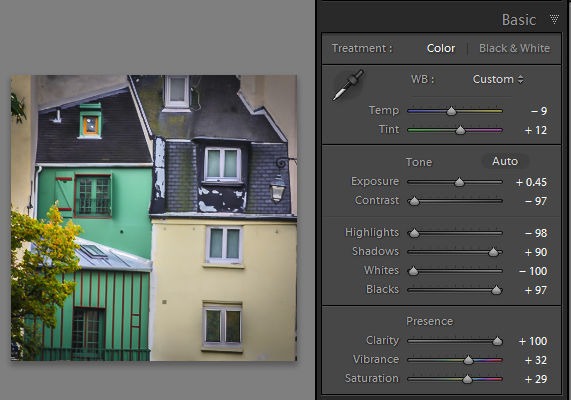
    To get started, open the image in the Lightroom Develop module. You will want to make the usual basic edits to the image so it shows a good tonal range and contrast.

    Before colorizing the image, make sure to adjust the tonal range and contrast.

    Before colorizing the image, make sure to adjust the tonal range and contrast

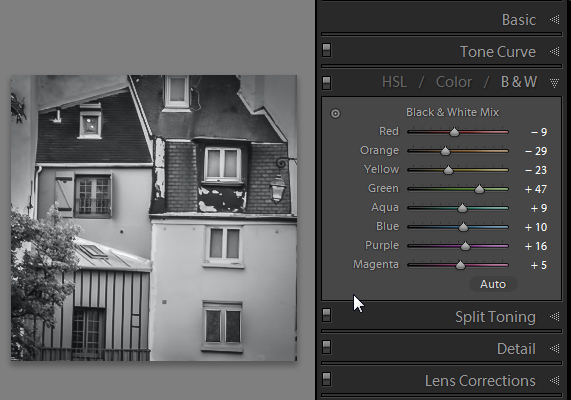
    Then convert the image to a black and white by clicking B&W panel and adjust how the underlying colors in the image are converted to black and white using the sliders. Lighter areas will show the color better and darker areas will show a more subtle tint.

    Use B&W to create a black and white image.

    Use the B&W panel to create a grayscale or monochromatic image

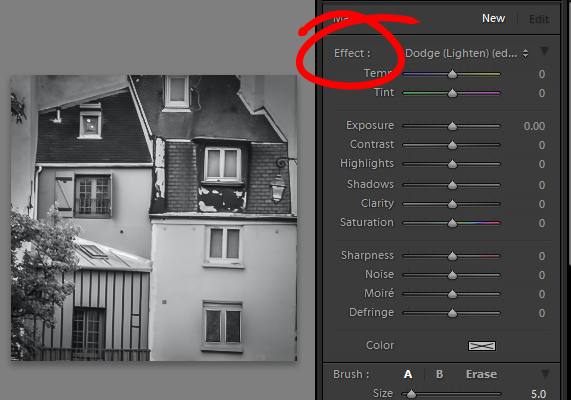
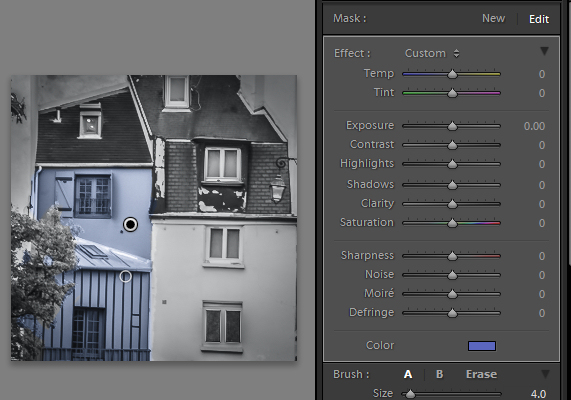
    When you’re ready to add color to the image, click the Adjustment Brush and return all the sliders to zero by double clicking on the word Effect at the top of the panel (circle in red below).

    Double click Effect to reset all the Adjustment Brush sliders.

    Double click Effect to reset all the Adjustment Brush sliders

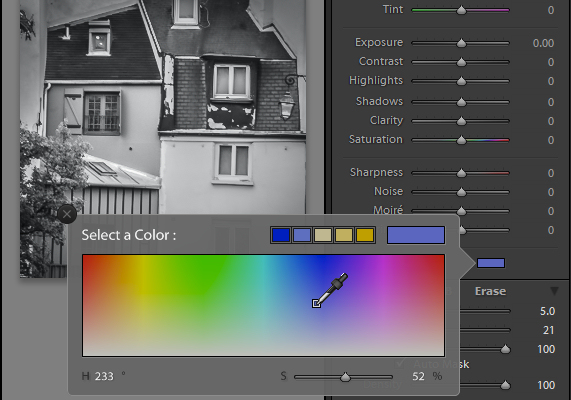
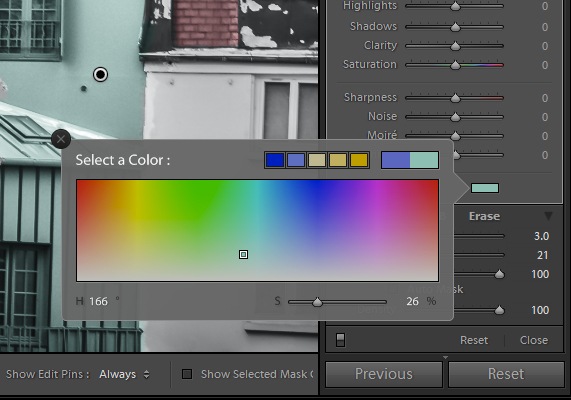
    Click on the color sampler and choose a color to use.

    Select a color to tint the image with from the Color selector

    Select a color to tint the image with from the Color selector as shown here

    Now click on the area that you want to recolor to set an Edit Point. Paint over the area to apply the color to it. As you paint with the Adjustment Brush a layer of partially opaque color is applied to the image.

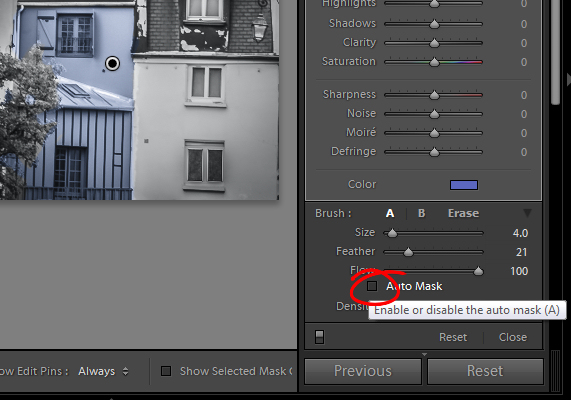
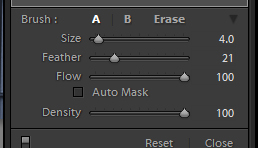
    Select the Auto Mask checkbox if you are working on an area of the image that has distinct edges. Doing this makes it easier to limit the painting to only the desired area. The roof tops and buildings here are good examples of areas with distinct edges.

    Selecting Auto Mask helps paint in areas with defined edges.

    Selecting Auto Mask helps paint in areas with defined edges (stay within the “lines”)

    When painting an area that is less defined, disable the Auto Mask checkbox. The tree in this image has less defined edges so you should disable Auto Mask when coloring this area.

    The buildings have defined edges so use Auto Mask when painting them. The tree does not, so disable Auto Mask when painting it.

    The buildings have defined edges so use Auto Mask when painting them. The tree does not, so disable Auto Mask when painting it.

    If you mistakenly paint over an area and want to undo the painting click the Erase brush link or hold Alt to select Erase and paint to remove the mistake.

    To zoom into the image press Z on the keyboard and click on the image to zoom in or out. To move the image hold the spacebar so the mouse pointer turns into a hand and drag on the image.

    Size the brush using the Size slider

    Size the brush using the Size slider

    To resize the brush either use the [ and ] keys on the keyboard or adjust the size using the Size slider.

    When you have finished working with the first color, click New to set a new Edit Point. Select a different Color and paint that onto the image.

    Continue creating a new Edit Point for each color until the coloring is complete.

    If desired, you can alter a color or adjust a painted area by selecting the Adjustment Brush and then click the Edit Pin for that adjustment. You can then change the color using the color picker.

    Give a photo the look of a hand tinted image in Lightroom

    Give a photo the look of a hand tinted image in Lightroom

    Do you have some other tips:

    If you have some other ways of doing this technique in Lightroom please share. Or share your images if you give it a try!

    For more Lightroom tips and tutorials try these:

    • Processing an Image in Lightroom 5 – a Video Tutorial
    • 6 of Lightroom’s Hidden Treasures
    • Why Lazy Photographers Should Use Lightroom Smart Collections
    • 3 Uses for the Radial Filter Tool in Lightroom 5
    • Lightroom 5 Tips – Hidden Gems

    The post How to Apply the Look of Hand Coloring in Lightroom by Helen Bradley appeared first on Digital Photography School.

    Digital Photography School

  • Light Tent Comparison – DIY Versus Kit Tents

    A light tent is an invaluable photography tool for shooting smaller objects and items and for achieving even, near-shadowless lighting. In our earlier post, we looked at How to Use a Light Tent for Product-Style Photography, which covered the basics for using and shooting with a light tent. In this post, we will take a look at a head-to-head comparison between buying a light tent kit versus making your own DIY version.

    The light tent contenders

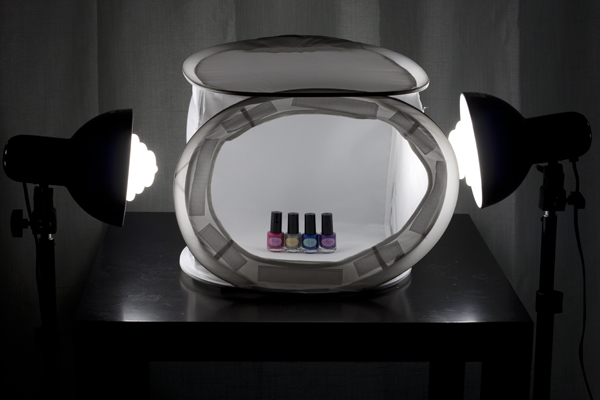
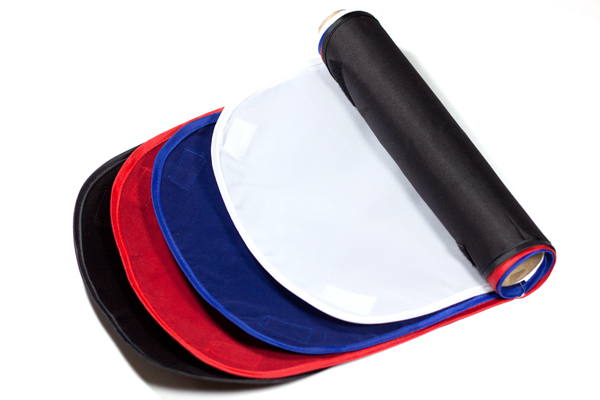
    In this corner, we have the Square Perfect SP500 Platinum Photo Studio In A Box. This kit contains: two pop-up light tents (one 30 inch cube and one 12 inch cube – 12 inch shown below); two lights with adjustable stands; two 30W, 5400K daylight fluorescent bulbs; a tripod; a carrying case; and two sets of four colored fabric backdrops (white, black, red, and blue) sized for each light tent.

    light tent kit, Square Perfect, photography, setup

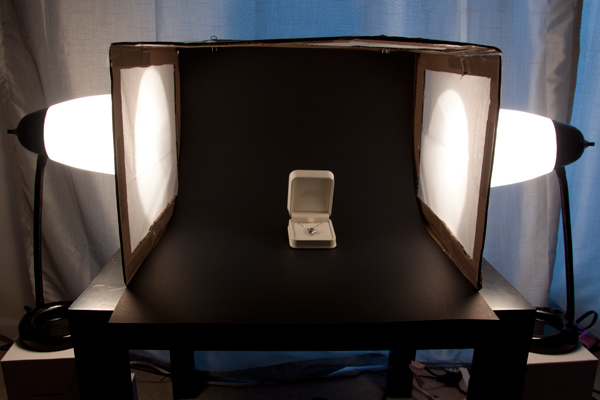
    And in this corner, we have the DIY Light Tent, built using these specifications: Foldable DIY Photography Light Tent. This light tent will be lit by means of two adjustable desk lamps and 60W, 2900K halogen bulbs. The backdrops are made from standard poster board and cut to size. You can purchase daylight-rated light bulbs for your DIY kit as well, but you may need to order them online from a photography or home improvement site.

    light tent, DIY, how to, photography

    To make this an even test, we will be comparing the 12 inch kit cube against the 12 x 16 x 18 DIY tent. The first set of comparisons will feature each set as described above (the lights that come with each kit), while the second set will put the two up against each other using the same lighting set up for both kits.

    Light tent comparison: using their own lights

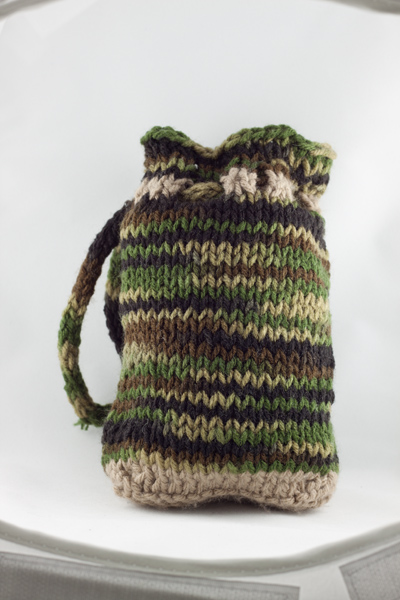
    light tent, product photography, knit bag, photography, how to, light tent

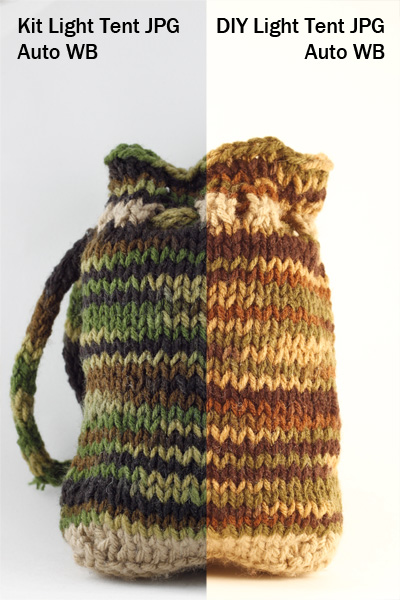
    For this first photo-face-off, each light tent will be evaluated using its own lights (daylight fluorescents for the light tent kit and halogen bulbs for the DIY light tent). A major consideration when shooting with a light tent is controlling or choosing the correct white balance to match the lights being used. You want your white backdrop to look white and not have any color tint from the lights used. Read more about that issue in: How to Use a Light Tent for Product-Style Photography.

    These shots show SOOC (Straight out of Camera) JPG files for the kit and DIY light tents using auto white balance.The kit’s light gives a cooler (more neutral) look to the background, and the colors of the knit bag are much truer to life, while the DIY lights impart a yellowish hue to the bag and the background. Setting your camera on “Tungsten” white balance for the DIY table lamps may give you a more neutral color, or you can also do a custom white balance using a gray card or even the white backdrop as a test shot. Consult your camera manual for how to perform a custom white balance with your camera.

    compare-bag-autoWB-darker

    This image is a little dark on purpose so you can see the color tint of the background more easily

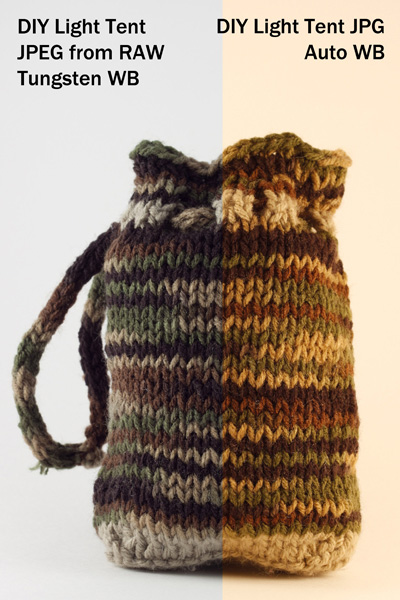
    If you want perfectly clean whites and neutral blacks, then I would recommend shooting in RAW, which will give you greater flexibility regarding the white balance in post-processing. These images (left) show a comparison of the same image of the bag with a Tungsten white balance setting as compared to the Auto. The Tungsten white balance was selected in post-processing from the RAW image file, or it can also be selected as a white balance preset on the camera when shooting, especially if using JPG format.

    Light intensity

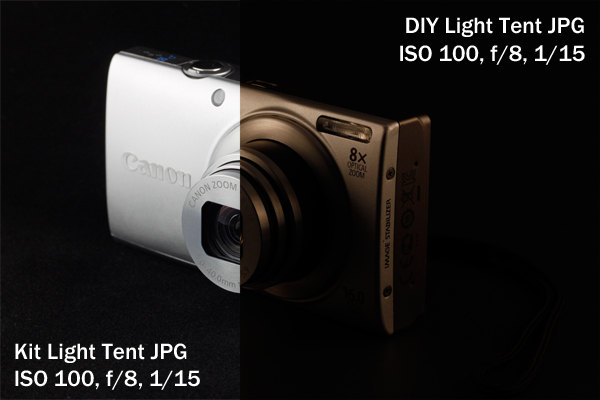
    As you can see by the image below the DIY lights are considerable less intense (not as bright), which will mean you will either need to use a much longer exposure (shutter speed) to get a correct exposure, or increase your ISO. If working on a tripod (recommended for this type of set up) exposure time shouldn’t be an issue though so just stay at ISO 100 and adjust accordingly.

    light tent, product photography, camera, Canon, point and shoot, Canon A4000IS

    Light tent comparison: using the same lights

    A final test was done to see whether this difference in light was due to the different light bulbs being used or to a difference in the light tents themselves.

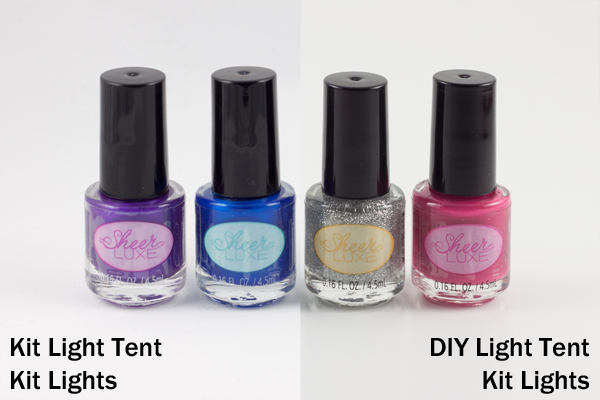
    light tent, product photography, nail polish

    Left image shot at 1/25th – right image at 1/13th

    These two shots were taken using the daylight lights from the light tent kit with both the kit tent and the DIY tent (again, in aperture priority, ISO 100, f/8). The kit light tent shot was taken at 1/25th of a second, and the DIY light tent shot was taken at 1/13th of a second, which is a full full stop difference. This means that even with the same lights, the DIY light tent blocked more light than the kit light tent and required longer shutter speeds to shoot the same exposure. The background also came out a little more gray than the kit light tent.

    Light tent comparisons: practicalities

    There are many other considerations to keep in mind when deciding which kind of light tent would be best for you. Think about how much room you have to devote to gear use and storage, as well as how much the benefits of a pricier kit outweigh the cost investment.

    Use of ease

    light tent, product photography, knit bag, how to

    Notice edges of tent showing in places

    The lighting stands that come with the light tent kit have greater range and reach than a typical desk lamp, but they cannot get down as low. This makes it difficult to use the kit lights for shooting with the 12-inch cube sitting on a table top, as the lights are too tall to sit beside it on the table and too short to reach up from the floor. A coffee table seems to be the ideal height. For the desk lamps, they work well when sitting on a table next to the light tent, but they will need to be placed on a stack of boxes or books if shooting from something like a coffee table (as shown earlier).

    The 12-inch cube also has a lip around the edge, making the functional shooting space a bit smaller, as you want to avoid the edge appearing in your frame. This is far less of a problem with the 30-inch cube. One workaround is putting a book underneath the backdrop to raise the bottom up. The benefit here of the DIY box is that you can make it the size you want for the subject you have, and there is no lip to shoot around, so you can shoot straight-on at your subject.

    Backdrops

    Backdrops require careful handling and attention, and the poster board DIY versions are much easier to replace than the fabric ones from the kit. If you are going to be shooting something potentially messy or greasy, consider using a poster board backdrop regardless of which light tent you use.

    light tent, how to, photography, fabric, backdrops

    Care for your fabric backdrops by ironing out the wrinkles before hanging. If you roll them up on a cardboard tube when you are finished shooting, you should be able to reuse them again without having to iron every time. Keep a lint roller or clear tape on hand to deal with any dust or lint, and save yourself the time of editing it all out in post-processing.

    Portability

    The light tent kit has the edge in portability, as it comes with its own carrying case. The case is not particularly sturdy or padded, however, so you would not want to travel with it other than carefully placing it in your car (without stacking anything on top of it).

    Storage

    The DIY light tent folds down flat for easy storage, and you can simply put your two desks lamps back where you borrowed them from, until the next time you are shooting. The light tent kit takes up significantly more space, and the process of folding the light tents back down into themselves is a little complicated and requires some practice, though there are plenty of “how to” videos online. There is also the risk of deformation if you leave the tents stored too long in their folded down state.

    Cost

    The DIY light tent is the clear winner in the cost department, particularly if you already own a desk lamp or two, which are the priciest elements. The cardboard box and tissue paper should not set you back more than about five dollars. The light tent kit is currently listed at $ 143, a very discounted price on Amazon, which makes it reasonable to consider as an investment.

    Final verdict: which light tent to choose?

    There are a lot of different variables to consider when making the final choice about whether a DIY light tent will serve your needs or whether you should invest in a light tent kit. If you are looking at exploring what a light tent can do and whether it would be useful, then definitely build your own to experiment with. Keep the white balance in mind and shoot in RAW. But if you are shooting JPG, remember to adjust the white balance setting when shooting by using a preset or doing a custom white balance.

    If you know that you will be consistently shooting a lot of this style of shots, perhaps for selling jewelry or crafts online or for displaying directions for your own DIY projects on a blog, then you should consider investing in a light tent kit. The time savings of having bulbs that match your white balance is considerable if you are doing a lot of light tent photography. You will also have significant flexibility with a kit that offers different sizes of light tents and a better range of motion and height for the lights and light stands.

    Do you shoot with a light tent? Do you prefer a light tent kit or a DIY version? Share your thoughts in the comments below.

    The post Light Tent Comparison – DIY Versus Kit Tents by Katie McEnaney appeared first on Digital Photography School.

    Digital Photography School

  • Sunset Photography Tips Video Tutorials

    Yesterday I shared a set of amazing sunset images and this week’s photography challenge is also to capture some sunset images. So to help you along with that is a video tutorial on how to underexpose to get more color in your sunset shots, also one of the tips I mentioned on the challenge page!

    In this video Gordon Laing goes through step by step how to change the settings on your camera to do just that. Have a look:

    And a second video by the Corel Learning Center with five more sunset photography tips. These are practical and easy to understand and follow:

    Have some other tips, please share in the comments below!

    Look for another article on sunsets coming up this week!

    The post Sunset Photography Tips Video Tutorials by Darlene Hildebrandt appeared first on Digital Photography School.

    Digital Photography School

  • Weekly Photography Challenge Sunset Photography

    Earlier today I shared some stunning, and colorful sunset images, including one of my own from my recent photo tour to Nicaragua. Even if you can’t get to exotic locations like that, I have a few tips for you to help you take better sunset photos. Then off you go as sunset photography is this week’s photography challenge.

    Group from my photo tour to Nicaragua getting ready to shoot some fire spinning on the beach. I turned around and shot them against the last bit of light in the sky.

    Group from my photo tour to Nicaragua getting ready to shoot some fire spinning on the beach. I turned around and shot them against the last bit of light in the sky.

    Sunset photography tips:

    I give these in my travel class, they are easy to do and make such a dramatic difference in coming back with a boring sunset versus one that has your friends drooling.

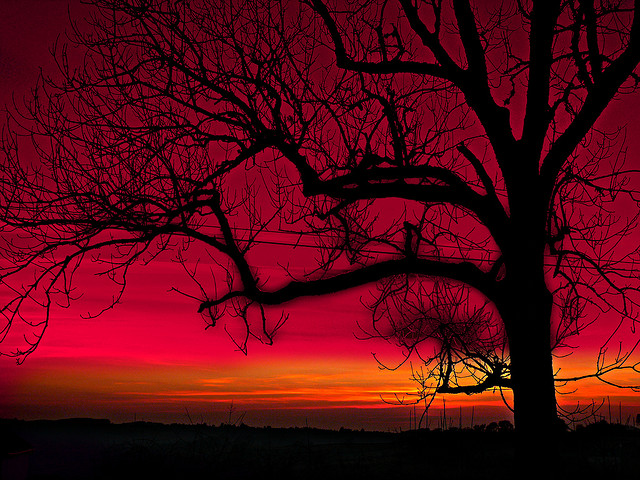
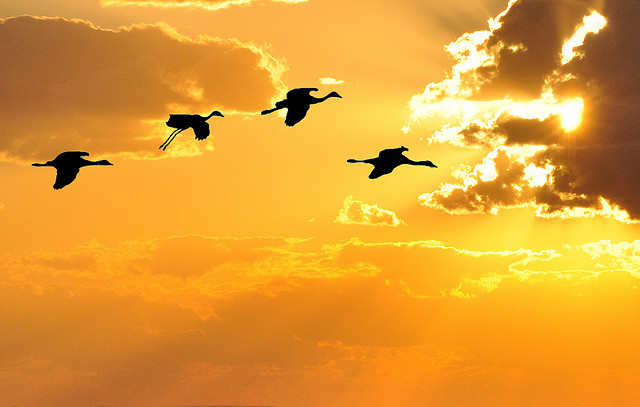
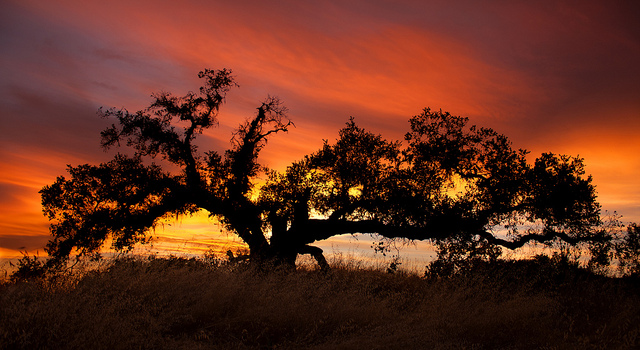
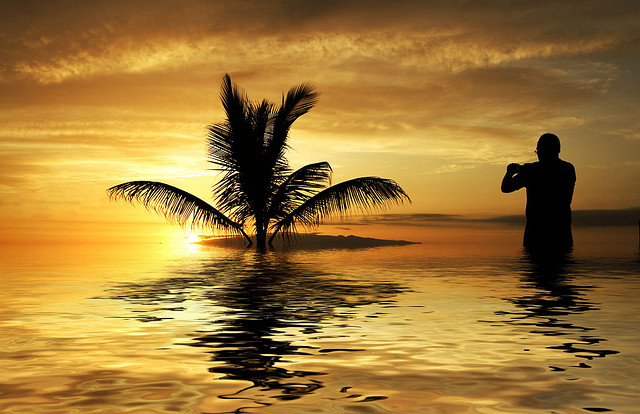
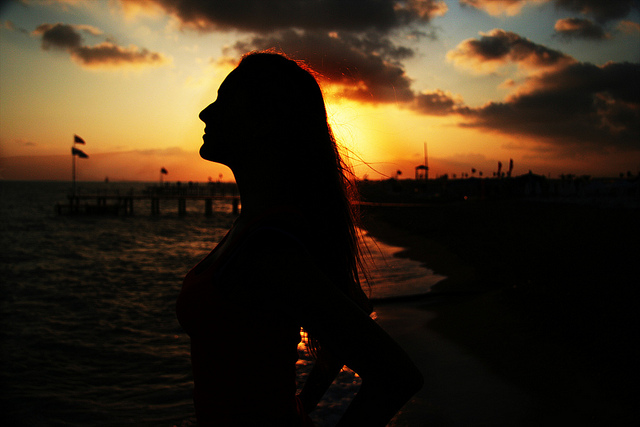
    1. Put something in front of the sunset – just a gorgeous sky at sunset is not enough to make a great photo. It needs something of interest, a focal point. So basically the sunset becomes a stunning background for something. Ideally pick something with a recognizable shape such as: a tree, a person, birds, animals, a city skyline, etc. Just make sure the outline is clean and doesn’t overlap something else, watch for people standing together that look like one person with three legs, horizon going right through a person’s head, and so on – in a silhouette they will all blend together and be a messy blob. Lastly, focus on the item, NOT the sky!
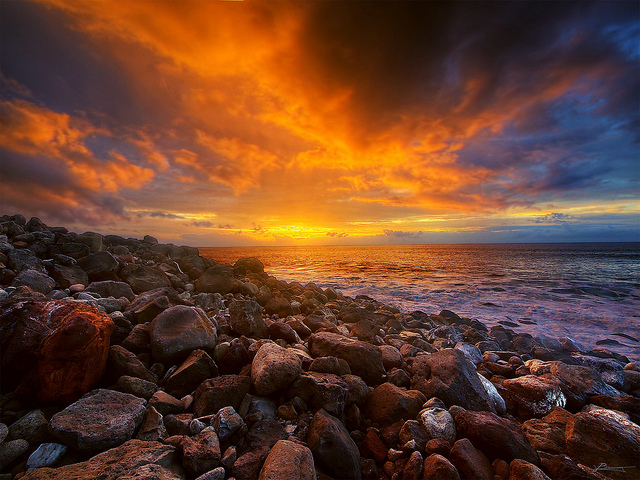
    2. Wait (or hope) for some clouds – sunsets with clouds can be even more incredible as the colors move and shift across the sky, almost as if they are alive. Keep shooting until it’s dark, use every bit of light there is and see how the colors change over the whole time period.
    3. Expose for the sky, meaning underexpose according to your camera’s meter – often when you shoot a sunset your camera’s meter will read the light and try to make it brighter. But if you want more vibrant and saturated colors, and to create a silhouette of the lovely subject you’ve placed in front of the sky – you will need to override the camera and tell it to under expose, or make it darker. This is subjective so you might want to bracket your exposures when shooting and choose the best ones later.
    4. Adjust your White Balance – using Auto White Balance most of the time will give you a decent result. For sunsets if you really want to bring out the color though, try switching to one of the presets that adds warmth such as Shade or Cloudy. If you have K as an option play with the entire scale – shoot one image at 2500K and another at 10,000K and see which works best for that scene.

    By Theophilos Papadopoulos

    By RayMorris1

    By Jeff S. PhotoArt

    By Bo Nielsen

    By Milivoj Sherrington

    By esther**

    By Angela Sevin

    For some articles that might help with this challenge, see these:

    • 12 Tips for Photographing Stunning Sunsets
    • Using Sun Flares and Starbursts to Create Stunning Images
    • Do you pack up and leave after sunset and miss the fun of night photography?
    • Getting Great Portraits At Sunset
    • How to Use a 10-stop ND Filter to Take Long Exposure Sunset Images

    Share your sunset images!

    Simply upload your shot into the comment field (look for the little camera icon in the Disqus comments section as pictured below) and they’ll get embedded for us all to see or if you’d prefer upload them to your favourite photo sharing site and leave the link to them.


    The post Weekly Photography Challenge Sunset Photography by Darlene Hildebrandt appeared first on Digital Photography School.


    Digital Photography School

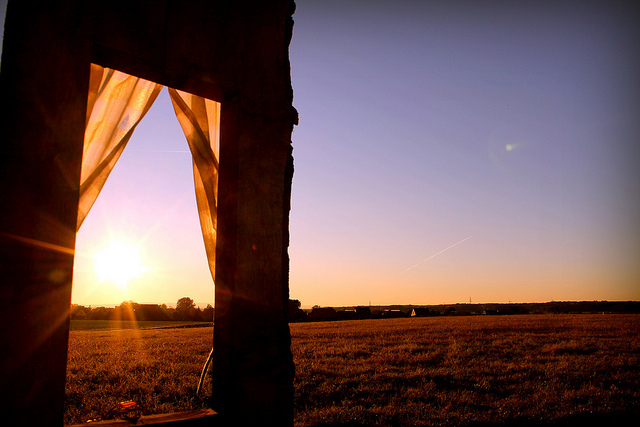
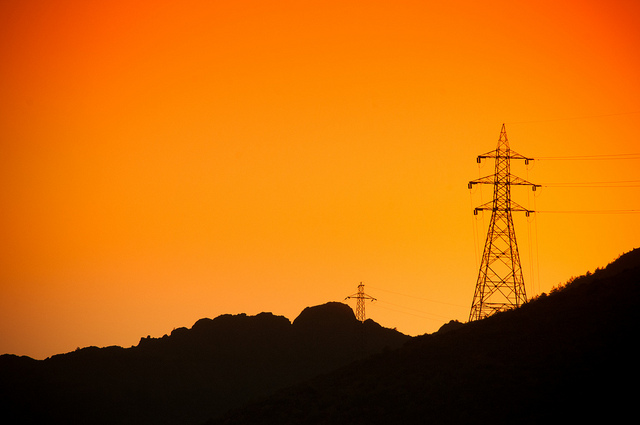
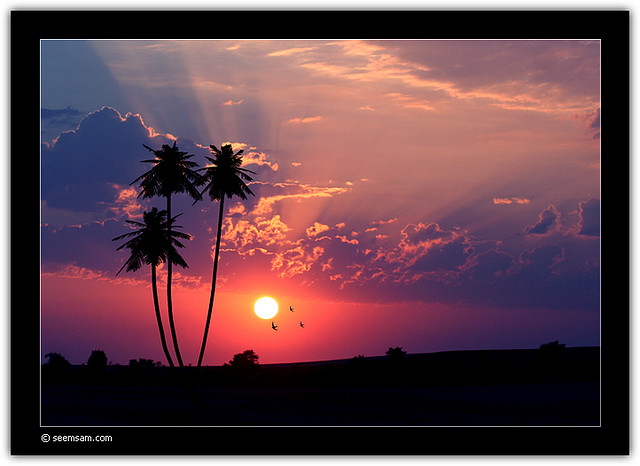
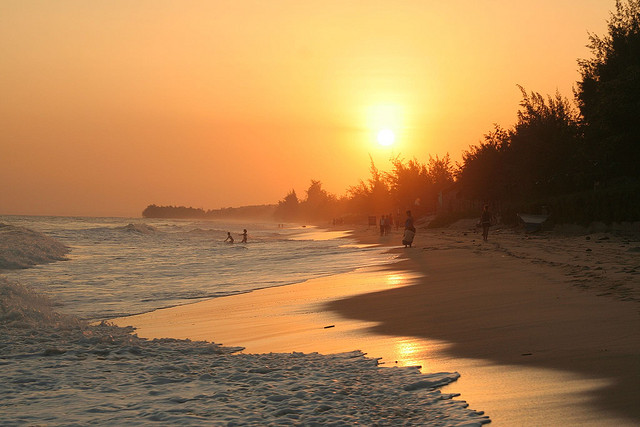
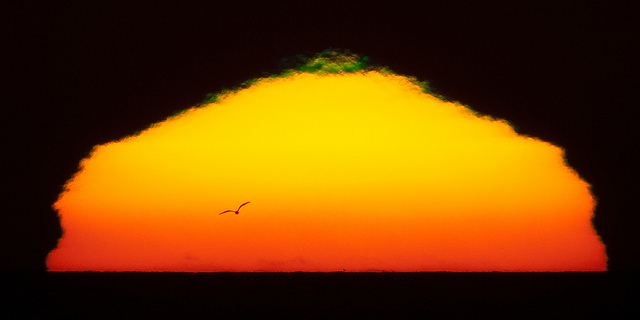
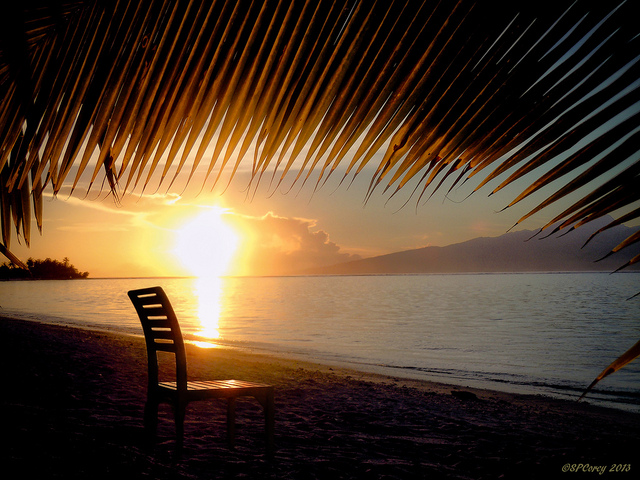
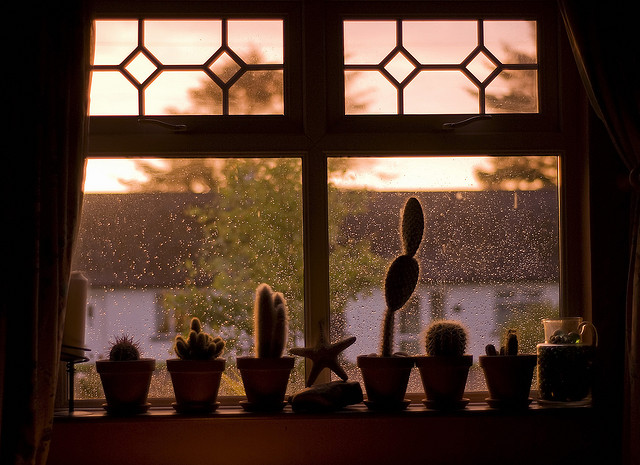
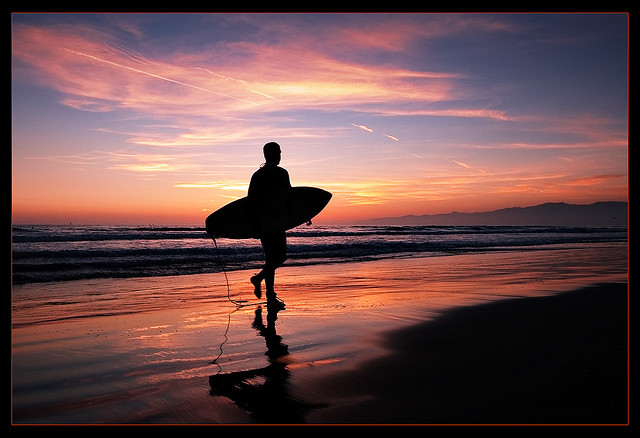
  • 39 Colorful Sunset Photos to Start off Your Weekend

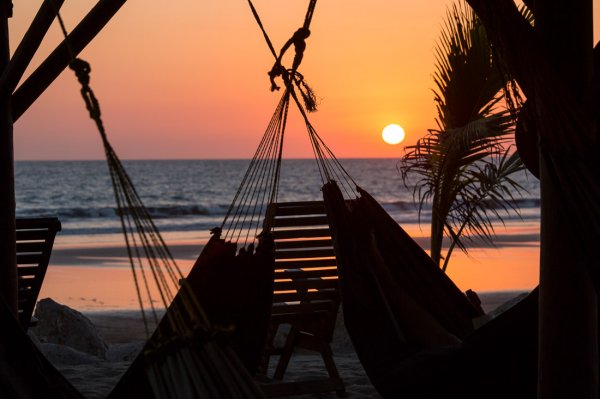
    Well I’ve just returned from spending two and a half weeks in sunny Nicaragua including nine days living right on the beach, in a little fishing village.

    Teaser alert: I will share some of my images from the trip with you in article very soon I promise, be patient! Here’s one for you!

    Nicaragua-flickr-046

    Darlene’s image of the beach in Nicaragua

    Who doesn’t love a good sunset right?

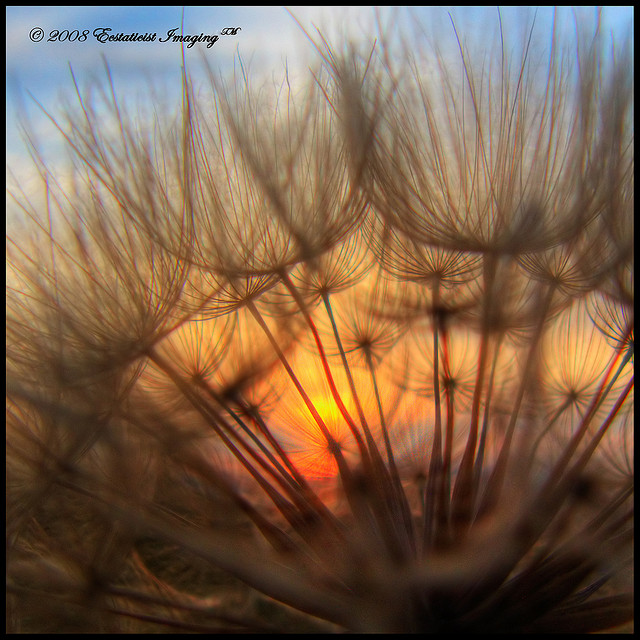
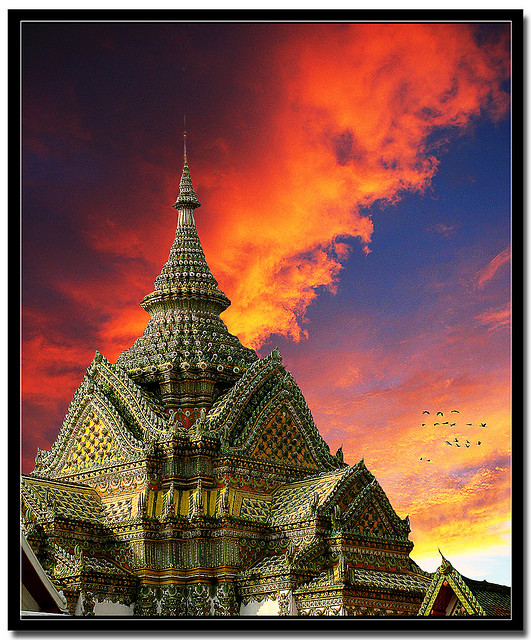
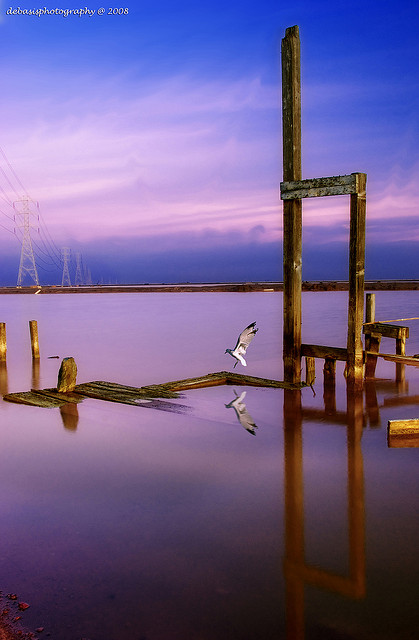
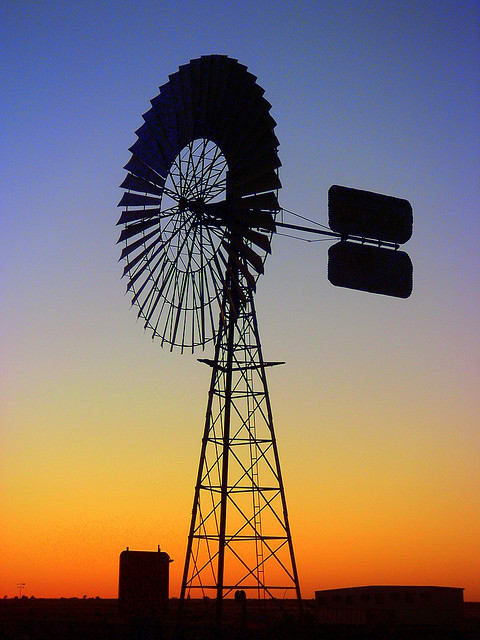
    ENJOY and hope you feel refreshed just looking at these sunset photos!

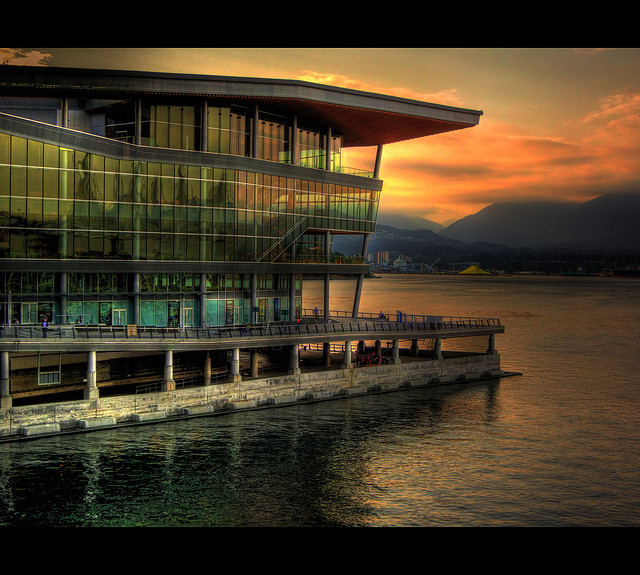
    By Philipp Rümmele

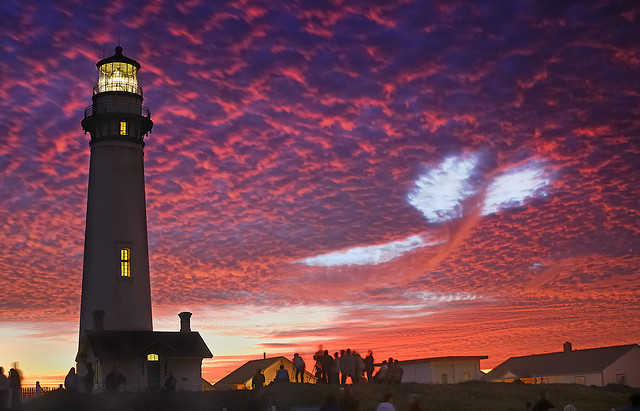
    By esther**

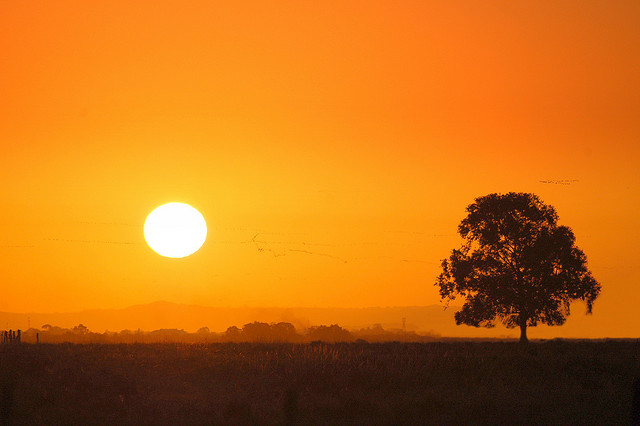
    By Chris Gin

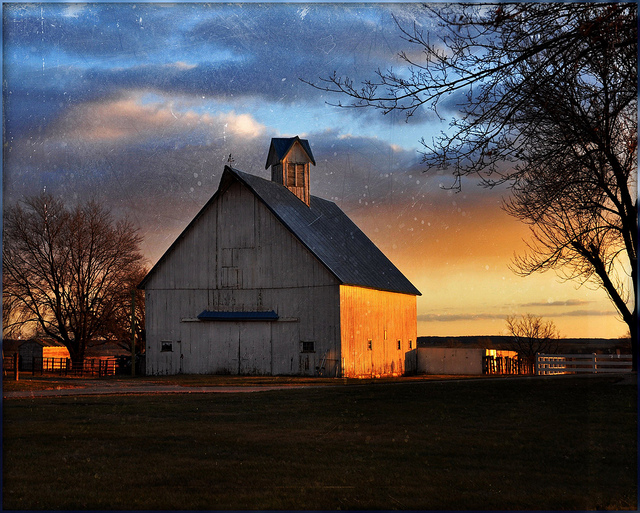
    By Giovanni Orlando

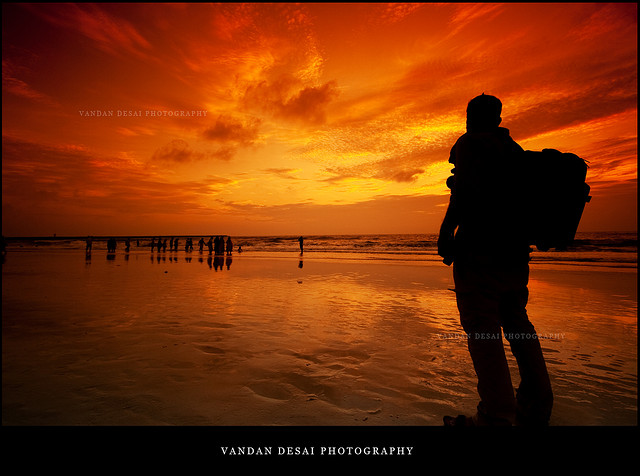
    By Vandan Desai

    By Chris Gin

    By Eduardo Amorim

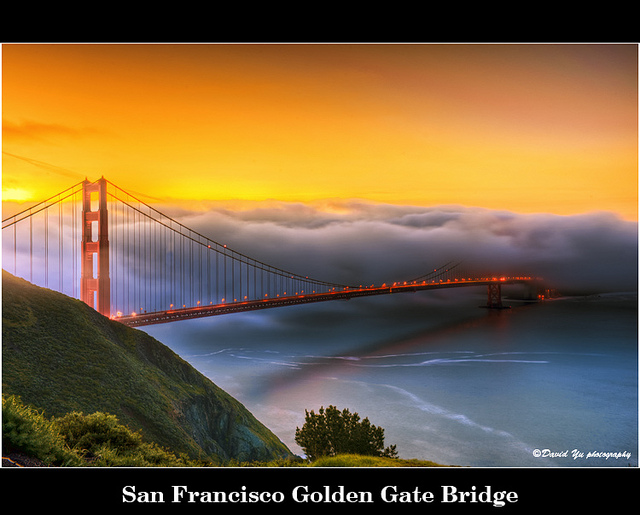
    By David Yu

    By nebojsa mladjenovic

    By seyed mostafa zamani

    By paul bica

    By Len Radin

    By Evan Leeson

    By Dave

    By Eduardo Amorim

    By TumblingRun

    By Evan Leeson

    By Nick Kenrick

    By Debasisphotography

    By NeilsPhotography

    By Trey Ratcliff

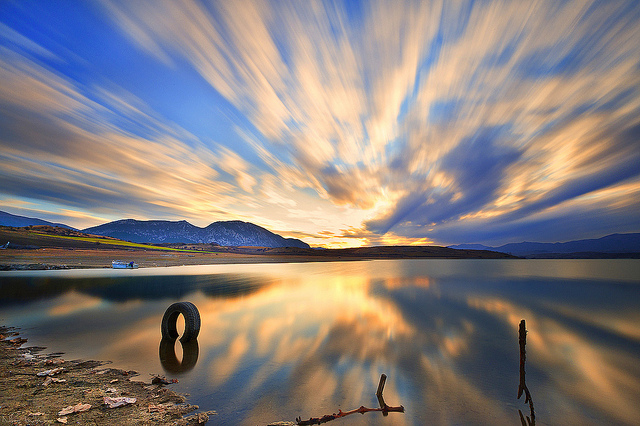
    By Nikos Koutoulas

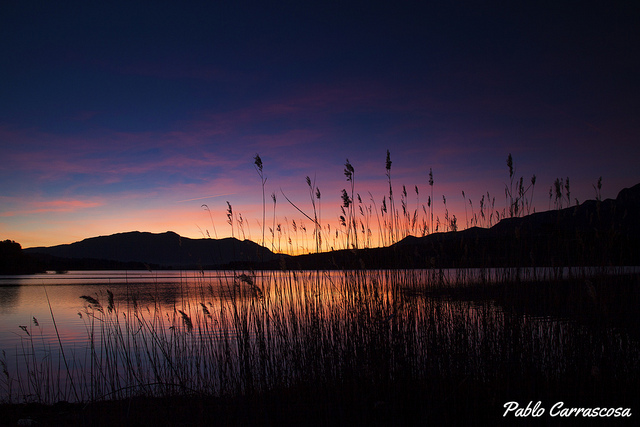
    By Pablo Carrascosa

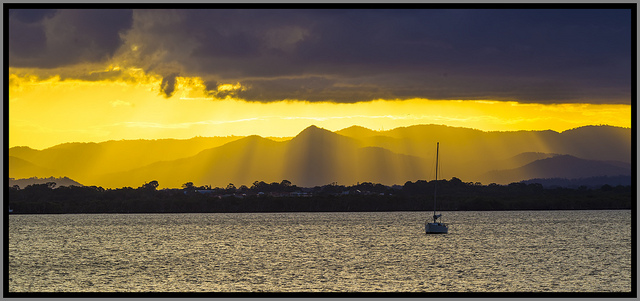
    By John

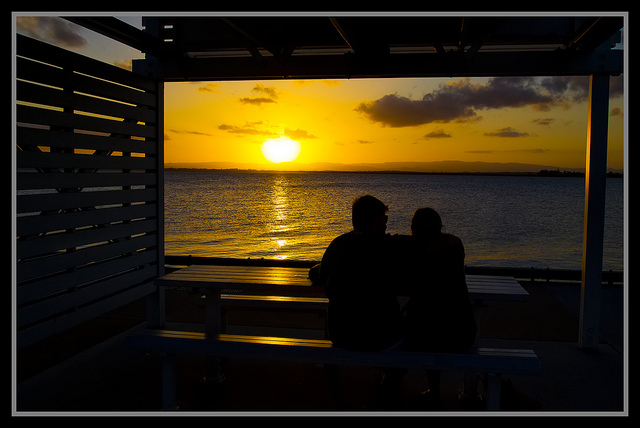
    By John

    By Don McCullough

    By cortto

    By Nhi Tran

    By a_migo

    By Simon Stamm

    By Kamil Porembi?ski

    By Arlo MagicMan

    By mr clearview

    By Mike Baird

    By Steve Corey

    By philip hay

    By Pedro Szekely

    By Chris Goldberg

    By Minoru Nitta

    To get some tips on shooting sunsets and using sunset light try these articles:

    • How to Photograph Dramatic Clouds at Sunset
    • How to Shoot Landscapes at Sunset
    • Create a Warm, Sunset Mood Image in Lightroom 4
    • Tips for Great HDR Sunsets

    The post 39 Colorful Sunset Photos to Start off Your Weekend by Darlene Hildebrandt appeared first on Digital Photography School.

    Digital Photography School