Category: Photography

  • 50 Majestic Spring Photography Examples to Set Up Your Mood

    No matter how long the winter is, spring is sure to follow. Spring is a fantastic season that brings nature back to life. It’s often considered the most beautiful and inspiring time of the year with its colorful, refreshing and vivid imagery and structures. This post proves just that! The wide range of flowers that appears is probably one of Continue Reading

    The post 50 Majestic Spring Photography Examples to Set Up Your Mood appeared first on Photodoto.


    Photodoto

  • Review Comparison of the Canon EOS 70D vs Canon 700D / Rebel T5i

    EOS 700D and 70D review comparison

    Earlier in the year I compared the EOS 5D Mark III and 6D, Canon’s least expensive full-frame cameras. Today I’m going to look at two other models that cause confusion: the Canon EOS 70D vs Canon 700D (Rebel T5i).

    Note: North America readers will know the EOS 700D as the Digital Rebel T5i. EOS 700D is the European name for the same camera. It is called the Kiss X7i in Japan.

    The confusion arises because many photographers, when buying a new camera, start by searching online for information. While there are lots of websites that list the differences between the two cameras, it isn’t always easy to understand which of these matter to you.

    The major differences

    I’m going to start by looking at the major points of differentiation between the two models. It’s impossible to list them all, but these are the ones most likely to influence a buying decision:

    Price

    Budget is an important part of the buying decision, and there is a sizeable difference in price between the two models. At the moment you can buy the EOS 700D (Rebel T5i) body only for around $ 700 and the EOS 70D for about $ 1100 (body only prices, excluding tax). The difference isn’t really surprising considering the difference in specifications between the two models.

    Bottom line:  If you’re on a tight budget then the EOS 700D (Rebel T5i)  is the model for you, but not before considering the benefits of the 70D.

    Megapixels

    Not really a big deal in today’s world of high megapixel digital cameras, but it may matter to some. The EOS 70D has a 20.2 megapixel sensor compared to the EOS 700D’s (Rebel T5i) 18.0 megapixels.

    EOS 700D and 70D review comparison

    The sensor of the EOS 70D. Both cameras have an APS-C size sensor with a similar megapixel count.

    Bottom line:  The difference between the two models is negligible, and shouldn’t greatly influence your decision.

    Autofocus performance

    This is a big difference. Minor differences aside (and excluding AF in Live View or movie mode), the autofocus of the 70D is the same as that found in the more advanced Canon EOS 7D camera. It has 19 cross-type AF points (the more reactive ones) plus a transmissive LCD screen in the viewfinder that lets you configure different display options.

    By contrast the EOS 700D (Rebel T5i) has 9 cross-type AF points and a fixed viewfinder display. This diagram shows the difference between the two:
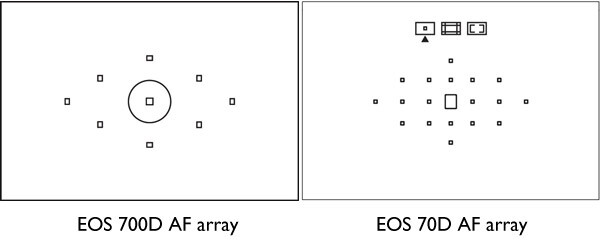
    EOS 700D and 70D review comparison

    The autofocus arrays of the EOS 700D (Rebel T5i) and 70D compared

    The higher AF point count of the EOS 70D makes it better for shooting moving subjects, as there are more AF points to measure the focusing distance to the subject. It is also more likely that you can find a well placed AF point to use when photographing still subjects, without having to focus and recompose. This is useful when using prime lenses at wide apertures, where the margin of error for focusing is small.

    The autofocus of the EOS 70D also excels when using the camera in Live View or movie mode. It uses new technology called Dual Pixel CMOS Autofocus, the only EOS digital SLR to do so. This is mainly of interest to people who want to use the camera to shoot movies.

    You can read about the autofocus performance of the EOS 70D in more detail in my article Understanding EOS Autofocus: The EOS 70D.

    Bottom line:  The autofocus performance of the EOS 70D is much better than that of the EOS 700D (Rebel T5i). If you want to buy an EOS digital SLR to shoot movies, the 70D currently has the best AF performance in movie mode.

    Lens micro-adjustment

    The EOS 70D allows you to calibrate your lenses so they focus as accurately as possible. This is a feature found only on higher end Canon cameras and will appeal in particular to photographers who use prime lenses at wide aperture settings, where AF performance is critical. The EOS 700D (Rebel T5i) doesn’t have this feature.

    Bottom line:  Autofocus micro-adjustment complements the more advanced autofocus of the EOS 70D. It is Canon’s least expensive camera with this feature.

    The Quick Control dial

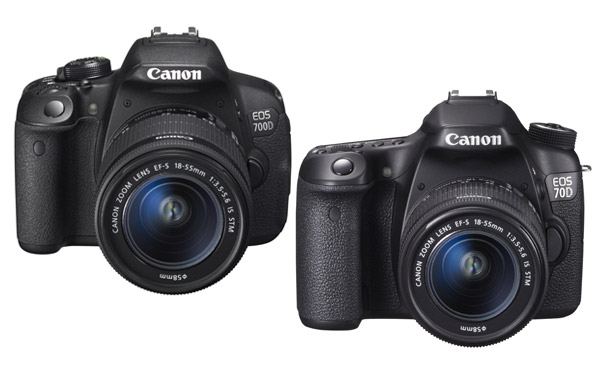
    The Quick Control dial is one of the features that differentiates mid-range EOS cameras such as the EOS 70D from enthusiast level models like the 700D (Rebel T5i). It is located on the back of the camera where it is easily moved by your thumb when holding the camera. The benefit of the Quick Control dial is that it lets you adjust exposure compensation and focus point selection easily while looking through the viewfinder. This speeds up the photo taking process and may make the difference between getting a shot and missing it. The cross keys on the EOS 700D (Rebel T5i) can be used while looking through the viewfinder, but are much harder to do so.

    This diagram shows the difference between the two:
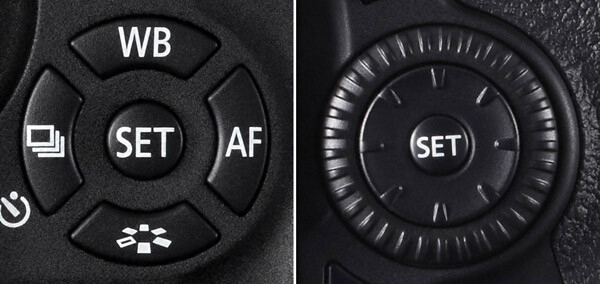
    EOS 700D and 70D review comparison

    These photos show you how the Quick Control Dial (700D/T5i – left image) and (70D – right image above) cross keys influence the design of the back of the camera:
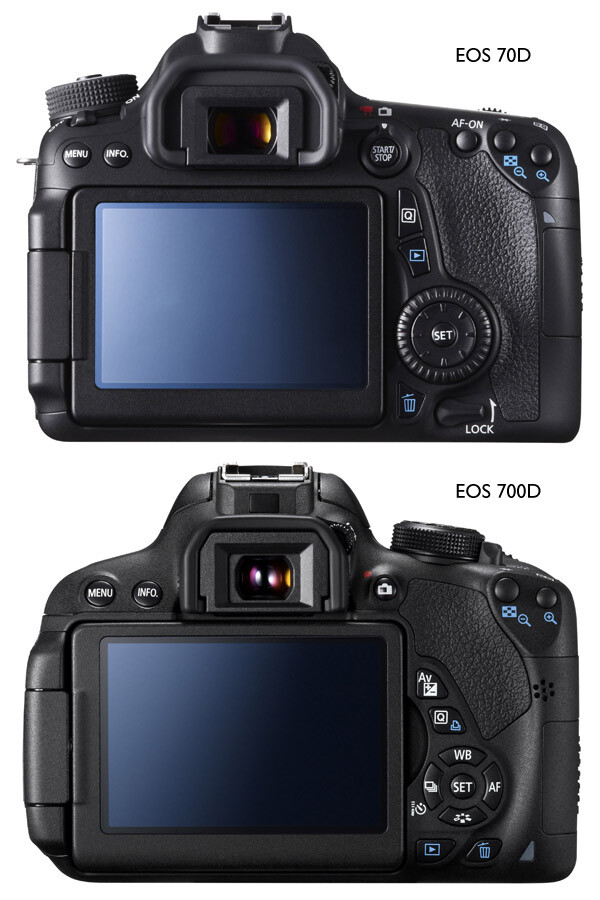
    EOS 700D and 70D review comparison

    Another advantage of the Quick Control dial is that it lets you scroll very quickly through your images when playing them back on the camera’s LCD screen.

    For me, the Quick Control dial is so useful that I never want to use another camera without it.

    Bottom line:  The Quick Control dial on the EOS 70D makes it easier and quicker to use in many situations. This is something you can only appreciate by trying the camera out, so make sure you do so before making a buying decision.

    Size and weight

    The EOS 70D isn’t a great deal bigger than the 700D/T5i, but it is heavier (755 grams/1.6 lbs. compared to 580 grams/1.3 lbs.). If you are intending to carry the camera around all day, then the lighter 700D/T5i may have more appeal. But it really is subjective, and this is where the hands-on comparison comes in again. I cannot stress the importance of trying out both models to see which one you prefer to handle.

    Bottom line:  Try before you buy, as preferences when it comes to size and weight are personal.

    Built-in Wi-fi

    The EOS 70D has built-in Wi-fi, the EOS 700D/T5i doesn’t. The Wi-fi feature lets you:

    • Transfer images to other Canon cameras with Wi-fi
    • View saved images or operate the camera from a smartphone (the free app EOS remote is required)
    • Print images using a Wi-fi printer
    • Operate the camera remotely using EOS Utility (free software that comes with the camera) which lets you transfer photos wirelessly to your computer, something that photographers working in a studio may find useful
    • Upload images to Canon iMage Gateway, a free photo online service for Canon camera owners(but not to photo sharing sites like Flickr or FTP)
    • View photos on a television screen if you use a media player supporting (DLNA) Digital Living Network Alliance

    You can’t do any of those things with an EOS 700D/T5i, nor can you buy a Wi-fi unit for the camera.

    Bottom line:  If Wi-fi is important to you, then buy the EOS 70D. If you shoot tethered in a studio, remember you can transfer images to a computer using an extra long USB cable if your camera doesn’t have Wi-fi.

    Electronic Level

    The EOS 70D has an electronic level display that you can view on the LCD screen. It is useful for taking photos with a level horizon when you have the camera mounted on a tripod. There is also an electronic level display in the viewfinder to help you keep the camera level when shooting hand-held. The EOS 700D/T5i doesn’t have this feature.

    Bottom line: The electronic level is a useful feature, especially for landscape photographers. However, if your budget doesn’t stretch to the EOS 70D, remember you can buy an inexpensive spirit level that fits in the EOS 700D/T5i’s hotshoe for landscape photography.

    Shooting speed

    The EOS 70D can shoot at 7 frames per second (fps), the 700D/T5i is a little slower at 5 fps. How important this is depends on the subjects you shoot – it is more likely to be of interest to those of you into sports and wildlife photography.

    Bottom line: The more advanced autofocus and higher shooting speed of the EOS 70D makes it the better model for sports and wildlife photography.

    Minor differences

    There are lots of minor differences between the two cameras, so I’ve provided some links to in-depth reviews so that you can get more information before making a purchasing decision. You’ll also see some photos taken with both models. In the meantime, if you own or have used either of these cameras, why not tell us what you think in the comments. Why did you choose one or the other, and do you think you made the best choice?

    EOS 70D reviews

    • Digital Photography School
    • DP Review
    • Camera Labs
    • Petapixel

    EOS 700D/T5i reviews

    • Digital Photography School
    • DP Review
    • Pocket Lint

    Finally, if you want to ask owners of these cameras what they think, a good place to do so is the EOS magazine forum. It’s a high quality forum with lots of helpful members. You should also take a look at EOS magazine – the most in-depth magazine for Canon EOS users you can buy.

    For more reviews and discussion on cameras and equipment see our Cameras section!


    Understanding EOS – a new ebook

    Understanding EOS ebookMy ebook Understanding EOS is written for photographers who want to learn to get the best from their EOS cameras. It teaches you everything you need to know to take control of your camera and start creating beautiful photos. Click the link to learn more.

    The post Review Comparison of the Canon EOS 70D vs Canon 700D / Rebel T5i by Andrew S. Gibson appeared first on Digital Photography School.


    Digital Photography School
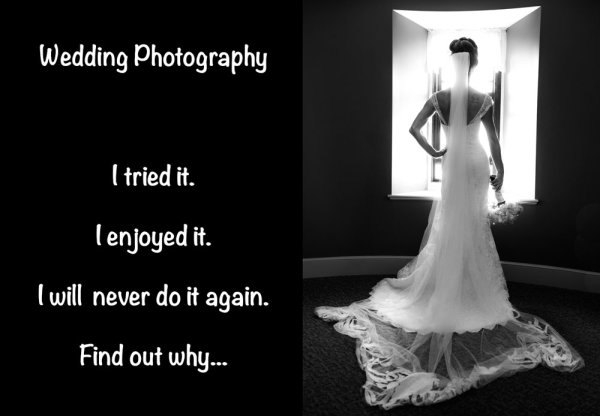
  • The Story of Photographing my First Wedding also Likely my Last

    There’s really no question that wedding photography is one of the most common forms of professional photography and if you’ve recently become the owner of a DSLR odds are sooner or later someone you know might ask you to photograph their wedding. Though this might be a tempting offer, I want you to think long and hard before saying yes, because photographing a wedding is a lot more than pointing a camera and capturing the moments. To help drive home this point I’m telling a bit of a story today.

    weddingalt

    My story is about why, even though photographing this wedding was the best experience of my photography life, I more than likely won’t be photographing another wedding anytime soon.

    I don’t want you to think that I’m here to tell you that it’s a bad idea to get into wedding photography, or even that my first (and last) time as a wedding photographer was a bad experience. Neither of these are the case – in fact I quite enjoyed photographing this wedding, but there are some things that I learned about myself which would make me hesitate if I were asked to do it again.

    SneakPeak1

    First some background

    Like most new photographers these days I created a website, set up a Facebook page, and started sharing my photos on a daily basis. Over time I noticed that my page was growing with not only my immediate friends, but friends of friends, and even people I didn’t know – I guess you could say I started attracting a following.

    After a couple of years of sharing landscape and wildlife shots from around the New England area, one of my sister’s friends reached out to me and asked if I’d photograph her wedding.

    My first instinct was to say “I’m not a wedding photographer – why are you asking me?”. So I sort of brushed it off as a random thing, but she insisted that she liked my style and wanted to work with someone she knew and trusted. If there’s anything to my credit – I’ve always been a hard worker. So, as this post requires that I photograph a wedding, you probably won’t be surprised to hear that I eventually did commit to the job.

    Months of preparation

    And I mean months!

    The bride-to-be was extremely organized and prepared, having everything booked months in advance – in fact – the photographer was one of her last jobs to tackle. After accepting the job I had nearly a full year to learn as much as I could about photographing weddings and that’s exactly what I did. This three part series here on dPS: Wedding Photography 101 (Part 1), Wedding Photography 101 (Part 2), Wedding Photography 101 (Part 3) should be on every prospective wedding photographer’s reading list. But a quick search for “wedding photography” on dPS will yield dozens of other great reads.

    SneakPeak5

    However, all the reading that I was doing, really couldn’t prepare me for the real thing. Emotions, stress, time crunch, uncontrollable problems, and anything else that you can pack into the ten hour day – you simply can’t read that, so I enlisted the help of a professional. I reached out to a local photographer, who worked closely with a friend of mine, and he was kind enough to allow me to shadow him, and even second shoot for him on a couple of occasions.

    This experience gave me a huge boost of confidence going into the event, and I highly recommend reaching out to your own local wedding photographers prior to photographing a wedding on your own for the first time. The experience is priceless.

    The final bit of preparation was gear related – I was being paid for this shoot and as a landscape/wildlife photographer my ultra-wide angle and telephoto zooms were not ideal for the task at hand. So I spent a little of the money that I was paid for the wedding to rent a second camera (you can never be too prepared) and a 24-70mm f/2.8 lens which would be my workhorse for the night.

    The wedding was a success

    Due to my preparation and my commitment to wanting to provide the best possible photographs that my ability would allow, I’d say the wedding was a success. The bride and groom got photos that they will enjoy for the rest of their lives and I learned more than I could ever have imagined in a very short amount of time.

    SneakPeak4

    The day of the wedding I was at my wits end, running on pretty much pure adrenaline at that point. I had a list of ‘must have shots’ which I was able to check off throughout the day and night. It’s hard to imagine that the event lasted as long as it did, as it all went by so quickly, with barely a break for food or drink. All said and done, I left the reception after the last dance feeling confident that I had done the best that I could. So why never again?

    Why I won’t photograph another wedding

    There’s no question that this was a valuable experience. I learned more about myself as a photographer photographing this wedding than I had in the nearly 3 years of photographing landscapes, but I’d also learned that it wasn’t for me. I enjoy the peace and quite of nature and the ability to go back to the same location to fine tune the shot over a period of time and lighting conditions. Weddings are a one shot deal – you get the light you get – you get the weather you get, and you get one shot to make it happen.

    You have to be a people person – something I am not. Going around to get various people that I didn’t know together for photographs was hard enough when there were actually a handful of people that I did know at this wedding (sister’s friend remember?). I don’t think that I could do this on my own, without help, and without a lot more practice. So I urge anyone who’s thinking about photographing a wedding to not take it lightly. It’s an important day for a lot of people – not just the bride and groom – but their parents, extended family, and friends will want to remember this day as well so you MUST get it right.

    The moral of this story is that wedding photography can be a very rewarding experience, but you have got to put the work into it. If you are thinking to yourself that it will be an easy job – think again. Oh and please – don’t ever do this for free – being paid to shoot this wedding was what motivated me to find help, rent gear, drive to their location and process hundreds of photos – the experience was a bonus.

    Some stats from the wedding

    • hours shot from start to finish on the day – 10 hours
    • number of images shot total – 1500
    • number of images given to the couple – 500
    • how long it took to edit it – approximately 5-6 hours
    • number of hours estimated spent preparing: time with other photographer, etc –  Dozens and dozens of hours of prep time between reading articles and spending time with this mentor photographer I would say easily 50 hours or more went into the prep.

    Equipment used to shoot the wedding

    • camera bodies:  rental D600 and my own D7000 as backup
    • lenses:  rented the 24-70 f/2.8 (pretty much used for the entire event) also had my 55-300mm Nikon & 11-16mm Tokina, and a 50mm prime on my D7000 for odds and ends shots
    • flash:  Nikon SB700
    • light modifiers like umbrellas or reflectors – none
    • tripod:  had my Manfrotto 190XBPRO with me but rarely used it
    • other:  nothing else, But Jim (my mentor of sorts) told me that if I were to get into this that it’s a good idea to stock up on things like needles, various threads, safety pins, tape, Advil, Aspirin, Tylenol, scissors, and so much other stuff – not really for you, but you’ll be the hero of the wedding if you pull something the bride needs out of your magic bag of tricks

    Editors note: 

    Having done somewhere in the neighbourhood of 250 weddings in my time, I can concur that everything John has said is absolutely true, and some of the same advice I give people considering doing one for the first time. Being prepared is the number one thing I can say also. I remember wanting to throw up the entire first year I did weddings, the pressure is THAT intense. These are people’s memories and not something to take lightly. I too, like John’s mentor did carry such an emergency kit and can tell you I’ve used deodorant, men’s black socks, nylons, clear nail polish to stop runs in nylons, safety pins, After Bite for bug bites, Visine, allergy meds, Stain remover (get the stick, takes grease right out of a wedding gown), nail glue, bug spray, sunscreen,  and more. John gives great advice from his experience – heed it well.

    The post The Story of Photographing my First Wedding also Likely my Last by John Davenport appeared first on Digital Photography School.


    Digital Photography School
  • Top Photo Spots – a New Way to Find Locations for Photography

    Top Photo Spots is a hugely ambitious project headed up by James Brandon (a regular  dPS writer) that aims to take the guesswork out of travel photography. James has asked me to introduce TPS here on Digital Photography School in hopes of bringing attention to the project and helping bring his vision to life. It’s a great idea and one, that if it can be accomplished, could become a go-to resource for photographers looking to find locations for photography around the world – however it’s a long way from that point right now.

    So what is Top Photo Spots?

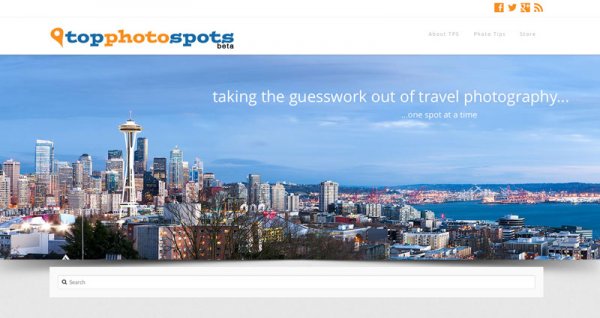
    topphotospots1

    The best way to introduce TPS is to take a quote from the man who created it – from James himself.

    You can Google something like “best places to photograph in Big Sur” and while you might get some helpful information, it will mostly be from random one-off websites and it won’t always be geared towards photographers.

    In essence TPS aims to solve the problem of searching the web, which is filled with tourists photos of various locations, inaccurate or confusing information on where and how the photographs were taken, and replace that with something that’s geared specifically towards photographers.

    The concept, layout and design are there

    Overall TPS has a unique concept that will fill a huge need in this industry, the layout and design are modern, easy to navigate and complement the concept well, but – oh yes there’s a but – the big hurdle that TPS needs to conquer is content (which I’ll touch on in a bit). So, let’s focus on the good first.

    As I said, the design is great and well thought out. Each location that’s been added to TPS has a sample photograph, Google map with location pins for points of interest, and a description of what to expect.

    topphotospots2

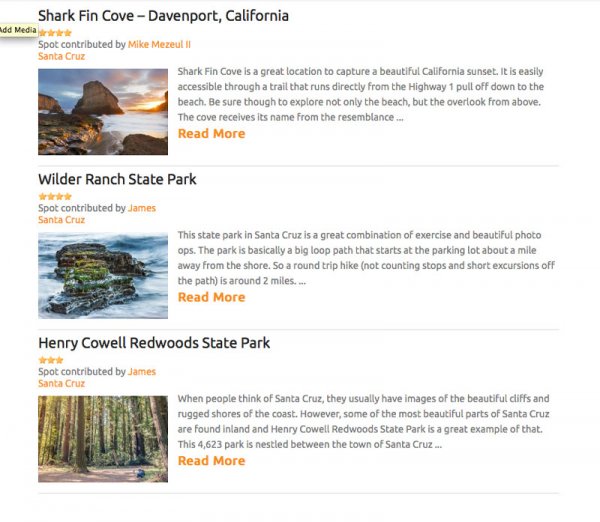
    After the brief introduction to the overarching location, in this case Santa Cruz, California, there are sub-posts that describe various photographic opportunities within the location in more detail.

    topphotospots3

    Moving into one of these sub-locations will provide you with a sample photograph from that specific location as well as another Google map giving you exact coordinates to get you there and of course more information on the location itself. It’s a really well thought out concept and I can see these guides being very helpful to people visiting locations and looking for not only ideas of things to photograph, but exactly how and where to take photographs.

    Now – about the content problem

    Currently James has TPS listed in a beta status while he builds content and brings in contributors. As I’ve said from the start of this article – this is an ambitious project – it’s going to take a lot of time and effort to get it to the point where it needs to be in order to truly be meaningful to the majority of people searching for locations to photograph.

    Currently there are only a few dozen locations, most of which are within the United States, so the location you are traveling to probably isn’t yet listed – which means there’s a lot of room to grow. But this is where you can help!

    TPS is openly looking for contributors to help fill out the site with locations around the world. If you’ve got an interesting location and know a bit about writing for the web I’d suggest that you check out the write for TPS page and help James get the site rolling – it could be the next big thing in travel photography.

    Final Thoughts and Suggestions

    Top Photo Spots is a great concept that is too ambitious for the vast majority of people to even attempt – which is why it’s such a good idea. If James can succeed in his vision I think that TPS will become an extremely valuable resource for photographers looking for spots to photograph on their next trip.

    That said, I do have a few suggestions for James, and I’m sure he’ll entertain more in the comments – here are the three big things that I’d like to see integrated into the site at some point in the future.

    • A visually appealing way to browse through all the currently available locations – sometimes people don’t know where they want to travel, but rather are looking for something to inspire them.
    • The ability to print and download guides, or save them to a mobile device. Ideally I’d want to have quick and easy access to the guide when I’m on location without having to refer back to TPS – especially if the location is in a remote location where access to the internet might be limited.
    • Integrate TPS with other photographers around the world who are willing to set up photo walks and guides of locations that are featured on TPS. This could take some time – but I think that a site like TPS is set up perfectly for this and would be a huge benefit to people traveling to the new locations. Not only that, but it would set it even further apart from the ‘Google search’ method that we are currently using to find places to photograph.

    So go have a look at Top Photo Spots and check out what James has put together so far. Then come back here and tell us what you would add to the TPS wish-list above.

    For more on travel photography:

    • Tips for Photographing Popular Tourist Destinations
    • 10 Ways to Improve your Vacation Photos
    • 6 Tips for Photographing People When Travelling

    The post Top Photo Spots – a New Way to Find Locations for Photography by John Davenport appeared first on Digital Photography School.


    Digital Photography School
  • Remote Wildlife Photography From My Basement

    A couple of weeks ago it was -30 Celsius (-22 Fahrenheit) and I was intent on photographing a pair of Red-backed Voles that seem to have established themselves in the backyard of my home in Edmonton, Alberta, Canada. Before I got myself a new gadget, I probably would have suited up in my heavy duty Canada Goose parka, some long underwear, snow pants and about four hand warmers and camped out for a morning to get a few shots of these cute little guys.

    But now I’m a bit older and maybe even a bit wiser and I do so love my technology. And one of those technological gadgets allows me to get me shots without having to worry about freezing any of my favourite appendages right off. What’s the gadget I’m talking about? It’s called the CamRanger and it allows me to operate my camera anywhere that I’m within WiFi range (~35m indoors and ~100m outdoors).

    CamRanger_SetupThe CamRanger itself is a little white plastic box measuring about 3.5” x 2” that you connect to the USB port of your camera via a USB cable. The device itself is powered by a rechargeable lithium battery. Once the CamRanger is plugged into your camera it sets up its own WiFi network. Connecting a device to that WiFi network (like an iPhone, iPad, Android device, Mac or Windows computer) allows you to wirelessly control your camera from that device.

    In my case, I used my iPad to connect to the CamRanger attached to my camera. I set the camera up on a tripod with the lens pointing at the holes in the side of a snow bank that the voles were using to access the world outside their lair. Once set up, I could scurry into my own lair which in this case was my home office in our basement.

    I activated the Live View feature to keep an eye on what the camera was seeing. I’d been watching these voles for a few days (they set up camp under one of our bird feeders) and I knew that they came out for about an hour each morning just after sunrise. Sure enough, not long after getting everything set up and waiting for my glasses to defrost, the voles started making their appearance.

    From my position warmly tucked away in the basement I could consult the live histogram and make adjustments to the exposure (Shutter Speed, Aperture and ISO) to make sure that my exposure was perfect. I turned on a feature in the software app called “Focus Peaking” that allowed me to clearly see what was, and wasn’t in focus and I fine-tuned that focus via controls in the app.

    With all that set up, it was just a matter of waiting for the voles to get themselves into a photogenic position and then I’d tap the remote shutter button on the CamRanger app and take a shot. The voles usually spend their time cautiously emerging from their lair, then darting out to find one seed or another, and quickly returning to the shelter of their tunnel entrance to safely eat the seed. If they got a particularly good seed, they’d retreat further within the tunnel, presumably to stash it away.

    Northern Red-backed Vole - © Paul Burwell Photography

    Northern Red-backed Vole – © Paul Burwell Photography

    During these breaks in the action, I used another feature of the CamRanger to download the full resolution images to the iPad so that I could magnify them to check for critical sharpness. There is a bit of lag between what you see on the app’s Live View display and what is happening in the “real world” along with a slight delay between when you press the shutter button on the app and when the signal arrives at the camera to make the photograph. It isn’t long (think milliseconds) but it can be enough that by the time the photo is made the fast little critter isn’t where you thought it should be, and focus is off or the composition isn’t great.

    I use my CamRanger a lot and love its ability to remotely initiate photography and video sessions. It also has a built in intervalometer to make time lapse photos and can do advanced bracketing of exposures for HDR type applications. Another favourite CamRanger feature of mine is its ability to provide very precise focus control for macro photography and it can even perform automatic focus stacking to provide enhanced depth-of-field images by running them through some third party software.

    Northern Red-backed Vole - © Paul Burwell Photography

    Northern Red-backed Vole – © Paul Burwell Photography

    A few years ago I’d dreamed of the possibility of having remote operational control of my camera at a distance and now, with the help of the CamRanger, that’s a reality. My toes and fingers are eternally grateful! CamRanger is widely available and sells for about $ 300 US dollars.

    More on wildlife photography here:

    • 5 Most Common Mistakes in Wildlife Photography – and How to Avoid Them
    • Manipulating Natural Light in Wildlife Photography
    • Making Sharper Wildlife Photographs – [Part 1 of 2]
    • Making Sharper Wildlife Photographs – [Part 1 of 2]

    The post Remote Wildlife Photography From My Basement by Paul Burwell appeared first on Digital Photography School.


    Digital Photography School

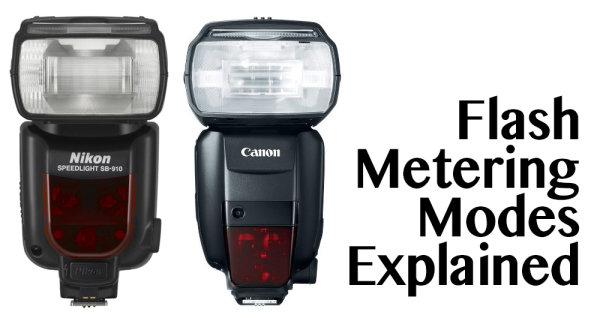
  • Understanding Flash Metering Modes

    flash-metering-modes

    Flash Metering Systems TTL, A-TTL,  E-TTL and E-TTL II

    Terms used in this article are Canon specific but there are the same or similar terms for Nikon, Sony, Olympus and other camera manufacturers. _J6L0002-Edit-Edit

    When you use your camera’s metering system, the meter will measure the reflected light from your subject (see Metering Modes and How Your Camera Meter Works).  This is not the case when you use your camera with a flash, either a pop-up or mounted on your camera’s hot shoe and set to one of the TTL modes. (TTL is an acronym for Through The Lens) Irrespective of which TTL flash mode you choose, the exposure is not based on reading the ambient light,  (see: Balancing Flash and Ambient Light with a Light Meter)  it is based on the flash output. Measuring flash output can be achieved by either measuring a fixed output pre-flash and evaluating the exposure, or by measuring the flash output as it is fired. This data is then used to calculate the flash output required to expose the scene correctly.

    So on to understanding flash metering modes . . .

    There are three flash metering modes

    TTL or through the lens metering

    This is the standard metering mode, typically used when your camera has a pop-up flash or a dedicated external flash heads. The exposure is based on the flash firing. The quantity of the flash output is monitored through the lens by a flash sensor that is mounted below the mirror.

    Keep in mind, that when you use a flash the maximum (fastest) shutter speed is the sync speed of your camera (check your manual to check what your camera sync speed is, most are 1/200 or 1/250th). You must never attempt to use faster shutter speeds unless your flash supports “High Speed Sync”.  Since the shutter speed is fixed at the sync speed or slower (in Aperture priority mode: Av on Canon, A on Nikon) the camera will automatically set it at the sync speed.  In Manual (M) mode you must set the shutter speed to the sync speed or slower otherwise you will get black bands in your image.  This is because the shutter starts closing before the flash has had a chance to fully expose the sensor.

    In TTL mode the flash will read the exposure from the light bouncing off your subject and the flash sensor will turn off the flash when it believes the image has been exposed correctly. In this TTL mode changes to the aperture setting will typically affect the exposure of the areas of your image that is lit with just the ambient light.

    TTL Flash in modes other than Aperture Priority or Manual:

    flash-metering-modes

    P – is the Program mode  or Program auto mode.  In this mode the camera manages all the settings. Some cameras have an “A” or full Auto mode. Canon cameras may also have a “CA” setting for Creative Auto mode. In these modes the camera sets shutter speed at the sync speed, and the aperture based on the ambient light. When using TTL the flash fires and turns off when the auxiliary sensor tells it to based on the evaluated exposure of the flash.

    For TTL the flash power and duration is based on the ISO and the aperture setting. In most cameras the ”through the lens“ flash exposure reading is taken from the same area as your focus point. For TTL flash metering there is no pre flash.

    A-TTL (Advanced through the lens)

    This metering mode performs in the same basic manner as TTL. It will read the exposure through the lens, from the area of focus and trigger the flash to turn off when the appropriate exposure is achieved. The main difference is that this method uses a pre-flash. This pre-flash is used to determine f-stop based on the distance to the subject that reflects the flash output. The pre-flash is fired when the camera’s shutter is half depressed, the camera evaluates the readings and sets the aperture. Now when the shutter is fully depressed the flash fires to correctly expose for the subject. Based on the model of your flash, the pre-flash can be an actual white light flash or an infrared flash.

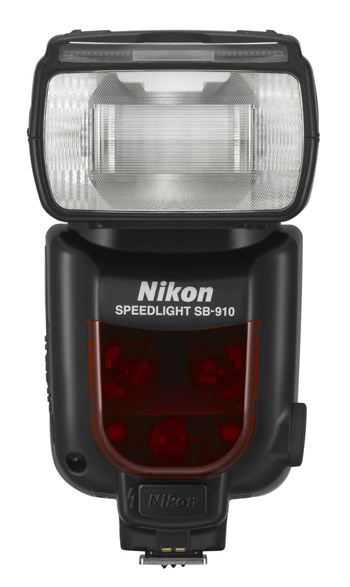
    nikon-flash

    Nikon’s latest, the SB910

    In all cases the main flash is fired as a pre-flash if the flash head is oriented in any position other than directly at the subject. This pre-flash can be an annoyance. The pre-flash is measured by the flash unit and the evaluated data is communicated back to the camera. If you use your camera in Program or Automatic mode with A-TTL, ambient light exposure and flash based exposure are collectively evaluated and the camera attempts to resolve the lighting to establish the f/stop (aperture) for the best exposure. Since the sensor that evaluates the pre-flash is located on the flash unit instead of the camera’s sensor, using a filter on the camera lens will cause inaccurate readings.  This is because the sensor on the flash is not covered with an equivalent filter.

    E-TTL (evaluative through the lens)

    As with A-TTL, E-TTL also uses a pre-flash. However, the flash exposure is not measured by the dedicated flash sensor but the main sensor that is used for ambient light exposure readings. This is similar to the exposure calculations and focus locking that occurs before the shutter opens.  This is true for images captured in ambient light when your camera is in Aperture, Shutter Priority or Program mode. E-TTL has far greater exposure accuracy than TTL or A-TTL modes. The pre-flash in E-TTL mode is not triggered when the shutter is half depressed but when the shutter is fully depressed. Since flash durations are very short the pre-flash is not visible to the naked eye. The pre-flash measures the distance and reflectivity, and calculates the appropriate flash output. All this is accomplished just before the shutter actually opens.  The pre-flash is fired immediately before the main flash except when your camera is set for 2nd curtain sync. In addition, if FEL (flash exposure lock) is used, the pre-flash is fired only when FEL is established.

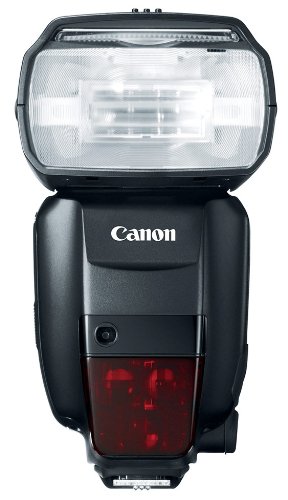
    41Dl+k0z0pL

    Canon’s newest speedlite the Canon 600EX-RT

    E-TTL II

    This is the new standard in Canon EOS systems.  It is a firmware enhancement that uses the camera and not the flash to do all the evaluation. Fortunately it is compatible with older E-TTL flash units.  E-TTL II uses the camera’s evaluative metering zones before and after the pre-flash. In this process, areas with small changes in brightness are then averaged for flash metering. This method prevents the issue where highly reflective materials result in specular highlights. With ETT-L II the  flash metering system is not linked to the selected focus area. This allows focus and recomposition without affecting correct flash exposure. Overall the E-TTL II system allows for much more natural exposures with out the harsh appearance typical of direct flash photography.

    The post Understanding Flash Metering Modes by Shiv Verma appeared first on Digital Photography School.


    Digital Photography School
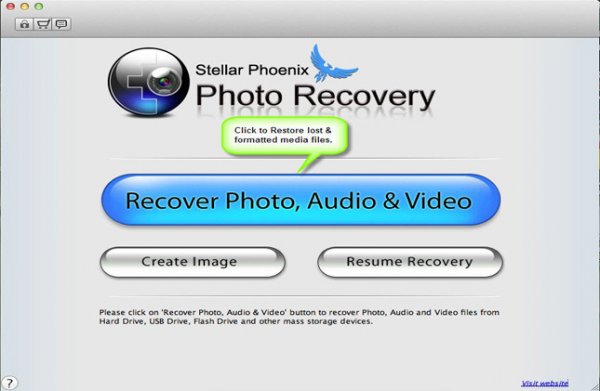
  • Stellar Phoenix Mac Photo Recovery Software Review

    The “click of death!”

    I’m sure it’s happened to you at some point or other, a drive dies *click bzzt click bzzt click*  or a memory card stops working for some unknown, and entirely frustrating reason. I’ve used pretty much every memory card and hard disk on the market at some point or another, and have lost images to the “corruption demons” with a couple of them… Here’s how to get those files back!

    Photo recovery software to the rescue!

    simon pollock photography gtvone

    It’s not always the fault of the card or the drive – a premature ejection like pulling the drive out of your computer / usb / firewire or indeed grabbing a card out of your camera while it’s writing a file – most of the time the file system (like a set of drawers on the card or drive) manages to put the data away before stopping, but sometimes, like my office floor, things are left everywhere and that’s when you encounter data corruption (very basically).

    Stellar Phoenix Mac Photo Recovery 6 Mac

    stellar phoenix photo recovery software review

    What they say

    Stellar Phoenix Mac photo recovery is a utility that recovers deleted, formatted, lost photos, pictures, songs, movies, and other multimedia files from Mac systems.

    • Recovers from Mac – Systems, External Drives, USB Drives, iPod and Digital Cameras
    • Supports a wide range of image, audio, and video file formats
    • Supports hard drives with capacities over 2 TB
    • Efficient Scan Engine scans the storage media faster
    • Also recovers Thumbnails of the corresponding image files
    • Compatible with Mac OS X 10.5 up to the Latest OS X Mavericks

    What we say

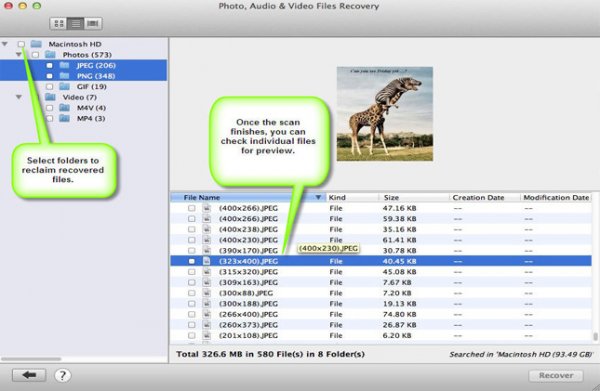
    After recovering from all kinds of old drives, CF cards (a 16mb one from a LONG time ago) including a 2TB disk, I am very happy with Stellar Phoenix Mac Photo recovery! It’s dead easy to use – you start it up, choose your drive and click recover… Sure, you can head into the advanced tab and recover only single file types if you wish, for example if you were after a set of CR2 files (Canon RAW) from a CF card, you could narrow your search down to just those files. Once scanned you can save the scan / found files information if you wish to restore the files at a later date.

    5

    I started this review a long time ago and, with the first version of the software, I had some minor issues – it called a CR2 a DNG and so on, which in the big scheme of things wasn’t a total fail, but could be very confusing… I was able to give this feedback to the creators, and with the new version there are no issues, and none of the previous bugs.

    There are two versions of the software, one that simply recovers any of your media files and another slightly more expensive ($ 39 vs $ 49.99) version that also repairs corrupt jpeg files. I am using the regular version and I did encounter a couple of corrupt images, I hope to run through the same tests with the platinum version soon.

    Recovery time was about average based on my previous experience (Yes, the photo at the top is me and yes, we’d just lost a 9TB storage array… long story) with a CF card of 16GB taking a bit over an hour and a 2TB drive via USB taking about a day and a half. In both cases I was able to successfully recover the data I needed.

    Data recovery isn’t always guaranteed, I’m not going to lie – sometimes the pretty photographs just don’t want to come back. ever. I was able to recover everything I set out to recover using Stellar Phoenix Mac Photo software in this case.

    Conclusion… Based on my time in I.T. and my previous experience with recovery software, I’m happy to recommend this software if you find yourself in a spot of digital bother.

    For more on image recovery and back up see:

    • Recover Images from a Damaged SD card
    • Recovering lost or deleted files – Backing Up & Saving Your Images: Part 4
    • Memory Cards – How to Extend Their Life and Keep Them Healthy

    The post Stellar Phoenix Mac Photo Recovery Software Review by Sime appeared first on Digital Photography School.


    Digital Photography School

  • Mastering Self-Portraiture II: Various and Stellar Kinds of Self-Portraits

    Do you want to take your self-portrait,but still don’t know where to start ? Don’t worry! Have your latest attempts been a little boring? Trust us. It’s normal. The first self-portraits you take might be out of focus, boring or nothing out of the ordinary. But keep this in mind: Practice makes perfect. Keep shooting, and don’t be afraid to Continue Reading

    The post Mastering Self-Portraiture II: Various and Stellar Kinds of Self-Portraits appeared first on Photodoto.


    Photodoto

  • 10 Photography Hacks that will Dramatically Improve Your Photos

    Mike is the author of the eBook Hacking Photography: A Plain-English Guide to Taking Impressive Photos – Fast, on sale now for 60% off at SnapnDeals.

    There is a widely accepted rule called The Pareto Principle also known as the 80:20 rule. In short, it states that 80% of the results come from 20% of the efforts. I find that in learning photography, this can even skew much higher. This means that potentially improving 5% of your photographic knowledge in the right places, could improve your photography by 95%!

    10 photography hacks that will dramatically improve your photos

    Hack 1 – Turn the flash off of automatic!

    Camera manufacturers are often too eager to make the flash pop up even when it gets slightly dark. This is actually a retention tool for them. If the flash pops, the photo won’t look as good but people won’t be blurry because the flash freezes them in place. If enough new photographers see blurry photos (even though they are caused by improper photographer technique) they will assume something is wrong with the camera and take it back for a refund.

    Instead, keep the flash closed and increase the ISO. In all the camera modes except manual mode, increasing your ISO will cause the camera to increase your shutter speed to have a better chance of freezing people in motion. Now shoot the photo. It will use the ambient (available) light, which typically has more color and character instead of a bright face and black background.

    Hacking photography music

    Hack 2 – Get in close to your subject…then get closer

    Most people think that they have to step way back and get a lot of space around the subject to get the whole scene. Your subject is not a mime that is stuck in an invisible box, it’s okay to cut off their foreheads, legs, or lower half every now and then! Try getting a close-up of someone’s face from the eyebrows to the mouth. Here is a quick example:

    Hacking photography get closer

    The problem with zooming way out for every photo is that it doesn’t make it plainly obvious to the viewer what is the point or subject of the photo. I’m a huge fan of subtraction – the less there is in your photo the better. The best images are simple and very clear to the viewer what “story” you are telling with your images.

    Hack 3: Eliminate the clutter

    This is huge! The best images are ones that are simple and have breathing room for the subject. Try to find the simplest background possible. It’s no different than walking into a super cluttered house versus walking into a clean minimalistic space with very few items to distract you.

    If you are taking a photo of a person, take the extra second to look around and find a minimal background that doesn’t distract the viewer.

    Hack 4: Look for repeating patterns

    Ever hear someone say that a photographer “just has the eye for it?” I disagree. This is a learned skill, not something that you are born with.

    As you walk around, take notice of buildings, windows, patterns in brickwork, etc. I was walking by a building I walk by all the time and something suddenly ‘clicked’ and I realized there was a really cool pattern in the brickwork I had never noticed before. I ran home and grabbed my camera to shoot it before I forgot again.

    Hacking photography repeating patterns

    Hack 5: Shoot from interesting perspectives

    I would argue that 99% of photos most viewers ever see are shot from eye-level where the photographer was standing – the same viewpoint we see 99% of our lives from. It’s no surprise when you go to the top of a huge building and look down at a city that it’s visually stunning because we don’t see that perspective very often. You see this birds-eye-view used a lot in food photography.

    Hacking photography birds eye view

    The same goes for getting down on your stomach and shooting straight up to the sky. Anytime you are afforded a unique viewpoint it’s always interesting to the viewer.

    Hack 6: Look for symmetry

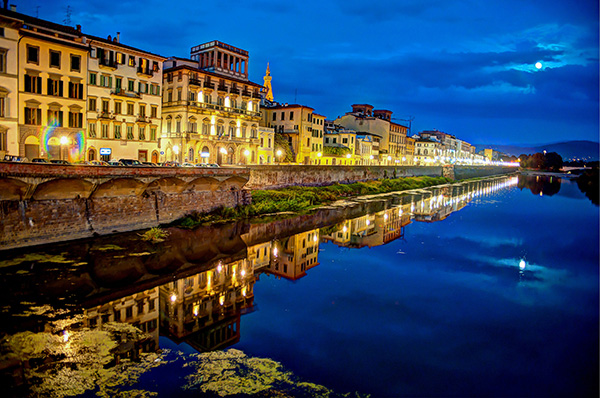
    Your viewer will do backflips if you can find an image that perfectly reflects the same thing top to bottom, or right to left! How many times have we seen something every day then see a photographer create an image that is an entirely different view of that item?

    I took a photo trip to Italy and consciously tried to capture as much symmetry as I could. Here is a quick symmetrical shot:

    Hacking photography florence moon

    Always keep an eye out for perfect symmetry!

    Hack 7: Straighten your lines

    Instead of just clicking away when you see something interesting, take the extra second to make sure horizontal lines are horizontal, and vertical lines are vertical. We all have the habit nowadays of just pointing our cameras in the general vicinity of what we are shooting. I propose you take a moment and line yourself up perfectly with that building or person.

    Hack 8: Max out the aperture

    What most people perceive as “artistic” photographs (AKA better than most) are ones that use a big aperture (small f-number) to blur the background or foreground, to call more attention to a subject. If you are using a kit lens your aperture will likely only go down to f/3.5, which isn’t a very big aperture.

    The biggest impact item, and cheapest investment in gear that can make your photos go from okay to awesome is a lens with a huge aperture. I recommend purchasing a 50mm f/1.8 new on Amazon for $ 130-200 (Canon 50mm f/1.8 or Nikon version) or you can usually find them in perfect condition, used, for between $ 80-150.

    Hacking photography aperture

    Hack 9: Know where the light is coming from, and the quality

    It’s funny how easy it is to take great photographs if you are just simply aware of these two things. Think about this: if you are shooting a photograph of someone outside and the sun is directly behind him or her, they will show up as a dark silhouette. If all you did was switch positions with this person so they are facing the sun, they will be nicely lit.

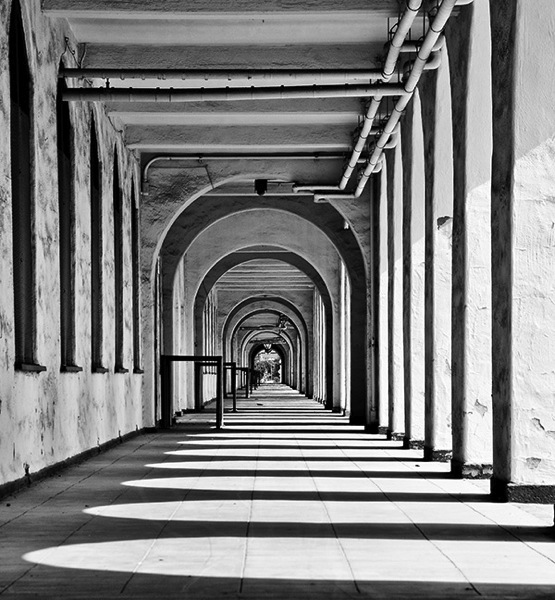
    Being aware of the direction and quality of light can also ties into step 4 above. I walked outside of a building, looked down an outside walkway and noticed the shadows formed a really cool pattern because the sun was very bright and coming in from the left. This made an interesting arch pattern that almost looked like an MC Escher sketch.

    Hacking photography maze patterns

    Hack 10: Use the Rule of Thirds

    The rule of thirds is the simplest and most under-utilized tip in the book. Are you ready for the quickest and easiest lesson yet? Here we go: go into your camera and turn on the “Grid” function which will show a grid in your viewfinder with horizontal and vertical lines when you look through it. 99% of new photographers put their subject smack in the middle of the frame when they compose the photo. The viewer also sees 99% of photos with the subject right in the middle of the frame because they look directly at a person, item, etc. This gets really boring really quickly, as we discussed earlier.

    The tic-tac-toe rule

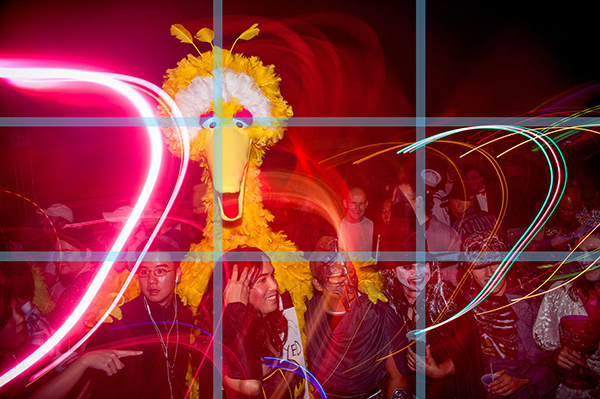
    Imagine a tic-tac-toe board when you look through your viewfinder. Some cameras have a ‘grid’ function you can turn on to see this through the viewfinder. You always want to line up the point of interest where the lines meet each other. When you compose your photo, line up the point of interest at either 1/3 to the right or left of the frame, and/or the top or bottom 1/3. You want to give your subject room to breathe in the frame.

    I caught this at a huge Halloween party Miller-Coors sponsored. You can see who got the attention at the intersection of the top and left 1/3 marks. Note the people on bottom all line up with the bottom horizontal 1/3 line.

    Hacking photography rule of thirds

    Wrapping up

    If you follow these 10 hacks, your photography will take a giant leap forward. I recommend experimenting with one of these hacks per day for 10 days. After you get used to thinking about each one, you will eventually internalize the lesson so it will just happen instinctually. That’s when photography really gets fun. I can’t wait to see what you come up with.

    Please share any additional tips in the comments section below.

    For more on these hacks grab Mike’s eBook Hacking Photography: A Plain-English Guide to Taking Impressive Photos – Fast, on sale now for 60% off at SnapnDeals.

    The post 10 Photography Hacks that will Dramatically Improve Your Photos by Mike Newton appeared first on Digital Photography School.


    Digital Photography School
  • 8 Reasons You Should Organize Your Photo Collection

    Editing and organizing our websites, print portfolios, business collateral and promotional material is something every professional photographer does at least once if not several times a year. It allows us to present the best possible vision of our work to our clients.

    After a build-up of new work it was time for me to edit my portfolio as well. I’ve spent the last several weeks working on a vigorous edit in preparation for a large annual marketing and meeting push – and it occurred to me this would make a good post for dPS. While the purpose of my organizational edit is for business reasons, you don’t need to be a professional photographer to benefit from a good organization of your images. Every level of photographer will find something valuable in it.

    Here are eight reasons why you should consider spending a bit of screen time and organize your photo collection.

    Website Thumbnail Edit

    1. Everything is easier to find

    If you don’t have a good organizational system in place, there’s little that’s quite as droll as sifting through your images and key wording, tagging, starring, folder sorting, and/or color coding them. However you want to distinguish your files, it helps to find them in a pinch.

    Without a good system how will you ever locate those photos of the Johnson family if they decide they actually want to buy some from you down the line? Or what about that shot you entered a year ago on a National Geographic forum… and now they want to publish it!

    No matter what your system is, it’s important to develop one. Just know yours in and out, in case a cool or monetary opportunity arises in the future.

    How could you find a file in this mess?

    How could you find a file in this mess?

    2. See how you’ve progressed

    Sitting down and organizing your images from beginning to the present gives you a great overview of how you’ve progressed since first picking up a camera. You’ll notice not only the difference in content of what you’re photographing, but the quality of it as well. There’s nothing as bemusingly head-shake inducing as looking at some of the first images that came out of your camera. How could you possibly ever have been that bad?! Look back and see how far you’ve come and celebrate!

    3. You’re forced to review the good with the bad

    There are some valuable lessons to be learned in organizing your images, especially in recent ones. You’ll get a play-by-play look at the good images, along with the bad ones.

    Sit down and really take some time to think about what it is that makes you admire certain images, but dislike others. What did you do right in those great ones? What did you do wrong in the poor ones? This critical review will help you develop your eye and create better images in the future.

    4. It will teach you to avoid recurring mistakes

    During any good review you’ll probably realize there are one, two or more mistakes you’re consistently making. You’ll find new ones every time you do this, and you’ll know what to avoid in the future.

    During past reviews I found I used to slightly overexpose my images, or that I was lacking in night images with my travel shots. Taking the time to review allowed me to correct those mistakes and bolster the holes in my portfolio. I’m always finding something new to work on, and so will you. Learning from your mistakes is what makes you better.

    5. Discover ideas you want to revisit

    Perhaps a year or two or more ago you took a trip to the Grand Canyon or photographed a really fun concept, but realize now all the little things you missed or messed up on. Now that you’ve sat down to organize you remember that great idea you had – and with your new-found knowledge, it could be a great time to revisit the shoot and improve upon it.

    There’s nothing wrong with revisiting a concept you’ve photographed before and working to improve it. Many professionals work on a project or series for years before they think it’s complete. Some scrub everything they’ve shot and re-start again on a concept they love, but want to tackle with a new execution. Consider it a challenge to re-invent something you’ve already done.

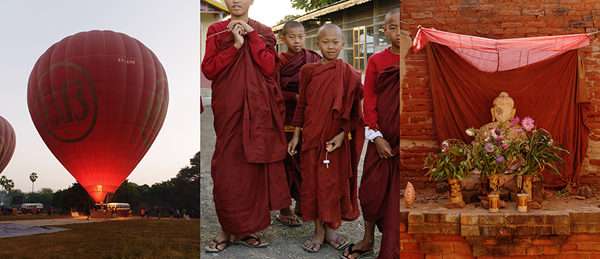
    Color-Theme-MattDutile

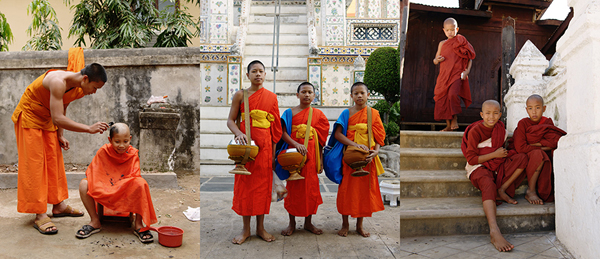
    6. Find themes and begin developing a vision

    If you had your own website, or already do have one, how would you organize it? Would there be a portrait section? Or weddings and babies? Perhaps landscapes and still life? Or travel and lifestyle? Most professionals organize their images by subject, project or theme. Doing so in your own work can tell you a lot about what kind of photographer you think you are or want to become. What do you value and enjoy shooting?

    Look for themes across your work other than simply subject. What you may notice appearing is your specific style or vision. After a great period of time every photographer begins developing a sense of style, but you may be able to notice the threads of it early. It’s a clue to what you value in your images and your unique perspective.

    Monk-Theme-MattDutile

    7. It’s easier for potential clients

    If you have the desire to take your hobby professionally one day, organizing now and understanding how you would define your photography will make it easier for potential clients to identify what they like about your work ,or why they should hire you. The business of photography is defining what you bring to the market that’s different, and at what value. It’s answering the question, “Why should I work with you?”.

    8. It just looks nice

    The last reason is one of simple vanity. Organization, if done right, just looks pretty. I often enjoy in my spare time putting together different color arrangements, collages and themes. Some of them make their way into my marketing material if the idea turns out particularly good, others may entirely change the way I categorize my business, and still others go in the trash as a fun but failed experiment. Organization doesn’t just have to be a boring task though, it can fuel creative insight and help you develop your images.

    The post 8 Reasons You Should Organize Your Photo Collection by Matt Dutile appeared first on Digital Photography School.


    Digital Photography School